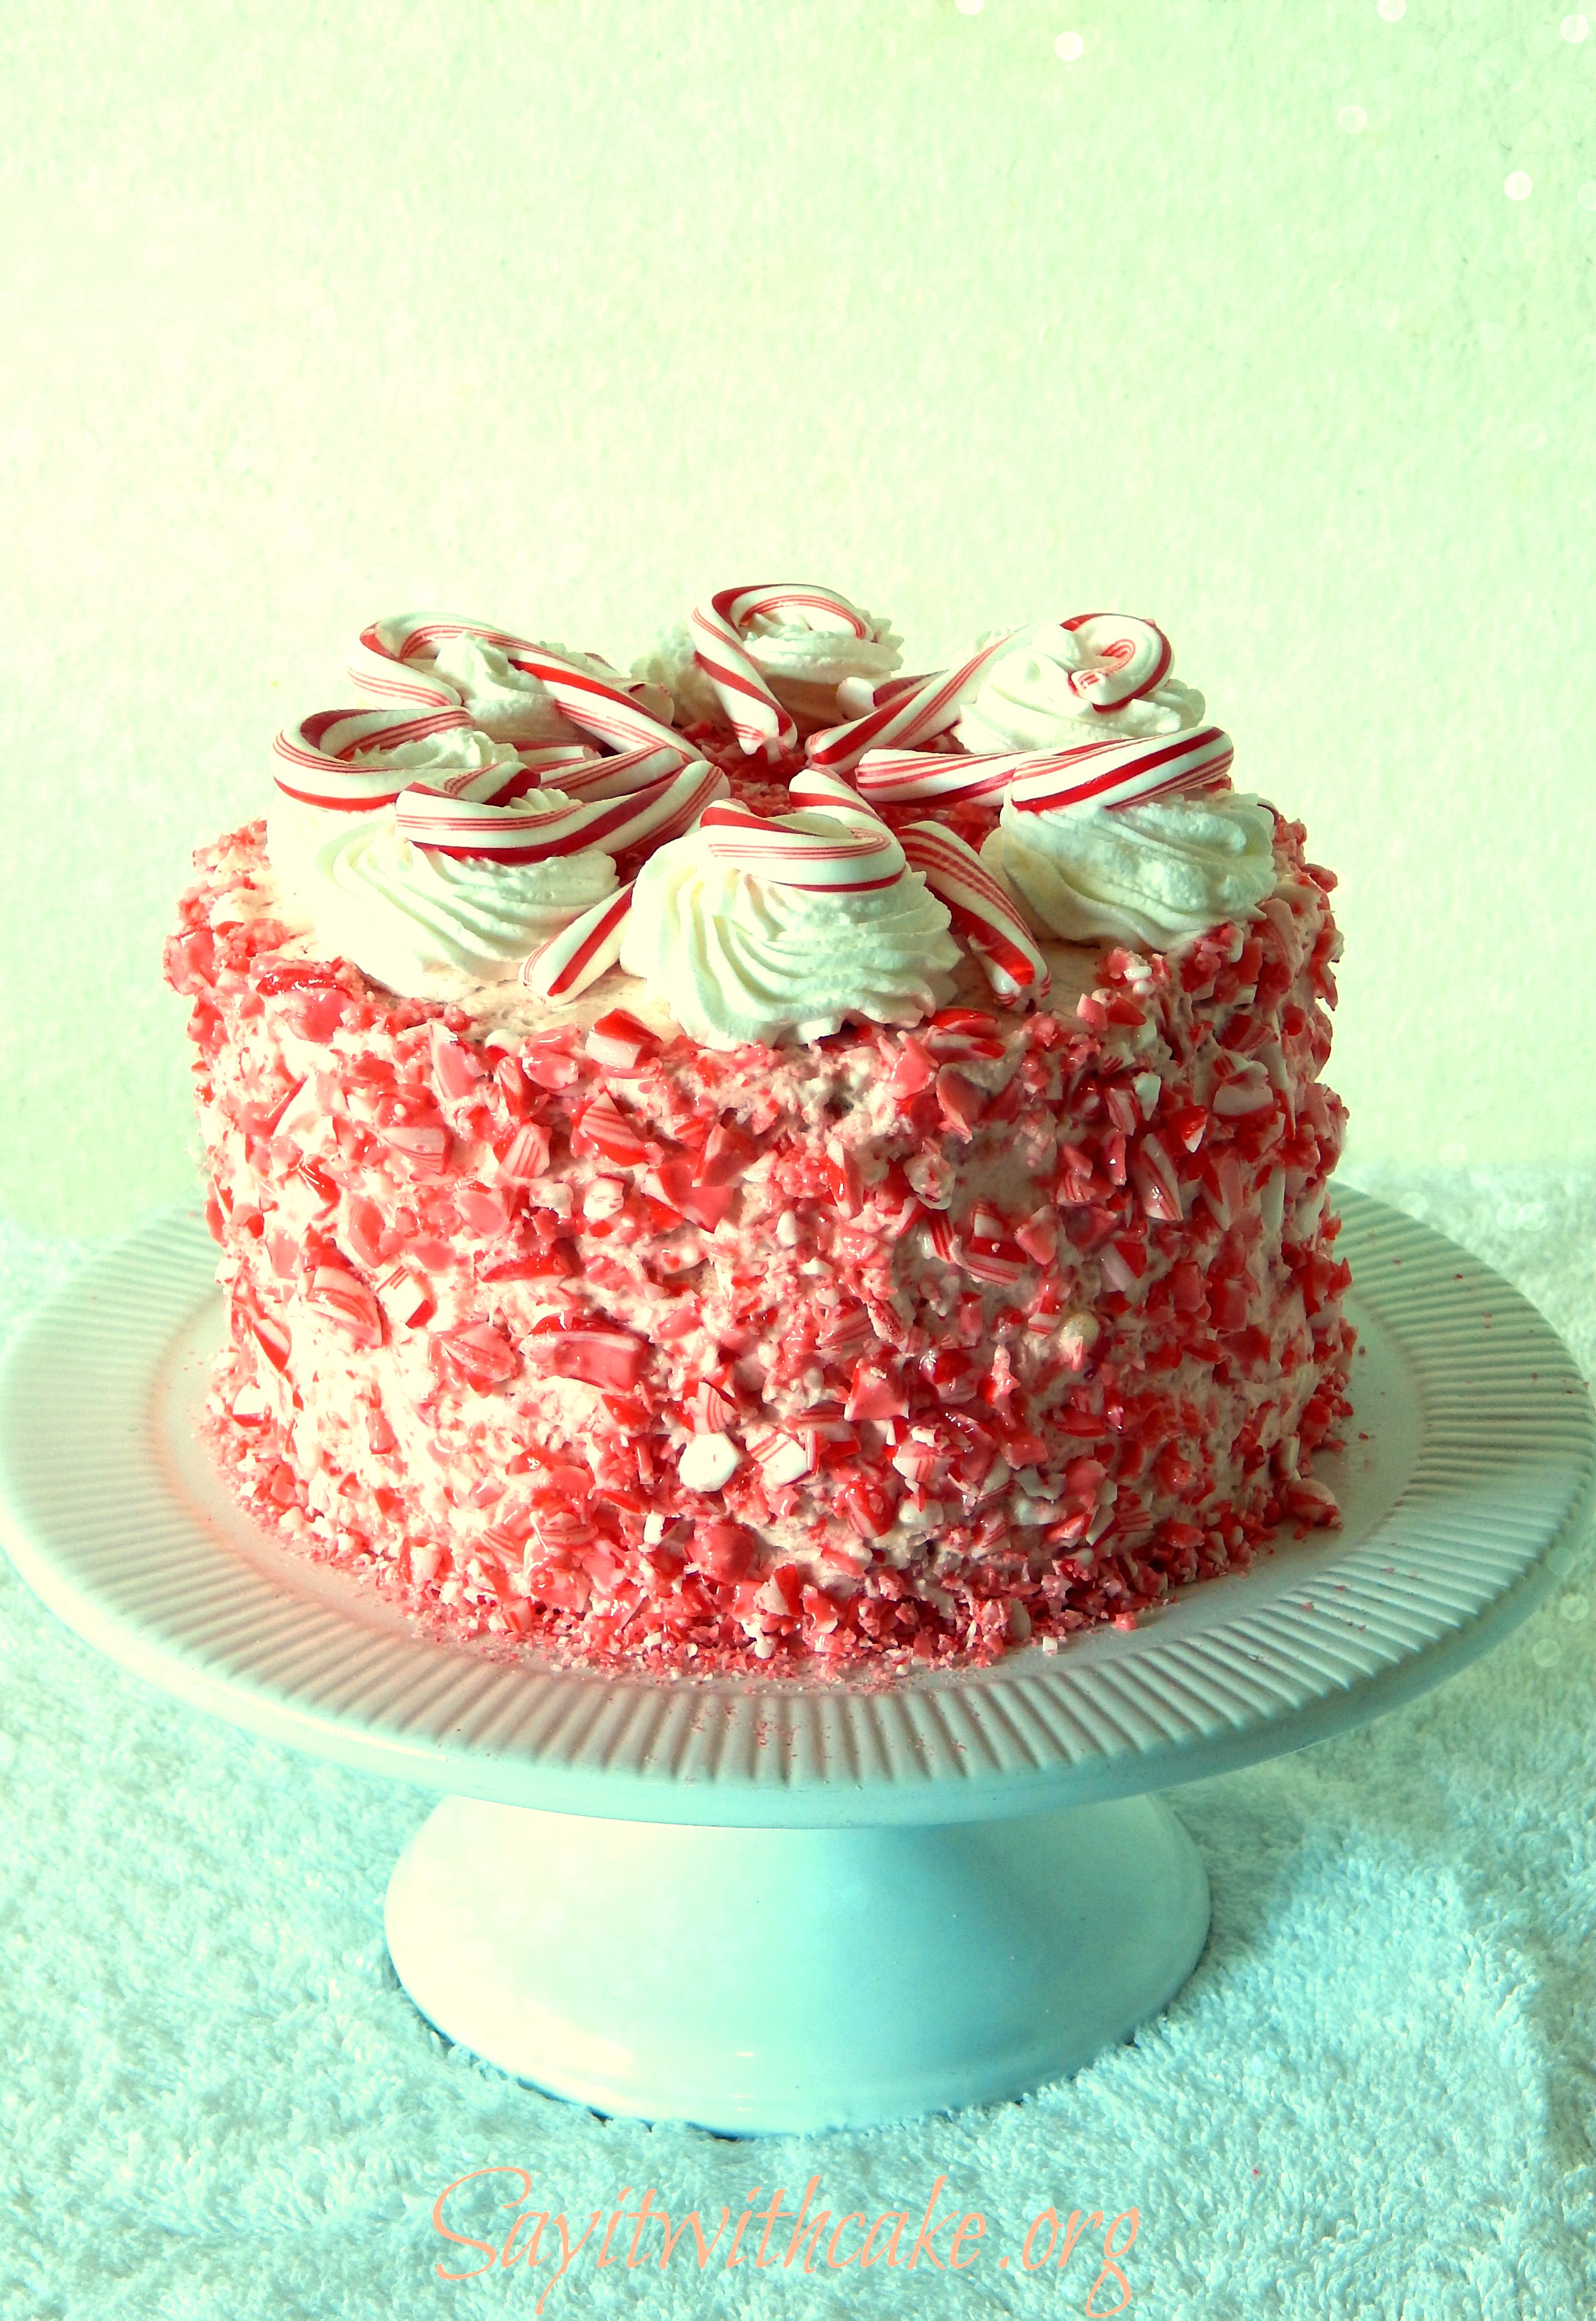
 What is Christmas without candy canes? Candy Canes are essential to Christmas! I remember one of the best parts of Christmas was getting a huge candy cane from my Aunt Jenni along with a new Christmas coloring book. She would give them to us every year and my sisters and I looked forward to it! They were the big candy canes, a big delicious stick of peppermint. We would get them all over our faces as kids and would enjoy every last drop
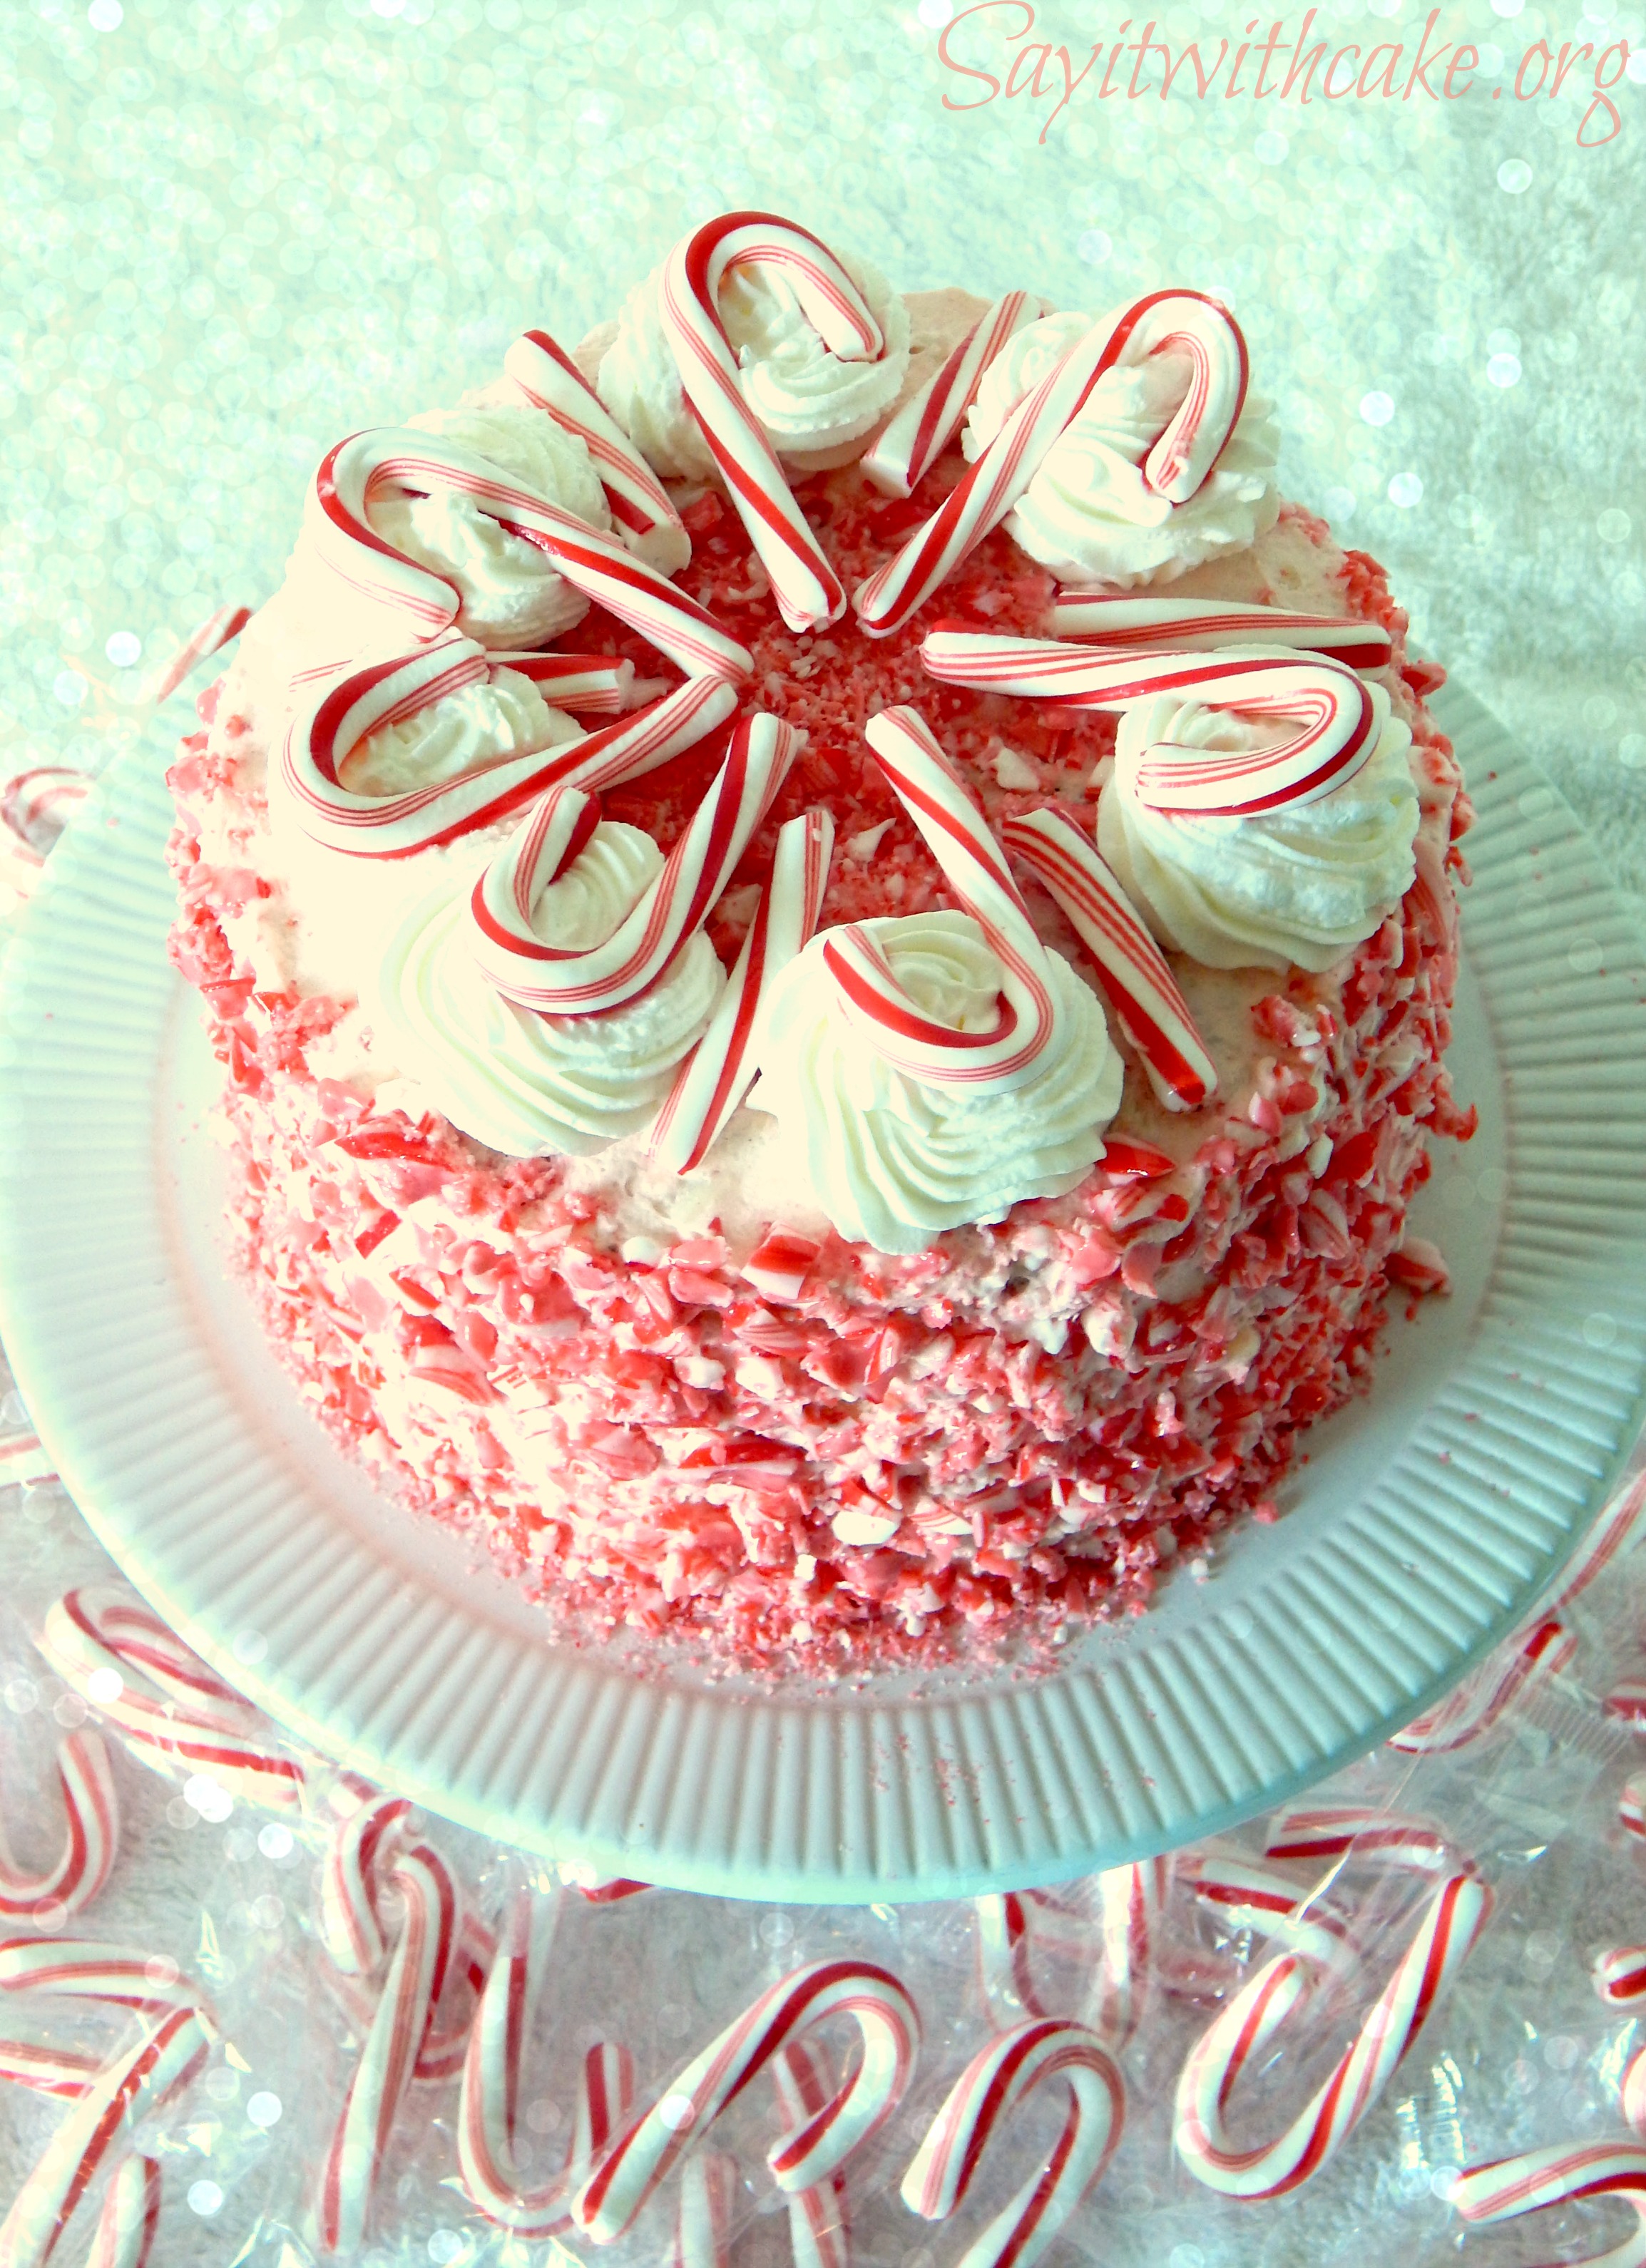
I made this cake from my favorite white cake recipe. I baked three separate pans. I made the filling with heavy whipping cream with chopped up pieces of peppermint kisses. I covered the cake in whipped cream and put chopped up pieces of candy canes on the sides. It was really easy to make and is the perfect amount of peppermint. It is light and fluffy with the whipped cream frosting and filling. To make the whipped cream, simple put two cups of heavy whipping cream in a mixer with 3 TB of sugar and beat with whisk attachment until stiff peaks form. To crush the candy canes, I put them in a plastic bag. I covered the bag with a towel and hit the bag with a hammer. It was fun and my three year old loved watching me do it lol!
Ingredients
- 2 boxes white cake mix 2 cups all-purpose flour 2 cups granulated sugar 1 1/2 teas. salt 8 egg whites 2 2/3 cups water 4 Tbls. vegetable oil 2 cups (16oz carton) sour cream 2 teaspoon clear vanilla flavor 2 teaspoons almond extract
- *For my cake I cut this recipe in half
Instructions
- Mix all dry ingredients by hand using a whisk in a very large mixing bowl. Add the rest of the ingredients and beat on low speed for 2 minutes. Bake at 325 degrees
- ***One recipe makes: one 14" round + one 6" round
- or one 16" round
- or one 12" round + one 10" round
- or one 12x18" sheet cake
- or one 12" round + one 8" round + one 6"
- Half a recipe makes: two 8" rounds
- or two 6" rounds + 6 cupcakes

I hope you enjoy this cake! Merry Christmas!!
Shamene
My cake was featured here!
]]>
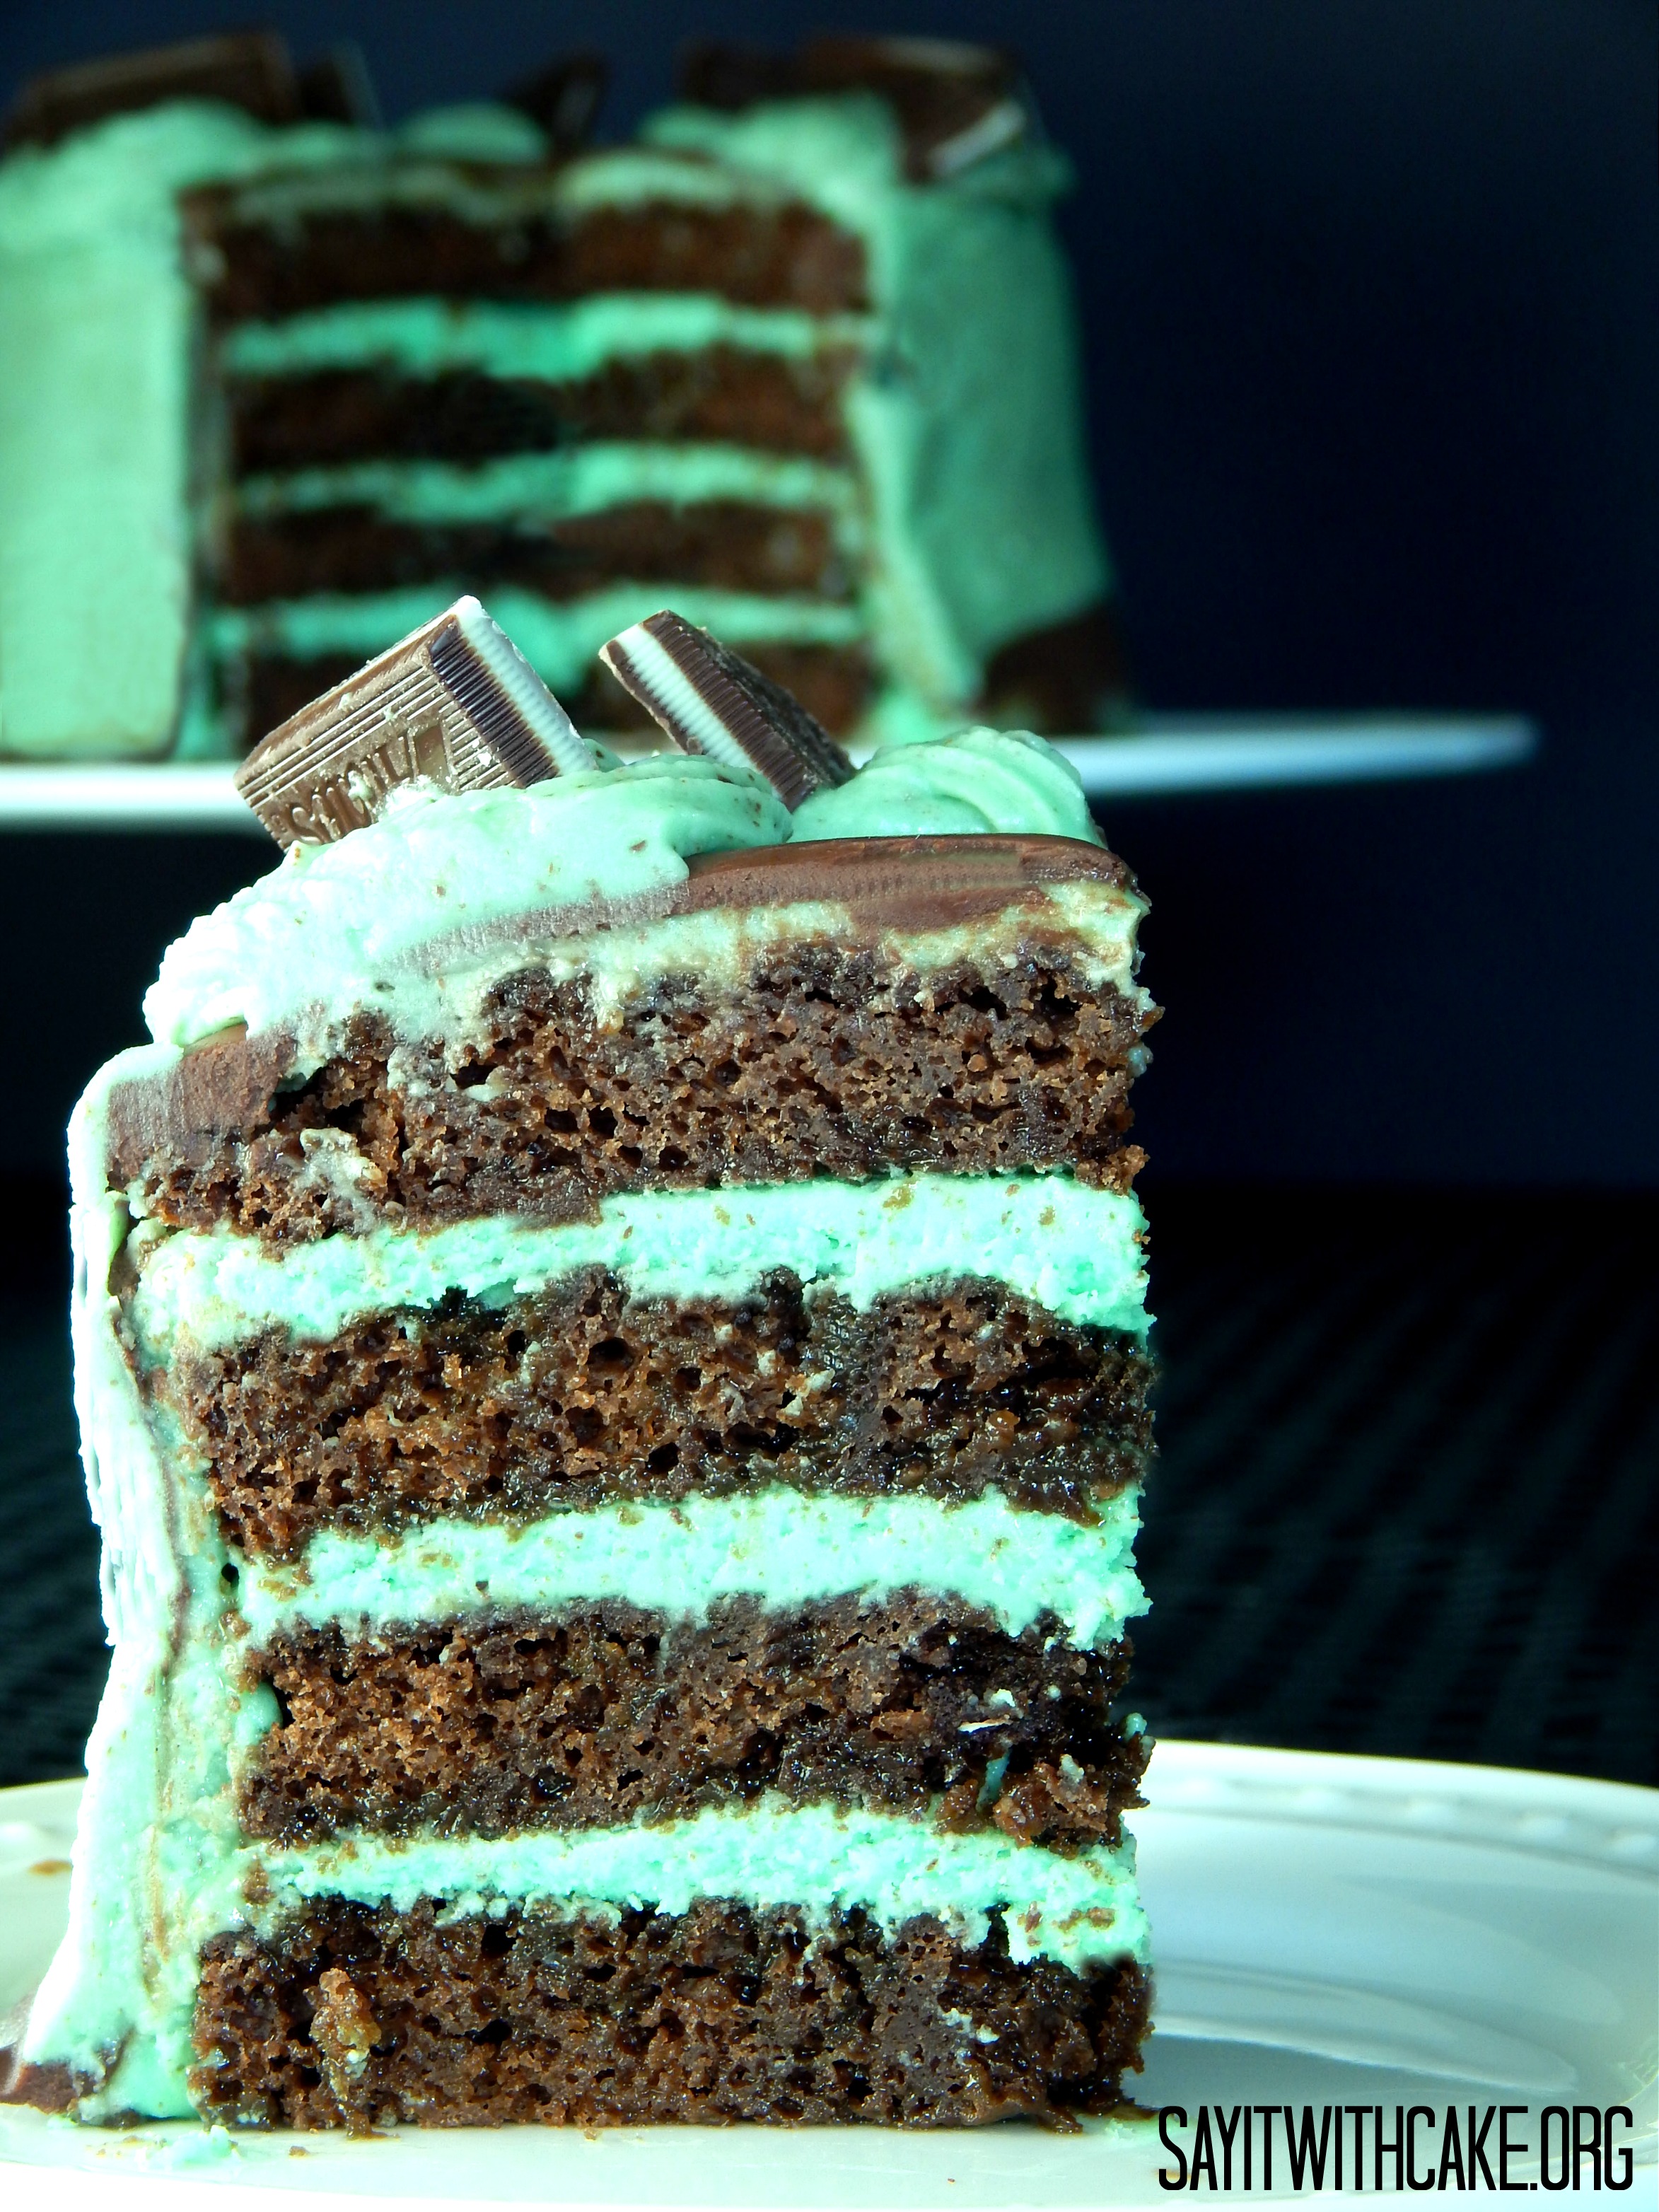
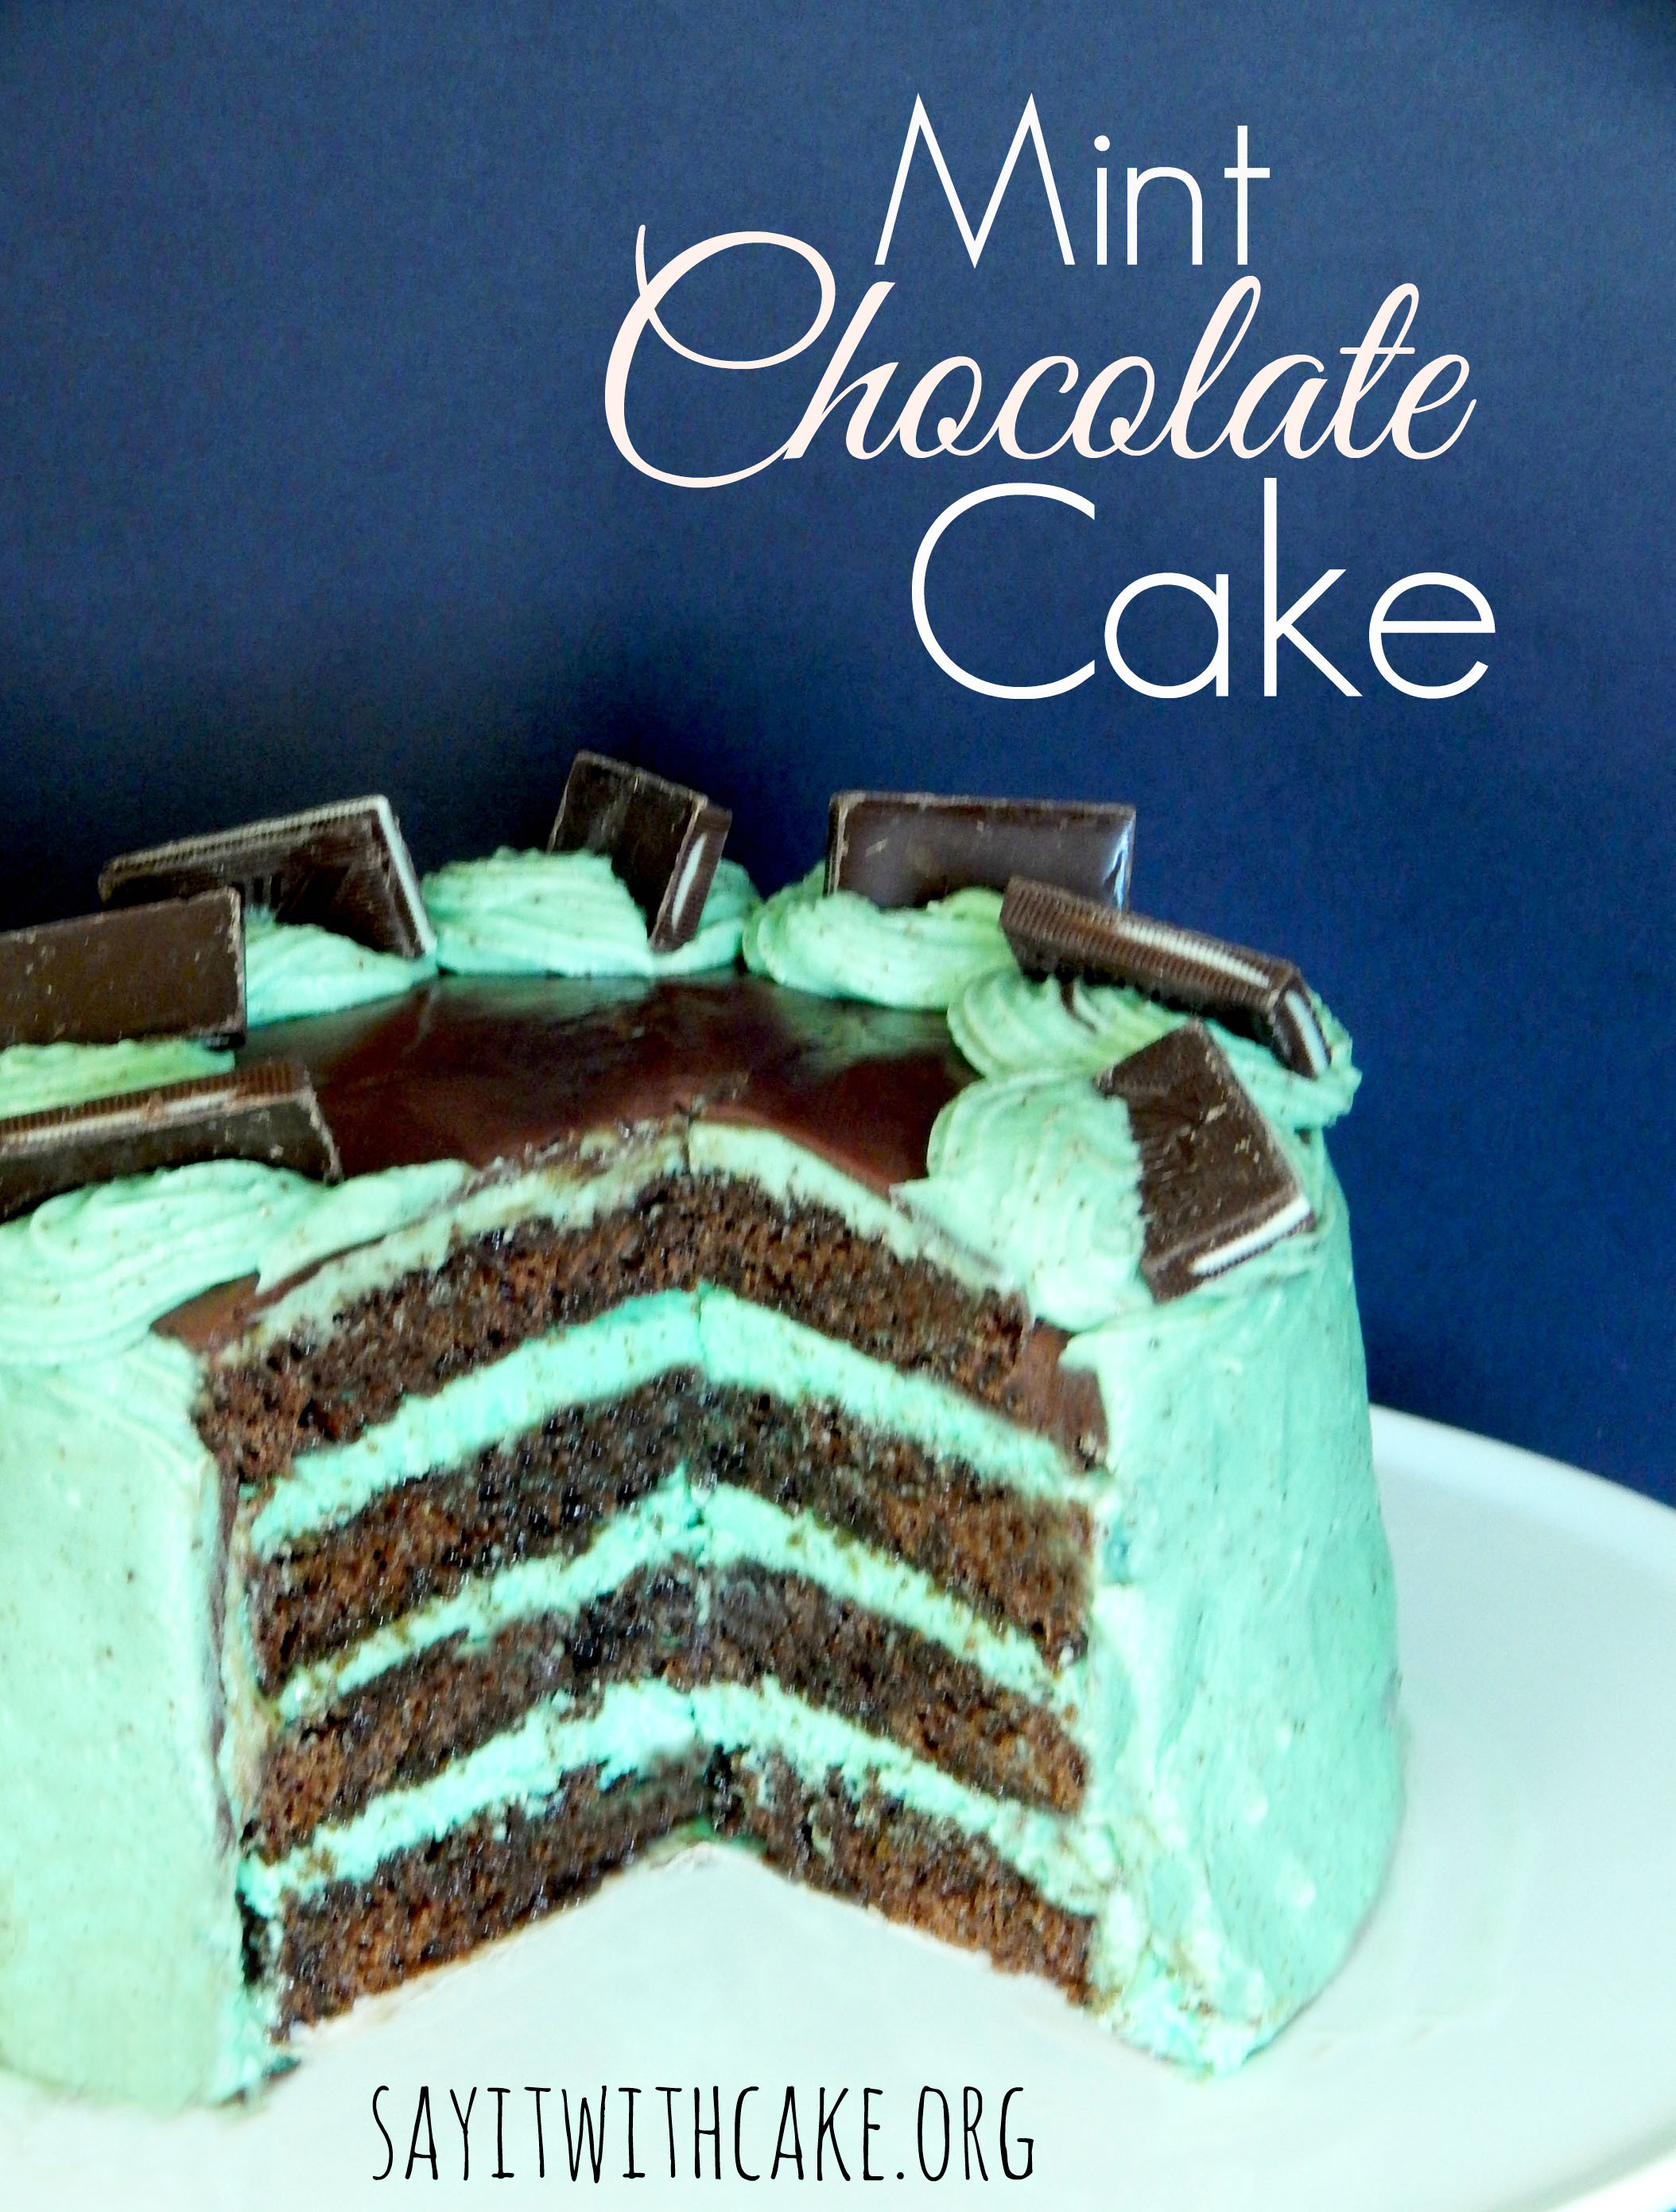
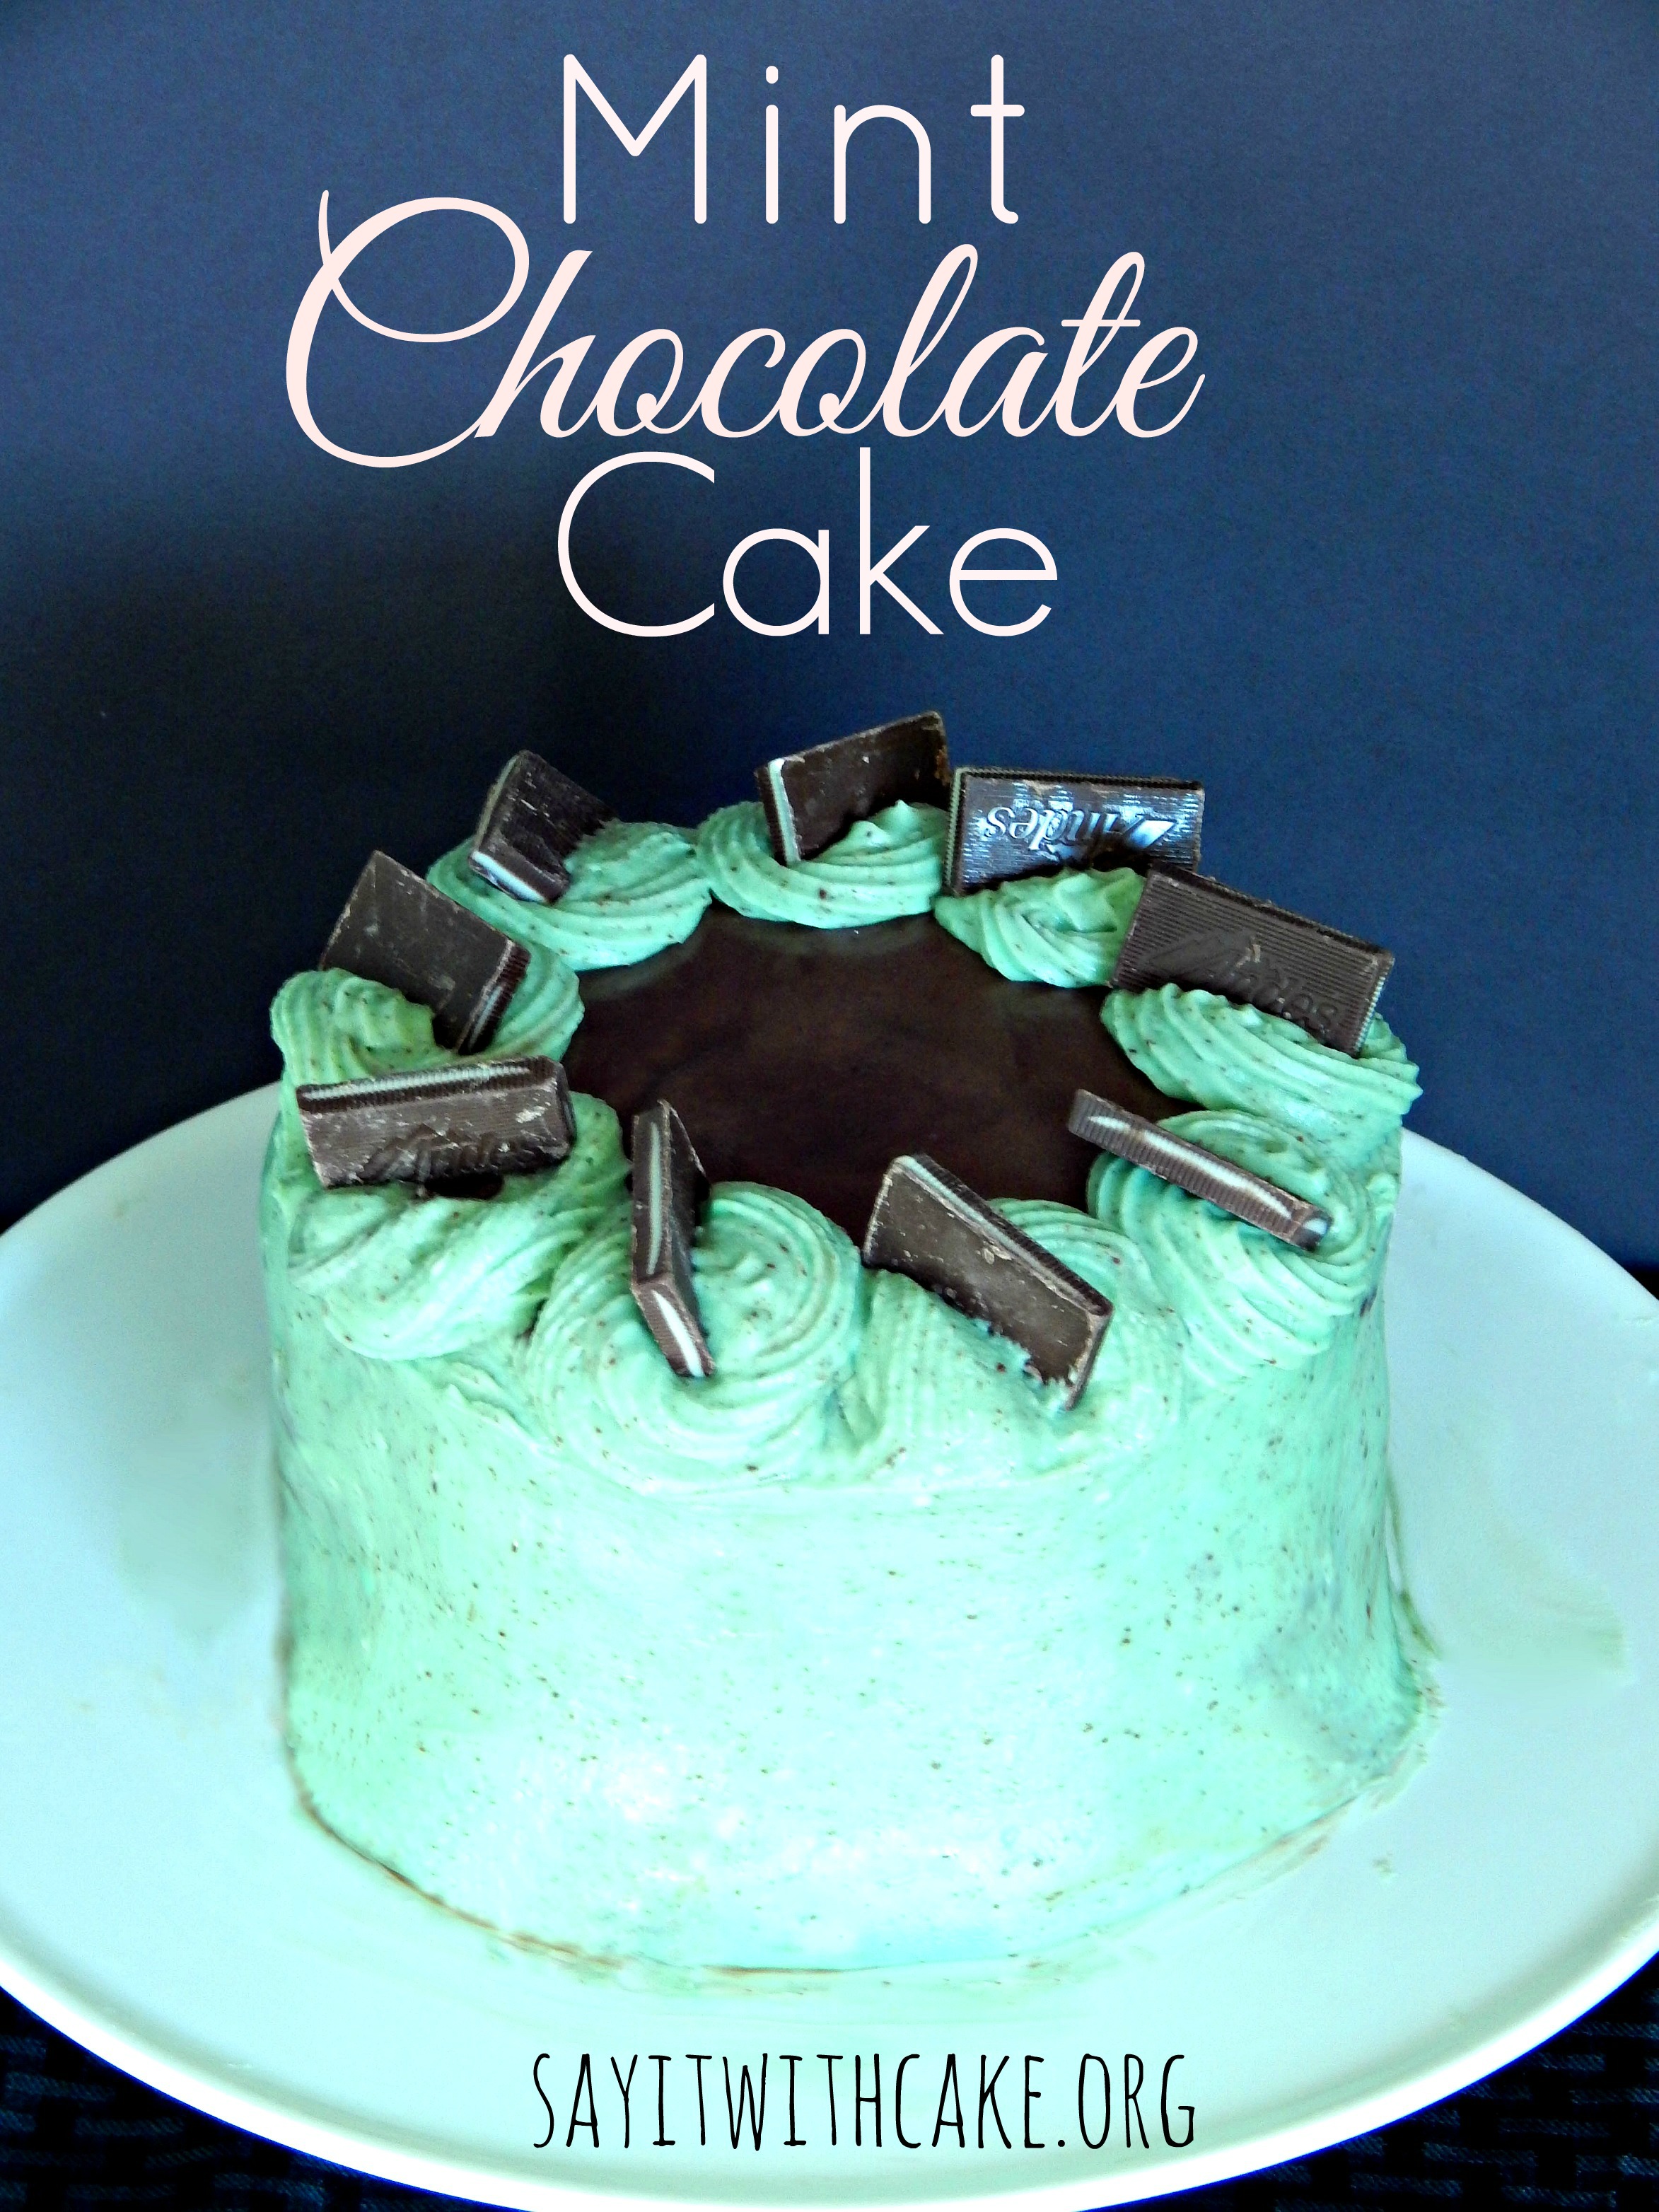 Chocolate and mint…..the perfect combination. I have been in a real holiday baking mood this past week. Of all the Christmas treats I made for everyone else, this baby was purely for me
Ingredients
- 2 cups white sugar
- 1 3/4 cup all purpose flour
- 1 cup unsweetened, Dutch process cocoa powder
- 1 1/2 tsp baking powder
- 1 1/2 tsp baking soda
- 1 teaspoon salt
- 2 eggs
- 1 cup milk
- 1/2 cup vegetable oil
- 2 tsp vanilla extract
- 3/4 cup boiling water
- 2 sticks (1 cup) salted butter, slightly softened
- 1/3 cup heavy cream
- 2 tsp mint extract
- 1 tsp vanilla extract
- Drop or two of green food coloring
- 4 cups powdered sugar
- 2 oz semisweet chocolate, finely chopped
Instructions
- Preheat oven to 350. Grease and flour 2 eight or nine inch pans.
- In the bowl of a mixer, combine sugar, flour, cocoa powder, baking powder, baking soda, and salt. Whisk together until fully combined. Add eggs, milk, oil, and vanilla and beat on medium speed for 2 minutes. Scrape the sides of the bowl, then slowly stir in the boiling water. Pour batter evenly into prepared pans and bake for 30 -40 minutes, until tops of cakes spring back when you lightly touch in the center.
- Remove cakes from oven. Allow to cool in pans for about 10 minutes, then remove to finish cooling on wire racks.
- Prepare frosting: In the bowl of a mixer, beat butter, cream, and both extracts on medium speed until smooth. With mixer speed on low, slowly add powdered sugar and mix until just combined. Add food coloring and increase speed to medium high and beat for about minute, until frosting is light, smooth, and fluffy. If frosting is too thick, add another Tablespoon or two of cream and beat for 30 more seconds. Add chopped chocolate and mix on low until incorporated. Frost cooled cake.
Enjoy!
Shamene
My cake was featured here!!

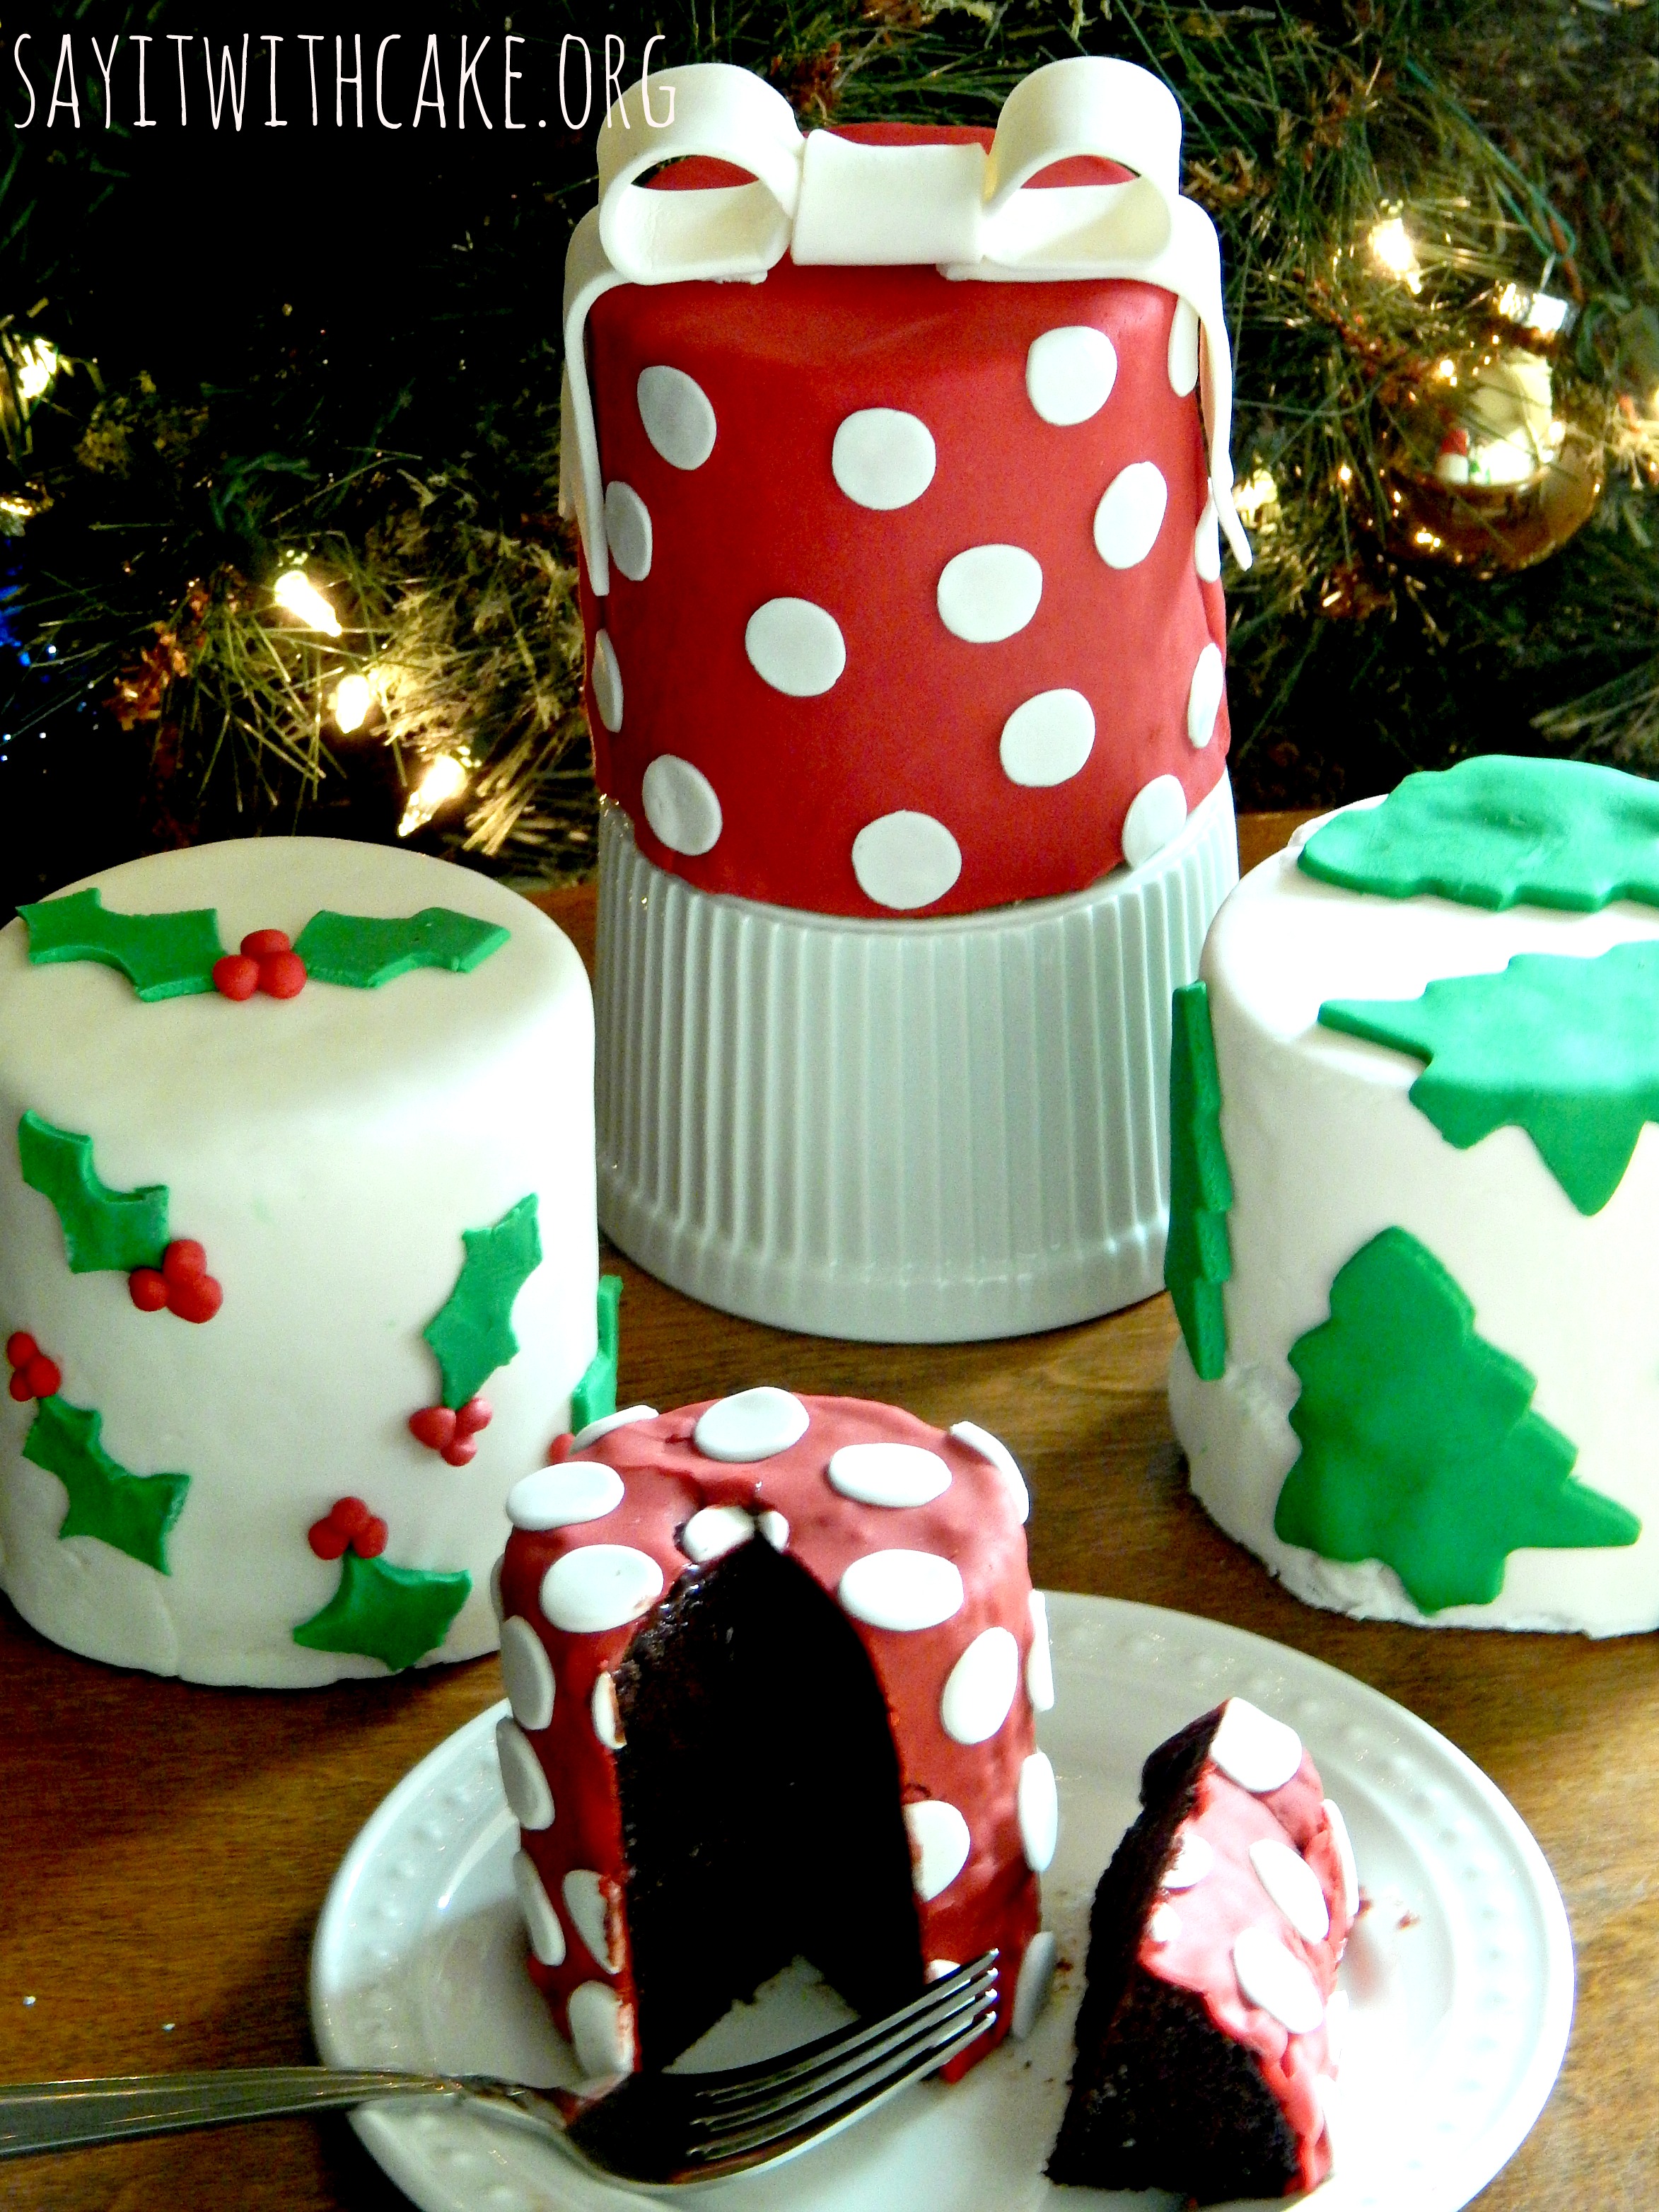
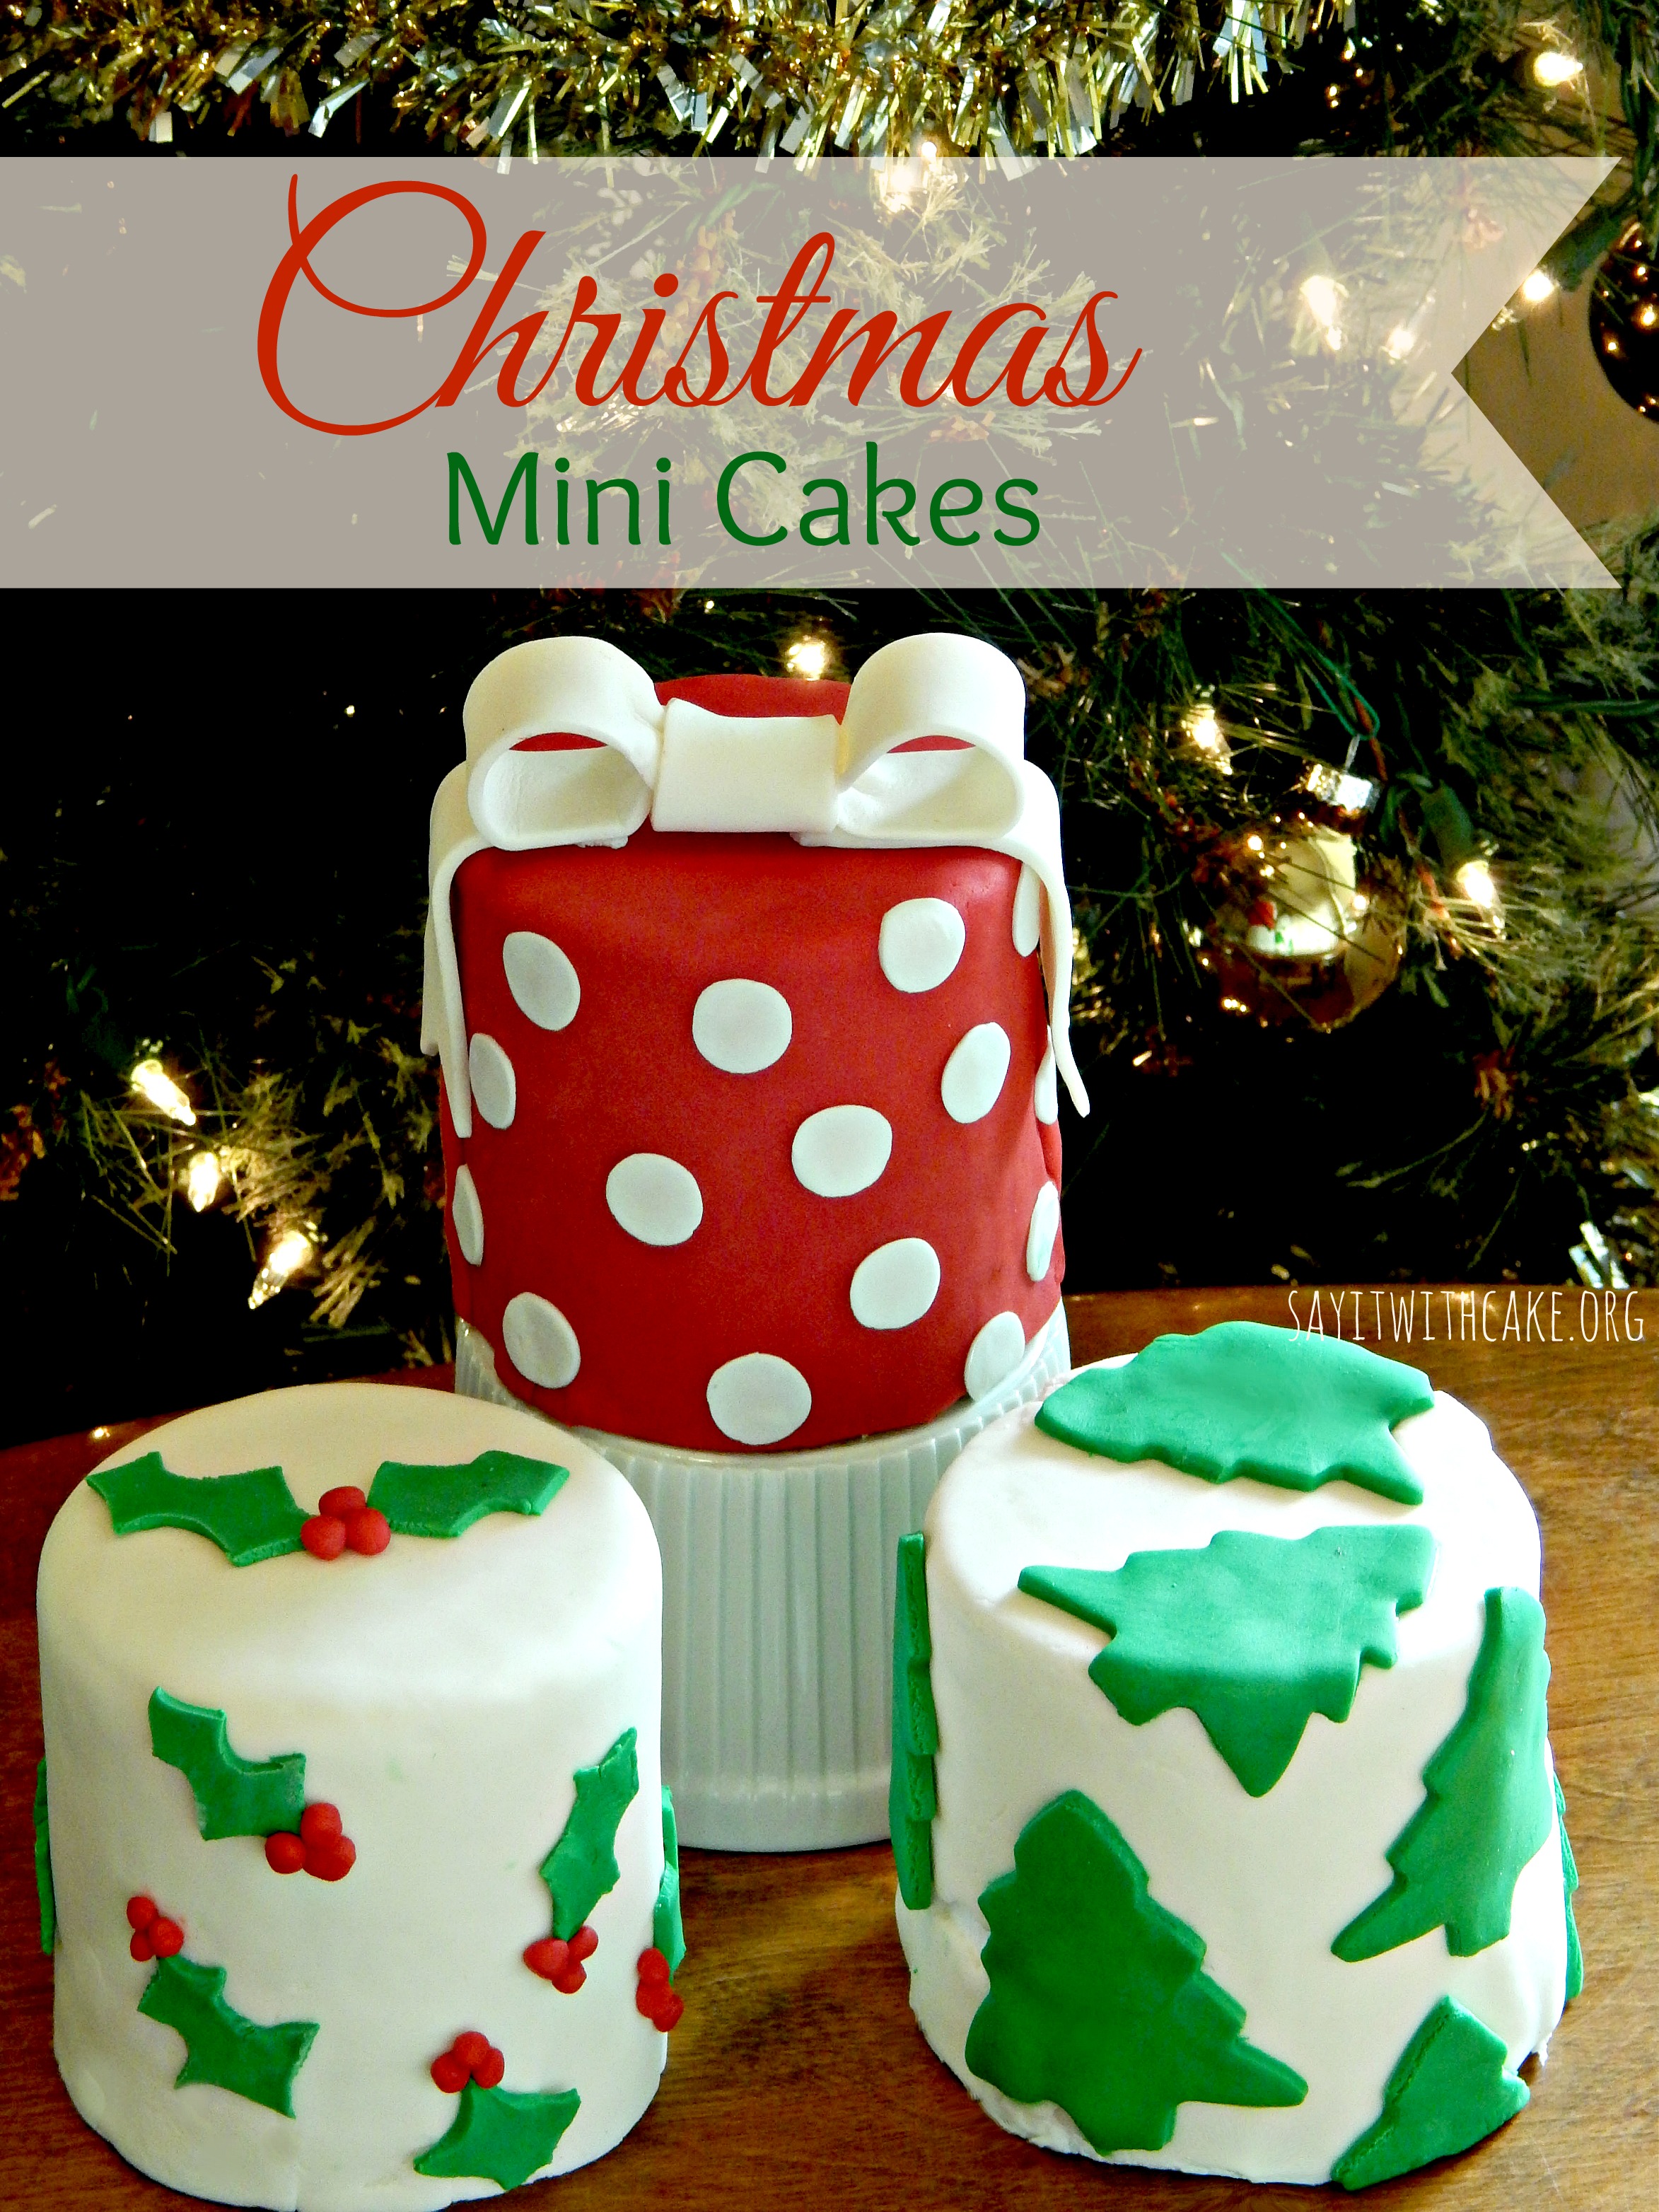 Christmas is coming!! This month there will be all kinds of parties and dinners with plenty of opportunities to bake something spectacular to take as a dessert! These mini cakes are so cute and are perfect for a party or even a gift for someone special! Keep reading and I will show you how to make these mini cakes step by step!
What you will need:
4 or 5 inch round cake pans or specialty mini cake pan
Cake mix
Buttercream
Fondant
Food coloring
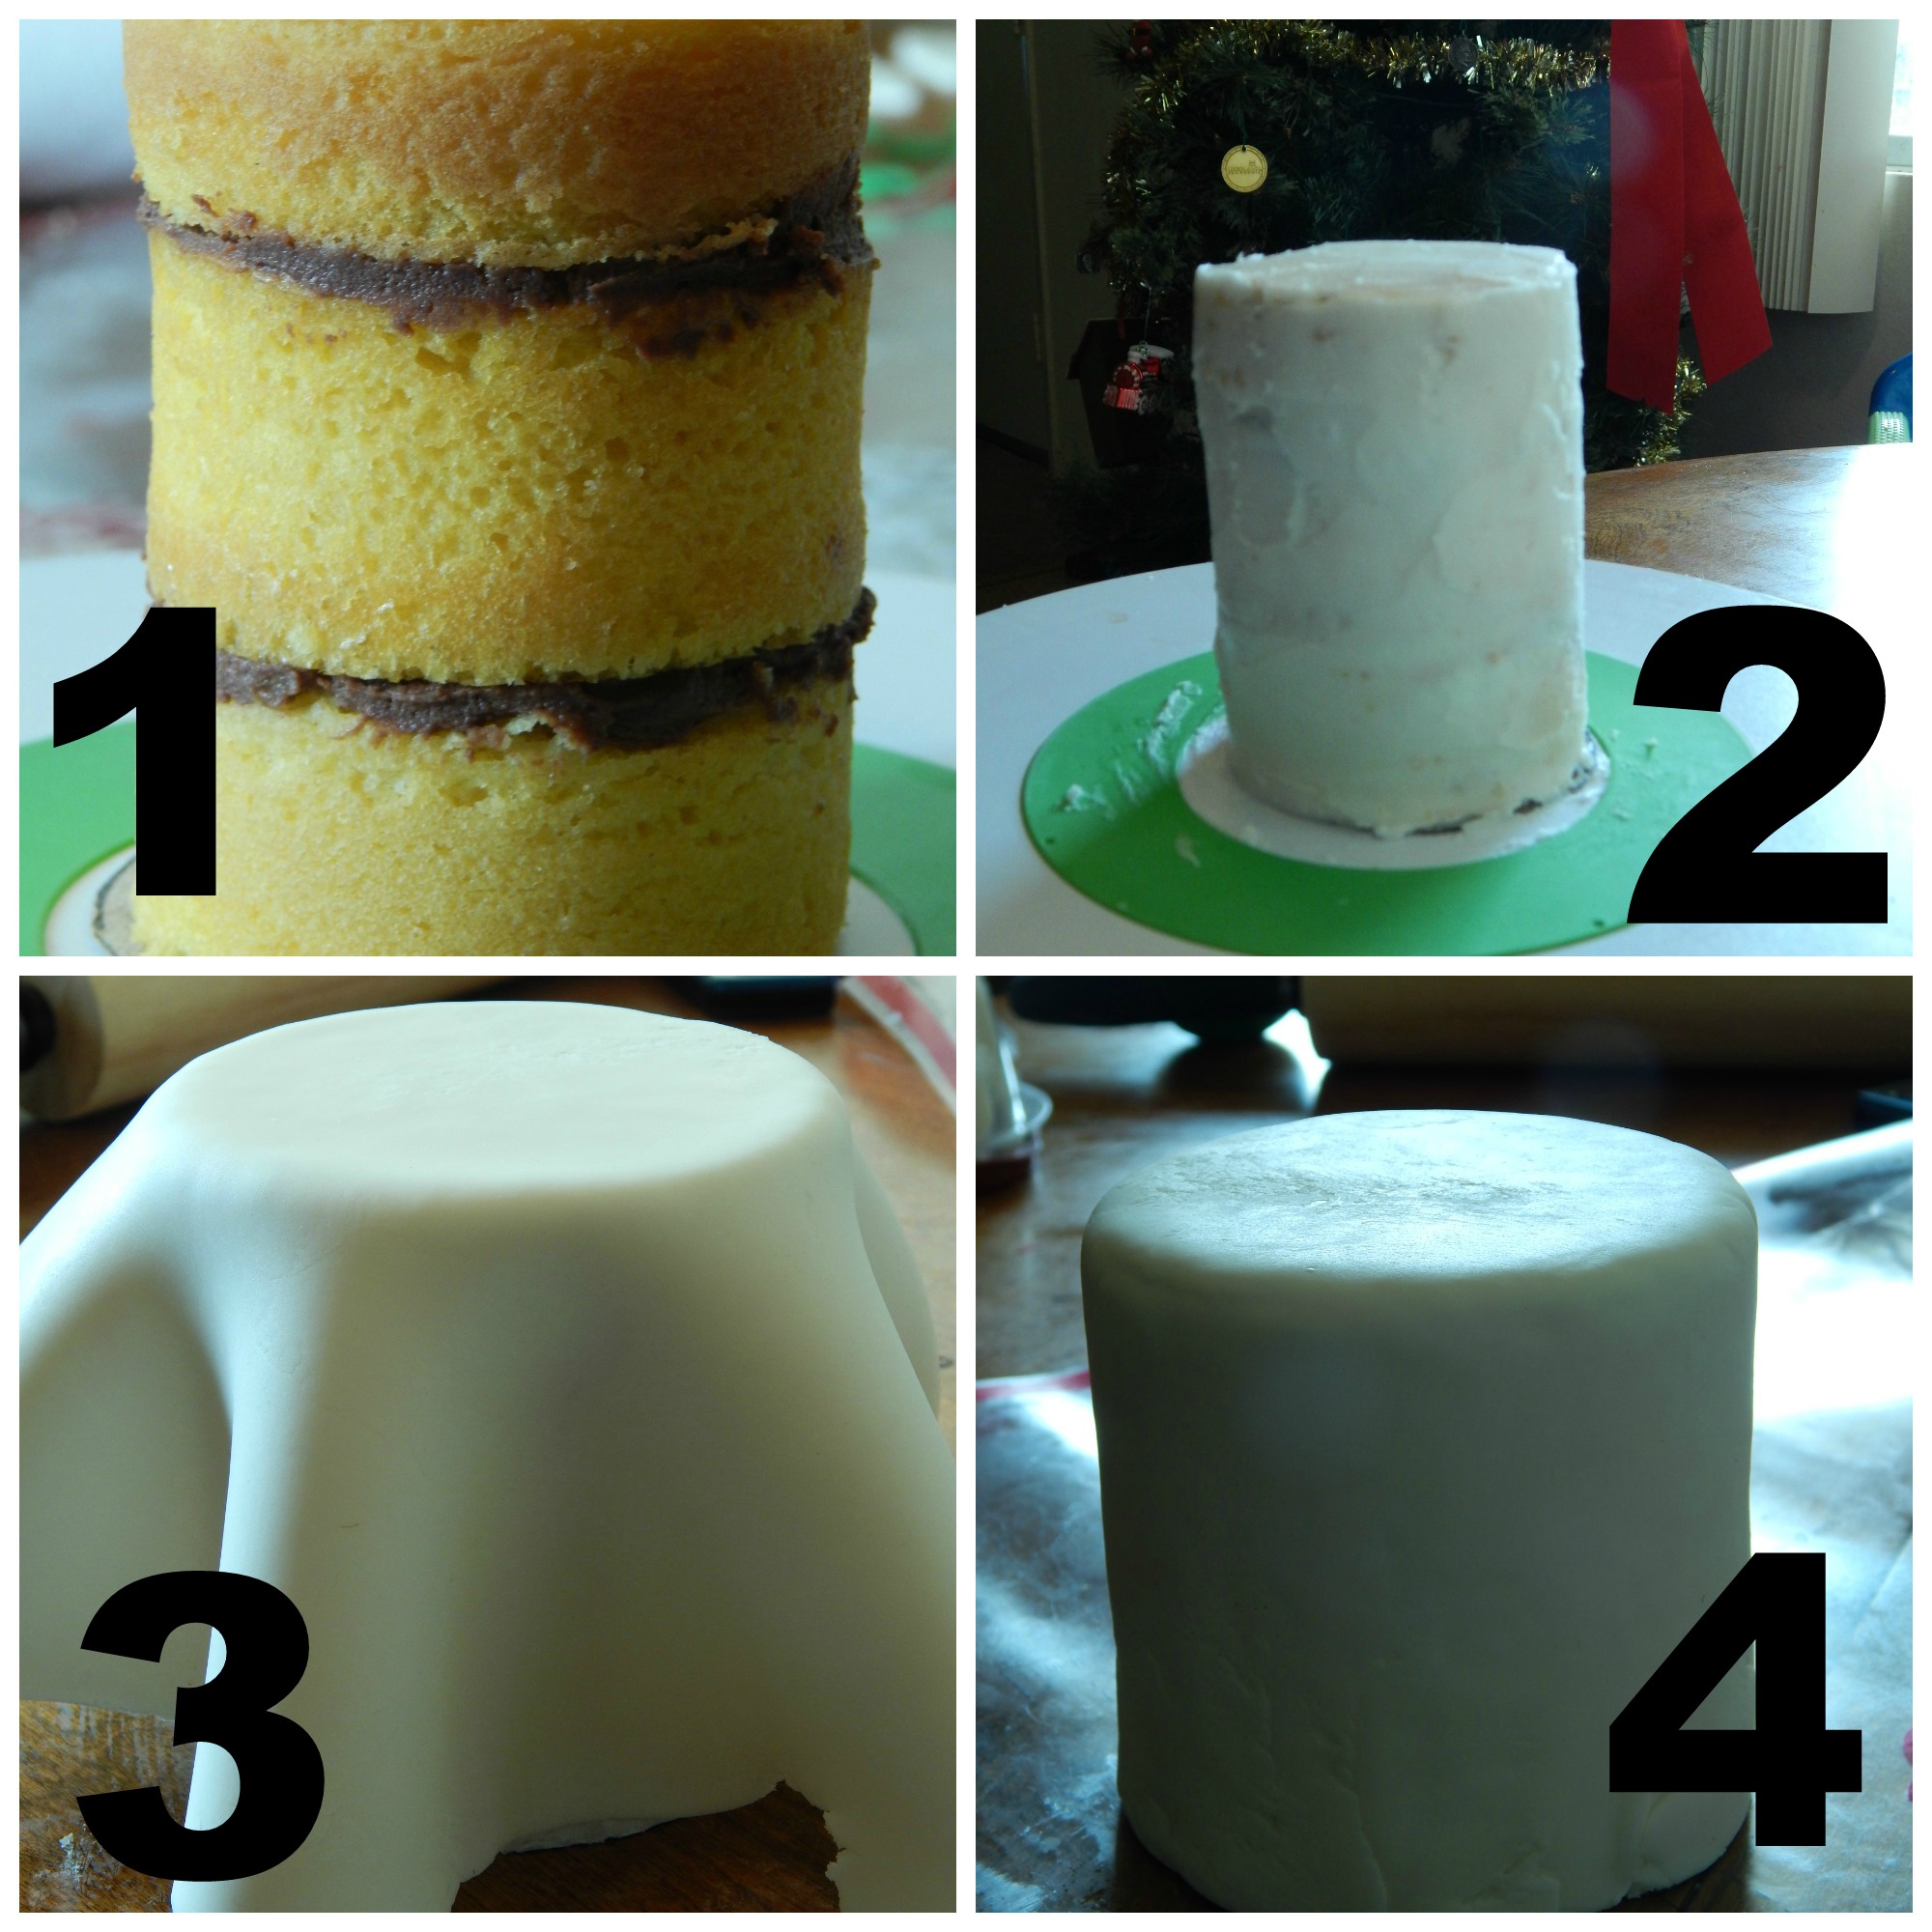
1. Make cake mix, grease and flour mini cake pans, cook for 3o minutes, let cool, stack three cakes with buttecream in between each layer. It is very iimportant to grease and flour the pans since they are so small it is easier for the cake to stick to the pan! Check the cake with a toothpick to make sure it is done before you take it out. You can cook all of the mini cakes at the same time if you have enough pans.
2. Frost the cakes with buttercream on a turn table. This is the trickiest part I think! The cake is so small and much harder to frost! I started from the bottom and worked my way up. After everything was covered with buttercream I scraped the sides with a bench scraper. Please note the smoother and cleaner you get the buttercream, the better the fondant will look. Every bump and crease in the buttercream show through the fondant!
3. Roll out fondant into 12 inch circle and cover the mini cake. Smooth down sides.
4. After you have put on the fondant, you can cut out pieces of different colored fondant for decoration. For my cakes I cut out polka dots, holly leaves, and small christmas trees. I cut out the holly free hand with a small knife, and the christmas trees with a cookie cutter.
Ingredients
- 2 boxes white cake mix 2 cups all-purpose flour 2 cups granulated sugar 1 1/2 teas. salt 8 egg whites 2 2/3 cups water 4 Tbls. vegetable oil 2 cups (16oz carton) sour cream 2 teaspoon clear vanilla flavor 2 teaspoons almond extract
Instructions
- Mix all dry ingredients by hand using a whisk in a very large mixing bowl. Add the rest of the ingredients and beat on low speed for 2 minutes. Bake at 325 degrees
- ***One recipe makes: one 14" round + one 6" round
- or one 16" round
- or one 12" round + one 10" round
- or one 12x18" sheet cake
- or one 12" round + one 8" round + one 6"
- Half a recipe makes: two 8" rounds
- or two 6" rounds + 6 cupcakes
Ingredients
- 8 ounces miniature marshmallows (4 cups not packed, or half of a 16-ounce bag)
- 1 pound powdered sugar (4 cups), plus extra for dusting
- 2 tbsp water
- Food coloring or flavored extracts, optional
Instructions
- Dust your counter or a large cutting board with powdered sugar. Place the marshmallows and the water in a large microwave-safe bowl. Microwave on high for 1 minute, until the marshmallows are puffy and expanded.
- Stir the marshmallows with a rubber spatula until they are melted and smooth. If some unmelted marshmallow pieces remain, return to the microwave for 30-45 seconds, until the marshmallow mixture is entirely smooth and free of lumps. If you want colored or flavored fondant, you can add several drops of food coloring or extracts at this point and stir until incorporated. If you want to create multiple colors or flavors from one batch of fondant, do not add the colors or flavors now. Instead, refer to step 6 below for instructions.
- Add the powdered sugar and begin to stir with the spatula. Stir until the sugar begins to incorporate and it becomes impossible to stir anymore.
- Scrape the marshmallow-sugar mixture out onto the prepared work surface. It will be sticky and lumpy, with lots of sugar that has not been incorporated yet--this is normal. Dust your hands with powdered sugar, and begin to knead the fondant mixture like bread dough, working the sugar into the marshmallow with your hands.
- Continue to knead the fondant until it smoothes out and loses its stickiness. Add more sugar if necessary, but stop adding sugar once it is smooth--too much sugar will make it stiff and difficult to work with. Once the fondant is a smooth ball, it is ready to be used. You can now roll it out, shape it, or wrap it in cling wrap to use later. Well-wrapped fondant can be stored in a cool room or in the refrigerator, and needs to be kneaded until supple before later use.
- If you want to add coloring or flavoring to your fondant, flatten it into a round disc. You might want to wear gloves to avoid getting food coloring on your hands during this step. Add your desired amount of coloring or flavoring to the center of the disc, and fold the disc over on itself so that the color or flavor is enclosed in the center of the fondant ball.
- Begin to knead the ball of fondant just like you did before. As you work it, you will begin to see streaks of color coming through from the center. Continue to knead until the streaks are gone and the fondant is a uniform color. Your fondant is now ready to be used or stored as outlined above.
Ingredients
- 1 1/2 cup sweetex or crisco
- 1/4 teaspoon salt
- 1 teaspoon meringue powder
- 2 pounds powdered sugar
- 1/2 cup milk or water
- 1 tsp vanilla
Instructions
- mix the sweetex, salt, and meringue powder with electric mixer to blend aobut 30 seconds
- Add the milk in the bowl, then add the sugar and blend by hand with a spatula until the sugar is absorbed into the liquid
- put bowl back on the mixer and beat on medium speed for 2-5 minutes until smooth and a little fluffy.
- if mixture is too stiff, you can add more liquid. if it is too runny add more powdered sugar
ENJOY!
Shamene
My cakes were featured here!