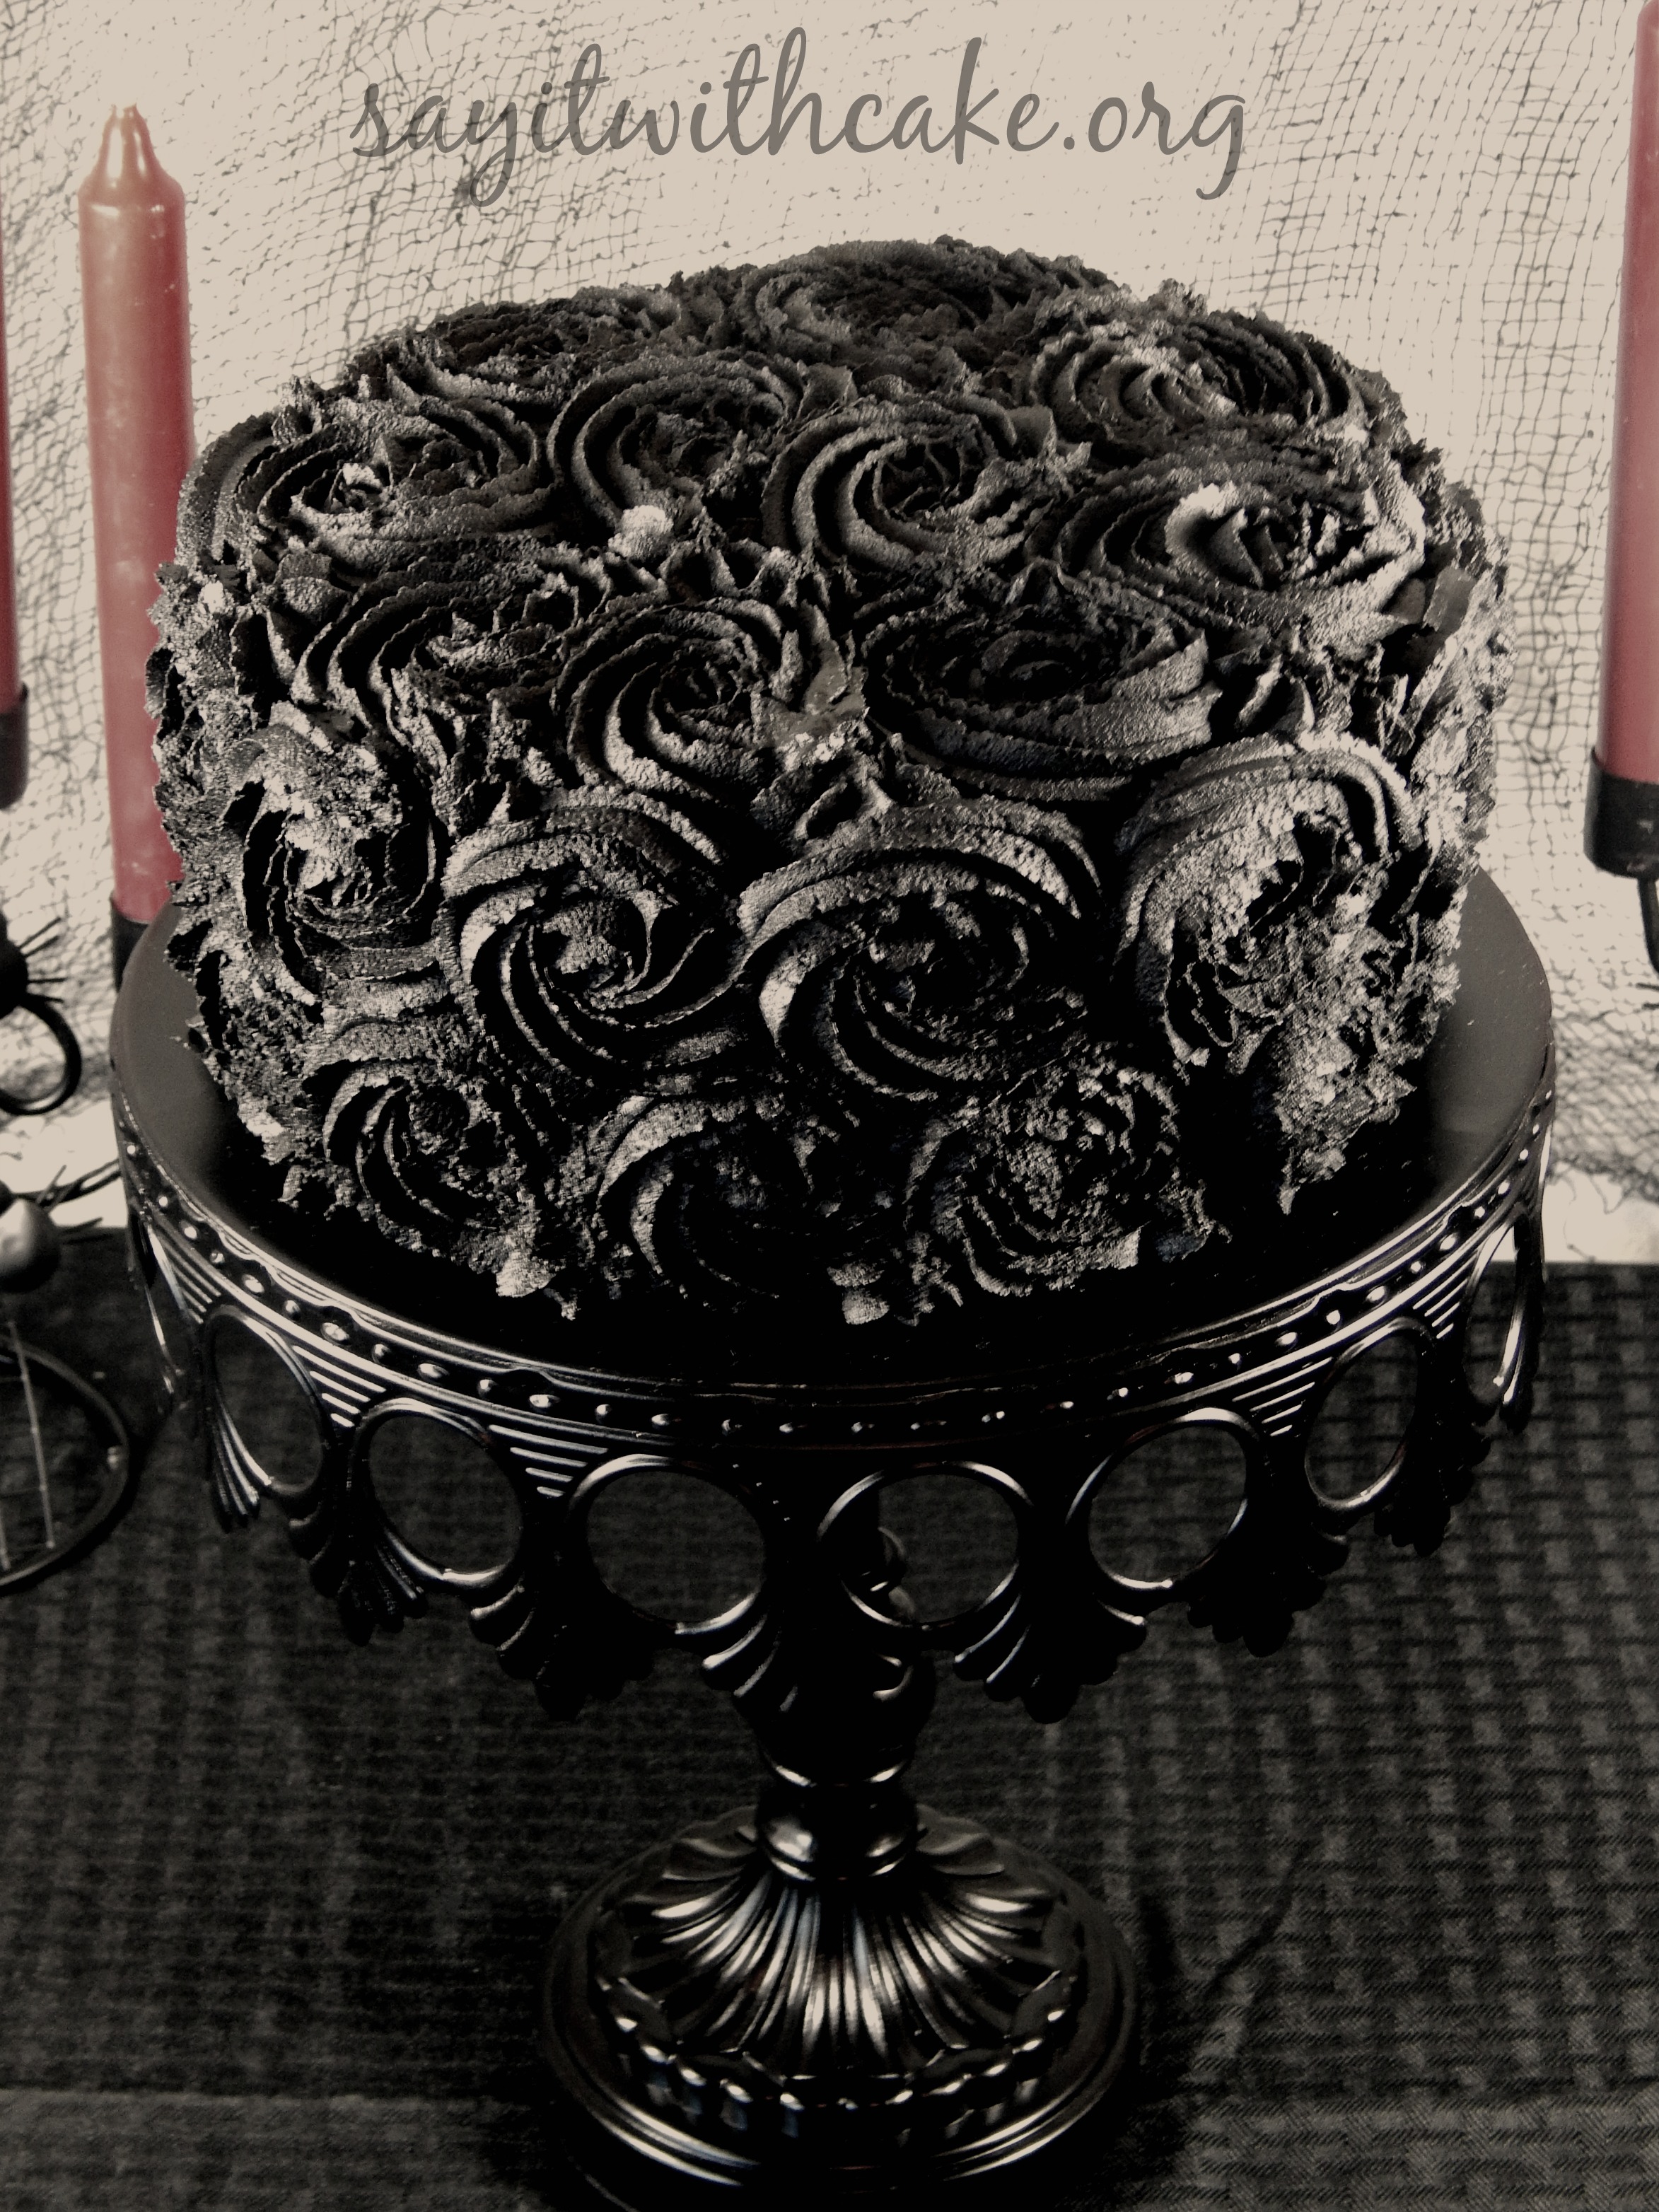
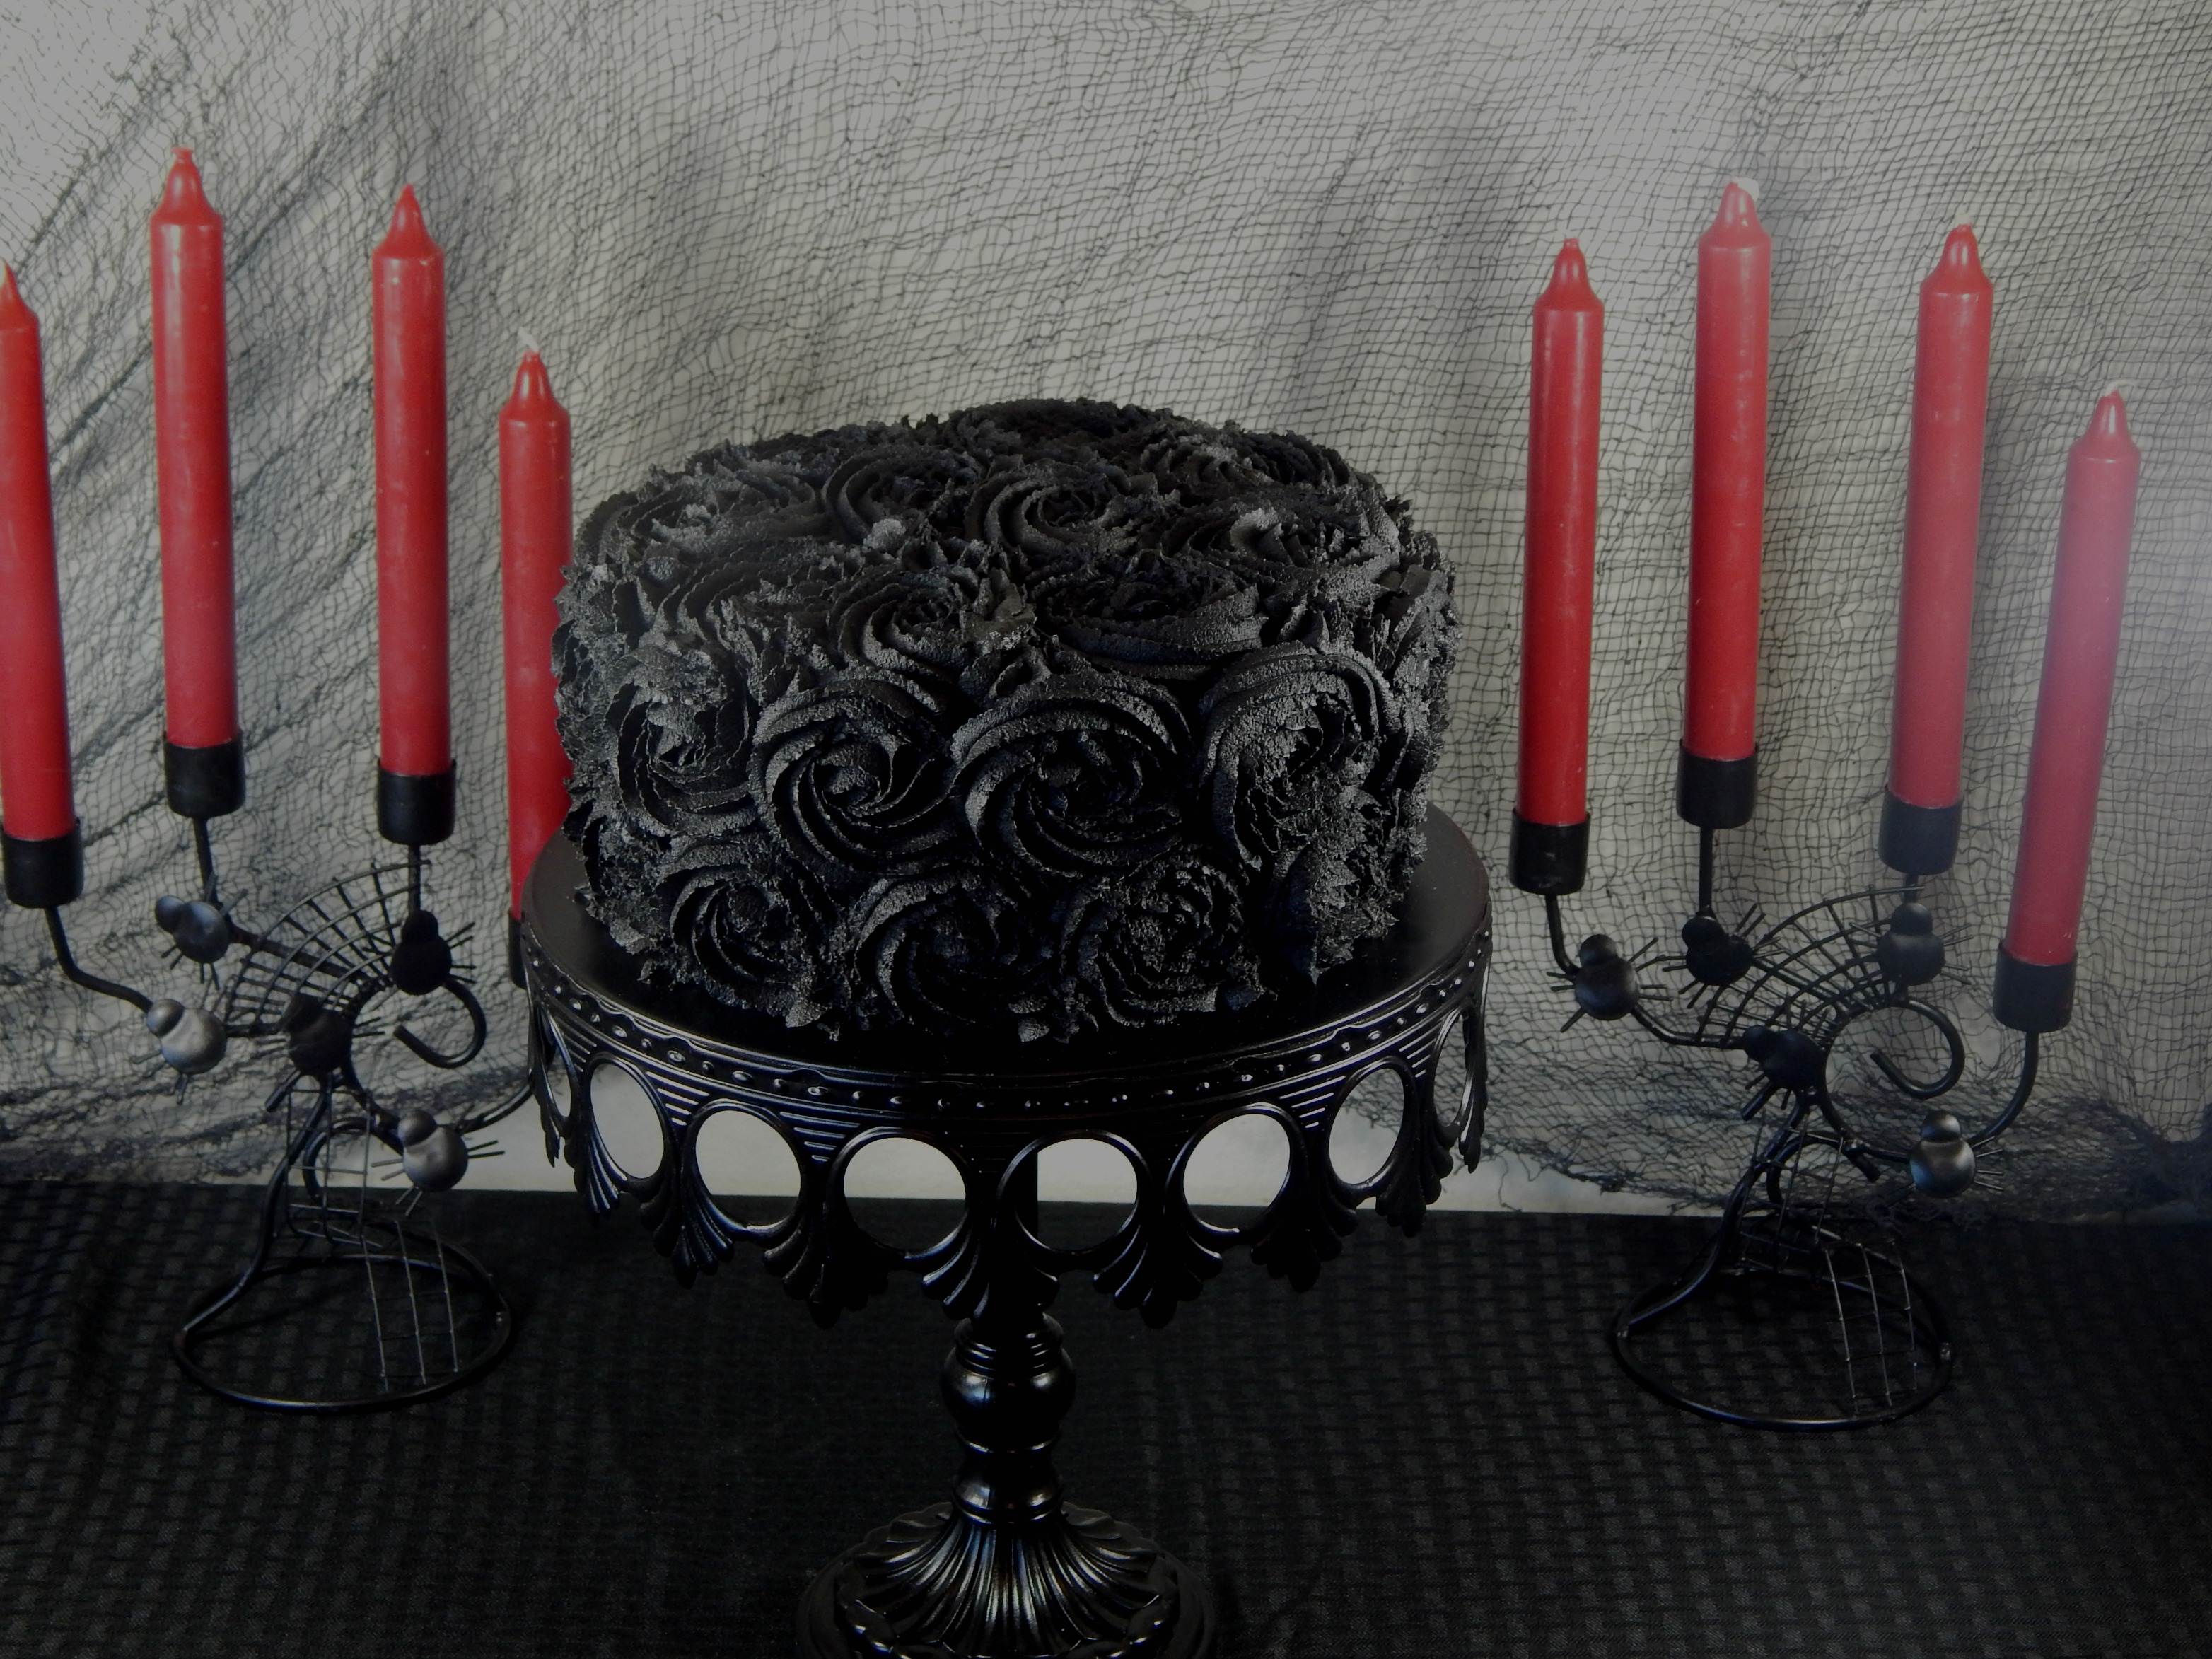
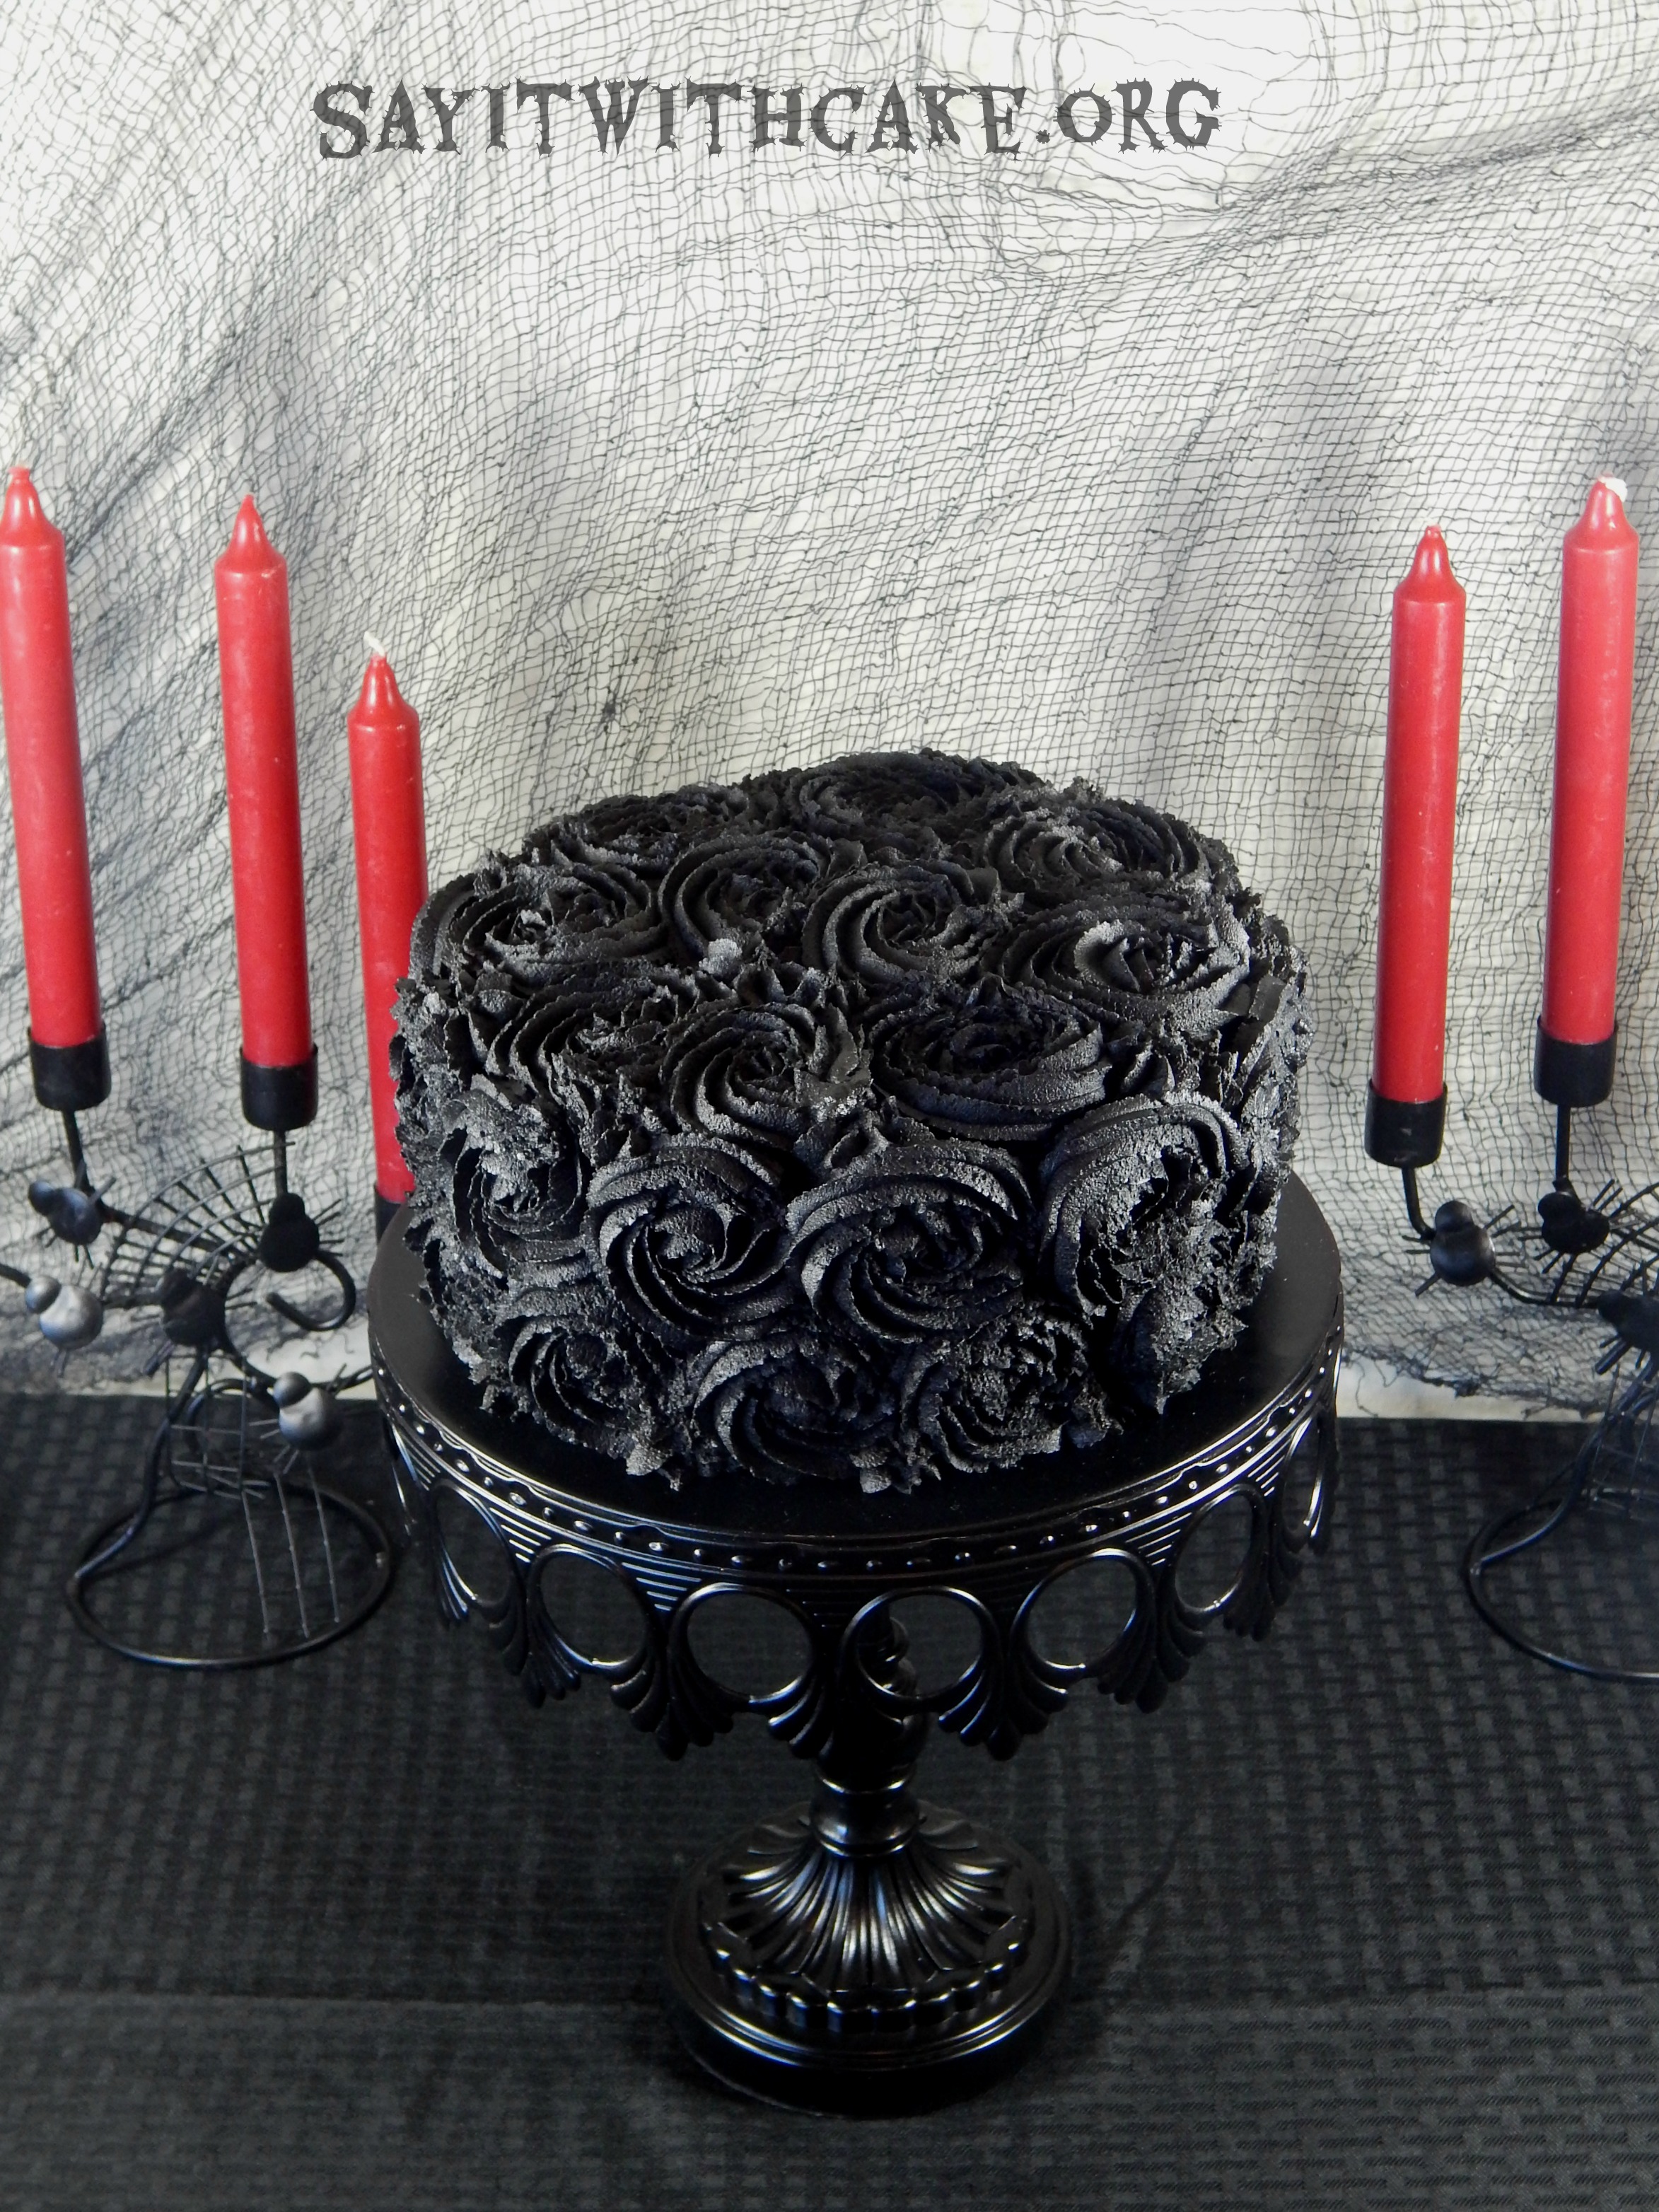
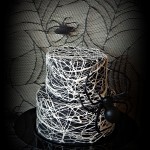
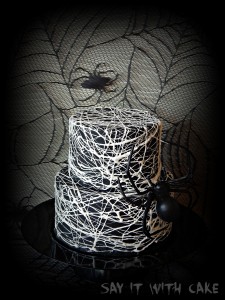
 Happy Halloween! I made this black rose swirl cake for a Halloween party. I think the black roses make it a little spooky and mysterious. I got to use my new black cake stand, I think it went perfect with the cake!
For this black rose swirl cake, I started with a dark chocolate cake. I wanted a red filling, so I created my own red velvet filling. It has whipping cream, chocolate pudding, and red coloring. The filling is so delicious and holds up well.
To cover this 8 inch cake, I needed one and a half recipes of buttercream. I added a half a cup of dark cocoa mix. Then I added two teaspoons of black gel coloring. If you let the frosting sit overnight, that’s when it turns its blackest. When I first made it was more on the grey side. By morning it was very black.
You need to frost a crumb coat first on the cake and let it sit in the fridge for 20 minutes.

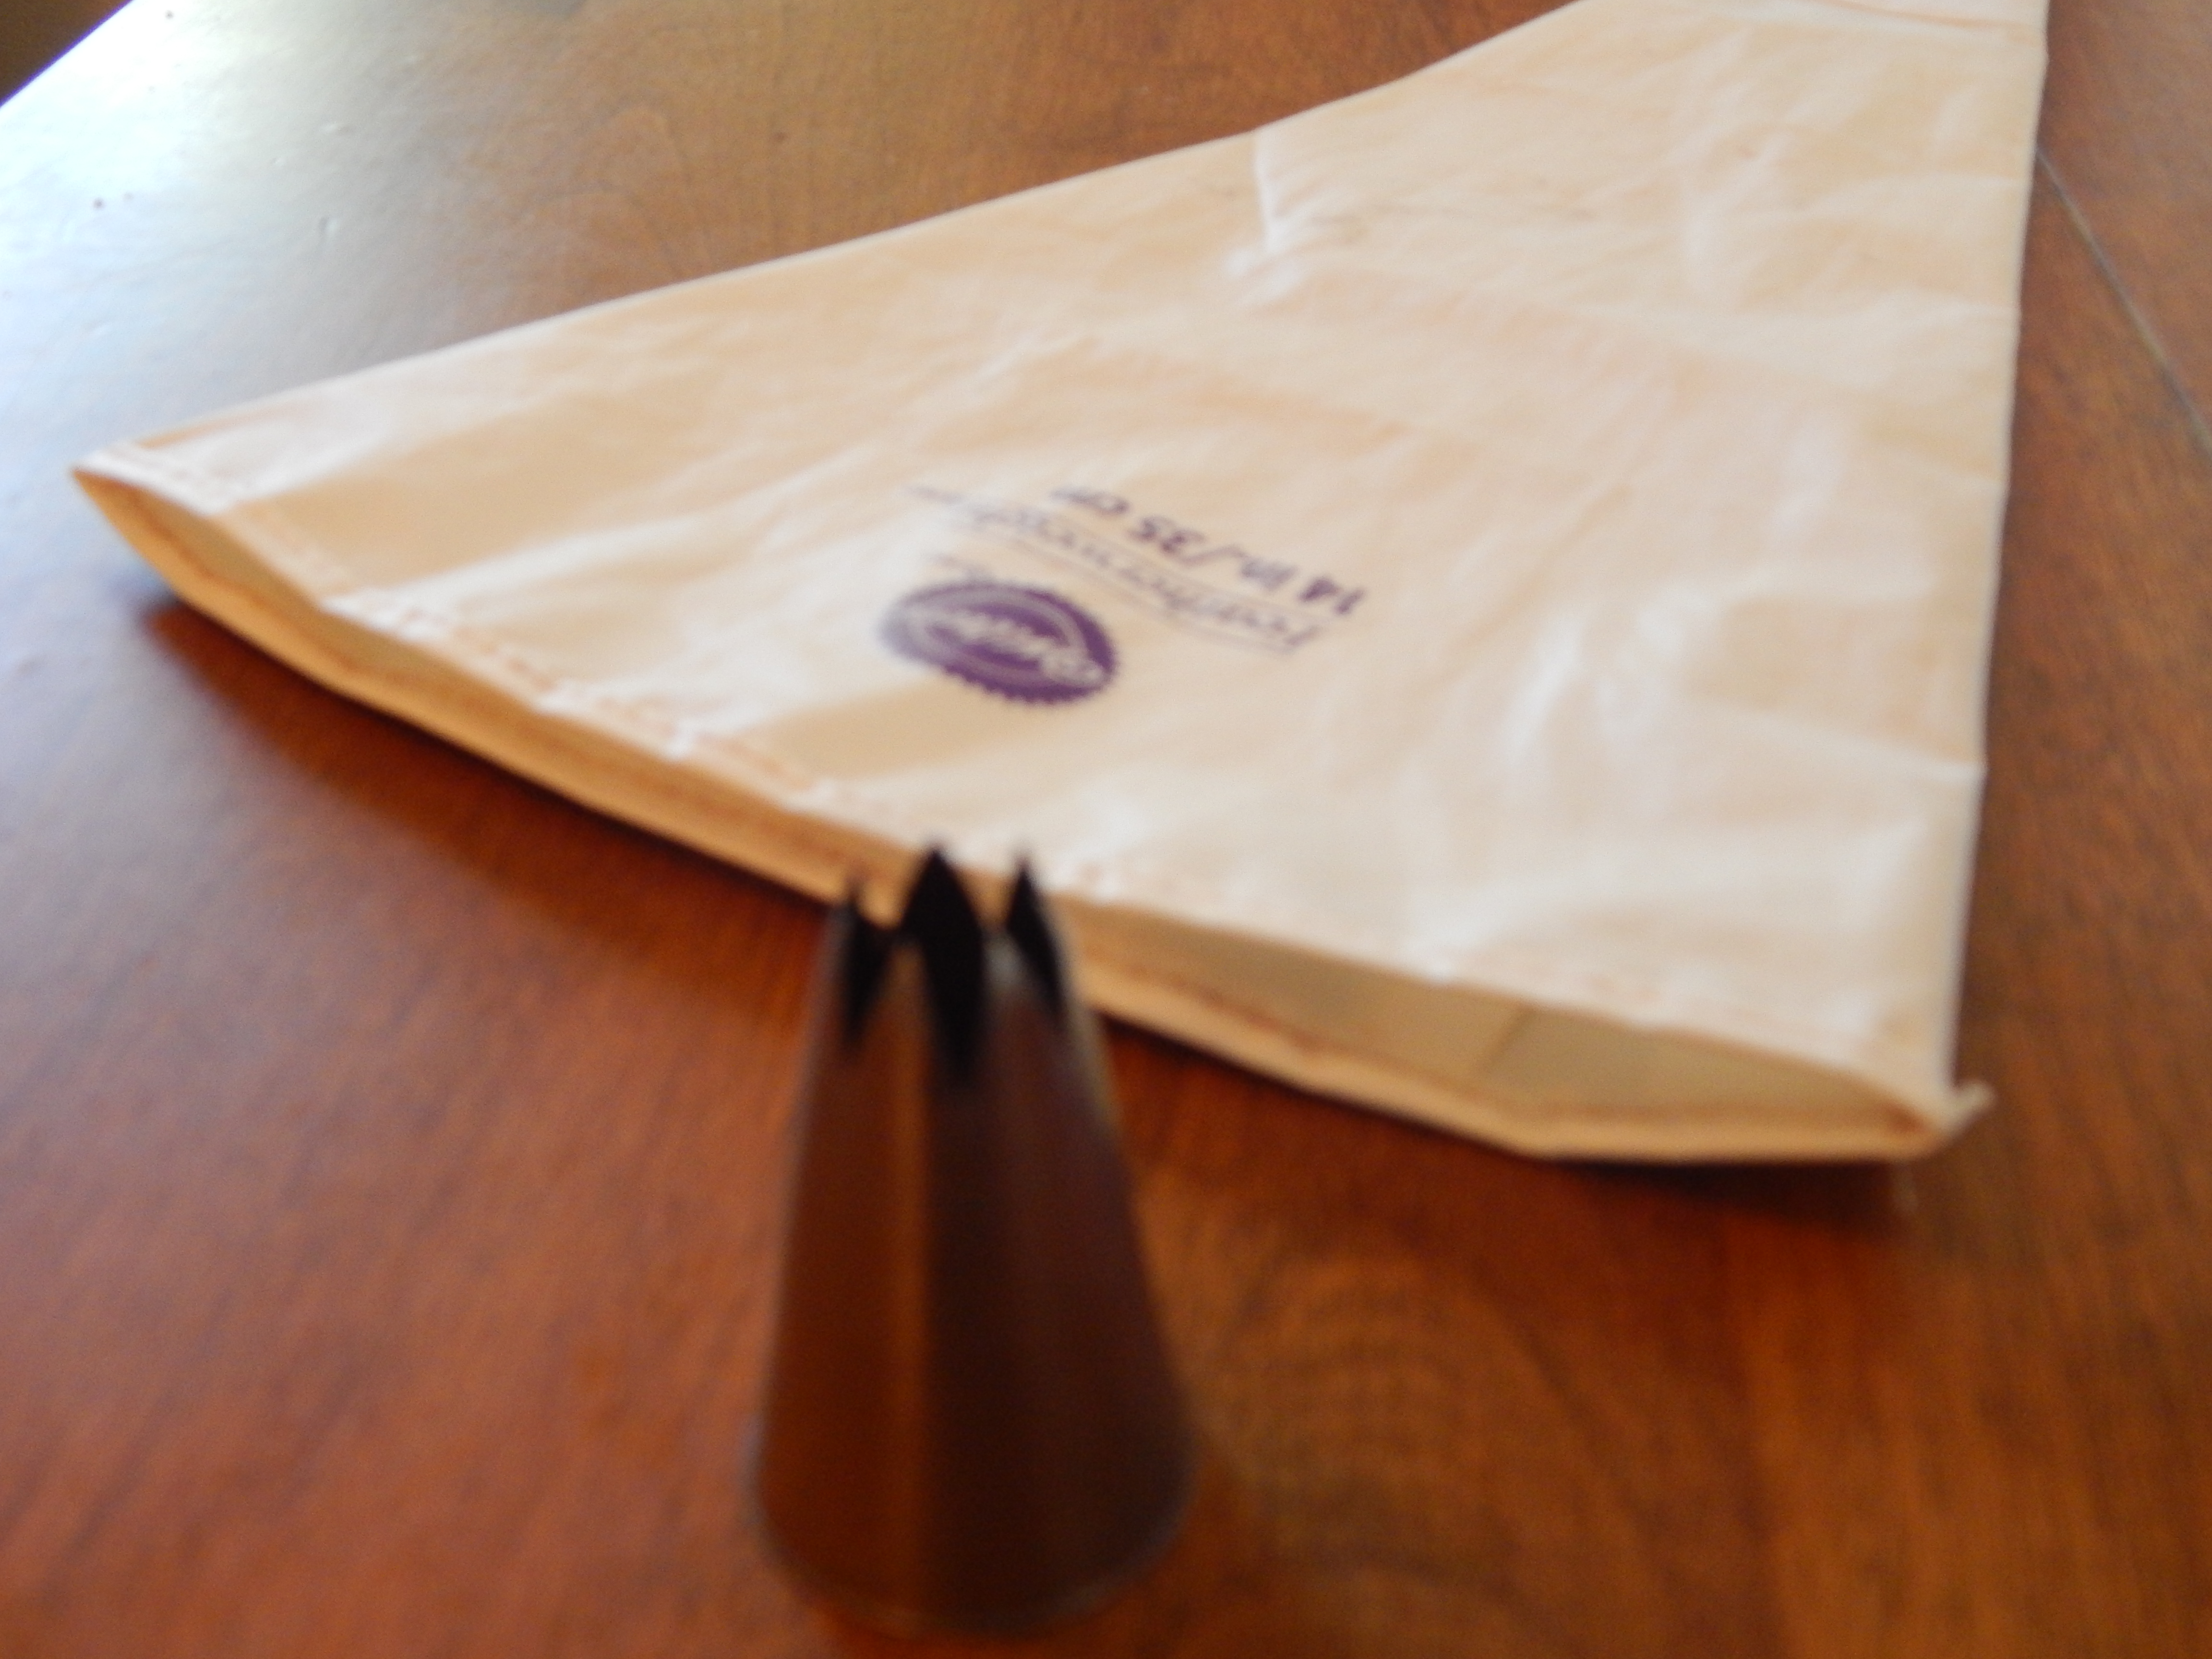
This is the tip I used to make the swirls. You start from the center and make a swirl around. You make swirls to cover the whole cake.
Ingredients
- Ingredients (to cover one 8 inch cake)
- 1 1/2 cup sweetex or crisco
- 1/4 teaspoon salt
- 1 teaspoon meringue powder
- 2 pounds powdered sugar
- 1/2 cup milk or water
- 1 tsp vanilla
- 1/2 cup cocoa powder
- 2 tsp black food color
- 2 cups whipping cream
- 1 box chocolate pudding
- 2 tsp red food color
Instructions
- 1.mix the sweetex, salt, cocoa, black food color, and meringue powder with electric mixer to blend about 30 seconds
- 2.Add the milk and vanilla in the bowl, then add the sugar and blend by hand with a spatula until the sugar is absorbed into the liquid
- 3..put bowl back on the mixer and beat on medium speed for 2-5 minutes until smooth and a little fluffy.
- 4.if mixture is too stiff, you can add more liquid. if it is too runny add more powdered sugar
- add ingredients and whip with kitchen aid until stiff peaks form.
Enjoy!

other Halloween cakes you might enjoy
Halloween Cake

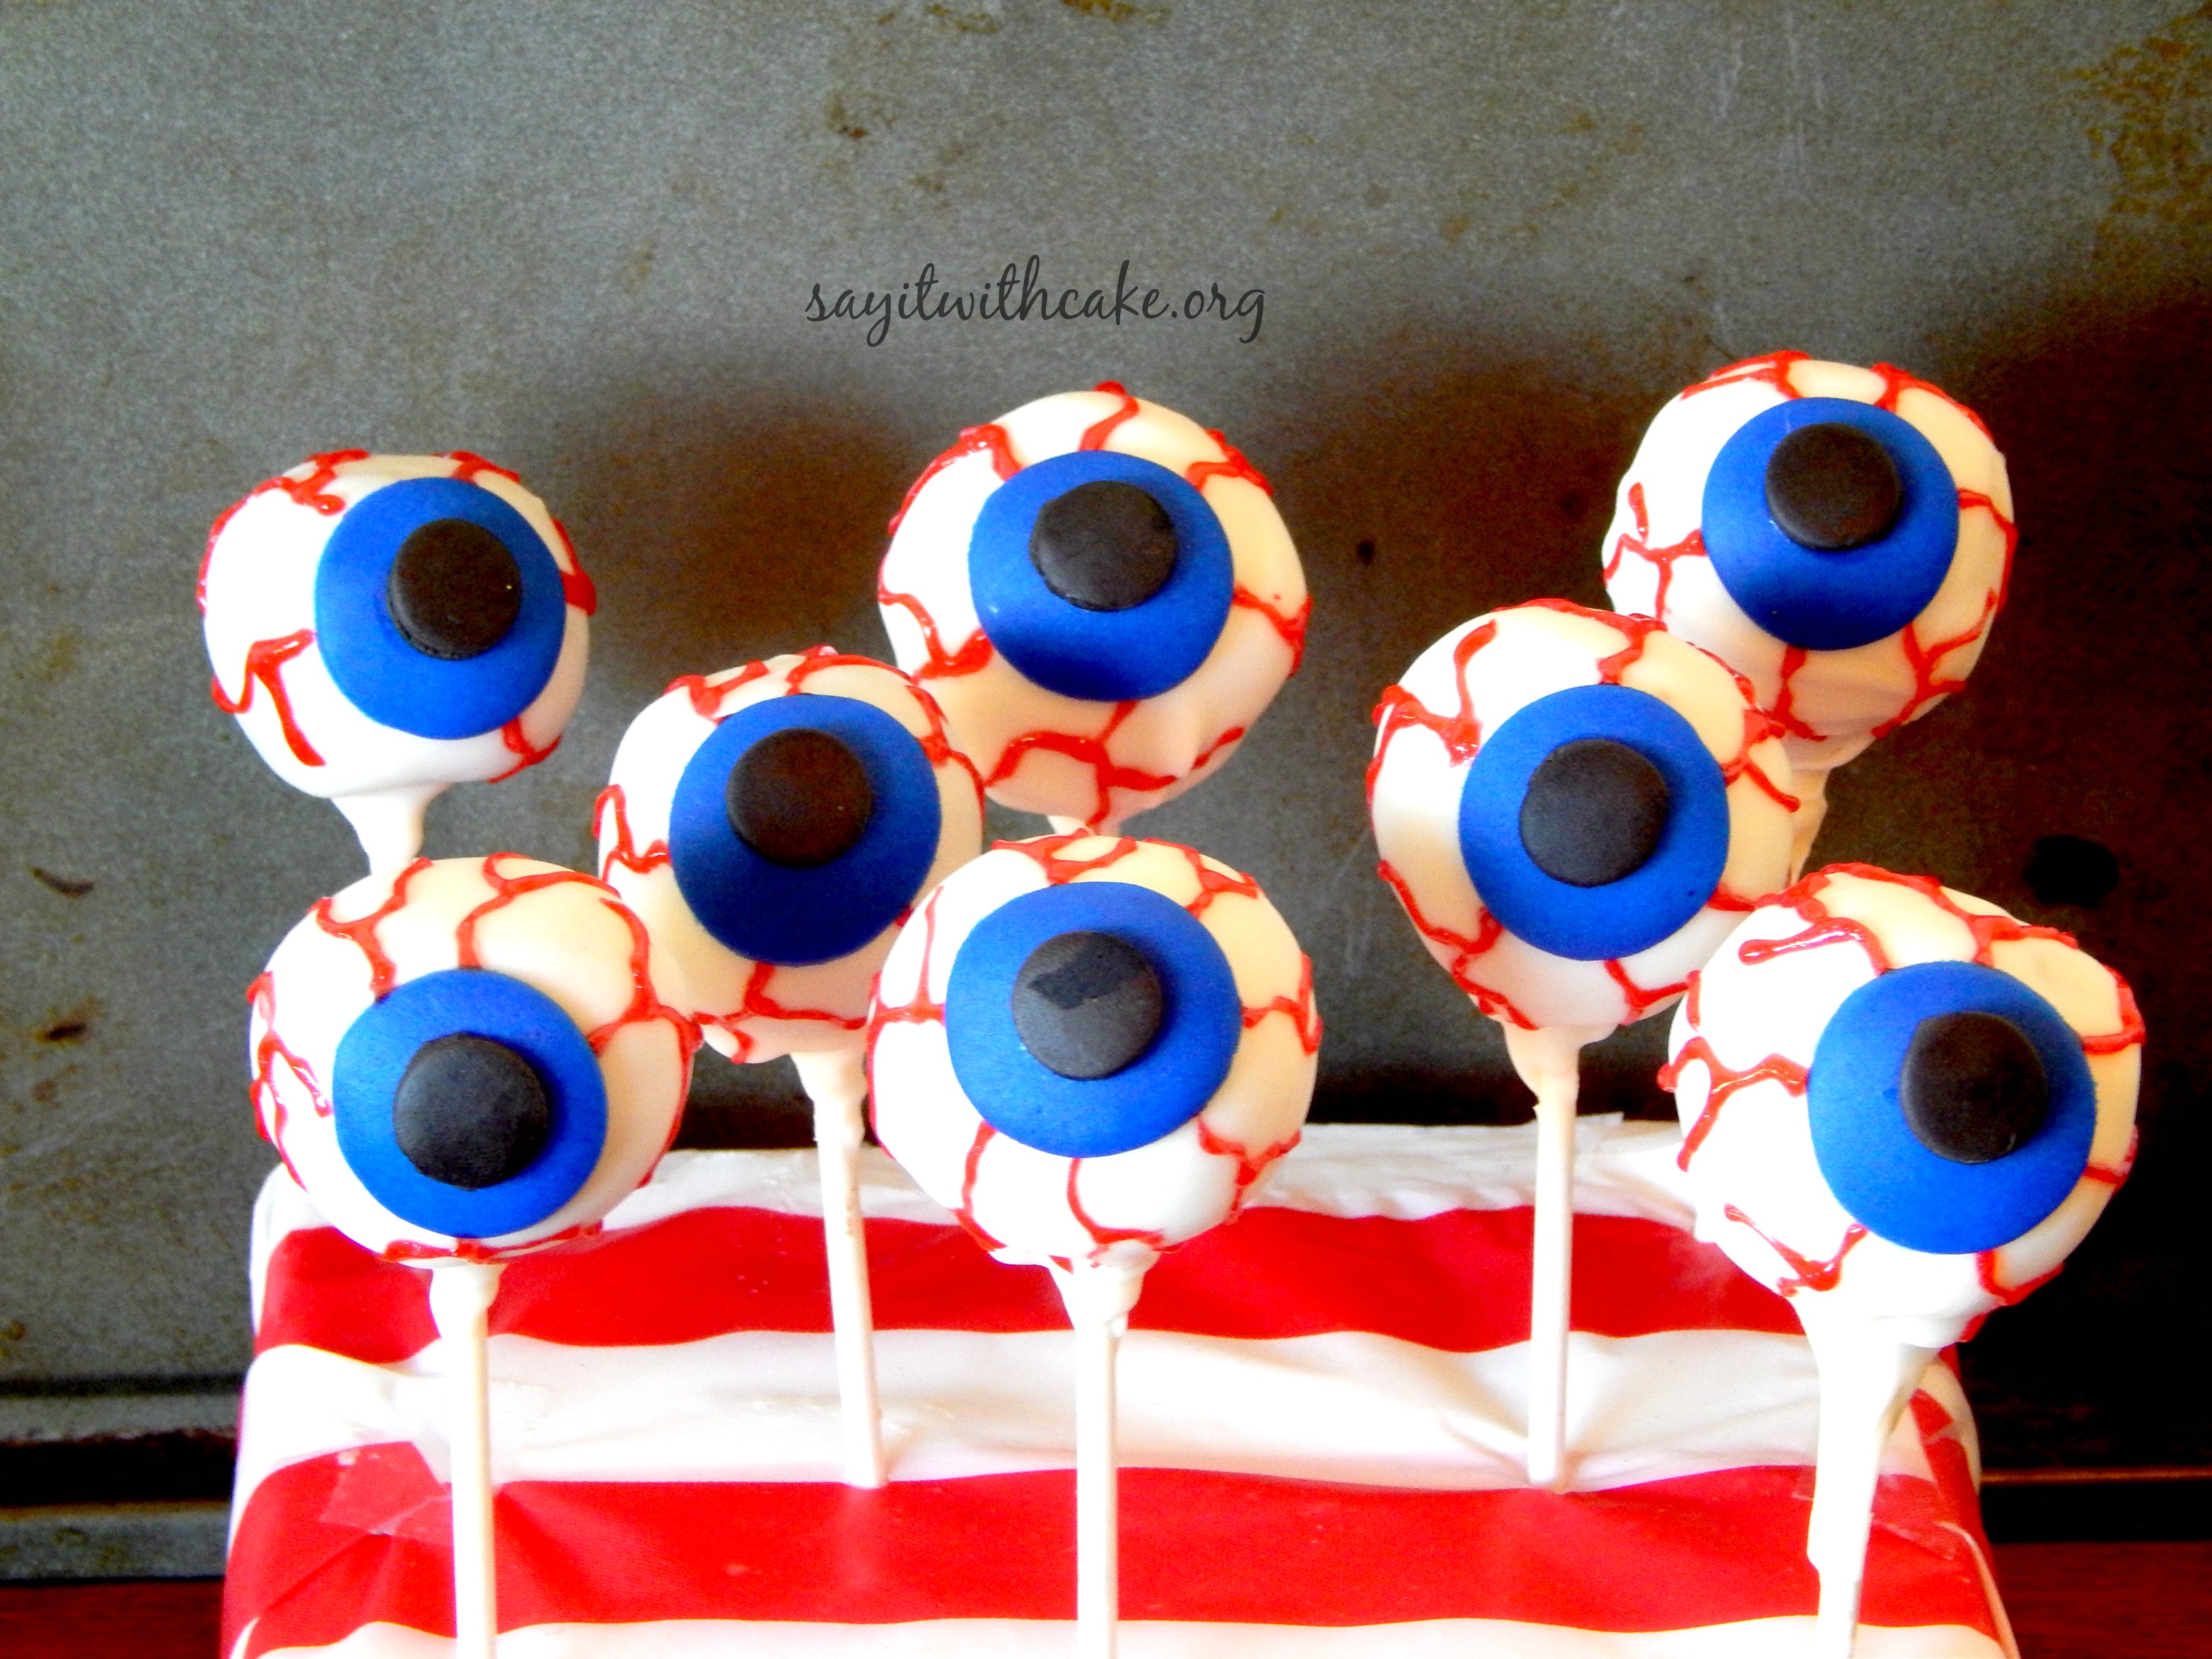
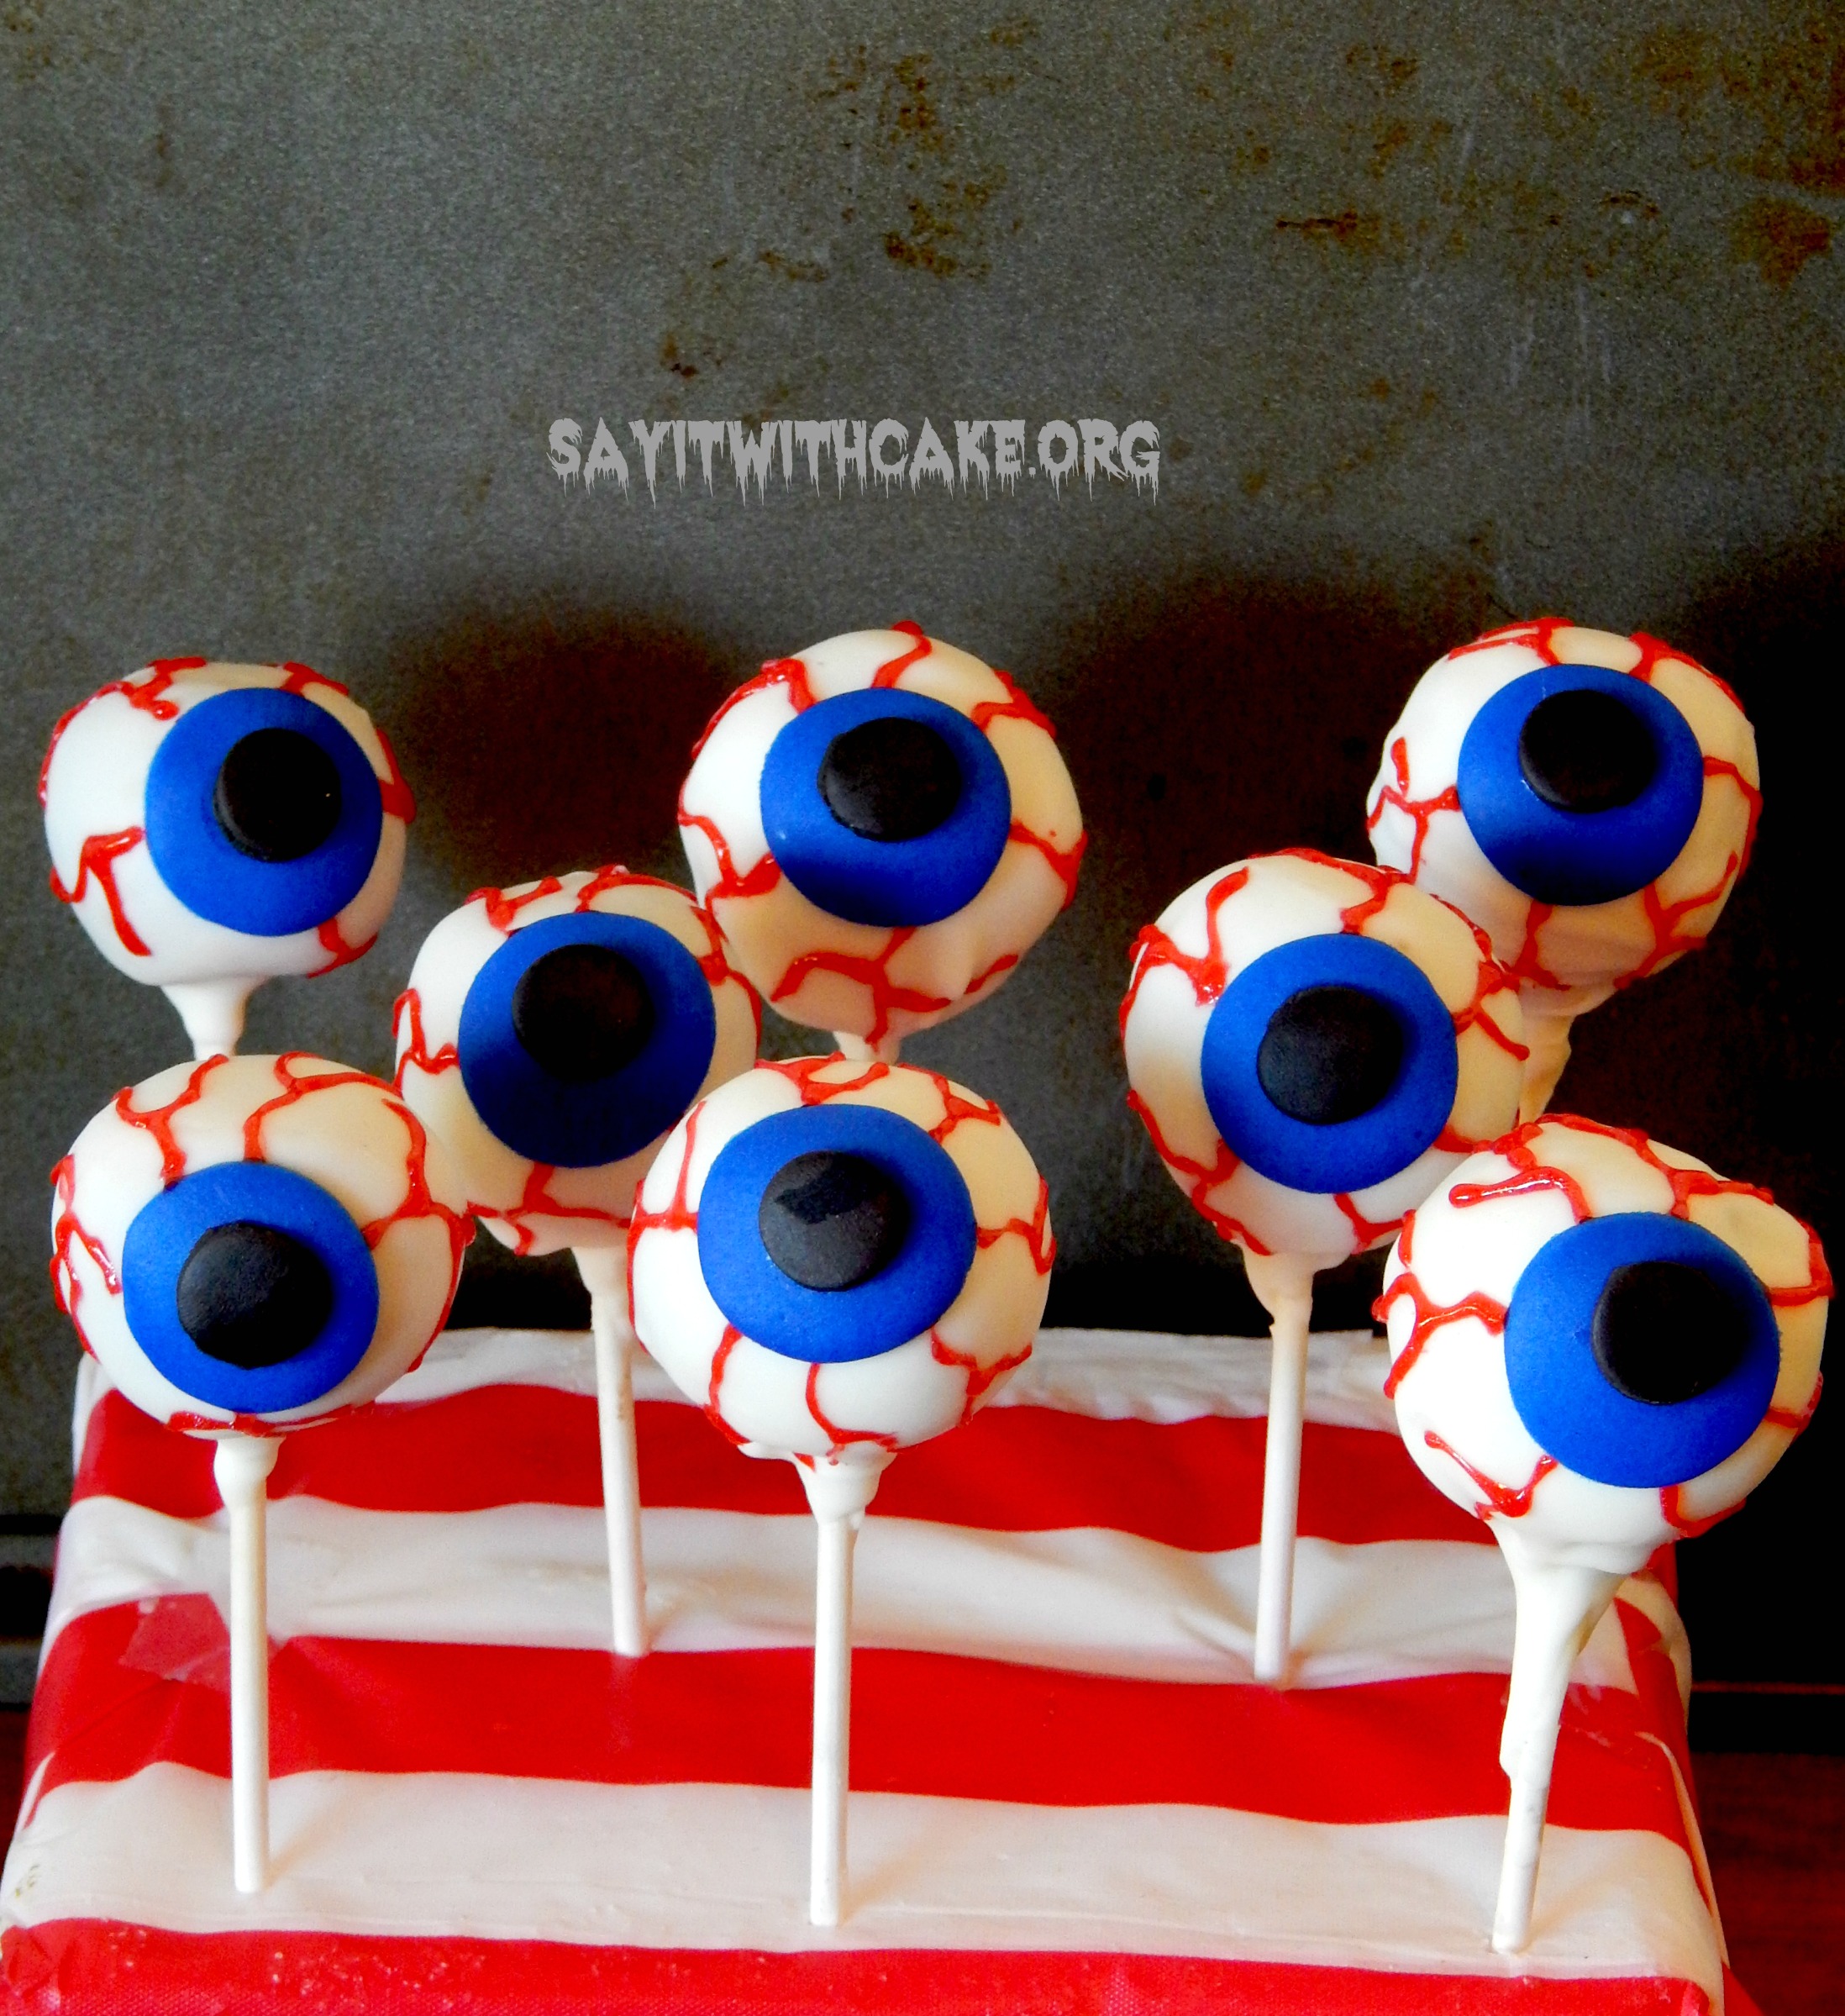 I had a lot of fun making these eyeball cake pops this year. They were very easy and I had all the ingredients in my cupboard. These eyeball cake pops look so gross I don’t know if I can even make myself eat one! I made them for a Halloween party, and I am sure the kids will think they are really disgusting!
To make these eyeball cake pops, first you will make cake pops (any flavor you like). You can learn how to make cake pops with my tutorial Here. After they have completely dried, roll out some blue fondant (or any color you would like your eyeball). You can also use green, brown, yellow? Use a small circle cutter to cut out circles for the eyeballs. I used the bottom of a piping tip for the bigger circle, and the top for the smaller circle. Then cut out some smaller black circles. Stick them onto the cake pop with a little bit of water. Next use some piping gel to pipe on the red veins on the eyeballs. This was the fun part for me! Let them dry, and that is all! Super easy and scary!
Enjoy!
Other cake pops you might like


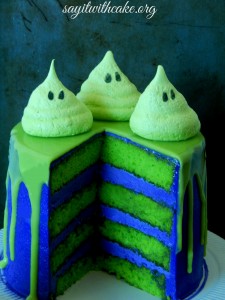
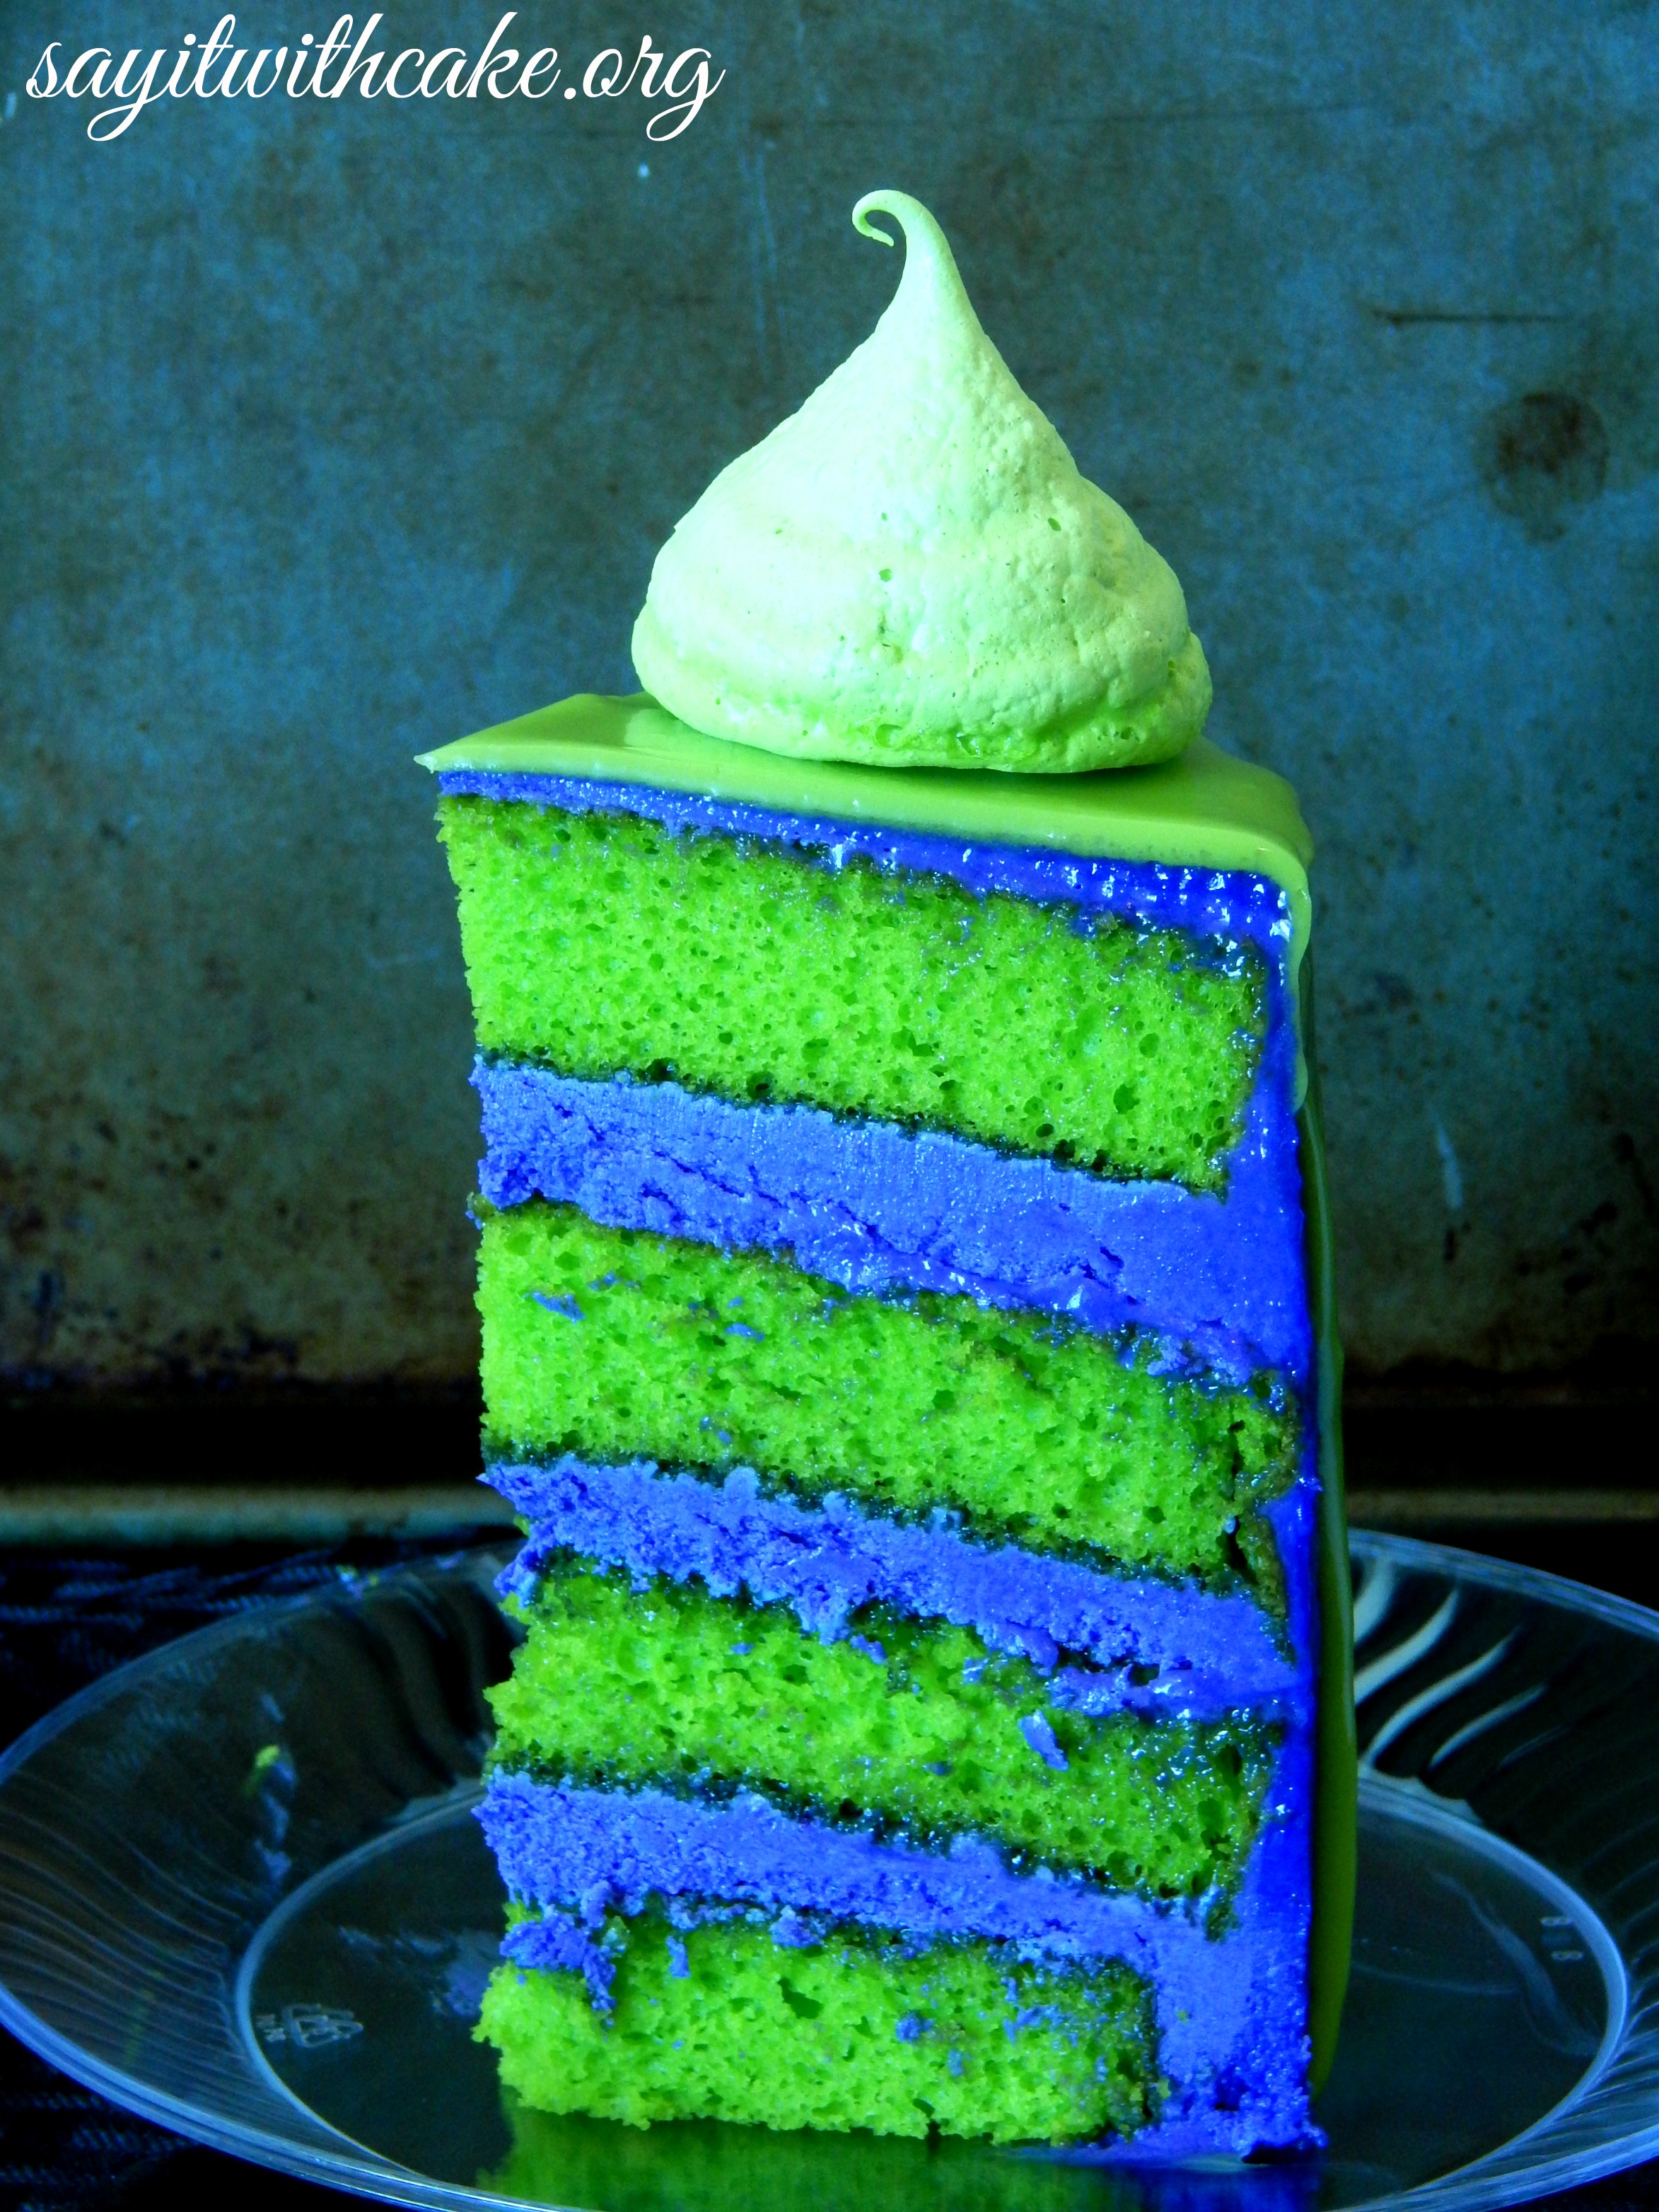
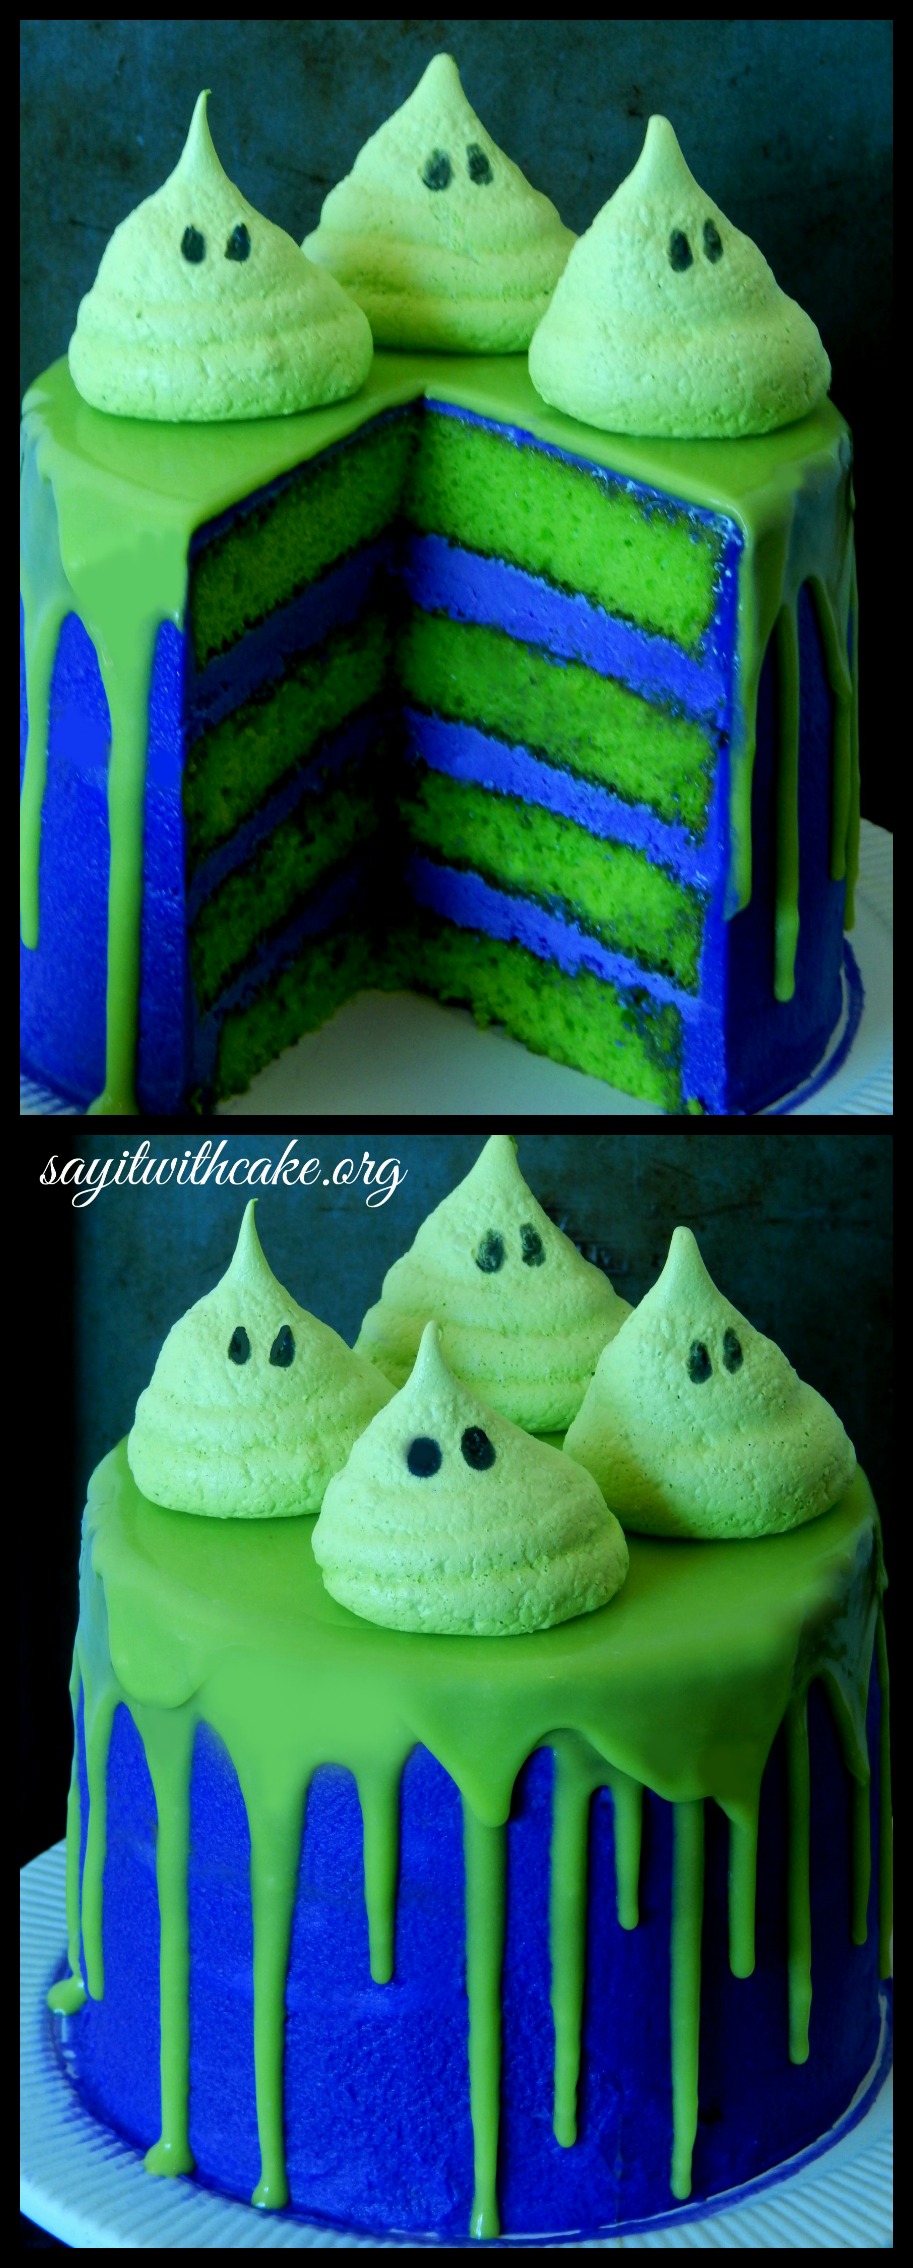
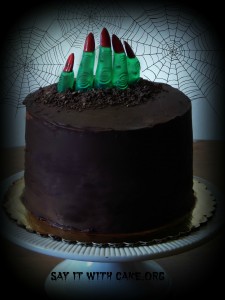
 My favorite part of this Halloween Cake with Meringe Ghosts is of course the ghosts! I think they look so cute, and they were really easy to make! You just whip up some meringue with a few basic ingredients and bake them on a cookie sheet for a little over an hour. I wanted to make them green so I could make it look like the cake got slimed

The cake is actually purple and neon green, but the purple looks more like blue in these pictures! Either way, I think the colors look pretty good together and turn out very Halloween-ish. The green slime is made from green chocolate ganache. All I did was substitute neon green candy melts for the chocolate. You can also add neon green food coloring to the cream before you mix the ganache, but when I did this my ganache turned out too dark. I wanted it thin and light green to look just like slime.

For best results in making this layer cake, DO NOT use store bought canned frosting. The frosting does not crust and the layers will slide around, and the ganache will not drip nicely! I speak from experience! I tried to take the easy way out and use canned frosting, and the layers slid right off when I tried to cut the cake! So I ended up having to throw the cake away and start over! Not fun!
Meringue ghost recipe from foodie misadventures
Ingredients
- 3 large egg whites
- 1/2 teaspoon cream of tartar
- 3/4 cup sugar
- 1/2 teaspoon vanilla
- Vibrant Green food color gel
- Black gel icing or piping gel tinted with black gel color
- Special Tools:•Small food safe paint brush
Instructions
- Preheat oven to 200°. Line 2 baking sheets with cooking parchment.
- In a deep bowl, with a mixer at high speed, whip egg whites and cream of tartar to a thick foam. Continuing to beat, add sugar, 1 tablespoon every 30 seconds, then whip until meringue holds very stiff peaks. Beat in vanilla.
- If using cooking parchment, smear a little meringue on the underside of each corner to make it stick to baking sheets.
- Spoon meringue into a pastry bag fitted with a 1/2-inch plain tip (or spoon into a gallon-size heavy plastic food bag, then cut off 1 corner to make a 1/2-inch-wide opening). Pipe meringue onto baking sheets into ghostly shapes, spacing about 1 ½ to 2 inches apart. To make eyes paint black gel onto each ghost.
- Bake until meringues begin to turn pale gold and are firm to touch, 1 hour and 15 minutes to 1 and 30 mixtures hours, rotating pans halfway through baking. Turn off heat and leave meringues in closed oven for 1 hour. Slide a spatula under meringues to release
Purple buttercream recipe HERE except do not add the mint extract, and add purple gel food coloring
White Almond Sour Cream Cake Recipe HERE
Green slime ganache recipe below, except change red candy melts for vibrant green candy melts
Ingredients
- 12 ounces of red candy melts
- 1/3 cup heavy whipping cream
- red food coloring
Instructions
- chop up red candy melts
- color cream with red coloring, and heat cream in pan till starts to boil
- pour cream over candy melts in a bowl
- stir until smooth
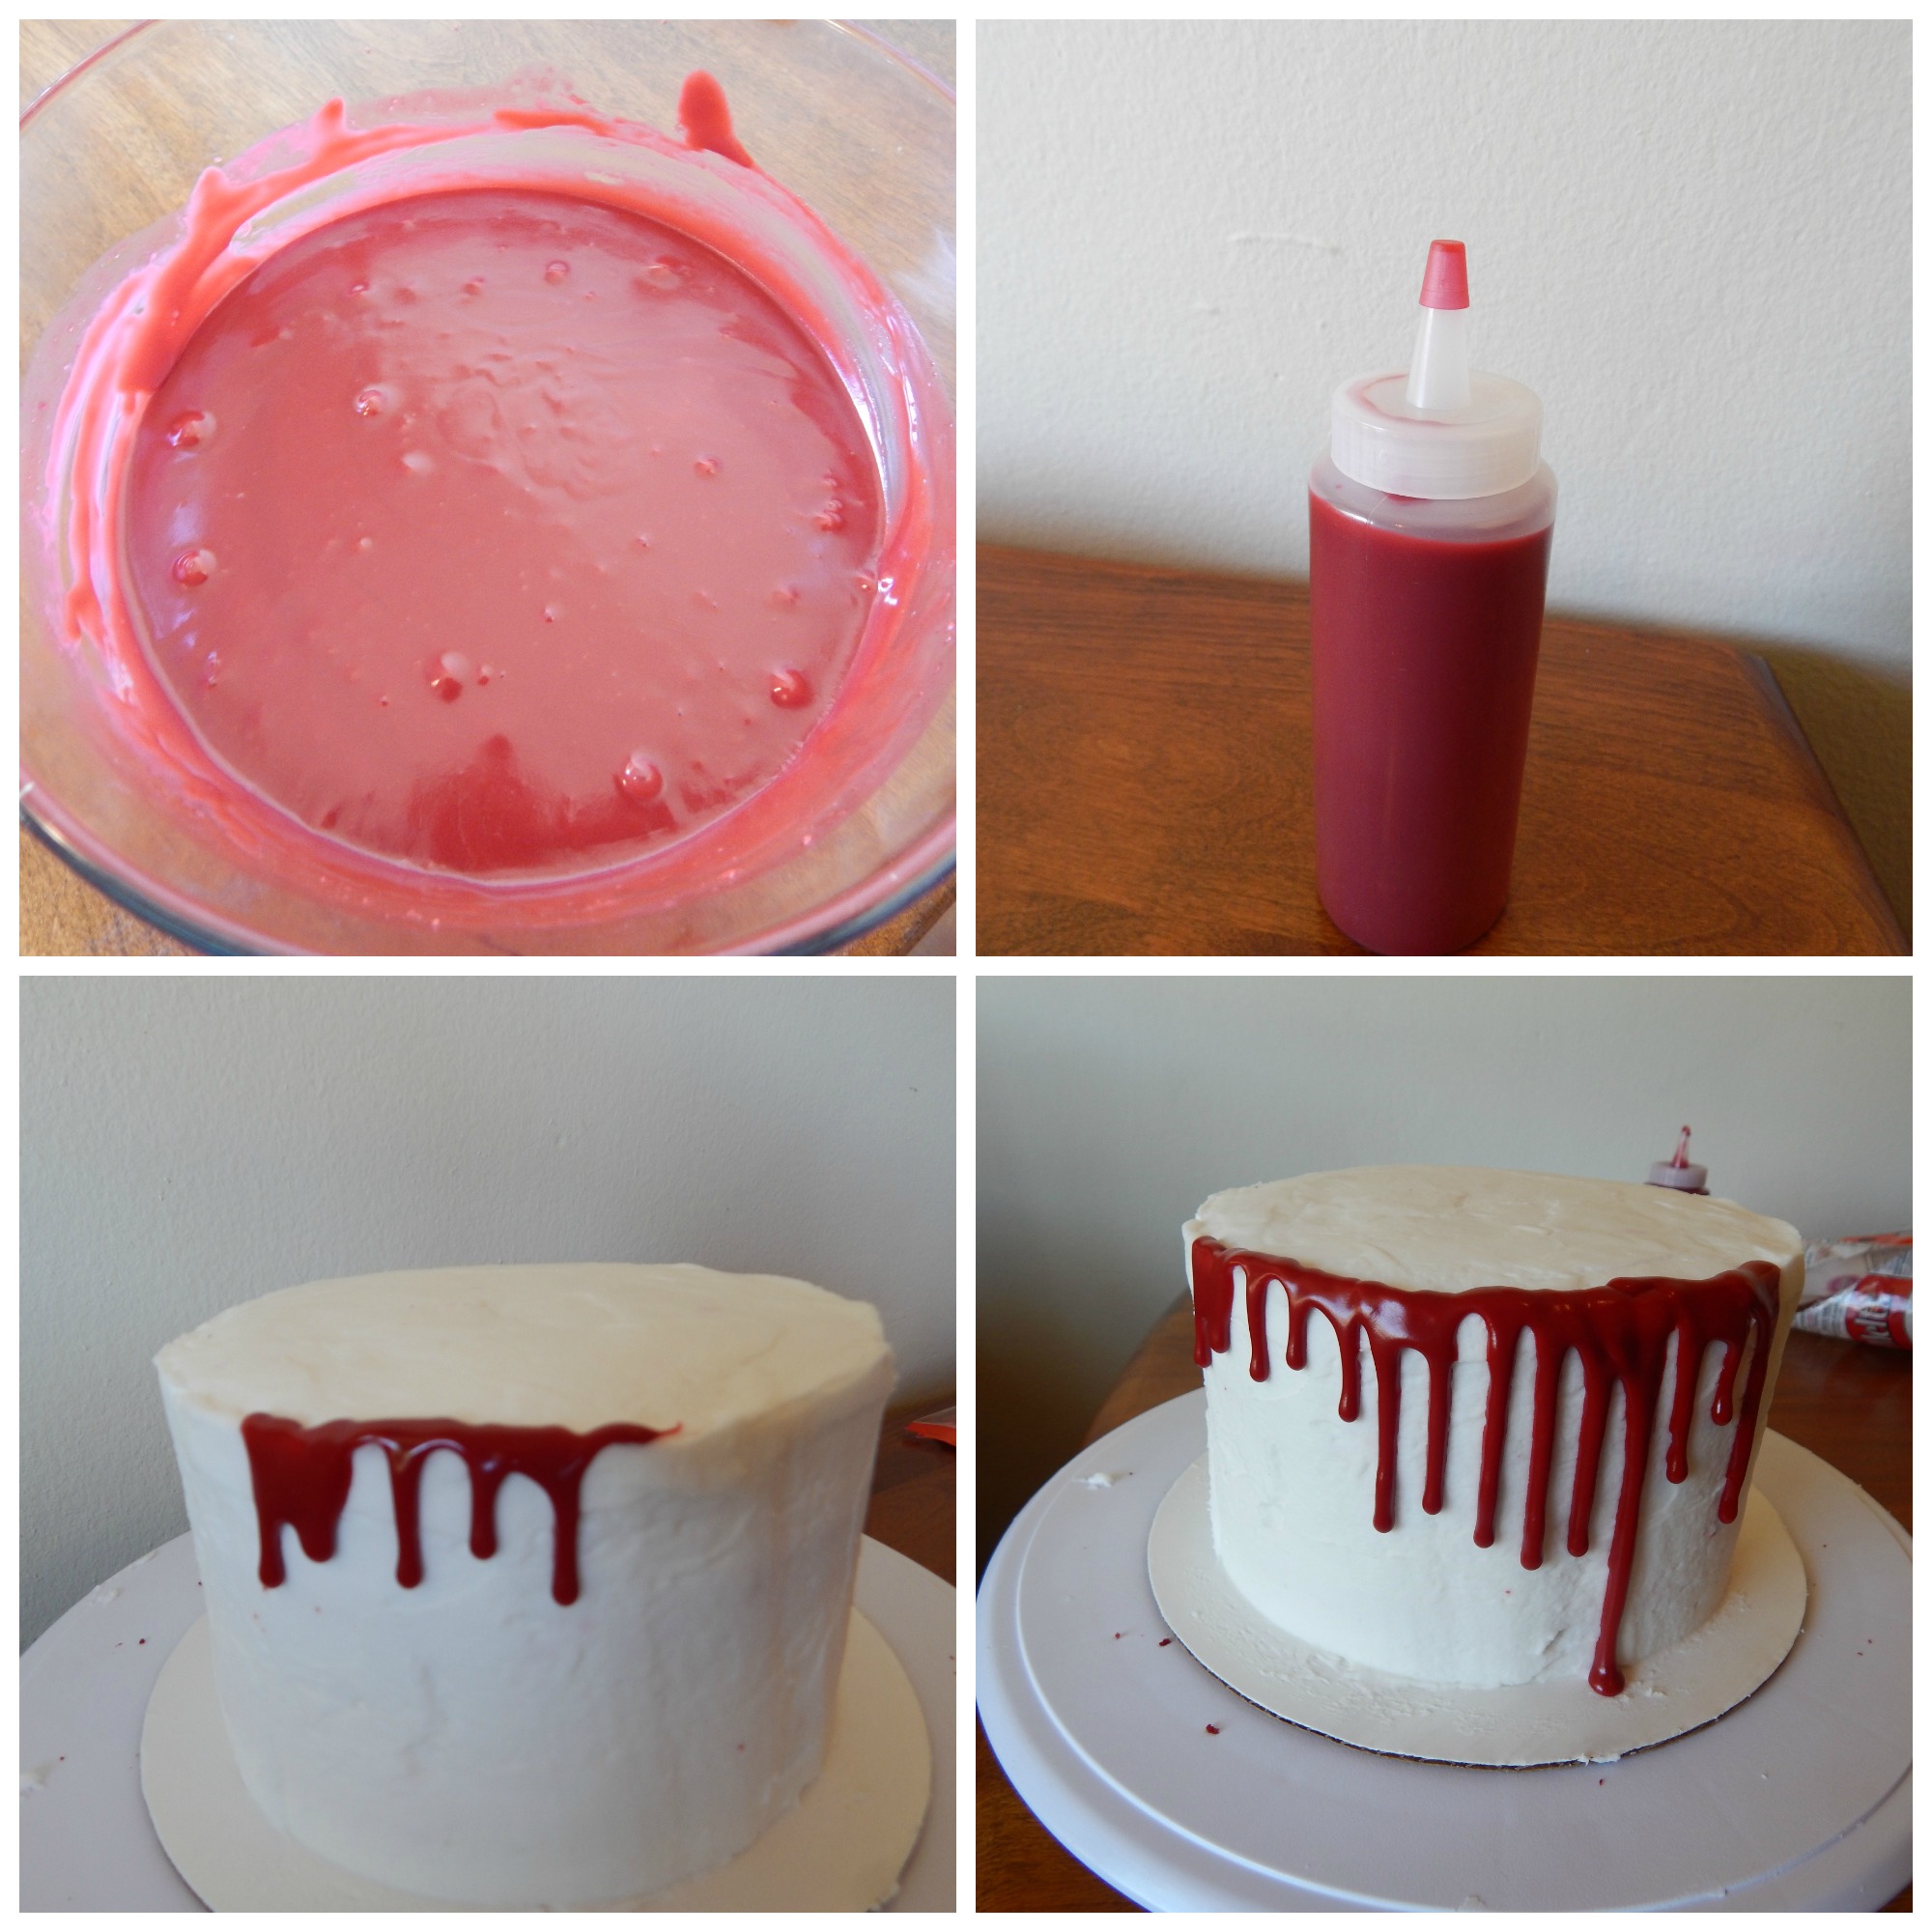
This tutorial is from my Bloody Halloween cake, but the effect is the same for this cake just use green candy melts instead of red. For my slime cake, I made bigger thicker drips then this tutorial, but it is the same concept. To make this green slime Halloween cake, first bake and cool your cake with two 8 inch cake pans. Split each cake, and fill with buttercream frosting or whatever kind of filling you choose. Let cake sit in refrigerator for 2 hours to let the frosting set…this will help make sure you don’t have bulges outside of your cake when you frost it. Next apply a crumb coat all over the cake. Let it sit in refrigerator until frosting has set, about 20 minutes. Next frost your cake with the buttercream frosting. Now comes the fun part! Make the green ganache and pour it into a squeeze bottle when it is still a little warm but not hot. Carefully squeeze ganache along edge and allow it to drip down the cake. The more you squeeze out, the longer your drips will be. Then fill in the middle with remaining ganache and spread with the back of a large spoon.
Enjoy!
Shamene
Other Halloween cakes you might like

Polka Dot Cake
My cake was featured here!
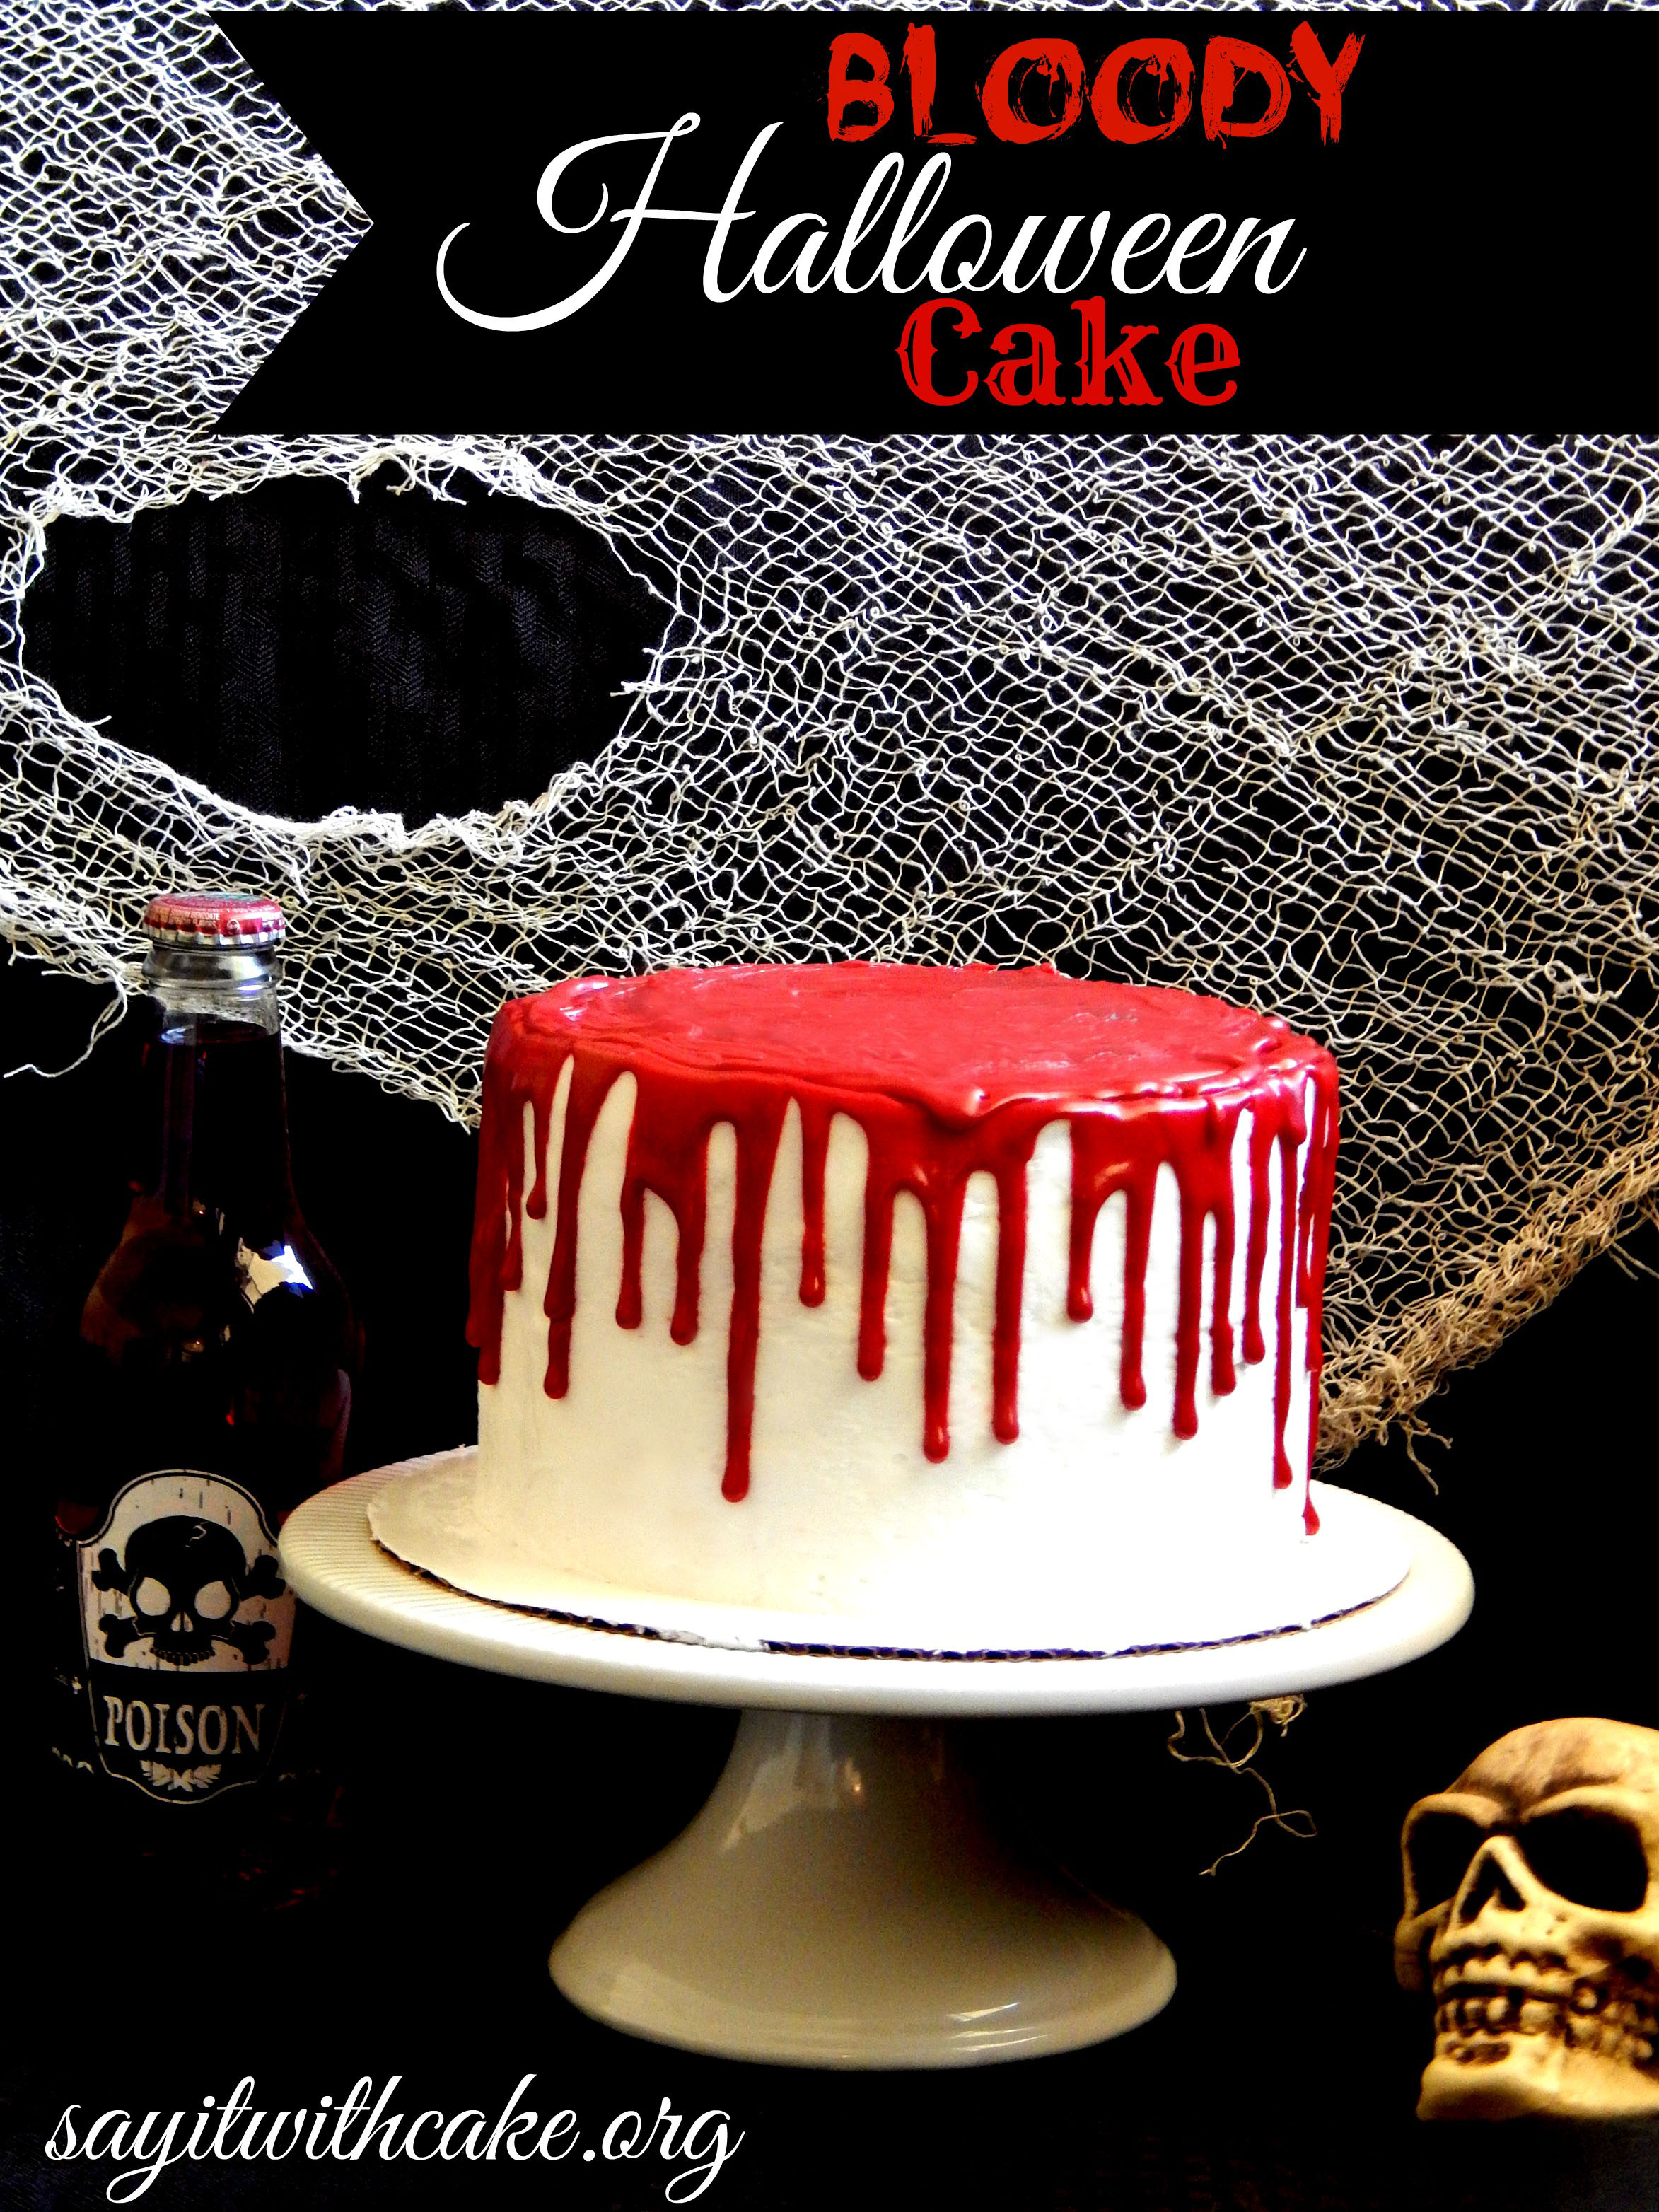
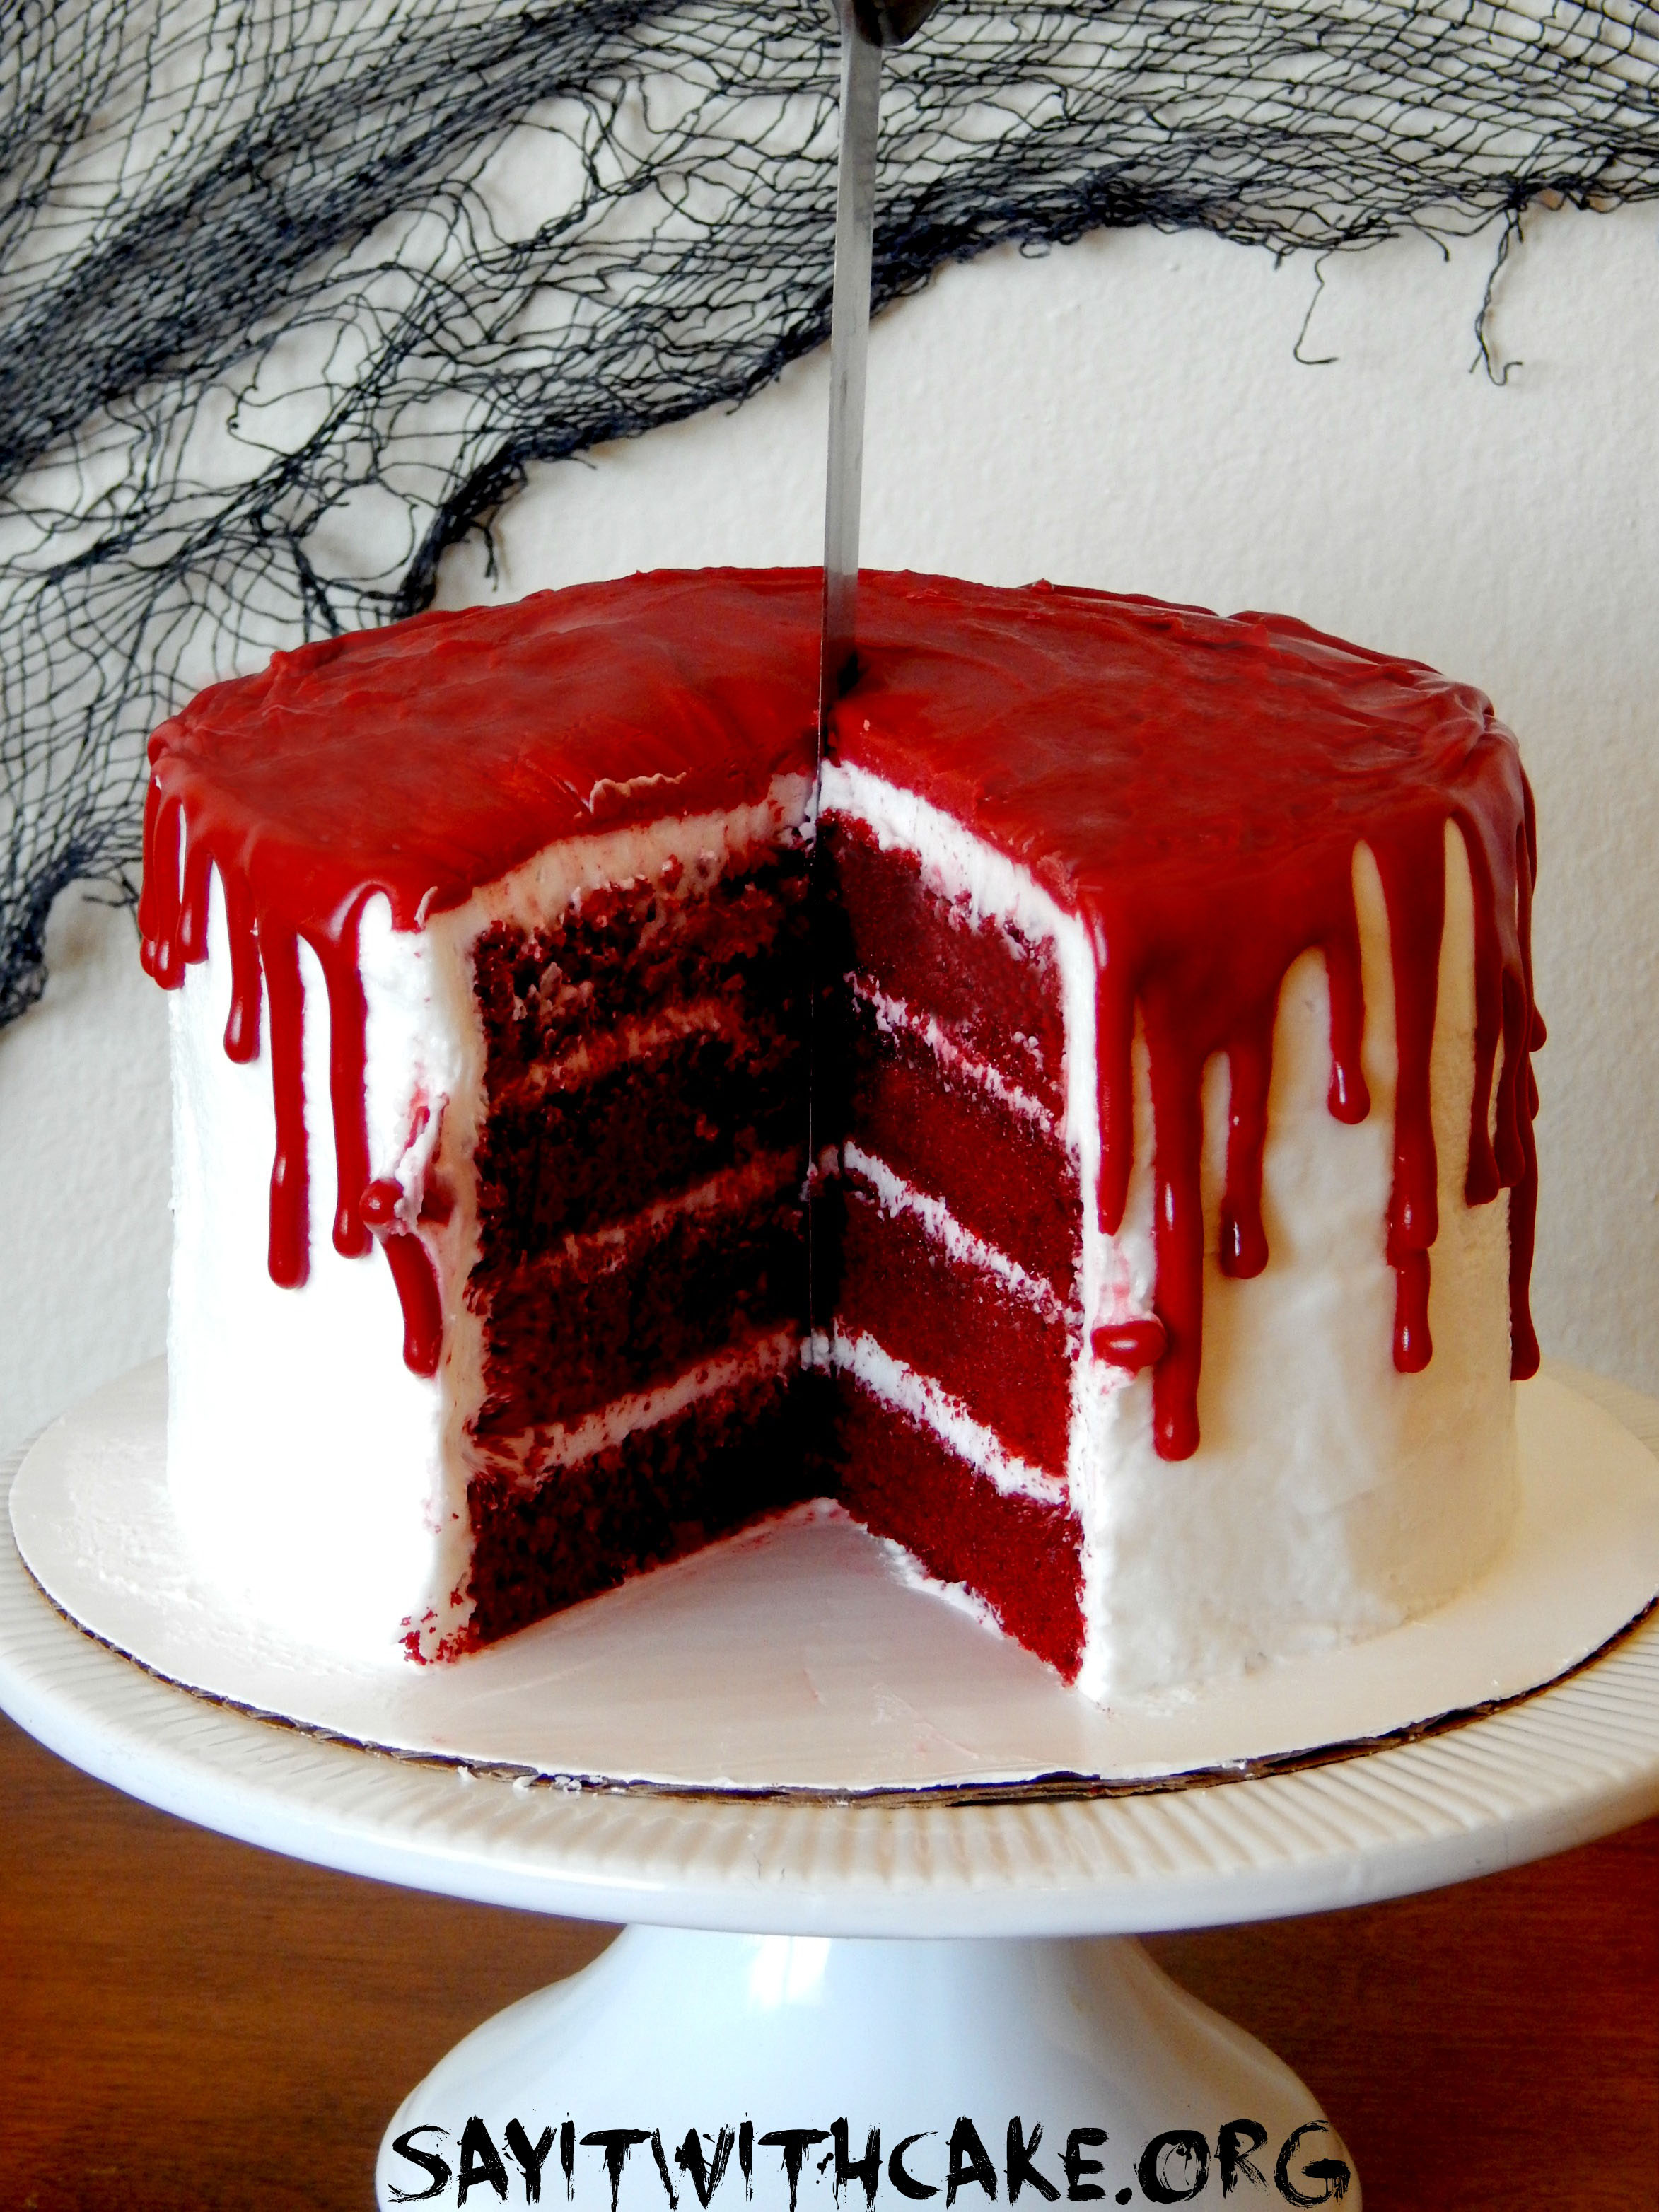
Maybe this is taking a stab in the dark, but I bet your dying to try a slice of this cake! This Bloody Halloween cake is a delicious red velvet four layer cake with cream cheese filling, topped with a vanilla buttercream frosting, and covered with a red ganache. The blood-like red ganache, looks so spooky, perfect for a Halloween Cake!To make this bloody Halloween cake, first bake and cool your cake with two 8 inch cake pans. Split each cake, and fill with cream cheese frosting. Let cake sit in refrigerator for 2 hours to let the frosting set…this will help make sure you don’t have bulges outside of your cake when you frost it. Next apply a crumb coat all over the cake. Red Velvet cake makes a lot of crumbs! Let it sit in refrigerator until frosting has set, about 20 minutes. Next frost your cake with the buttercream frosting. Now comes the fun part!
Make the red ganache and pour it into a squeeze bottle. Carefully squeeze ganache along edge and allow it to drip down the cake. Then fill in the middle with remaining ganache.

Ingredients
- 12 ounces of red candy melts
- 1/3 cup heavy whipping cream
- red food coloring
Instructions
- chop up red candy melts
- color cream with red coloring, and heat cream in pan till starts to boil
- pour cream over candy melts in a bowl
- stir until smooth
Red Velvet Cake Recipe Here
Vanilla Buttercream Recipe Here
Cream Cheese Frosting Recipe Here
Enjoy!

Other Halloween cakes you might like!
Brain Freeze Red Velvet Ice Cream Cake
Witch Fingers chocolate Mousse cake
My cake was featured HERE!


The clock is ticking down and Halloween is just a few days away! I love seeing all the cool Halloween cakes, cupcakes, and cakepops! I have been inspired by these awesome ladies and their amazing talents! Whether you are throwing a ghoulish bash, or want some fun treats to make with your kids, you are sure to find something fun at this round up of Spooktacular Baked Treats for Halloween!
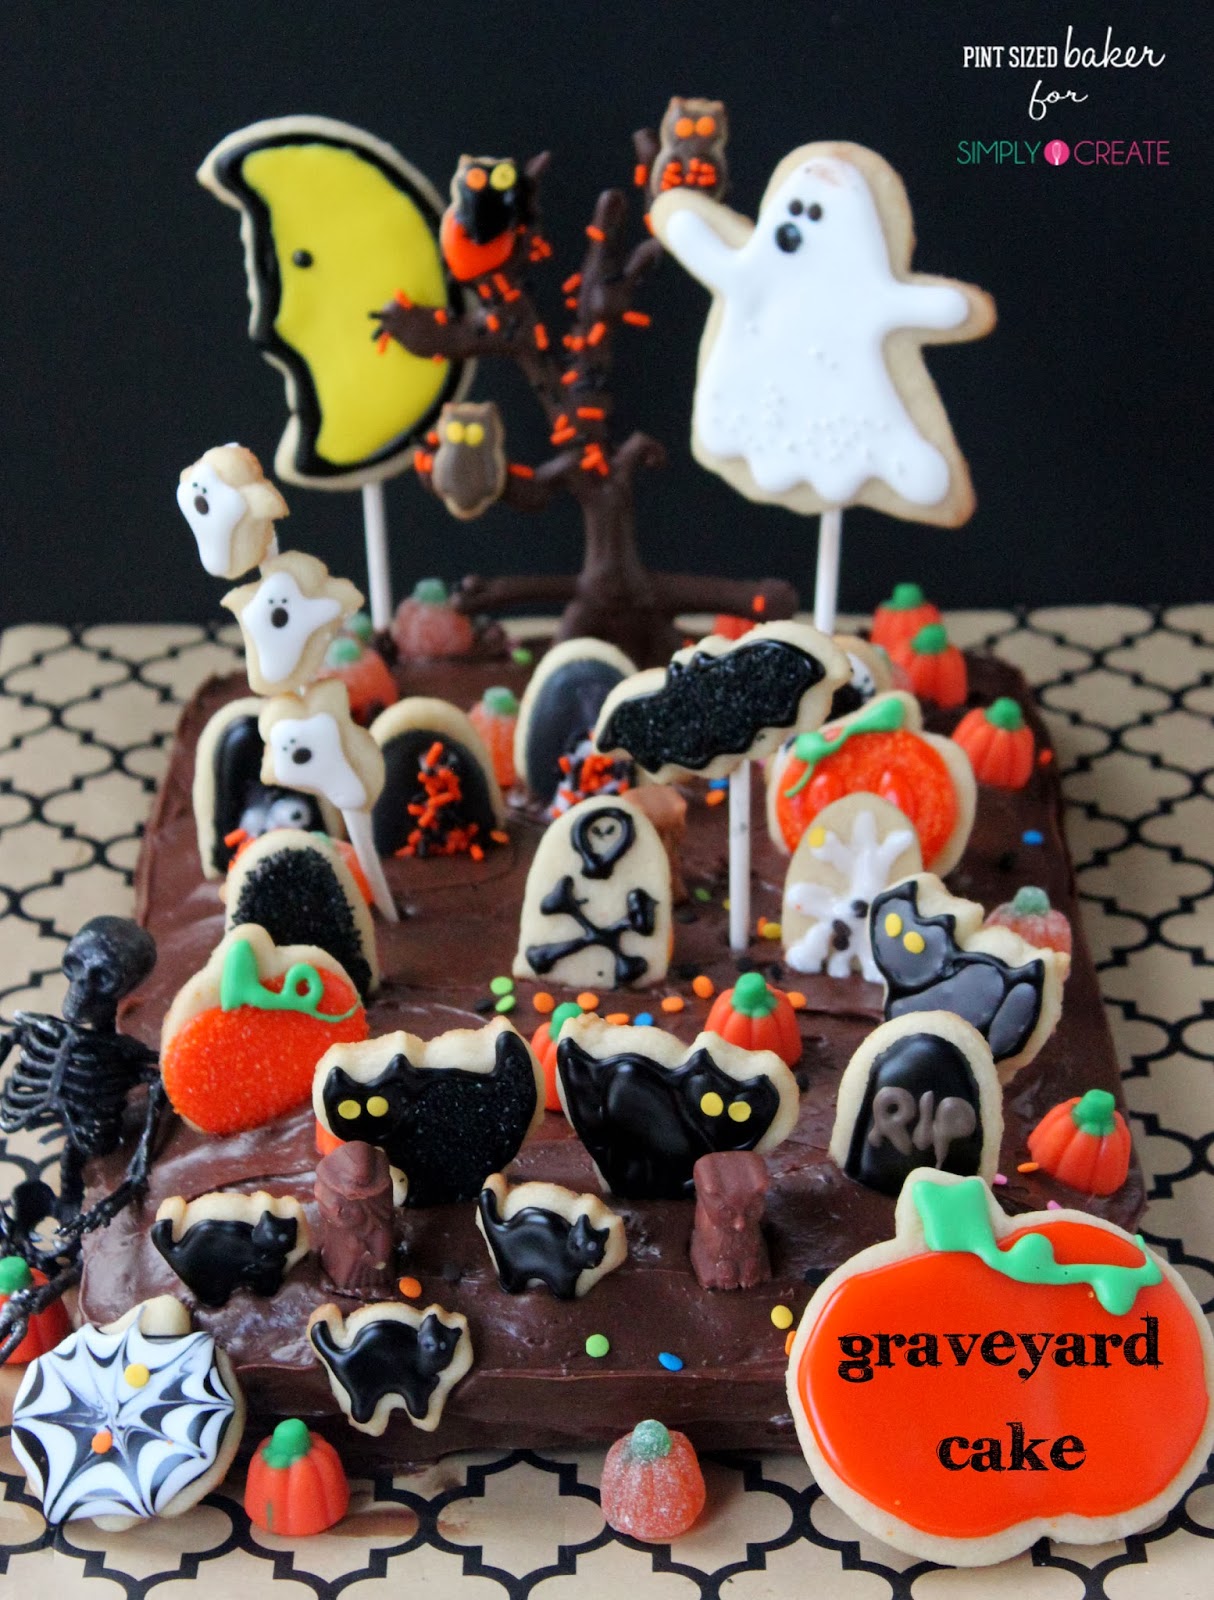
Graveyard Cake by Pint sized Baker
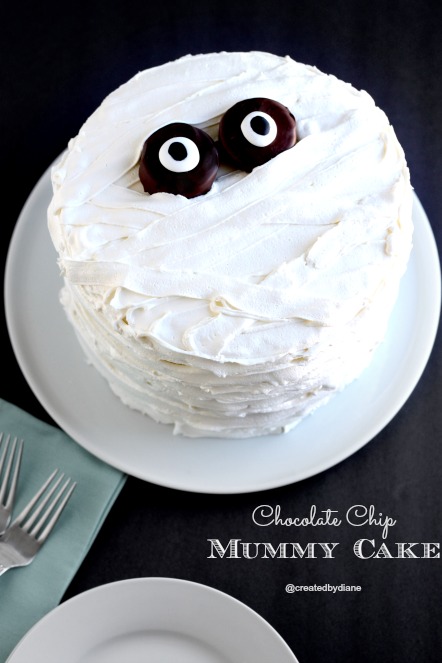
Mummy Cake by Created by Diane
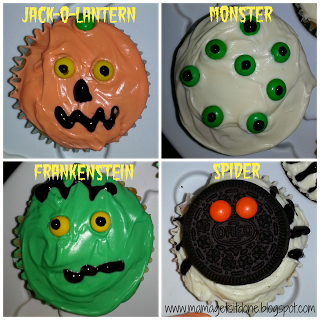
Creepy Halloween Cupcakes by Mama gets it done
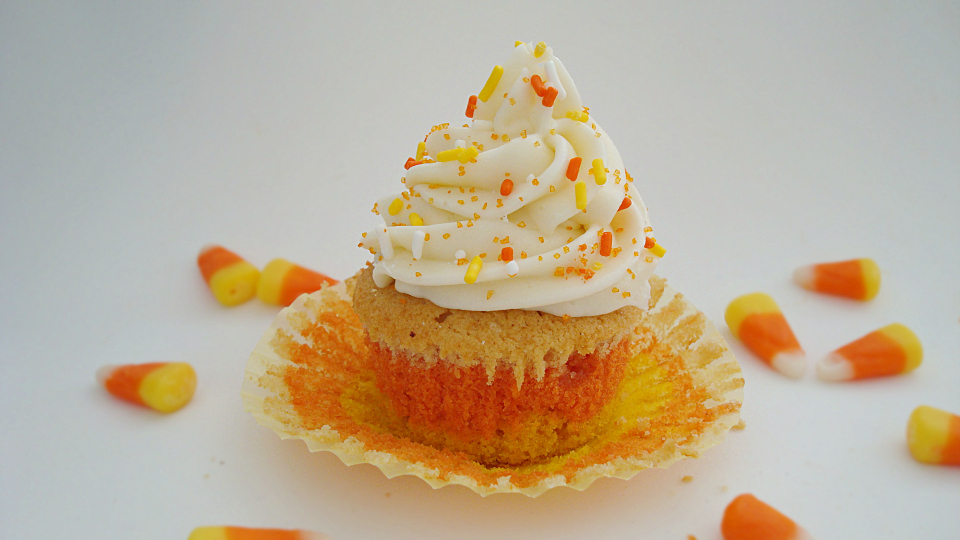
Candy Corn Cupcakes by Gal on a mission
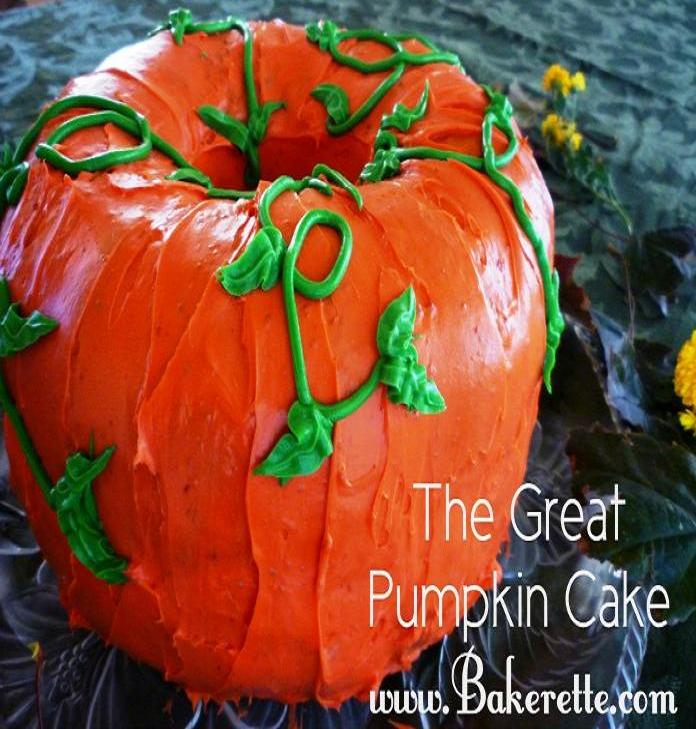
The Great Pumpkin Cake by Bakerette
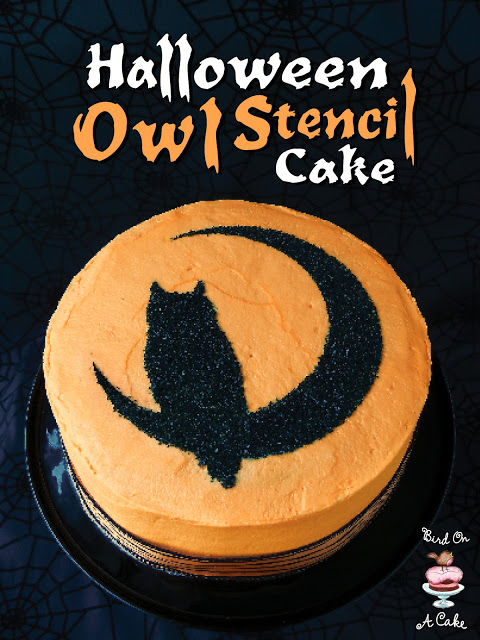
Halloween Owl Stencil Cake by Bird on a Cake
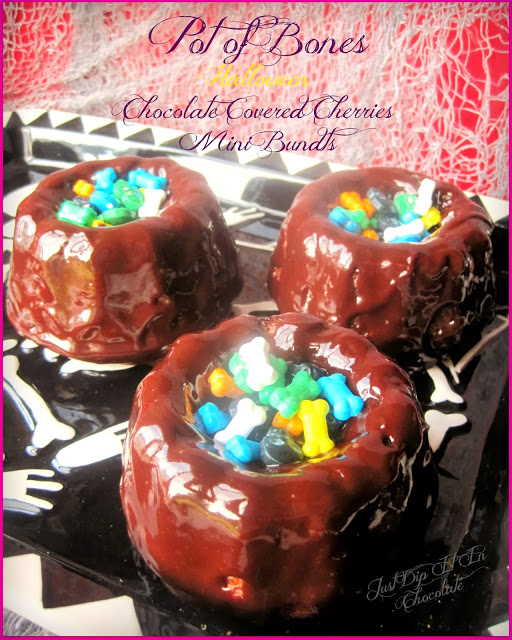
Pot of Bones by Just Dip it in Chocolate
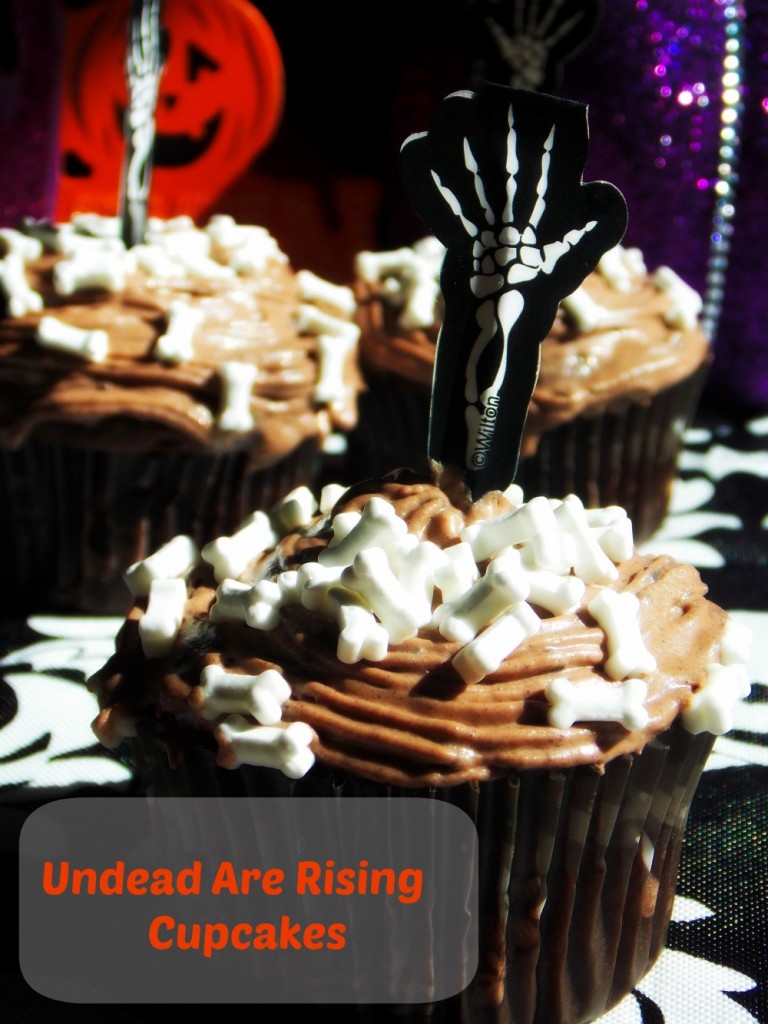
The undead are rising cupcakes by living off Love and Coffe

Mummy Cupcakes by Loris culinary creations
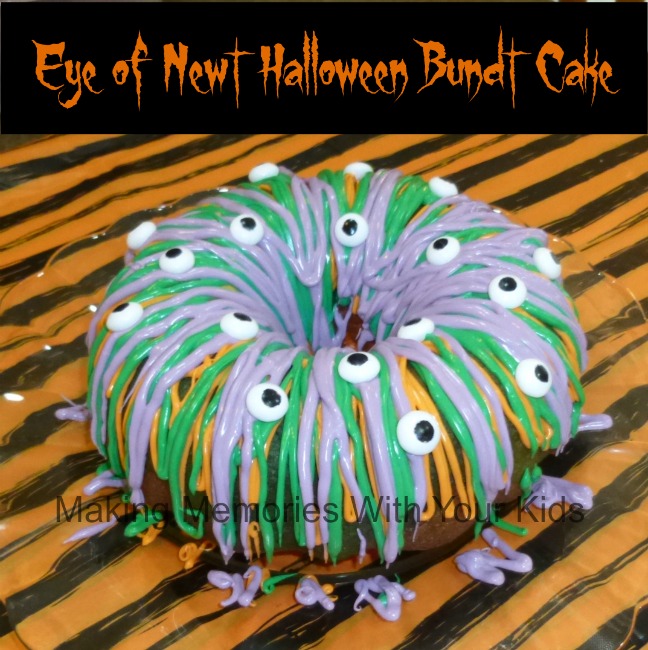
Eye of the Newt by Making Memories with your kids

Green Slime Cupcake by Moments with Mandi
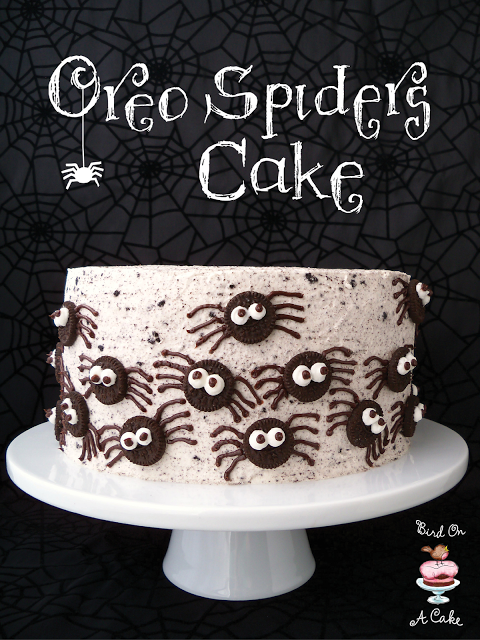
Oreo Spider Cake by Bird on a cake
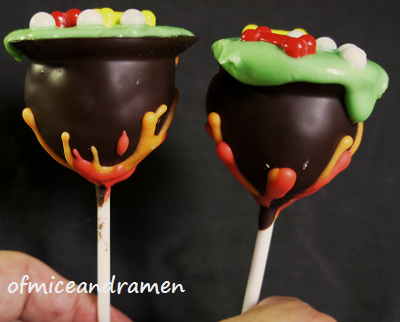
Witch Cauldron Cakepops by Of mice and ramen

Slime Filled Cupcakes by Lady behind the curtain
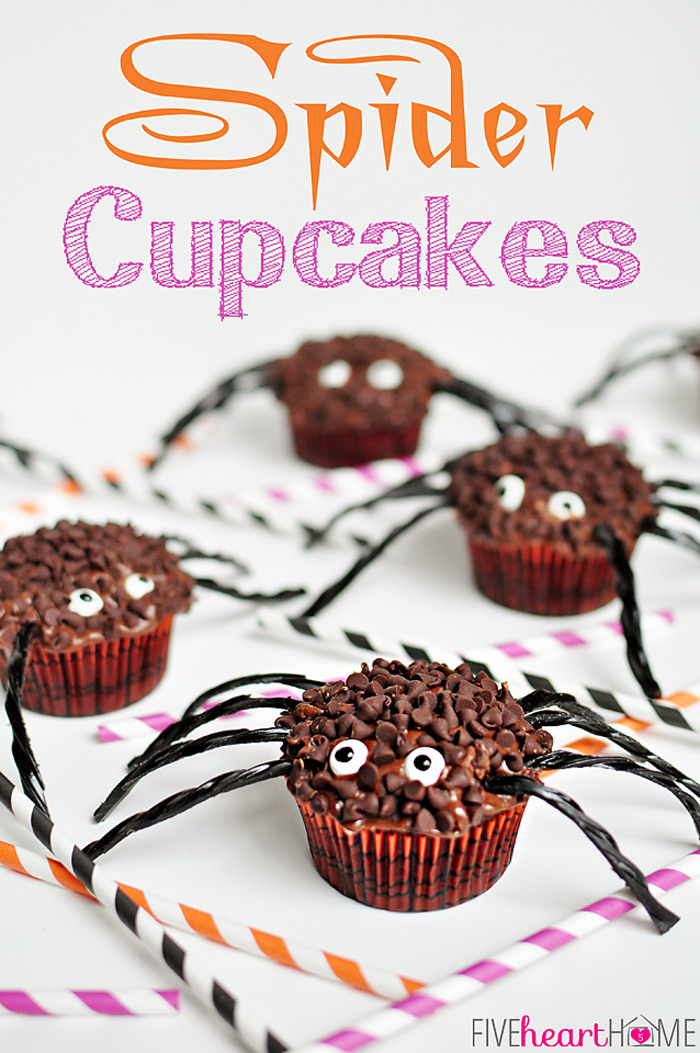
Spider Cupcakes by five heart home
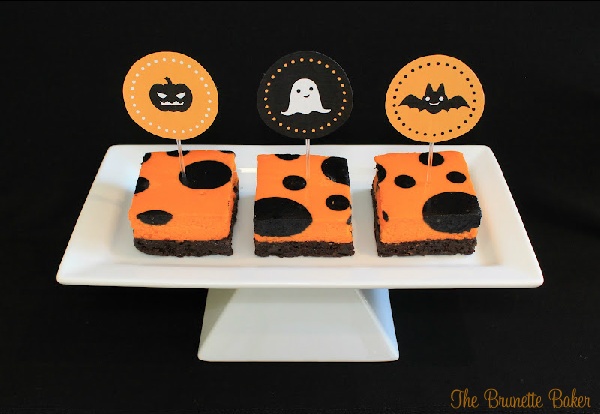
Polka Dot Cheesecake by The Brunette Baker
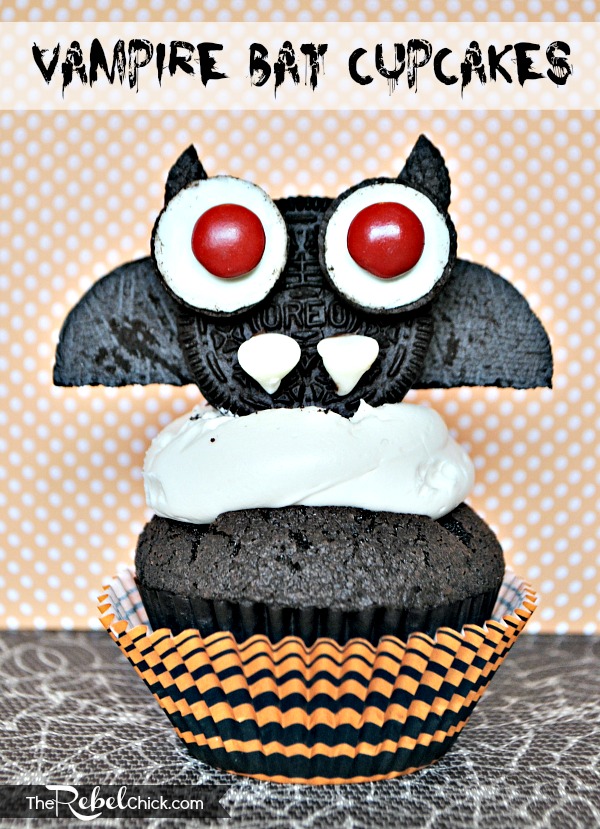 Vampire Bat Cupcake by The Rebel Chick
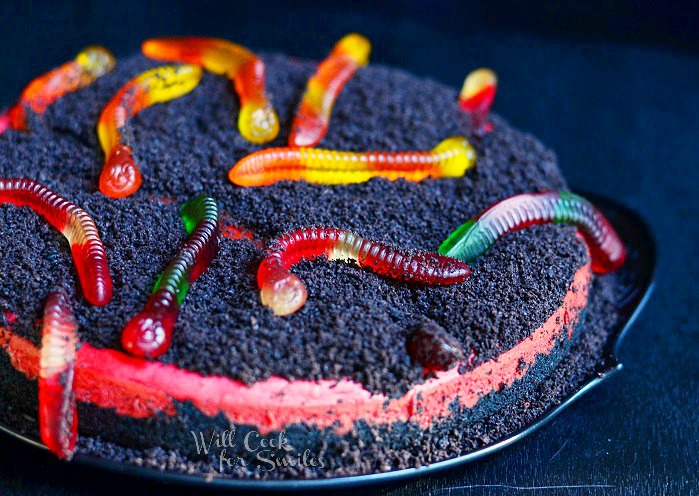
Dirt and Worms red velvet cheesecake by Will Cook For Smiles
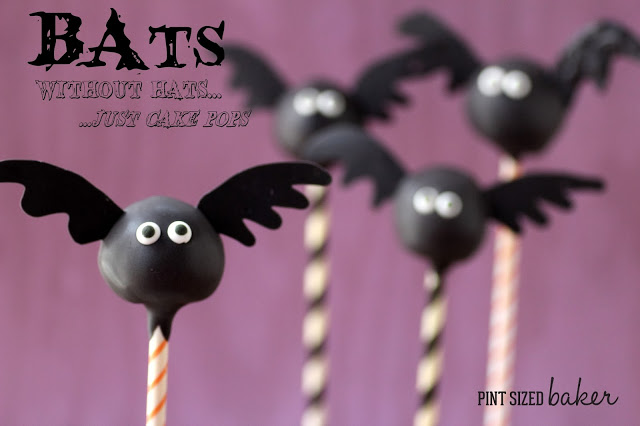
Bat Cake Pops by Pint Sized Baker
ENJOY!
Shamene
]]>HALLOWEEN IS IN 11 DAYS!!!!
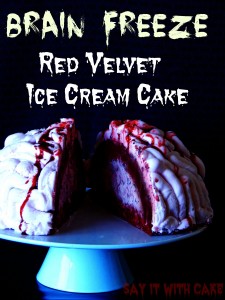
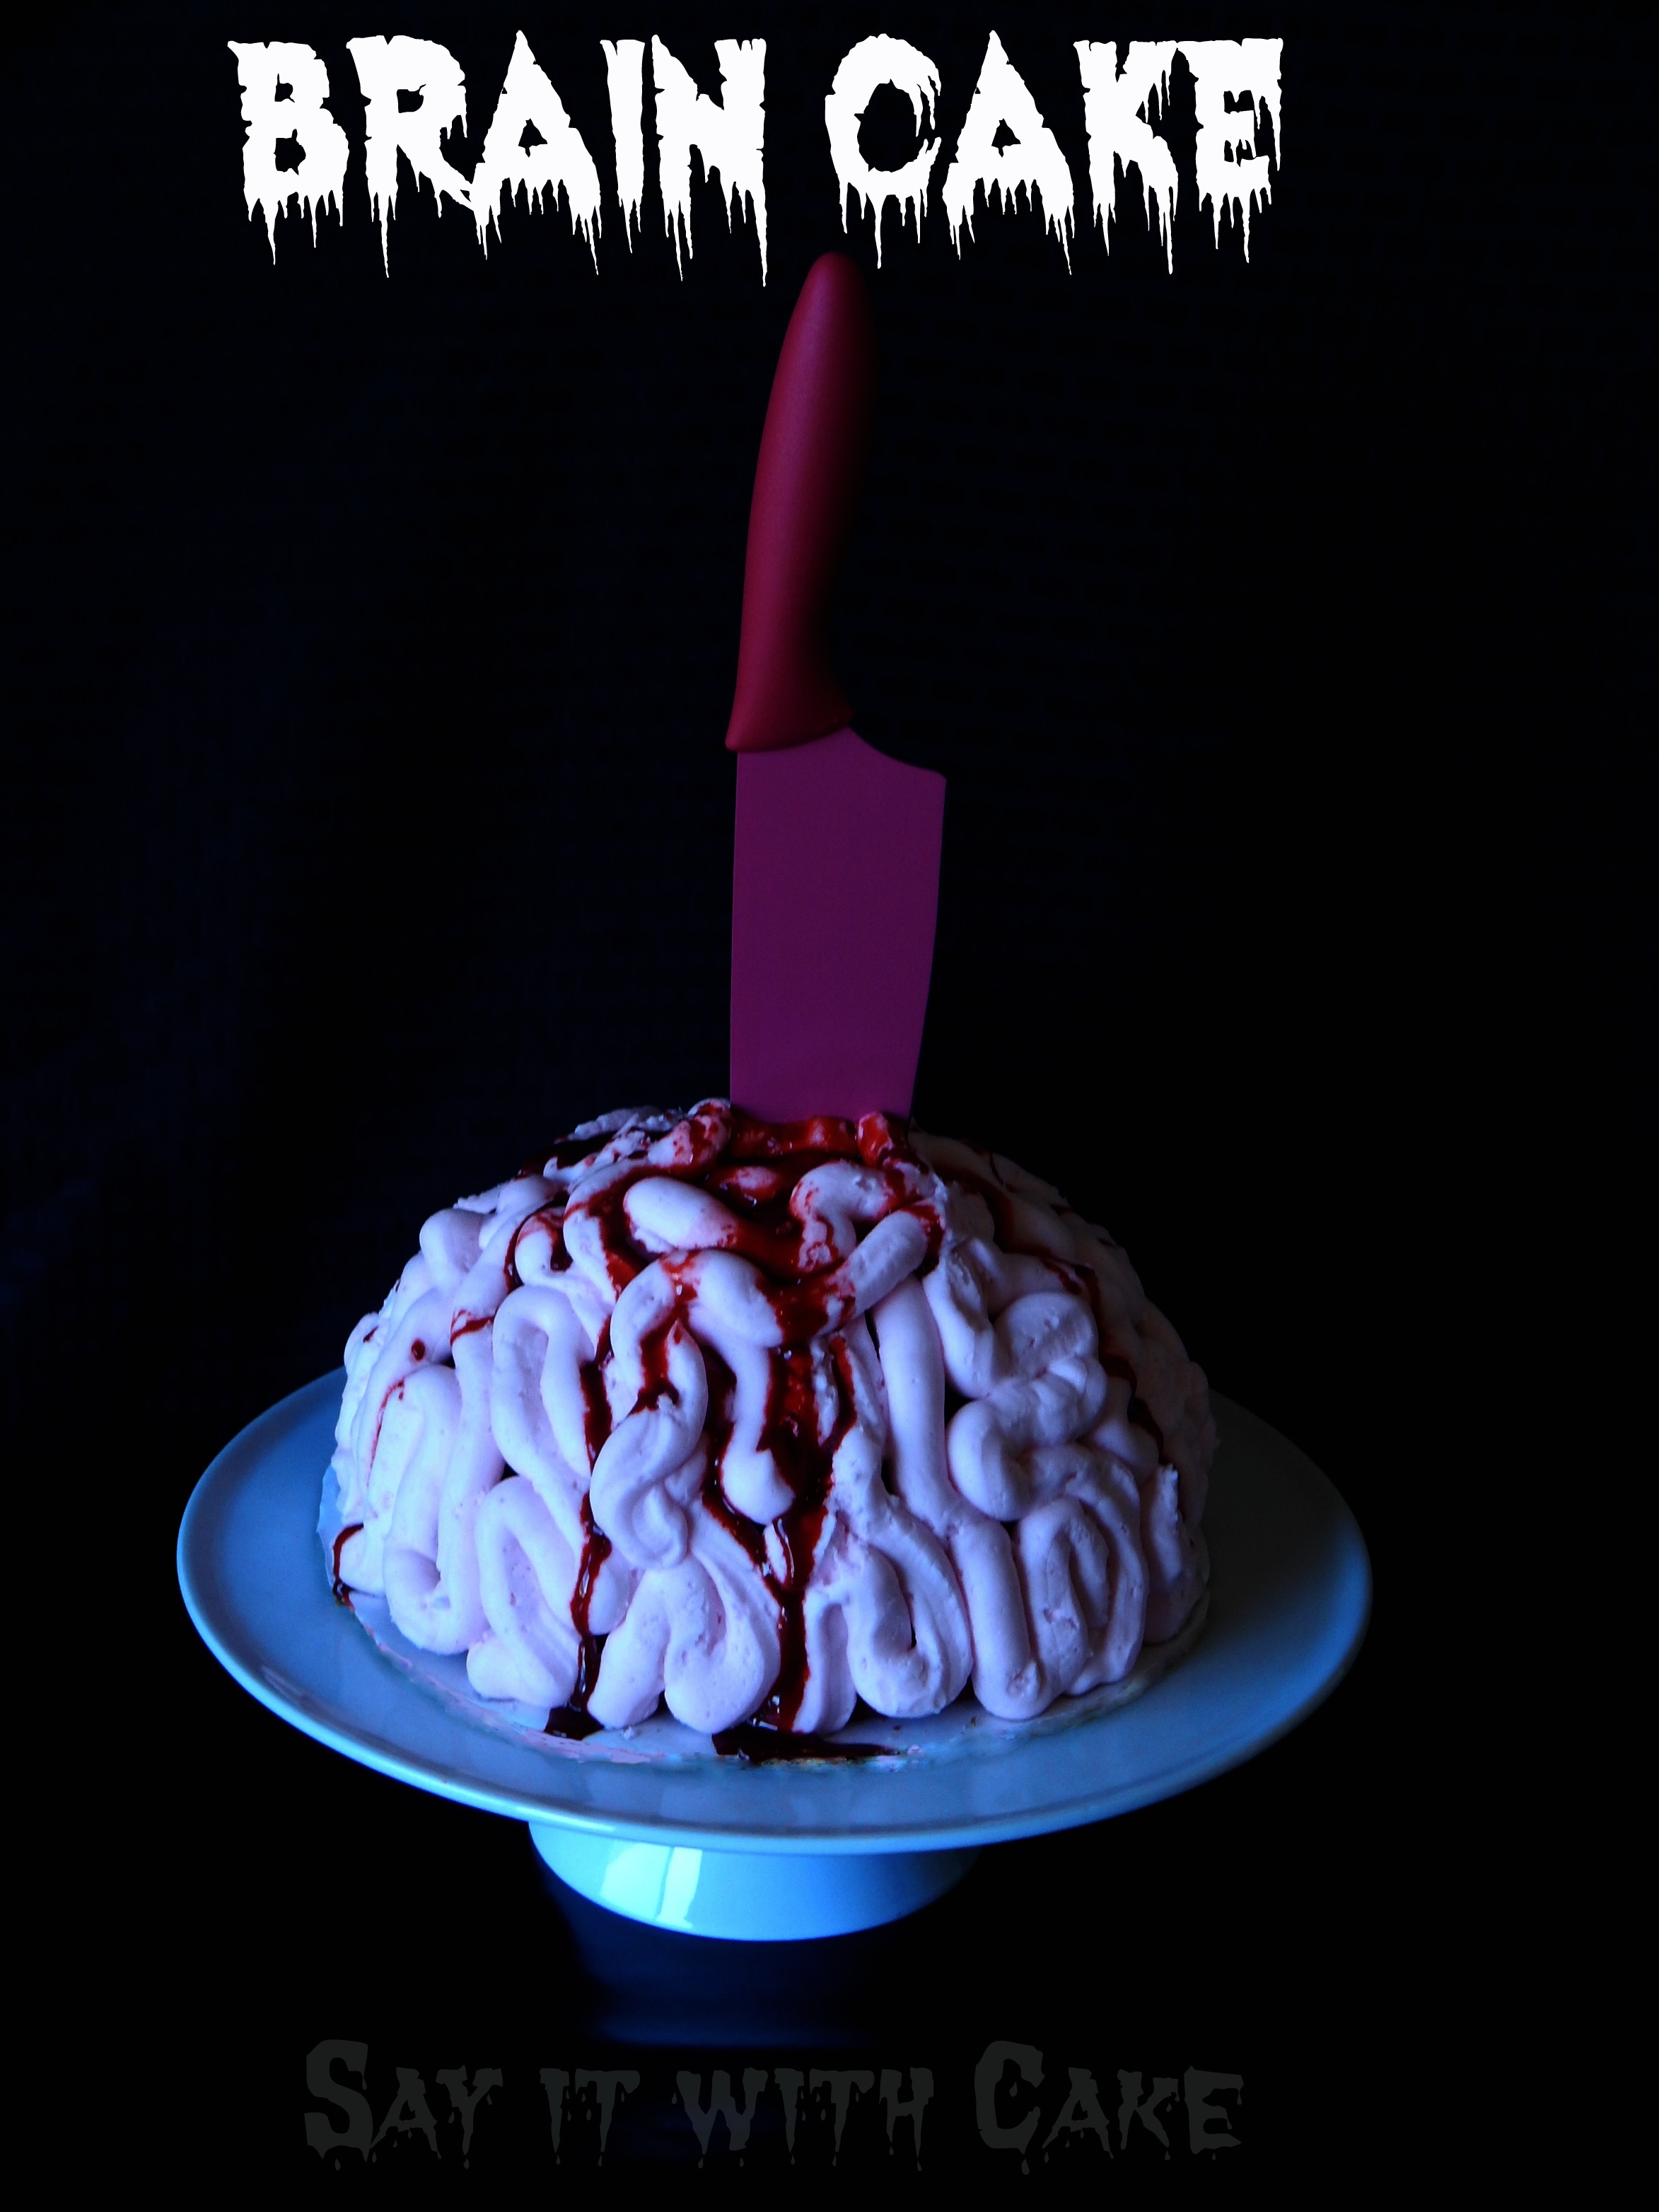
While eyeballs are quite the delicacy, brains are undoubtedly a zombie’s favorite food. From the rich and fatty frontal lobe back to the sumptuous cerebellum, brains are such a treat. With such a description, aren’t you just dying to try some?! Move over still-beating hearts, brains are what’s for dinner…or in our case, dessert.
Gross Halloween party foods are always impressive, but trust me, if you really want to impress your zombie guests, serve up this Halloween party dessert once the main meal is over. For the live humans present at the bash, this brain cake is an acceptable facsimile!

HOW TO MAKE A BRAIN CAKE
You will need :
red velvet cake box mix
Buttercream or Swiss Meringue buttercream frosting, tinted pink
Edible Blood
Your choice of cutlery
Directions:
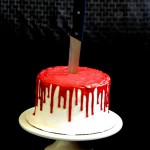
Make the red velvet cake according to package directions. Use an oven-safe pancake batter bowl to bake the cake in order to achieve that lovely brain-shaped appearance. If you want to make this an ice cream cake like I did, just use an ice cream cake pan with a hallow circle inside. Fill the cake with ice cream and let set. Put the base cake on top and flip over.
Once the cake has baked and cooled completely, it’s time to really layer on the gross factor. To make the cake brain-like, pipe cranial wrinkles onto the cake using a wide round tip in your pastry bag. The more wrinkles, the better! Use the photo above as a reference – this technique is simple, but effective!
After covering the entire cake, strategically drizzle the edible blood from a central point on the cake and gently place the knife in the frontal lobe to make both a totally awesome centerpiece for your dessert buffet and a perfect sweet treat for your zombie guests
Edible Blood recipe
- corn syrup
- red and blue food coloring
- cocoa powder or chocolate syrup
- corn starch (optional)
- Sir red food coloring into the corn syrup until you have a deep red mixture.
- Add some cocoa powder or chocolate syrup to darken and thicken the fake blood.
- If the color still isn’t deep enough, add a drop or more of blue food coloring.
- Stir in a bit of corn starch if you want your blood to be thicker.
HAPPY HAUNTING!
Shamene
My cake was featured Here!
]]>
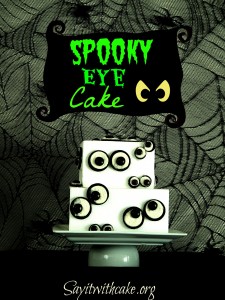
Halloween is one of my favorite holidays! I just love making Halloween cakes and seeing all the Halloween treats everyone makes. I have seen some truly frightening cakes complete with dismembered body parts, blood and guts. I was tempted to try making my own gruesome cake, but my three year old son gets scared very easily! The closest I came to gruesome was this brain cake. So this spooky eye cake is just a little bit scary but safe enough for a three year old to help!
And speaking about three year olds, this cake is easy enough for a three year old to help with! It is very easy!
For this spooky eye cake, all you need is a white frosted cake, oreos, mini oreos, junior mints, and black M&M’s. I used two square cakes, one six inch and one eight inch frosted with white buttercream frosting.
After frosting the cakes, take the oreos and slowly twist them apart to keep the filling in tact on one side. Take the junior mints and stick it onto the cream of the oreo. Dab a little bit of the buttercream on the back of the oreo and stick it onto the cake. Thats it! Do the same with the mini oreos and the M&M’s. Easy!
ENJOY!! Happy Halloween!
Shamene
I was featured Here!


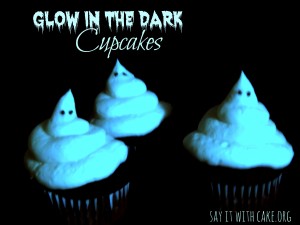
I am soooo excited because I found this totally cool recipe for cupcake frosting that glows under a black light! I found this recipe just in time for Halloween. These cupcakes are so cute and glow brightly under a black light. They would be perfect to take to a Halloween party, or those glow stick parties that are popular during Halloween time. Can you guess what the secret ingredient is that makes the cupcake frosting glow?? OK I will tell you, the secret ingredient is…………..
Tonic Water!!
That is so cool, right! The quinine in the tonic water causes it to glow under a black light! I made my ghost cupcakes with white frosting, so I used the recipe to add the tonic water to the frosting. If you want to use other colors, they won’t glow with only using the tonic water in the frosting you have to use a mixture of gelatin, water and tonic water and dip your cupcake in it. I will explain in the recipe.
Here is the Recipe
Ingredients
- 1 black light
- 24 prepared and cooled cupcakes
- 7 cups confectioners' sugar
- 1 cup vegetable shortening
- 1 teaspoon clear vanilla extract
- 5 tablespoons tonic water {diet tonic water works too}
- mini chocolate chips morsels
- Neon Food Color
- 0.3 ounce package of either Lime or Orange Gelatin
- 1 cup boiling water
- 1 cup chilled tonic water
Instructions
- Prepare desired cupcakes and allow to cool. Begin frosting by adding confectioners' sugar, shortening, vanilla, and 3 tablespoons tonic water into a large bowl. Beat on low speed until no loss sugar is visible. Add remaining two tablespoons as needed to bring frosting to piping consistency. Mix at high speed for about a minute to allow frosting to become light and fluffy. Place half of white frosting into a separate bowl and set aside. Add neon food coloring to frosting until it reaches desired color {orange for orange gelatin, green for lime gelatin}.
- Pipe colored frosting onto cooled cupcakes and place in the freezer for at least an hour. Meanwhile pipe white frosting on half of the cupcakes using a large round frosting tip. Add two mini chocolate chip morsels for the ghost's eyes to finish ghost cupcakes.
- After lettering colored cupcakes freeze, prepare the gelatin by adding gelatin mix to 1 cup boiling water. Stir for about 2 minutes then add 1 cup chilled tonic water. Transfer to a container that will let you easily dip frosting into and place into an ice bath to cool. Keep gelatin in ice bath stirring occasionally until gelatin is cool but not yet set {about 5 to 10 minutes}.
- When gelatin is cool to the touch take cupcakes out of the freezer a couple at a time. Dip into gelatin upside down, submerging the frosting but not the cake {it is ok for the gelatin to drip onto cupcake, just don't submerge it completely}. Rotate cupcakes dipping and then returning to the freezer for about a minutes to set gelatin, then re-dip. Dip 4 to 6 times for best results.
- Refrigerate until a couple minutes before serving to keep gelatin set. Then place cupcakes under a black light and watch then glow.
 "C&LFeaturedButton")

http://www.kidstylefile.com.au
]]>

This post was featured here!
]]>
Polka Dot Cake
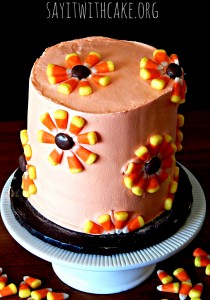
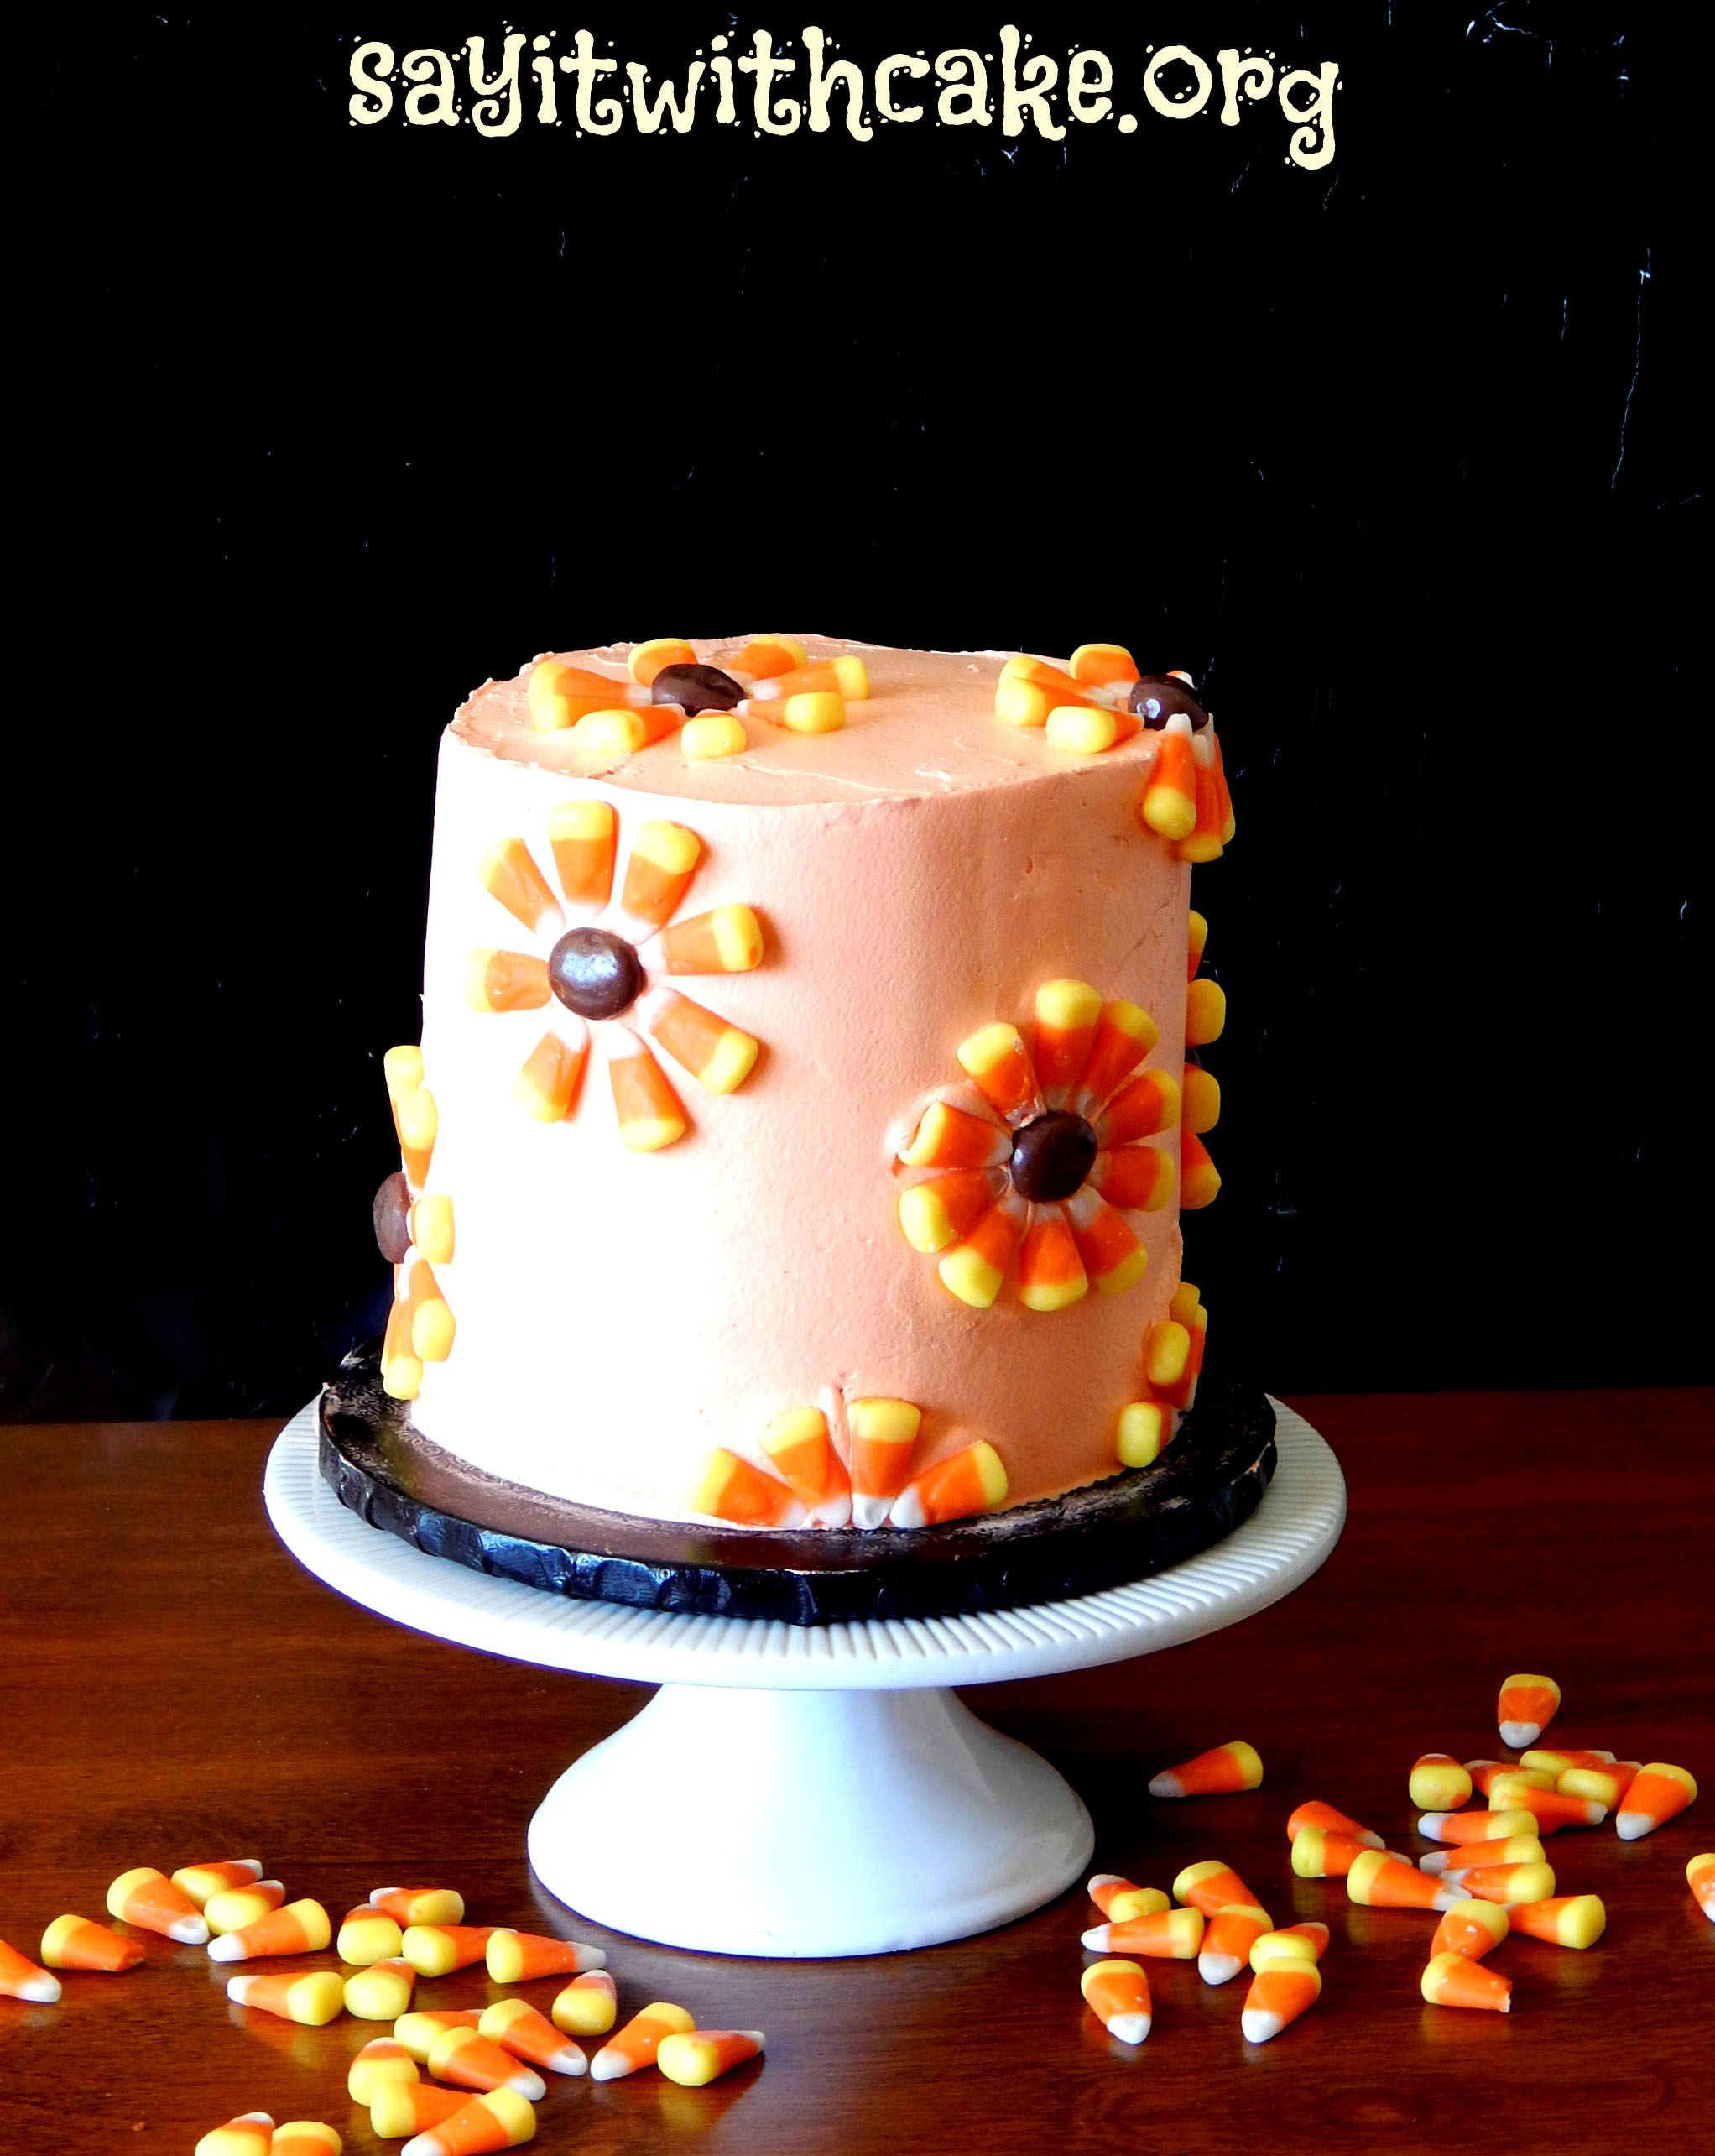
What is Halloween without CANDY CORN!!! This cake is actually decorated with Candy corn and Milk Duds-yum! Its a delicious Chocolate cake frosted and filled with light fluffy pastry pride. But I think the best part of this cake is the surprise when you cut into it! Black chocolate cake with orange polka dots, perfect for Halloween!
This was my first time making a “polka dot” cake and I was so nervous cutting into it, hoping it would look the way I imagined it would. I was hoping for a little more polka dots, but other then that I was happy about the way it looked and the color. This cake is a little time consuming, because you need to make the cake balls first, then cook them inside the cake. This cake is just so cute!!
Notes on this Recipe: This recipe makes enough batter to fill a 10″ x 3″ deep pan plus an 8″ x 3″ deep pan, or two 8″ x 3″ pans plus a 6″ x 3″ pan. The recipe may be halved. Note: it is important not to overbake the cake in order to produce the best results. Don’t open the oven door until the cakes are nearing the end of baking, or else the centers may collapse. Your cakes are done with a toothpick inserted in the center comes out with a bit of crumb clinging to it, and the cakes are just starting to pull away from the sides of the pans. Two other things to note: first, using the DH Dark Choc Fudge cake mix will result in a deep, dark chocolatey cake without having to use cocoa powder. I have tried this same recipe using other chocolate mixes but the result was not quite as chocolatey. Secondly, although the batter will taste and smell strongly of coffee, the cake will not. The coffee does a wonderful job of boosting the chocolate flavor.
WASC stands for White Almond Sour Cream. A delicious was to make a cake using a cake mix as a base.
This recipe is adapted from Cakepro on Cakecentral
Ingredients
- 2 boxes Duncan Hines Dark Chocolate Fudge cake mix
- 2 2/3 c. water
- 1/2 c. vegetable oil
- 6 large or extra large eggs
- 16 oz. sour cream
- 2 cups all-purpose flour
- 2 cups granulated sugar
- 1 1/2 tsp salt
- 1 Tbsp vanilla extract
- 1 Tbsp instant coffee
Instructions
- Preheat oven to 325 degrees F.
- Prepare cake pans by spraying generously with original Pam.
- Add cake mix, flour, sugar, and salt to mixing bowl and stir with a whisk to mix and de-clump the cake mix.
- Dissolve coffee granules in room temperature water.
- You may also use 2 2/3 cups cooled strong black coffee in place of the water and instant coffee if you prefer.
- Add remaining ingredients to mixing bowl and mix on low speed for one minute. Stop, scrape bowl, and mix for 2 minutes on medium speed.
- Pour into prepared pans and bake on middle rack of oven.
- Your cakes are done with a toothpick inserted in the center comes out with a bit of crumb clinging to it, and the cakes are just starting to pull away from the sides of the pans.
- Let cool for half an hour in the pan, then invert onto cooling racks to cool to room temp.
- Wrap cakes in plastic wrap after cooling to prevent cakes from drying out. These cakes freeze really well. Wrap cakes well with plastic wrap and then with foil, and place in freezer. For long-term storage (more than 2 weeks), place wrapped cakes in a paper grocery sack. The paper sack will keep freezer odors out of your cakes. When you are ready to thaw them, remove cakes from paper sack and leave on counter overnight in plastic/foil.
First, make cake balls. I used a cake pop maker, it was really easy and they were made in about 15 minutes. Next, you pour a little bit of the black chocolate cake batter in the bottom of the cake pans. I used three six inch pans. Next, place the cake balls in the pan. If I had to do this again, I would put more cake balls in the pan then I did. They rise to the top while cooking. Then cover the cake balls with the black batter. Cook them until the toothpick comes out clean. Let them cool completely on a cooling rack. Level the cakes and stack them. I used whipped Pastry Pride as my filling. Let the cake sit for 3 hours for the filling to sit. This is important because you need to give the filling time for gravity to work. The filling will start to bulge out a little over a few hours. If you frost your cake before letting it sit for a few hours, you will get bulges out of the side of your frosted cake where the filling is. I learned this the hard way! So now I always let my filled cake set for a few hours! After this, then you can frost your cake. I used whipped Pastry Pride to frost my cake. Next I put Milk Duds all over the cake as centers of the flowers. I arranged thecandy corn to look like petals. All done! Now you get to cut into the cake and see the awesome polka dots!!
Polka Dot Cake
ENJOY!
Shamene
]]>