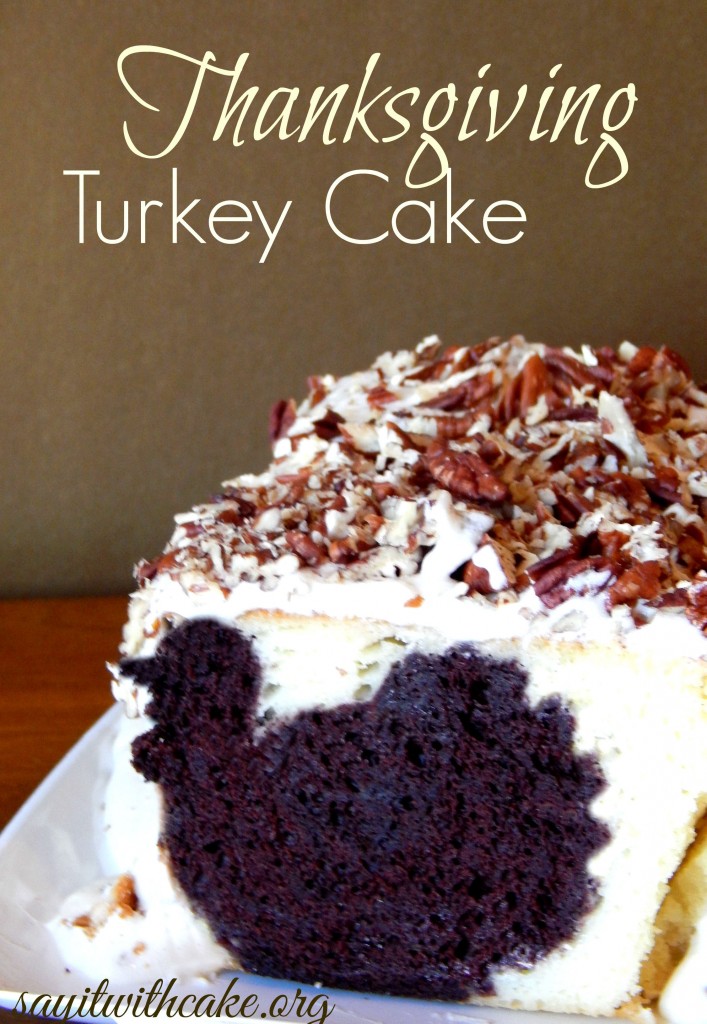
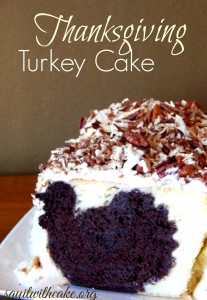
 My Grandma Rose had a tradition of hosting a Thanksgiving dinner the Sunday before Thanksgiving. When you have a huge family, sometimes it can be hard to get everyone together on the actual day of Thanksgiving. Sometimes you have to switch years with your spouse (this year my family, next year yours). My Grandma’s tradition was a great way for everybody to be able to get together and celebrate Thanksgiving every year! Since my Grandma and Grandpa have both passed away, we still carry on the tradition! So since I will be having two Thanksgivings this year, I get to come up with two Thanksgiving desserts. This cake will be sure to wow my family and I am sure they will be wondering “How did you do that?”!
Ingredients
- 2 (16 ounce) boxes Betty Crocker Pound Cake mix
- • 1/2 cup (1 stick) unsalted butter, divided, softened
- • 4 eggs, divided
- • 1 1/3 cups milk, divided
- • brown food coloring or cocoa powder
- • 1 1/2 cups powdered sugar
- • 2 1/2 tablespoons milk
- • 1 teaspoon butter, melted
- • 1/4 teaspoon vanilla
- • 1/8 teaspoon salt
Instructions
- Preheat oven to 350. Coat a 9×5 inch loaf pan with cooking spray.
- Prepare your first pound cake: combine 1 box of cake mix, 1/4 cup (1/2 stick) softened butter, 2 eggs, and 2/3 cup milk in a large bowl. Whisk together with an electric mixer or by hand. Add in your food coloring until you reach the desired color (I think I used 25 drops.) or use 2 TB of cocoa powder.
- Pour batter into prepared pan and bake for 8-10 minutes less than instructed on box (about 50 minutes.) Let cool, remove from pan and refrigerate for up to 4 hours. Cut cold cake into slices the thickness of your cookie cutter. Cut turkey shapes from the slices. Set aside.
- Prepare your second box of pound cake mix the same as the first, except omit the food coloring. Coat a 9×5 loaf pan with cooking spray and pour just barely enough batter to cover the bottom. Align your turkey cut outs down the center, keeping them tightly together. Poor the remaining batter over the heart cut-outs in the pan, making sure to cover the sides and tops. (Careful the batter doesn’t overflow.) Bake according to the directions on the box, about 1 hour. Let cool when done.
- Meanwhile, prepare your icing. In a medium bowl, mix all of your ingredients together until combined and creamy. Add more powdered sugar if it appears too runny or more milk if it seems too stiff, until you reach the consistency you like.
- Remove baked and cooled pound cake from pan and top with icing. Let set; cut into slices and enjoy!
recipe and ideas from She Knows, Very Culinary, and Play Party Pin
ENJOY and HAPPY THANKSGIVING!
Shamene
My cake was featured here!
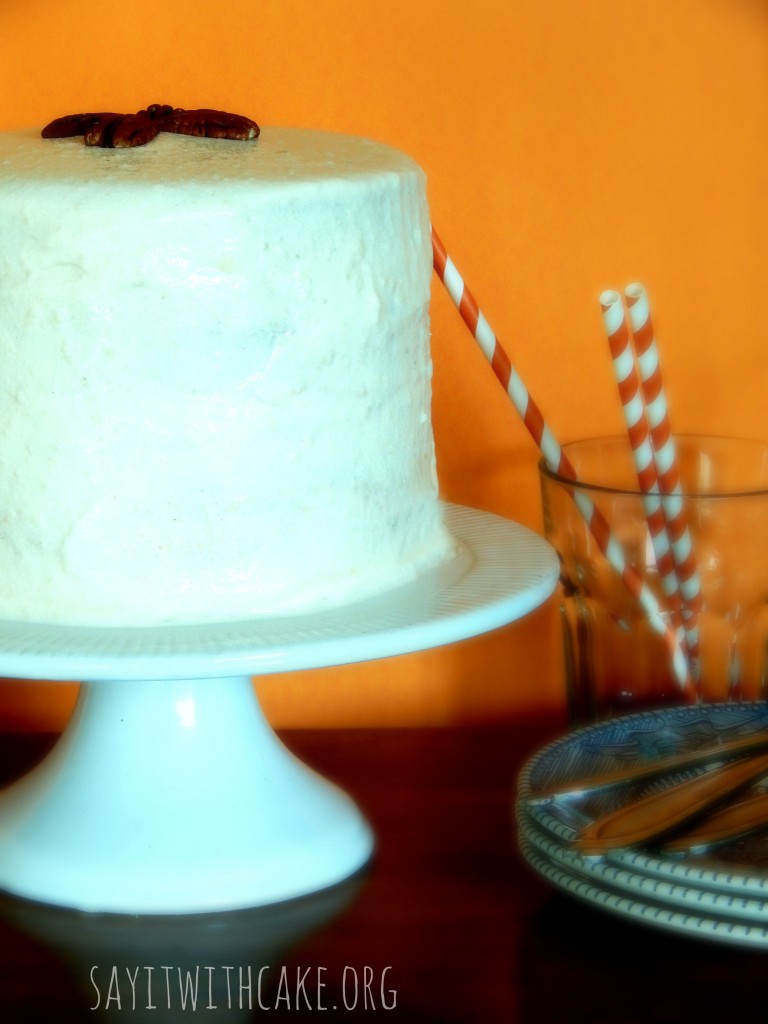
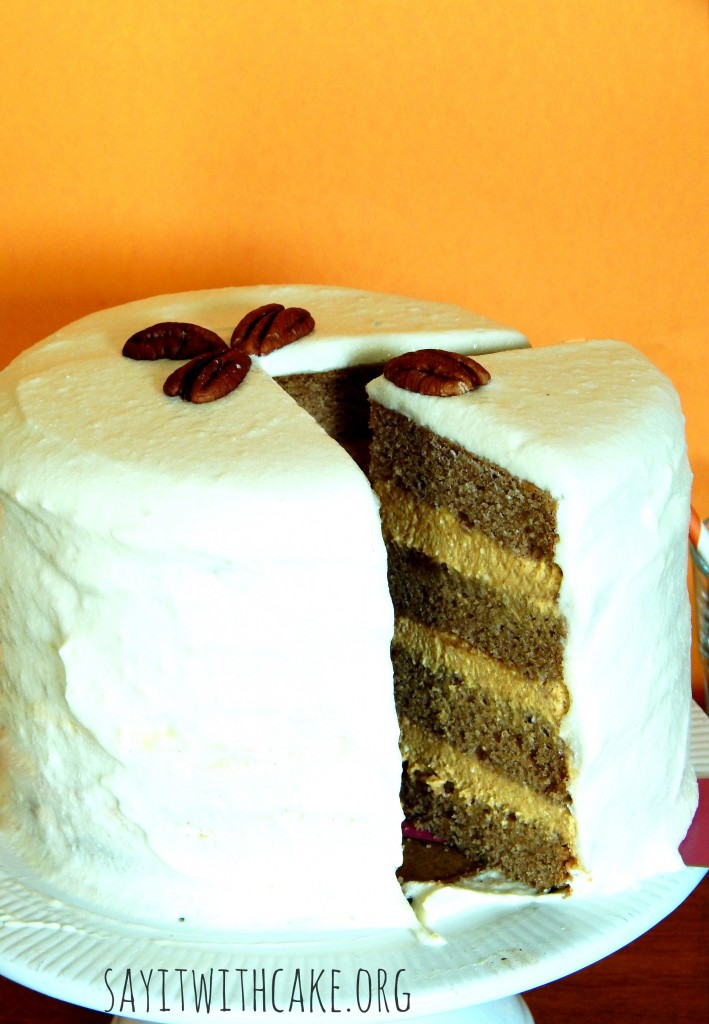
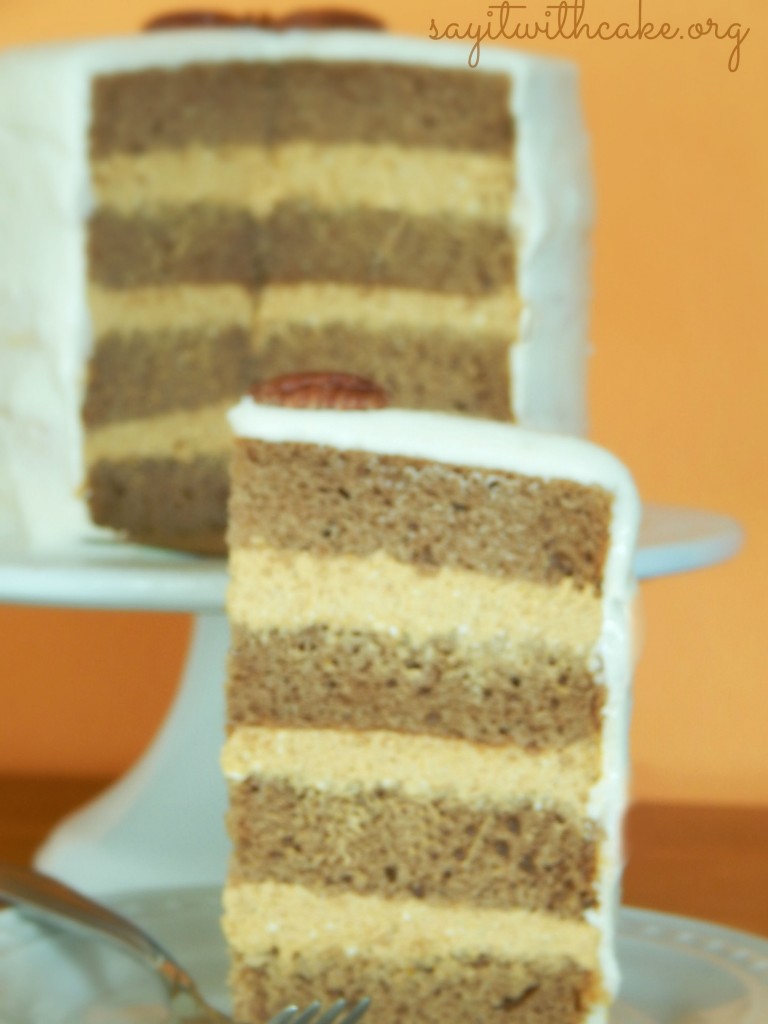
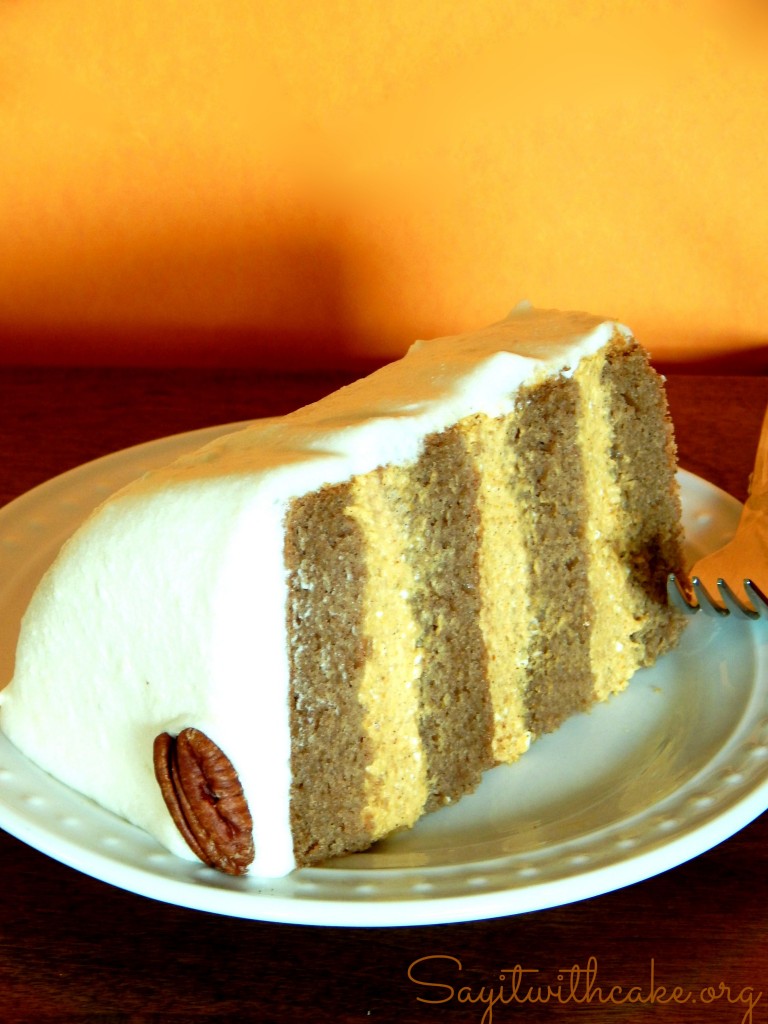
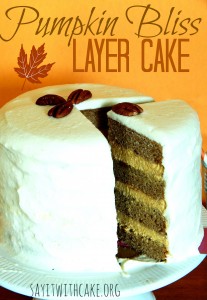 Move over pumpkin pie, there is a new dessert in town! This four layer cake is packed full of flavor and fall spices. Four layers of pumpkin spice cake, with a creamy pumpkin filling, and topped with a light and fluffy cream cheese frosting! This pumpkin spice layer cake is the ultimate fall cake and is perfect to serve for Thanksgiving dessert!
This was my first time making cream cheese frosting and I was a little nervous to attempt it! I usually make buttercream icing, it is my tried and true recipe. This cream cheese frosting is a perfect match for this cake. If I had used buttercream, it definitely would not have been as good! It is so good I couldn’t help myself from eating spoonfulls of it 
Now this pumpkin filling is to die for! My husband was eating the leftover filling with vanilla wafers- no joke! The filling is my favorite part of this cake. I am debating whether to serve this cake or my Caramel apple layer cake for Thanksgiving this year. Aren’t fall desserts the best!
Ingredients
- 3 cups cake flour
- 2 teaspoons baking powder
- 1 teaspoon baking soda
- 1 teaspoon ground nutmeg
- 1 teaspoon ground cinnamon
- 1 teaspoon ground ginger
- 1/2 teaspoon ground cloves
- 2 sticks butter, softened
- 2 cups sugar
- 1/2 teaspoon salt
- 4 eggs
- 1 1/4 cups buttermilk
- Mix the following for a yummy filling: 4 oz softened cream cheese 1/2 cup powdered sugar then mix in 1/2 cup canned pumpkin 1 tsp cinnamon 1/4 tsp nutmeg and 1/4 tsp vanilla. Once mixed slowly add 1/2 cup whipping cream. Beat for 1-2 minutes. Refrigerate for 1-2 hours. Great to make ahead of time. Do not try to freeze. I did this and it was not a good idea.
- 1 cup granulated sugar
- 1/4 cup all purpose flour
- 3 tablespoons cornstarch
- 1/4 teaspoon salt
- 1 1/2 cups milk (I used 1%)
- 1 tablespoon lemon juice
- 1 teaspoon vanilla extract
- 1/2 cup (1 stick) unsalted butter, softened
- 4 ounces cream cheese
Instructions
- Preheat oven to 350 degrees F. Butter and flour 2 (8-inch) round cake pans.
- In a small mixing bowl whisk together cake flour, baking powder, baking soda, ground nutmeg, ground cinnamon, ground ginger and ground cloves.
- Cream the butter, sugar and salt until light and fluffy with an electric mixer. Beat in the eggs, 1 at a time, beating well after each addition. Beat in the dry ingredients and the buttermilk alternately beginning and ending with the dry.
- When the batter is well mixed and smooth, divide it amongst the 2 prepared cake pans and bake about 25 minutes or until a toothpick inserted into the center of the cakes come out clean. Let cool in the pan for 10 minutes then turn out to cool completely. If the cake layers have domed a little during the baking process, slice off the tops with a long serrated knife so they are flat and even.
- Torte both cakes so you have four even and level cakes.
- Place the first layer, cut side down, on a cake pedestal or serving plate. Spoon about 1 cup of pumpkin filling onto the center of the cake. Spread it almost to the very edges with an offset spatula. Repeat with the remaining 3 layers.
- Let sit in the refrigerator for one hour to allow the filling to set.
- Crumb coat the cake, and let sit in refrigerator for 20 minutes. Finish with last layer of frosting and garnish with pecans if desired.
- Place the sugar, flour, cornstarch and salt in a small pot and whisk to combine.
- Gradually whisk in the milk, ensuring there are no lumps.
- Place over medium heat and cook, stirring often, until thickened.
- Pass the mixture through a fine mesh strainer, and into an airtight container.
- Refrigerate for about an hour, or until completely cooled.
- Place the cooled mixture in a large mixing bowl, along with the lemon juice and vanilla, and whip on high speed.
- Whip in the cream cheese, a tablespoon at a time.
- Whip in the butter, a tablespoon at a time, until fluffy.
- Transfer to an airtight container and chill until ready to use.
- note: if you would like the frosting thicker, add more cornstarch and allow frosting to sit in refrigerator before using.
Enjoy!!
Shamene
My cake was featured here!

Fall is officially here! Time for apples, pumpkins, changing leaves, and cooler weather. This cake represents everything I love about this time of year! The perfect blend of spice and sweet and all the flavors of the season. With a single bite, I wanted to wrap up in my favorite sweater, watch my high school football game, and go jump in some leaves. It is the perfect dessert to usher in the fall and an instant all-time favorite. Yes, it is that good!
This cake has a lot of steps, but the steps are pretty easy and it is so worth it! The caramel sauce is to die for! I couldn’t stop eating it. The cake itself was delicious and my husband told me he would like to try it warm out of the oven with no filling or buttercream. The cake by itself is that full of flavor. One tip I will give is while making the caramel sauce to watch it very carefully while it is boiling. I looked away for a minute and it had turned a darker color then I wanted! It still tasted great but I would have preferred it a little lighter. It seemed to take forever to turn a caramel color, but when it starts to change color is just sneaks up on you! Also, I used light corn syrup but you can use light or regular it doesn’t matter.
Recipe adapted from Baked Explorations by Matt Lewis & Renato Poliafito
Caramel Apple Layer Cake
Prep Time: 45
Cook Time: 35
Keywords: bake dessert cake
Ingredients (8 inch cake)
For The Apple Cake
- 4 cups all-purpose flour
- 2 teaspoons baking soda
- 1 teaspoons baking powder
- 1 teaspoon salt
- 1 teaspoons cinnamon
- 1/2 teaspoon ground allspice
- 1/2 teaspoon ground cloves
- 1 1/2 cups (3 sticks) unsalted butter, cut into 1-inch cubes, at room temperature
- 2 1/2 cups sugar
- 2 large eggs
- 4 cups unsweetened applesauce
For The Caramel Sauce
- Yield: about 2 cups
- 1 1/2 cups sugar
- 1/4 cup corn syrup
- 1/2 cup (1 stick) of butter, softened, cut into 1/2-inch cubes
- 1 ½ cups heavy cream
For The Caramel Buttercream
- 1½ cups sugar
- 1⁄3 cup all-purpose flour
- 1 1/2 cups whole milk
- 1⁄3 cup heavy cream
- 1 1/2 cups (3 sticks) unsalted butter, soft but cool, cut into small pieces
- 1 teaspoon pure vanilla extract
- 1⁄3 cup plus 2 tablespoons Classic Caramel Sauce (see recipe above), at room temperature
Instructions
Method for Apple Cake
Preheat the oven to 325-degrees. Butter four 8-inch round cake pans, line the bottoms with parchment paper, and butter the parchment. Dust the parchment with flour and knock out the excess flour.
Sift the flour, baking soda, baking powder, salt, cinnamon, allspice, and cloves together into a large bowl. Set aside.
In the bowl of a standing mixer fitted with the paddle attachment, beat the butter until creamy, about 4 minutes. Add the sugar and beat until light and fluffy, about 3 minutes. Add the egg and beat until combined.
Add the flour mixture to the mixer bowl in three parts, alternating with the applesauce, beginning and ending with the flour mixture. Scrape down the bowl, then mix on low speed for a few more seconds.
Divide the batter among the prepared pans and smooth the tops. Bake for 40 to 45 minutes, rotating the pans halfway through the baking time, until a toothpick inserted in the center of the cake comes out clean. Transfer the pans to a wire rack and cool for 20 minutes. Turn the cakes out onto the rack, remove the parchment, and let cool completely
Method for Caramel Sauce
In a medium saucepan with high sides, combine the sugar and corn syrup with 1/2 cup water. Stir the mixture gently so you don’t slosh any of it up the sides of the pan. Turn the heat to medium-high and continue stirring until the sugar dissolves. Increase heat to high, stop stirring, and allow the mixture to boil. Once it begins to turn a rich caramel color (if you don’t want to eyeball it, take the caramel to 300 degrees F on a candy thermometer), remove it from the heat, add the butter and cream, and stir until combined.
You can save the caramel sauce, tightly covered, in the refrigerator for up to 1 week. Let it come to room temperature before using it on cakes, ice creams, or quick breads.
If you want a warm topping, heat the caramel sauce in short bursts in the microwave or in the top of a double boiler.
Method for Buttercream
In a medium, heavy-bottomed saucepan, whisk the sugar and flour together. Add the milk and cream and cook over medium heat, whisking occasionally, until the mixture comes to a boil and has thickened, about 10 to 15 minutes.
Transfer the mixture to the bowl of a standing mixer fitted with the paddle attachment. Beat on high speed until cool. Reduce the speed to low and add the butter and vanilla; mix until thoroughly incorporated. Increase the speed to medium-high and beat until the frosting is light and fluffy.
Add 1⁄3 cup of the caramel and continue mixing until combined. If the frosting is too soft, put the bowl in the refrigerator to chill slightly, then beat again until it is the proper consistency. If the frosting is too firm, set the
bowl over a pot of simmering water and beat with a wooden spoon until it is the proper consistency.
Assembly of cake
Place one of the cake layers on the cake base and level off the top. Put a thin layer of caramel sauce on the layers and then spread caramel buttercream on top. Next, add another layer of cake and level and frost as you did with the first layer. Repeat with all 4 cakes. Trim the top of the last layer and then place it on top of the cake bottom side up. Spread a very thin layer of frosting over the entire cake (crumb coat) and place the cake on the fridge for 30 minutes. Remove the cake from the fridge and use the remaining frosting to ice the top and sides. Use the remaining caramel to drizzle over the top. Add chopped peanuts, if desired.
I really hope you enjoy this cake as much as I do! I highly recommend making this cake for your family, they will love it! I would love to hear from you! Please leave a comment below if you would like!
ENJOY!!
linked up at http://www.thecountrycook.net/2014/09/weekend-potluck-134.html#more

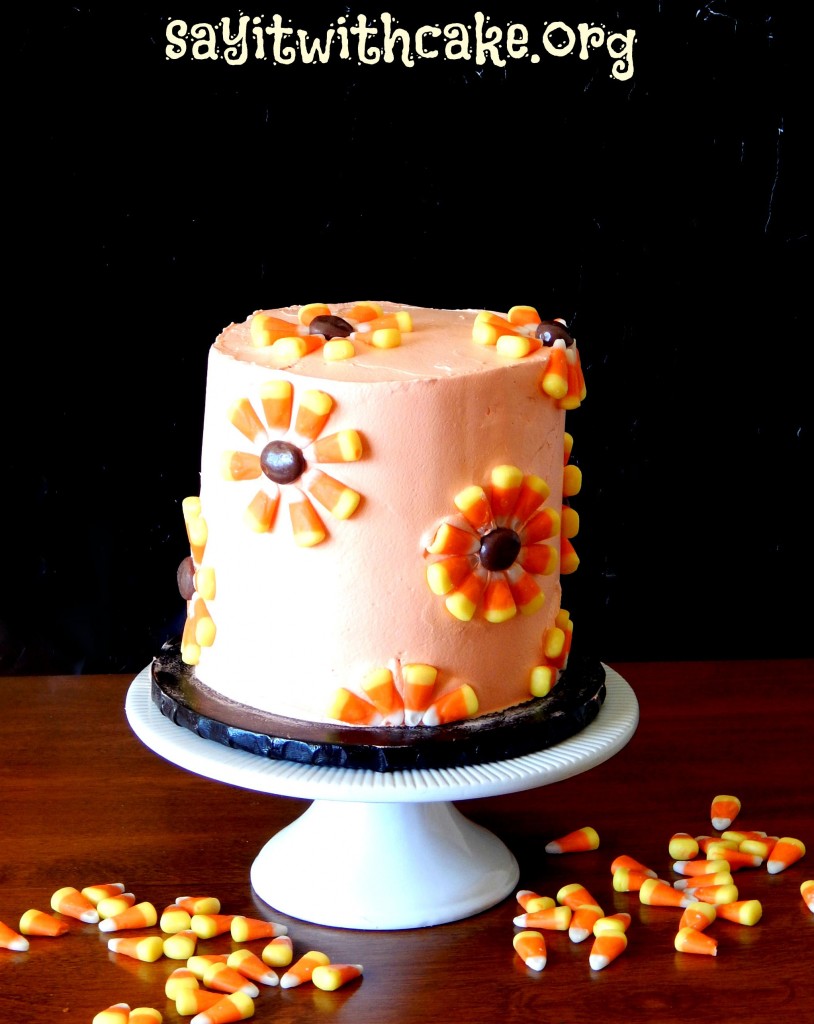
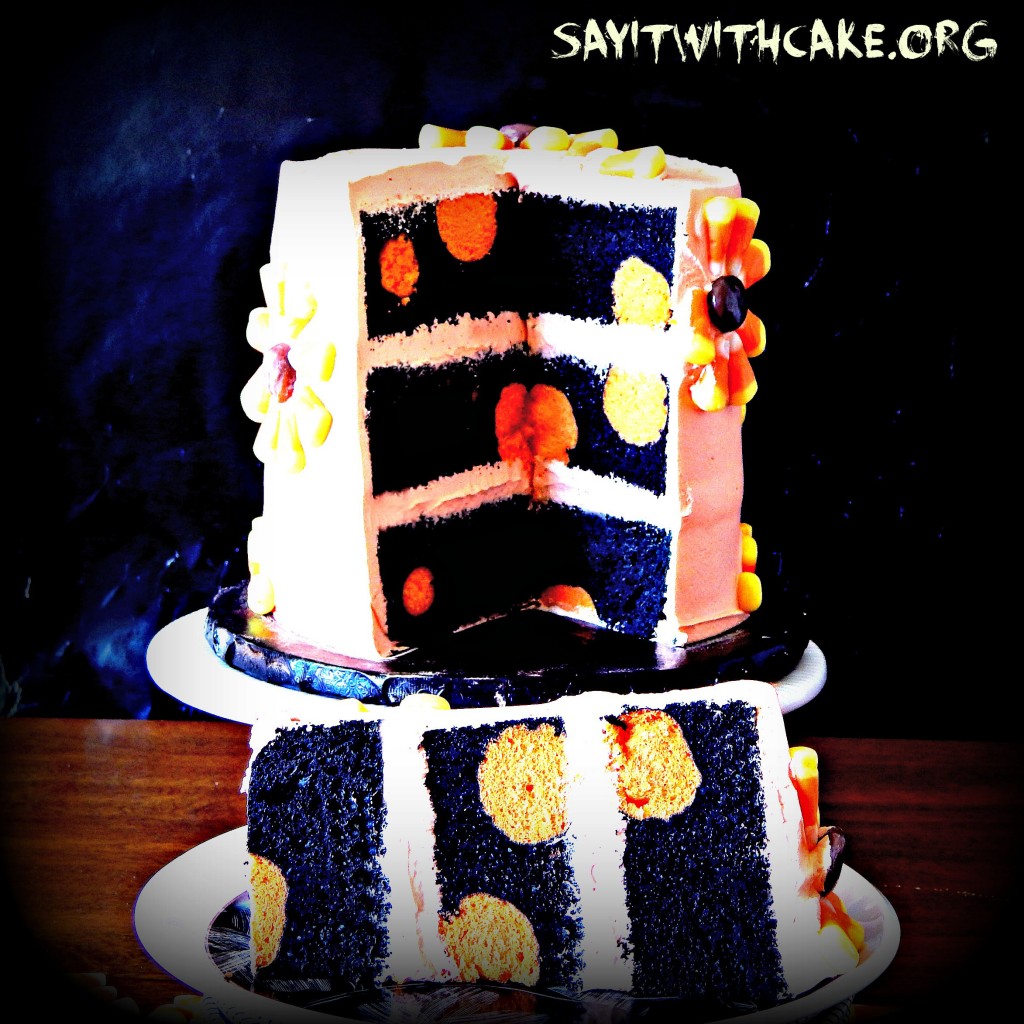
What is Halloween without CANDY CORN!!! This cake is actually decorated with Candy corn and Milk Duds-yum! Its a delicious Chocolate cake frosted and filled with light fluffy pastry pride. But I think the best part of this cake is the surprise when you cut into it! Black chocolate cake with orange polka dots, perfect for Halloween!
This was my first time making a “polka dot” cake and I was so nervous cutting into it, hoping it would look the way I imagined it would. I was hoping for a little more polka dots, but other then that I was happy about the way it looked and the color. This cake is a little time consuming, because you need to make the cake balls first, then cook them inside the cake. This cake is just so cute!!
Notes on this Recipe: This recipe makes enough batter to fill a 10″ x 3″ deep pan plus an 8″ x 3″ deep pan, or two 8″ x 3″ pans plus a 6″ x 3″ pan. The recipe may be halved. Note: it is important not to overbake the cake in order to produce the best results. Don’t open the oven door until the cakes are nearing the end of baking, or else the centers may collapse. Your cakes are done with a toothpick inserted in the center comes out with a bit of crumb clinging to it, and the cakes are just starting to pull away from the sides of the pans. Two other things to note: first, using the DH Dark Choc Fudge cake mix will result in a deep, dark chocolatey cake without having to use cocoa powder. I have tried this same recipe using other chocolate mixes but the result was not quite as chocolatey. Secondly, although the batter will taste and smell strongly of coffee, the cake will not. The coffee does a wonderful job of boosting the chocolate flavor.
WASC stands for White Almond Sour Cream. A delicious was to make a cake using a cake mix as a base.
This recipe is adapted from Cakepro on Cakecentral
Ingredients
- 2 boxes Duncan Hines Dark Chocolate Fudge cake mix
- 2 2/3 c. water
- 1/2 c. vegetable oil
- 6 large or extra large eggs
- 16 oz. sour cream
- 2 cups all-purpose flour
- 2 cups granulated sugar
- 1 1/2 tsp salt
- 1 Tbsp vanilla extract
- 1 Tbsp instant coffee
Instructions
- Preheat oven to 325 degrees F.
- Prepare cake pans by spraying generously with original Pam.
- Add cake mix, flour, sugar, and salt to mixing bowl and stir with a whisk to mix and de-clump the cake mix.
- Dissolve coffee granules in room temperature water.
- You may also use 2 2/3 cups cooled strong black coffee in place of the water and instant coffee if you prefer.
- Add remaining ingredients to mixing bowl and mix on low speed for one minute. Stop, scrape bowl, and mix for 2 minutes on medium speed.
- Pour into prepared pans and bake on middle rack of oven.
- Your cakes are done with a toothpick inserted in the center comes out with a bit of crumb clinging to it, and the cakes are just starting to pull away from the sides of the pans.
- Let cool for half an hour in the pan, then invert onto cooling racks to cool to room temp.
- Wrap cakes in plastic wrap after cooling to prevent cakes from drying out. These cakes freeze really well. Wrap cakes well with plastic wrap and then with foil, and place in freezer. For long-term storage (more than 2 weeks), place wrapped cakes in a paper grocery sack. The paper sack will keep freezer odors out of your cakes. When you are ready to thaw them, remove cakes from paper sack and leave on counter overnight in plastic/foil.
First, make cake balls. I used a cake pop maker, it was really easy and they were made in about 15 minutes. Next, you pour a little bit of the black chocolate cake batter in the bottom of the cake pans. I used three six inch pans. Next, place the cake balls in the pan. If I had to do this again, I would put more cake balls in the pan then I did. They rise to the top while cooking. Then cover the cake balls with the black batter. Cook them until the toothpick comes out clean. Let them cool completely on a cooling rack. Level the cakes and stack them. I used whipped Pastry Pride as my filling. Let the cake sit for 3 hours for the filling to sit. This is important because you need to give the filling time for gravity to work. The filling will start to bulge out a little over a few hours. If you frost your cake before letting it sit for a few hours, you will get bulges out of the side of your frosted cake where the filling is. I learned this the hard way! So now I always let my filled cake set for a few hours! After this, then you can frost your cake. I used whipped Pastry Pride to frost my cake. Next I put Milk Duds all over the cake as centers of the flowers. I arranged thecandy corn to look like petals. All done! Now you get to cut into the cake and see the awesome polka dots!!
ENJOY!
Shamene
]]>