Say it With Cake http://sayitwithcake.org Wed, 27 Sep 2017 22:21:33 +0000 en-US hourly 1 http://wordpress.org/?v=4.2.16 Flourless Chocolate Torte http://sayitwithcake.org/flourless-chocolate-torte-2/ http://sayitwithcake.org/flourless-chocolate-torte-2/#comments Sat, 16 Sep 2017 00:44:27 +0000 http://sayitwithcake.org/?p=52250 This Flourless Chocolate TorteIMG_5159 is a dense and rich flourless chocolate cake covered with chocolate mirror glaze and topped with fresh strawberries.

I made this cake special for my step Mom Peggy’s birthday! This is the shortest Cake I have made in a long time.  Usually I pile my cakes high in 3-5 layers.  This cake is more like a torte then a cake.  It is so rich and chocolatey that one layer seemed enough for this cake!

I love this shot that my sister took.  You can see the reflection of the strawberries in the mirror glaze! Before covering the cake with the mirror glaze, I used some ganache to smooth out the sides and top of the cake.  I waited till the ganache was the consistency of peanut butter before I started frosting.  I smoothed out the edges and let it set before pouring the mirror glaze on top.  However, you can see on the right hand side of the cake, it was not even or smooth enough and you can actually see every bump and dip in the side of the cake! The mirror glaze shows all imperfections of the cake, so be careful to get it as perfectly smooth as you can before pouring on the mirror glaze.  I wish I had put on another layer of ganache!

Before pouring on the mirror glaze, also remember to wait till it is the correct temperature or it will not lay smooth.  90 degrees F is the temp you want your mirror glaze to be.

photography by Wendycoxphotography.com

Flourless Chocolate Torte

Ingredients

    Ingredients for Mirror Glaze
  • Makes glaze for a dozen 10-inch cakes.
  • 700 grams chocolate (white or dark)
  • 400 grams water
  • 600 grams sugar
  • 400 grams condensed milk
  • 1 tablespoon vanilla extract
  • 38 grams powdered gelatin (yes, it’s quite a large amount)
  • If making a dark chocolate mirror glaze, you may wish to add about 100 grams of cocoa powder,
  • Flourless chocolate Cake:
  • 1 cup butter
  • 1 1/2 cups chopped semi-sweet chocolate (or chocolate chips)
  • 6 eggs
  • 1 cup sugar
  • 1 tablespoon vanilla
  • 3/4 cup cocoa powder (I used a mix of dutch process and regular)
  • 1 teaspoon salt
  • Ingredients for Ganache
  • 12 ounces chocolate chips
  • 1 cup heavy cream

Instructions

    Directions for Mirror Glaze
  1. Bloom the gelatin in cold water. This is quite a bit of gelatin so rather than sprinkling it on top of cold water, quickly stir them together. It should be a thick slurry.
  2. Heat the water, sugar, and condensed milk in a saucepan. Bring it just to a boil and turn off the heat. Stir in the vanilla and bloomed gelatin until it is fully dissolved.
  3. Place the chocolate in a bowl and pour the hot liquid over it. Let the mixture sit for a few minutes until the chocolate is fully melted. Using an immersion blender (or poured into a blender), process until it is very smooth. Be careful not to introduce too many bubbles since every minor imperfection will show on the surface. For the same reason, strain the glaze through a sieve to remove any stray particles.
  4. When the glaze has cooled to 90°F (32°C), it is ready to pour over your entremets. Use a stand or cooling rack to position the entremet and collect the excess below. You can save this and use it for future pours.
  5. Once poured over frozen entremets, the glaze will cool quickly. It will take about 15 minutes until it is fully cooled and solidified. It should be more like a soft ganache-like gel than a hard shell.
  6. Directions for Cake:
  7. Preheat the oven to 350ºF. Grease three 8 inch cake pans (depending on how many layers you want) and line with parchment paper.
  8. Melt the butter and chocolate chips in the microwave or on the stove top.
  9. Meanwhile beat together the eggs and sugar for about five minutes at high speed until pale and more than doubled in volume. Add the vanilla to the eggs and beat until combined. Sift in the cocoa and salt and mix again until combined. Stream in the melted chocolate and butter and beat until combined. Divide into prepared cake pans and bake for about 20-25 minutes or until toothpick comes out with some crumbs attached but no longer wet.
  10. Directions for Ganache
  11. Place the chocolate in a medium-sized bowl and set aside.
  12. Bring cream to a boil in a small saucepan and when it begins to bubble up, pour over the chocolate and let sit for 5 minutes. Gently stir, starting in the middle and working your way outward, until the cream and chocolate are completely mixed. Cover with plastic wrap and set aside. Let the ganache sit at room temperature over night.
http://sayitwithcake.org/flourless-chocolate-torte-2/

]]>
http://sayitwithcake.org/flourless-chocolate-torte-2/feed/ 0
White Vanilla Bean Mousse Layer Cake http://sayitwithcake.org/white-vanilla-bean-mousse-layer-cake/ http://sayitwithcake.org/white-vanilla-bean-mousse-layer-cake/#comments Sun, 03 Sep 2017 21:26:32 +0000 http://sayitwithcake.org/?p=50869 cakewhite
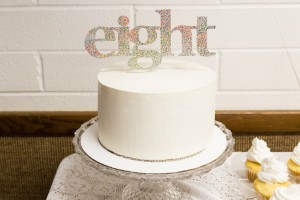
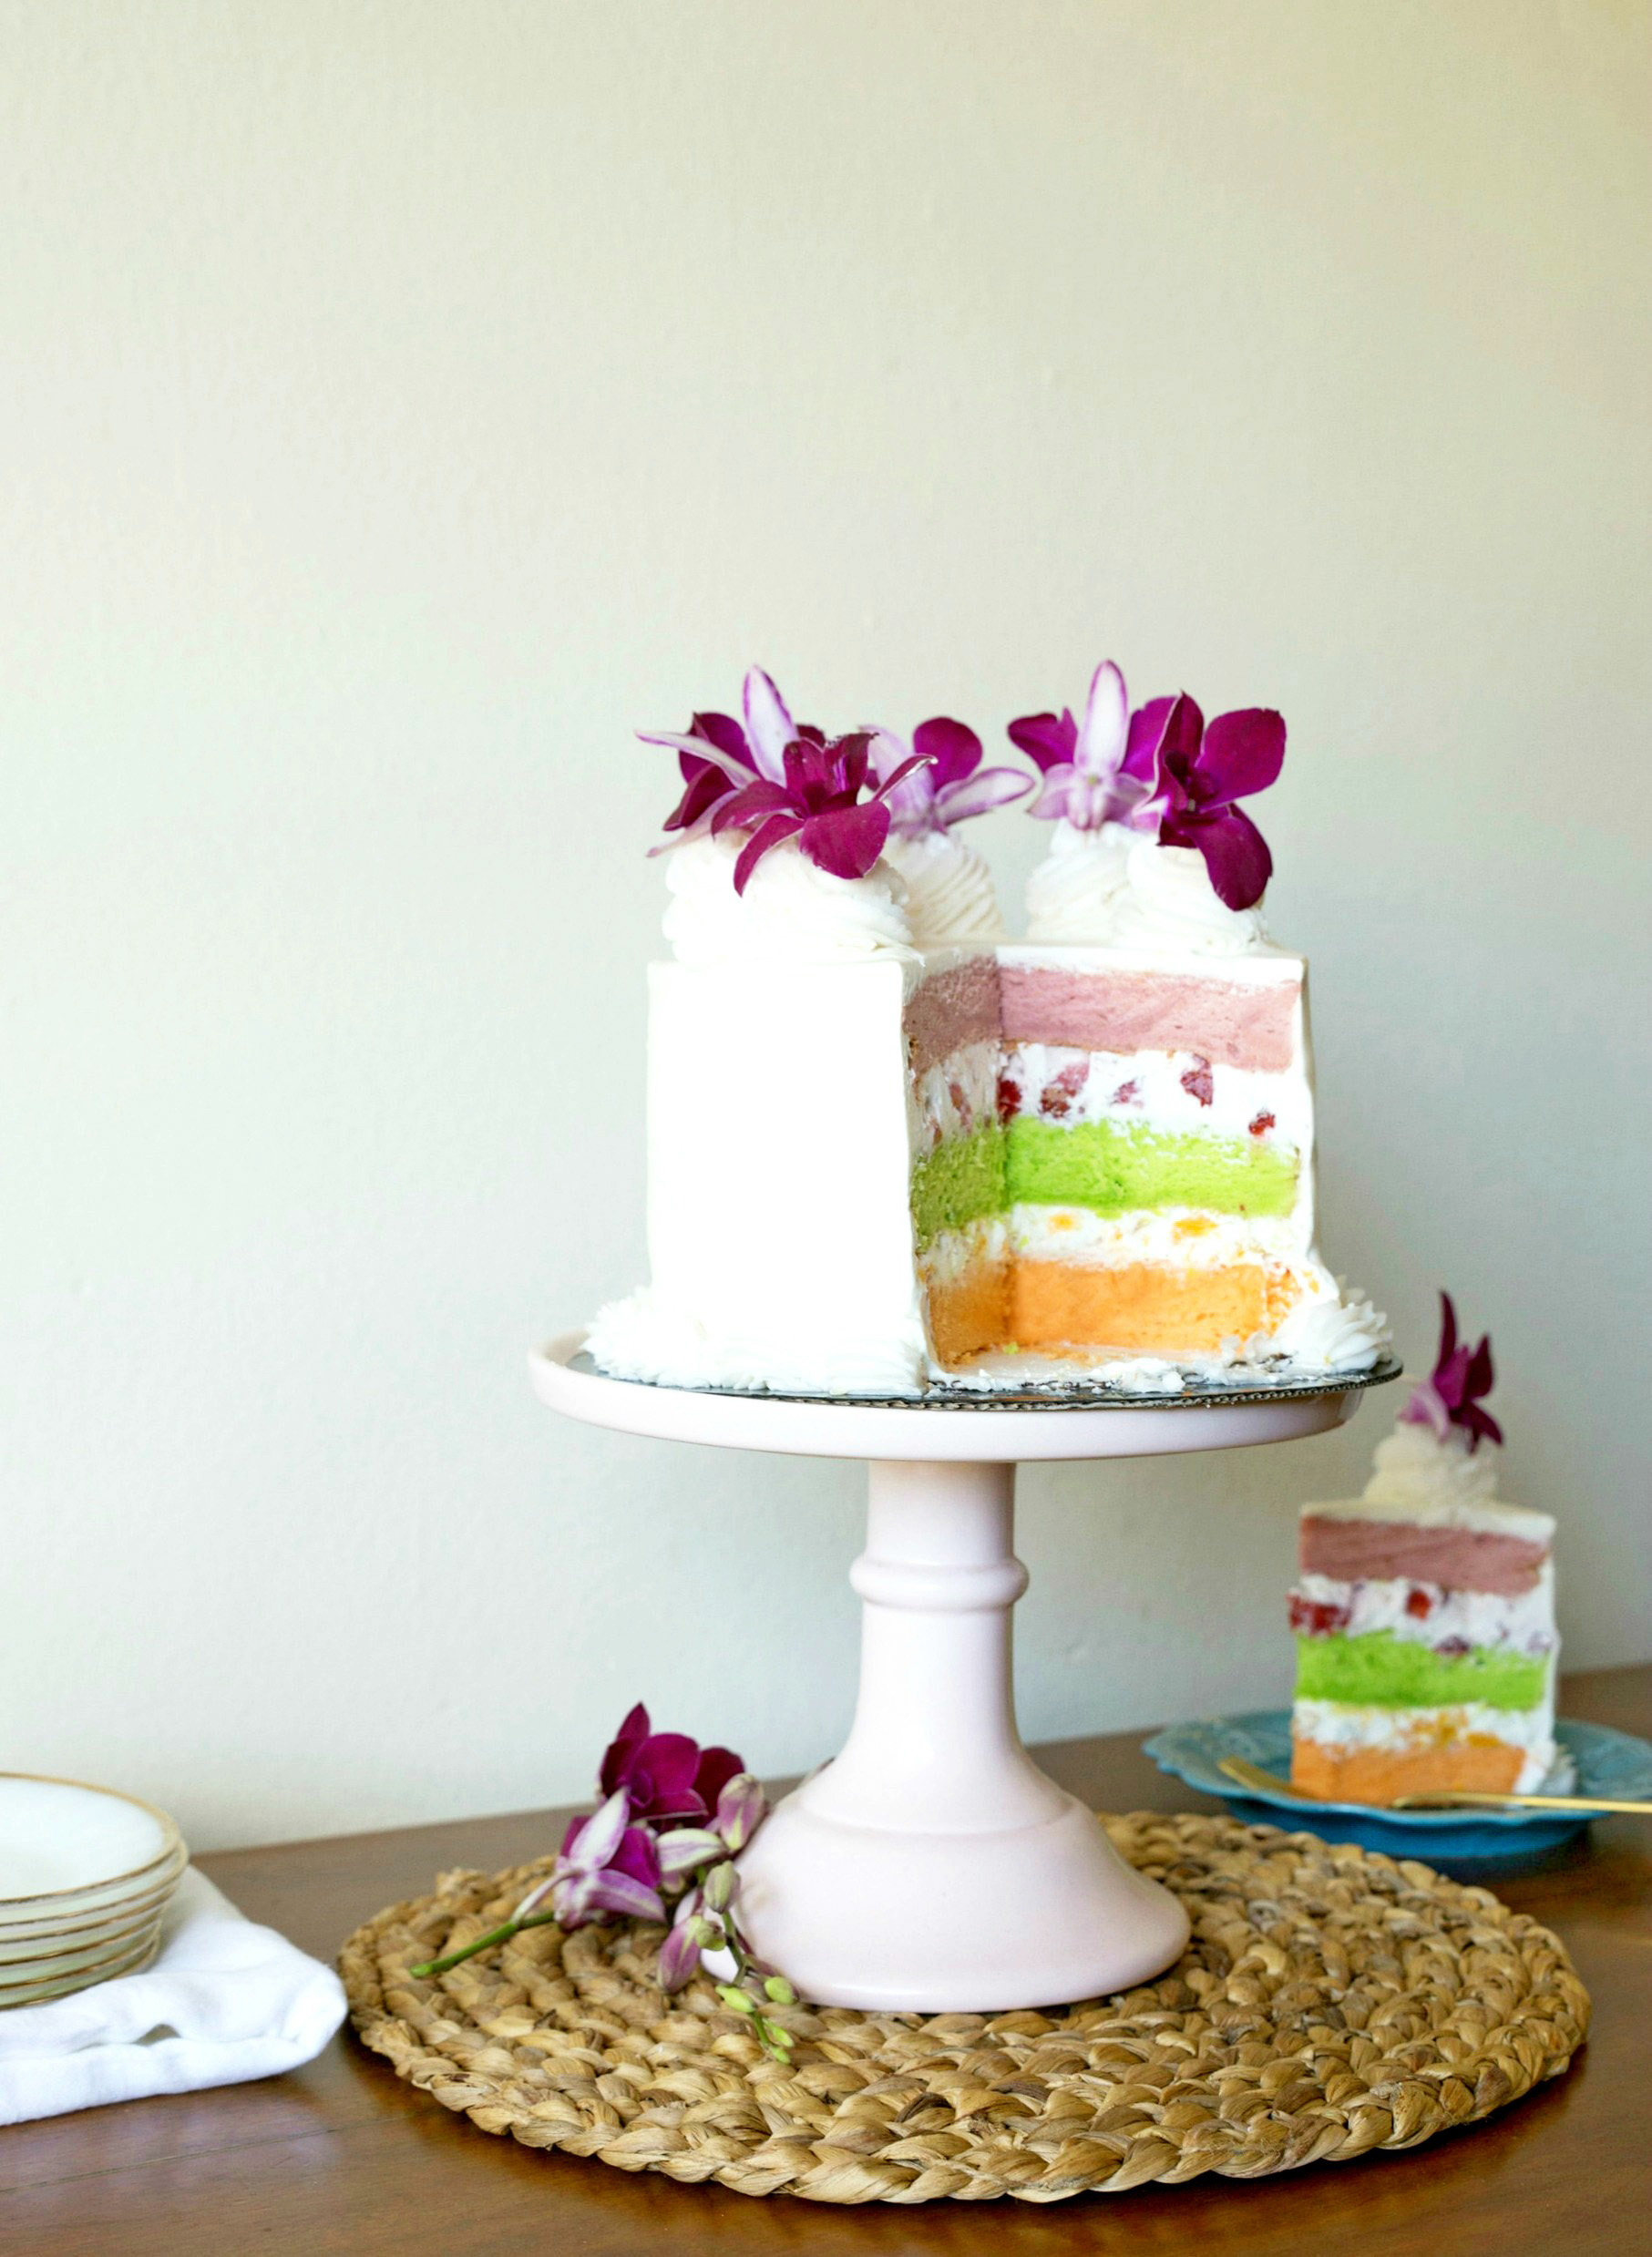
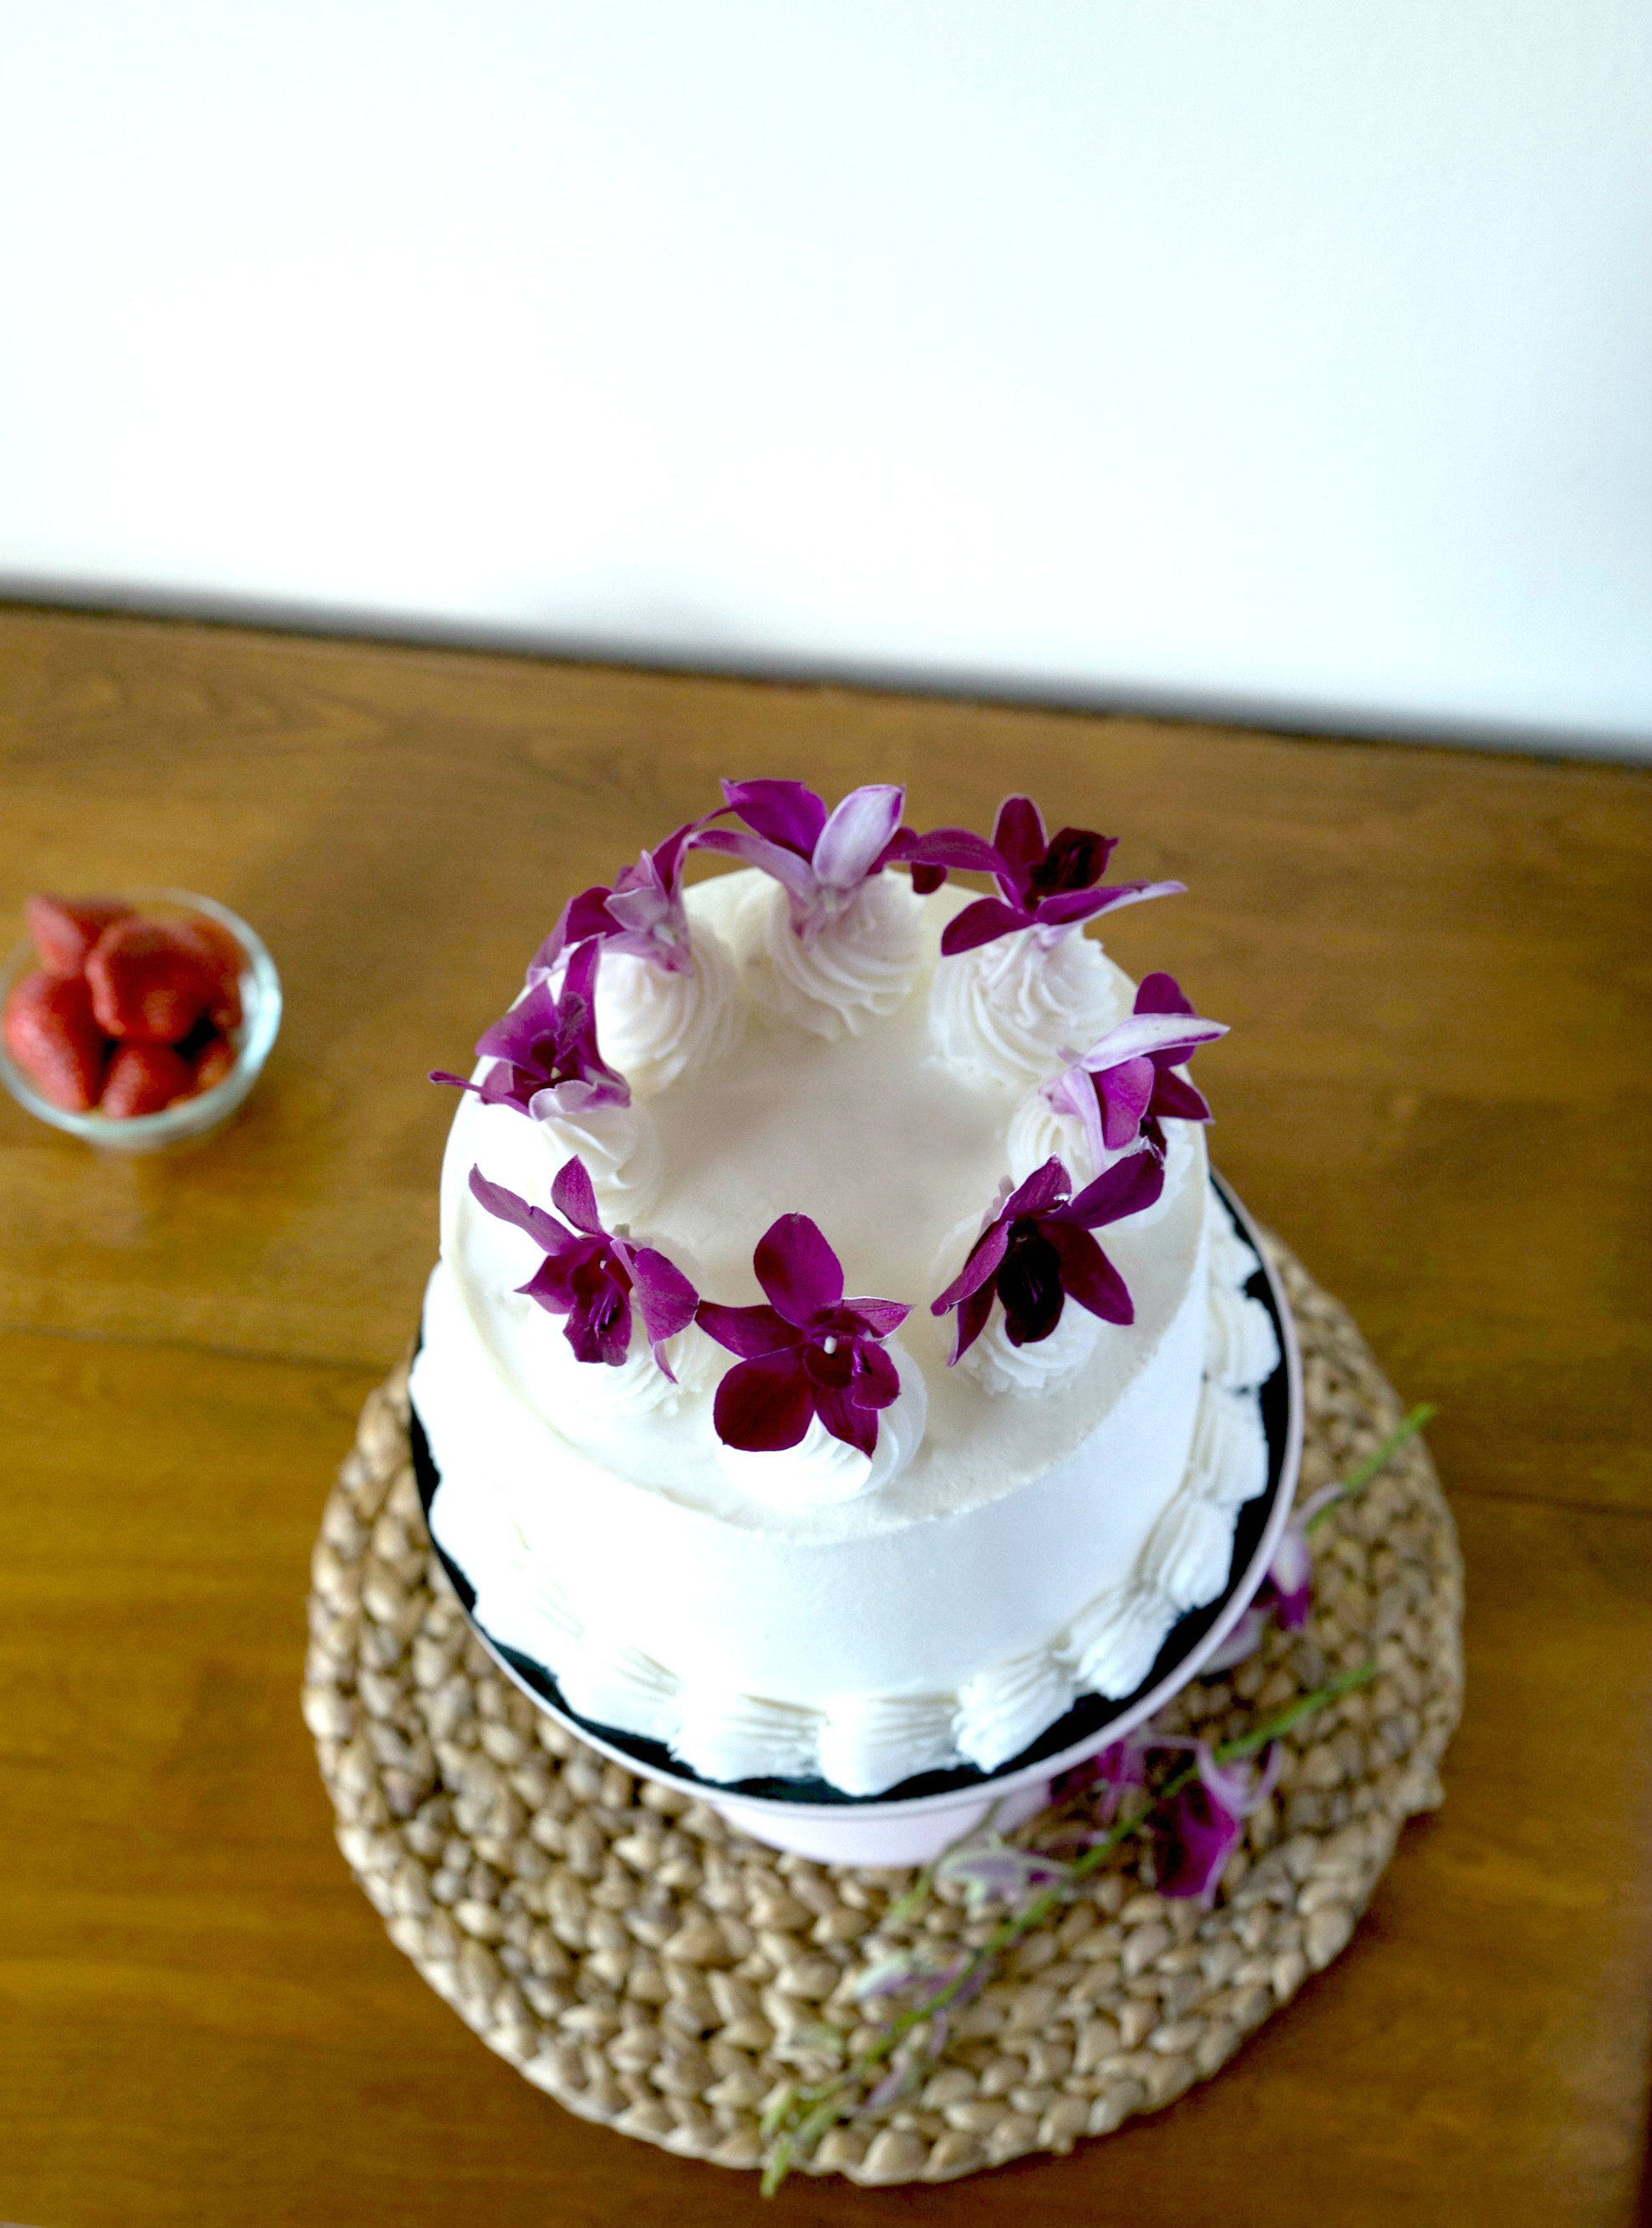
This cake is a 5 layer white vanilla bean cake filled with white chocolate, vanilla mousse and cookie crumbles.  It is frosted with a vanilla bean swiss meringue buttercream frosting. This cake was made to celebrate my nephew Timmys Baptism!

IMG_4443

My sister set up this dessert table for his baptism.  I think it looks so classy and elegant in all white.  Below is my nephew Timmy! He is so cute and I love him so much.

My cake didn’t quite turn out how I planned.  I followed a new recipe from Cake Blog but my cake did not look fluffy like the cake in the picture.  Somehow it was dense, a little chewy and a little rubbery.  I am writing to Carrie to find out what she think might have happened.  I followed the recipe exactly, so I think she will probably be able to tell me where I went wrong.  I’m very bummed because I wanted this cake to be spectacular, since all my family attended and tried the cake :(  I don’t know if I should try the recipe again and see if I can get it right or stick to my usual white cake recipe here. 

photography by Wendycoxphotography

Classic Vanilla Cake by Carrie Sellman

1 1/2 cups butter unsalted at room temperature

2 3/4 cups sugar

9 egg whites at room temperature

4 1/2 cups cake flour sifted twice

2 Tablespoons baking powder

1 1/2 teaspoons salt

2 1/4 cups buttermilk

1 1/2 tablespoons vanilla bean paste

Directions

1. Preheat oven to 350

2. Sift together flour, baking powder, and salt. Set aside. 

3. Stir vanilla bean paste into buttermilk. Set aside.

4. In the bowl of a stand mixer, beat butter and sugar on medium high using the paddle attachment.  Cream until pale and fluffy, about 5 minutes.

5. With the mixer on low, add egg whites one at a time, mixing well after each egg. 

6. Add one third of your dry ingredients and mix until combined.

7. Add on half of your buttermilk. Mix. Alternate ingredients again. Dry, wet, dry and mix gently. Do not over mix.

8. Divide the batter between prepared pans.  (I used five 8 inch pans about one and a half cup of batter in each pan to make thin layers.)

9. Bake 30-33 minutes, rotating pans once.  Cake is finished when a toothpick comes out clean. 

10. Cool 10-20 minutes before inverting cakes from pans.  Cool completely before assembling cake.  Wrap with plastic wrap and refrigerate if not using until tomorrow.  

Cake Soak by Christina Tossi

55 g milk (1/4 cup)
4 g clear vanilla extract (1 teaspoon)

whisk together the milk and vanilla in a small bowl.

Cake Crumb by Christina Tossi

makes about 275 g (2 ¼ cups)

100 g granulated sugar (1/2 cup)
25 g light brown sugar (1 1/2 tablespoons, tightly packed)
90 g cake flour (3/4 cup)
2 g baking powder (1/2 teaspoon)
2 g kosher salt (1/2 teaspoon)
20 g rainbow sprinkles (2 tablespoons)
40 g grapeseed oil (1/4 cup)
12 g clear vanilla extract (1 tablespoon)

1. heat the oven to 300°F.

2. combine the sugars, flour, baking powder, salt, and sprinkles in the bowl of a stand mixer fitted with the paddle attachment and mix on low speed until well combined.

3. add the oil and vanilla and paddle again to distribute. the wet ingredients will act as glue to help the dry ingredients form small clusters; continue paddling until that happens.

4. Bake for 15 minutes at 300°F.

5. let the crumbs cool completely before using in a recipe or scarfing by the handful. stored in an airtight container, the crumbs will keep fresh for 1 week at room temperature or 1 month in the fridge or freezer.

 Swiss Meringue Buttercream by Sayitwithcake

Ingredients

  • 5 large egg whites
  • 1 cup plus 2 tablespoons sugar
  • Pinch of salt
  • 1 pound (4 sticks) unsalted butter, cut into tablespoons, room temperature
  • 1 1/2 teaspoons pure vanilla extract
  • 1 vanilla bean or 2 TB of vanilla bean paste

Instructions

  1. Combine egg whites, sugar, and salt in the heatproof bowl of a standing mixer set over a pan of simmering water. Whisk constantly by hand until mixture is warm to the touch and sugar has dissolved (the mixture should feel completely smooth when rubbed between your fingertips).
  2. Attach the bowl to the mixer fitted with the whisk attachment. Starting on low and gradually increasing to medium-high speed, whisk until stiff (but not dry) peaks form. Continue mixing until the mixture is fluffy and glossy, and completely cool (test by touching the bottom of the bowl), about 10 minutes.
  3. With mixer on medium-low speed, add the butter a few tablespoons at a time, mixing well after each addition. Once all butter has been added, whisk in vanilla and scrape the vanilla from the pod into the mixture. Switch to the paddle attachment, and continue beating on low speed until all air bubbles are eliminated, about 2 minutes. Scrape down sides of bowl with a flexible spatula, and continue beating until the frosting is completely smooth. Keep buttercream at room temperature if using the same day.

Vanilla bean white chocolate mousse by Sayitwithcake
  • 6 Tablespoons unsalted butter
  • 15.5 oz. high-quality white chocolate (chopped)
  • 1 3/4 cups heavy whipping cream
  • 2/3 cup powdered sugar
  • 1 1/2 teaspoons vanilla extract
  • 2 teaspoons unflavored gelatin
  • 2.5 Tablespoons cool water

To make chocolate mousse filling:
    1. In a small dish soften 2 teaspoon unflavored gelatin in 2.5 tablespoons cool water, set aside.
    2. In a heat-proof bowl combine chopped semi-sweet chocolate, white chocolate and butter. Melt over double boiler or microwave. Stir until smooth and set aside to cool.
    3. Heat softened gelatin on low heat and stir to dissolve and became completely free of lumps, set aside to cool.
    4. Mix 1 3/4 cups heavy cream and vanilla extract until medium peaks form, gradually adding powdered sugar. Mix in gelatin.
    5. Stir a few tablespoons of whipped cream into melted chocolate mixture to lighten it. Then transfer chocolate mixture into remaining whipped cream and gently fold in with a spatula, scraping the bottom to incorporate the cream completely.
]]>
http://sayitwithcake.org/white-vanilla-bean-mousse-layer-cake/feed/ 2
German Chocolate Cake http://sayitwithcake.org/german-chocolate-cake/ http://sayitwithcake.org/german-chocolate-cake/#comments Mon, 21 Aug 2017 05:04:05 +0000 http://sayitwithcake.org/?p=50759 germancake1This delicious German Chocolate cake is a 12 layer cake when you include all the fillings! It has layers of chocolate cake, malt milk soak, crack pie coconut filling, pecan crunch filling, chocolate frosting, and coconut pecan frosting. It is based on the Milk Bar’s German Chocolate Jimbo Cake. I made this cake for my husbands birthday.  This cake has a lot of steps and components, but if you make them ahead of time it is very easy to put together the day before the event!  For me, the best part of this cake is the crack pie filling.  When I make it again, I will double the crack pie filing recipe! I also think I would use less of the pecan filling because when I cut the cake, it divided at the pecan crunch layer on all the slices.  If I used less, then it might stick together better.  Or I might use the left over fudge sauce over the pecan layer to help it stick better. I followed this recipe from Christina Tossi exactly.  Its really important to have all the ingredients from this recipe and try not to substitute on your own.  The crack pie filling tastes awesome, and it is those hard to find ingredients like the corn powder that make it that way.  Some of the ingredients were very hard to find.  The feuilletine was hard to find.  I ended up using rice crispies. She says in a pinch you can use those, or cornflakes.  I could not find corn powder either, so I made my own.  I bought dehydrated corn, and ground it up into a powder.  The glucose was also hard to find, so I ordered it online.  My cake came out darker then the original Milk bar cake because I used dark chocolate cocoa powder, but it turned out good that way.

Photography by Wendycoxphotography

Milk Bar’s German Chocolate Cake Recipe by Christina Tossi

  Ingredients

  1. For the fudge sauce:
  2. 1 ounce 72 percent chocolate, chopped
  3. 2 tablespoons cocoa powder
  4. 1/8 teaspoon kosher salt
  5. 1/4 cup glucose
  6. 2 tablespoons sugar
  7. 1/4 cup heavy cream
  1. For the chocolate cake:
  2. 1 stick butter, room temperature
  3. 1 1/2 cups granulated sugar
  4. 3 eggs
  5. 1/2 cup buttermilk
  6. 1/4 cup grape-seed oil
  7. 3 tablespoons fudge sauce
  8. 1 teaspoon vanilla extract
  9. 1 1/4 cups cake flour
  10. 1/2 cup cocoa powder
  11. 1 1/2 teaspoons baking powder
  12. 1 1/2 teaspoons kosher salt
  1. For the chocolate malt cake soak:
  2. 1/4 cup milk
  3. 2 tablespoons Ovaltine powder
  1. For the crack-coconut filling:
  2. 2/3 cup granulated sugar
  3. 3 tablespoons light brown sugar
  4. 1 tablespoon milk powder
  5. 1 tablespoon corn powder
  6. 1/2 teaspoon kosher salt
  7. 4 tablespoons butter, melted
  8. 3 tablespoons heavy cream
  9. 1/4 teaspoon vanilla extract
  10. 2 egg yolks
  11. 1 cup sweetened coconut
  1. For the pecan crunch:
  2. 3/4 cup pecans, chopped
  3. Splash grape-seed oil
  4. 1/2 teaspoon salt
  5. 1 tablespoon light brown sugar
  6. 3/4 cup feuilletine
  1. For the chocolate malt frosting:
  2. 1 stick butter, room temperature
  3. 1 cup powdered sugar
  4. 1/2 teaspoon kosher salt
  5. 1/4 cup cocoa powder
  6. 2 tablespoons whole milk
  1. 1/4 cup sweetened coconut, toasted, for garnish
  1. Special equipment:
  2. 1 (6-inch) cake ring
  3. 2 strips acetate, each 3 inches wide and 20 inches long

Directions

  1. Make the fudge sauce: Combine the chocolate, cocoa powder, and salt in a medium bowl.
  2. Combine the glucose, sugar, and heavy cream in a heavy-bottomed saucepan, and stir intermittently while bringing it to a boil over high heat. The moment it boils, pour it into the bowl holding the chocolate. Let sit for 1 full minute.
  3. Slowly, slowly begin to whisk the mixture. Then continue, increasingly the vigor of your whisking every 30 seconds, until the mixture is glossy and silky smooth. This will take 2 to 4 minutes, depending on your speed and strength. You can use this sauce at this point, or store it in an airtight container in the fridge for up to 2 weeks; do not freeze.
  1. Make the chocolate cake: Heat the oven to 350°F.
  2. Combine the butter and sugar in the bowl of a stand mixer fitted with the paddle attachment, and cream together on medium high for 2 to 3 minutes. Scrape down the sides of the bowl, add the eggs, and mix on medium high for 2 to 3 minutes. Scrape down the sides of the bowl once more.
  3. On low speed, stream in the buttermilk, oil, fudge sauce, and vanilla. Increase the mixer speed to medium high, and paddle for 4 to 6 minutes, until the mixture is practically twice the size of your original fluffy butter-and-sugar mixture and completely homogeneous. Don’t rush the process. You’re basically forcing too much liquid into an already fatty mixture that doesn’t want to make room for that liquid. There should be no streaks of fat or liquid. Stop the mixer, and scrape down the sides of the bowl.
  4. On very low speed, add the cake flour, baking powder, salt, and cocoa powder. Mix for 45 to 60 seconds, just until your batter comes together. Scrape down the sides of the bowl.
  5. Spray a quarter sheet pan with nonstick cooking spray, and line it with parchment, or just line the pan with a Silpat. Using a spatula, spread the cake batter in an even layer in the pan.
  6. Bake the cake for 30 to 35 minutes. The cake will rise and puff, doubling in size, but will remain slightly buttery and dense. At 30 minutes, gently poke the edge of the cake with your finger: the cake should bounce back slightly, and the center should no longer be jiggly. Leave the cake in the oven for an extra 3 to 5 minutes if it doesn’t pass these tests.
  7. Take the cake out of the oven, and cool on a wire rack or, in a pinch, in the fridge or freezer (don’t worry, it’s not cheating). The cooled cake can be stored in the fridge, wrapped in plastic wrap, for up to 5 days.
  1. Make the malt cake soak: Whisk together the milk and Ovaltine in a small bowl.
  1. Make the crack-coconut filling: Heat the oven to 325°F.
  2. Combine the granulated sugar, brown sugar, milk powder, corn powder, and salt in the bowl of a stand mixer fitted with the paddle attachment, and mix on low speed until evenly blended.
  3. Add the melted butter, and paddle for 1 minute until all the dry ingredients are moist.
  4. Add the heavy cream and vanilla, and continue mixing on low for 1 minute until any white streaks from the cream have completely disappeared into the mixture. Scrape down the sides of the bowl with a spatula.
  5. Add the egg yolks, paddling them into the mixture just to combine. Be careful not to aerate the mixture, but be certain the mixture is glossy and homogeneous. Mix on low speed until it is.
  6. Line the bottom and sides of a small baking pan with plastic wrap. Pour the crack pie filling into the pan, put the pan into the oven, and bake for 8 to 10 minutes. Gently shake the pan. The crack pie filling should be firmer and more set toward the outer boundaries of the baking pan but slightly jiggly and loose in the center. If the crack pie filling is jiggly all over, give it 2 to 3 minutes.
  7. Once cooled, mix the crack pie filling with the sweetened coconut. This filling can be used immediately or stored in an airtight container in the refrigerator for a week.
  1. Make the pecan crunch: Heat the oven to 325°F.
  2. Put the pecans on a sheet pan, and toast them in the oven for 15 minutes.
  3. Puree the warm pecans in a food processor with a splash of grape-seed oil, salt, and light brown sugar.
  4. In a small bowl, combine the pecan puree with the feuilletine. The crunch can be stored in an airtight container at room temperature for 5 days or in the fridge for up to 2 weeks.
  1. Make the chocolate malt frosting: Combine the butter, sugar, salt, and cocoa powder in the bowl of a stand mixer fitted with the paddle attachment, and cream them together on medium high for 5 to 7 minutes, until the mixture is smooth and fluffy. Scrape down the sides of the bowl.
  2. With the mixer at its lowest speed, stream in the milk. Crank the mixer up to medium high, and beat for 2 to 3 minutes, until the mixture is silky smooth and a glossy. Scrape down the sides of the bowl. Use the frosting immediately, or store it in an airtight container in the fridge for up to 1 week.
  1. Assemble the German chocolate Jimbo layer cake: Put a piece of parchment or a Silpat on the counter. Invert the cake onto it, and peel off the parchment or Silpat from the bottom of the cake. Use the cake ring to stamp out 2 circles from the cake. These are your top 2 cake layers. The remaining cake scraps will come together to make the bottom layer of the cake.
  2. Clean the cake ring, and place it in the center of a sheet pan lined with clean parchment or a Silpat. Use 1 strip of acetate to line the inside of the cake ring.
  3. Put the cake scraps together inside the ring, and use the back of your hand to tamp the scraps together into a flat even layer
  4. Dunk a pastry brush in the malt cake soak and give the layer of cake a good, healthy bath of the soak.
  5. Use the back of a spoon to spread 1/2 recipe of the crack-coconut filling in an even layer over the cake.
  6. Sprinkle half of the pecan crunch evenly over the crack-coconut filling. Use the back of your hand to anchor it in place.
  7. Use the back of a spoon to spread 1/3 of the chocolate malt frosting over the pecan crunch layer.
  8. With your index finger, gently tuck the second strip of acetate between the cake ring and the top 1/4 inch of the first strip of acetate, so you have a clear ring of acetate 5 to 6 inches tall  high enough to support the height of the finished cake. Set a cake round on top of the frosting, and repeat the process for layer 1 (if 1 of your 2 cake rounds is less attractive than the other, use it here in the middle, and save the prettier one for the top).
  9. Nestle the remaining cake round into the frosting. Cover the top of the cake with the remaining frosting. Give it volume and swirls, or do as we do and opt for a perfectly flat top. Garnish the frosting with toasted, sweetened coconut.
  10. Transfer the sheet pan to the freezer, and freeze for a minimum of 12 hours to set the cake and fillings. The cake will keep in the freezer for up to 2 weeks.
  11. At least 3 hours before you are ready to serve the cake, pull the sheet pan out of the freezer, and using your fingers and thumbs, pop the cake out of the cake ring. Gently peel off the acetate, and transfer the cake to a platter or cake stand. Let it defrost in the fridge for a minimum of 3 hours (wrapped well in plastic, the cake can be refrigerated for up to 5 days).
  12. Slice the cake into wedges, and serve.

]]>
http://sayitwithcake.org/german-chocolate-cake/feed/ 0
Strawberry Chocolate Mousse Cake http://sayitwithcake.org/strawberry-chocolate-mousse-cake/ http://sayitwithcake.org/strawberry-chocolate-mousse-cake/#comments Wed, 16 Aug 2017 21:10:29 +0000 http://sayitwithcake.org/?p=50628 kkjkkjkjkjkjkj

This strawberry chocolate mousse cake is a moist, dark chocolate cake, topped with fresh strawberries, rich chocolate mousse, covered with chocolate ganache, and garnished with blackberries, raspberries, strawberries, mangoes, and kiwis.

I made this cake for my sweet niece, Marie, who turned 5! She loves chocolate and strawberries, so I combined the two and the result was great! I had only made strawberry filling with white cake before.  Then I thought about chocolate covered strawberries, and I thought the flavors went well together.  So now this cake is like a giant chocolate covered strawberry!

IMG_3083


kkjkkjkjkjkjkj

I love this recipe for the chocolate mousse.  It holds up well and doesn’t melt easily.  I will be using this recipe again in the future.  I think the trick for making this perfect consistency for the mousse was using gelatin in the recipe. IMG_3098

What I love about this strawberry chocolate mousse cake is that there is a strawberry in every bite!  The sweetness of the strawberries really balances the rich chocolate in the mousse and ganache.

The fresh fruit on top of the cake really makes it look elegant.  The fruit glaze preserves the fruit so it will stay fresh for a few days.

Auto Draft

Ingredients

    Chocolate cake
  • 1 cup sugar
  • 3/4 cup + 2 tablespoons all-purpose flour
  • 1/4 cup + 2 tablespoons cocoa
  • 3/4 teaspoon baking powder
  • 3/4 teaspoon baking soda
  • 1/2 teaspoon salt
  • 1 egg
  • 1/2 cup milk
  • 1/4 cup vegetable oil
  • 1 teaspoon vanilla extract
  • 1/2 cup boiling water
  • Chocolate Mousse:
  • 6 Tablespoons unsalted butter
  • 12 oz. high-quality semisweet chocolate(chopped)
  • 3.5 oz.white chocolate(chopped)
  • 1 3/4 cups heavy whipping cream
  • 2/3 cup powdered sugar
  • 1 1/2 teaspoons vanilla extract
  • 2 teaspoons unflavored gelatin
  • 2.5 Tablespoons cool water
  • Chocolate ganache
  • 24 oz. chocolate chopped
  • 2 cups cream
  • For filling
  • 2 quarts strawberries ( try to find small strawberries)

Instructions

    To make the chocolate cake :
  1. Preheat the oven to 350°F, grease 9 inch round baking pan and line the bottom with parchment paper. (for this step DO NOT use springform pan because the batter is very runny, it might leak)
  2. In a large bowl stir together dry cake ingredients: sugar, flour, cocoa, baking powder, baking soda and salt.
  3. Add egg, milk, oil and vanilla and mix on medium speed for 2 minutes. Add ½ cup boiling water and mix until combine.
  4. Pour the batter in the pan and bake until toothpick inserted in center comes out clean (25-35 minutes). Cool 10 minutes in the pan, than remove from pans to wire racks upside down (this flattens domed cakes) and cool completely.
  5. To make chocolate mousse filling:
  6. In a small dish soften 2 teaspoon unflavored gelatin in 2.5 tablespoons cool water, set aside.
  7. In a heat-proof bowl combine chopped semi-sweet chocolate, white chocolate and butter. Melt over double boiler or microwave. Stir until smooth and set aside to cool.
  8. Heat softened gelatin on low heat and stir to dissolve and became completely free of lumps, set aside to cool.
  9. Mix 1 3/4 cups heavy cream and vanilla extract until medium peaks form, gradually adding powdered sugar. Mix in gelatin.
  10. Stir a few tablespoons of whipped cream into melted chocolate mixture to lighten it. Then transfer chocolate mixture into remaining whipped cream and gently fold in with a spatula, scraping the bottom to incorporate the cream completely.
  11. To make the ganache
  12. pour chocolate into a bowl
  13. pour cream into a pot and cook until it starts to bubble up and pour right away over the chocolate.
  14. let it sit for 5 minutes, then whisk until it is completely smooth.
  15. let it set overnight or until desired consistency.
  16. To assemble the cake
  17. Put the cake onto a cake board or a serving plate and set the 9 inch ring from the spring form pan around the cake.
  18. spread a thin layer of the mousse on the cake.
  19. cut the stem ends off the strawberries and place them around in the pan to fill the whole bottom of the cake.  If some strawberries are too tall, cut off more stem so they are all the same size.  You don't want any strawberries sticking up too high over the top of the spring form pan.
  20. Put the mousse in a piping bag and fill in all the gaps around the strawberries.  Spread the remaining mousse over the top and put it in the fridge 4-6 hours or overnight to set.
  21. Make the ganache, and let it set at room temperature overnight.
  22. After the mousse has set, spread the ganache on the cake and place in fridge until the ganache has set.  Make sure the sides and top of the cake are smooth and has no bumps, or holes.  Any imperfections will show when you glaze the cake with ganache.
  23. Place the cake on a bowl over a cooling rack over a cookie sheet with rims.  Pour the ganache over the cake and let it set.
  24. Glaze the fruit and place on top  of the cake.
  25. How to Smooth Ganache on a cake
  26. Frost your cake with ganache when it is the consistency of peanut butter.  Get it as smooth as you can with your bench scraper.  If you see holes fill it up with ganache then smooth it again.  Place in the fridge to set.  Take a bowl of boiling hot water and place your bench scraper inside the water. After it is hot, hold it against your cake at a 45 degree angle.  Spin the turntable all the way around without stopping.  Do the top this way as well.  After that, clean up the edges.  Refrigerate to set the ganache.  Then repeat again until it is as smooth as you want it to be.  This is how to smooth ganache on a cake.  After it is smooth, you can pour ganache over for a flawless finish!  I poured on the ganache when it was too thick, so it didn't look how I expected.  Next time, I will pour on the ganache when it is thinner.
  27. How to glaze fruit for the top of the cake
  28. In the microwave, melt a little apricot jelly with some water(JELLY ONLY, not jam or preserves).  When it has cooled a little, dip a pastry brush in the glaze, and paint it on top of the fruit you want to glaze.
http://sayitwithcake.org/strawberry-chocolate-mousse-cake/

Enjoy!

xoxo Shamene

Other cakes you may like!

Strawberry Tres Leche cake

naked cake

Strawberry passion fruit Cake

Strawberry Layer Cake

]]>
http://sayitwithcake.org/strawberry-chocolate-mousse-cake/feed/ 0
Triple Berry Layer Cake http://sayitwithcake.org/triple-berry-layer-cake/ http://sayitwithcake.org/triple-berry-layer-cake/#comments Fri, 04 Aug 2017 22:47:07 +0000 http://sayitwithcake.org/?p=50170  31This triple berry cake is a three layer white almond sour cream cake, filled with whipped cream and strawberries, raspberries, and blueberries.  It is frosted with cream cheese whipped cream, and topped with strawberries, raspberries, and blueberries.

I made this cake for my Aunt Teresa’s birthday! At first I wasn’t going to use a dam, but now I am glad I did.  It kept the berry filling in nicely, with no bulges.  It held up well during the photo shoot by my sister Wendy, and also in the car ride.  I used two different kinds of buttercream for the dam.  I made the first with buttercream frosting, and the other with blackberry Swiss meringue buttercream.  I also put some of that underneath the berries.
Above is the white almond sour cream cakes.  You can see from the picture that they do not have any brown crust on the edges! This comes from using cooking strips and baking the cake at a lower temperature.  I love how they turned out!
Here, you can see the blackberry Swiss meringue buttercream dam that I used.  I simply piped a ring of buttercream about 1/2 inch from the edge of the cake.  I spread whipped cream on the bottom, then filled it up with fresh berries.  After that, I covered the top of the filling with more whipped cream.  There should be berries in every bite!
I love these photos my sister took of the cake!
Summer is the perfect time to make this cake.  The berries are all in season, and the flavor is sweet and fresh.
Photography by Wendy Cox Photography
Triple Berry Layer Cake

Ingredients

    White Almond Sour Cream CAKE
  • 2 white cake mix
  • 2 cups all purpose flour
  • 2 cups granulated sugar
  • 1 1/2 tsp. salt
  • 8 egg whites
  • 2 2/3 cups water
  • 4 TBS vegetable oil
  • 2 cups (16 oz..) sour cream
  • 2 tsp. clear vanilla
  • 2 tsp. almond extract 
  • Whipped Cream Icing
  • 1 eight oz. package reduced fat cream cheese (room temperature)
  • 1/2 cup of white sugar
  • 1 tsp vanilla extract
  • 1/8 tsp almond extract
  • 1 quart of heavy or regular whipping cream

Instructions

    Cake
  1. Mix all dry ingredients by hand using a whisk in a very large mixing bowl.
  2. Add the liquid ingredients and beat on low speed for 2-3 minutes, until well combined.
  3. Bake at 300° (time depends on the size pans used*)for 20 minutes then at 325 for 10 minutes. Make sure you grease and flour your pan, and USE BAKING STRIPS! This is the trick to get a crust free cake, and level on top. If you don't have cake strips use cut up towels soak in water and safety pin around the cake pan. I measured out one and a half cups of batter for each pan. I cooked each layer by itself in the oven.  This recipe made five 8 inch cakes.
  4. Whipped cream icing
  5. Combine all ingredients except the whipping cream by using a regular or stand mixer.
  6. Whip until it is smooth and creamy.
  7. While the mixer is still running, slowly add the cream.
  8. Continue to whip until stiff peaks form.
  9. To assemble the cake:
  10. Place the first layer of cake on top of a cake board with a bit of frosting to secure.
  11. Pipe a dam with buttercream frosting about 1/2 inches from edge of cake.
  12. Fill cake with strawberries, blueberries, and raspberries, and frost a layer of whipped cream over the top.  Be careful not to go over the top of the dam.
  13. Place second layer of cake and repeat steps 1-3.  With this cake recipe you will have about 5 eight inch cakes.  You can use all cakes to make a 5 layer cake if you wish.  If you do this, I would double the whipped cream recipe.  For this cake, I used 3 cake layers.
  14. Frost the cake with whipped cream and let set in the refrigerator for an hour.
  15. Decorate the top of the cake with berries and flowers if you like.  Also you can swipe the sides of the cake with an offset spatula to make the color texture.
http://sayitwithcake.org/triple-berry-layer-cake/

ENJOY!

Shamene

]]>
http://sayitwithcake.org/triple-berry-layer-cake/feed/ 0
Blackberry Layer Cake http://sayitwithcake.org/blackberry-layer-cake/ http://sayitwithcake.org/blackberry-layer-cake/#comments Fri, 28 Jul 2017 18:32:07 +0000 http://sayitwithcake.org/?p=49941 blackberrycake12This cake is a white WASC (white, almond, sour cream) cake with blackberry filling, frosted with blackberry Swiss Meringue buttercream, and topped with fresh blackberries!

I grew up in a small town in Northern California called Loleta.  Over by our good friends the Meyers house, there was a huge blackberry patch growing by the side of a dirt road.  Every summer my family and I would go pick blackberries as soon as they were ripe.  I remember bringing my Aunt Teresa, Julie, and Grandma over there to pick blackberries when they would come visit.  My sister Katy actually fell into the blackberry bush when she was young and got a giant cut on her leg.  Every time we see her scar we remember picking blackberries in Loleta lol.  At night after a great harvest of blackberries we would have vanilla ice cream and mix in the fresh blackberries! So delicious! I absolutely love those flavors together, and made this cake to taste like my favorite dessert when I was growing up.


I got my inspiration for this cake from the cakeblog.  When I saw the blackberry buttercream, I knew I had to try to make this cake! I love the blackberries with flowers on top of the cake and did my best to replicate it.  Instead of the lime cake, I used my favorite white almond sour cream cake recipe.  I love how the cake turned out so white against the blackberry filling.  By following this recipe your cake will not having any brown crust on it, and you will only see beautiful, yummy, white cake!  I also switched things up by using my blackberry filling instead of the Swiss meringue buttercream.  I love the contrast with the white cake, and also this filling has such a strong blackberry taste.  I frosted the cake using my Swiss Meringue buttercream recipe and added blackberry reduction.

When making this cake, you only have to make a blackberry reduction once, and just take out 3 TBS of the reduction to use for the Swiss meringue buttercream.   When making the reduction, it always seems to take longer then I think it will. So leave plenty of time for this step. The great part about using the blackberries in the frosting is that it turns the frosting a beautiful lavender color and has specks of berries in it.  The frosting is so delicious!

blackberrycake12

Blackberry Layer Cake

Ingredients

    WASC CAKE
  • 2 white cake mix
  • 2 cups all purpose flour
  • 2 cups granulated sugar
  • 1 1/2 tsp. salt
  • 8 egg whites
  • 2 2/3 cups water
  • 4 TBS vegetable oil
  • 2 cups (16 oz.) sour cream
  • 2 tsp. clear vanilla
  • 2 tsp. almond extract
  • Blackberry Filling
  • 24 ounces fresh blackberries
  • 2 sticks unsalted butter
  • 1 teaspoon lemon juice
  • big pinch of kosher salt
  • 3  ½ to 4  ½ cups powdered sugar
  • Blackberry Swiss meringue buttercream
  • 6 egg whites
  • 1 1/2 cups sugar
  • 1 1/2 cups butter softened
  • 1 tsp.  vanilla
  • 3 TBS blackberry reduction

Instructions

    WASC CAKE
  1. Mix all dry ingredients by hand using a whisk in a very large mixing bowl.
  2. Add the liquid ingredients and beat on low speed for 2-3 minutes, until well combined.
  3. Bake at 300° (time depends on the size pans used*)for 20 minutes then at 325 for 10 minutes. Make sure you grease and flour your pan, and USE BAKING STRIPS! This is the trick to get a crust free cake, and level on top. If you don’t have cake strips use cut up towels soak in water and safety pin around the cake pan. I measured out one and a half cups of batter for each pan. I cooked each layer by itself in the oven.  This recipe made five 8 inch cakes.
  4. Blackberry filling
  5. In a medium to large saucepan, cook down the blackberries until they’ve broken down and released their juices. They will be floating in their own liquid,  super saucy. If you use frozen, this will take a little longer. Strain cooked down blackberries in a fine meshed sieve into a bowl, pressing down on them to get every bit of liquid out. You should have about 1 cup blackberry juice. Place this back in a clean saucepan, and cook down until reduced to ½ cup. It should be thick  like chocolate syrup, and will be dark blood red. Set aside until completely cool (I put it in the fridge).
  6. In a bowl, beat the two sticks of butter until creamy. Add in 2 cups of powdered sugar, the reduced blackberry  juice, (SAVE  3 TBS FOR THE FROSTING )the lemon juice and huge pinch of kosher salt. Beat until creamy and uniform in color. Continue adding powdered sugar until you get a nice, thick, but still creamy consistency. I used a little less than 3 ½ cups. If you end up adding too much, drizzle in a couple of tablespoons of milk or cream until you reach the desired consistency. Set aside covered, at room temperature, until ready to assemble the cake.
  7. Blackberry Swiss Meringue buttercream
  8. Combine egg whites, sugar, and salt in the heatproof bowl of a standing mixer set over a pan of simmering water. Whisk constantly by hand until mixture is warm to the touch and sugar has dissolved (the mixture should feel completely smooth when rubbed between your fingertips or gets to 140 degrees F ).
  9. Attach the bowl to the mixer fitted with the whisk attachment. Starting on low and gradually increasing to medium-high speed, whisk until stiff (but not dry) peaks form. Continue mixing until the mixture is fluffy and glossy, and completely cool (test by touching the bottom of the bowl), about 10 minutes. Set your timer, it makes life much simpler.
  10. With mixer on medium-low speed, add the butter a few tablespoons at a time, mixing well after each addition. If for some reason your frosting now resembles curdled milk, don’t freak out, just keep beating it; it will come back I promise. Once all butter has been added, whisk in vanilla and the blackberry reduction. Switch to the paddle attachment, and continue beating on low speed until all air bubbles are eliminated, about 2 minutes. Scrape down sides of bowl with a flexible spatula, and continue beating until the frosting is completely smooth. Keep butter cream at room temperature if using the same day. This frosting can be made ahead and refrigerated, if you do that, make sure you let it get to room temp before you re-beat it. If you are using the next day, simply take it out the refrigerator the night before and let it sit on the counter, it will be the perfect temperature to whip the next morning. .
http://sayitwithcake.org/blackberry-layer-cake/


Enjoy!

Shamene


Other berry cakes you might enjoy!


lemon blueberry layer cake

lemon blueberry layer cake


Dark Chocolate Raspberry Cake

Dark Chocolate Raspberry Cake


Chocolate Raspberry Mud Cake

Chocolate Raspberry Mud Cake

]]>
http://sayitwithcake.org/blackberry-layer-cake/feed/ 2
Giant Peanut Butter Cup Cake http://sayitwithcake.org/giant-peanut-butter-cup-cake/ http://sayitwithcake.org/giant-peanut-butter-cup-cake/#comments Fri, 26 May 2017 01:22:52 +0000 http://sayitwithcake.org/?p=47500 pbcup2My seven year old son is crazy about Reese’s Peanut Butter cups.  When he was little, he used to love buying the snack size bag of little peanut butter cups and would call them little cupcakes lol.  They are by far his favorite candy.  So this year on his birthday I decided to try and make him a giant peanut butter cup cake! This rich chocolatey cake is a layer of chocolate cake, peanut butter filling, another layer of chocolate cake, and covered in ganache.  It is a peanut butter cup lovers dream! pbcup2


To make this cake, I used a mold for a giant cupcake that I got on Amazon.  I cooked half of the batter of a cake box mix inside the mold, then cut it in half.  I made the ganache, then poured some into the clean mold.  I used a pastry brush and painted the chocolate ganache up the sides of the mold like this picture.

IMG_6702

I let it freeze for about a half hour. Then I placed the bottom layer of chocolate cake, the peanut butter mixture, then the top cake.  After that, I covered the top of the cake with ganache and made sure to smooth it as perfectly as I  could with my off set spatula.

I set the cake in the freezer overnight.  Then in the morning I carefully took the mold off of the cake and it turned out like this!

18519999_10213002645681734_7154342666487848687_n

Giant Peanut Butter Cup Cake

Ingredients

Cake

  • chocolate cake box mix

Peanut Butter Filling

Ganache (make 2 batches for this cake)
  • 12 ounces chocolate chips
  • 1 cup heavy cream

Directions

Cake:

  1. Make cake according to cake mix directions.  Cook half of the batter in the cake mold. You can do whatever you would like with the rest of the batter (make cake pops, make a second cake etc.)
  2. Once cake is cool, push out of mold. Slice top of cake to level off, then cut cake into two layers. Carefully trim around the side of the cake. You want the two layers to be smaller than the inside of the mold so that it fits in with space around the edge.

Ganache:

  1. Place the chocolate in a medium-sized bowl and set aside.
  2. Bring cream to a boil in a small saucepan and when it begins to bubble up, pour over the chocolate and let sit for 5 minutes. Gently stir, starting in the middle and working your way outward, until the cream and chocolate are completely mixed. Cover with plastic wrap and set aside. Let the ganache sit at room temperature over night.

PB layer:

  1. Combine peanut butter, graham cracker crumbs, and confectioners sugar in food processor on high speed. Spoon onto a piece of wax or parchment paper.
  2. Trace the bottom of the cupcake mold onto a piece of wax or parchment paper. Place this piece on top of peanut butter mixture and roll with a rolling pin until it extends to edges of drawn circle. Use a sharp knife to cut along inside of circle. Remove excess peanut butter.  Add it to the top of the peanut butter.
  3. Place peanut butter in freezer to firm up a bit.

Assemble Cake:

  1. Paint sides and bottom of mold with ganache.
  2. Place first layer of cake circle, peanut butter layer, and then second layer of cake on top of hardened ganache. The circles should be the same, even size. I try to make my peanut butter layer thicker than the cake layers. Make certain that there is space between the fillings and the side of the mold so as to leave space for ganache.
  3. Pour down sides of cake and peanut butter layers until filled, then on top to  totally cover.
  4. Refrigerate or freeze until hardened. Peel from mold when fully firm.

Recipe by Sayitwithcake and 1finecookie

Enjoy!

Shamene


Other Chocolate Peanut butter cakes you might like!

Heaven and Hell Cake

Heaven and Hell Cake


Flourless Chocolate Peanut Butter Cup Cake

Flourless Chocolate Peanut Butter Cup Cake

]]>
http://sayitwithcake.org/giant-peanut-butter-cup-cake/feed/ 6
Emoji Party http://sayitwithcake.org/emoji-party/ http://sayitwithcake.org/emoji-party/#comments Mon, 22 May 2017 04:14:58 +0000 http://sayitwithcake.org/?p=47418 goodcakeThis is the Emoji Party I made for my son Dylan who turned 7! His dessert table included  a three tier cake, poop emoji cupcakes, emoji cookies, emoji cupcakes, emoji cups filled with popcorn, waters with emoji labels, and jars filled with emoji keychains.  His party included the dessert table, a food table with spaghetti, fettucine, Caesar salad, and garlic bread catered by DeLuca’s Pizza.  A jumper, 2 giant trampolines, an emoji game, a slide show, birthday cake, and a piñata! goodcakeWendy Cox Photography

The emoji cake is three tiers of chocolate and vanilla zebra striped cake with buttercream filling and frosted with a turquoise buttercream.  It is also covered in fondant emoji’s and a fondant number 7.

The poop emoji cupcakes are made with both chocolate and vanilla cupcakes.  They have black cupcake wrappers.  The frosting is a delicious chocolate buttercream.  Here is the recipe:

Chocolate Buttercream
 Ingredients
  • 1 cup salted butter, at room temperature
  • 3 1/2-4 cups powdered sugar
  • 1/2 cup cocoa powder
  • 1 tsp. vanilla extract
  • 3 Tablespoons heavy cream, or milk

Instructions

  1. With an electric mixer (either hand or stand), beat butter until pale, about 3-4 minutes on medium.
  2. Scrape down the bowl.
  3. Add 3½ cups powdered sugar, cocoa powder, vanilla, and 2 tablespoons of milk.
  4. Mix on low until powdered sugar and cocoa powder are incorporated.
  5. If the frosting is too dry, add another tablespoon of milk. If the frosting is too wet, add powdered sugar 2 tablespoons at a time until it reaches a spreadable consistency

Wendy Cox Photography 

The emoji cake pops are also chocolate and vanilla cake pops mixed with frosting and formed into balls.  After they were dipped into yellow candy melts I painted emoji faces on them with royal icing and a toothpick.  For a more detailed description on how to make a cake pop click here. Royal Icing

  • 1 tbsp. light corn syrup
  • 1 tsp CLEAR vanilla extract
  • 1 cup water
  • 2 lbs. powdered sugar
  • 5 tbsp. meringue powder

Instructions

  1. In a mixer, combine meringue powder, light corn syrup, clear vanilla extract, and water.
  2. Using a hand whisk, mix ingredients until the mixture becomes foamy.
  3. Add the powdered sugar to the mixture.
  4. Hand whisk the mixture until the powdered sugar is incorporated and looks soupy. (I do this step so the powdered sugar doesn’t fly everywhere when I start the mixer in the next step.)
  5. Attach the paddle attachment and beat mixture on medium-high for about 4-6 minutes.
  6. The mixture should begin to thicken and whiten.
  7. Mix until the icing forms peaks. (If you remove the paddle and wiggle it, the icing should kind of jiggle but the peaks will remain intact.)

Storing Royal Icing

After the royal icing is done mixing I immediately prep it for storage; royal icing can dry and start to crust over fairly quickly. I like to store my icing in the same mixing bowl. I know others like to transfer the icing to another bowl or into Tupperware for storage, which works great too. Below is just my preferred way of doing it.

  1. Scrape the sides of the bowl and gather the icing with a rubber spatula.
  2. Cover the top with plastic wrap touching the icing surface. Be sure to cover the edges of the icing. Any exposure to air will dry out the icing.
  3. Cover the bowl with a damp kitchen towel. This prevents little dry crusties of icing from forming and getting into your icing, which would clog your icing tips when you try to decorate.

From this point, I scoop out the amount of icing I need at a time, while recovering the icing with plastic wrap and the damp cloth when it is not in use. I leave this bowl of icing at room temperature on my kitchen counter. Royal icing will keep for a few weeks, however I tend to finish off the batch before the end of the second week.

Royal Icing Tips and Tricks

  • This recipe can be easily doubled or reduced in half. I buy 2-pound bags of powdered sugar most of the time when making royal icing. However, if I know I won’t need much icing for the cookies I have planned, I buy 1-pound bags and prep for half the recipe.
  • Royal Icing will separate in its bowl after a few hours. Just re-mix the icing with your mixer to bring it back to its normal, fluffy state.

IMG_1190

I used the same royal icing to frost my sugar cookies.  It took 2 batches of sugar cookies, and two batches of royal icing to make 100 cookies.  I flooded the cookies with yellow royal icing, then after they were dry, I piped on the faces with royal icing and used a toothpick to help with the tiny details. This is my son blowing out his candles.  He is such a cutie!The piñata is a poop emoji as requested by my son.  I made it out of cardboard, paper Mache, duct tape, and brown crepe paper.  It is about 4 feet tall! pinartadylan timmy pinata I love this shot of my niece Ruby hitting the piñata with all her might!

Above is the jumpy, the kids really enjoyed it :)

Here is a pic that I took showing some of the decorations.  I wish I had taken a photo of the food table, and some better ones of the decorations!

IMG_1256

This is Dylan playing tetherball at the party with his friends Nori and Steve.IMG_6697

This is an emoji game I made. You see the strip of paper my husband is holding up with the ants on it? Well, the kids look at the paper and try to guess what the name of the movie is based on the emoji pictures! The answer for the one was Antz.  The first one to guess it right hits the bell and if it is right, will get a point.  The teams were divided up boys against girls. 

Photography by Wendy Cox Photography ands some I took on my ipad :)  I hope you liked the party! I love comments and would be happy to answer any questions!

ENJOY!

Wendy Cox PhotographyShamene

]]>
http://sayitwithcake.org/emoji-party/feed/ 0
Dole Whip Cake http://sayitwithcake.org/dole-whip-cake/ http://sayitwithcake.org/dole-whip-cake/#comments Mon, 17 Apr 2017 03:47:51 +0000 http://sayitwithcake.org/?p=46268 dolewhip2Have you ever had a Dole Whip from Disneyland?  If you have, then you will know how delicious, light, airy, creamy, and tangy they are! They are my favorite treat to get when at Disneyland.

dole01


The lines are always so long to buy a Dole whip, last time I was there, I waited 45 minutes to get mine! It was worth the wait.


dole_whip_line1

Next time I go to Disneyland , I will run to get my Dole Whip right when the park opens.  I decided to make a cake based on my favorite treat.  It is a three layer white cake soaked with fresh pineapple juice, filled with pineapple curd and a fluffy pineapple filling that tastes similar to a Dole Whip.  It is frosted with Pastry Pride with pineapple curd mixed in, and topped with cherries and fresh pineapple.

The air whipped swirls on top of this cake topped with a red cherry look pretty close to the actual Dole Whip! I had never made a pineapple cake before and decided it was time to try.  I thought about making a pineapple upside down cake, but I will save that for another time.  I am glad I made this cake, and hopefully it will tide me over until I can go to Disneyland again :)


So to make this cake, first I started by making a white cake.  I decided to use a cake mix this time because I was short on time.  If you would like to make a white cake from scratch my favorite white cake recipe is here.   I used three 6 inch cake pans and cooked them all at the same time for about 30 minutes.

Next you will make the pineapple curd.   I discovered a really easy way to make the curd.  Basically I added the ingredients and whisked them together, and microwaving then for one minute at a time.  It sets up really nice in the refrigerator.  When I put the curd into the cake layer, I made a dam with the filling so the curd wouldn’t seep out.  However as you can see on my top layer, the dam wasn’t high enough and a lot of the curd leaked out.  This is unfortunate because the pineapple curd is one of the best parts of the cake.  I ended up scraping most of it off the sides as it dripped down.

For this delicious filling, I used my recipe from the Orange Dreamsicle cake.   Instead of the orange extract, I used about 1/2 cups of pineapple curd .  The result is light and creamy and tastes just like Dole whip in non ice cream form.  It pairs perfectly with the pineapple curd and they balance out each other. One is more tangy, one is more creamy.

The frosting on the outside is Pastry Pride which I bought at Smart and Final.  You simply whip it up for about 7 minutes and add a few tablespoons of pineapple curd.  Then, frost the cake like you would with frosting.  I thought about using a pineapple buttercream to frost the cake.  It might have been better for the dam, but I think the whipped cream was more similar to the Dole Whip.  Also, I always keep in mind that my husband prefers whipped cream to buttercream, and he is usually the one eating most of the cake :)

I brought this cake to my Aunt Teresa’s house for Easter Dinner.  The kids were very interested in the broken pieces of sugar shards decorating the cake.  They said it looked like glass.  I fed my little 1 year old nephew Gabey a giant piece of this cake.  He seemed to love it and kept asking for more, so I felt like it was a success :)  I also know it was good because my Aunt Teresa asked for a second piece to save for tomorrow! There is nothing I like more then making a cake my family likes, and going home with an empty cake plate.

Here is the recipe:

Dole Whip Cake

prepare white box cake mix

Pineapple Curd

  • 7 large egg yolks
  • 3/4 C sugar
  • 1/2 ts salt
  • 1/2 pineapple juice
  • 1 TB lemon juice
  • I stick of butter melted

Instructions

  1. In large microwave safe bowl, whisk together sugar, salt, and eggs until smooth
  2. Whisk in the pineapple juice, lemon juice, and butter
  3. cook in microwave for 1 minute
  4. take out and whisk. microwave for another minute
  5. keep doing this for about 3-5 minutes but take out and whisk after each minute
  6. It is done when the curd can coat the back of a metal spoon.

Dole Whip Filling

•2 c Cool Whip

•yellow food coloring (If desired)

•14 oz sweetened condensed milk

•1/2 c pineapple juice

•2 small pkgs instant vanilla pudding

  1. Combine pudding, water, Sweetened Condensed milk and extract.
  2. Add food color to desired shade.
  3. Fold in Cool Whip.
  4. Refrigerate 30 minutes.
  5. Spread 1 cup between layers of cooled cake (thick).
  6. Keep refrigerated, but this does hold up well at room temperature


For the Sugar Shards (do this day of serving):

3 cups granulated sugar
½ cup water

  1. Line 2 half sheet pans with tin foil, set aside.
  2. Place sugar and water into a medium saucepan over high heat. Stir to combine and until sugar dissolves. Do not stir from this point forward. Use a pastry brush to wash down the inside of the pot occasionally to prevent sugar from crystalizing.
  3. Cook sugar, swirling pot occasionally until desired color of caramel is reached (10-15 minutes).
  4. Immediately pour onto baking sheets. Tilt the sheets as needed to distribute the sugar. Allow to cool slightly (approximately 5 minutes).
  5. Once sugar has cooled and set (but is still warm), peel off tin foil and break sugar into shards.***

Photography by Wendy Cox Photography

ENJOY!

Shamene


Other cakes you might like!

naked cake

Passion Fruit Strawberry Cake

Strawberry Layer Cake

Blackberry Layer Cake

]]>
http://sayitwithcake.org/dole-whip-cake/feed/ 0
Passion Fruit, Guava, and Lime Chiffon Cake http://sayitwithcake.org/passion-fruit-guava-and-lime-chiffon-cake/ http://sayitwithcake.org/passion-fruit-guava-and-lime-chiffon-cake/#comments Sat, 25 Mar 2017 18:47:45 +0000 http://sayitwithcake.org/?p=45751 passionfruitThis Chiffon cake has three delicious Hawaiian flavors; guava, passion fruit, and lime.  It is filled and frosted with Chantilly cream filling mixed with fresh strawberries, and peaches.  It is topped with whipped cream rosettes and fresh purple orchids.  The taste of the Islands in every bite!

Lilikoi-Passion Fruit, guava and lime-Chiffon cake recipe is a delicious Hawaiian cake perfect for any luau party or Hawaiian celebration.

hcake1 hcake4 hcake8

I based my cake on the Kings Hawaiian Paradise Delight cake.  I made my first attempt here, and it turned out delicious.  However, this time I added fresh fruit into the filling, and I think this made it much better.  The fresh purple orchids really added something special.

This time, I found a specialty produce store and found passion fruit, guavas, and key limes.  I made a puree out of these fruits, and added to them to the chiffon cake.  It really made the flavors of the cake pop!


These are passion fruits.  To make the puree you simply scrape out the insides of 10 passion fruits into a food processor.  Process the pulp for a few seconds, then press the flesh through a sieve.


These are guavas.  To make the puree, cut them up in four sections.  Cook them in some water in a sauce pan for about three minutes until they are soft.  Press them with a spatula through a sieve.

Chiffon Cake
  • 2 1/4 cups of flour
  • 2/3 cups of white sugar
  • 1 tbsp. baking powder
  • 1 tsp salt
  • 1/2 cup vegetable oil
  • 1/2 cup water
  • 2 oz. key lime juice
  • 2 oz. guava puree
  • 2 oz. passion fruit puree
  • 5 egg yolks
  • 2 tsp vanilla extract
  • 2 tsp grated lemon zest
  • liquid food coloring : yellow, red and green
  • 8 egg whites
  • 1/2 tsp cream of tartar
  • 1/2 cup white sugar
Whipped Cream Icing
  • 1 eight oz. package reduced fat cream cheese (room temperature)
  • 1/2 cup of white sugar
  • 1 tsp vanilla extract
  • 1/8 tsp almond extract
  • 1 quart of heavy or regular whipping cream

Instructions

Chiffon cake
  1. Grease three pans with shortening and flour them.
  2. Preheat oven to 325 F
  3. Sift together flour with 2/3 cup of sugar, baking powder, salt-set aside.
  4. In another bowl, beat together oil, water, yolks, vanilla and lemon zest until well combined.
  5. Mix yolk mixture into flour mixture until smooth. At this point, the consistency should almost be like cookie dough. Divide the batter into thirds and put each into a separate bowl.
  6. In each separate bowl of batter, add one kind of nectar/juice. Once mixed in, you will need to add the food coloring- green for the lime layer, orange for the passion fruit layer and red or pink for the guava layer. Use your own judgment on how many food coloring drops to use and bear in mind that you will be adding eggs whites later which will lighten the batter.
  7. In another bowl, beat egg whites and cream of tartar until soft peaks are formed. Then slowly add the 1/2 cup of sugar and beat until stiff. Then you will need to take 1/3 of the egg white mixture and fold it into each bowl of batter. Then pour each into a separate pan.
  8. As far as the separation of batter I divided mine by sight. However, if you want to be more exact, you can weigh the batter and divide by weight and measure the whipped cream by cups and divide that way.
  9. Put each pan into the oven.
  10. Bake for 35-40 minutes or until toothpick comes out clean
  11. *Do not over mix! Also, do not over bake! take out of oven immediately before the sides start to pull away from the pan. I take these cakes out of the pan right away and put on a cooling rack. If you take them out before they have cooked too long, you should not have any brown on top or bottom of pan. After they are completely cool, you can use a cake leveler to level out the cakes and make them the exact same height.

Whipped Cream

  1. Combine all ingredients except the whipping cream by using a regular or stand mixer.  Whip until it is smooth and creamy.  While the mixer is still running, slowly add the cream. Continue to whip until stiff peaks form.
Cake Assembly
  1. For an 8 inch cake
  2. Put an 8 inch cardboard cake board onto a turn table. Secure with tape or non slip piece.
  3. Put a dollop of frosting onto cake board
  4. Put green cake onto cake board.
  5. Measure one cup of frosting and spread evenly onto green cake.
  6. Put orange cake on top of filling
  7. Measure one cup of frosting and spread evenly onto orange cake
  8. Frost the whole cake and use off set spatula or bench scraper to smooth it.
  9. Make sure top of cake is level and smooth
  10. Fill pipe bag with frosting and pipe desired border around cake.  Add flowers if desired.
  11. Keep refridgerated

Photography by Wendy Cox Photography

ENJOY!

Shamene

]]>
http://sayitwithcake.org/passion-fruit-guava-and-lime-chiffon-cake/feed/ 4