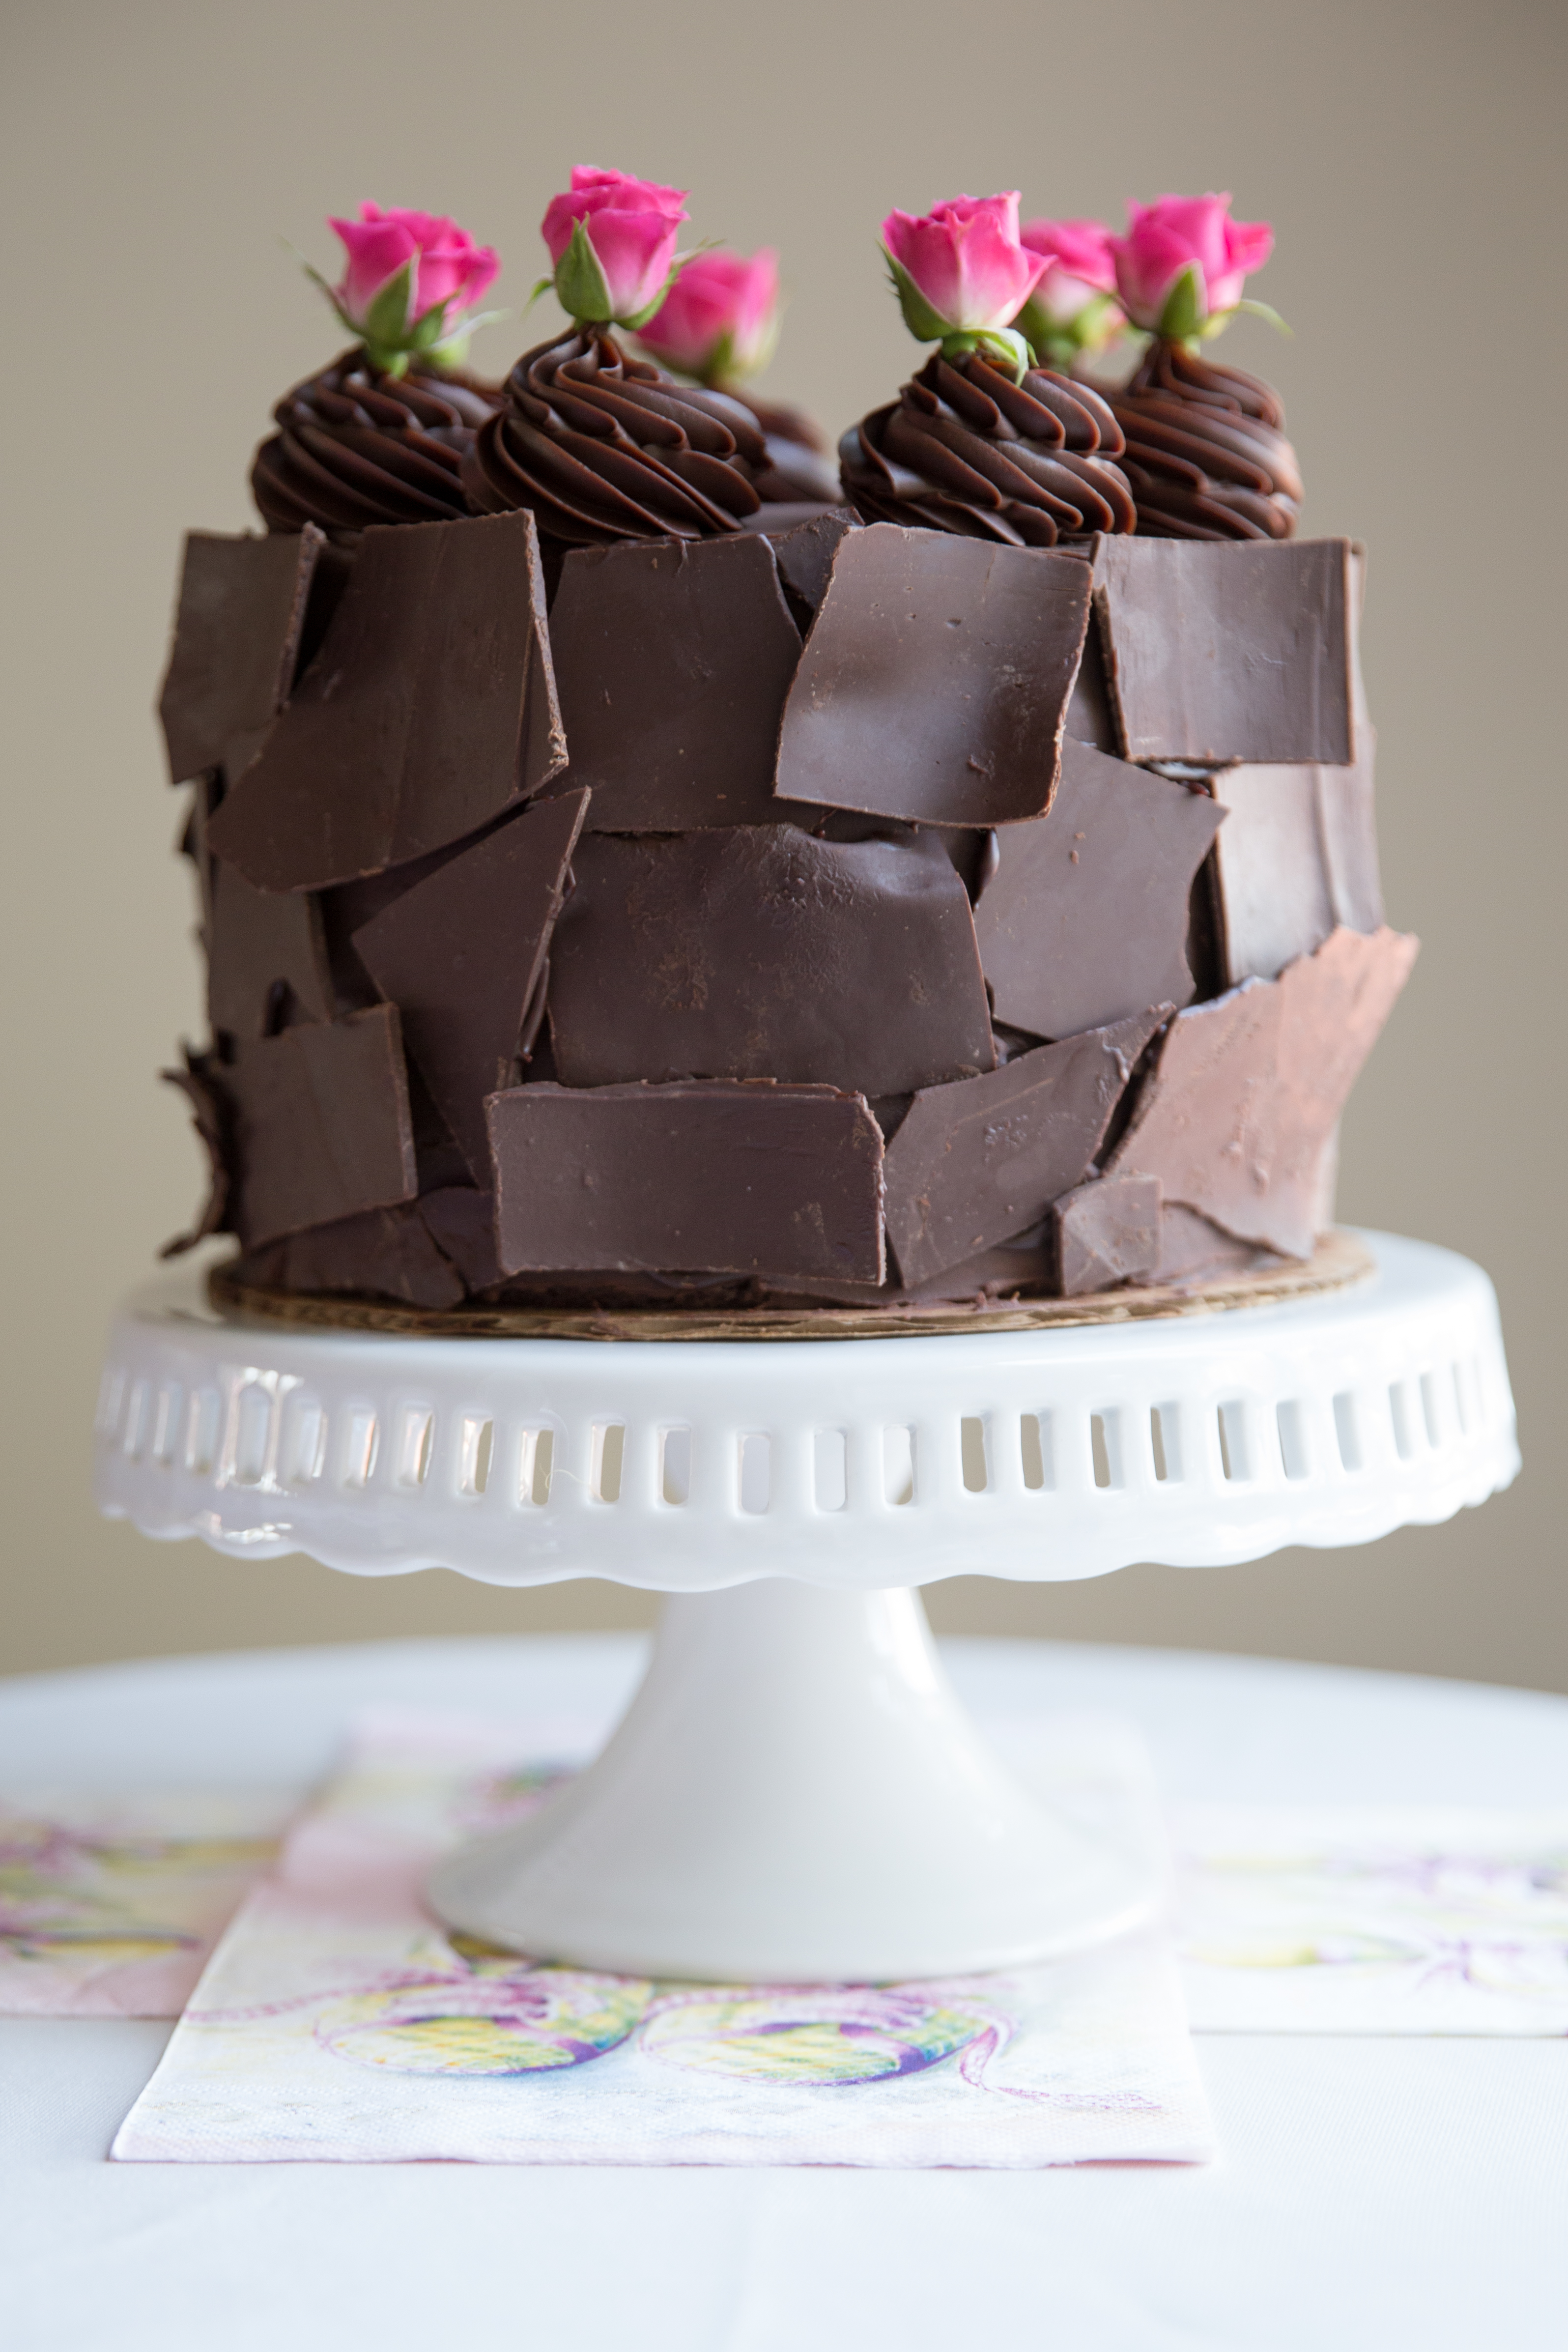
 This cake I made for my sister Emily’s Baby Shower. She is having her third girl, and wanted a chocolate with chocolate and chocolate cake! I made her an extra special chocolate cake with chocolate ganache filling, chocolate cheesecake filling, covered in chocolate ganache, topped with chocolate ganache swirls, and covered with chocolate square pieces!


Enjoy!

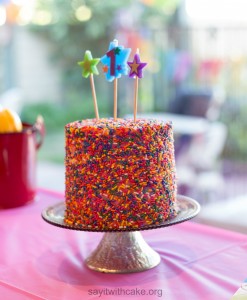 I made this sprinkle smash cake for my niece Matilda Wild who is turning one today! Sprinkle cakes are so pretty and festive! I will share some methods with you on how to make a sprinkle cake the easy and non messy way!
I have tried a sprinkle cake before but ended up with sprinkles all over the floor, table, and everywhere! This new method I learned from The Greedy baker and it was not messy at all! I was a little hesitant at first to actually roll the cake around in the sprinkles, but if you chill the cake until it has crusted, it isn’t an issue. Another think I learned is that next time, I will use small nonpareils sprinkles. The jimmies sprinkles I used left a few gaps and you can see more of the frosting. I would have preferred a more full coverage sprinkle like nonpareils!
1. Frost cake except top
2. roll cake in sprinkles with a cardboard circle on top and bottom an inch smaller then the cake
3. frost top of cake
4. cover top with sprinkles and smooth out
This is my sweet little niece Matilda enjoying her cake!
Enjoy!

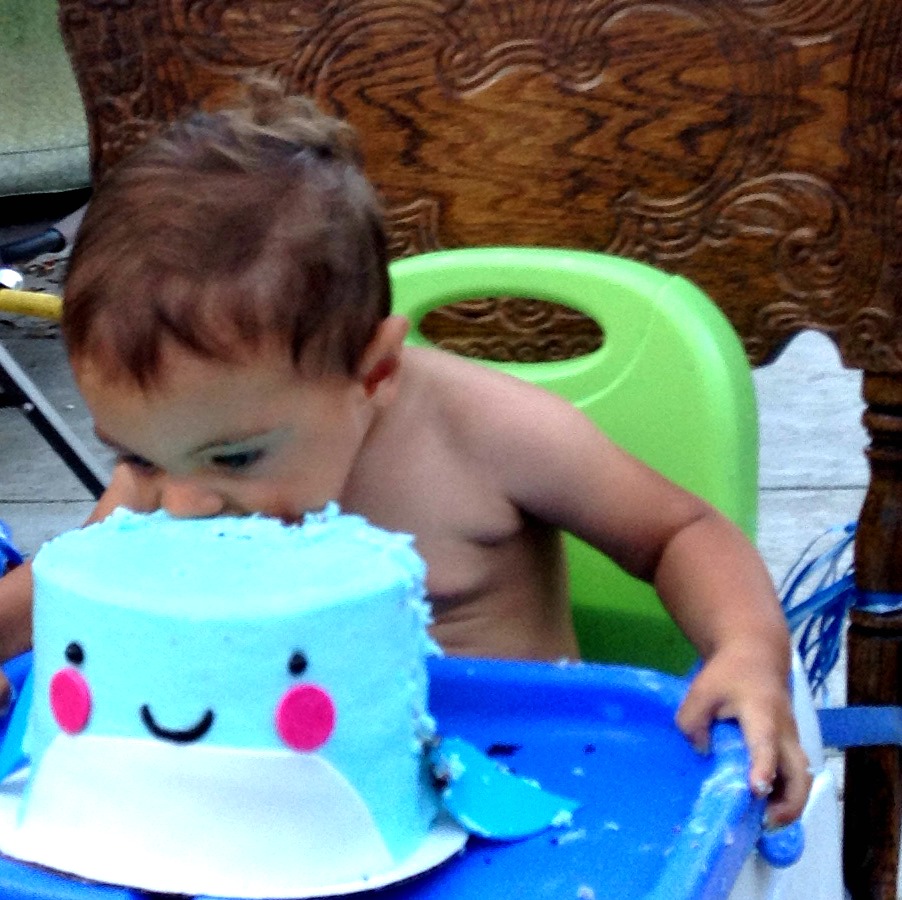
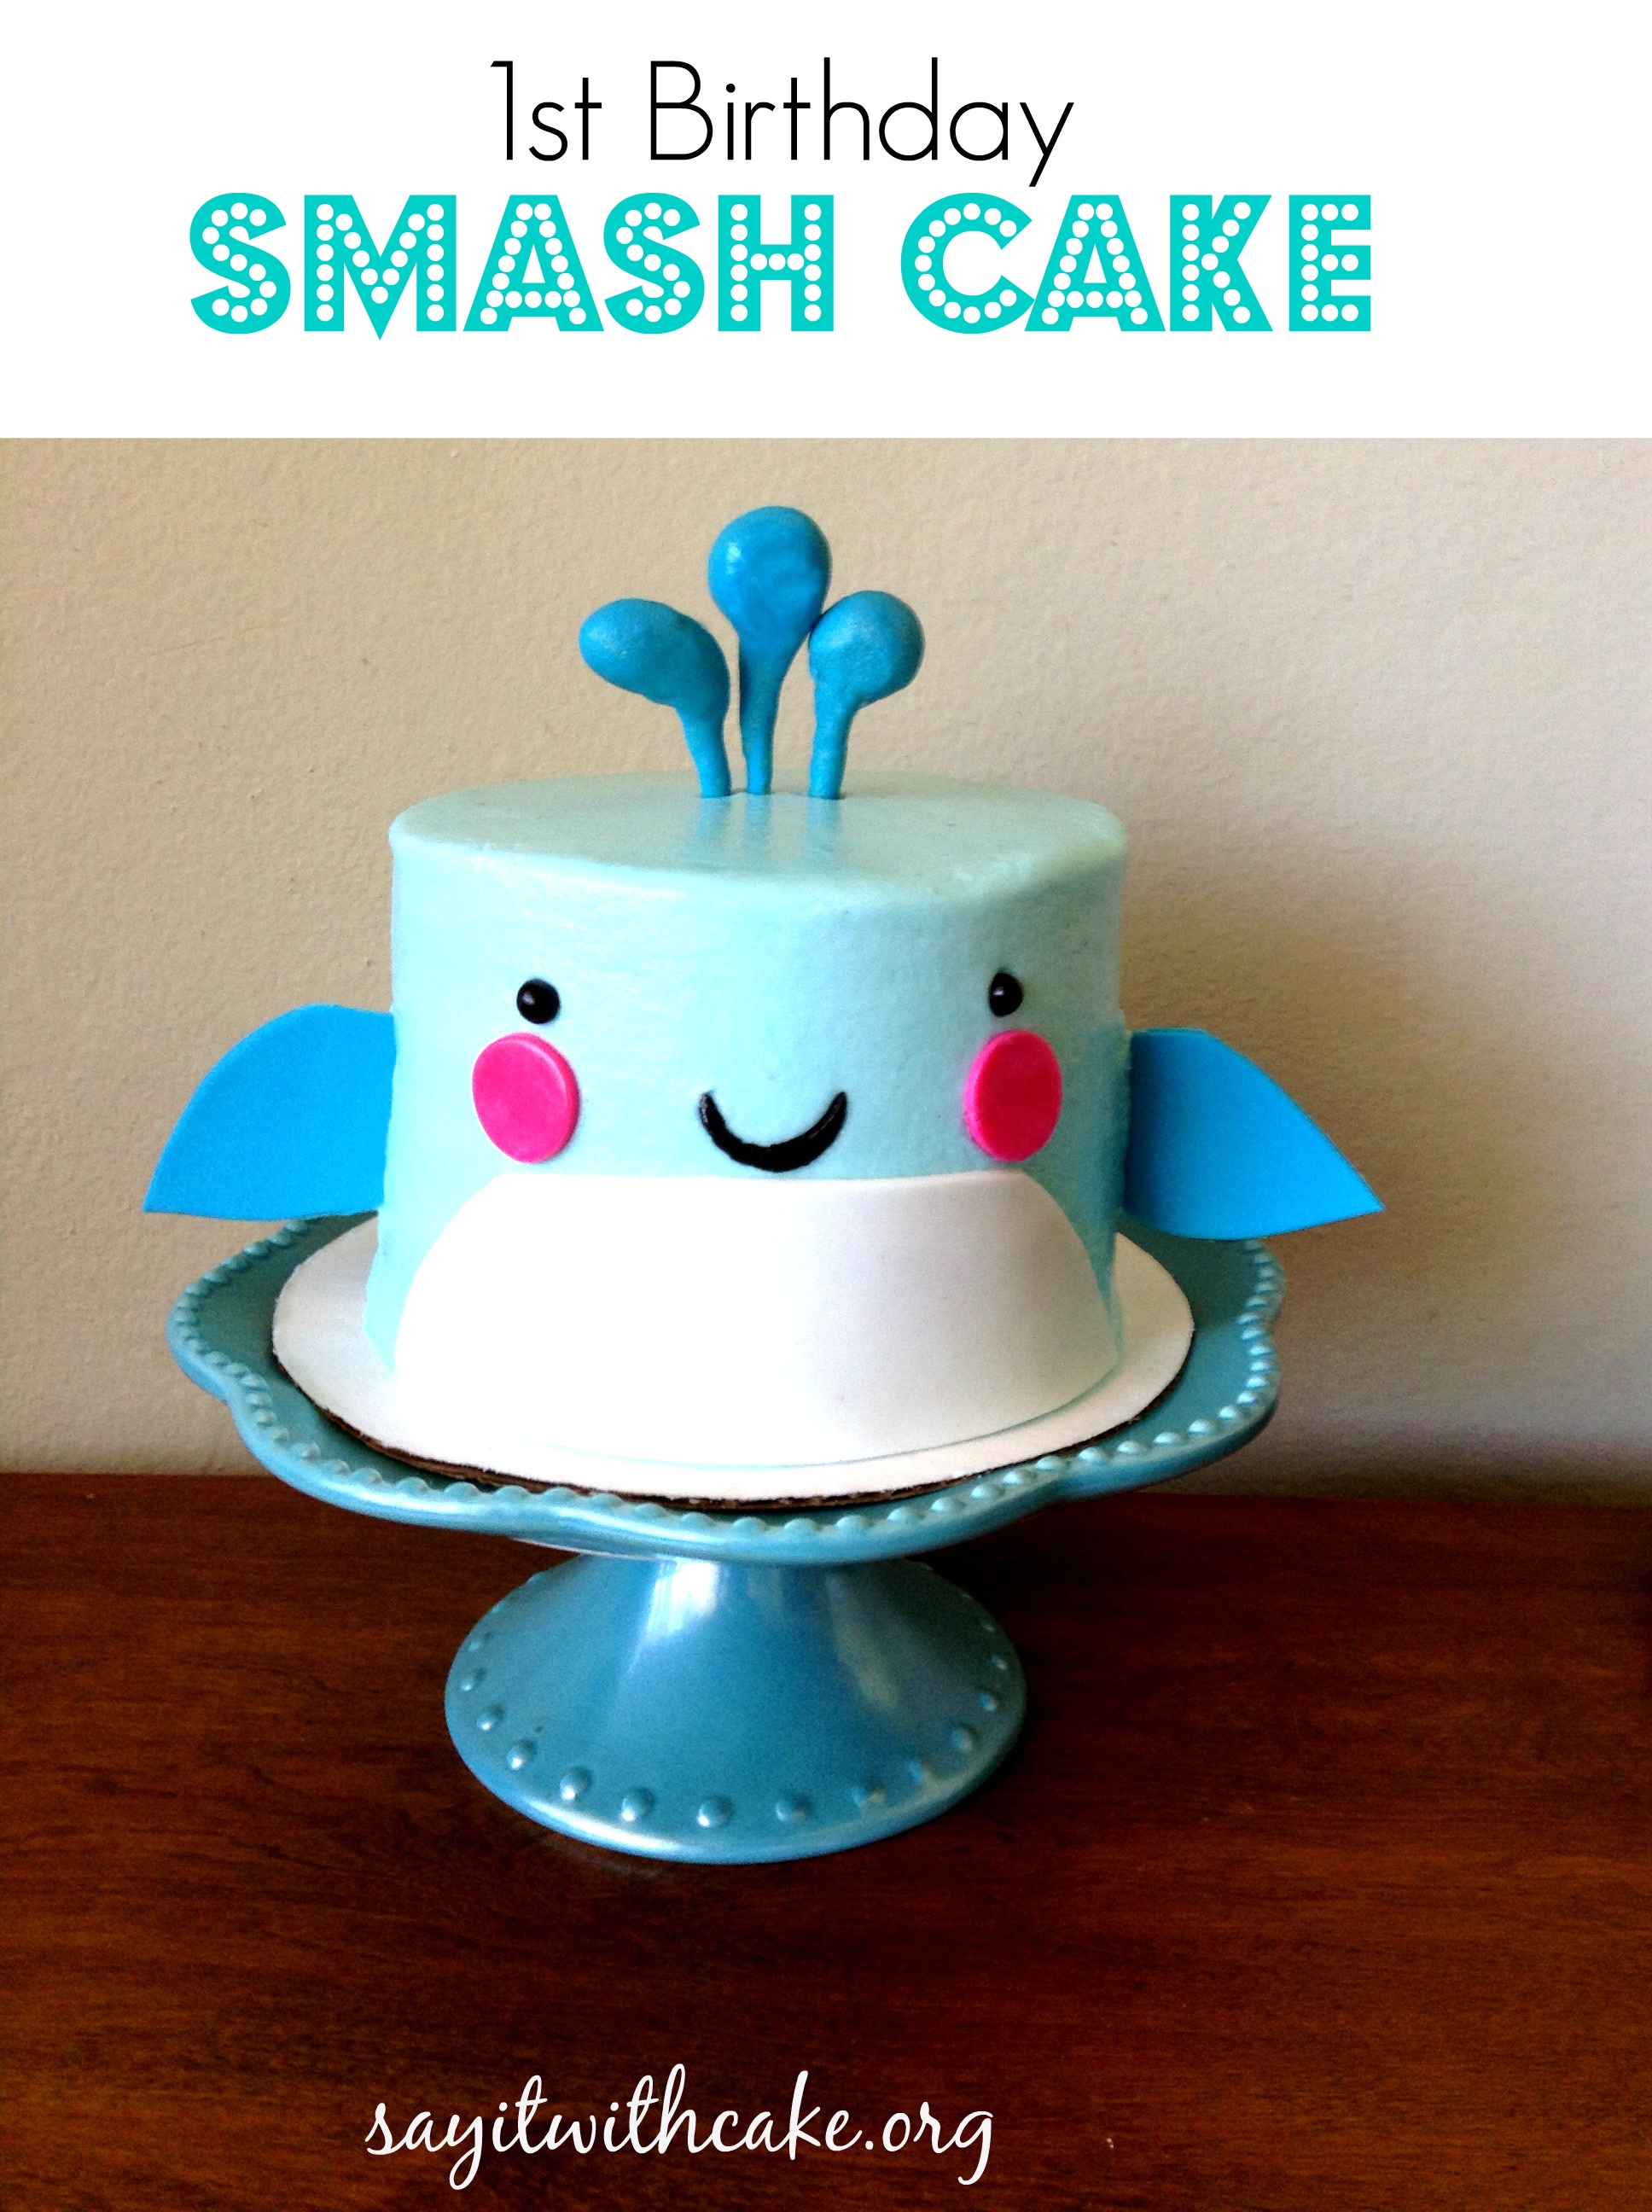 I made this little whale smash cake for my nephew Gabriel (I call him Gabey) who turned 1 years old! The inside is chocolate, and the outside whale is made with blue buttercream, and fondant pieces for the whale face. I have to say, Gabey really loved this cake and dug right in face first! By the end, the cake was destroyed and he seemed very pleased!
Doesn’t he look so cute sitting there with his legs crossed! He is patiently waiting while we take pictures so he can dig in!

now he can really enjoy a big bite! He is such a cutie!
To make this cake, I first baked three five inch cakes, cooled them, filled them with cream cheese filling, stacked them, and frosted them with a light blue buttercream.
Buttercream Frosting
- 1 1/2 cup sweetex or crisco
- 1/4 teaspoon salt
- 1 teaspoon meringue powder
- 2 pounds powdered sugar
- 1/2 cup milk or water
- 1 tsp vanilla
Instructions
- mix the sweetex, salt, and meringue powder with electric mixer to blend aobut 30 seconds
- Add the milk and vanilla in the bowl, then add the sugar and blend by hand with a spatula until the sugar is absorbed into the liquid
- .put bowl back on the mixer and beat on medium speed for 2-5 minutes until smooth and a little fluffy.
- if mixture is too stiff, you can add more liquid. if it is too runny add more powdered sugar
Then I made the fondant and colored it pink, blue, and black and left some white.
- 8 ounces miniature marshmallows (4 cups not packed, or half of a 16-ounce bag)
- 1 pound powdered sugar (4 cups), plus extra for dusting
- 2 tbsp water
- Food coloring or flavored extracts, optional
Instructions
- Dust your counter or a large cutting board with powdered sugar. Place the marshmallows and the water in a large microwave-safe bowl. Microwave on high for 1 minute, until the marshmallows are puffy and expanded.
- Stir the marshmallows with a rubber spatula until they are melted and smooth. If some unmelted marshmallow pieces remain, return to the microwave for 30-45 seconds, until the marshmallow mixture is entirely smooth and free of lumps. If you want colored or flavored fondant, you can add several drops of food coloring or extracts at this point and stir until incorporated. If you want to create multiple colors or flavors from one batch of fondant, do not add the colors or flavors now. Instead, refer to step 6 below for instructions.
- Add the powdered sugar and begin to stir with the spatula. Stir until the sugar begins to incorporate and it becomes impossible to stir anymore.
- Scrape the marshmallow-sugar mixture out onto the prepared work surface. It will be sticky and lumpy, with lots of sugar that has not been incorporated yet–this is normal. Dust your hands with powdered sugar, and begin to knead the fondant mixture like bread dough, working the sugar into the marshmallow with your hands.
- Continue to knead the fondant until it smoothes out and loses its stickiness. Add more sugar if necessary, but stop adding sugar once it is smooth–too much sugar will make it stiff and difficult to work with. Once the fondant is a smooth ball, it is ready to be used. You can now roll it out, shape it, or wrap it in cling wrap to use later. Well-wrapped fondant can be stored in a cool room or in the refrigerator, and needs to be kneaded until supple before later use.
- If you want to add coloring or flavoring to your fondant, flatten it into a round disc. You might want to wear gloves to avoid getting food coloring on your hands during this step. Add your desired amount of coloring or flavoring to the center of the disc, and fold the disc over on itself so that the color or flavor is enclosed in the center of the fondant ball.
- Begin to knead the ball of fondant just like you did before. As you work it, you will begin to see streaks of color coming through from the center. Continue to knead until the streaks are gone and the fondant is a uniform color. Your fondant is now ready to be used or stored as outlined above.
Cut out shapes for eyes, cheeks, fins, chest, and water. Put the blue fondant for the blow hole around toothpicks or skewers and dry and harden overnight. You can also add some tylose powder to the blue fondant to make it dry harder like gum paste.
Enjoy!
]]>
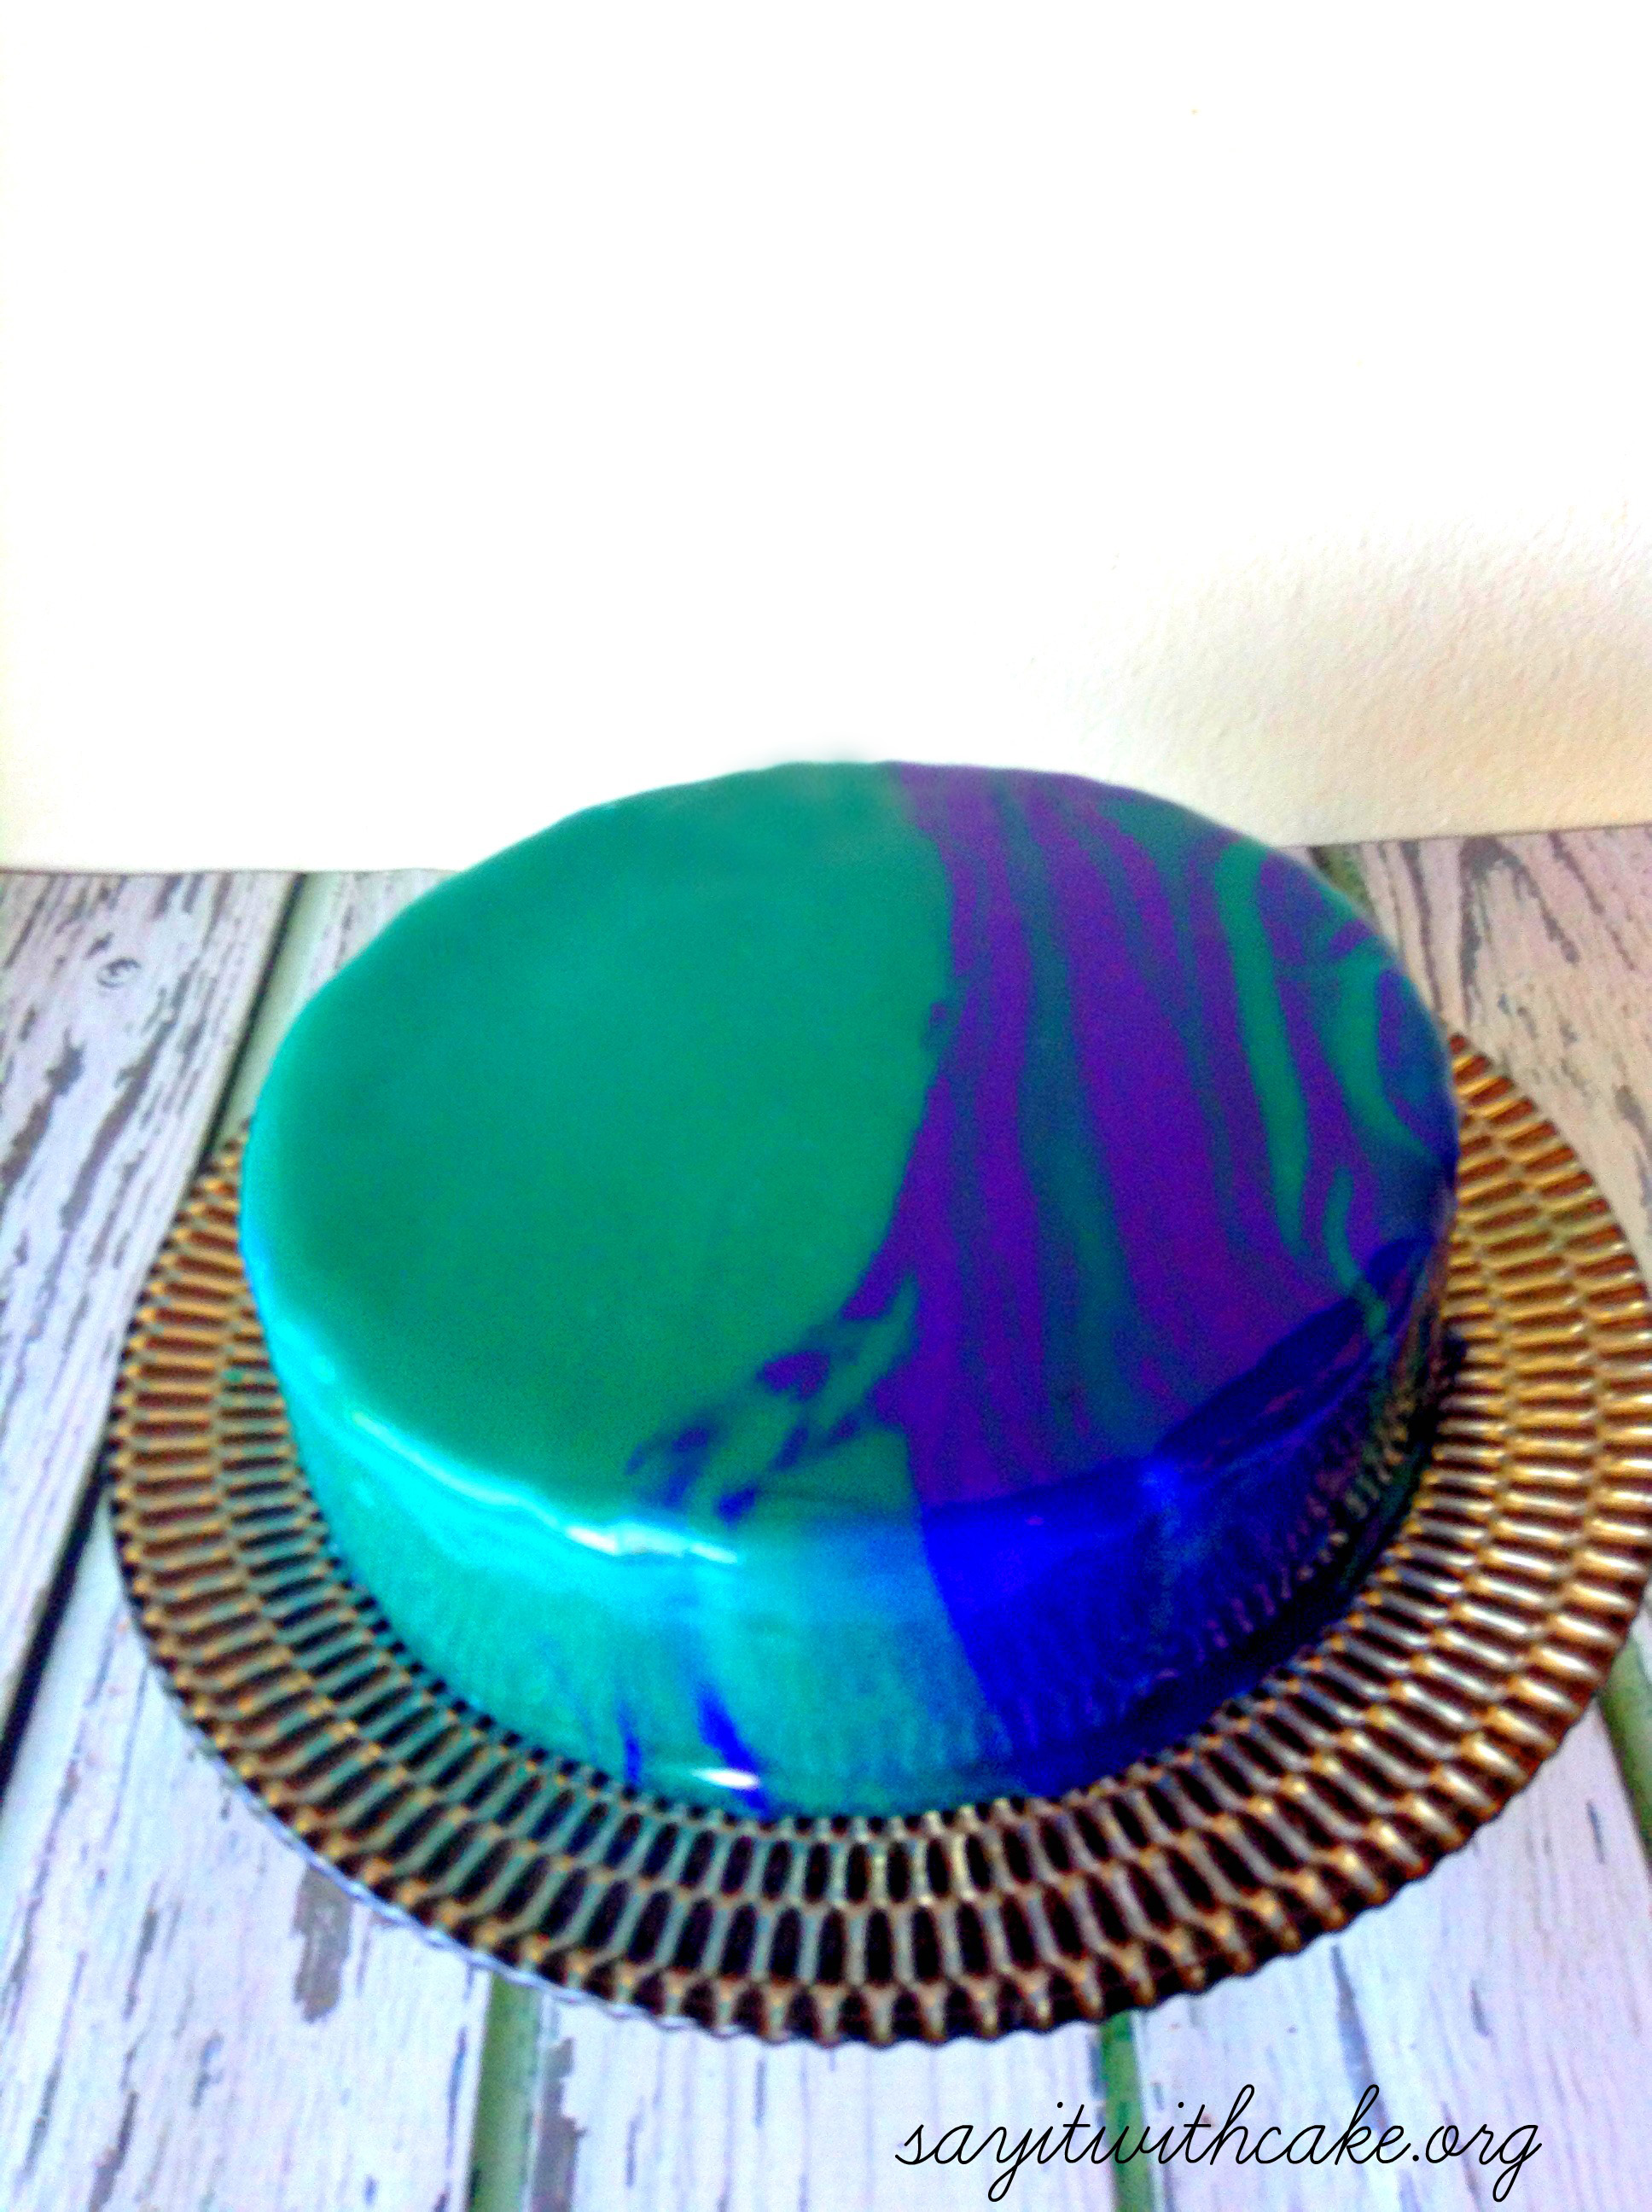 Mirror Glaze cakes are so pretty and fun to make! I think I am getting addicted to making mirror glaze cakes! So far I have made 4 mirror glaze mousse cakes here, here, and here. I don’t know if I will ever stop!
  I love the swirl effect of this mirror glaze.
This mousse cake is a vanilla sponge cake, blueberry white chocolate mousse, blueberry puree insert, and white chocolate mirror glaze on top.


Ingredients
- 20 g gelatin powder
- 120 g water
- 300 g light corn syrup
- 300 g sugar
- 150 g water
- 200 g sweetened condensed milk
- 300 g white chocolate good quality chopped fine
- food coloring
Instructions
- Bloom 20 g gelatin in 120 g water
- boil 300 g corn syrup, 300 g sugar, and 150 g water
- remove from heat and add gelatin
- add condensed milk
- pour over chocolate and mix until chocolate is melted completely (make sure you chop the chocolate really small before hand)
- stir and make sure glaze reaches 95 degrees F
- separate into multiple bowls if you want multiple colors
- add food color
- Let it cool for many hours until the glaze reaches 89.6 degrees F and is semi thick.
- Pour glaze over cake
enjoy!
other cakes you might like


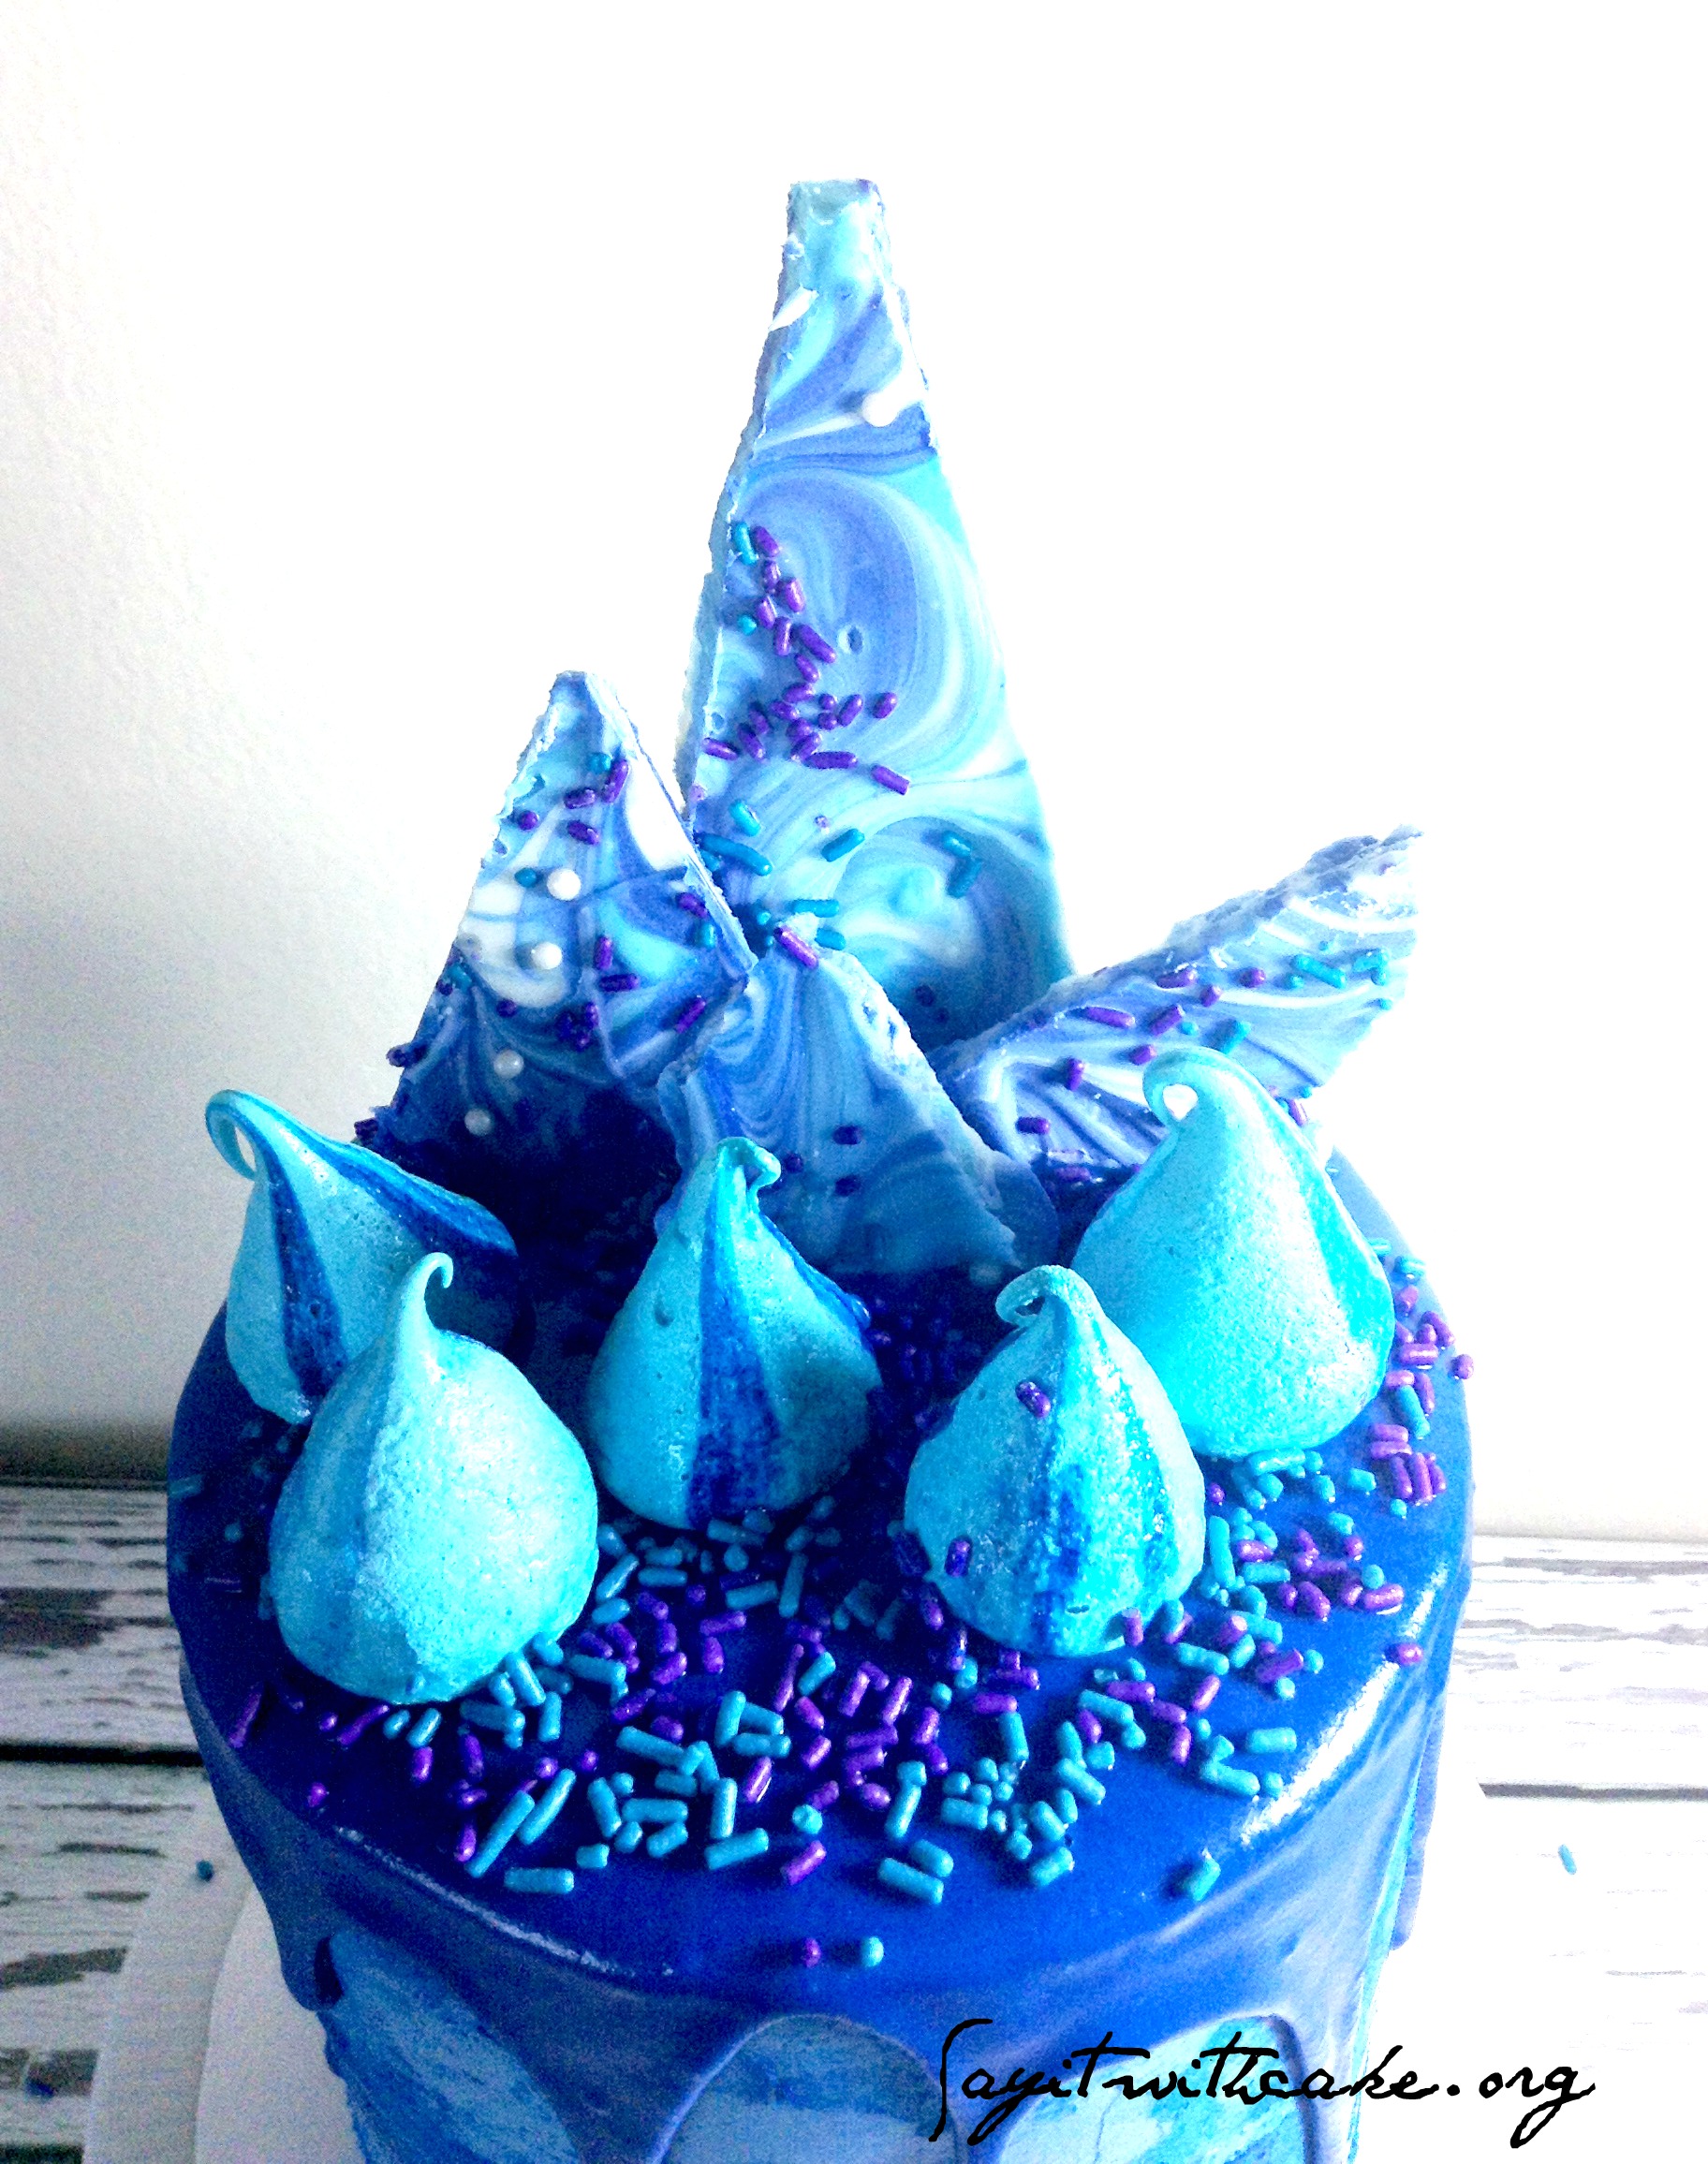
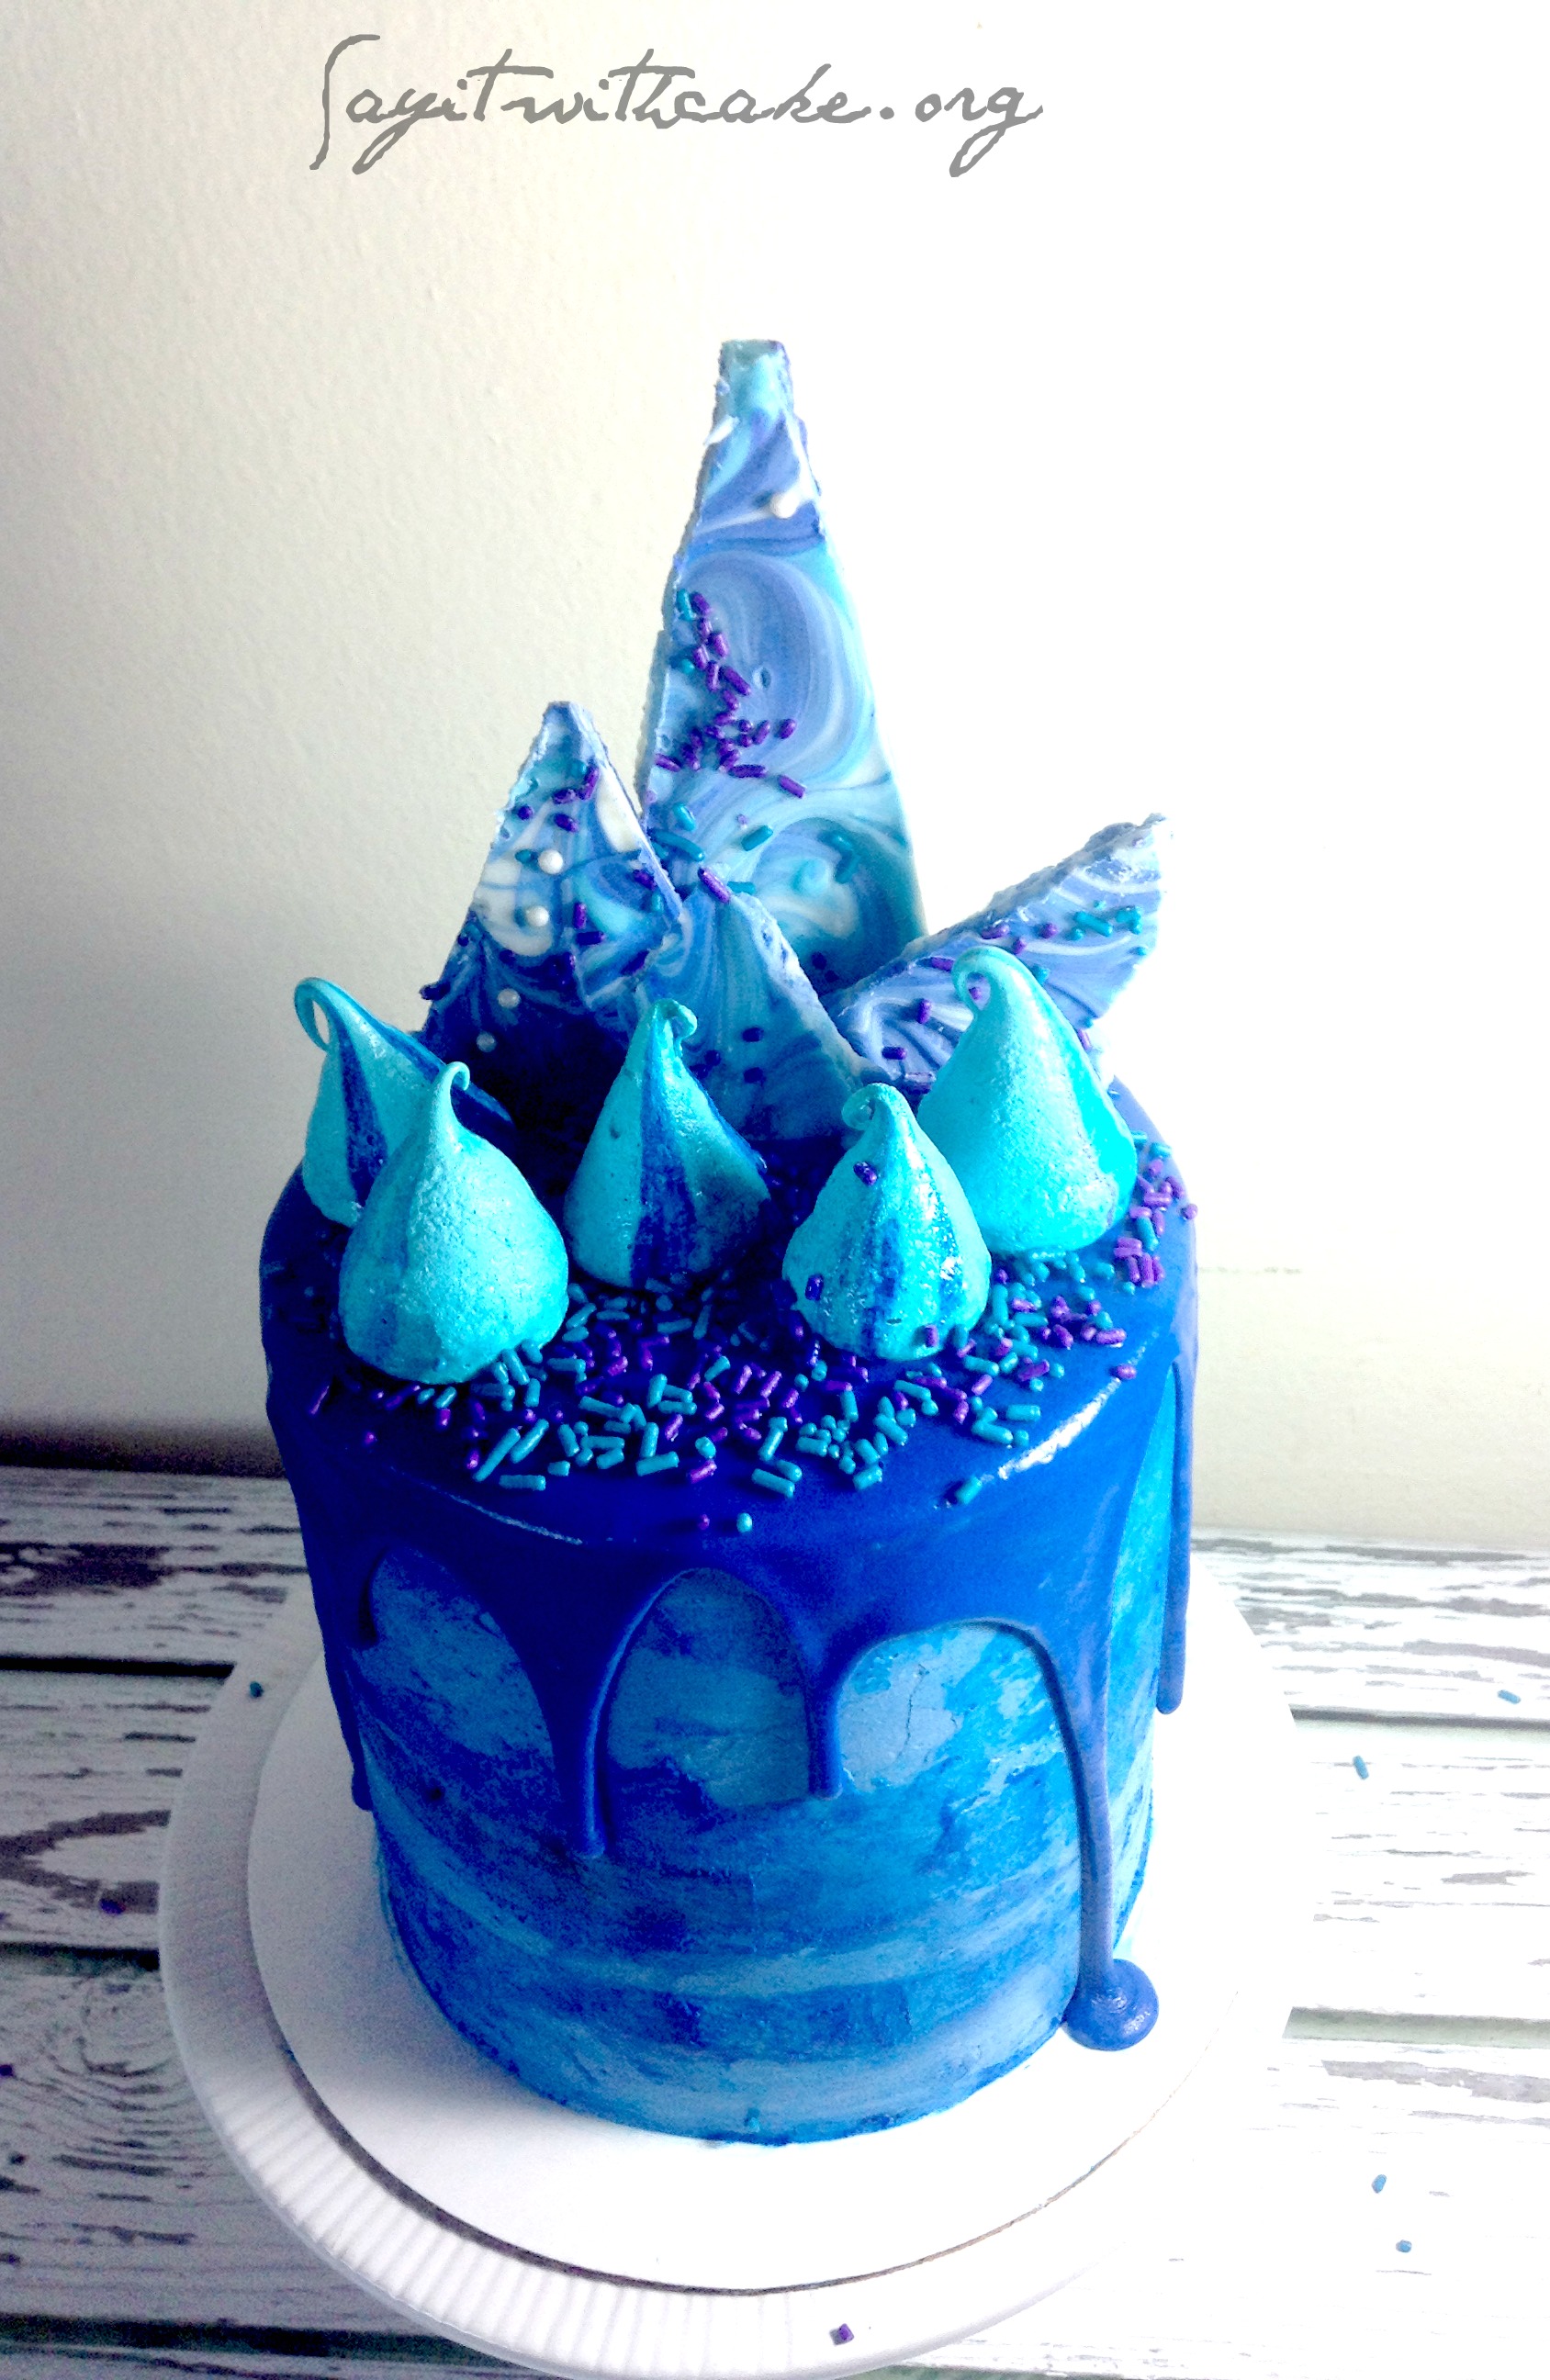 This cake is for my son who wanted to celebrate his 5 1/2 birthday this year! He looooves blue and wanted an all blue cake. I did my best! I got my inspiration from Katherine Sabbath
before sprinkles
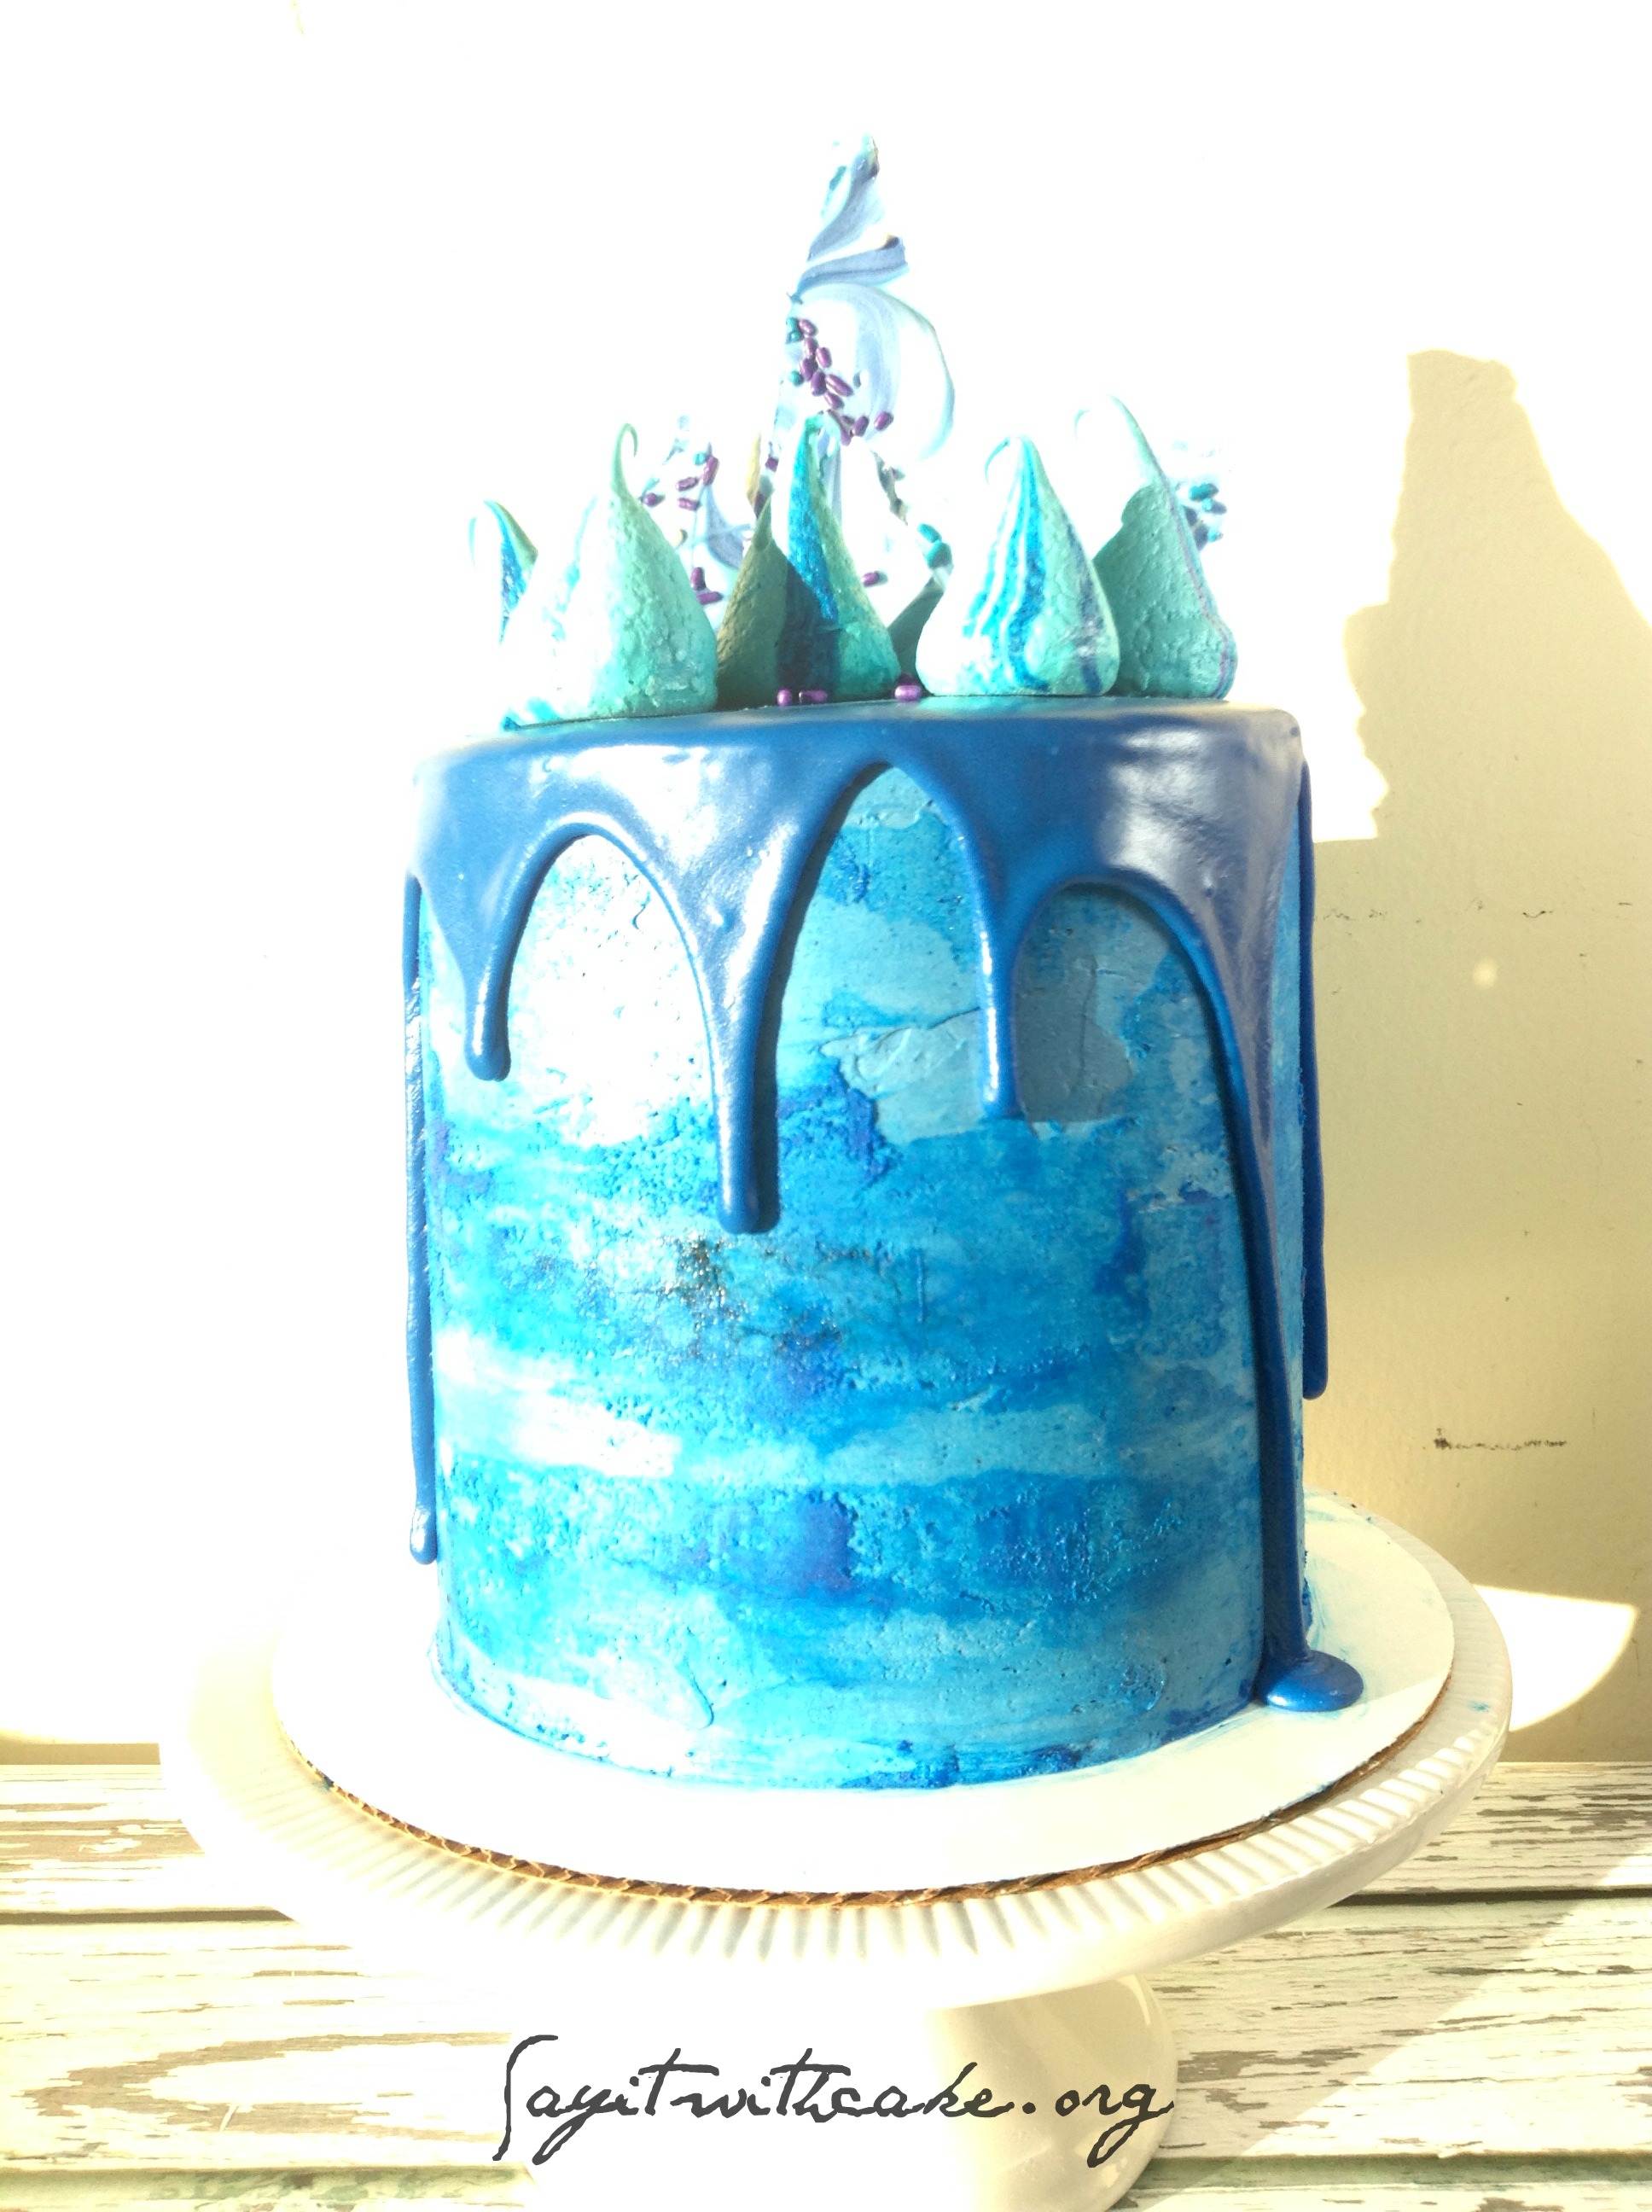
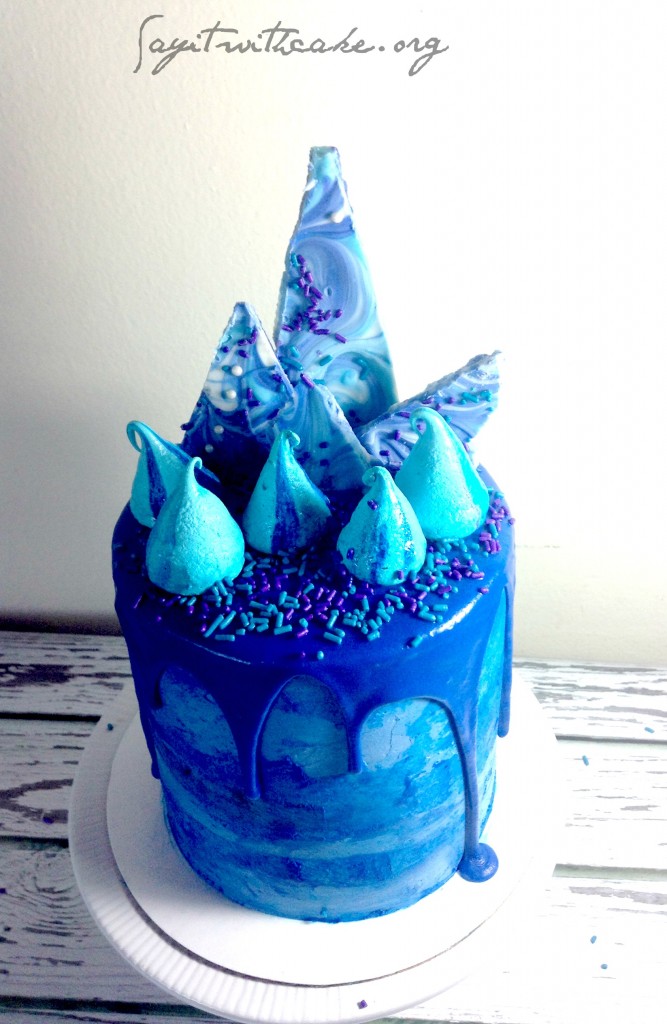
This cake has several components, the blue ganache, the blue meringue cookies, and the blue bark. You can make these several days in advance.
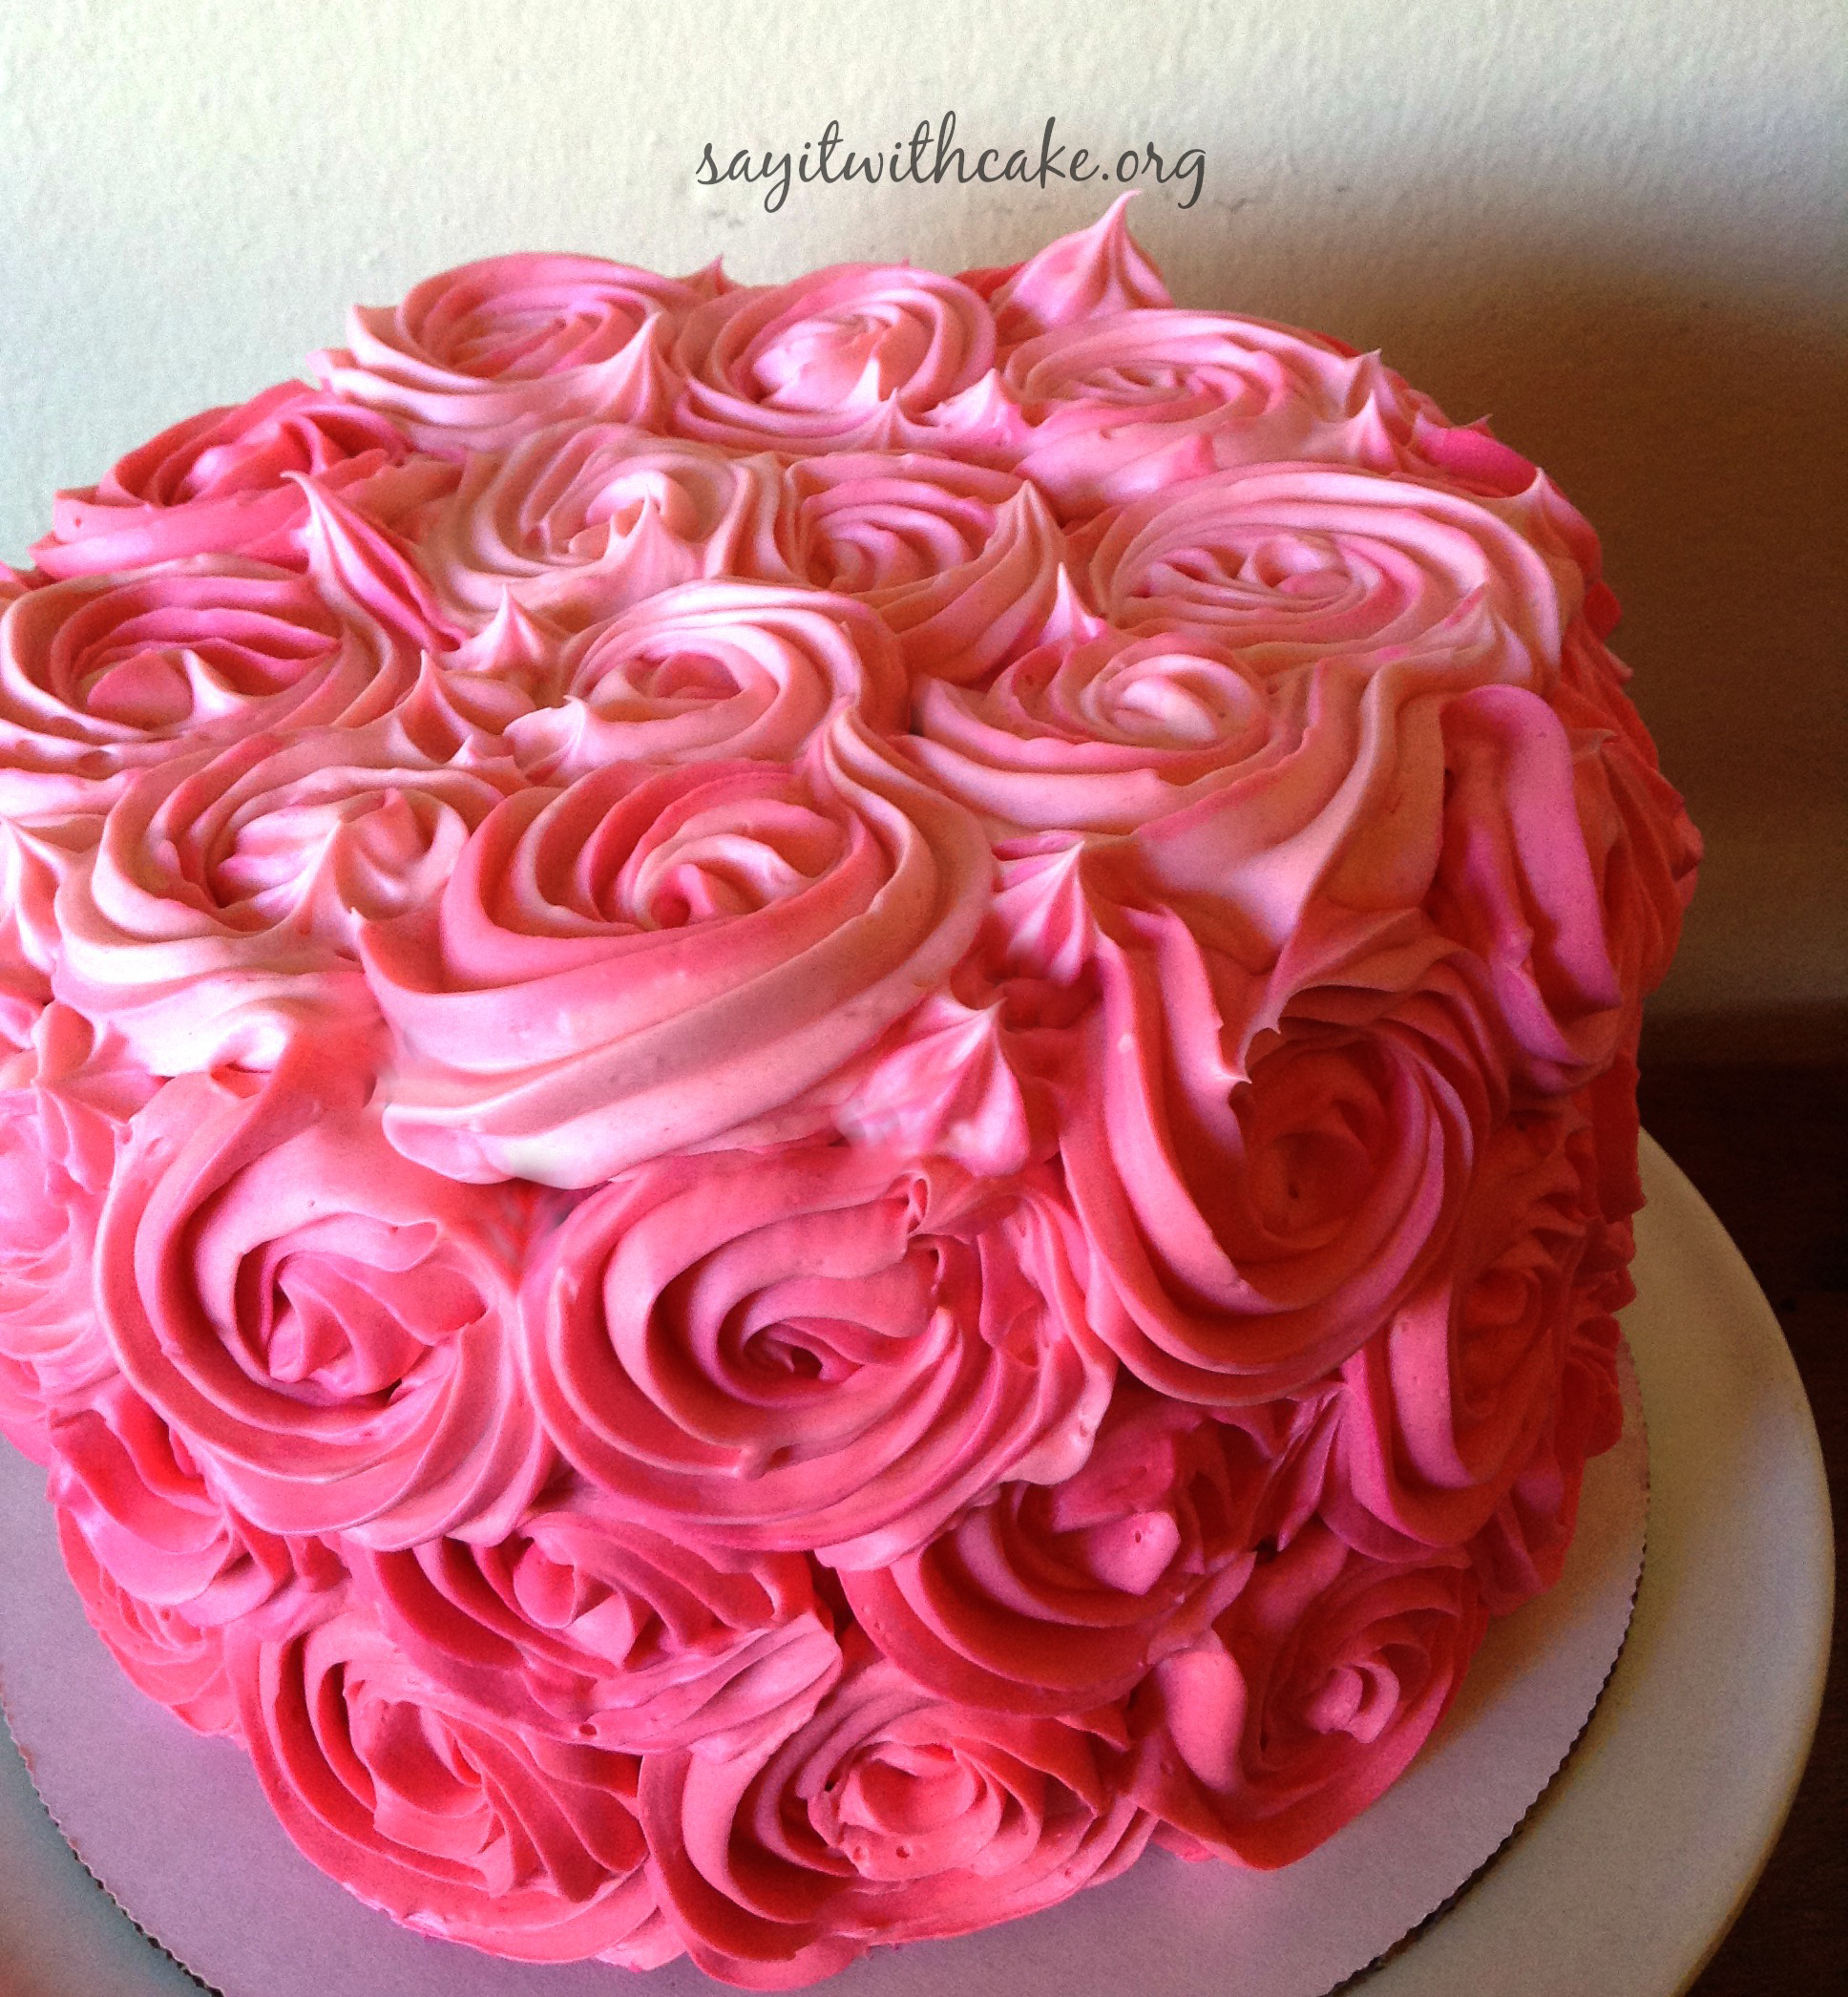
]]>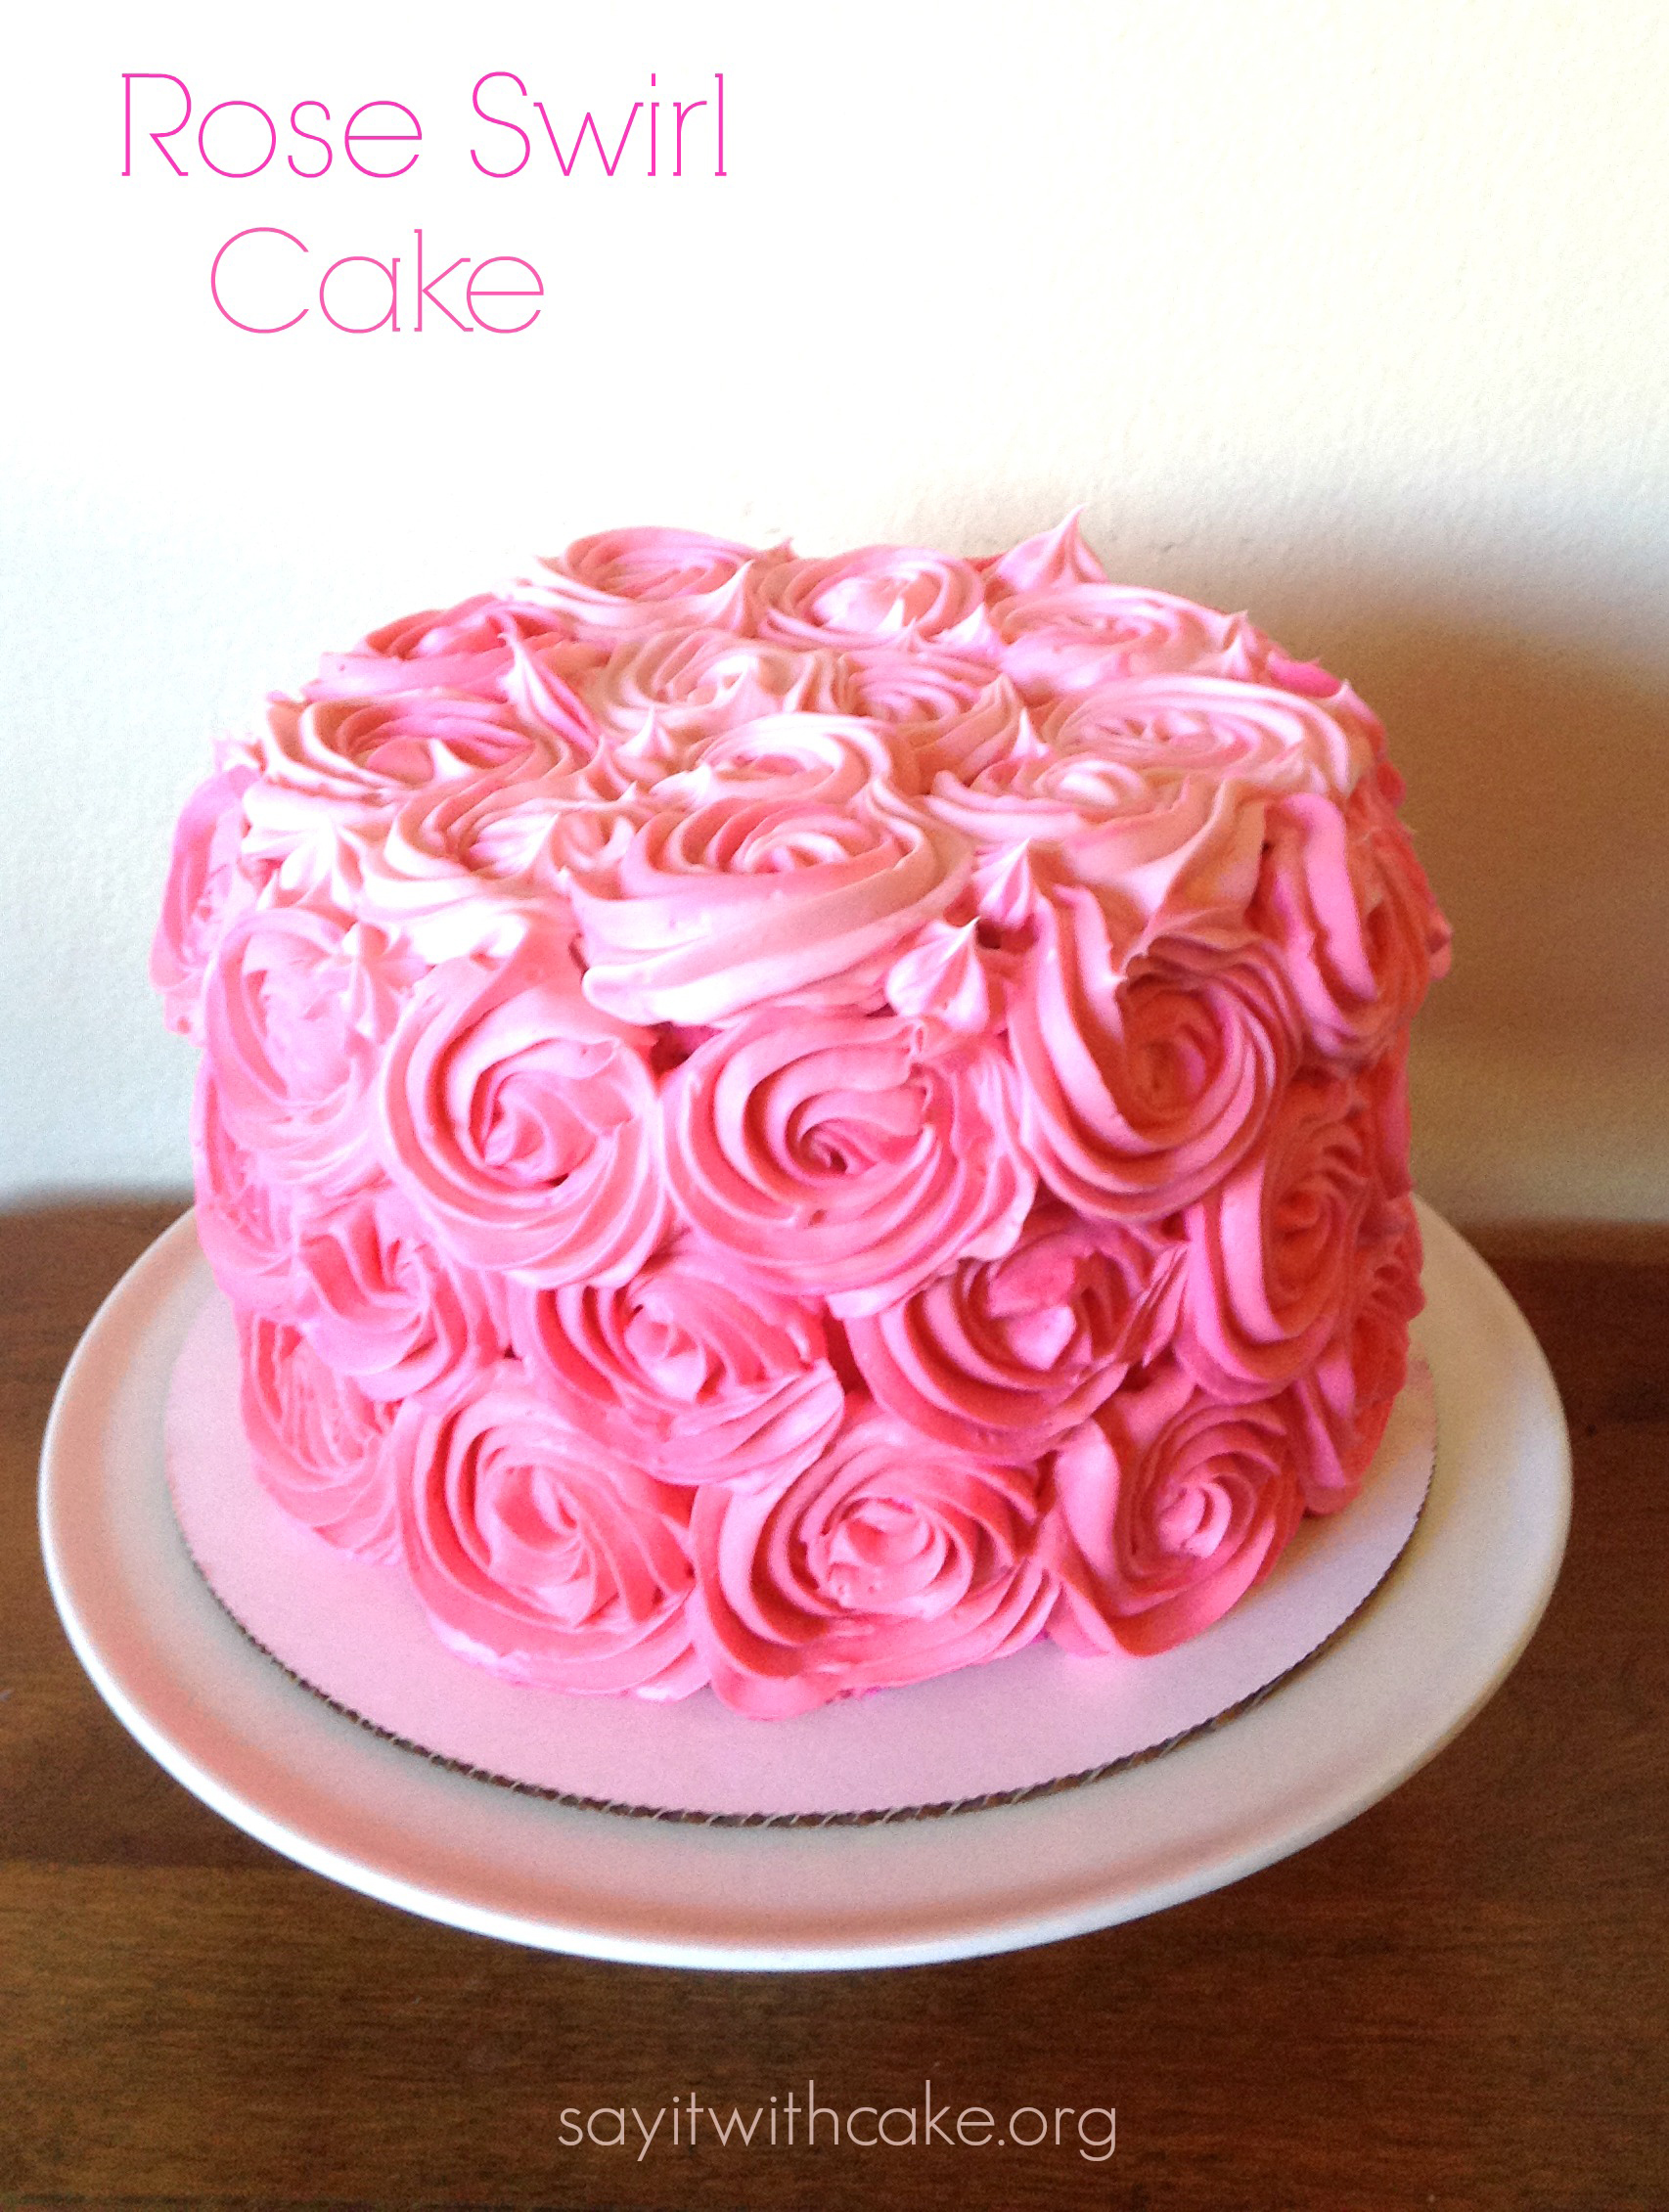 I am so excited about this cake because I used a new recipe for the frosting! I usually made a basic buttercream frosting, but this time I tried the Swiss meringue buttercream. It worked like a dream! The flowers held up, and there weren’t any air bubbles. Also I have to say that it is much tastier, it is a little less sweet. This frosting is perfect for my husband who doesn’t really enjoy super sweet frosting.
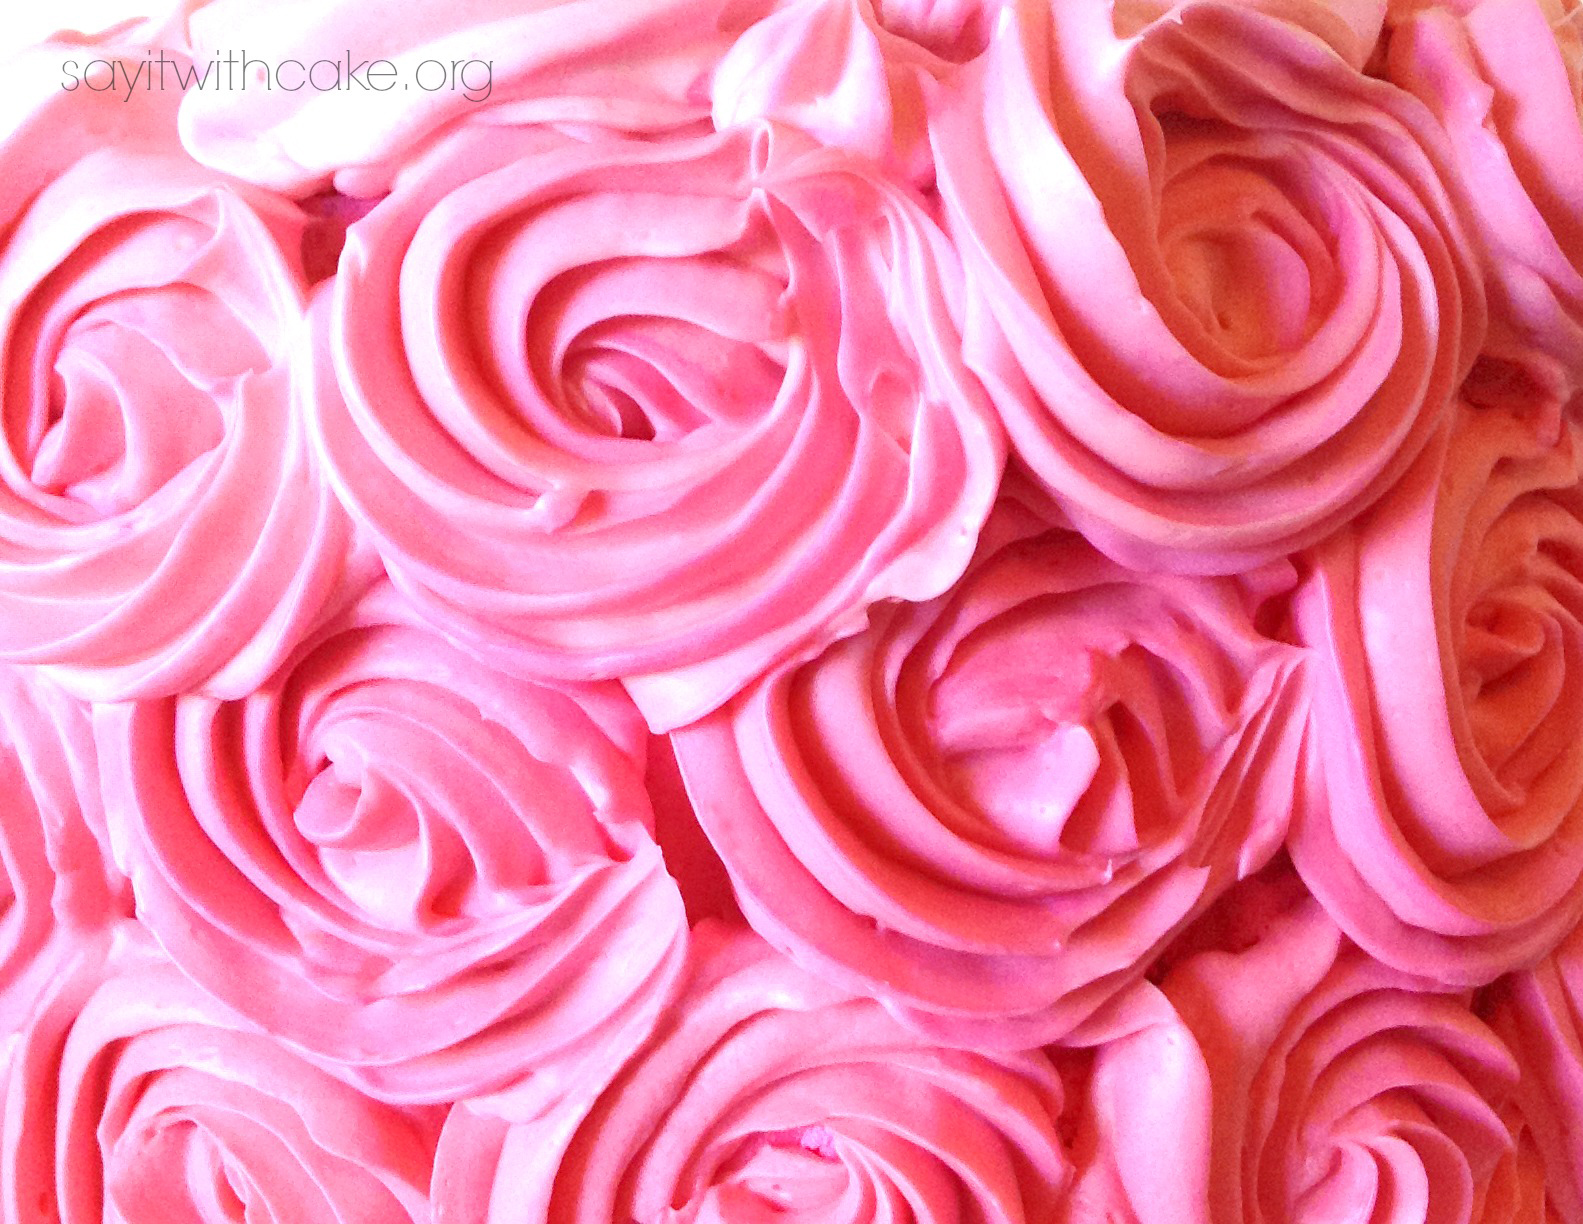
See how beautiful the roses turned out! This cake works well for a birthday cake for a girl, a Mothers day cake, or a Valentines day cake.
This cake is very easy to make once you get the Swiss meringue buttercream down. I had a few problems my first time but found some helpful websites here. If it turns out curdled, you scoop out 1/4 of the mixture and put it in the microwave for 15 seconds. Then pour it back into the bowl and beat it until it turns out creamy and fluffy.
You can see in this picture how I made a very subtle ombre effect with the roses from dark to light.
Ingredients
- 5 large egg whites
- 1 cup plus 2 tablespoons sugar
- Pinch of salt
- 1 pound (4 sticks) unsalted butter, cut into tablespoons, room temperature
- 1 1/2 teaspoons pure vanilla extract
Instructions
- Combine egg whites, sugar, and salt in the heatproof bowl of a standing mixer set over a pan of simmering water. Whisk constantly by hand until mixture is warm to the touch and sugar has dissolved (the mixture should feel completely smooth when rubbed between your fingertips).
- Attach the bowl to the mixer fitted with the whisk attachment. Starting on low and gradually increasing to medium-high speed, whisk until stiff (but not dry) peaks form. Continue mixing until the mixture is fluffy and glossy, and completely cool (test by touching the bottom of the bowl), about 10 minutes.
- With mixer on medium-low speed, add the butter a few tablespoons at a time, mixing well after each addition. Once all butter has been added, whisk in vanilla. Switch to the paddle attachment, and continue beating on low speed until all air bubbles are eliminated, about 2 minutes. Scrape down sides of bowl with a flexible spatula, and continue beating until the frosting is completely smooth. Keep buttercream at room temperature if using the same day.
- (Optional) To tint buttercream (or royal icing), reserve some for toning down the color, if necessary. Add gel-paste food color, a drop at a time (or use the toothpick or skewer to add food color a dab at a time) to the remaining buttercream. You can use a single shade of food color or experiment by mixing two or more. Blend after each addition with the mixer (use a paddle attachment) or a flexible spatula, until desired shade is achieved. Avoid adding too much food color too soon, as the hue will intensify with continued stirring; if necessary, you can tone down the shade by mixing in some reserved untinted buttercream.
Recipe from Martha Stewart
Other Rose Swirl Cakes you might like
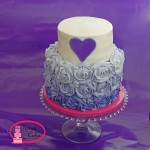
Purple rose swirl cake
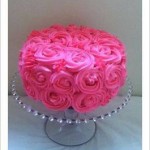
Rose Swirl Cake
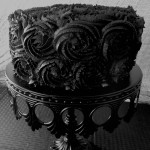
black rose swirl cake
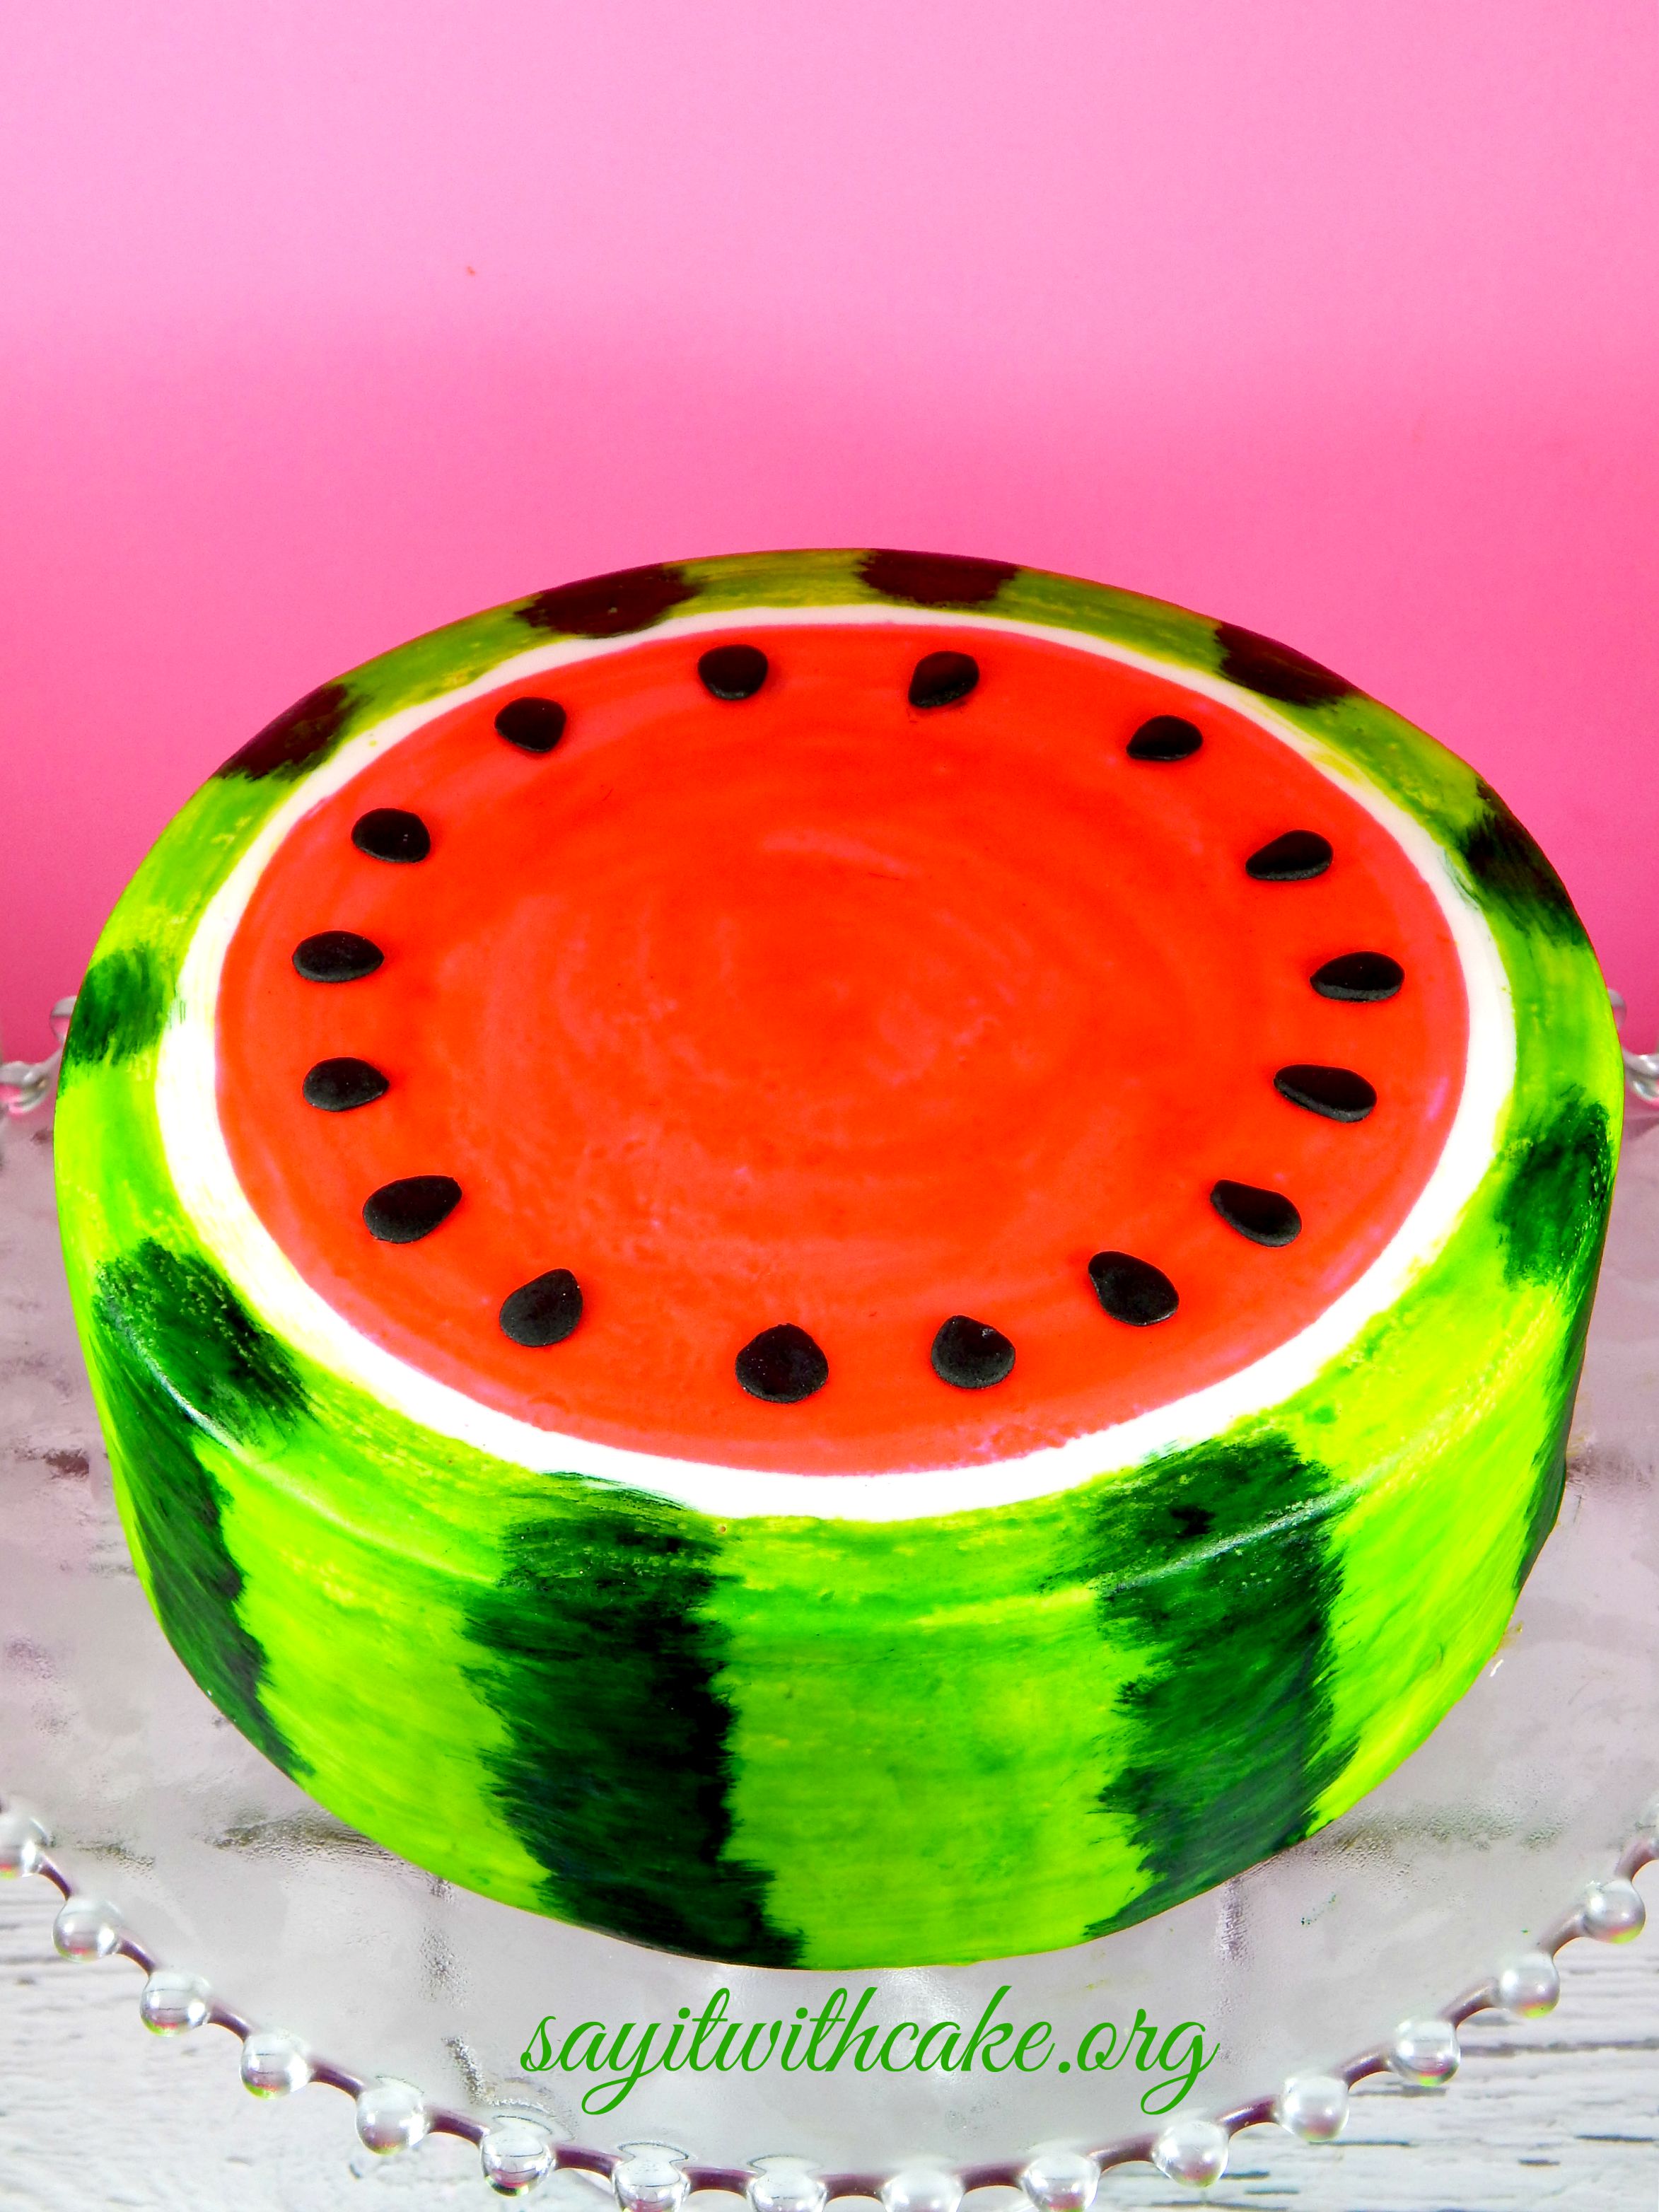
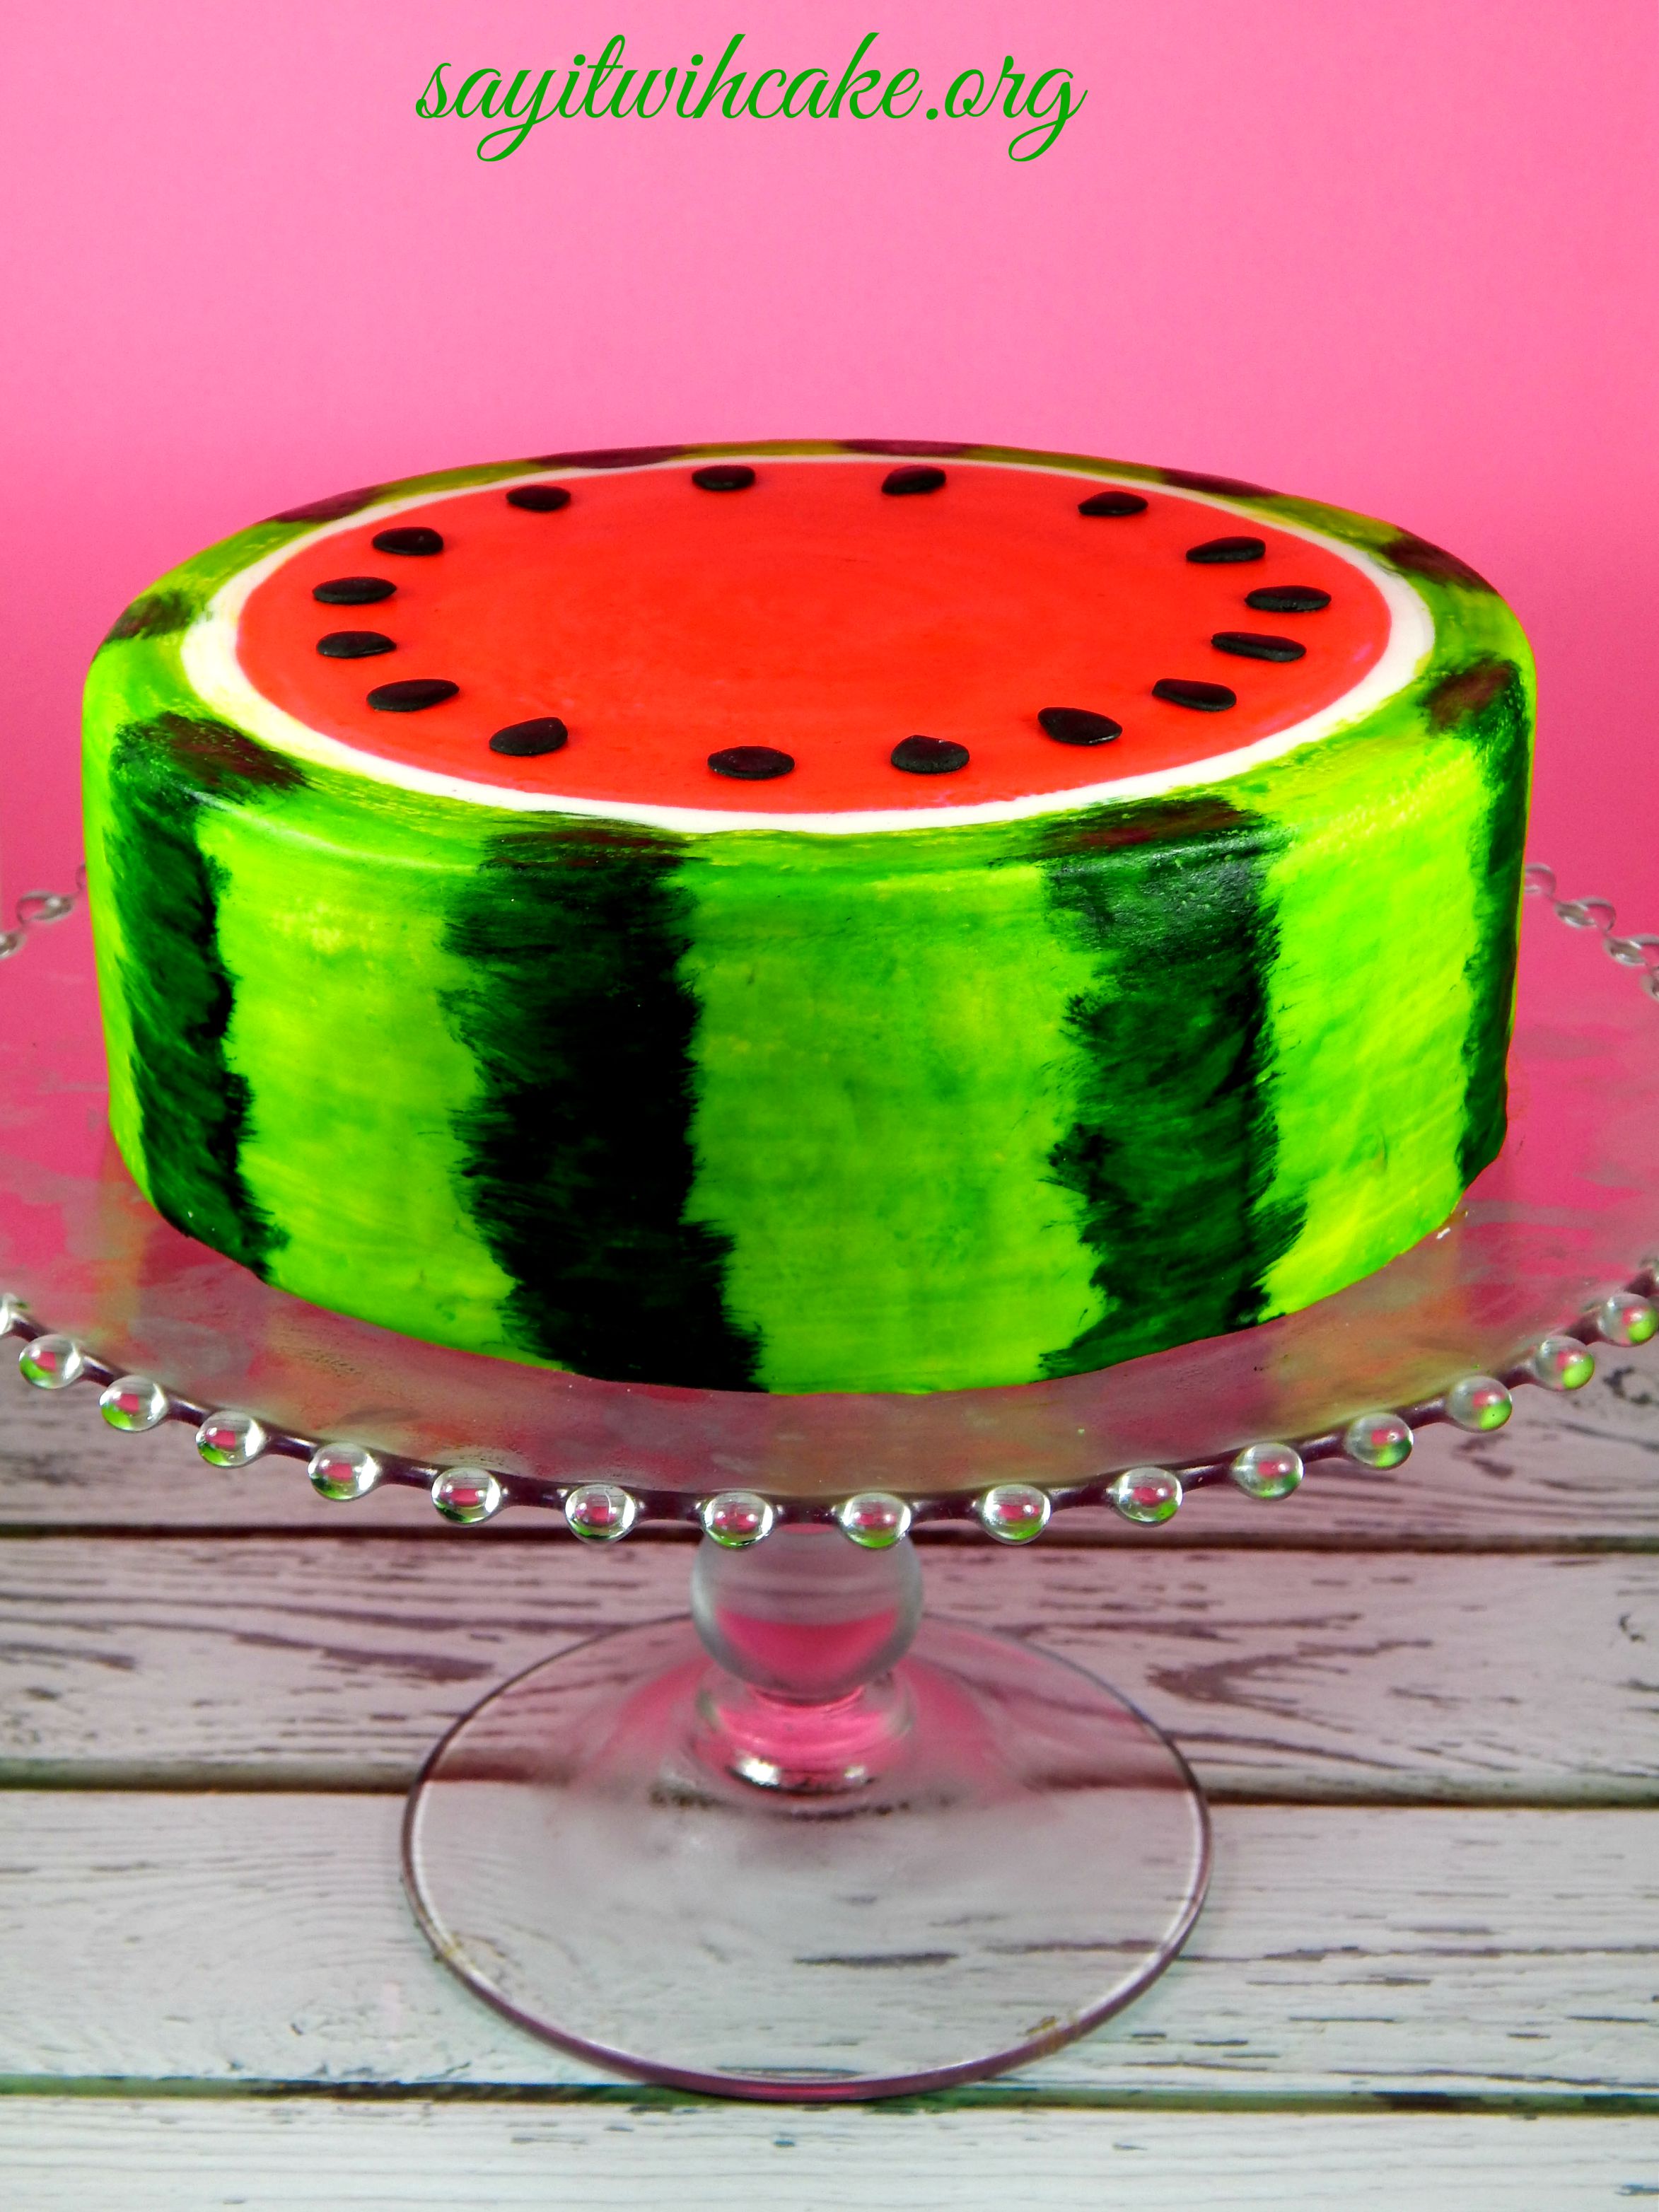
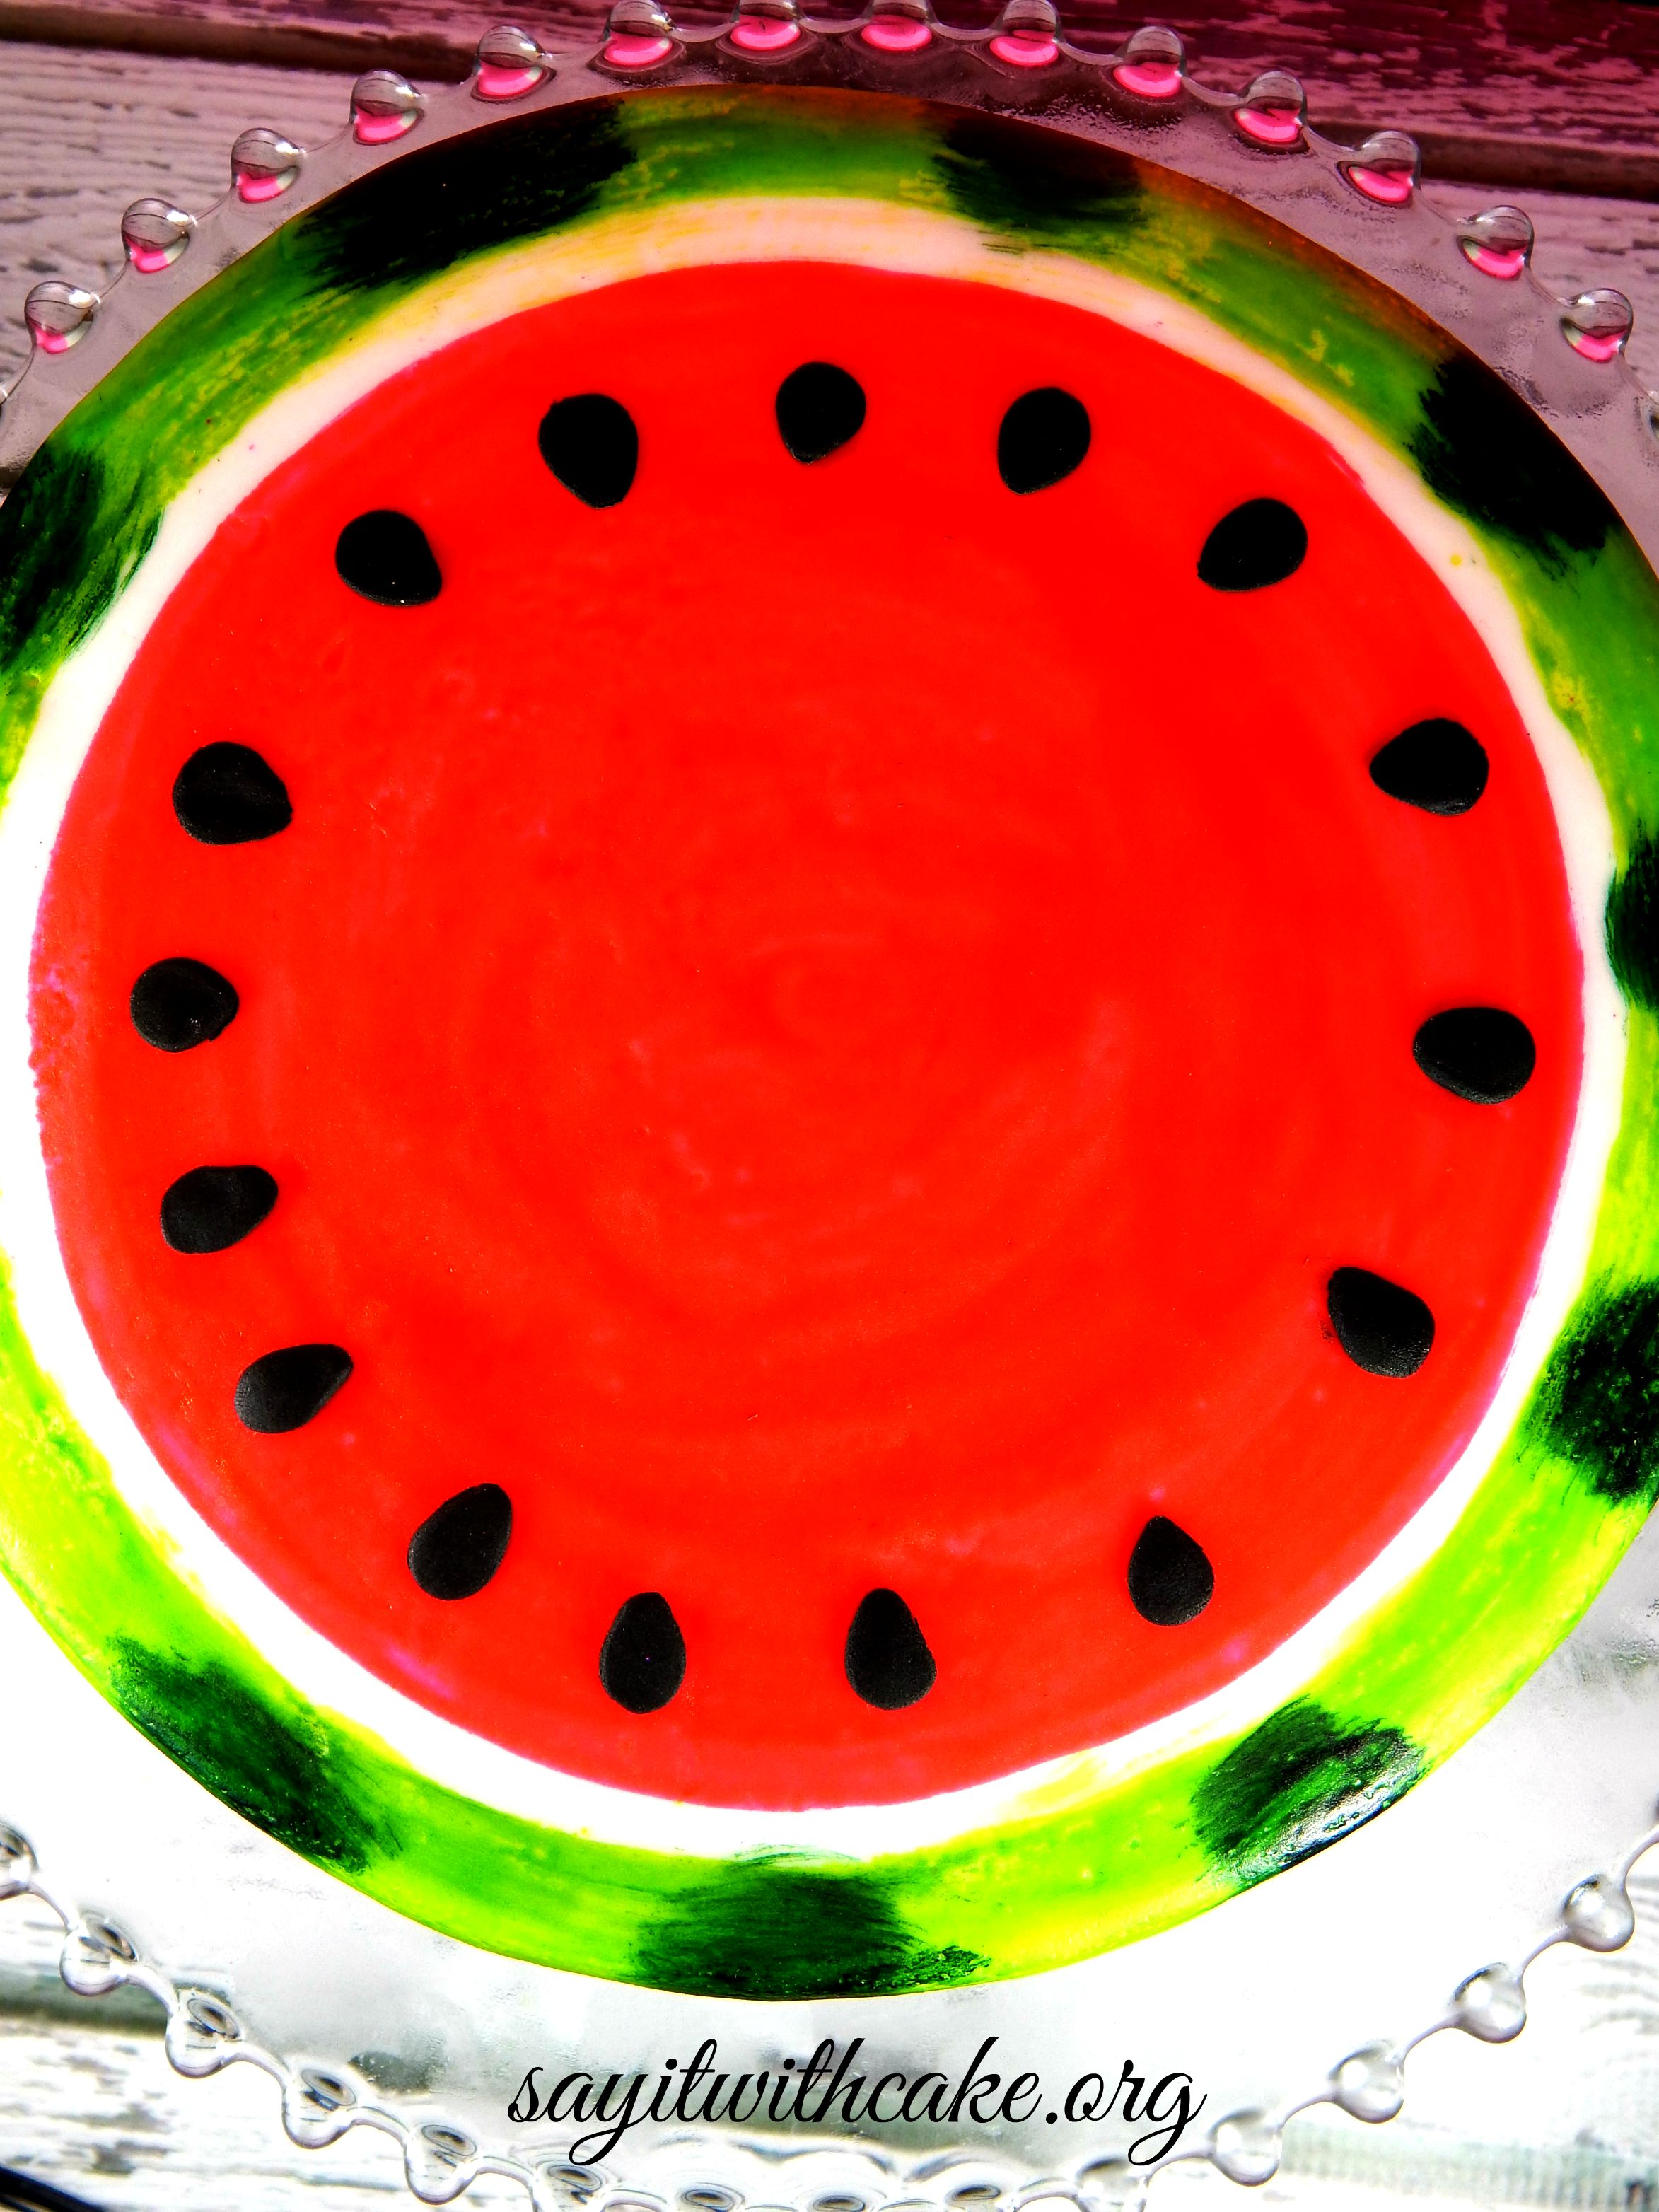
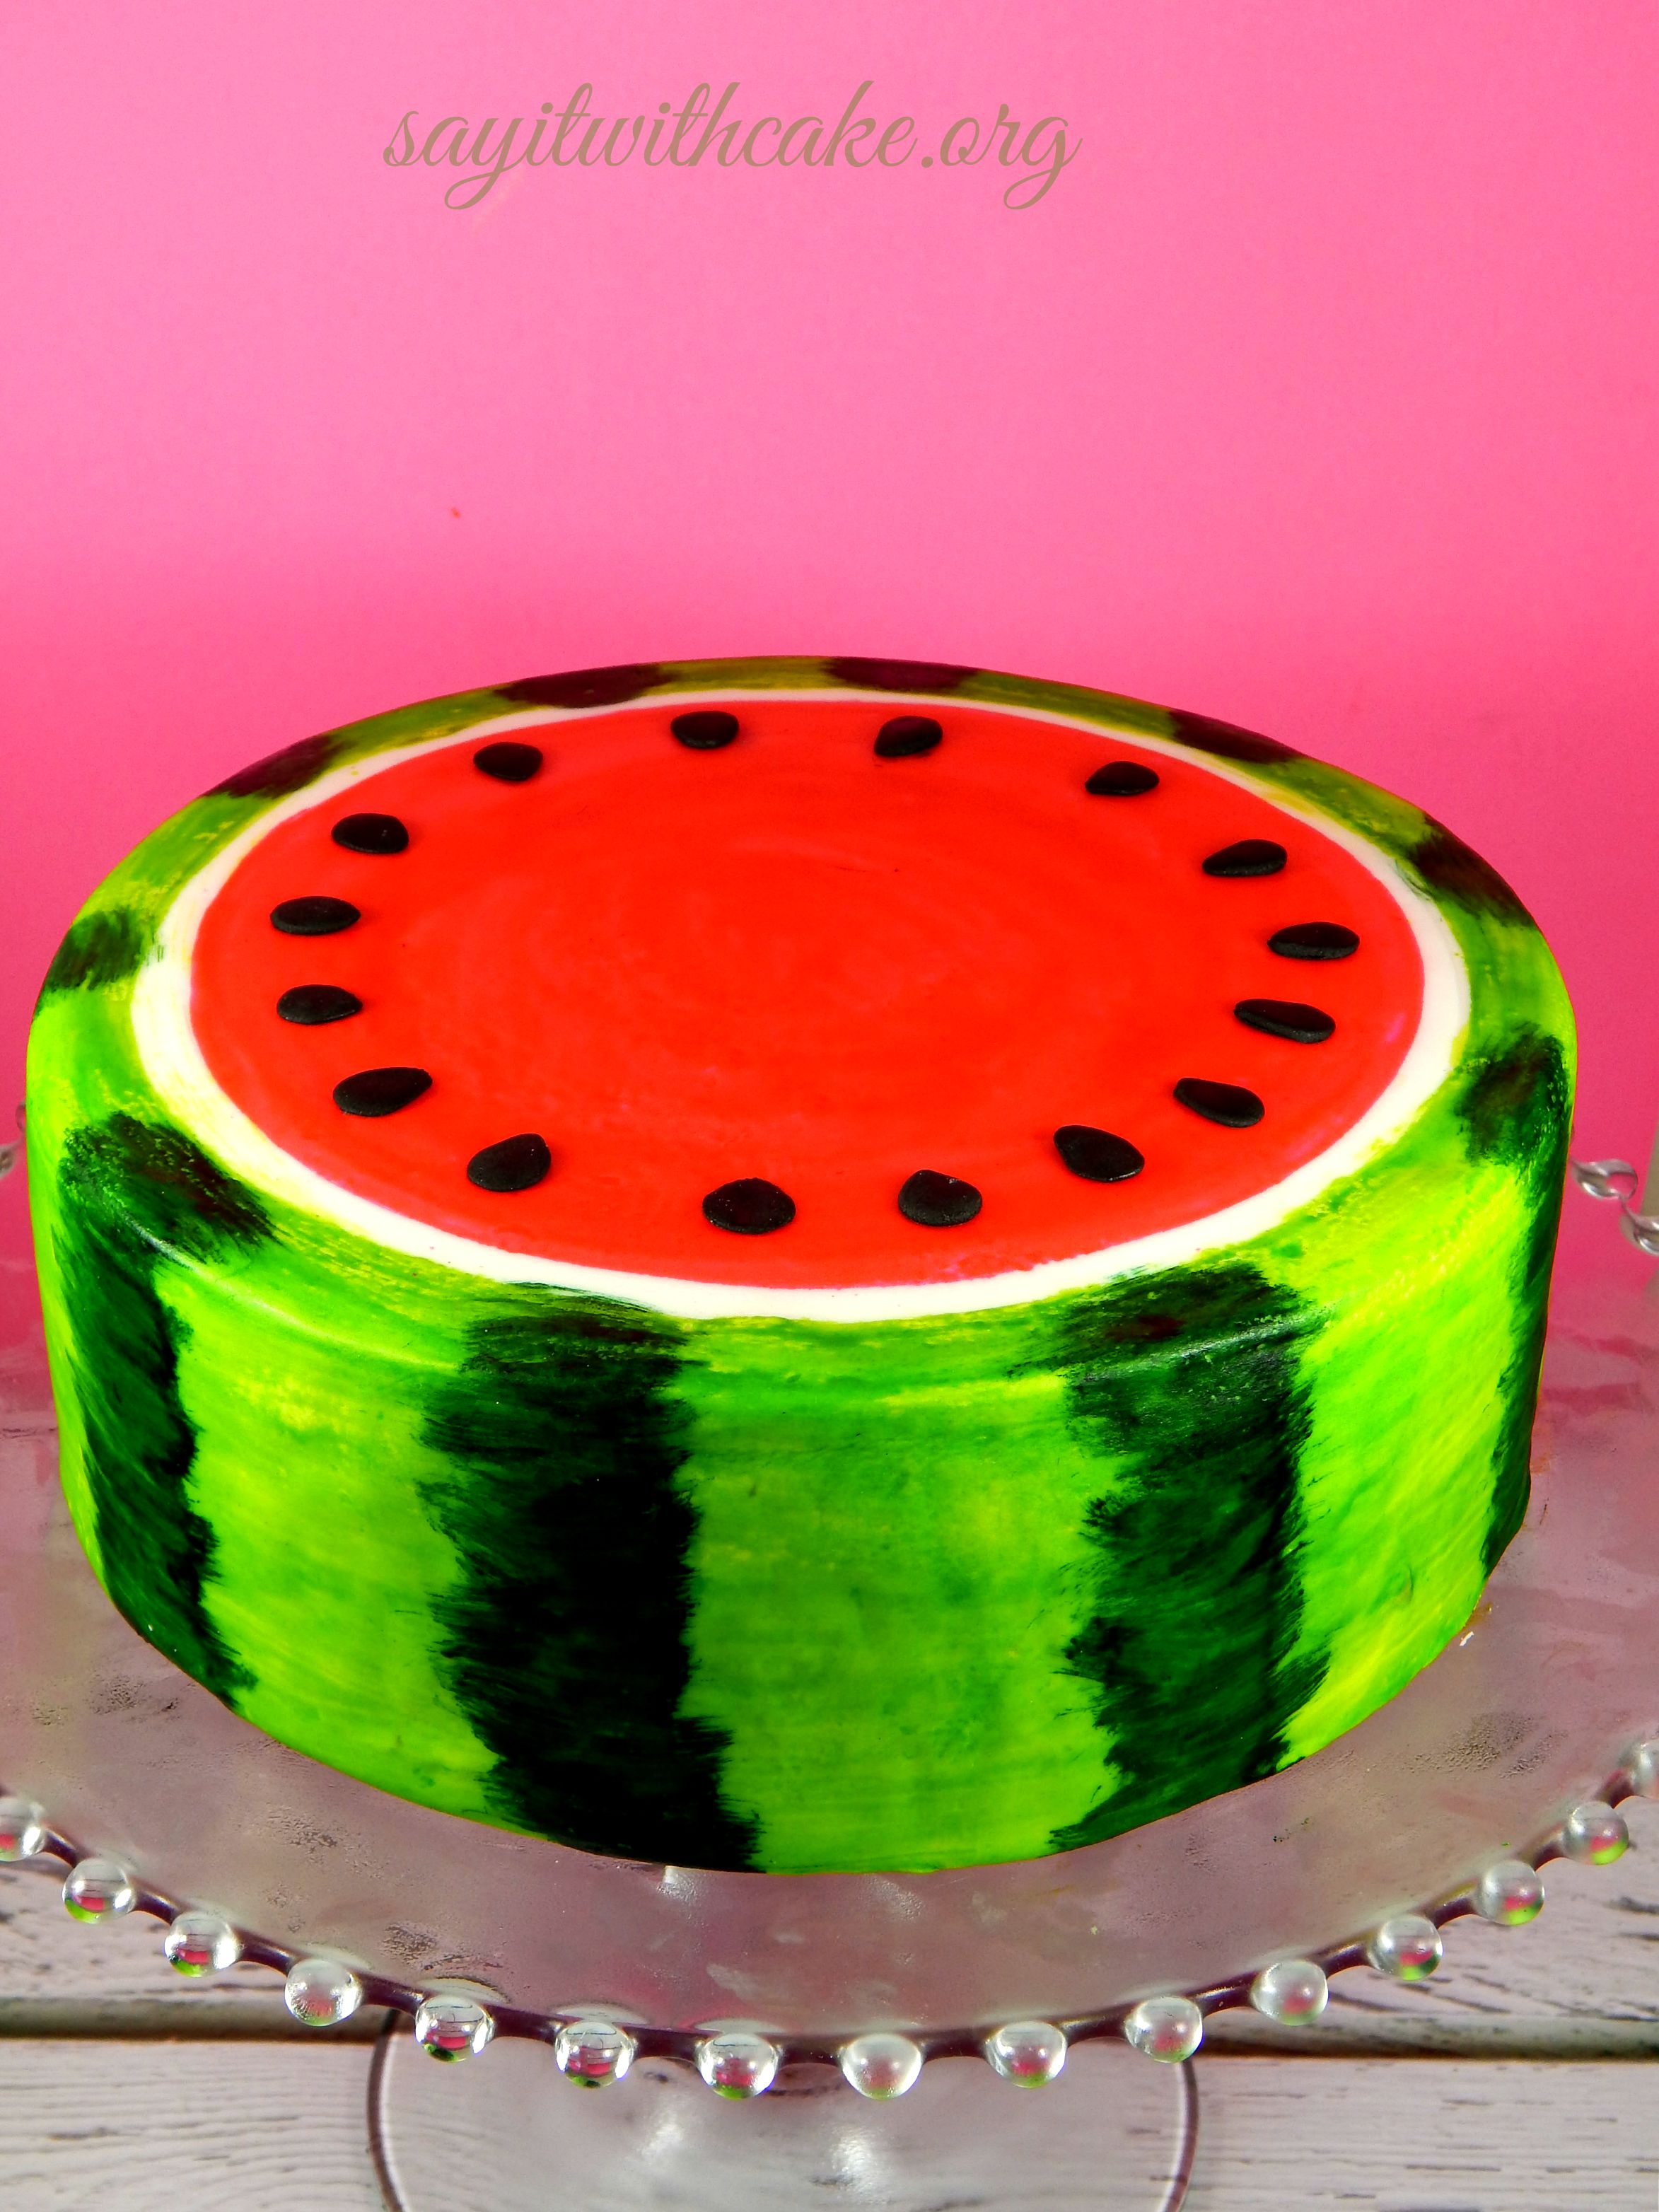 This Watermelon Cake is made with a deliciously refreshing watermelon flavored cake, frosted with a bright pink watermelon flavored buttercream, and covered with a home made marshmallow fondant. The watermelon design is hand painted, and the seeds are made with black fondant.
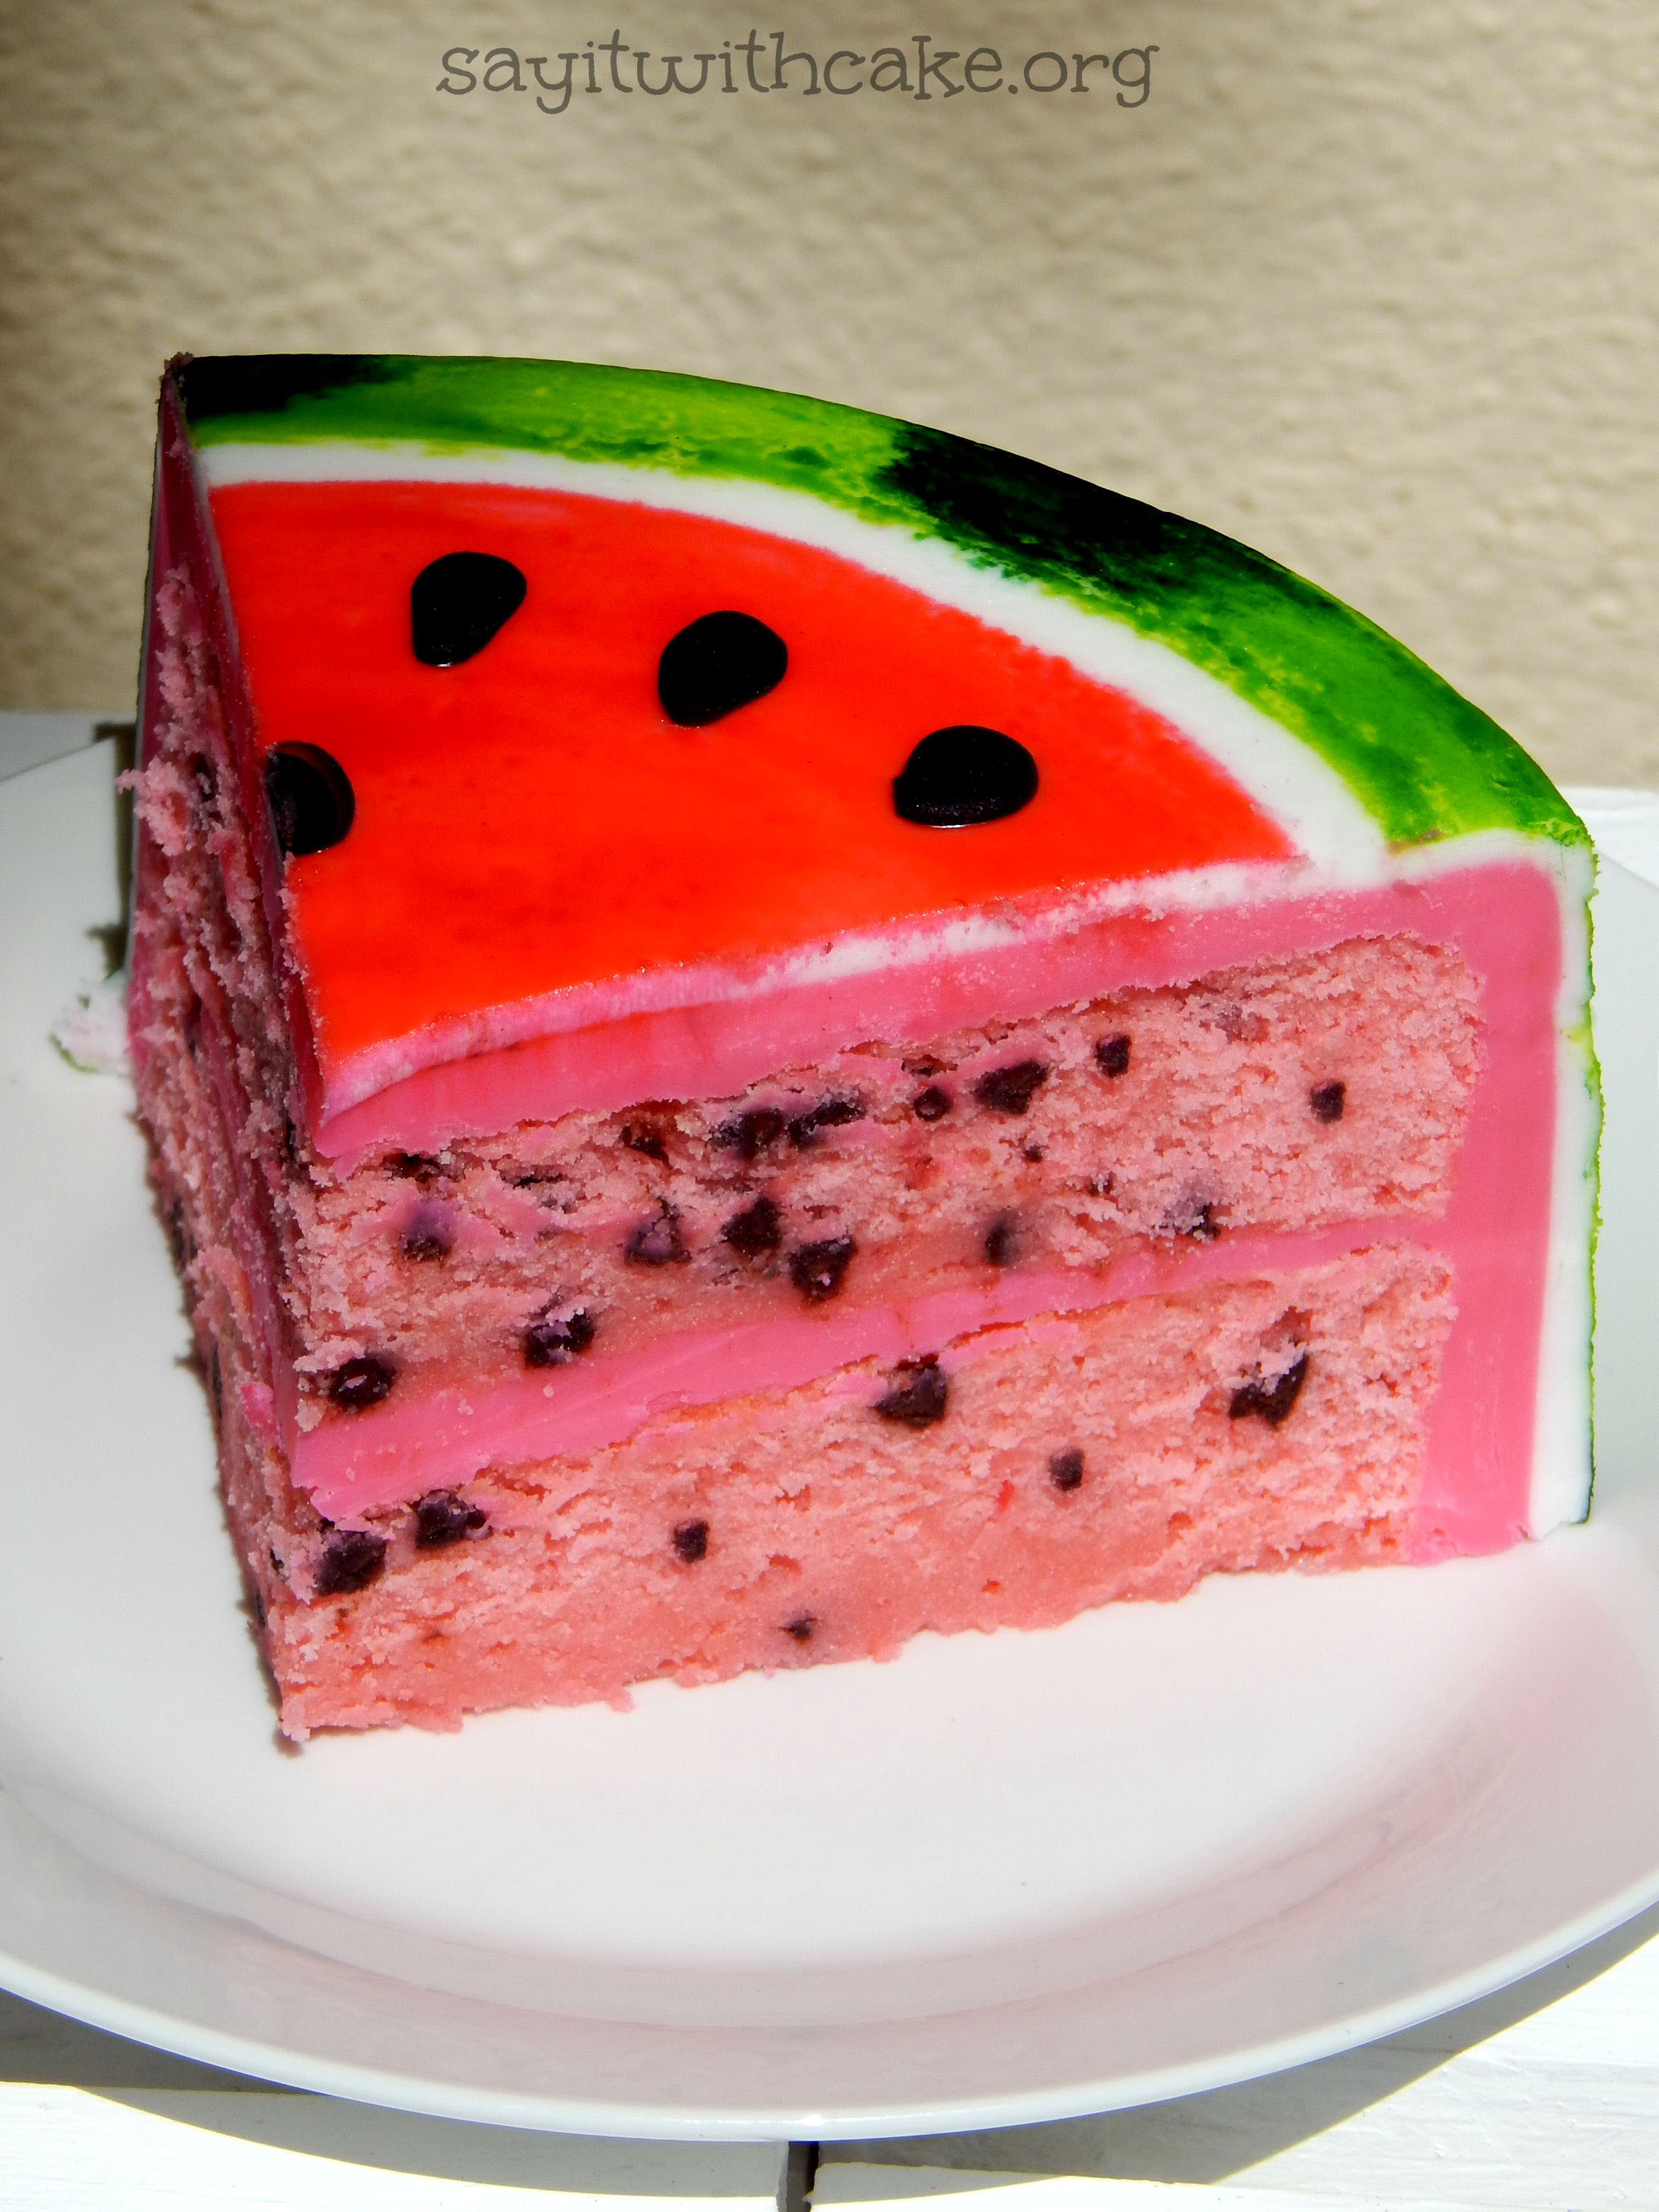
After several tries of making this cake, I still could not get the chocolate chips to not sink in the cake while it was cooking. I sprayed the mini chocolate chips with non stick cooking spray, and tossed it in flour. They still sunk. So I tried my recipe for the cake I used while trying to incorporate blueberries into the batter. It is a very thick batter and that was the only way I could get the chocolate chips not to sink. It is more of the consistency of cookie dough then cake batter. But it worked perfectly.
To paint the watermelon onto the fondant you will need lime green color gel, leaf green color, pink color gel, vodka, lemon extract or lemon juice, a small bowl, and a new paintbrush of good quality. The lemon extract, lemon juice, or vodka is to mix with the color gel to paint on the fondant. You can experiment and see what you prefer. Here is a list of the pros and cons of each choice.
Lemon juice: This doesn’t evaporate very quickly, so you’ll find yourself left with wet or tacky painted surfaces for a while. This means you can’t add detail on top of your work for some time.
Lemon extract: Extracts contain alcohol. Alcohol is quick to evaporate and so quick to dry, which is why lemon extract is sometimes recommended! Lemon extract can be pretty expensive if you are buying enough to paint the whole surface of the cake. Another thing to consider is that you most likely will be able to taste the lemon on the fondant so if you use this method, make sure the lemon will go with the flavor of your cake.
Vodka: This is what I use. It dries quickly which has its pros and cons; you can add another coat onto your work in around a minute, but you’ll need to add a few drops of vodka to your mix every so often. Don’t worry about painting with alcohol on kids’ cakes because the alcohol evaporate away completely leaving nothing behind but your hard work!
This is the watermelon ganache I made and covered my cake with. I used white chocolate and heavy cream. I flavored the cream with watermelon jello and added a few drops of pink while the cream was boiling.
 So all you do is mix a little food color with your medium of choice and paint directly onto the fondant. It dries very quickly and has a shiny finish!
Ingredients
- Cake
- By Sally's Baking Addiction
- 1 cup (230g) unsalted butter, softened to room temperature
- 1 and 1/4 cups (250g) granulated sugar
- 1/2 cup (100g) light brown sugar
- 4 large eggs, at room temperature*
- 1 Tablespoon vanilla extract
- 3 cups (375g) all-purpose flour, careful not to overmeasure*
- 1 Tablespoon baking powder
- 1/2 teaspoon salt
- 1 cup (240ml) buttermilk*
- 1 packet of watermelon jello
- a few drops of pink or red food color
- 1 Tablespoon all-purpose flour
- 1/2 cup miniature semisweet chocolate chips
Instructions
- Cake
- 1.Preheat the oven to 350F. Spray three 8x2 inch cake pans with nonstick spray. Set aside.
- 2.Make the cake. Using a handheld or stand mixer with a paddle attachment, beat the butter on high until creamy - about 1 minute. Add granulated and brown sugars and beat on medium-high speed until creamed, about 2-3 minutes. Scrape down the sides and bottom of the bowl as needed. Add eggs and vanilla. Beat on medium speed until everything is combined, about 2 full minutes. Scrape down the sides and bottom of the bowl as needed. Set aside.
- 3.In a large sized bowl, toss together the flour, baking powder, and salt. Slowly add the dry ingredients to the wet ingredients. Beat on low speed for 5 seconds, then add the milk watermelon jello and food color
- . Remove from the mixer and stir lightly until everything is just combined. Toss the chocolate chips in 1 Tablespoon of flour and fold into the batter. Batter is extremely thick. Do not overmix at any point. Overmixing will lend a tough, dense textured crumb.
- 4.Spoon batter evenly into 3 prepared cake pans. Bake for about 21-26 minutes or until a toothpick inserted in the center comes out clean. Remove from the oven and allow to cool completely before frosting.
Buttercream recipe Here
Marshmallow fondant recipe Here
Ganache recipe Here
Enjoy!
other watermelon treats you might like!


Watermelon Cake
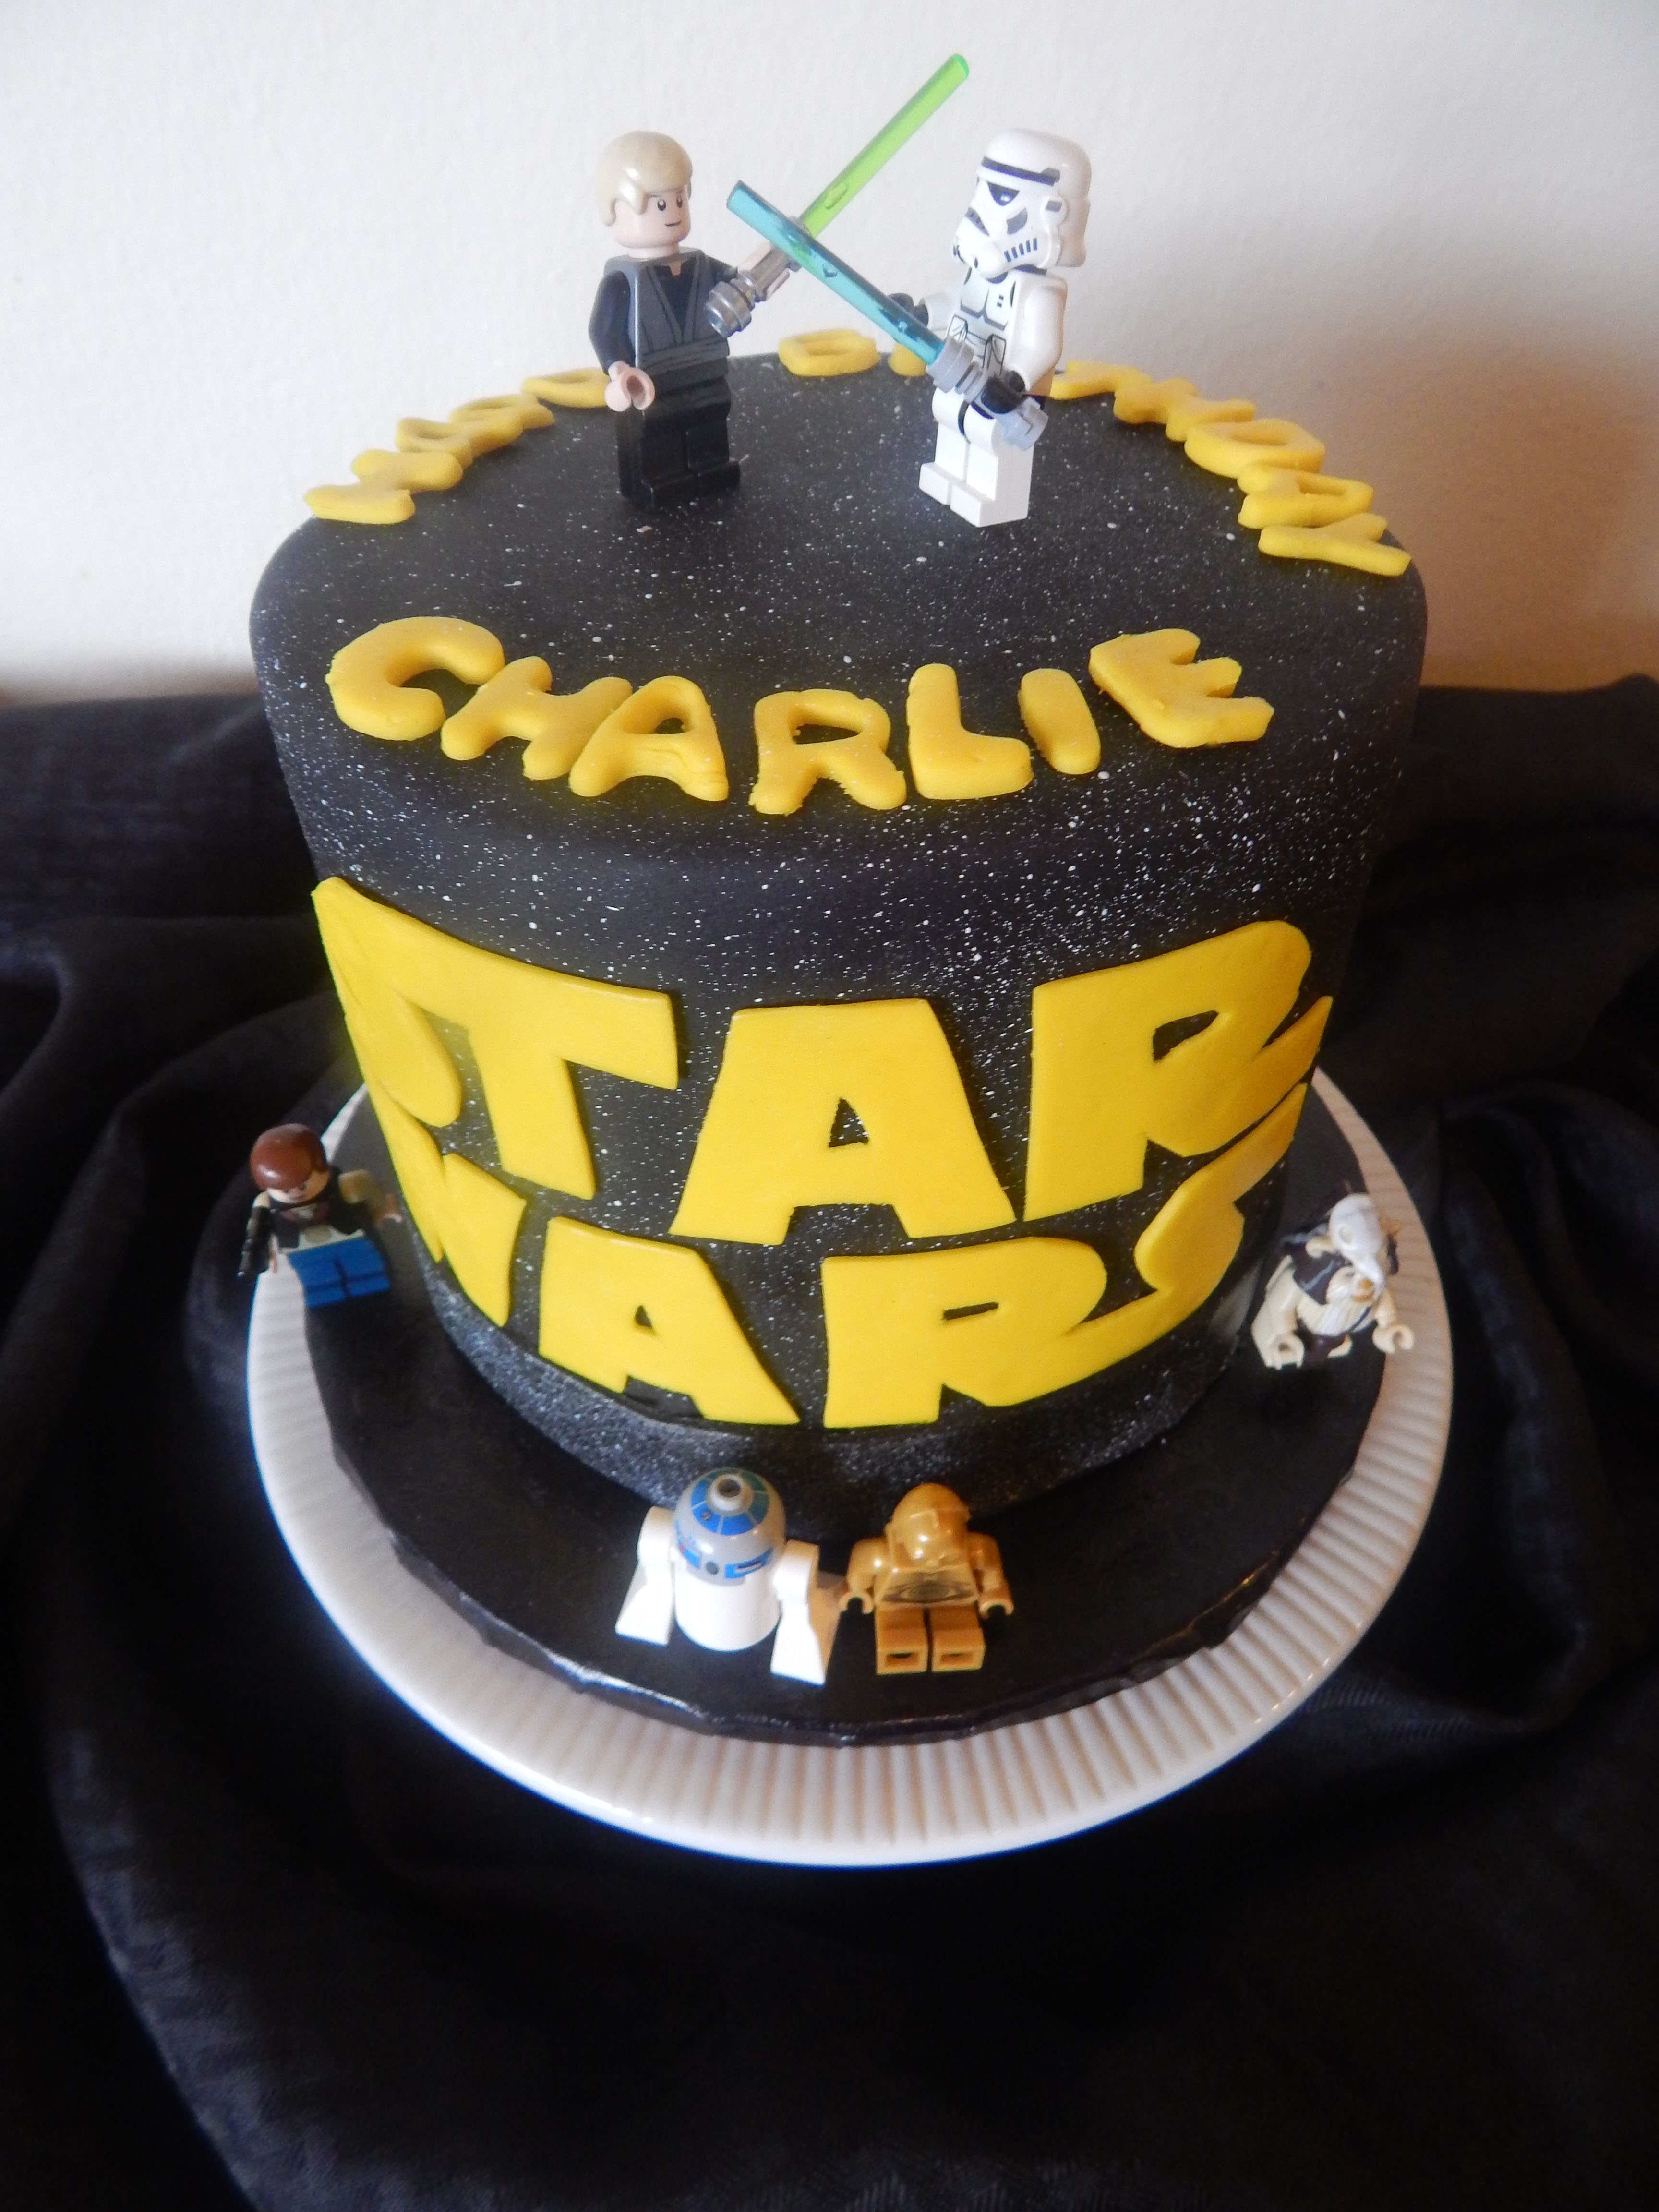 Happy Star Wars Day! Today I wanted to show you how I made this cute little Star Wars Cake. My friend Charlie is a huge fan of Star Wars, and wanted a fondant covered Star Wars cake for his birthday.
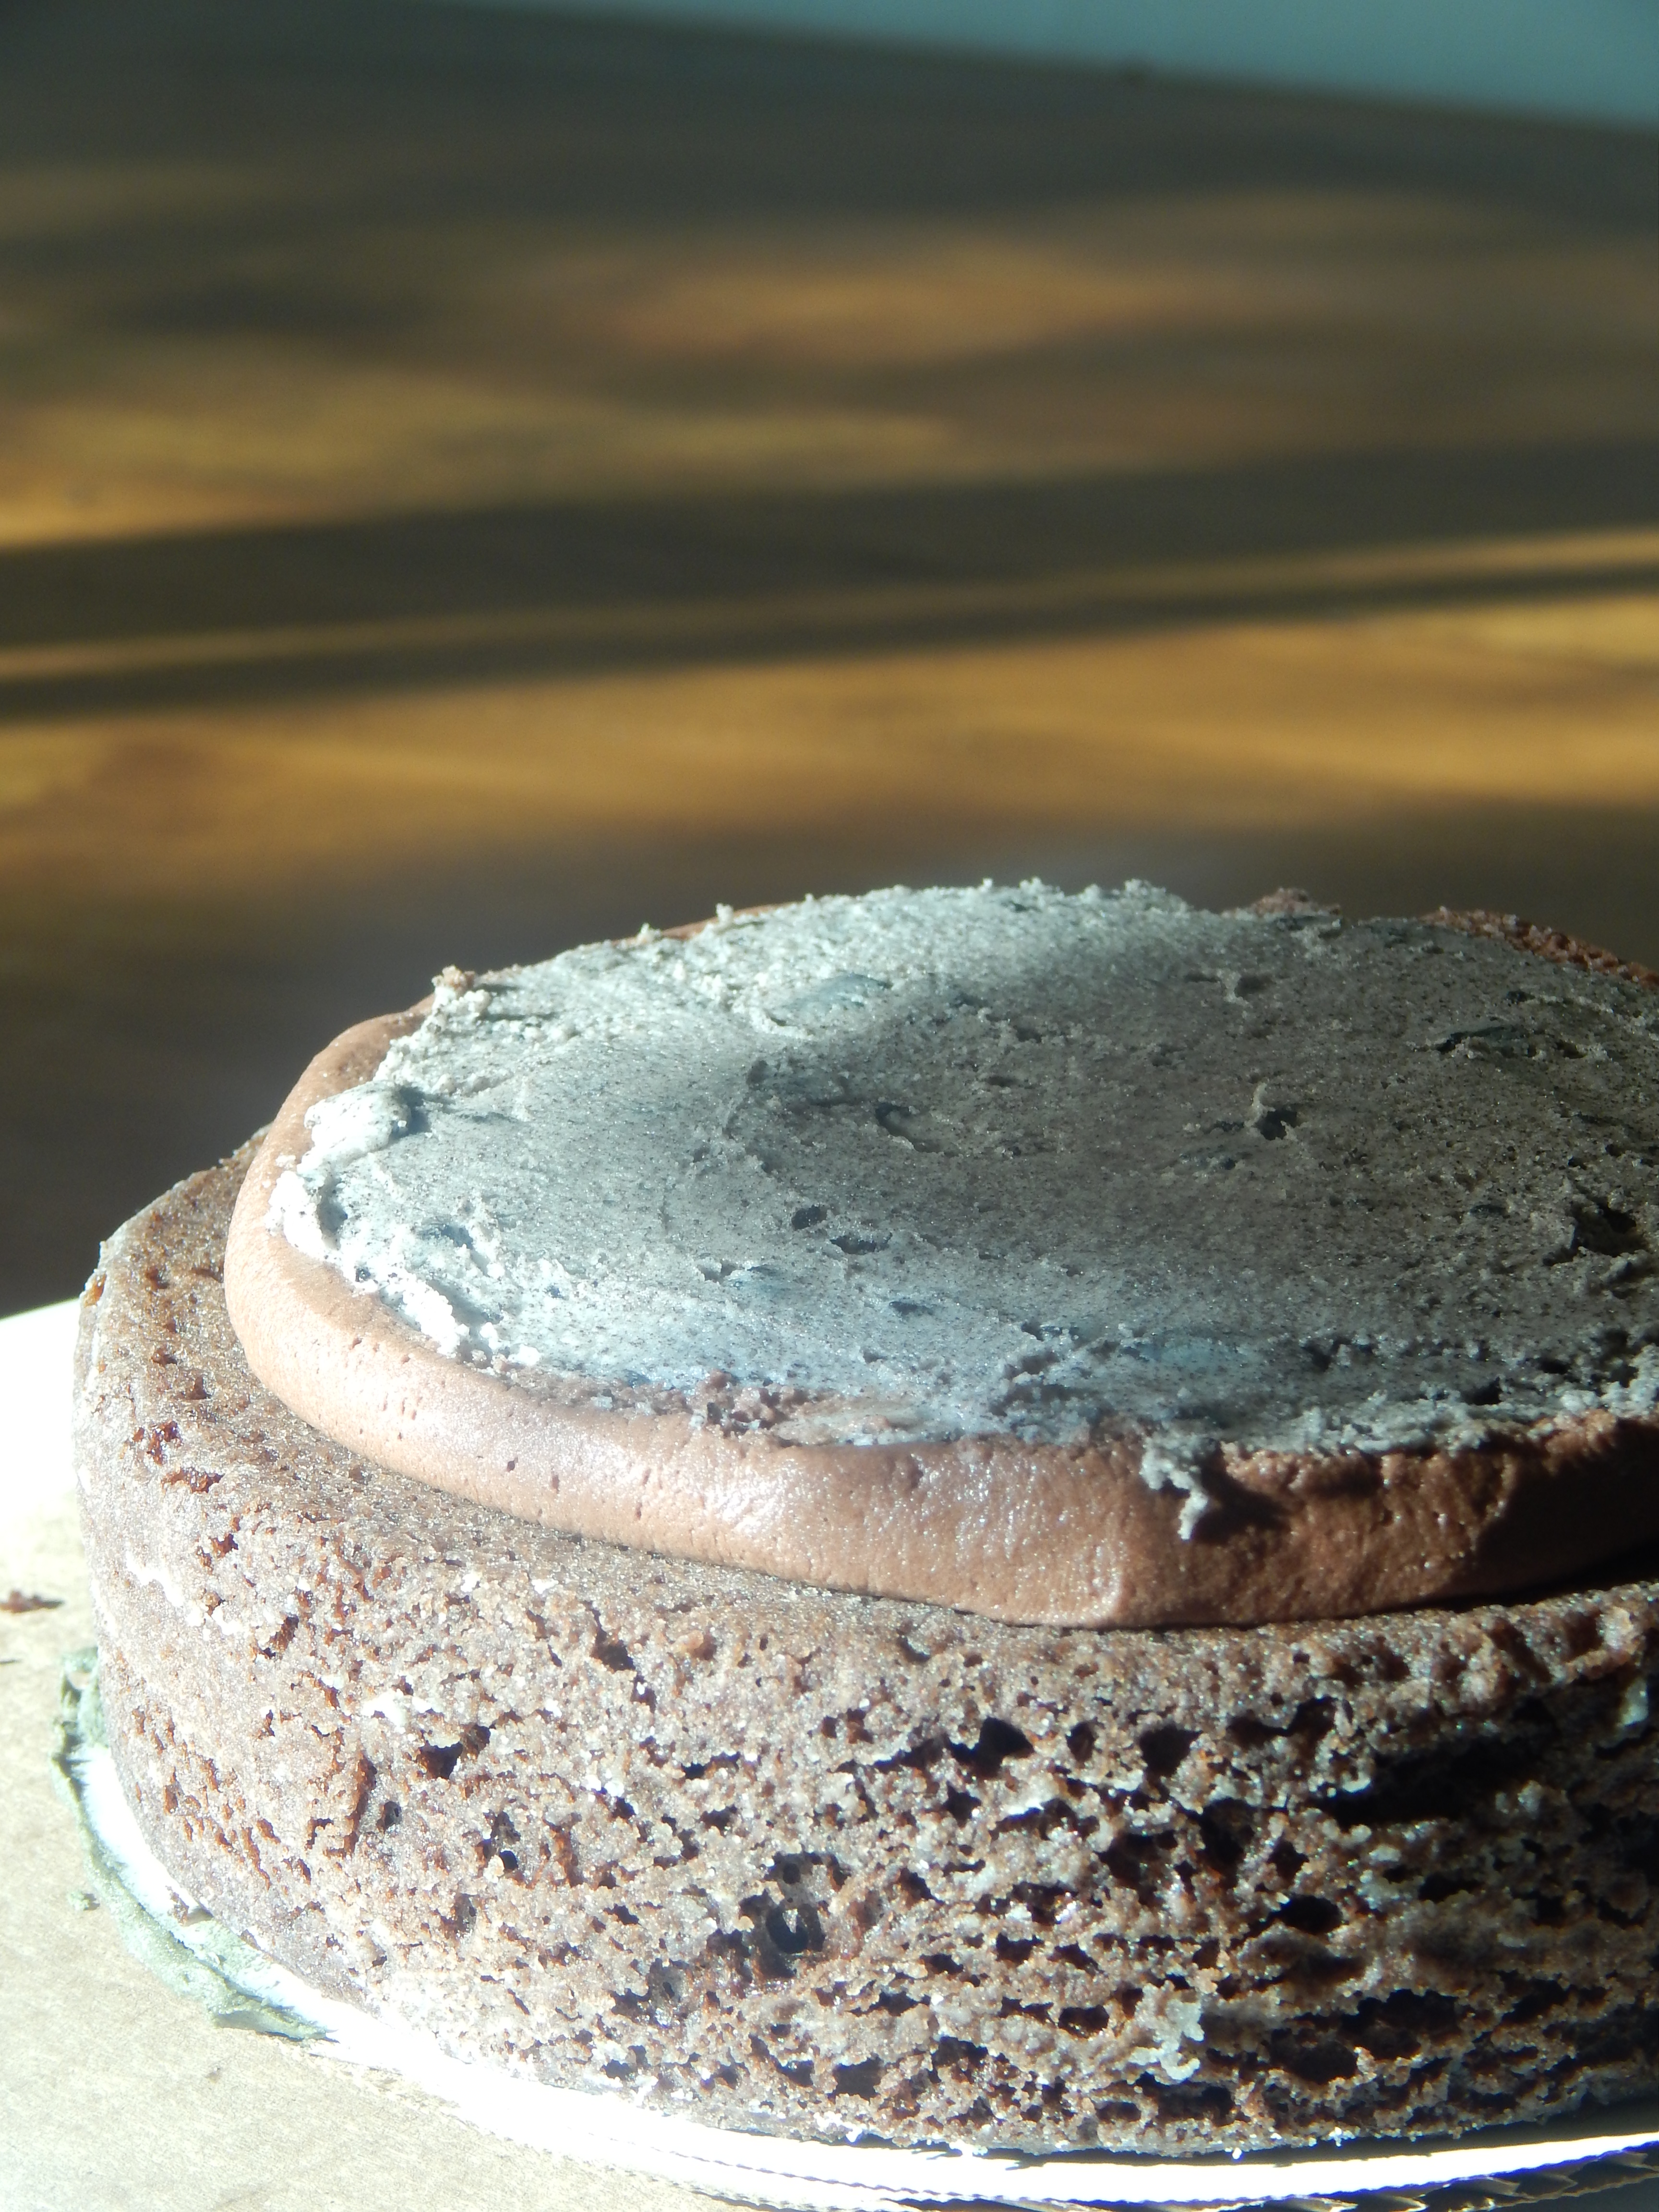
First I baked the chocolate cake and torted, filled, and stacked the cake.
Ingredients
- •1 c. salted butter, at room temperature
- •3½-4 c. powdered sugar
- •1/2 c. unsweetened cocoa powder
- •1 tsp. vanilla extract
- •2-3 T. whole milk, half-and-half, or cream
Instructions
- With an electric mixer (either hand or stand), beat butter until pale, about 3-4 minutes on medium.
- Scrape down the bowl.
- Add 3½ cups powdered sugar, cocoa powder, vanilla, and 2 tablespoons of milk.
- Mix on low until powdered sugar and cocoa powder are incorporated.
- If the frosting is too dry, add another tablespoon of milk. If the frosting is too wet, add powdered sugar 2 tablespoons at a time until it reaches a spreadable consistency

I made a dam of thick chocolate buttercream frosting around the edge of the cake and filled it with cookies and cream filling.
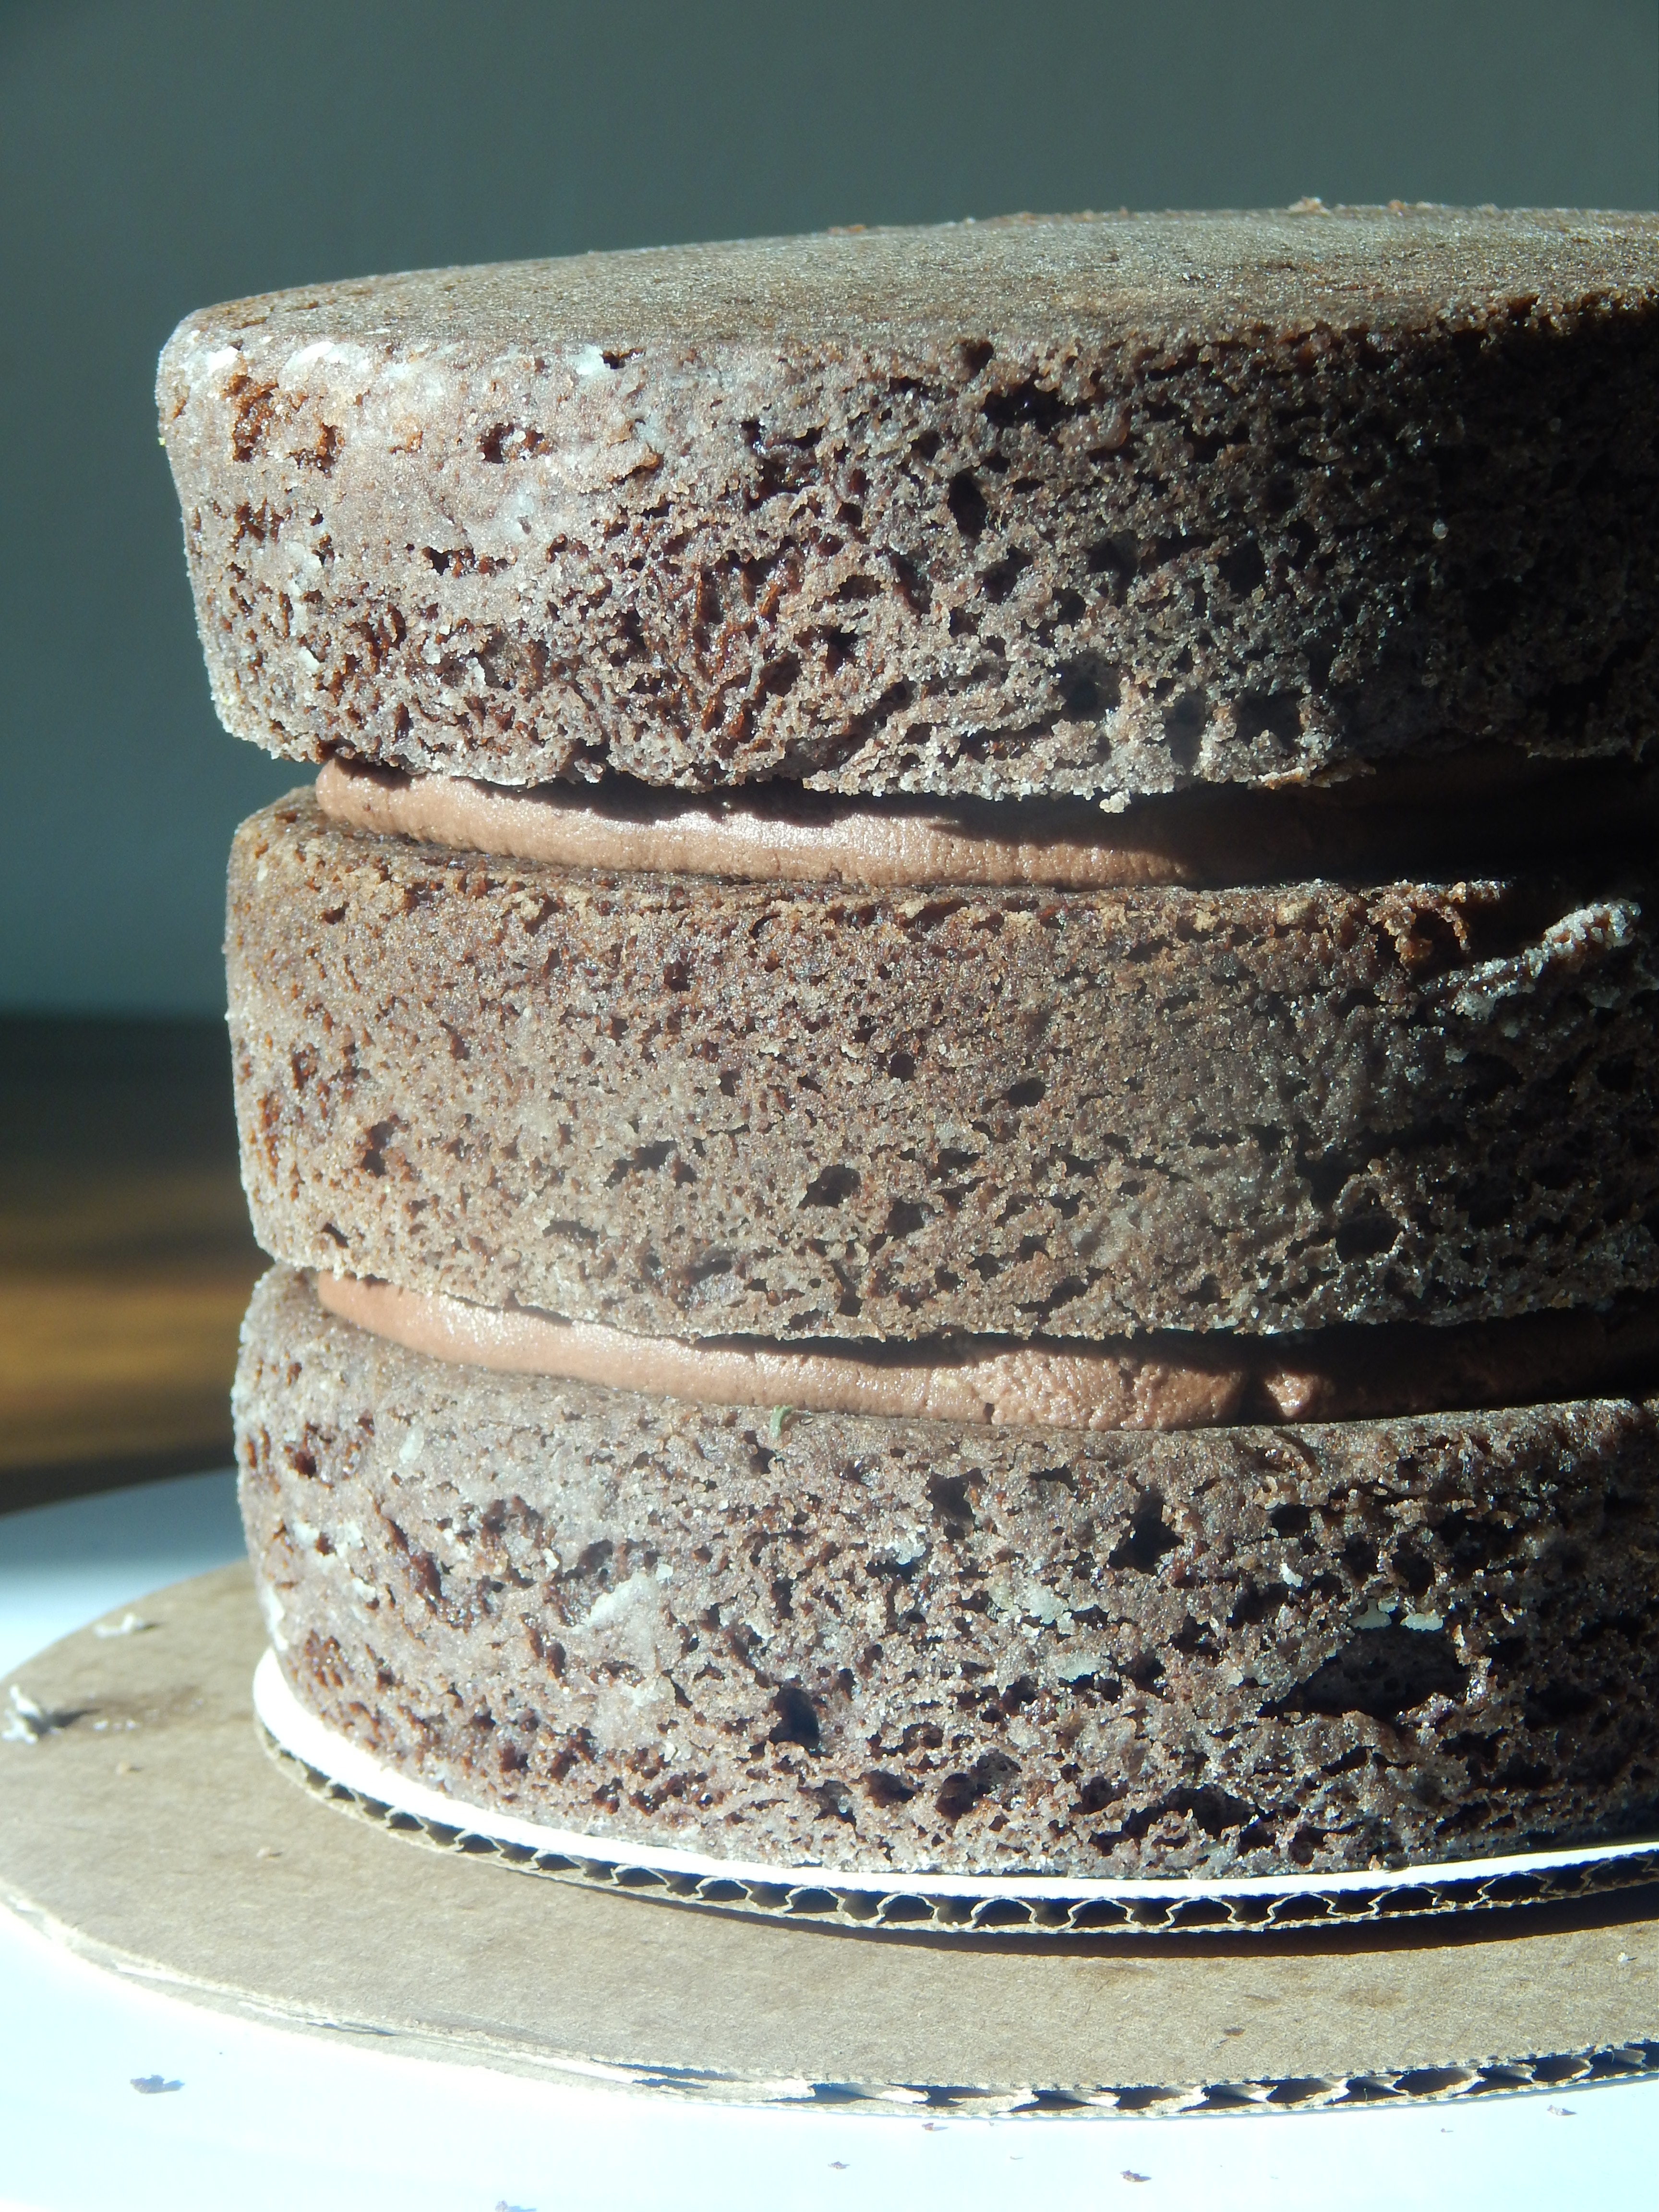
I repeated this for all of the layers. Next I covered the cake with chocolate buttercream frosting and covered the cake with black fondant. I always buy my black fondant because when you try to make it yourself, no matter how much black food coloring you use, it always turns out a dark gray and never completely black.
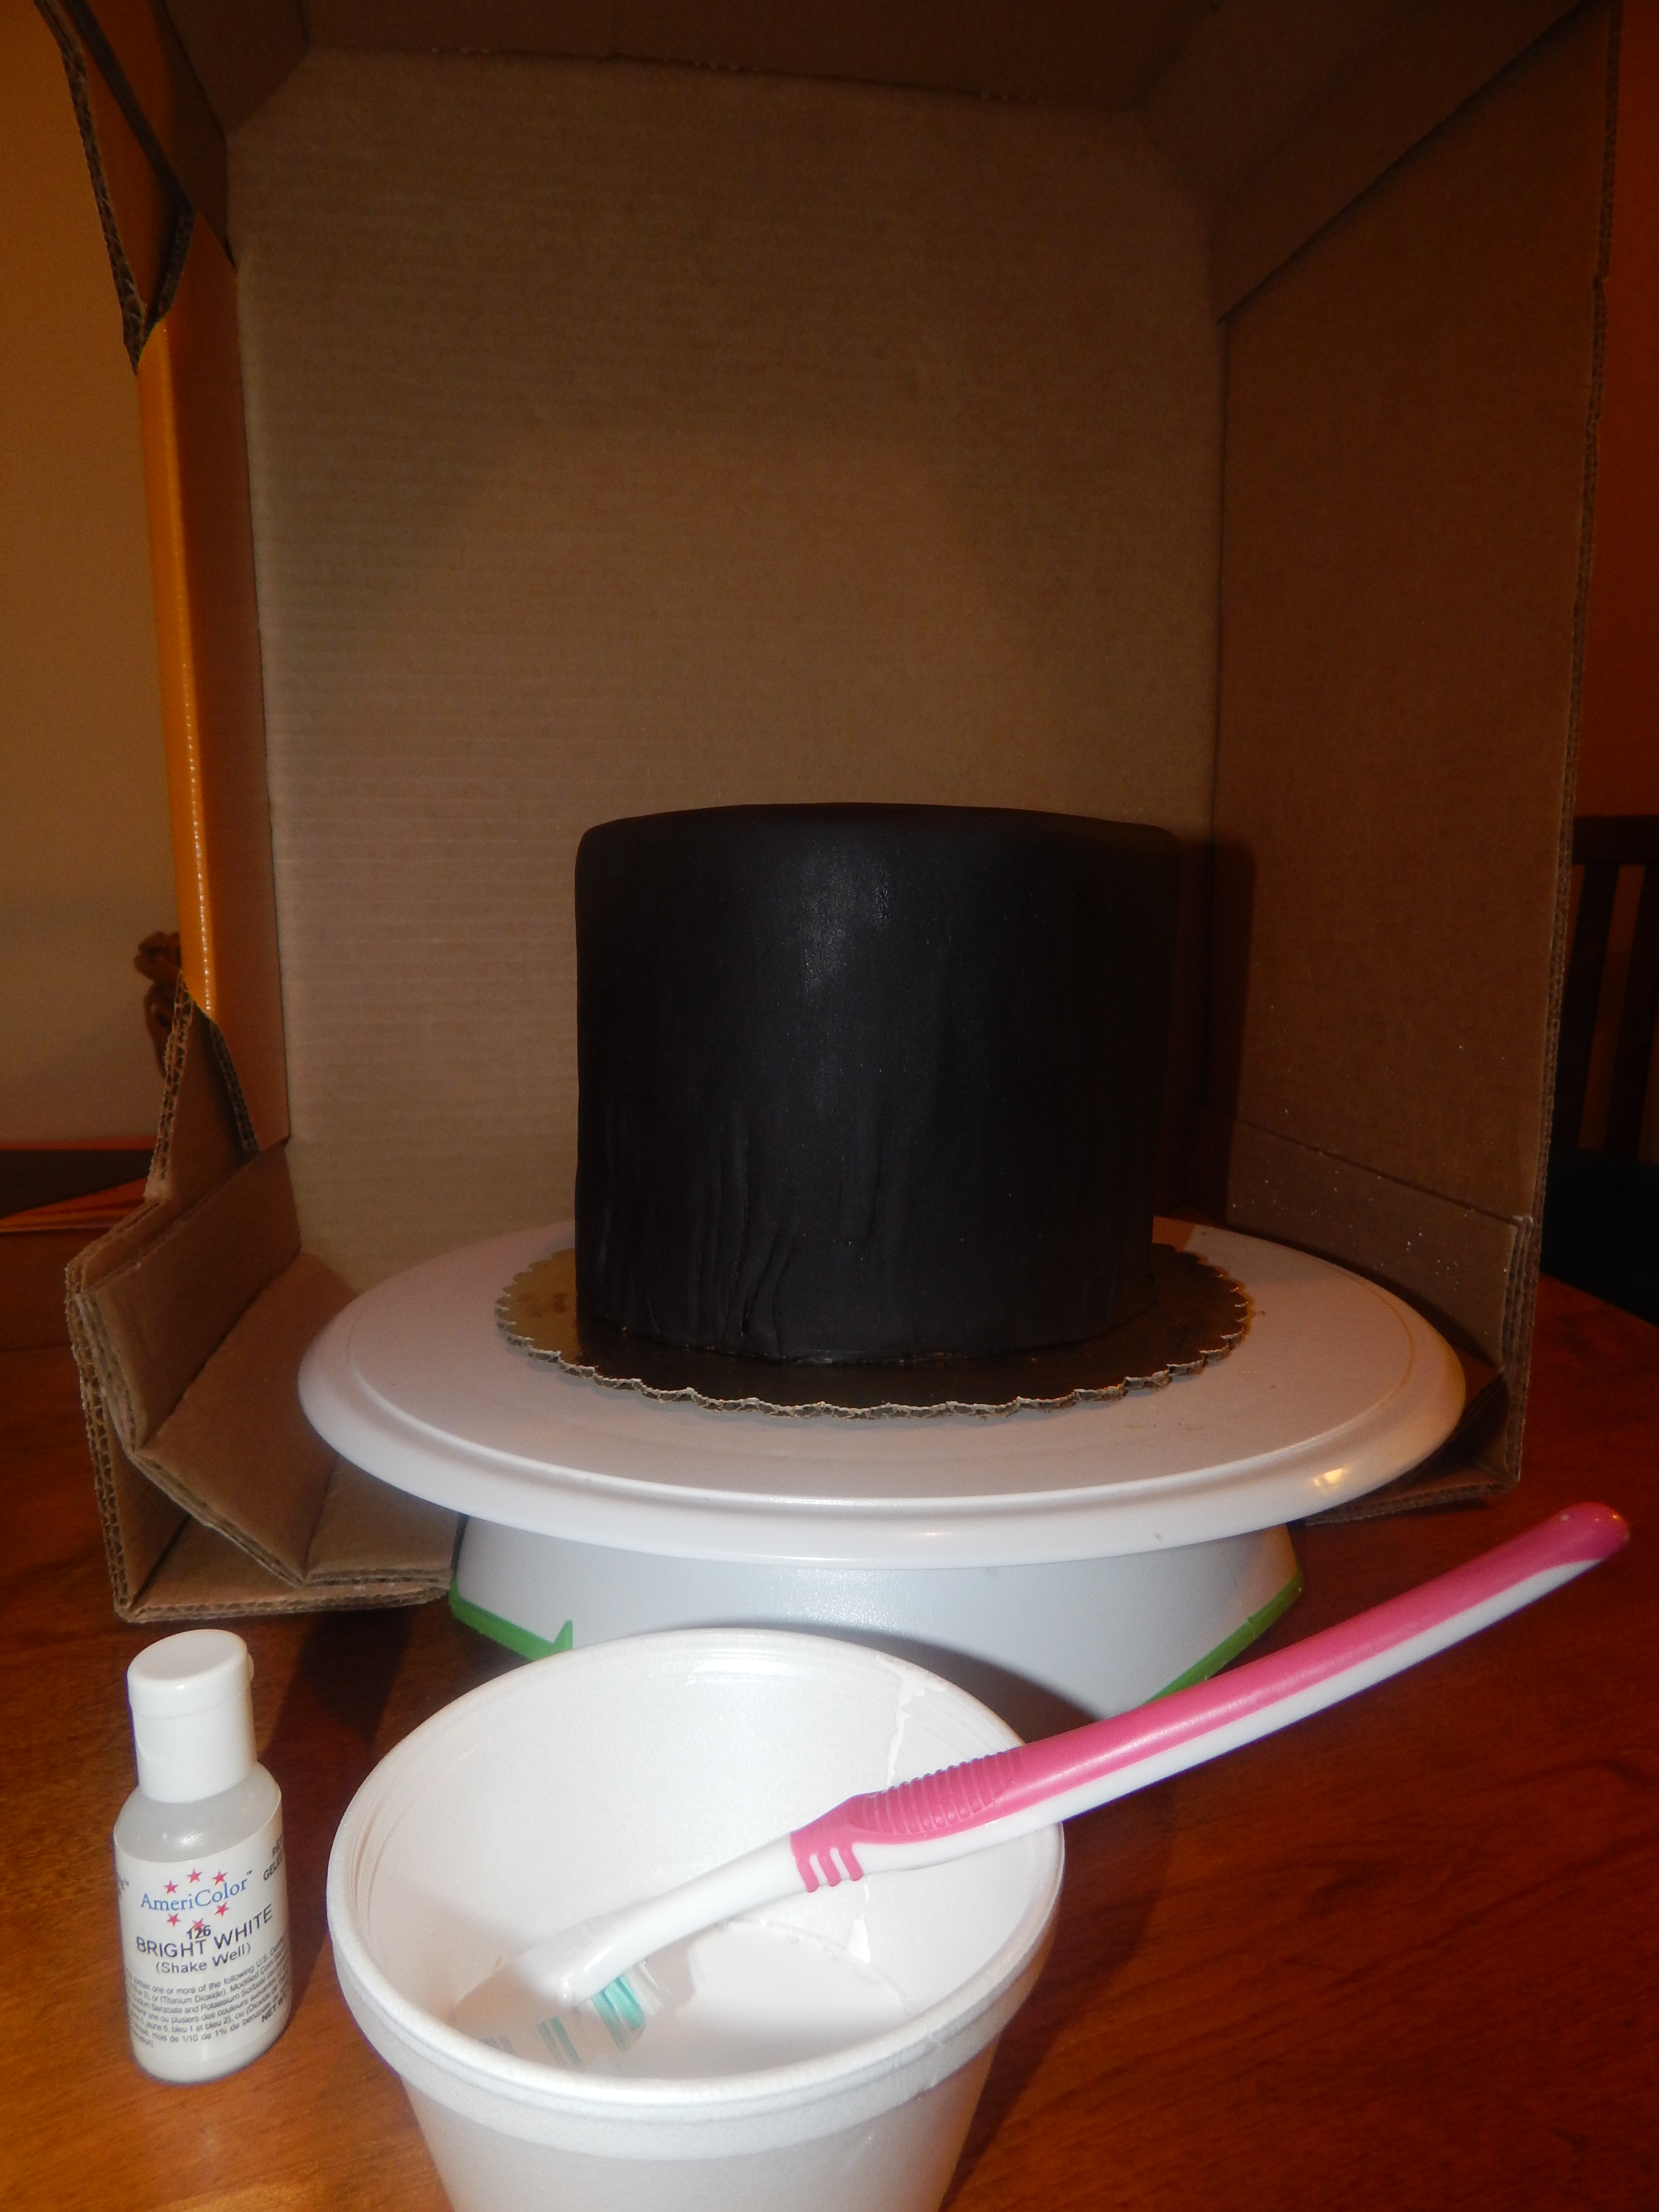
This is a tip I learned the hard way of trying too many times to make black fondant!
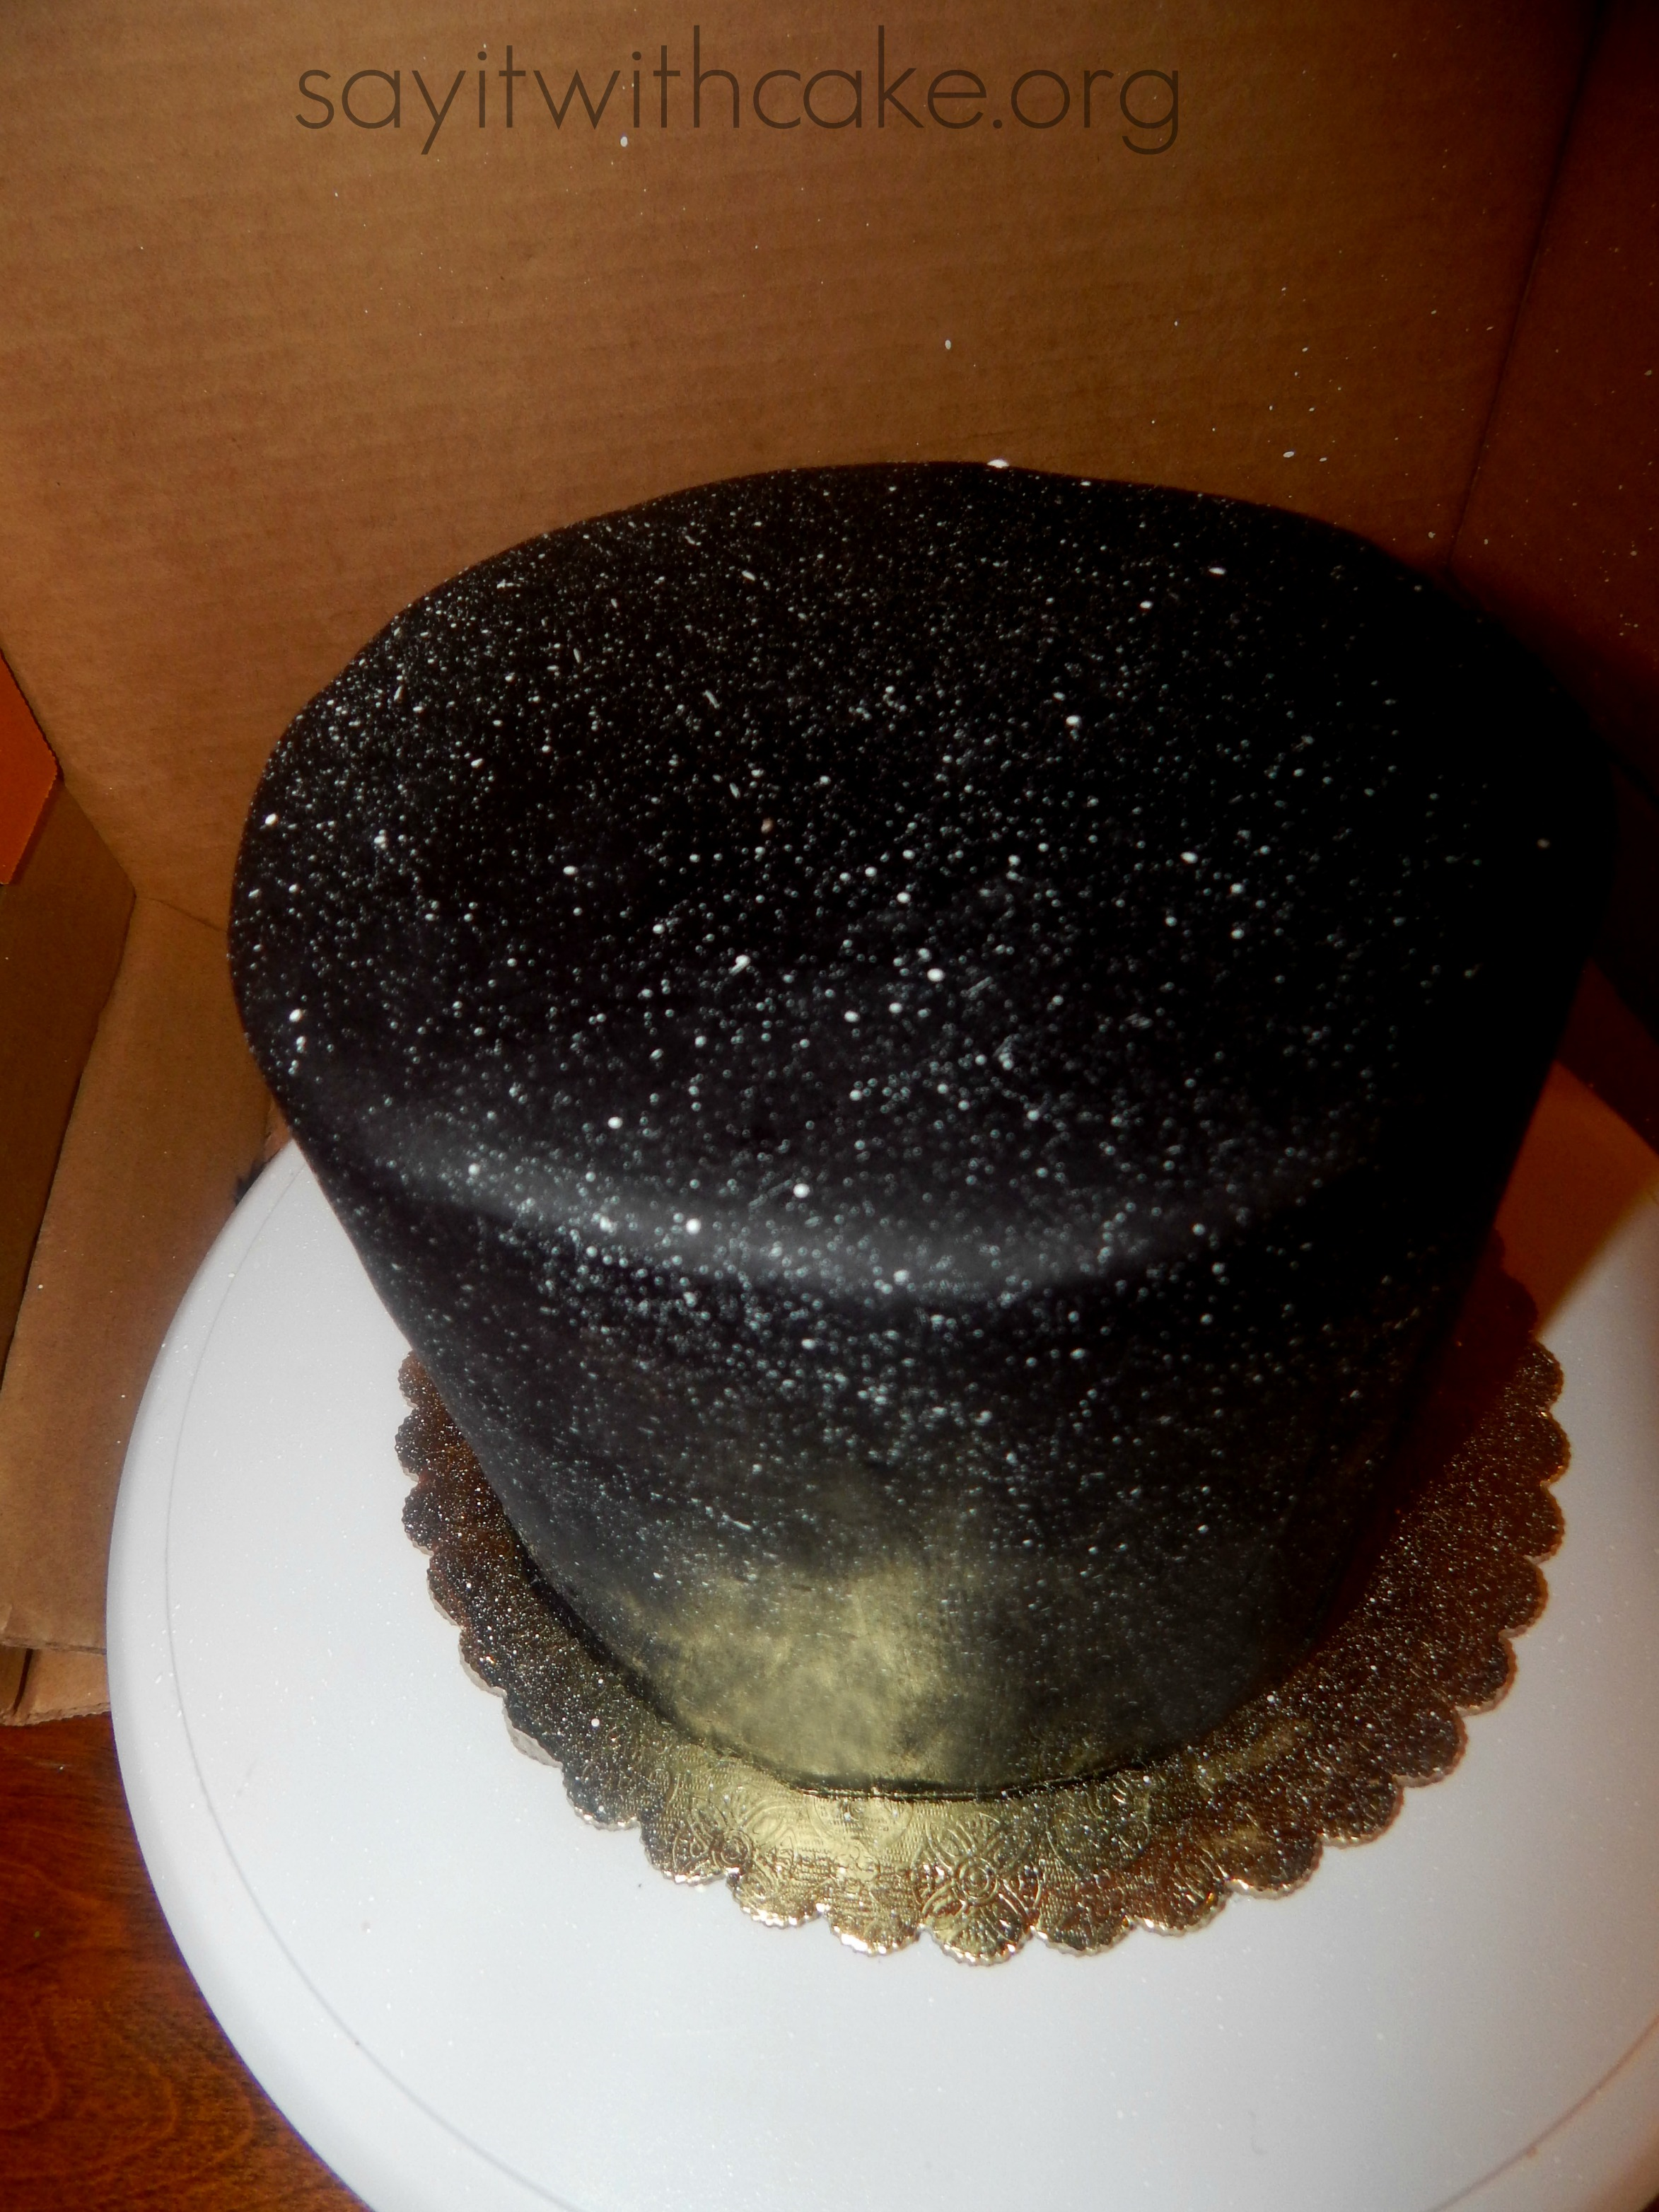
Next I took my fondant covered cake and put it inside a cardboard box with the side facing me open. I did this because I am going to splatter white food coloring and if I don’t do this it will get all over the walls, table and everything else! I put white food coloring in a cup and used a brand new tooth brush. I dipped the toothbrush in the food coloring and used my finger to flick the brush and splatter the food coloring all over the cake to look like a galaxy of stars!
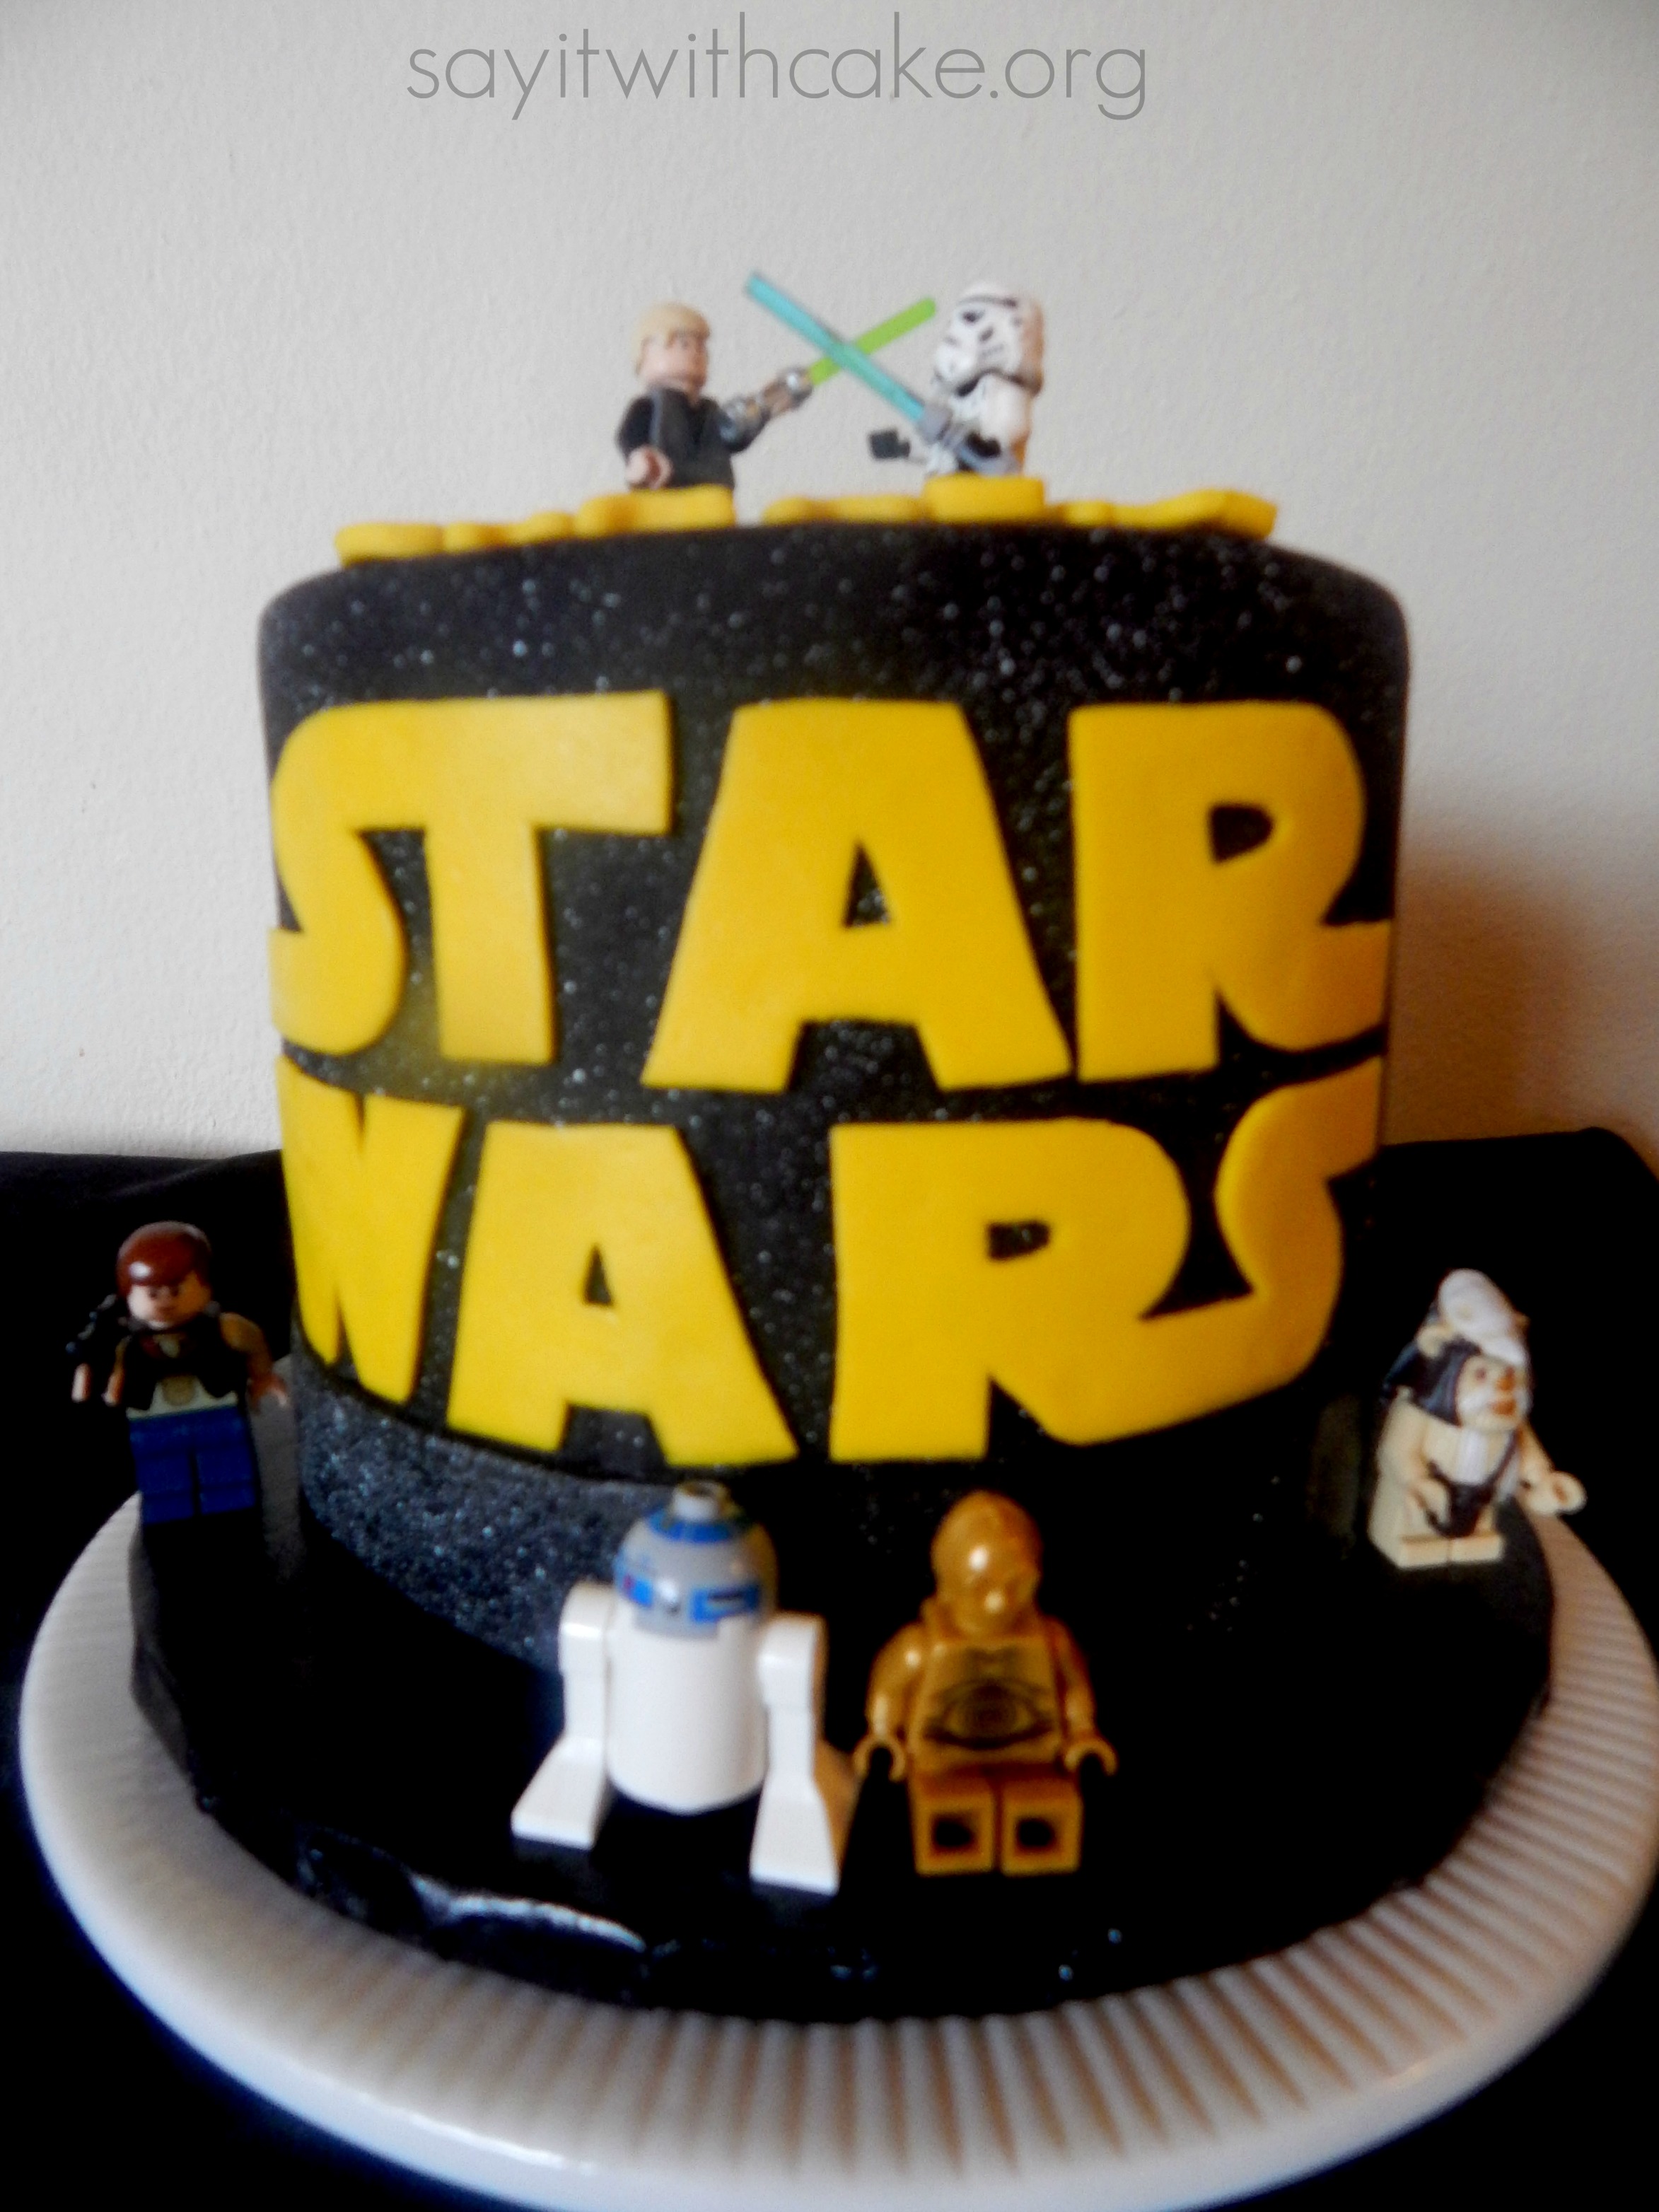
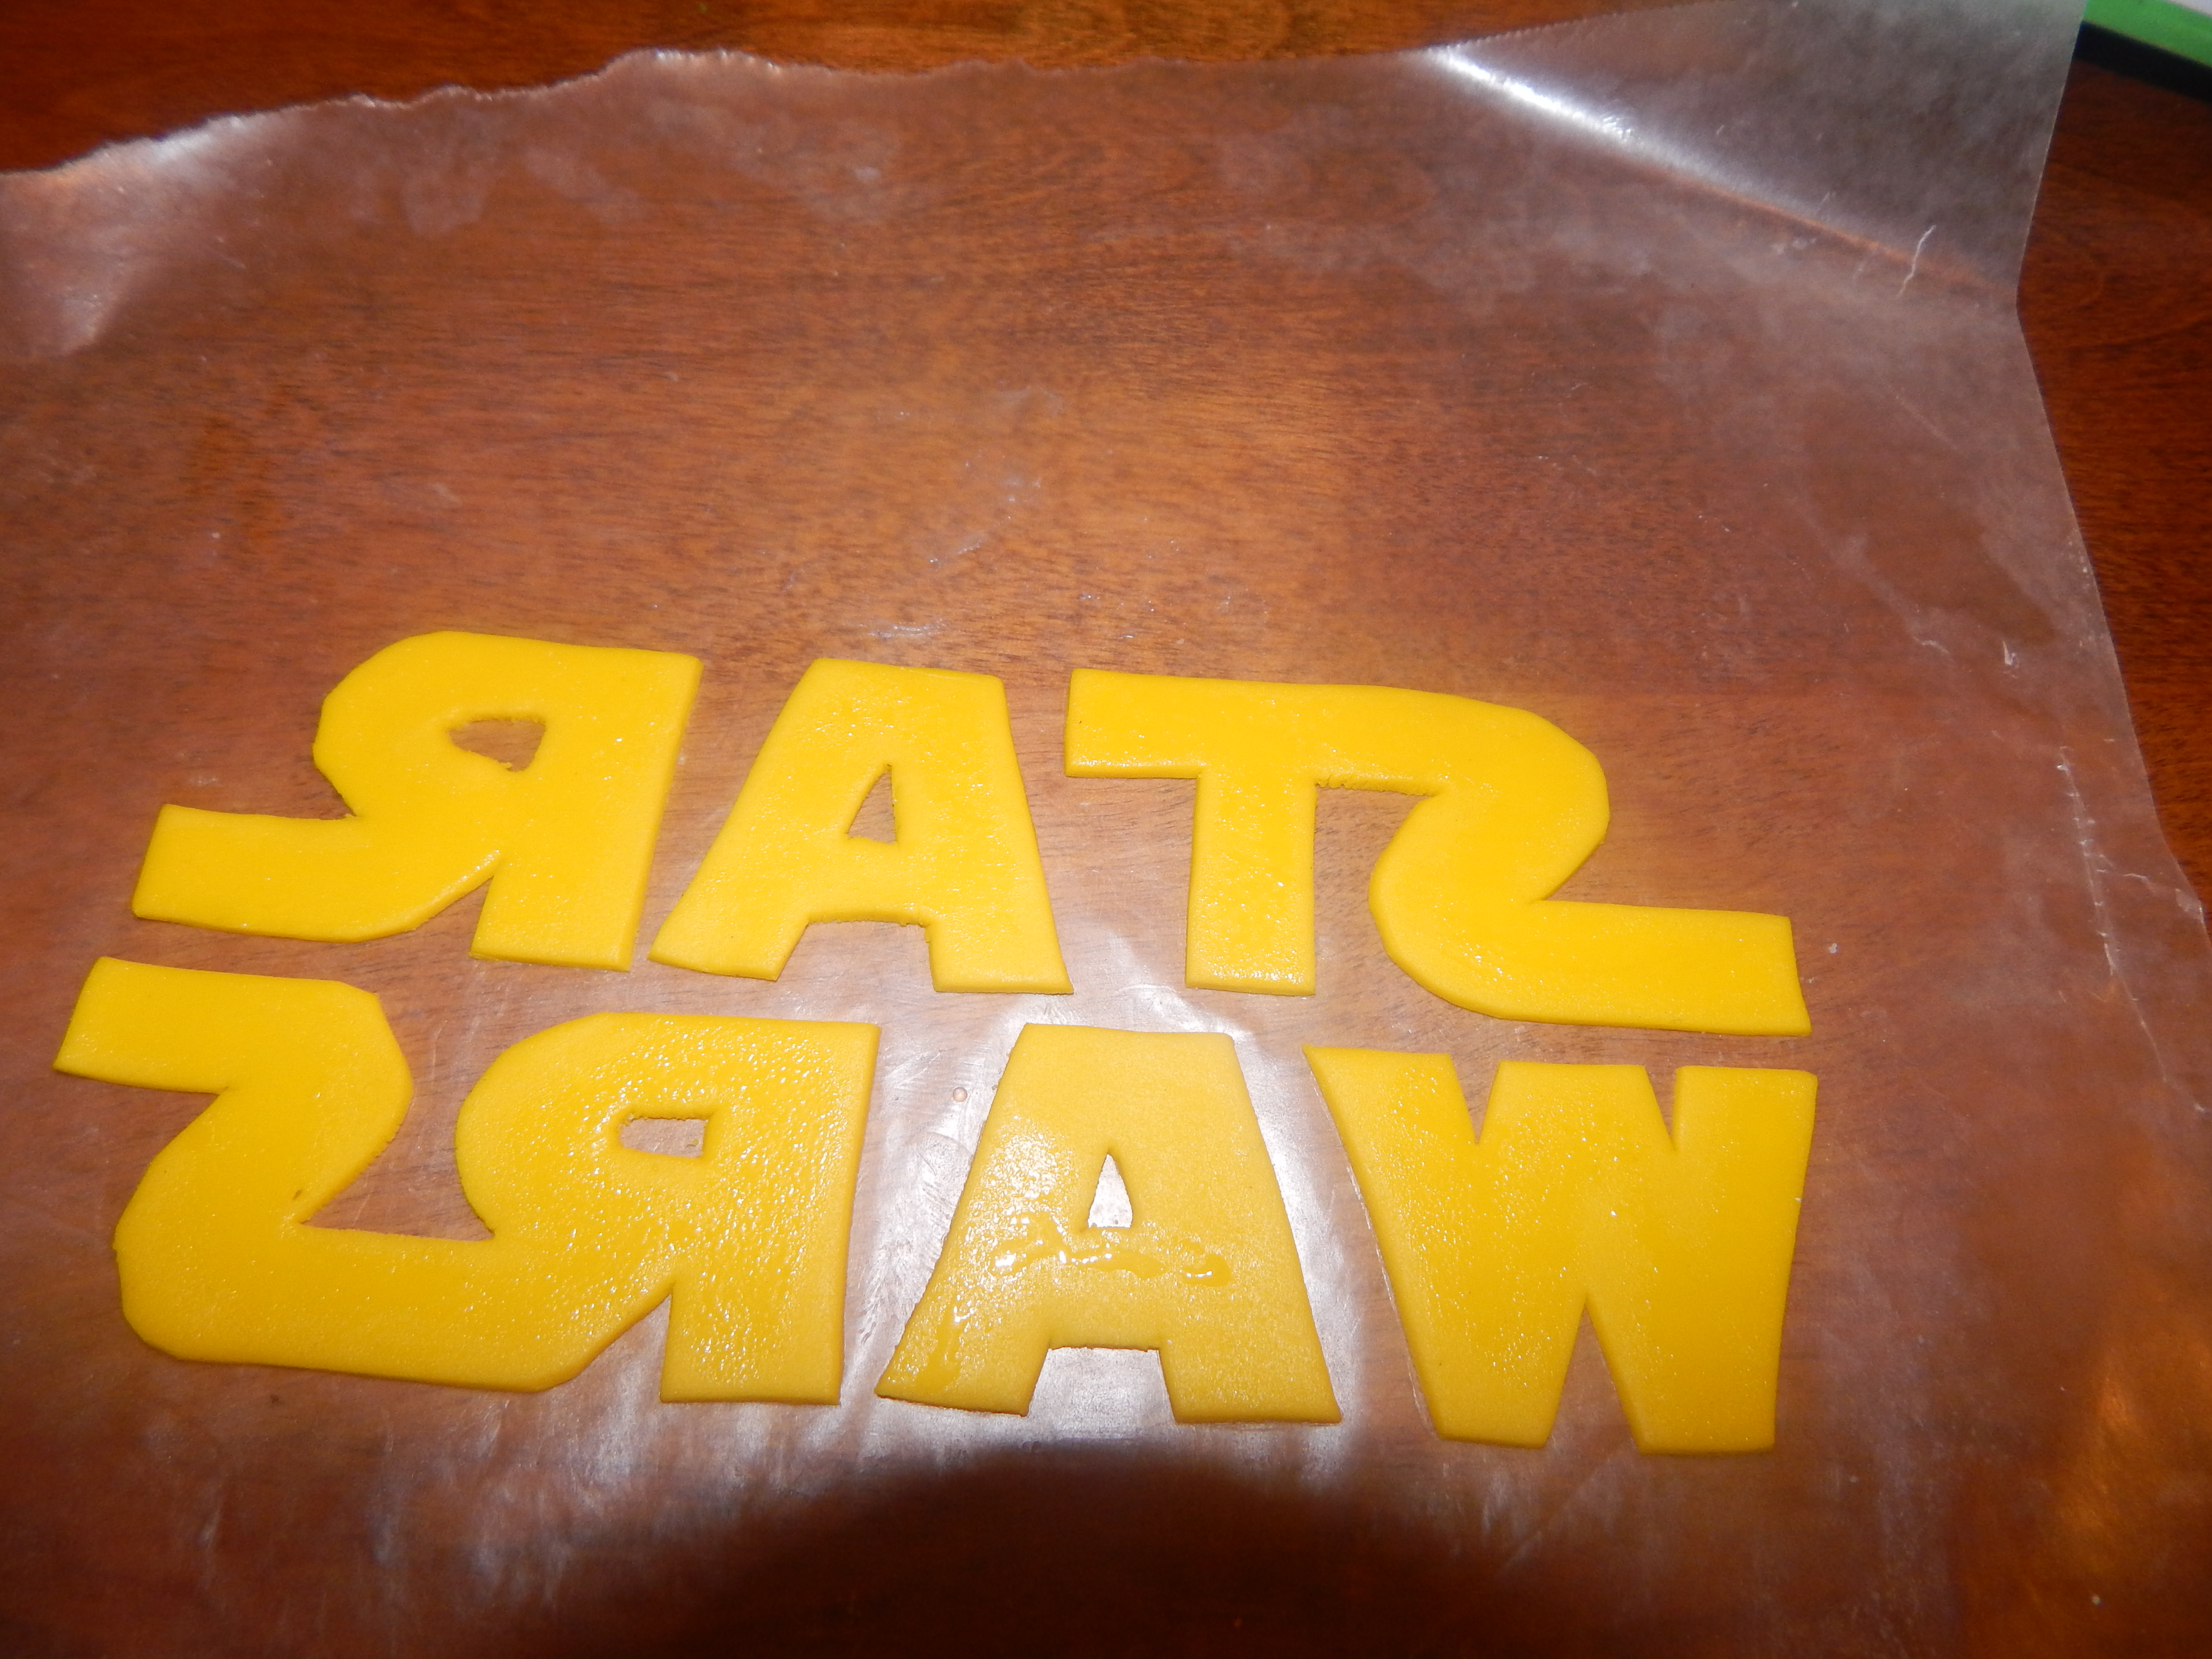
Next I cut out my fondant star wars letters. I cut them out backwards on a piece of wax paper so I could easily stick the letters to the cake using water and put them all on at once.
Next I wrote Happy Birthday Charlie with fondant and put it on the top of the cake along with some of his favorite Star Wars Lego characters!
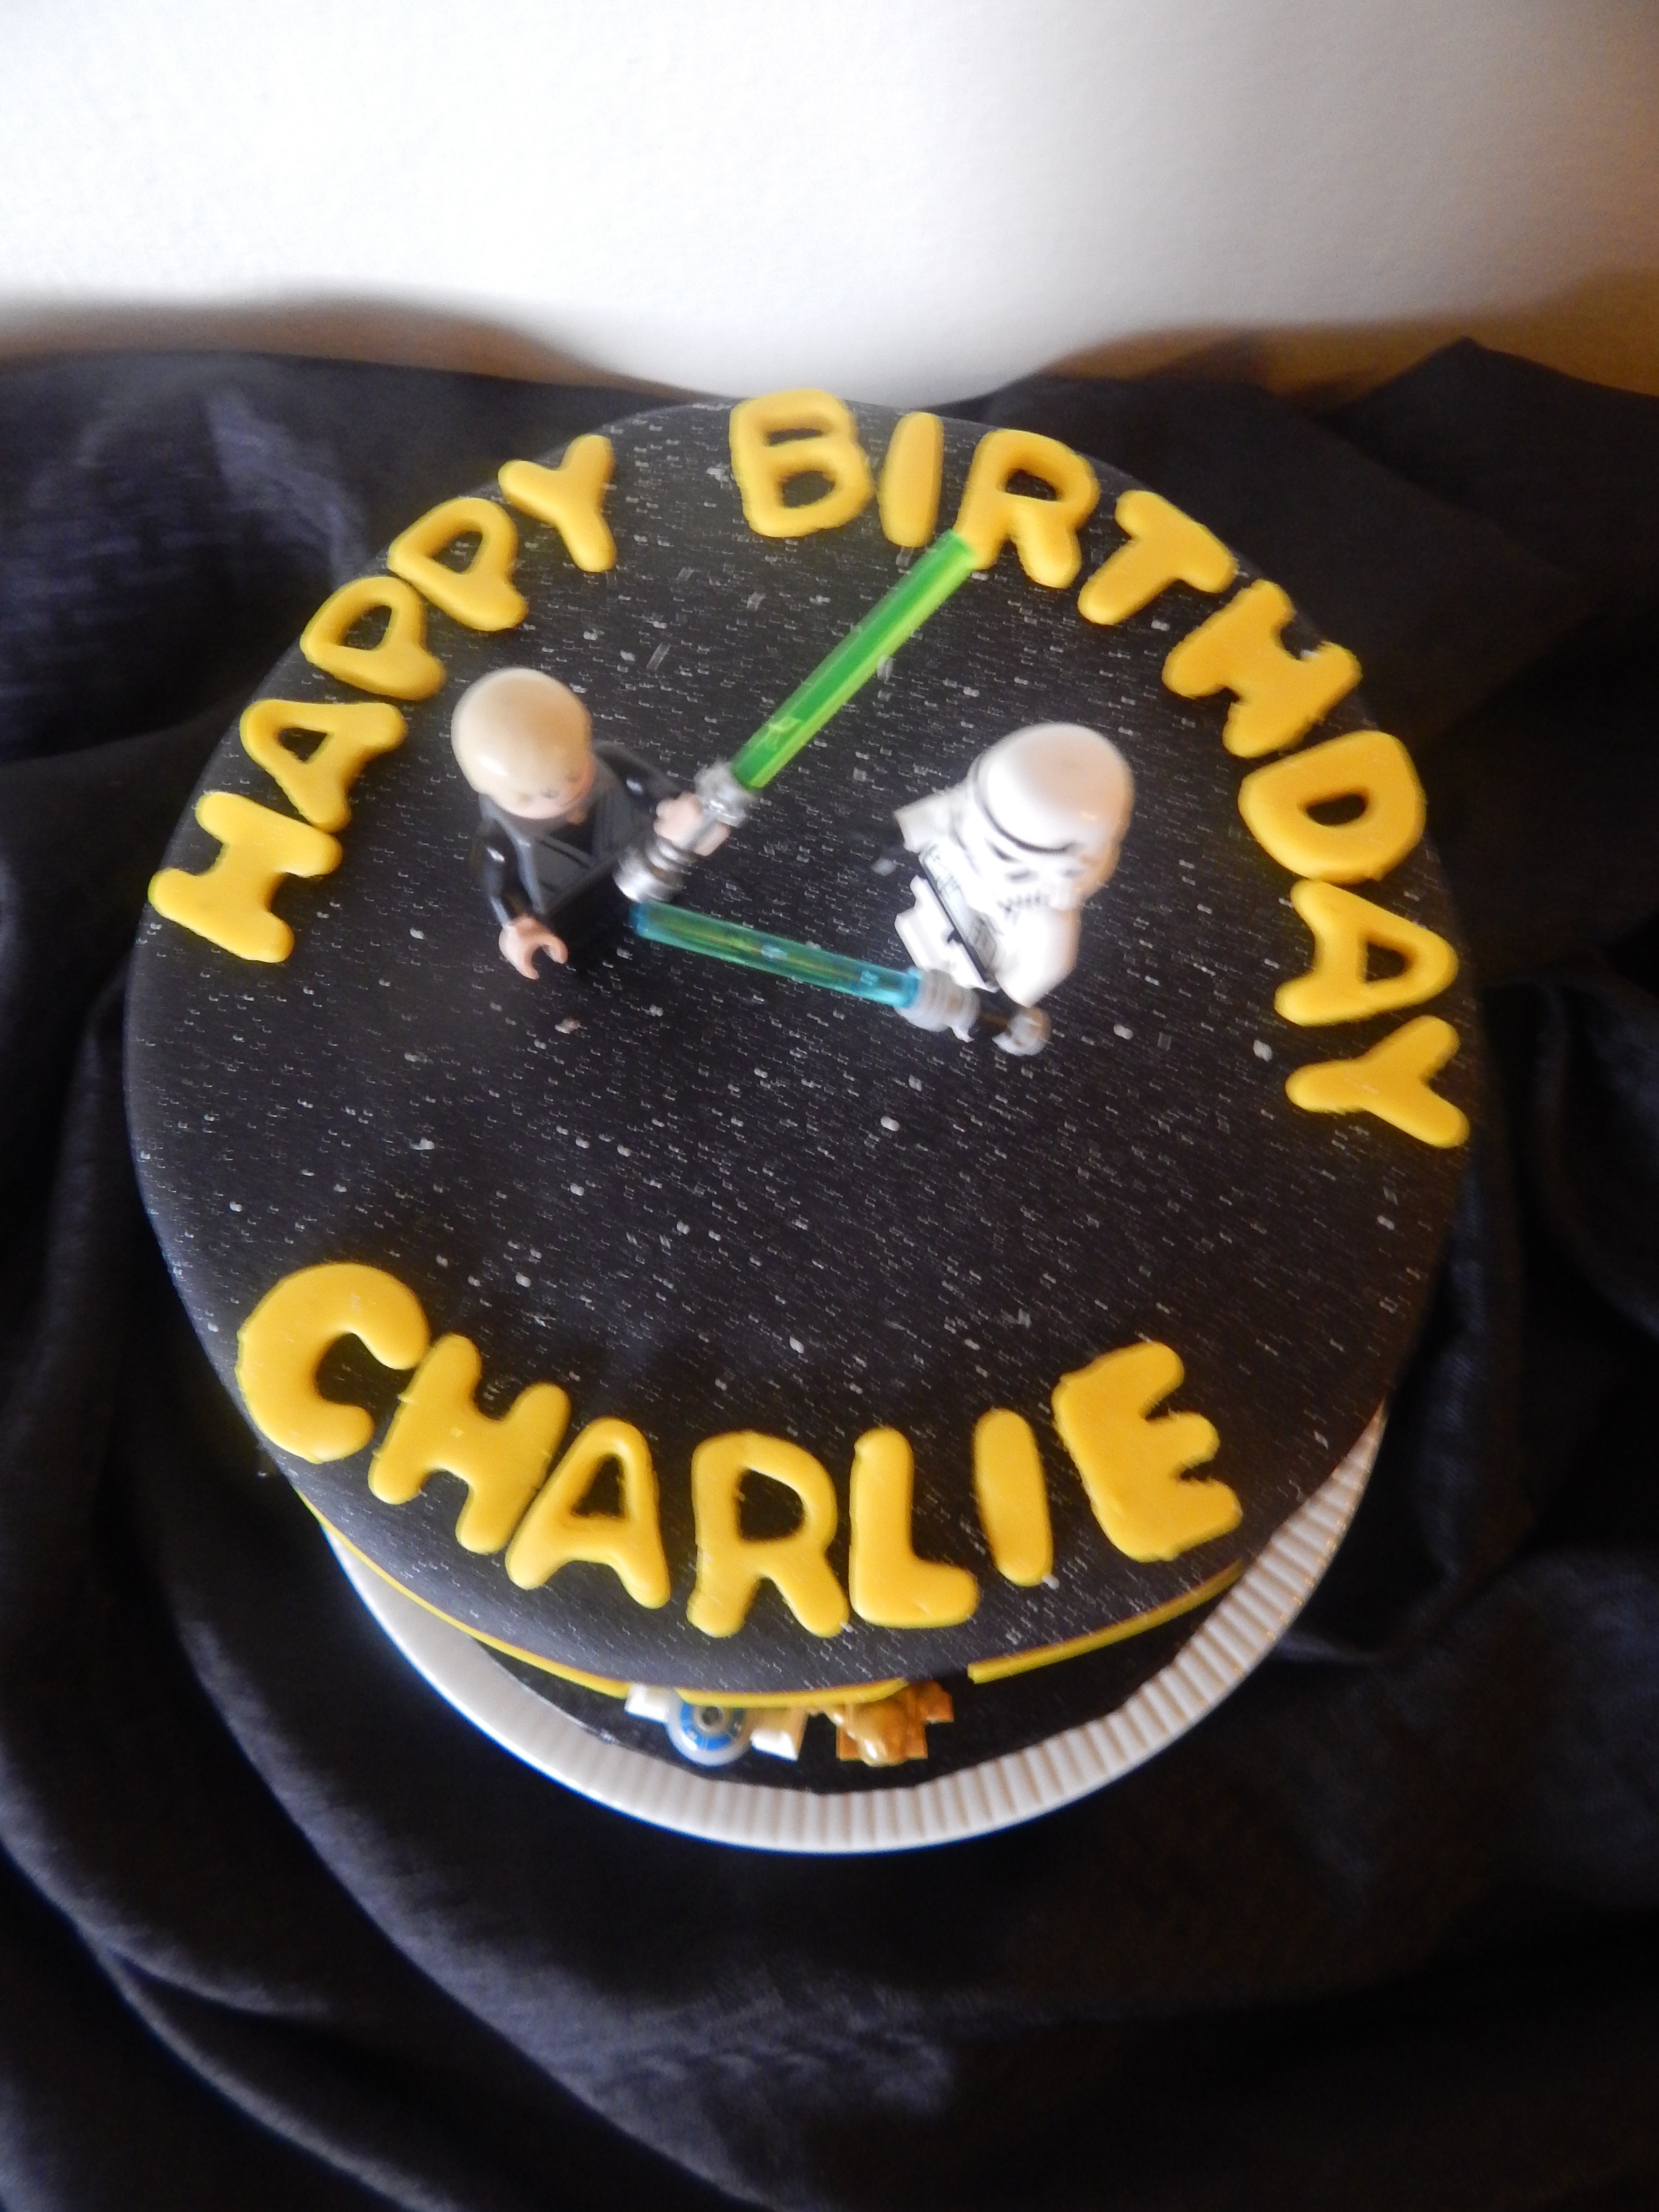
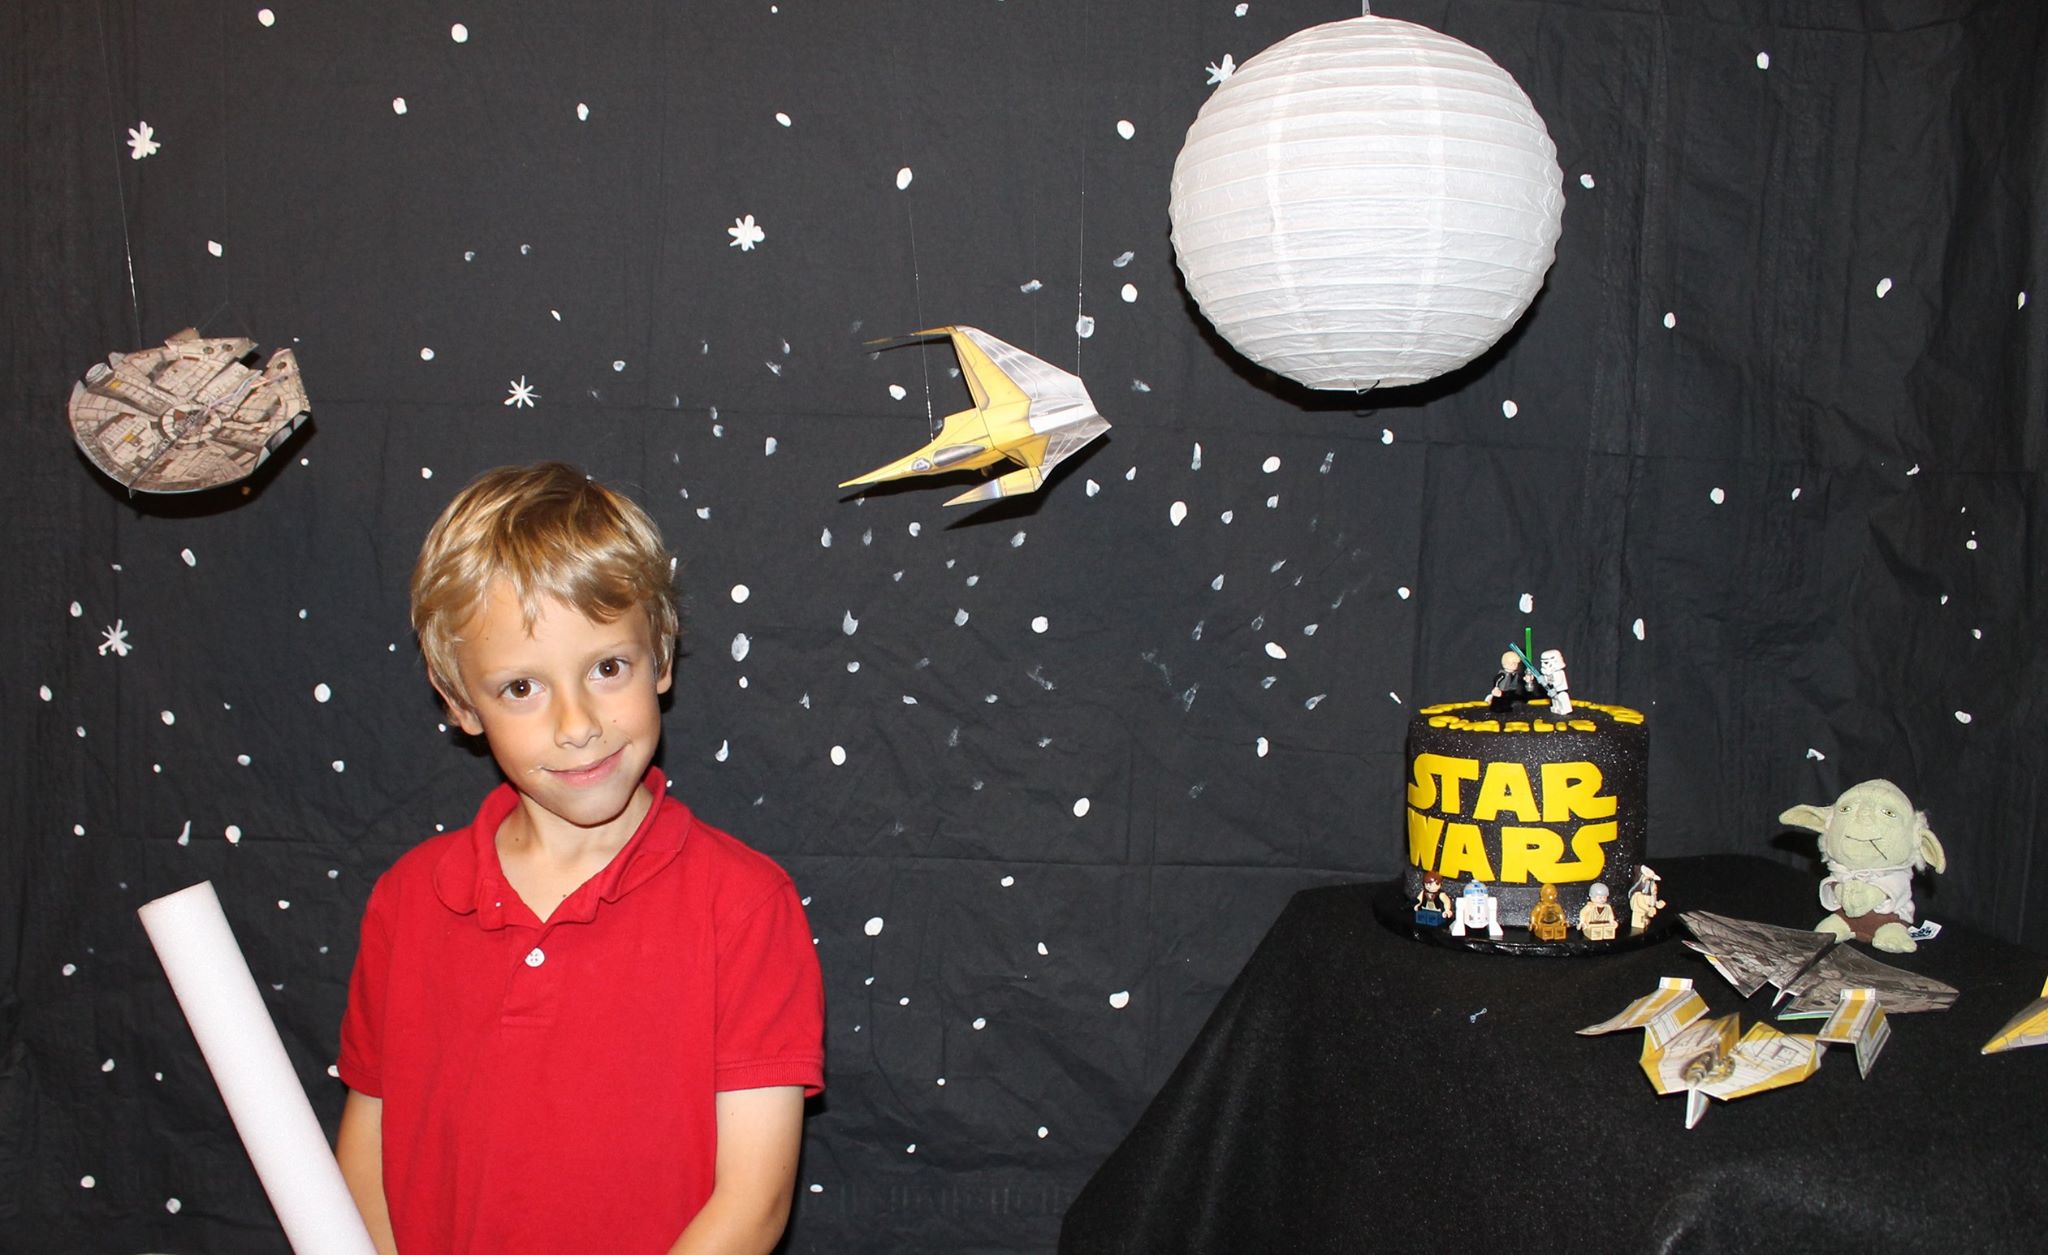
Here is a picture of him at his party, he looks so cute! I hope this tutorial helps if you want to build a Star Wars Cake of your own!
Star Wars Cake
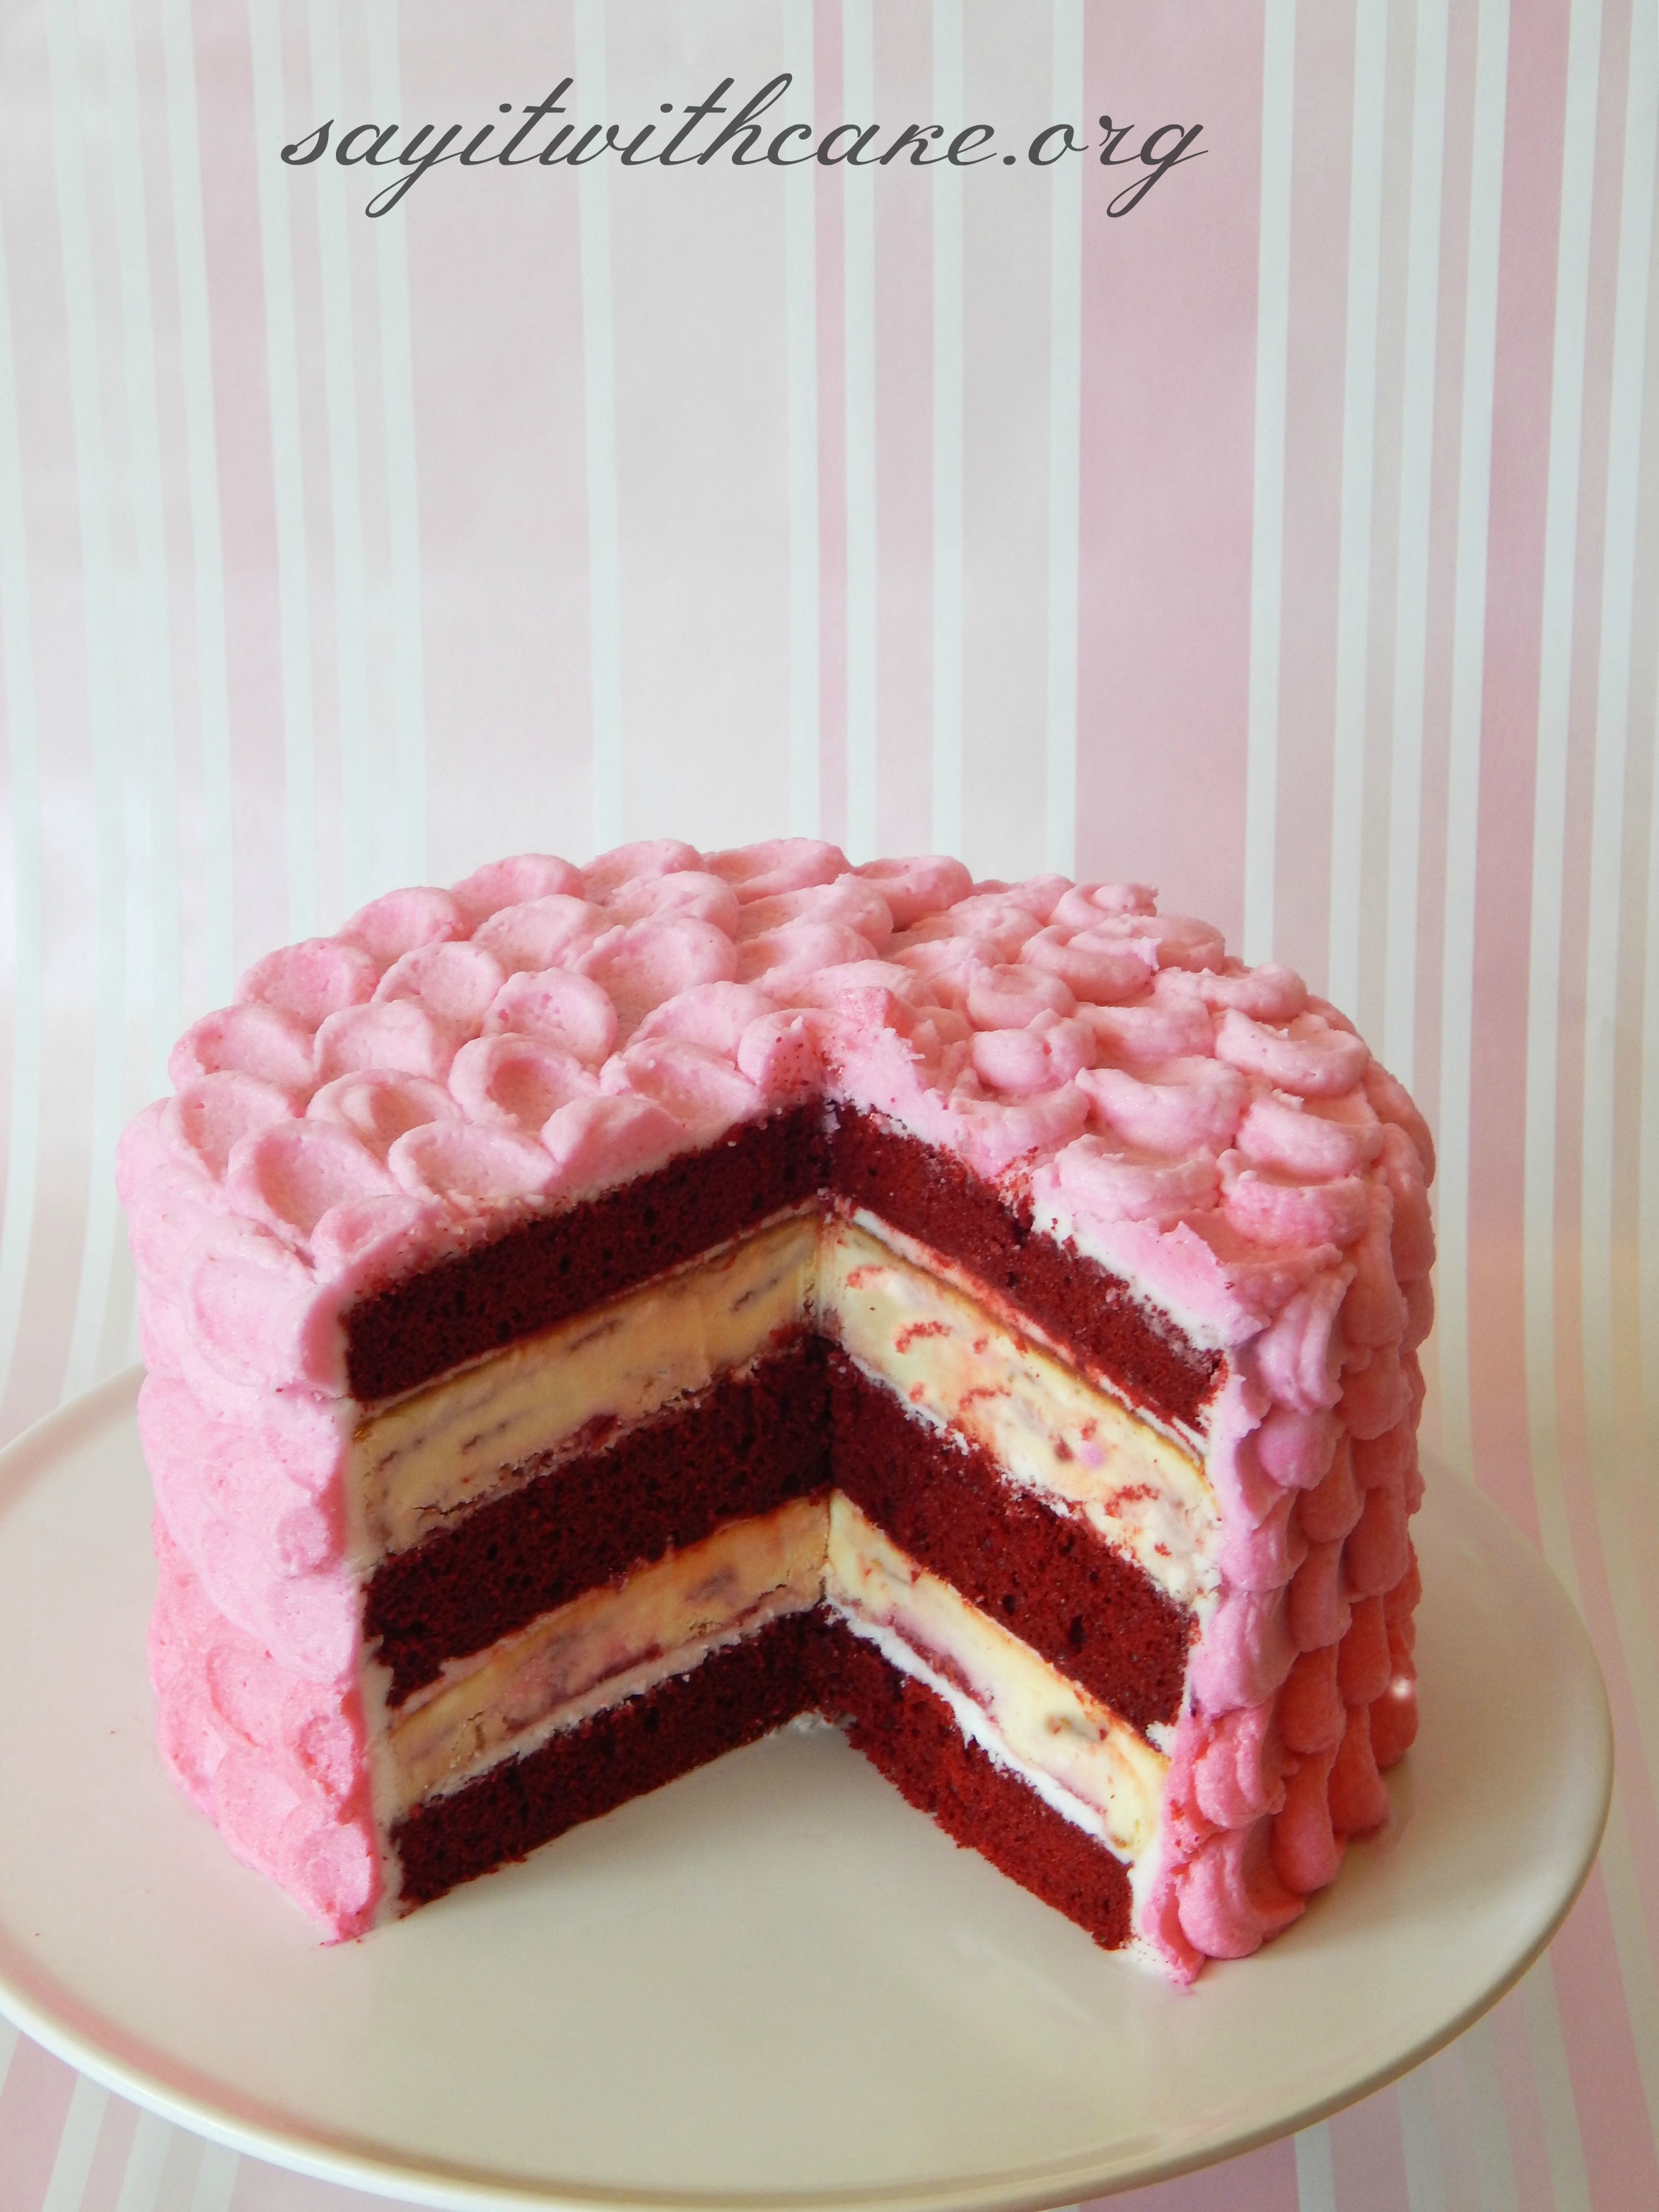
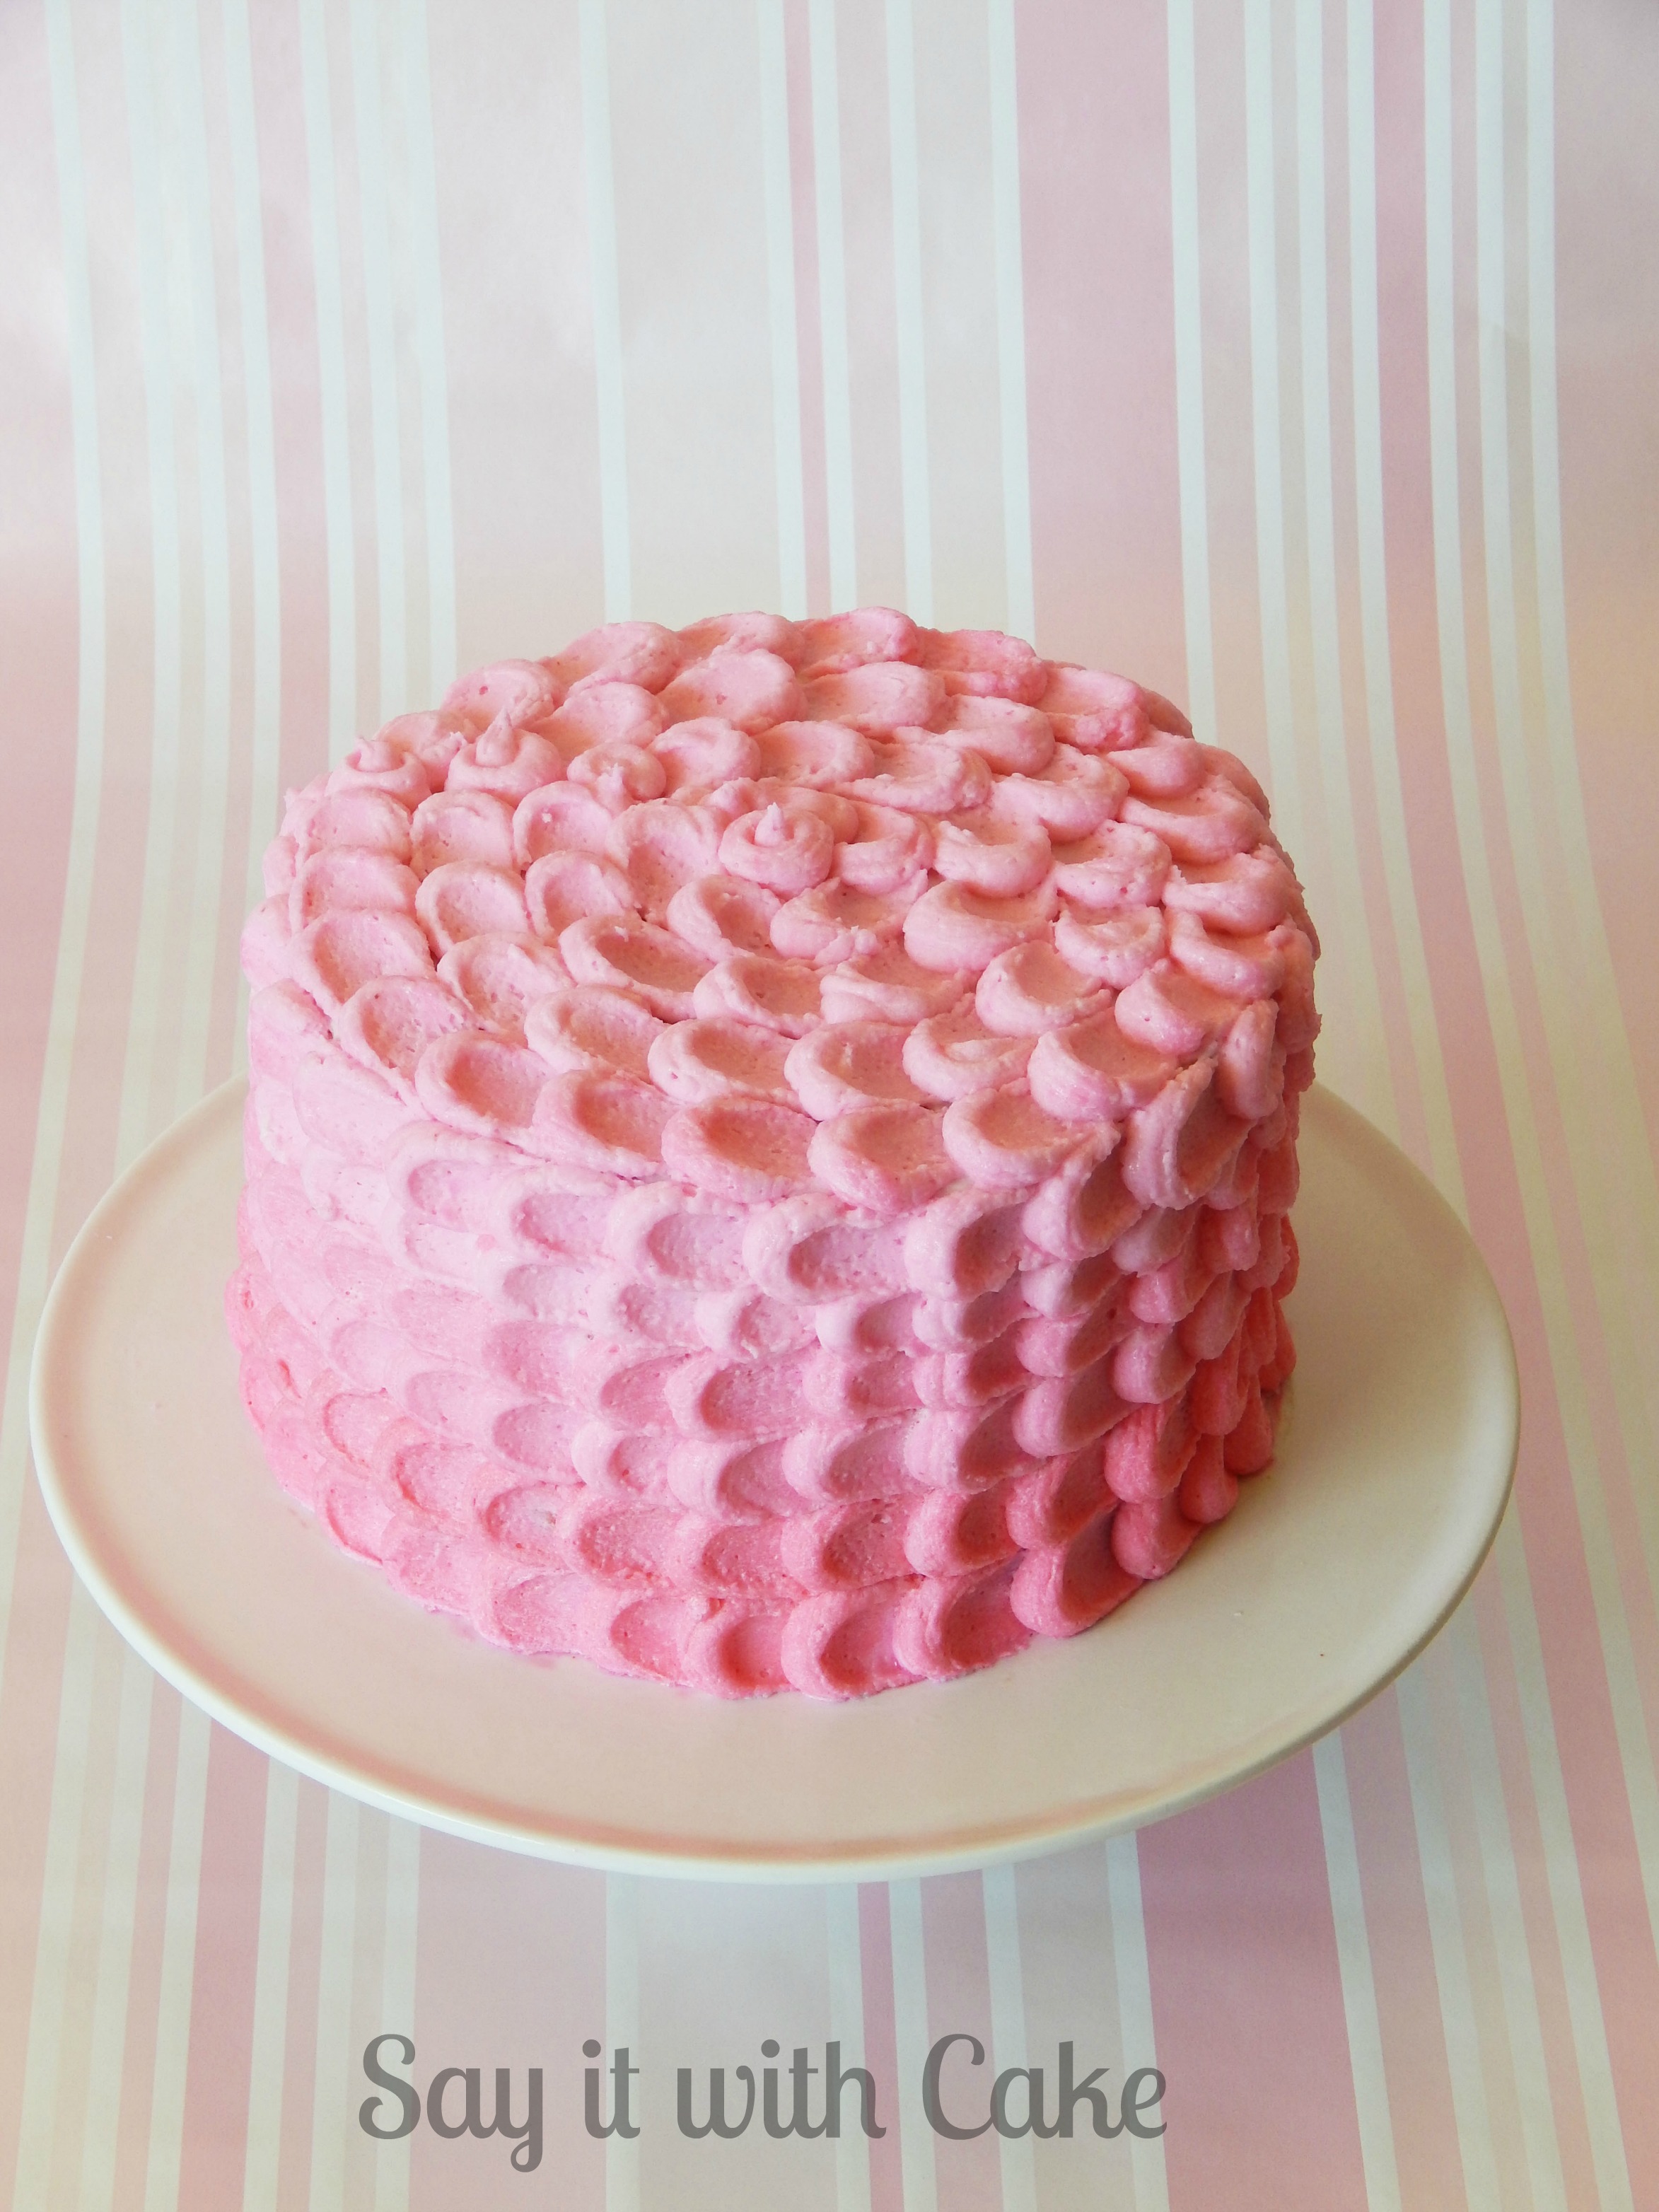
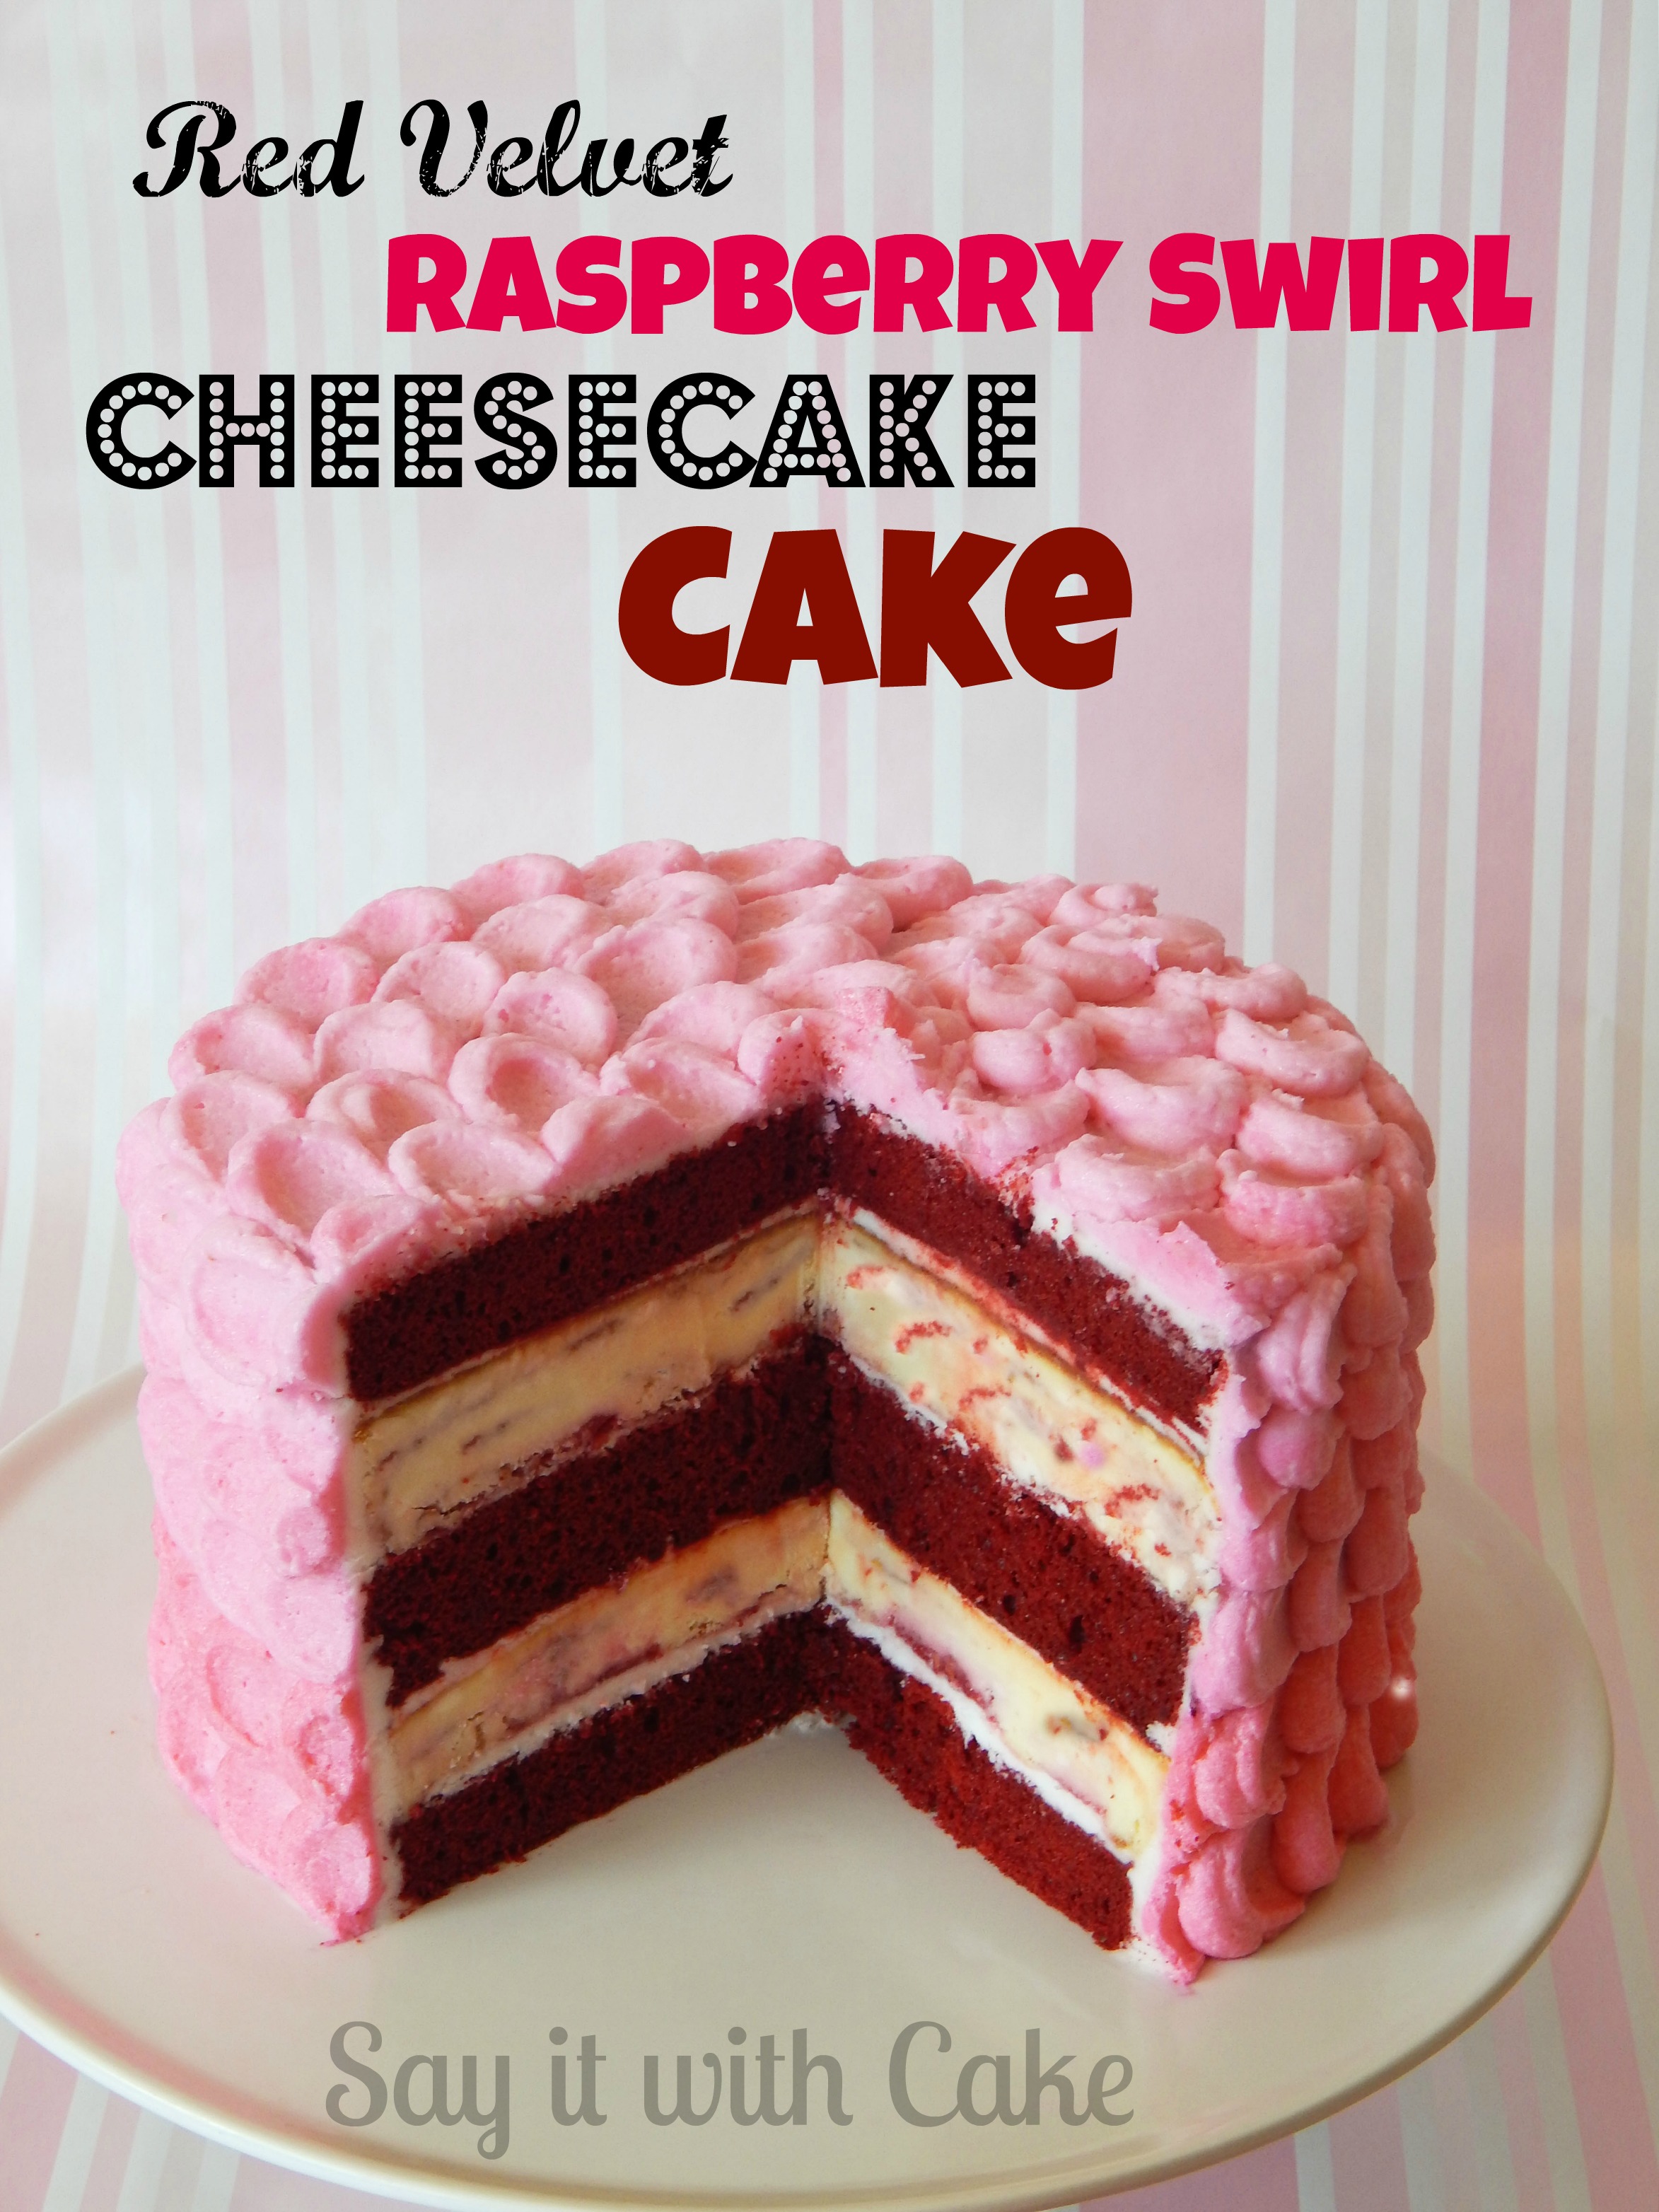
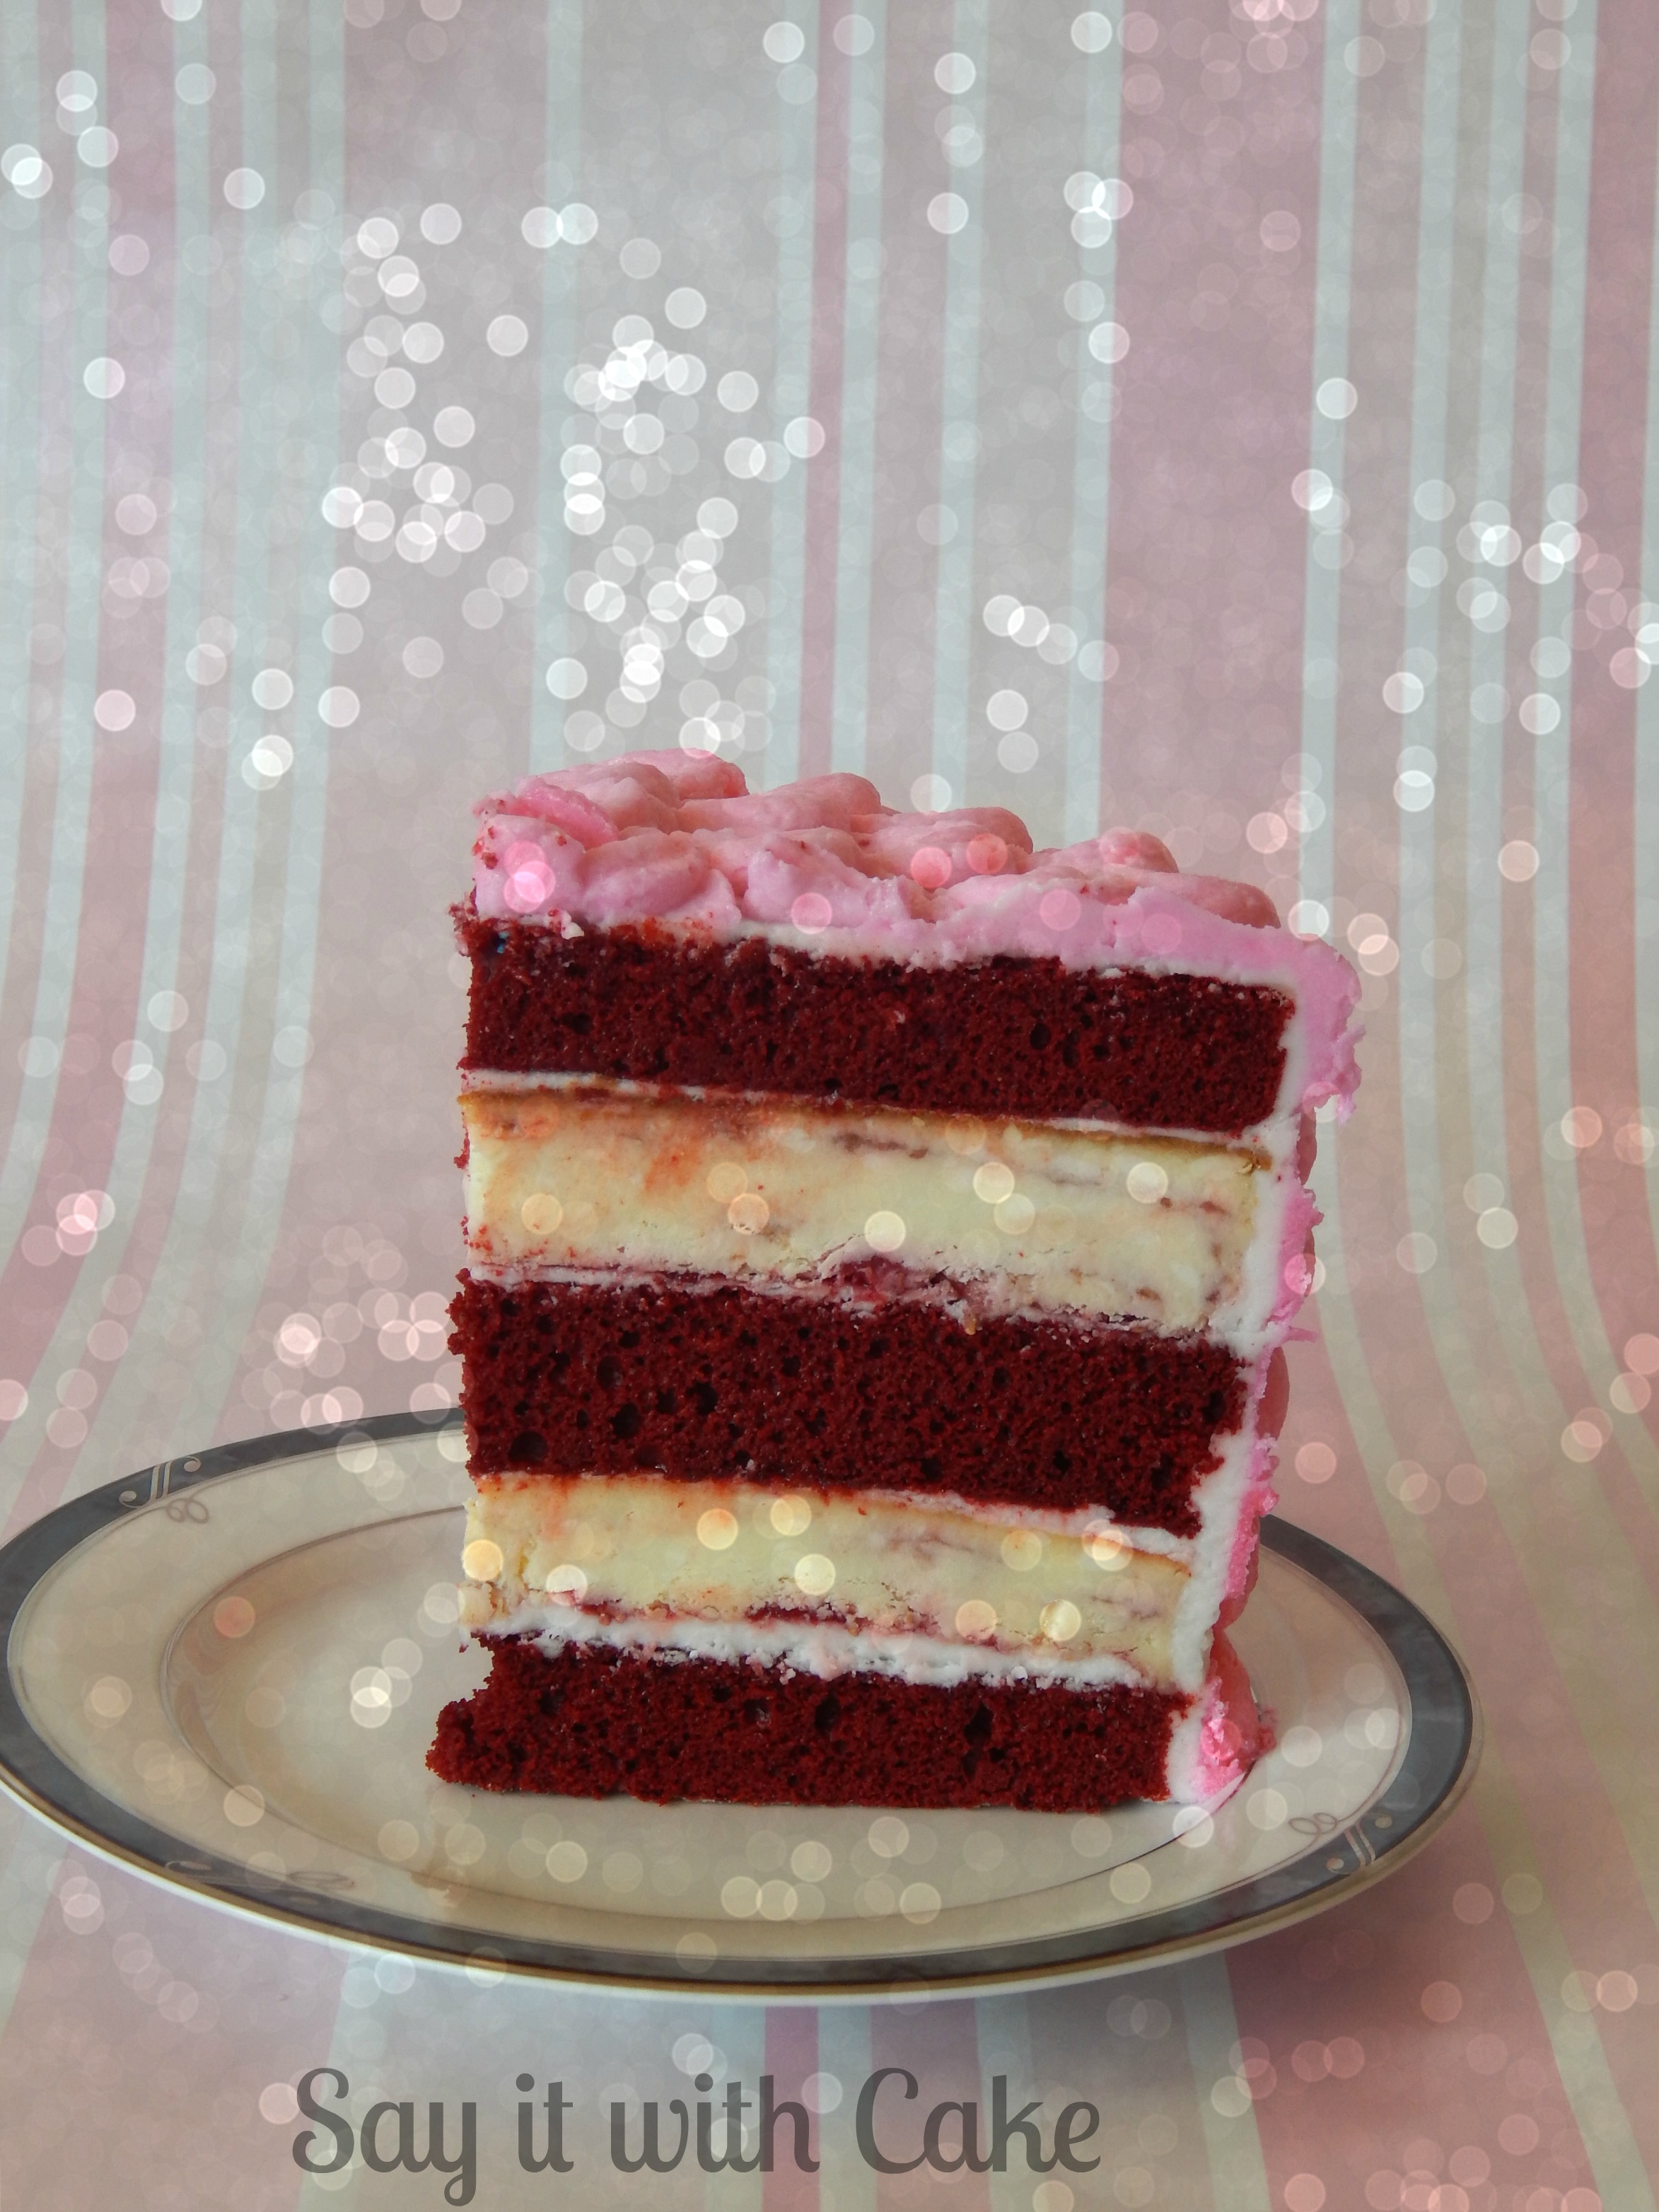
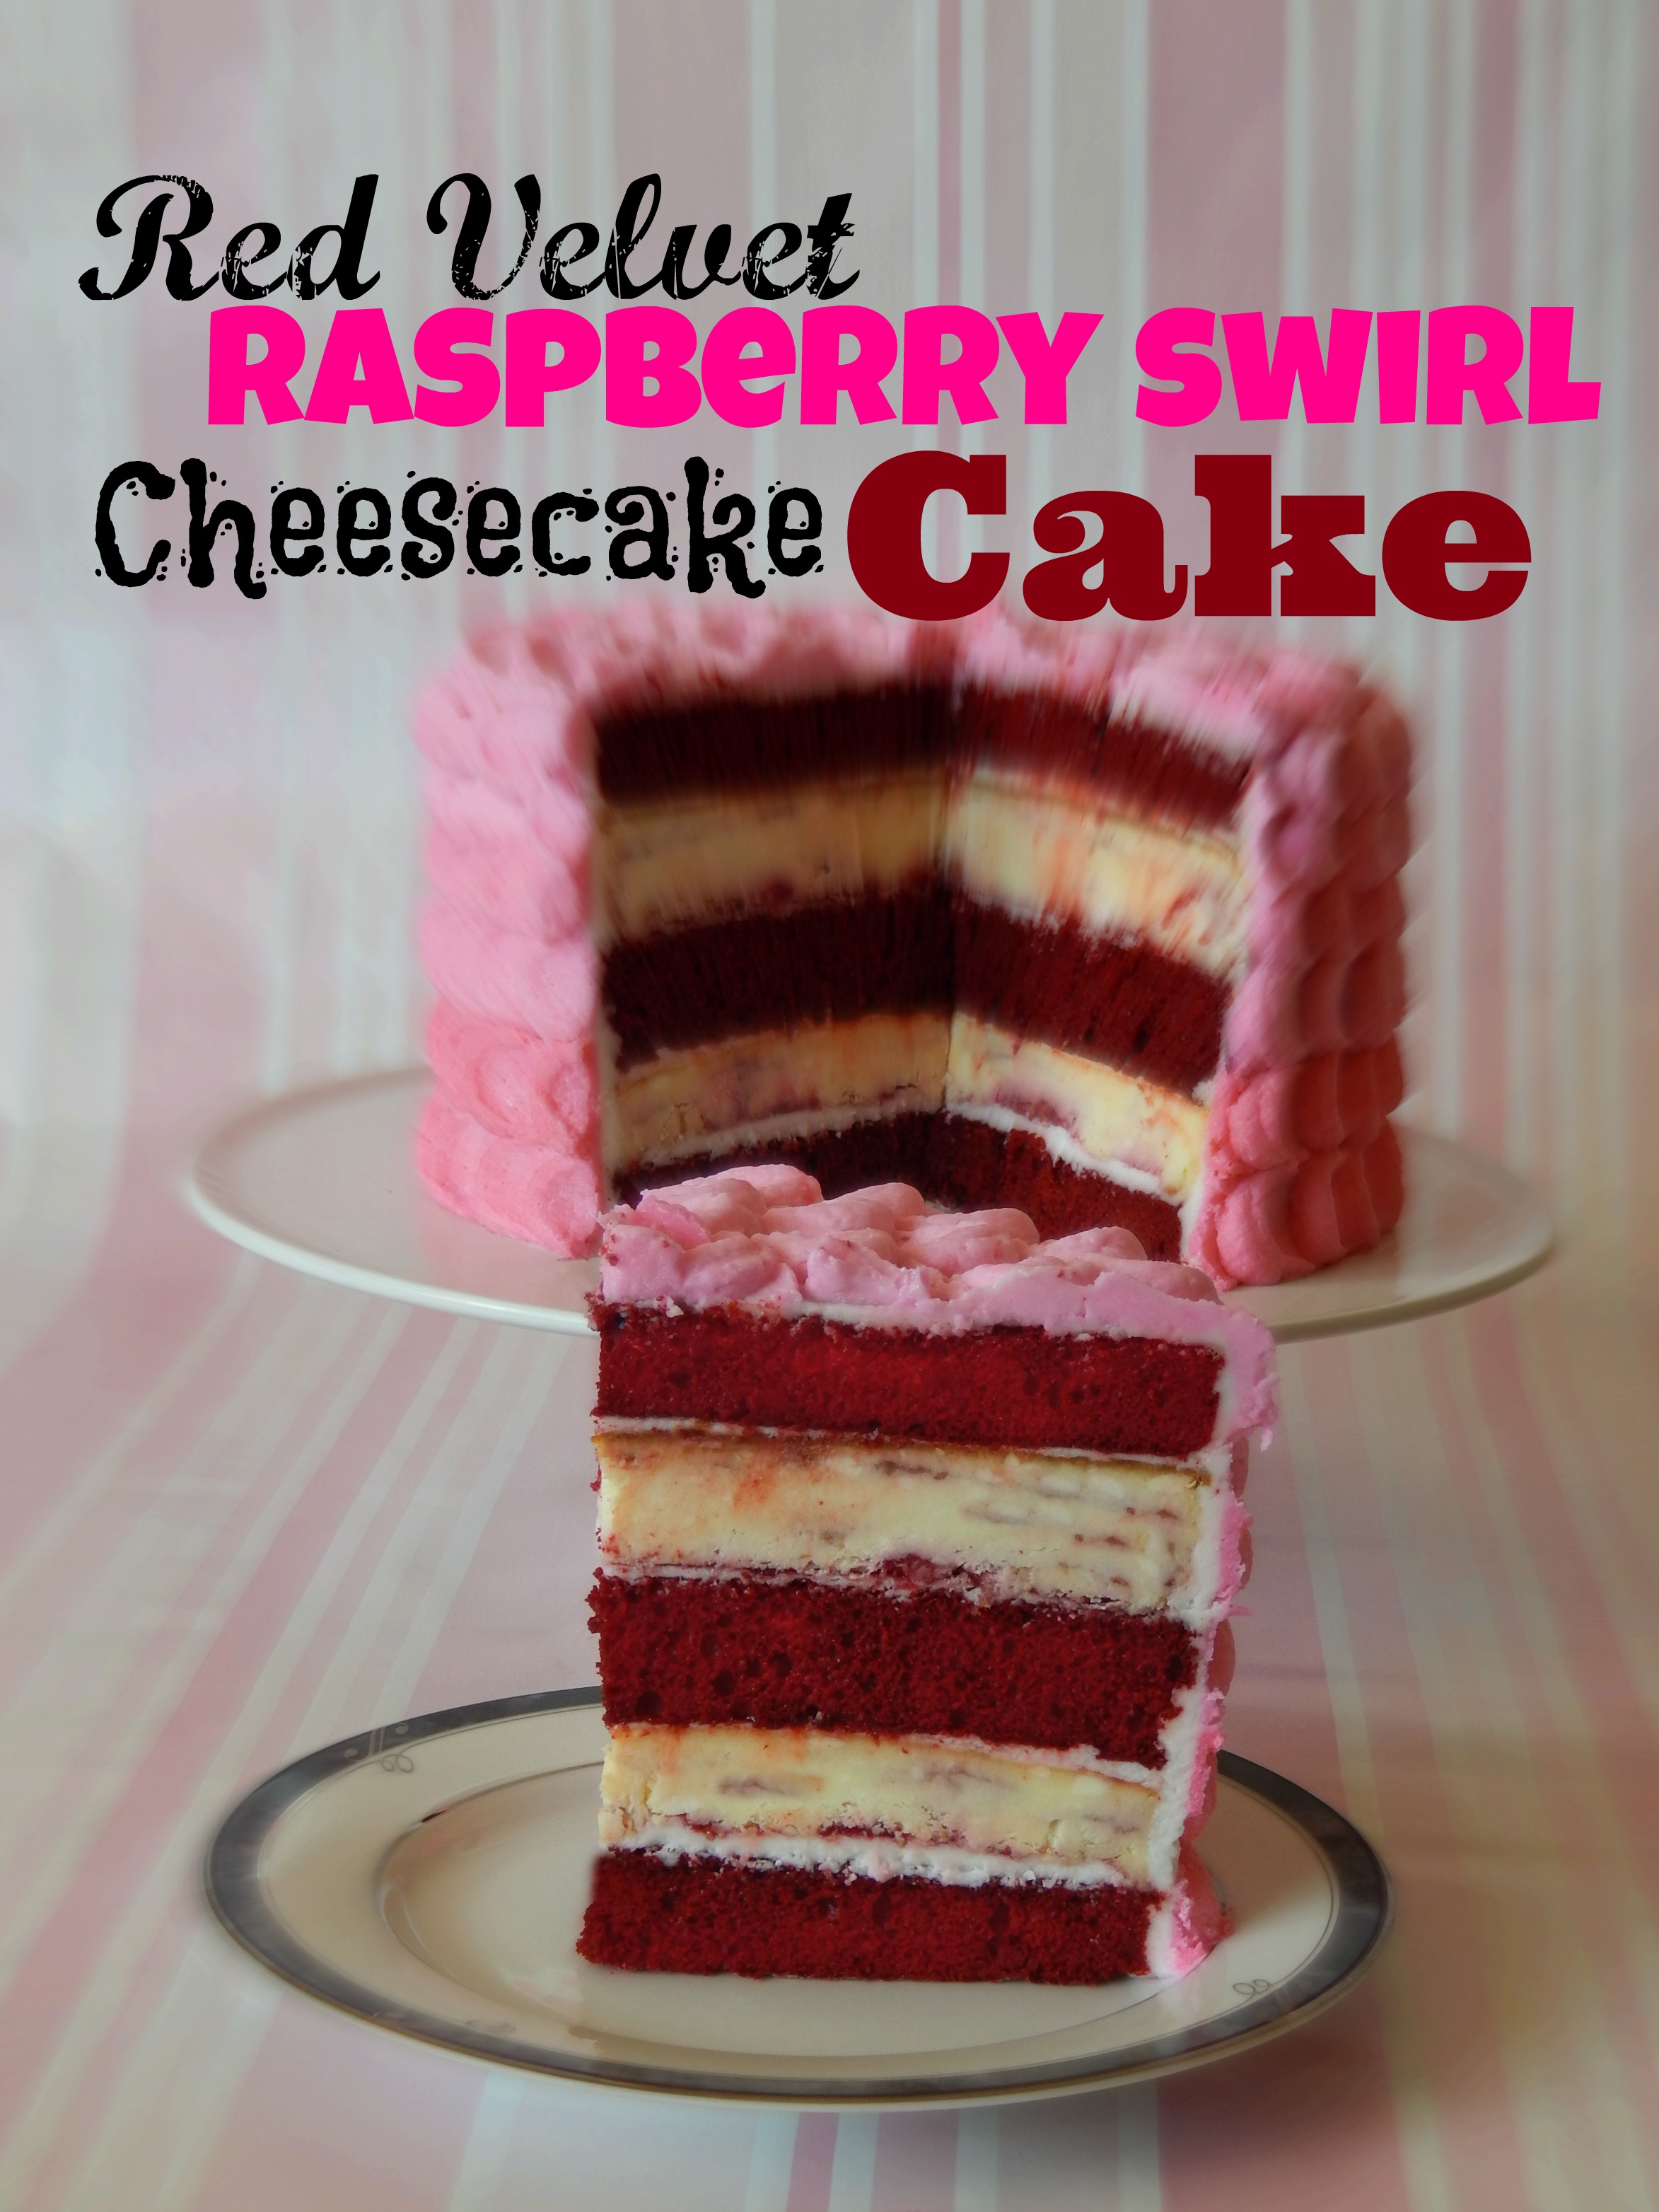
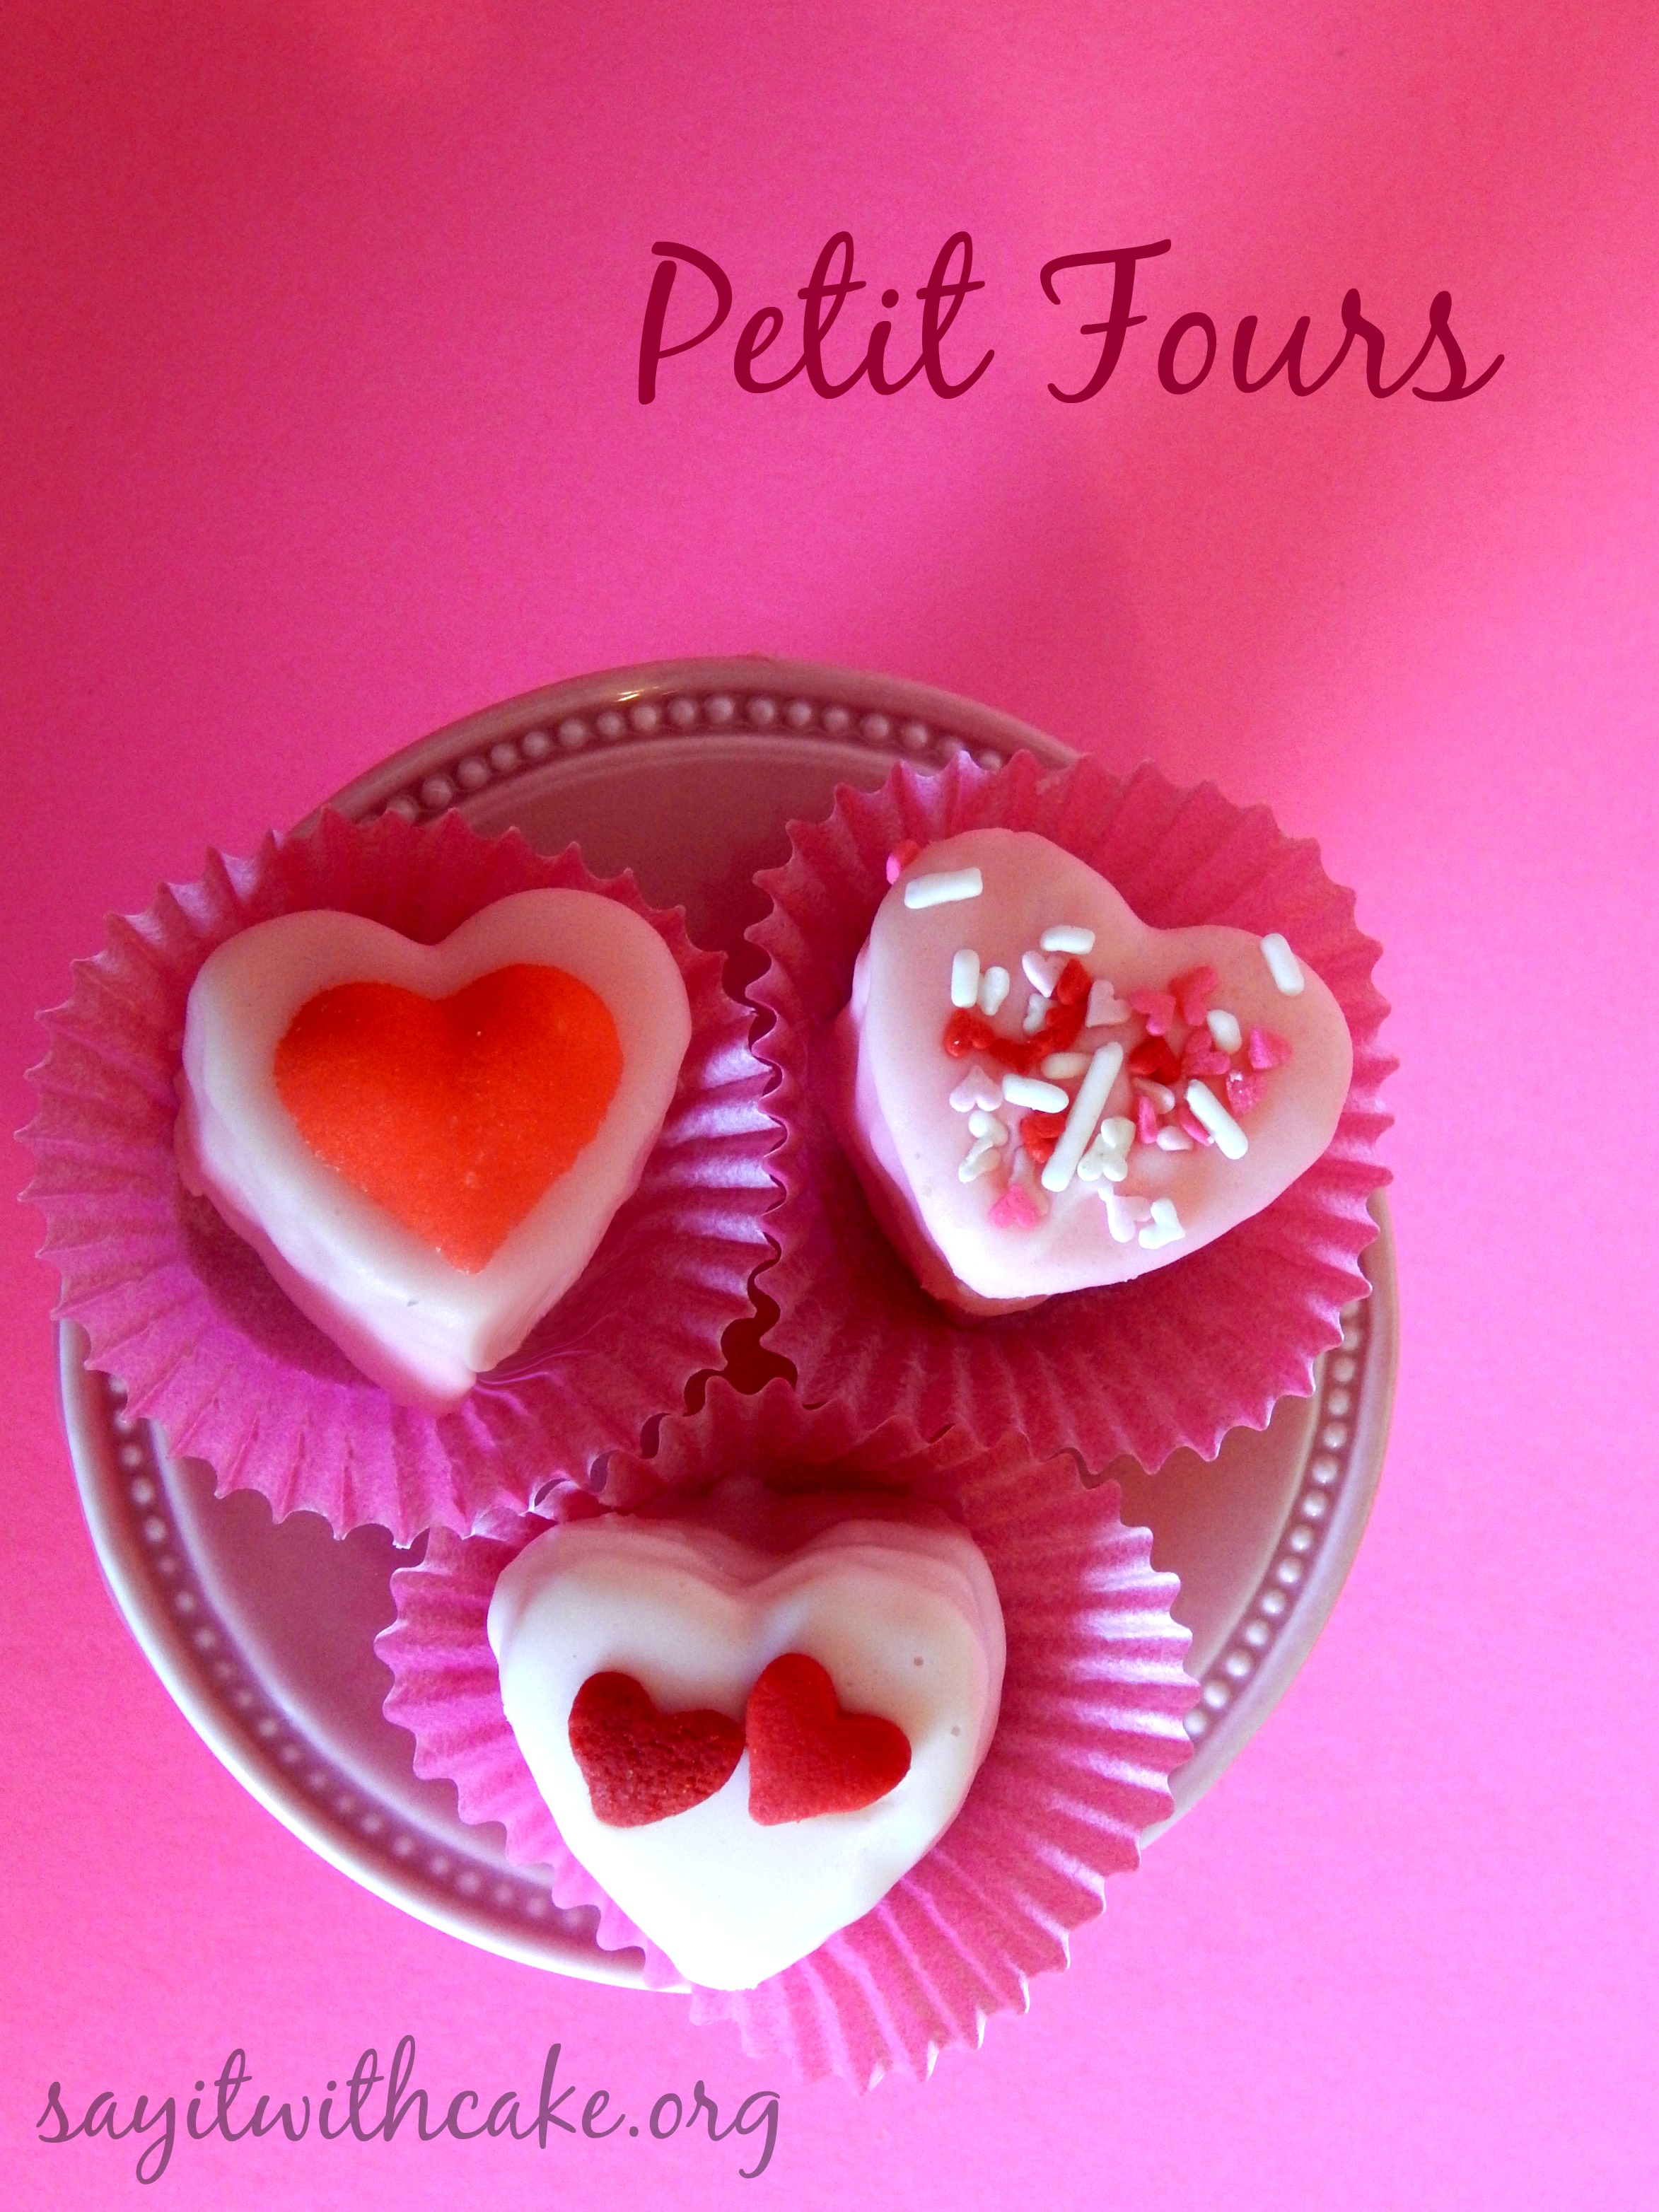
This 5 layer cake is based on a cheesecake I saw at the Cheesecake Factory. They have two layers of red velvet cake and one layer of cheesecake. I decided to try it with 3 layers of red velvet cake and 2 layers of cheesecake. Instead of using plain cheesecake, I made raspberry swirl cheesecake. It gives the cake a lot of yummy flavor and looks so pretty with the red and pink frosting. This cake is perfect to make for your Valentine this year!
Ingredients
- 2 sticks (16 tbsp) softened butter
- 1 cup granulated sugar
- 4- 8 oz packages cream cheese, softened
- 1- 3 oz. package cook and serve vanilla pudding
- 4 eggs
- 2 tsp baking powder
- 1 tbsp lemon juice
- 2 TB sugar
- 3/4 cup raspberries
- 18.25 ounce) package yellow cake mix
- 1 (3.5 ounce) package instant vanilla pudding mix
- 4 eggs
- 1 ounce red food coloring
- 1/2 cup vegetable oil
- 1 cup water
- 1 tablespoon distilled white vinegar
- 1 tablespoon unsweetened cocoa powder
- 1 cup cold milk
- Ingredients (to cover one 8 inch cake)
- 1 1/2 cup sweetex or crisco
- 1/4 teaspoon salt
- 1 teaspoon meringue powder
- 2 pounds powdered sugar
- 1/2 cup milk or water
- 1 tsp vanilla
Instructions
- Preheat oven to 325 degrees.
- Grease two 8" pans with shortening, line the pans with parchment and then grease the parchment. Lightly flour the pans and tap out excess over the sink. Set aside.
- Cream butter and sugar in a stand mixer fitted with paddle attachment.
- Add cream cheese a little at a time until smooth.
- Scrape bowl down and beat again on medium speed, adding eggs one at a time.
- Add remaining ingredients.
- Mix again until smooth.
- Divide batter evenly between pans. You should have 8 cups of batter, so 4 cups in each pan. Blend Raspberries with sugar to make puree. Pour big drops over half the batter in the pan and swirl with a fork.
- Add the rest of the batter and do the same with the rest of the puree. Do this with both pans of batter.
- Smooth batter with offset spatula and bake for 55 minutes to 1 hour.
- Cheesecake will puff up during baking, then deflate when taken out.
- Do not turn out cheesecakes when they are finished baking. Put them directly in the freezer, and leave until frozen solid.
- Turn out frozen cheesecake layers and peel parchment from the bottoms.
- Tip: if your cheesecake does not come out right away, just set it on a burner on the stove for a few seconds. Then cover the pan with saran wrap and flip it over onto a cutting board
- Preheat oven to 350 degrees F (175 degrees C).
- Grease and flour three 8 inch pans.
- Mix together cake mix, 1 box pudding mix, eggs, oil, food coloring, water, vinegar, and cocoa. Pour into prepared pans.
- Bake at 350 degrees F (175 degrees C) for 35 to 40 minutes.
- Cool.
- mix the sweetex, salt, and meringue powder with electric mixer to blend aobut 30 seconds
- Add the milk in the bowl, then add the sugar and blend by hand with a spatula until the sugar is absorbed into the liquid
- put bowl back on the mixer and beat on medium speed for 2-5 minutes until smooth and a little fluffy.
- if mixture is too stiff, you can add more liquid. if it is too runny add more powdered sugar
- OK so after you make both cakes, a total of 5 cakes, stack them with a thin layer of buttercream between each layer with raspberry filling on top of the buttercream. I used a store bought filling. Freeze untill completely frozen. Then you can take it out and frost it any way you like. I used a crumb coat of buttercream and piped on pink petals.
ENJOY!
Shamene
Try these other Valentine’s Day Treats
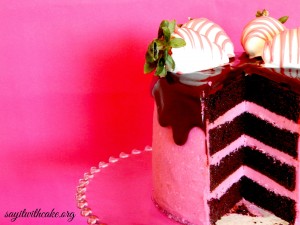
Dark Chocolate & Strawberry Buttercream Cake with Chocolate Covered Strawberries

My cake was featured here!
http://www.kleinworthco.com/2014/02/30-valentine-desserts.html
http://www.nibblesbynic.com/
http://www.madefrompinterest.net/2014/02/share-thursday-link-party-29/
]]>
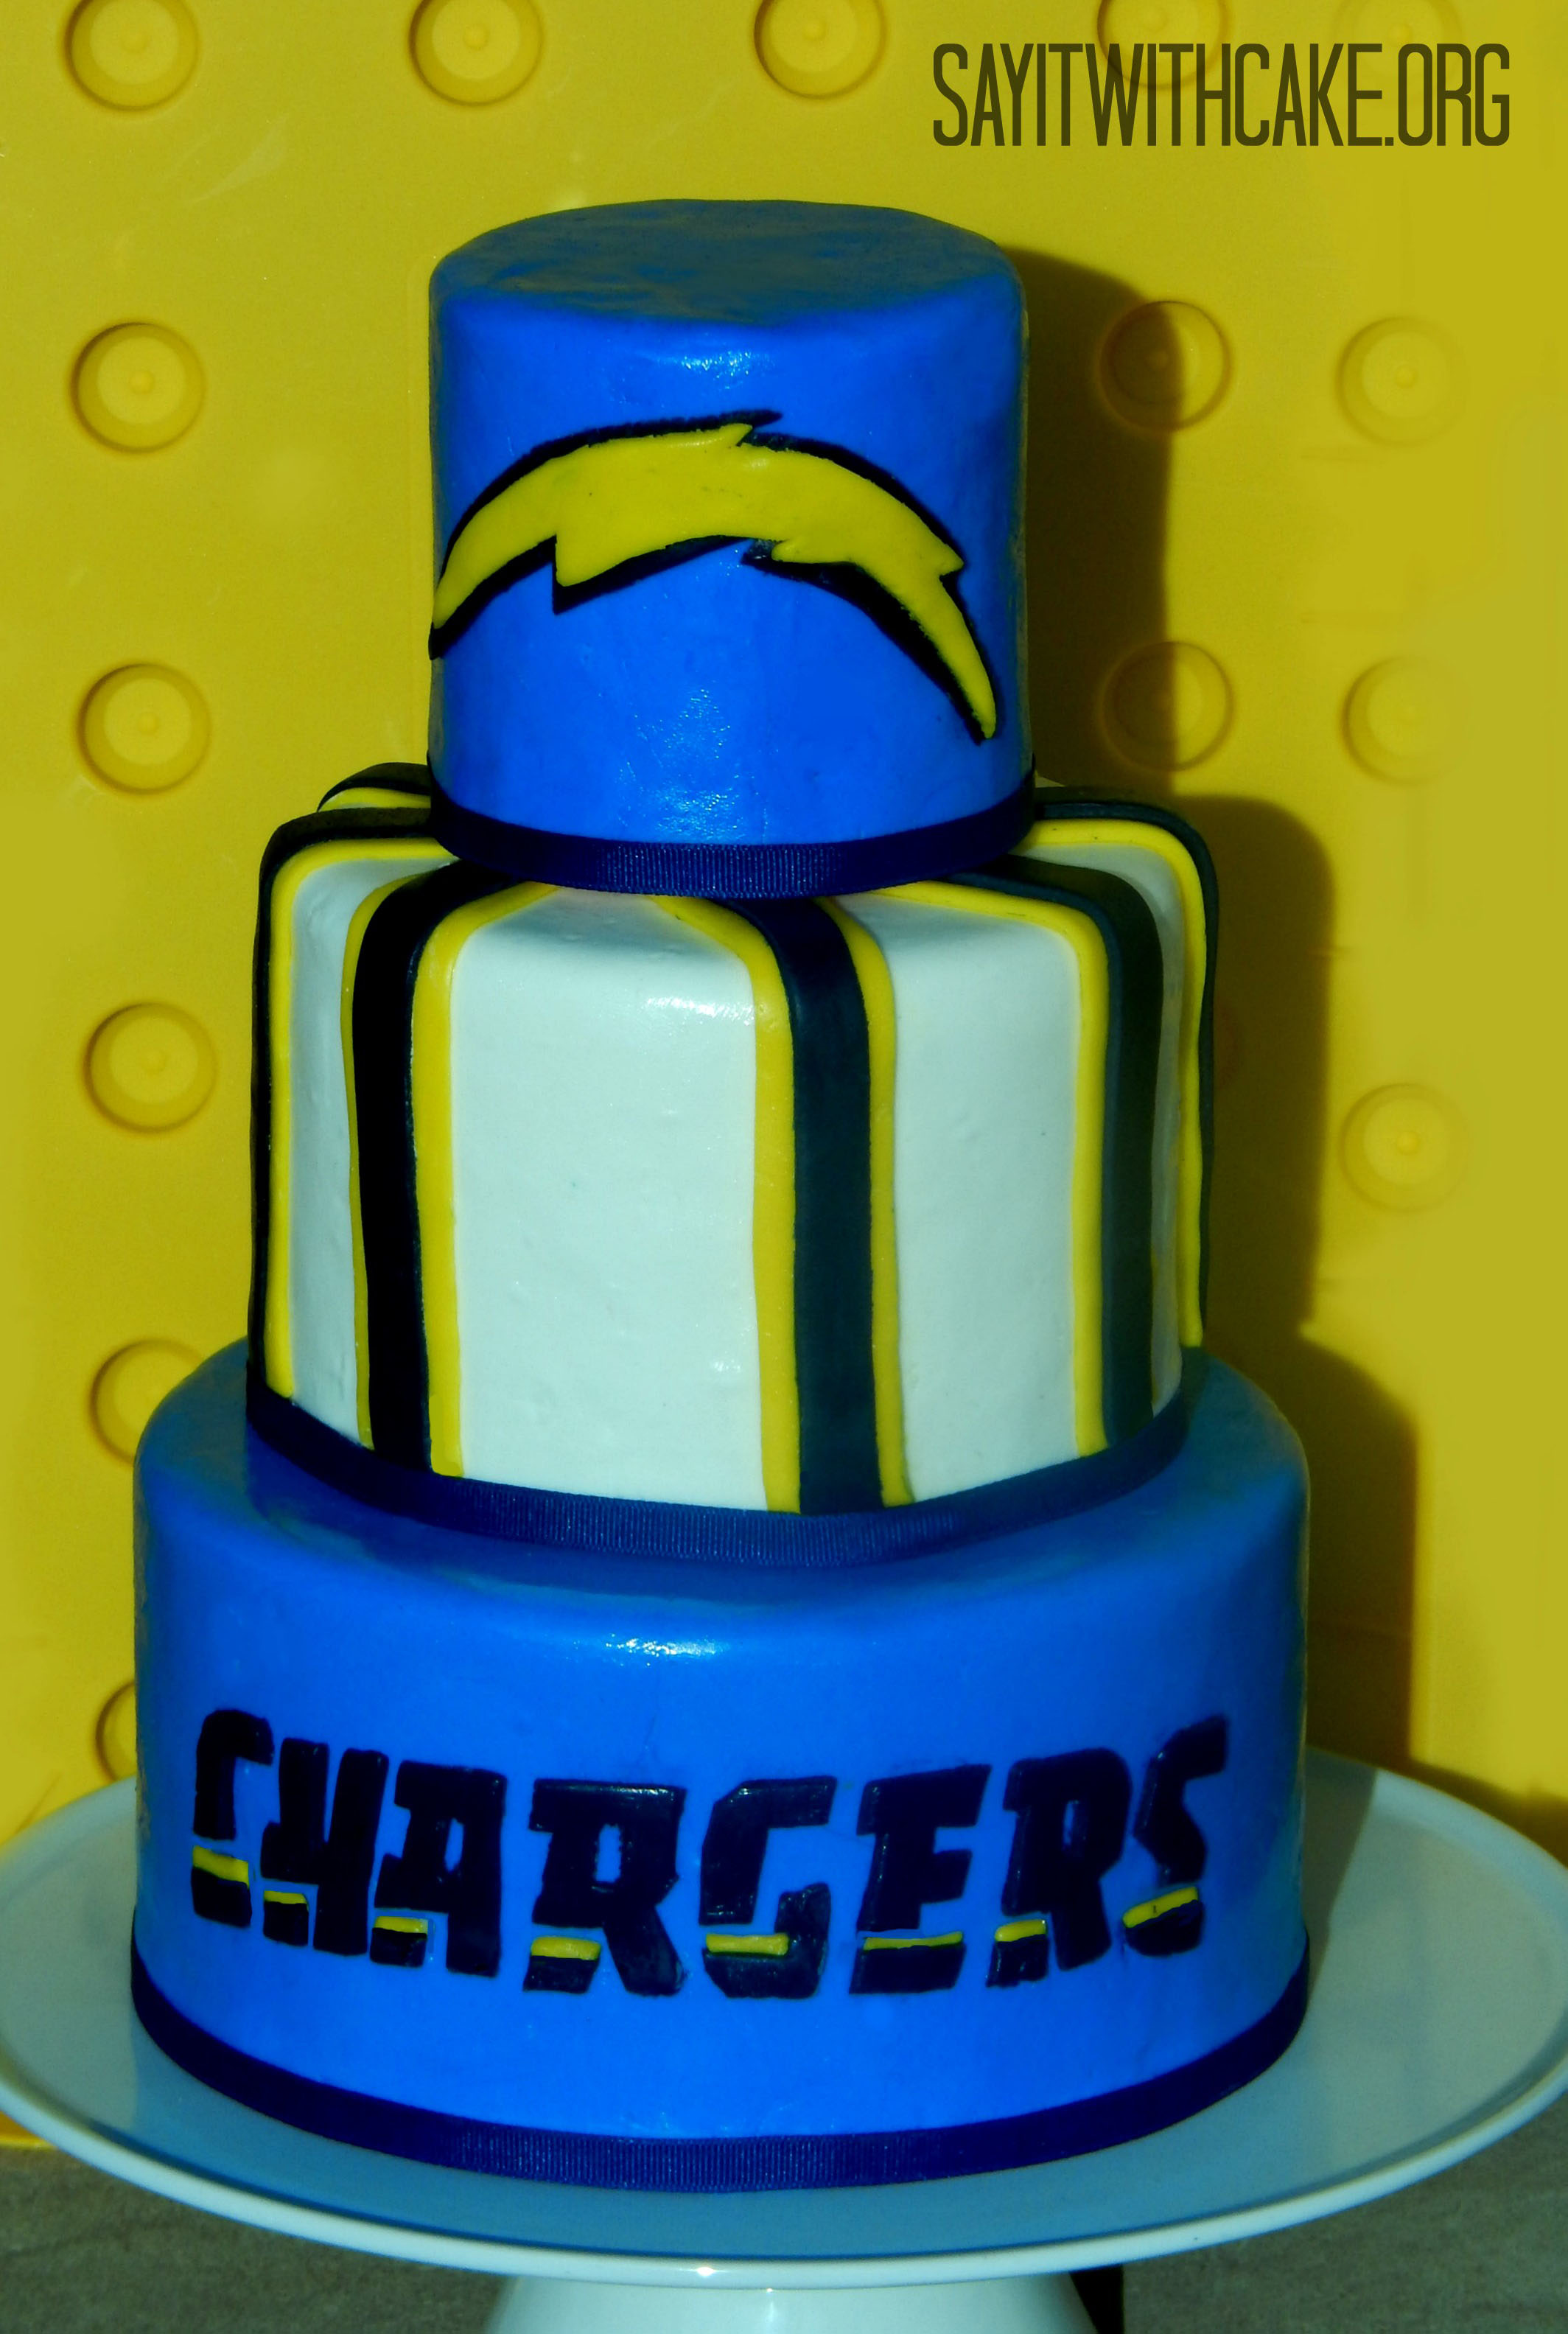 My favorite football team, the San Diego Chargers, made it to the playoffs! They will be playing on Sunday in Cincinnati, so I won’t be able to go to the game. However, I made this cake for an awesome Chargers playoff party! Go Chargers!
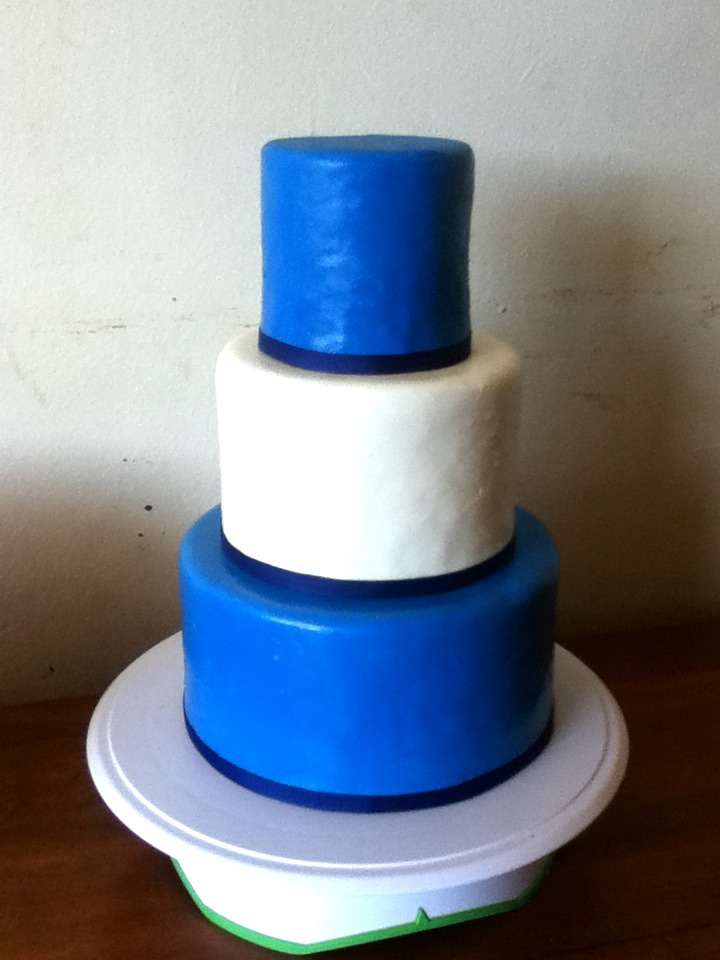
To make this cake, I first made three separate cakes, an 8 inch , a 6 inch, and a 4 inch cake. I frosted them with buttercream and let it crust. I made two batches of fondant. One I made baby blue, and the other batch I left white. I split the white fondant in half and made dark blue fondant and yellow fondant out of the white half. I covered two cakes with baby blue fondant and the 6 inch cake with white fondant. Here is what it looks like at this point:
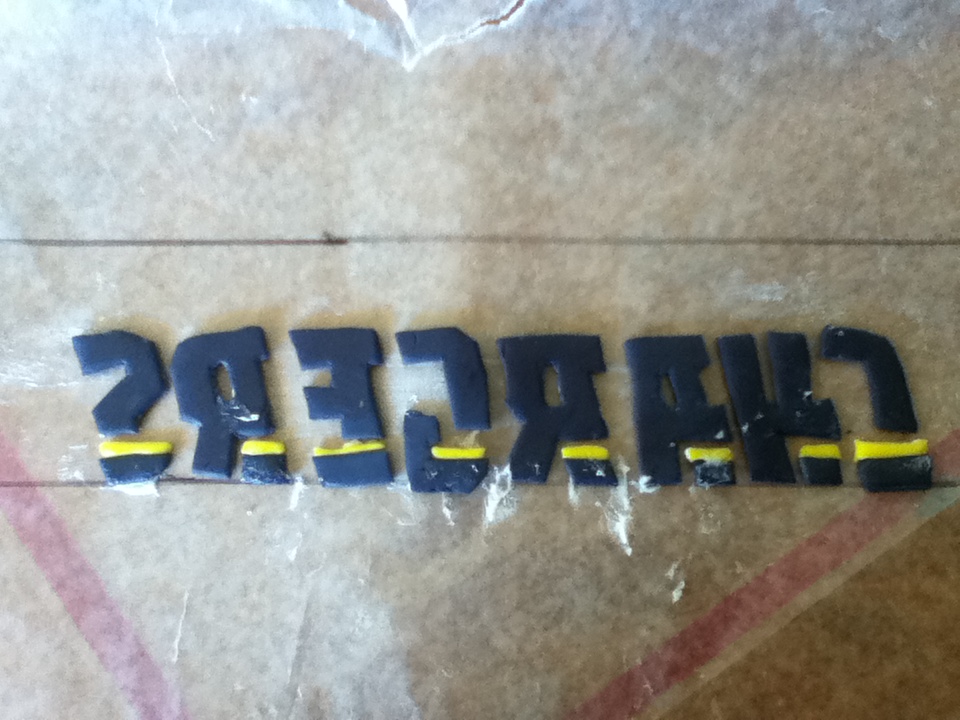
To make the Chargers lettering, I rolled out some dark blue fondant on a fondant mat. I printed out the lettering in the size I wanted from the computer. I cut it out and laid it on top of the fondant. I used an exacto knife to cut out the lettering around the paper print out. After I was done I peeled off the paper lettering. I put the lettering on a piece of wax paper with shortening spread lightly on it. You have to put the letters on backwards for this method to work. Next you pick up the piece of wax paper and the lettering will stick to the wax paper. I put water on the fondant, and pushed the wax paper against the cake. I peeled the wax paper off and the fondant lettering stuck to the cake. Here is a picture of what it looks like before I stuck it on the cake. Note that its placed on the wax paper backwards.
To make the stripes, I used a fondant ribbon cutter. To make the bolt, I drew a picture of the bolt in the size I wanted. Then I traced it into the fondant with an exacto knife on both the yellow and blue fondant. I hope you enjoy making your own Chargers cake! I have included a new recipe I found for fondant. It is from Cake Boss and is so much better then the fondant I used to use. The difference is the corn syrup, it makes the fondant have so much more elasticity and I did not have any breaking, or ripping in my fondant!
Ingredients
- 16 oz mini-marshmallows,
- 2 lb powdered sugar,
- 1 tbsp water,
- 1 tsp corn syrup (optional),
- 1 tsp lemon extract (optional).
- Yield: 3 lbs fondant
Instructions
- Empty your bag of marshmallows into a large, microwave-safe bowl, and add water. Microwave until the marshmallows are puffed up and soft looking (about 2 minutes in my microwave).
- Grease wooden spoon
- This is really important - while your marshmallows are in the microwave, use a paper towel and some shortening to thoroughly lubricate a wooden spoon. Making marshmallow fondant is a sticky business, and this is one way to make it a little easier on yourself.
- Stir and add optional ingredients
- Add your corn syrup and lemon extract, if you are using them. The corn syrup seems to help with flexibility of the fondant after it reaches room temperature, and the extract is for added flavor and to help cut the sweetness.
- Soupy marshmallows
- The mixture should be kind of soupy as you stir it, and most of the marshmallows should be dissolved.
- Adding color
- If you want to color this entire batch, you can add color now, rather than trying to knead it in later.
- GRADUALLY, begin to stir in the powdered sugar.
- Continue stirring and adding powdered sugar until you have used about 2/3 of the bag.
- When to stop
- Stop when it becomes difficult to continue to stir with the spoon.
- Ready for kneading
- Turn out onto a greased surface. KEEPING IN MIND THAT IT IS HOT, begin CAREFULLY kneading with your hands, and gradually add in the rest of your bag of powdered sugar. You may not need to use the entire bag! You'll want to stop kneading when the fondant stops absorbing the powdered sugar, and it actually feels like warm fondant (this is where previous experience with fondant comes in handy). You may want to keep your shortening nearby so you can grease your hands as necessary
- Knead on grased surface
- * A special note about stand mixers: I know that some people use their stand mixer and hook attachment to mix their MMF. Some people are successful and have never had a problem, but I have read TOO MANY STORIES of people burning out their mixer's motor this way! It's not worth the risk, folks! Your stand mixer wasn't made for this!
- Using your MMF
- When you are ready to use your MMF, grease your work surface with shortening and a paper towel. Be sure to cover every spot, there is nothing worse than having your fondant stick to the mat!
- The two most important things to have on hand when working with marshmallow fondant are shortening and a microwave. Marshmallow fondant does not loosen up with kneading, like traditional fondant. This is fondant straight from the bag. If it is too hard to roll out, put it in the microwave in 5-second increments until it is kneadable. It's important to not "melt" your MMF! You just want to soften it enough so that you can knead it and roll it out! A liberal coating of shortening on your hands will assist with the kneading process.
- Roll out
- Roll out as you would for any other kind of fondant, and cover cake as usual.
Recipe from Cakeboss.com
ENJOY!
Shamene
]]>