Say it With Cake » desserts
http://sayitwithcake.org
Tue, 10 Jan 2017 02:22:46 +0000en-UShourly1http://wordpress.org/?v=4.2.10Raspberry & Dark Chocolate filled Cupcakes
http://sayitwithcake.org/raspberry-dark-chocolate-cupcakes/
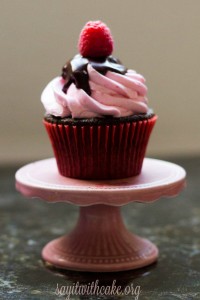
http://sayitwithcake.org/raspberry-dark-chocolate-cupcakes/#commentsSat, 12 Nov 2016 19:34:29 +0000http://sayitwithcake.org/?p=30969I love to bake and am often asked to brink desserts to family and friends functions. I was asked to brink cupcakes for my friends birthday and I wanted to somehow make them extra special. I decided to try these dark chocolate cupcakes filled with Bavarian cream, and also raspberry filling. I couldn’t decide which filling would be best so I tried out both on my family. I will let you know which one was the winner! I frosted these cupcakes with Raspberry Swiss Meringue buttercream, a chocolate glaze, and a fresh raspberry garnish.
With the chocolate on top of the piped frosting, it looks like a little sundae. I might even try sprinkles on the glaze next time. I used the chocolate mud cake recipe from my previous cake here. It is one of the best chocolate cakes I have tasted and hope it is just as good in cupcake form!
Chocolate Mud Cake
All Purpose Flour 2 cups / 240 grams
Cocoa Powder – 1/2 cup / 60 grams
Baking Powder – 2 tsp
Baking Soda – 1/2 tsp
Salt – 1/2 tsp
Water – 3/4 cup / 180 ml
Soft Unsalted Butter – 250 grams
Milk – 1/2 cup / 120 ml
Eggs – 4
Sugar – 2 3/4 cup / 550 grams
Dark Chocolate – 220 Grams chopped
Instant Coffee Powder – 2 TBSP
Oil – 2 TBSP
Directions
Preheat oven to 350 * Line 24 cupcake pan with liners.
Now time to make the batter. Take water in a sauce pan and bring it to a boil
Add in coffee, butter, dark chocolate and heat it gently till it is melted.
Add in sugar and whisk well till it is completely melted.
Pour this in a bowl and set aside to cool down a bit.
Now sift flour, cocoa, baking soda, baking powder and salt.
Now add in milk to the chocolate mix, add in one egg at a time and whisk it well.
Add in the sifted flour mix in and mix well.
Pour this in the prepared cupcake pan and pop it in oven for 17 min. or until the toothpick comes out clean.
Now remove it from oven and let them cool completely on a wire rack.
For the Raspberry Swiss Meringue Buttercream:
5 large, fresh egg whites (150 g)
1-1/4 cups (250 g) sugar
1-1/2 cups (3 sticks)(340 g) butter, cut into cubes and cool, but not cold
2 teaspoons (10 ml) pure vanilla extract
1/4 cup (59 ml)(or to taste) raspberry puree OR a handful (about 1 cup, or more to taste) of fresh, washed, and dried raspberries
pinch of salt
few drops pink food coloring (optional)
Directions
Wipe the bowl of an electric mixer with paper towel and lemon juice, to remove any trace of grease. Add egg whites and sugar, and simmer over a pot of water (not boiling), whisking constantly but gently, until temperature reaches 160°F, or if you don’t have a candy thermometer, until the sugar has completely dissolved and the egg whites are hot.
With whisk attachment of mixer, begin to whip until the meringue is thick, glossy, and the bottom of the bowl feels neutral to the touch (this can take up to 10 minutes or so). *Don’t begin adding butter until the bottom of the bowl feels neutral, and not warm.
Switch over to paddle attachment and, with mixer on low speed, add butter cubes, one at a time, until incorporated, and mix until it has reached a silky smooth texture (if curdles, keep mixing and it will come back to smooth). *If mixture is too runny, refrigerate for about 15 minutes and continue mixing with paddle attachment until it comes together. Add vanilla and salt, continuing to beat on low speed until well combined.
Add raspberry puree to taste or the fresh raspberries in small increments, and blend until combined. Add small amount of pink food coloring, if desired.
For the Glaze:
4 oz (115 g) high quality bittersweet chocolate, coarsely chopped or callets
1/3 cup (76 g) unsalted butter, at room temperature and cut into cubes
Place the chocolate and butter in a medium heatproof bowl over a pot of simmering water. Stir the mixture using a rubber spatula until melted and smooth. *Be careful to not get even a droplet of water into your bowl of chocolate and butter.
Assembly of the Dark Chocolate & Raspberry Cupcakes:
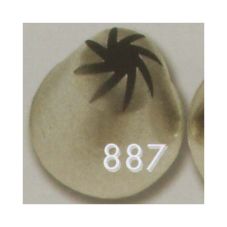
Fill a large pastry bag (18″) fitted with Ateco #887 (or the decorative tip of your choice) about 2/3 full and swirl the buttercream in a circular motion, beginning on the outside rim of the cupcake starting on the inside and swirling out. Gently release pressure when you reach the top of your swirl. I put the pastry bag in the refrigerator for a couple of minutes to get it not so soft before I piped.
Drizzle the top of the cupcake with Dark Chocolate Glaze (~1 tablespoon each). It hardens a little after chilled.
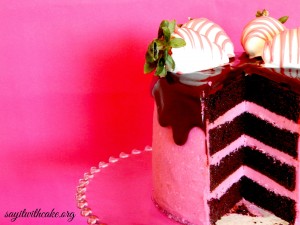
Top with a fresh raspberryDark Chocolate & Strawberry Buttercream Cake with Chocolate Covered Strawberries.
Cupcakes are best enjoyed the day they are made, but these keep particularly well in an airtight container at room temperature for up to 3 days (however, I’ve been known to eat them up to a week later, and they taste great!). If you do refrigerate, serve at room temperature–particularly Swiss Meringue Buttercream cupcakes, otherwise the buttercream is too hard and butter-like.
How to fill a Cupcake
Get a large piping tip and place the back of the tip onto the cupcake. Push down and twist until you come to the middle. You don’t want to get all the way to the bottom. Twist back up and you will have a nice hole in your cupcake, and the cupcake part will be left in your tip. Tap on the table to get the cake part to fall out.
Use a spoon to put in the filling of your choice. You can cover up the hole with part of the cupcake, or leave it and cover it when you frost your cupcake. Easy!
This is very simple and will give your cupcakes a little something special!
My nephew Timmy with his eyes on the cupcake, he couldn’t wait to try it! Did you like it Timmy?
Photography by Wendy Cox
Enjoy!
Other cakes you might like
]]>http://sayitwithcake.org/raspberry-dark-chocolate-cupcakes/feed/0Galaxy Cookies
http://sayitwithcake.org/galaxy-cookies/
http://sayitwithcake.org/galaxy-cookies/#commentsThu, 27 Oct 2016 03:20:35 +0000http://sayitwithcake.org/?p=29511I am a Cub Scouts leader, and tonight is our Space Derby! I was in charge of refreshments, so I came up with these Galaxy cookies. I think they go along great with the space theme of the night! They are easy and really fun to make! The glaze only takes two ingredients, a definite plus!
gel food coloring of choice (I used blue and purple)
edible glitter, if desired
foods to glaze ( I used Oreo thins)
for white stars
white food coloring
toothbrush
Instructions
Mix the icing sugar and milk together until smooth.
Spoon a bit of icing out into a separate bowl and keep it white.
Tint your base with just a bit of blue food coloring – you want it to be very pale, with just a hint of hue. I put in not even a drop, just a tiny corner from my spoon of coloring.
Mix well.
Drop on 2 drops of blue and one drop of purple, or red and using a chopstick, spoon, or skewer, drag the color back and forth in one direction, not quite mixing it together, but creating streaks of color.
Dribble some of the white icing back on top.
With a smooth swooshing motion, dip your cookie into the surface of the glaze, pulling it along the surface to achieve streaks.
Let the excess drip off and place on wax paper to let dry.
Dust with glitter, if desired.
From time to time, add more white icing to the bowl to ensure the galaxy effect.
For the stars
pour some of the white food coloring into a bowl. Dip your toothbrush into the coloring, then use your thumb to flick the color onto the cookies. they will look like millions of little stars!
The glaze on these cookies dried within an hour with a ceiling fan on in the room. I waited until the cookies were dry and hard to the touch before I put on the stars.
It might also be fun to make sugar cookies and use the galaxy glaze on those as well. I have also seen galaxy donuts that would be fun. The glaze in my recipe will work on donuts, and sugar cookies. The taste is nice and sweet, like a glaze on a Krispy Kreme donut, but not sticky I hope you have a chance to make these soon!
Enjoy!
Other desserts you might like!
Cub Scout Cake with dripping Gold Ganache
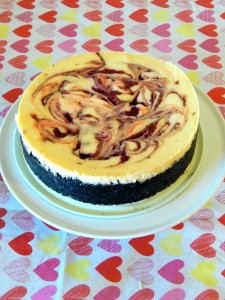
White Chocolate Raspberry Swirl Cheesecake
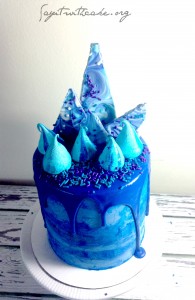
Blue Cake
]]>http://sayitwithcake.org/galaxy-cookies/feed/0Mud Pie
http://sayitwithcake.org/mud-pie/
http://sayitwithcake.org/mud-pie/#commentsSun, 23 Oct 2016 19:39:45 +0000http://sayitwithcake.org/?p=29362This delicious mud pie is a new and improved recipe based on my Kona Pie recipe HERE. I used a different ice cream called Mocha almond fudge. I also covered the pie in fudge instead of covered with whipped cream. I put a swirl of whipped cream on each piece instead. The result is a chocolatey mocha yumminess!
There are two ways you can assemble this mud pie. The first way is to use a spring form pan. The second way is to use a cake board with a pastry ring and an acetate ring. This is the way I made it because I wanted to pie to be smaller then my spring form pan. Make sure you freeze the crust for a few hours before putting in the ice cream. The mud pie turns out best if you let it freeze overnight. Also give the fudge on top time to freeze as well.
Enjoy!
Other cakes you might like!
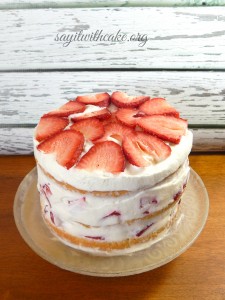
Strawberry Tres Leches Cake
Blackberry Mirror Glaze Entrement
Passion fruit Strawberry Cake
]]>
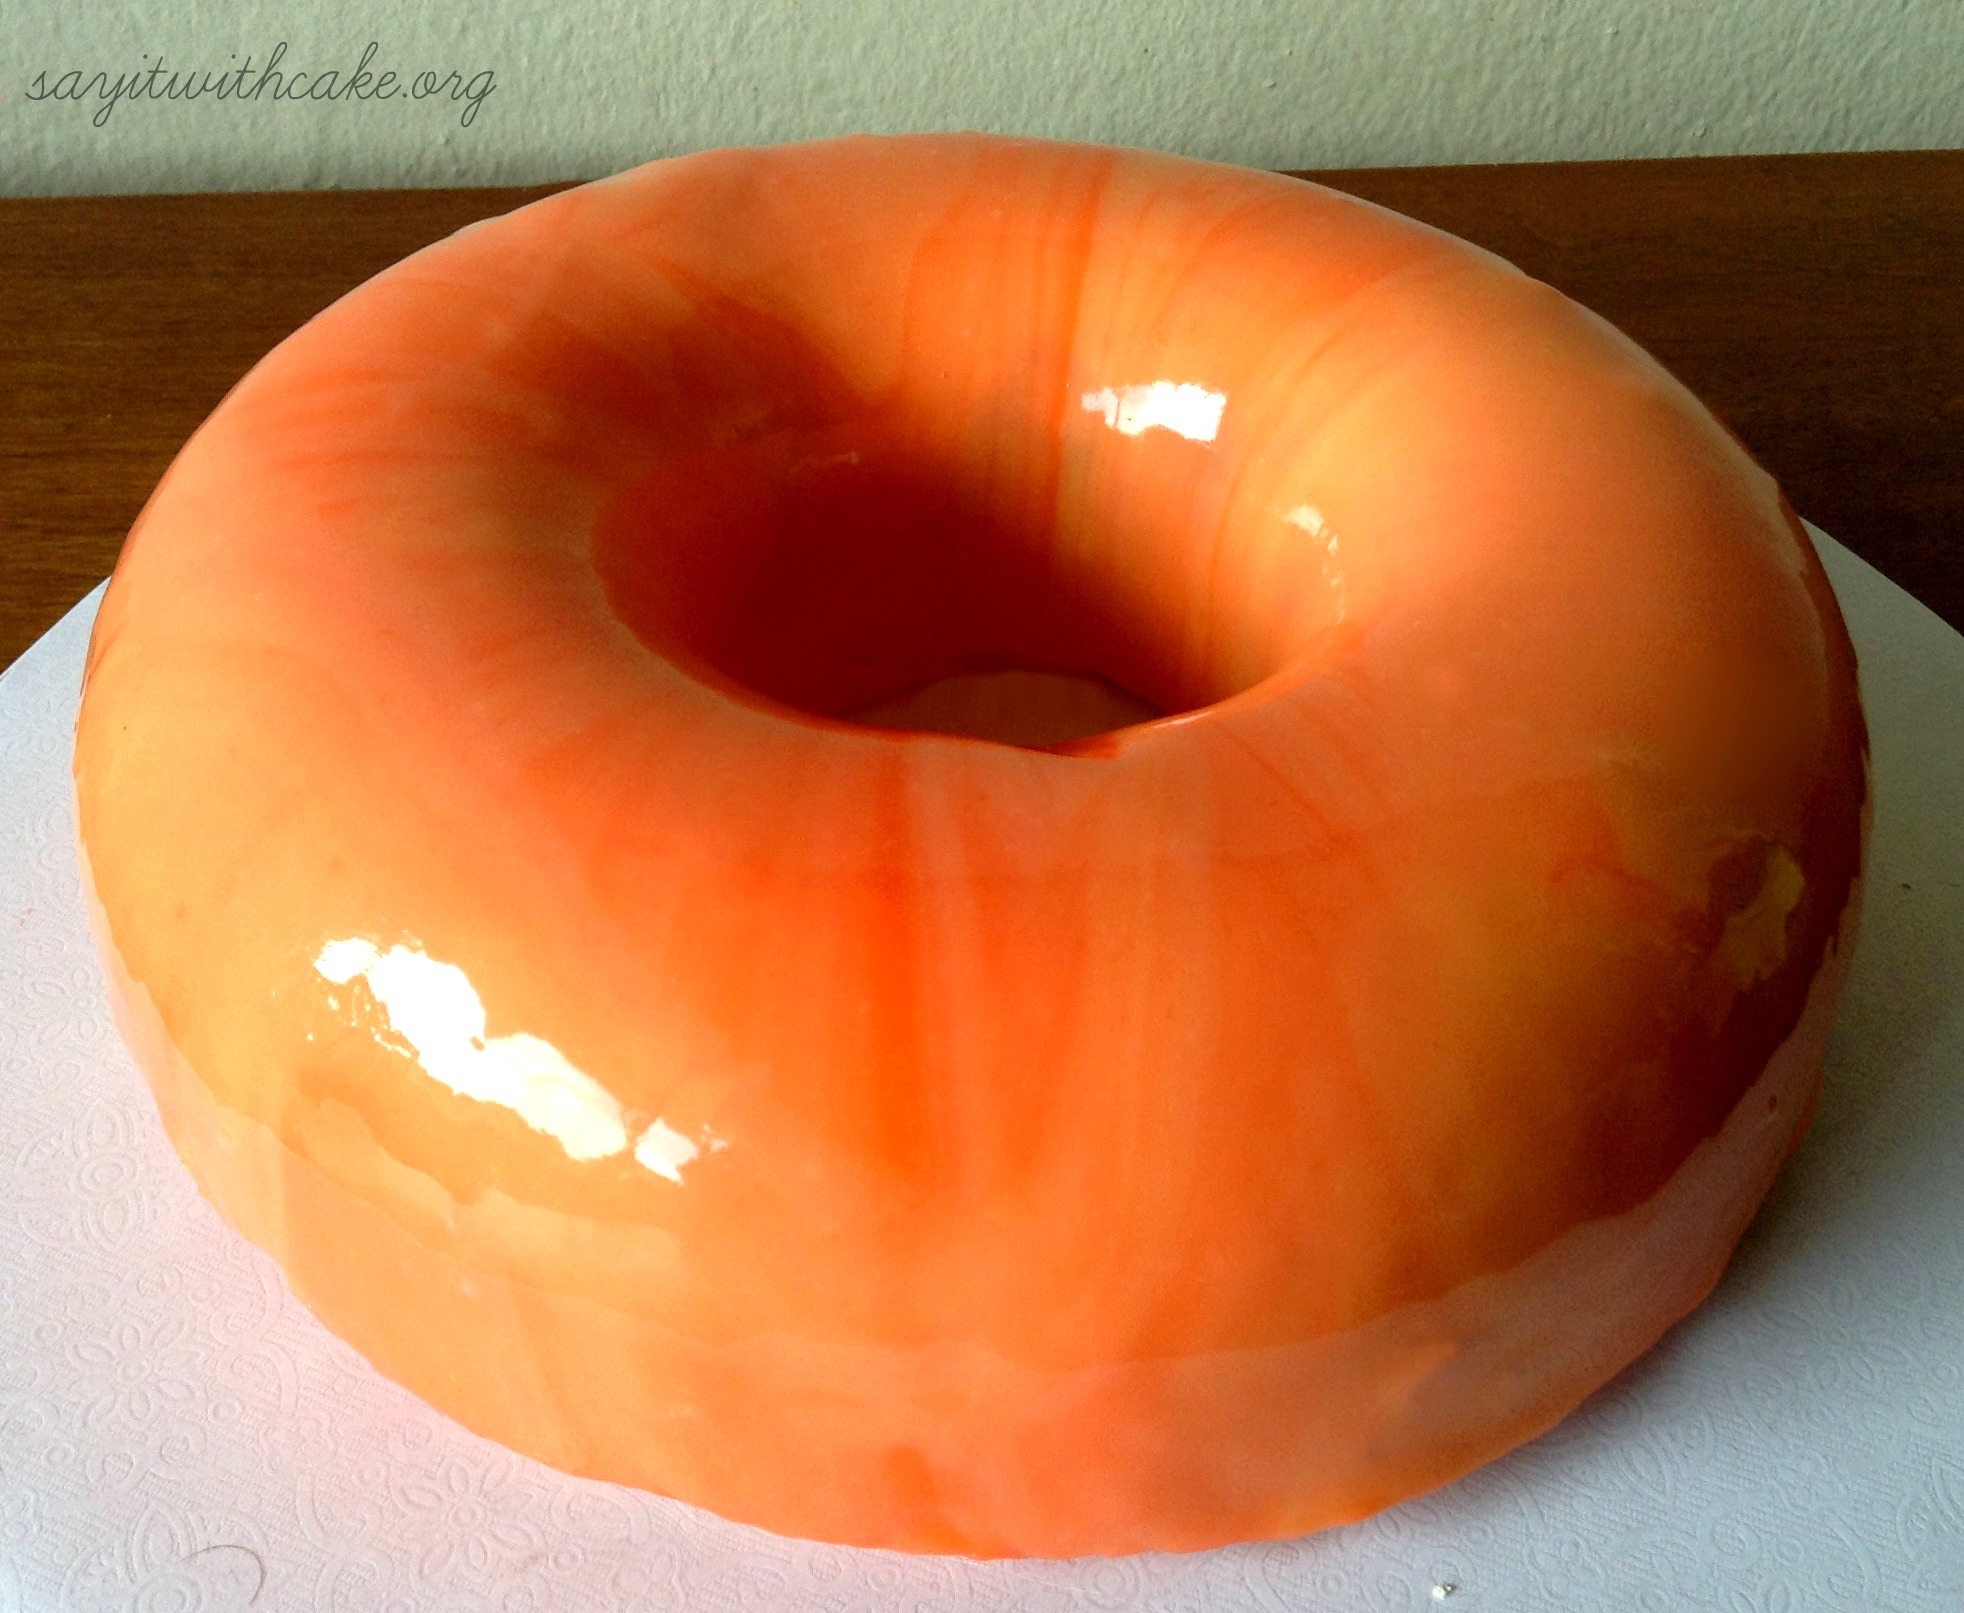
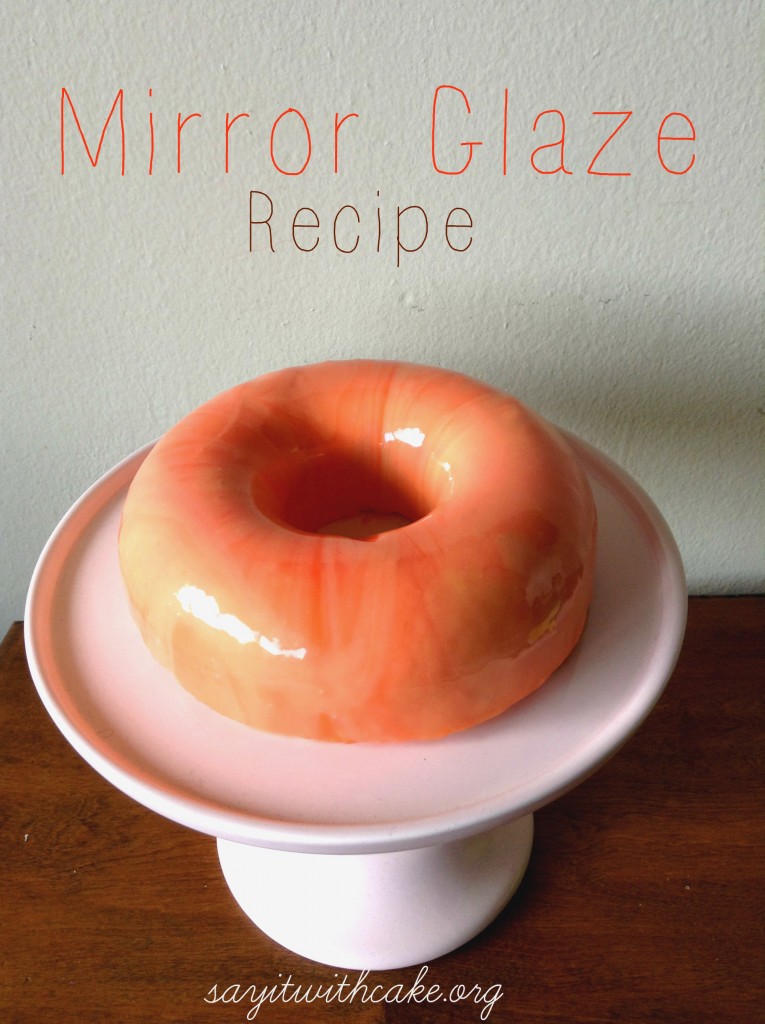
http://sayitwithcake.org/mud-pie/feed/2Peach Mousse Entremet with Mirror Glaze
http://sayitwithcake.org/peach-mousse-entremet/
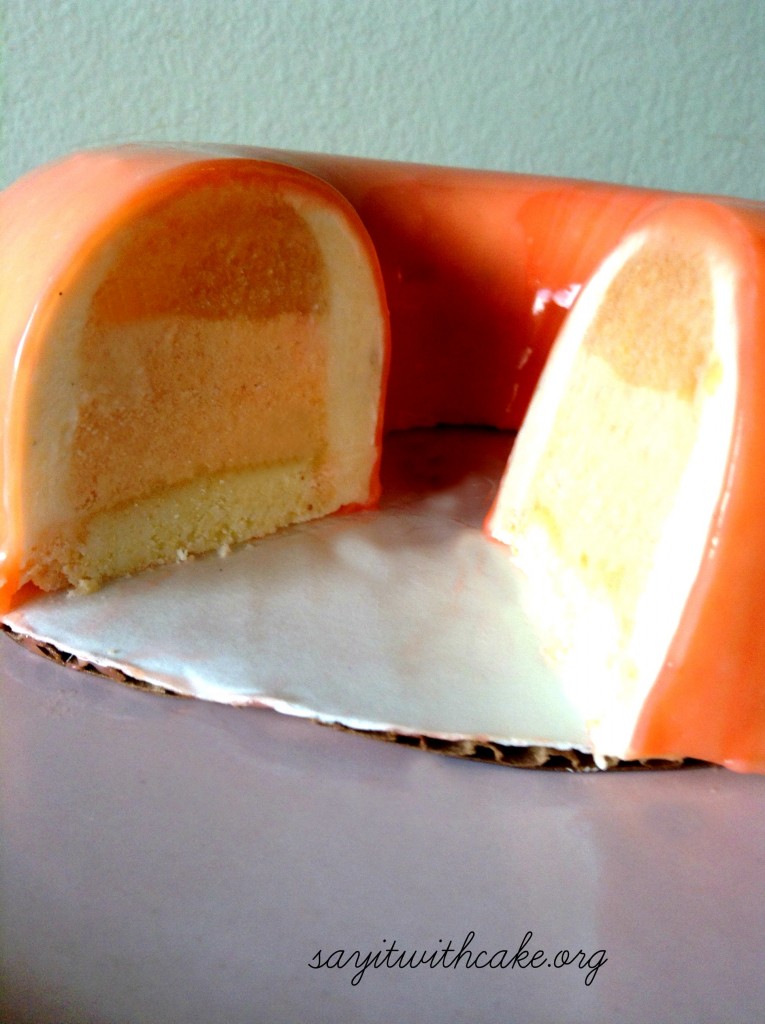
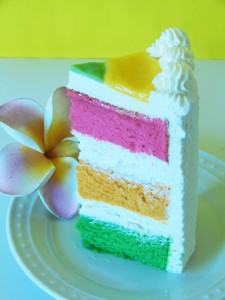
http://sayitwithcake.org/peach-mousse-entremet/#commentsSun, 19 Jun 2016 01:41:13 +0000http://sayitwithcake.org/?p=13084An entremets is in modern French cuisine a small dish served between courses or simply a dessert. Originally it was an elaborate form of entertainment dish common among the nobility and upper middle class in Europe during the later part of the Middle Ages and the early modern period. An entremet marked the end of a serving of courses and could be anything from a simple frumenty (a type of wheat porridge) that was brightly colored and flavored with exotic and expensive spices to elaborate models of castles complete with wine fountains, musicians, and food modeled into allegorical scenes.
For modern pastry chefs, an entremet is a multi-layered mousse-based cake with various complementary flavors and varying textural contrasts.
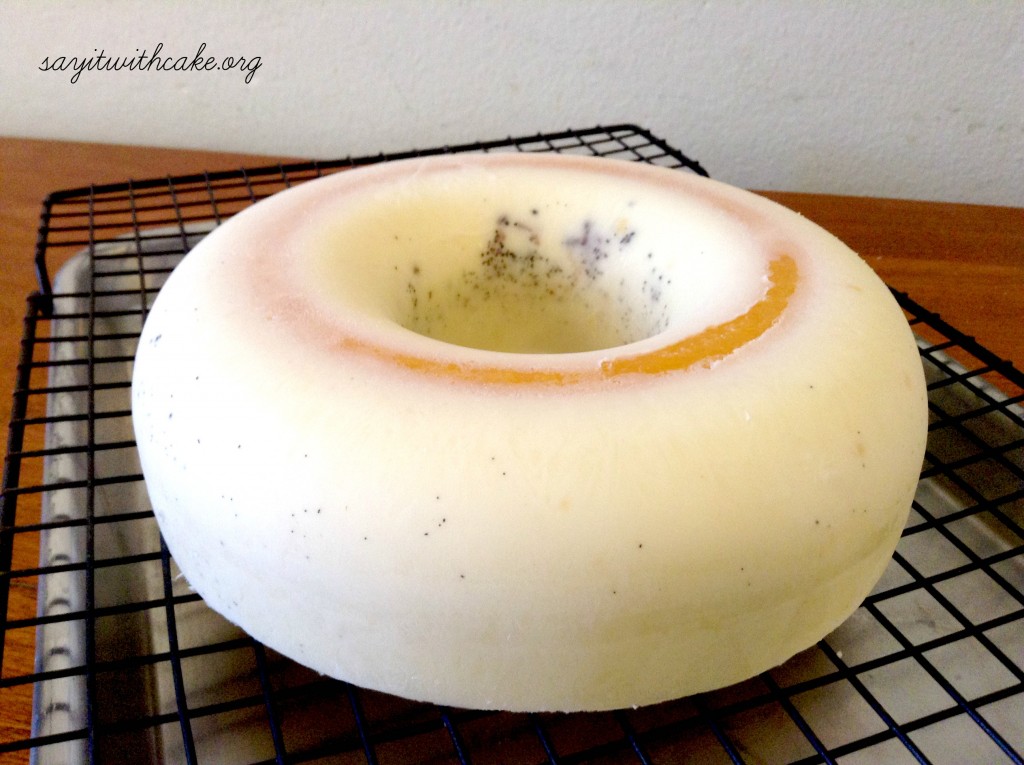
Layers in this delicious entremets are: sponge cake base, peach coulis, honey mousse, panna cotta, white chocolate mirror glaze. You can find some of the recipes on the links from my previous cake. I will add the recipe for the peach coulis, and the panna cotta.
I think the best part of this entremets is the vanilla panna cotta! You will have a hard time not eating it all!
Special Equipment you will need
Entremet rings or molds
200-bloom gelatin
Grade A vanilla beans
Immersion blender
Kitchen scale
Besides these special equipment, I also like to use a digital thermometer when I am making the white chocolate glaze. It is very important to wait till the glaze is the right temperature before pouring on the cake!
•200 grams peaches, about 6 small peaches or 4 larger ones, peeled
•4 grams gelatin bloomed in 2 tablespoons cold water
•40 grams of sugar
Panna Cotta
•500 grams (2 cups) heavy cream
•75 grams (1/3 cup) sugar
•1 vanilla bean
•5 grams gelatin bloomed in 2 tablespoons cold water
Instructions
PeachCoulis
Peel the peaches and slice them
They will be pureéd so precision does not matter here. As you peel them, drop them into water acidified with the lemon to prevent them from oxidizing and browing while you work.
Place the peaches into a saucepan with the sugar and allspice
Bring the peaches to a simmer to allow the flavors to blend and the peaches to break down
Bloom the gelatin in cold water and stir it into the peaches. Turn off the heat.
Pour the peaches into a container to cool. Remove the allspice.
Use an immersion blender or a blender to pureé the peach mixture
Pour the coulis into a mold just smaller than the entremet ring
Freeze this until completely solid.
Prepare the panna cotta
Only prepare this component once the other components are frozen solid.
Slice the vanilla bean in half and scrape out the caviar
Heat the sugar with the cream and the vanilla
When the sugar is fully dissolved, allow the vanilla to steep for a bit with the heat off. Stir in the gelatin and let sit for about 20 minutes.
Assemble the entremet layers
Remove the frozen layers from the freezer and, if necessary, cut to a diameter just smaller than the ring. You may brush your sponge with simple syrup for an extra moist sponge cake.
Line the edges with a healthy dose of softened butter to prevent the panna cotta from leaking out
Place in the sponge, peach coulis, honey mousse, and pour over the panna cotta liquid only until it reaches halfway up the mousse. If you fill to the top now, the mousse might float to the top. Place this in the freezer until the panna cotta starts to set enough to hold the mousse in place. Then pour in the panna cotta until the liquid is flush with the top.
Assemble the entremet
Carefully transfer this to the freezer and let freeze overnight
]]>http://sayitwithcake.org/peach-mousse-entremet/feed/0Green Chocolate Covered Strawberries
http://sayitwithcake.org/green-chocolate-covered-strawberries/
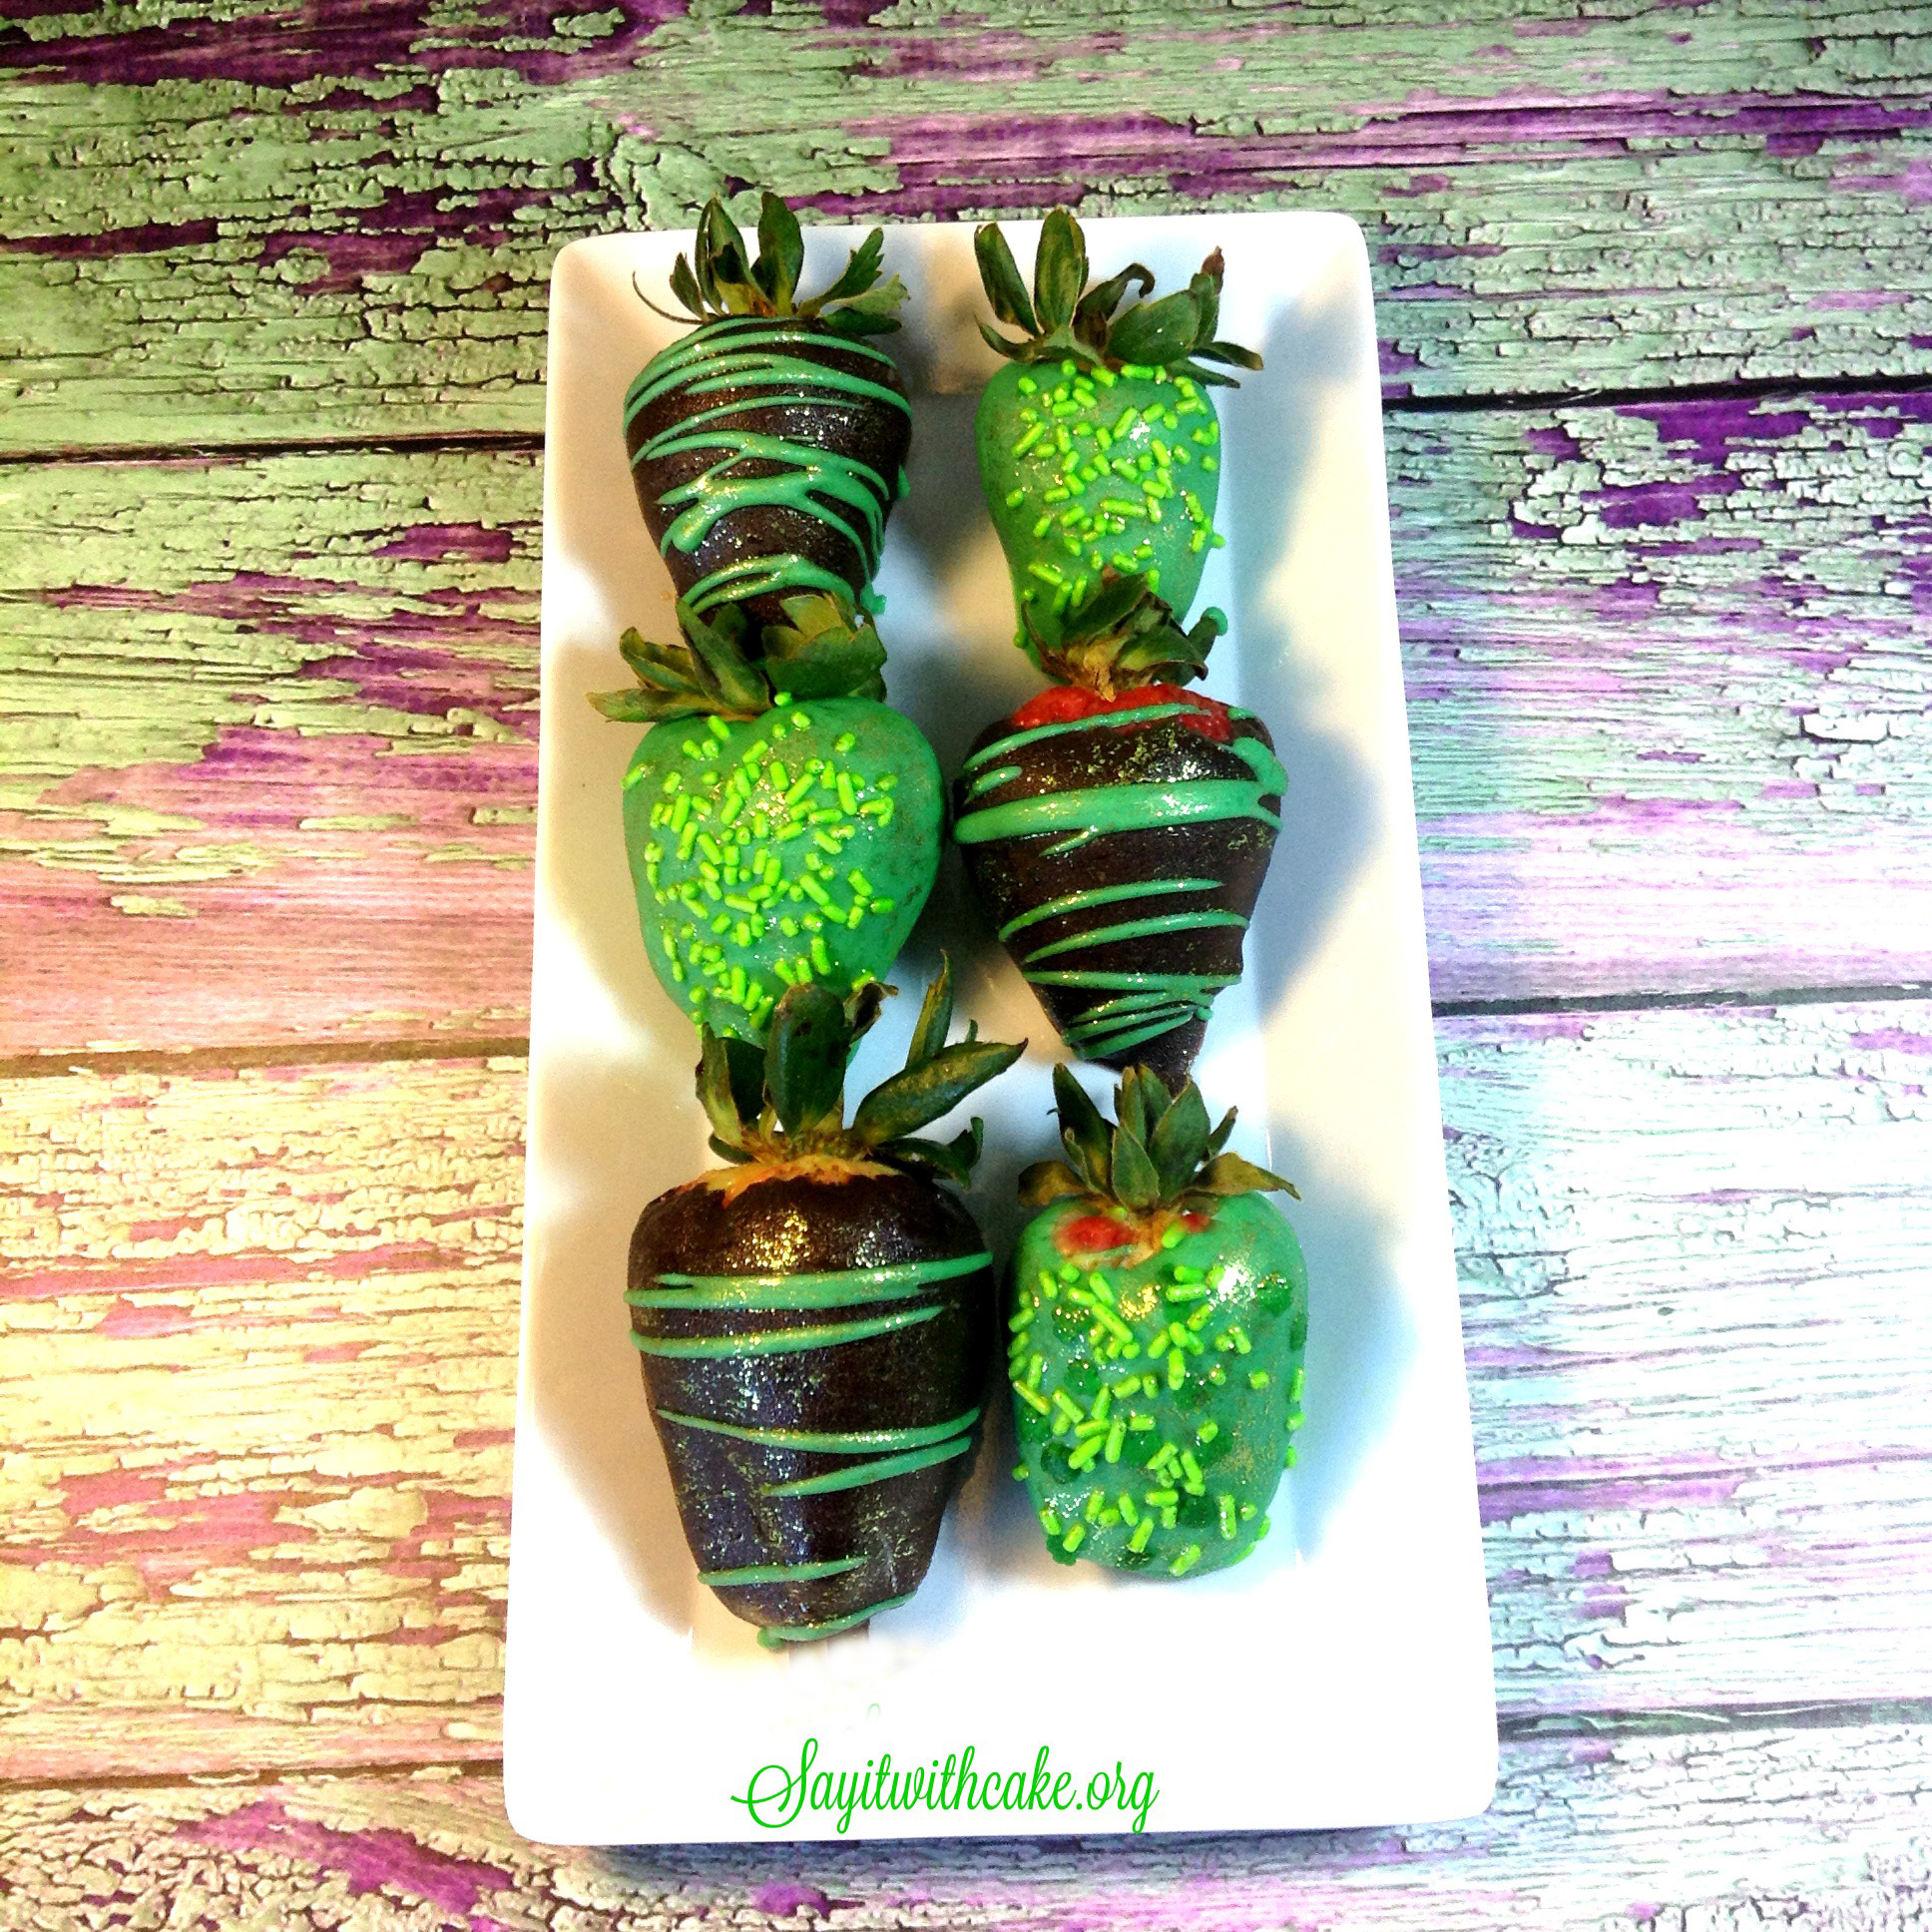
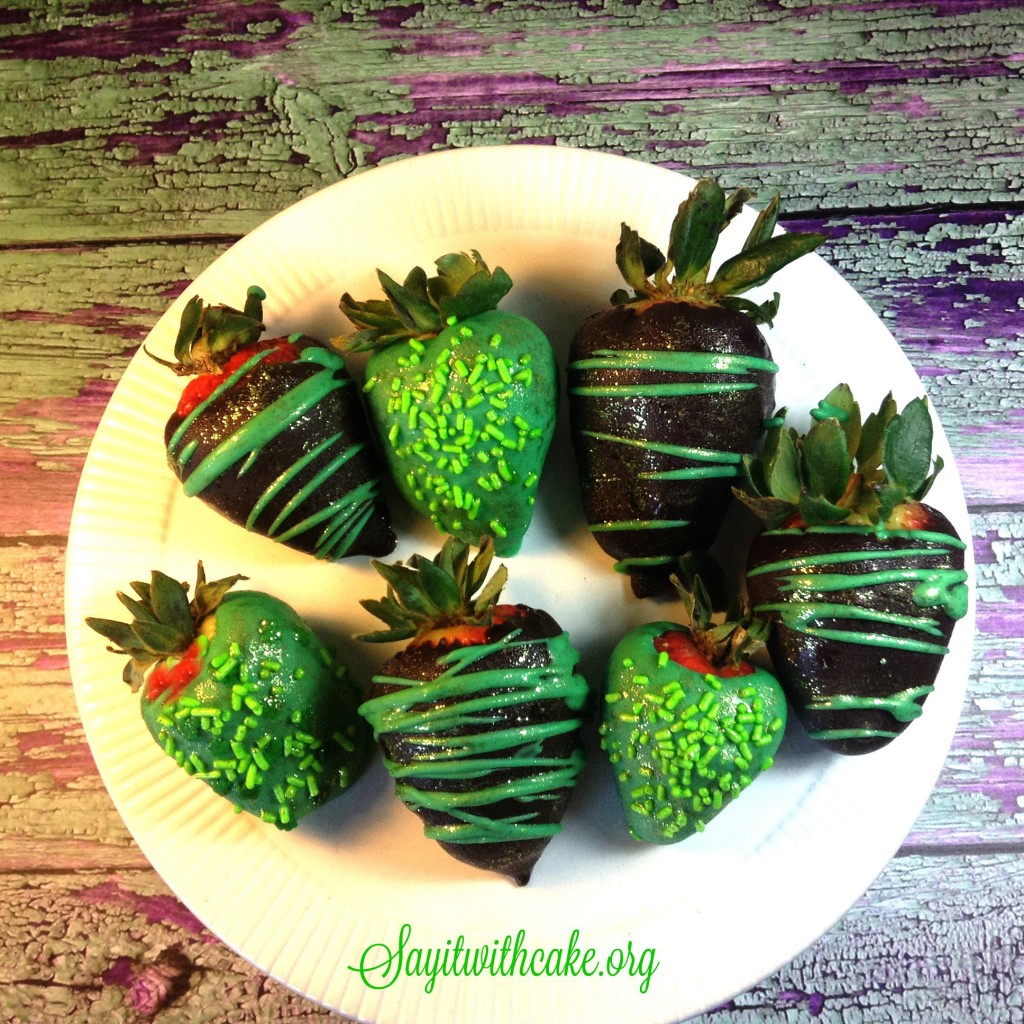
http://sayitwithcake.org/green-chocolate-covered-strawberries/#commentsSun, 28 Feb 2016 19:39:59 +0000http://sayitwithcake.org/?p=2467These St. Patrick’s Day Chocolate Covered Strawberries are so easy to make and are very beautiful! They are perfect for a St. Paddy’s Day treat!
Making chocolate covered strawberries is very easy! I will break down the steps for you.
– Line a baking sheet with wax paper. In a microwave-safe glass bowl, microwave the chocolate, stopping and stirring every 30 seconds, until melted and smooth.
– Holding a strawberry by the stem end, dip it in the melted chocolate, letting the excess drip off, then transfer to the prepared baking sheet. As you set the strawberry down, slide it ½ inch to the side to prevent the formation of a chocolate “foot.” Repeat with the remaining berries.
– Let chocolate harden at room temperature
Tips
You can also use candy melts to dip the strawberries in. To make the green strawberries, I used Green Wilton candy melts.
I always add a little bit of shortening to the chocolate melts to make it smoother and easier to dip.
To make the horizontal stripes, I fill a plastic bottle with melted chocolate and squeeze back and forth over a bunch of strawberries at once.
I added gold luster dust onto the strawberries by mixing a tiny amount of vodka with the luster dust and painting on the chocolate with a new paint brush.
Do not refrigerate the strawberries once they are covered. Some people say you can, but I never do.
Enjoy!
Some other Saint Patrick’s day treats you might enjoy!
]]>http://sayitwithcake.org/green-chocolate-covered-strawberries/feed/0Kona Pie
http://sayitwithcake.org/kona-pie/
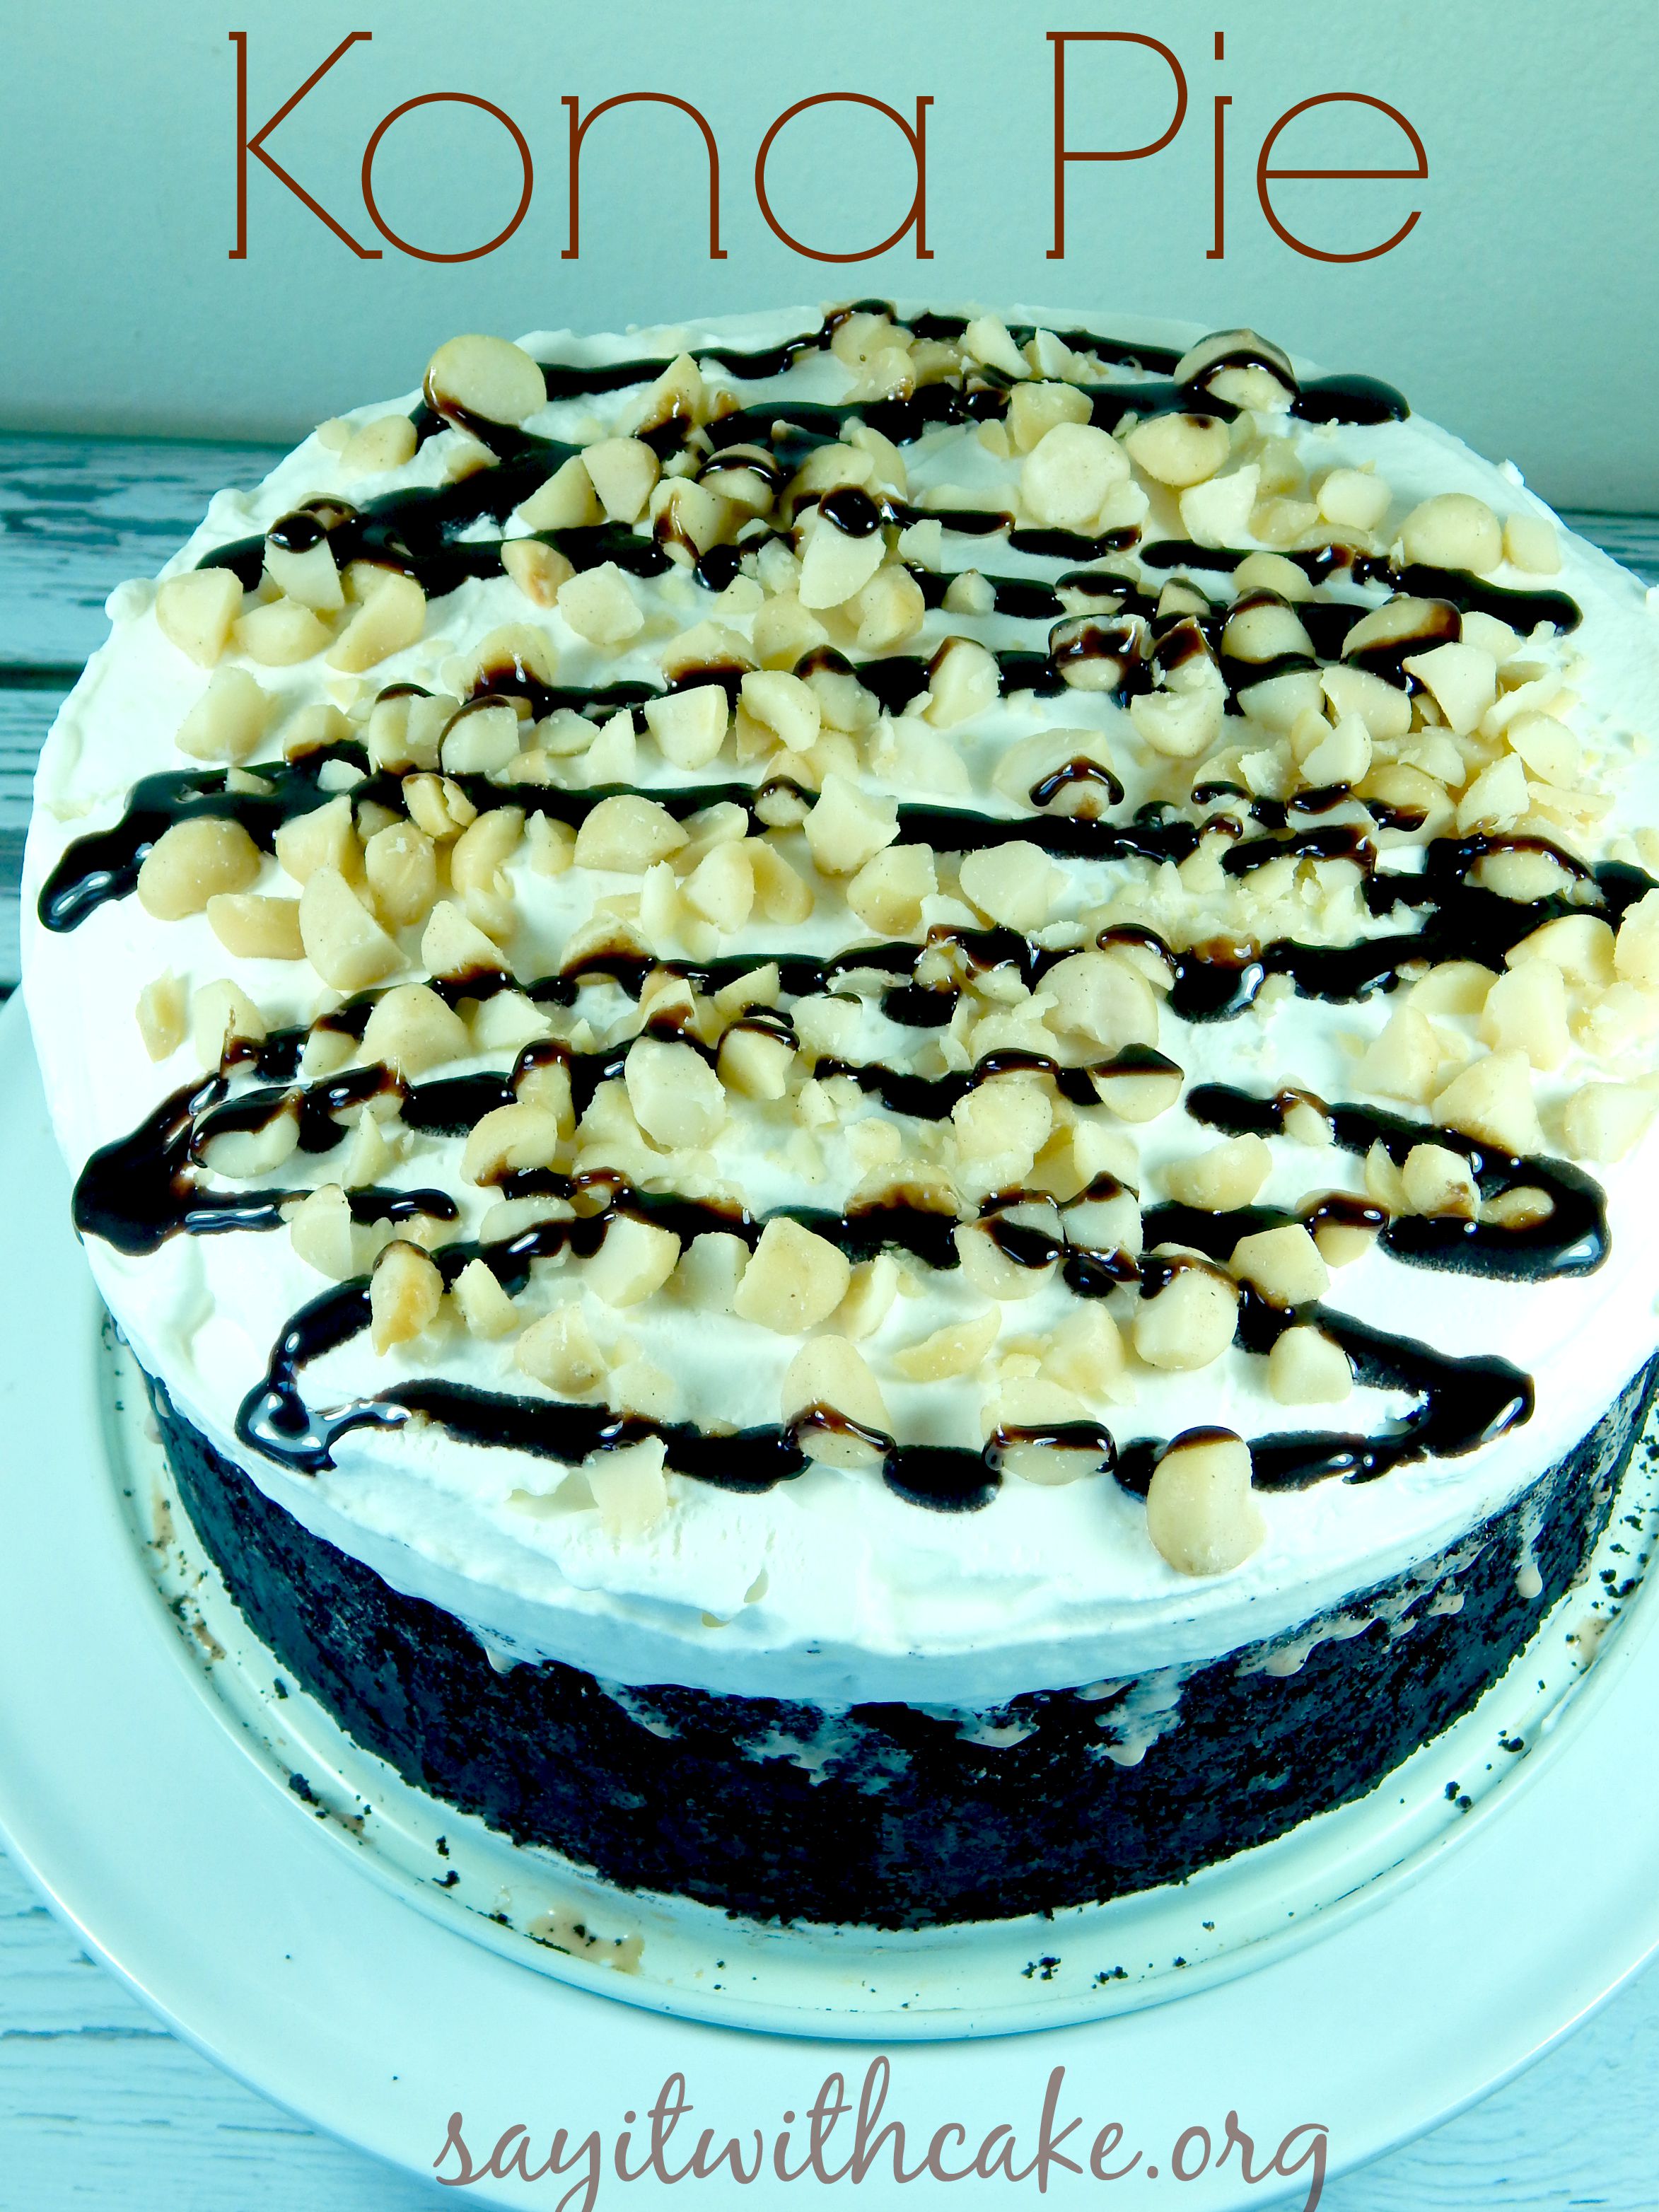
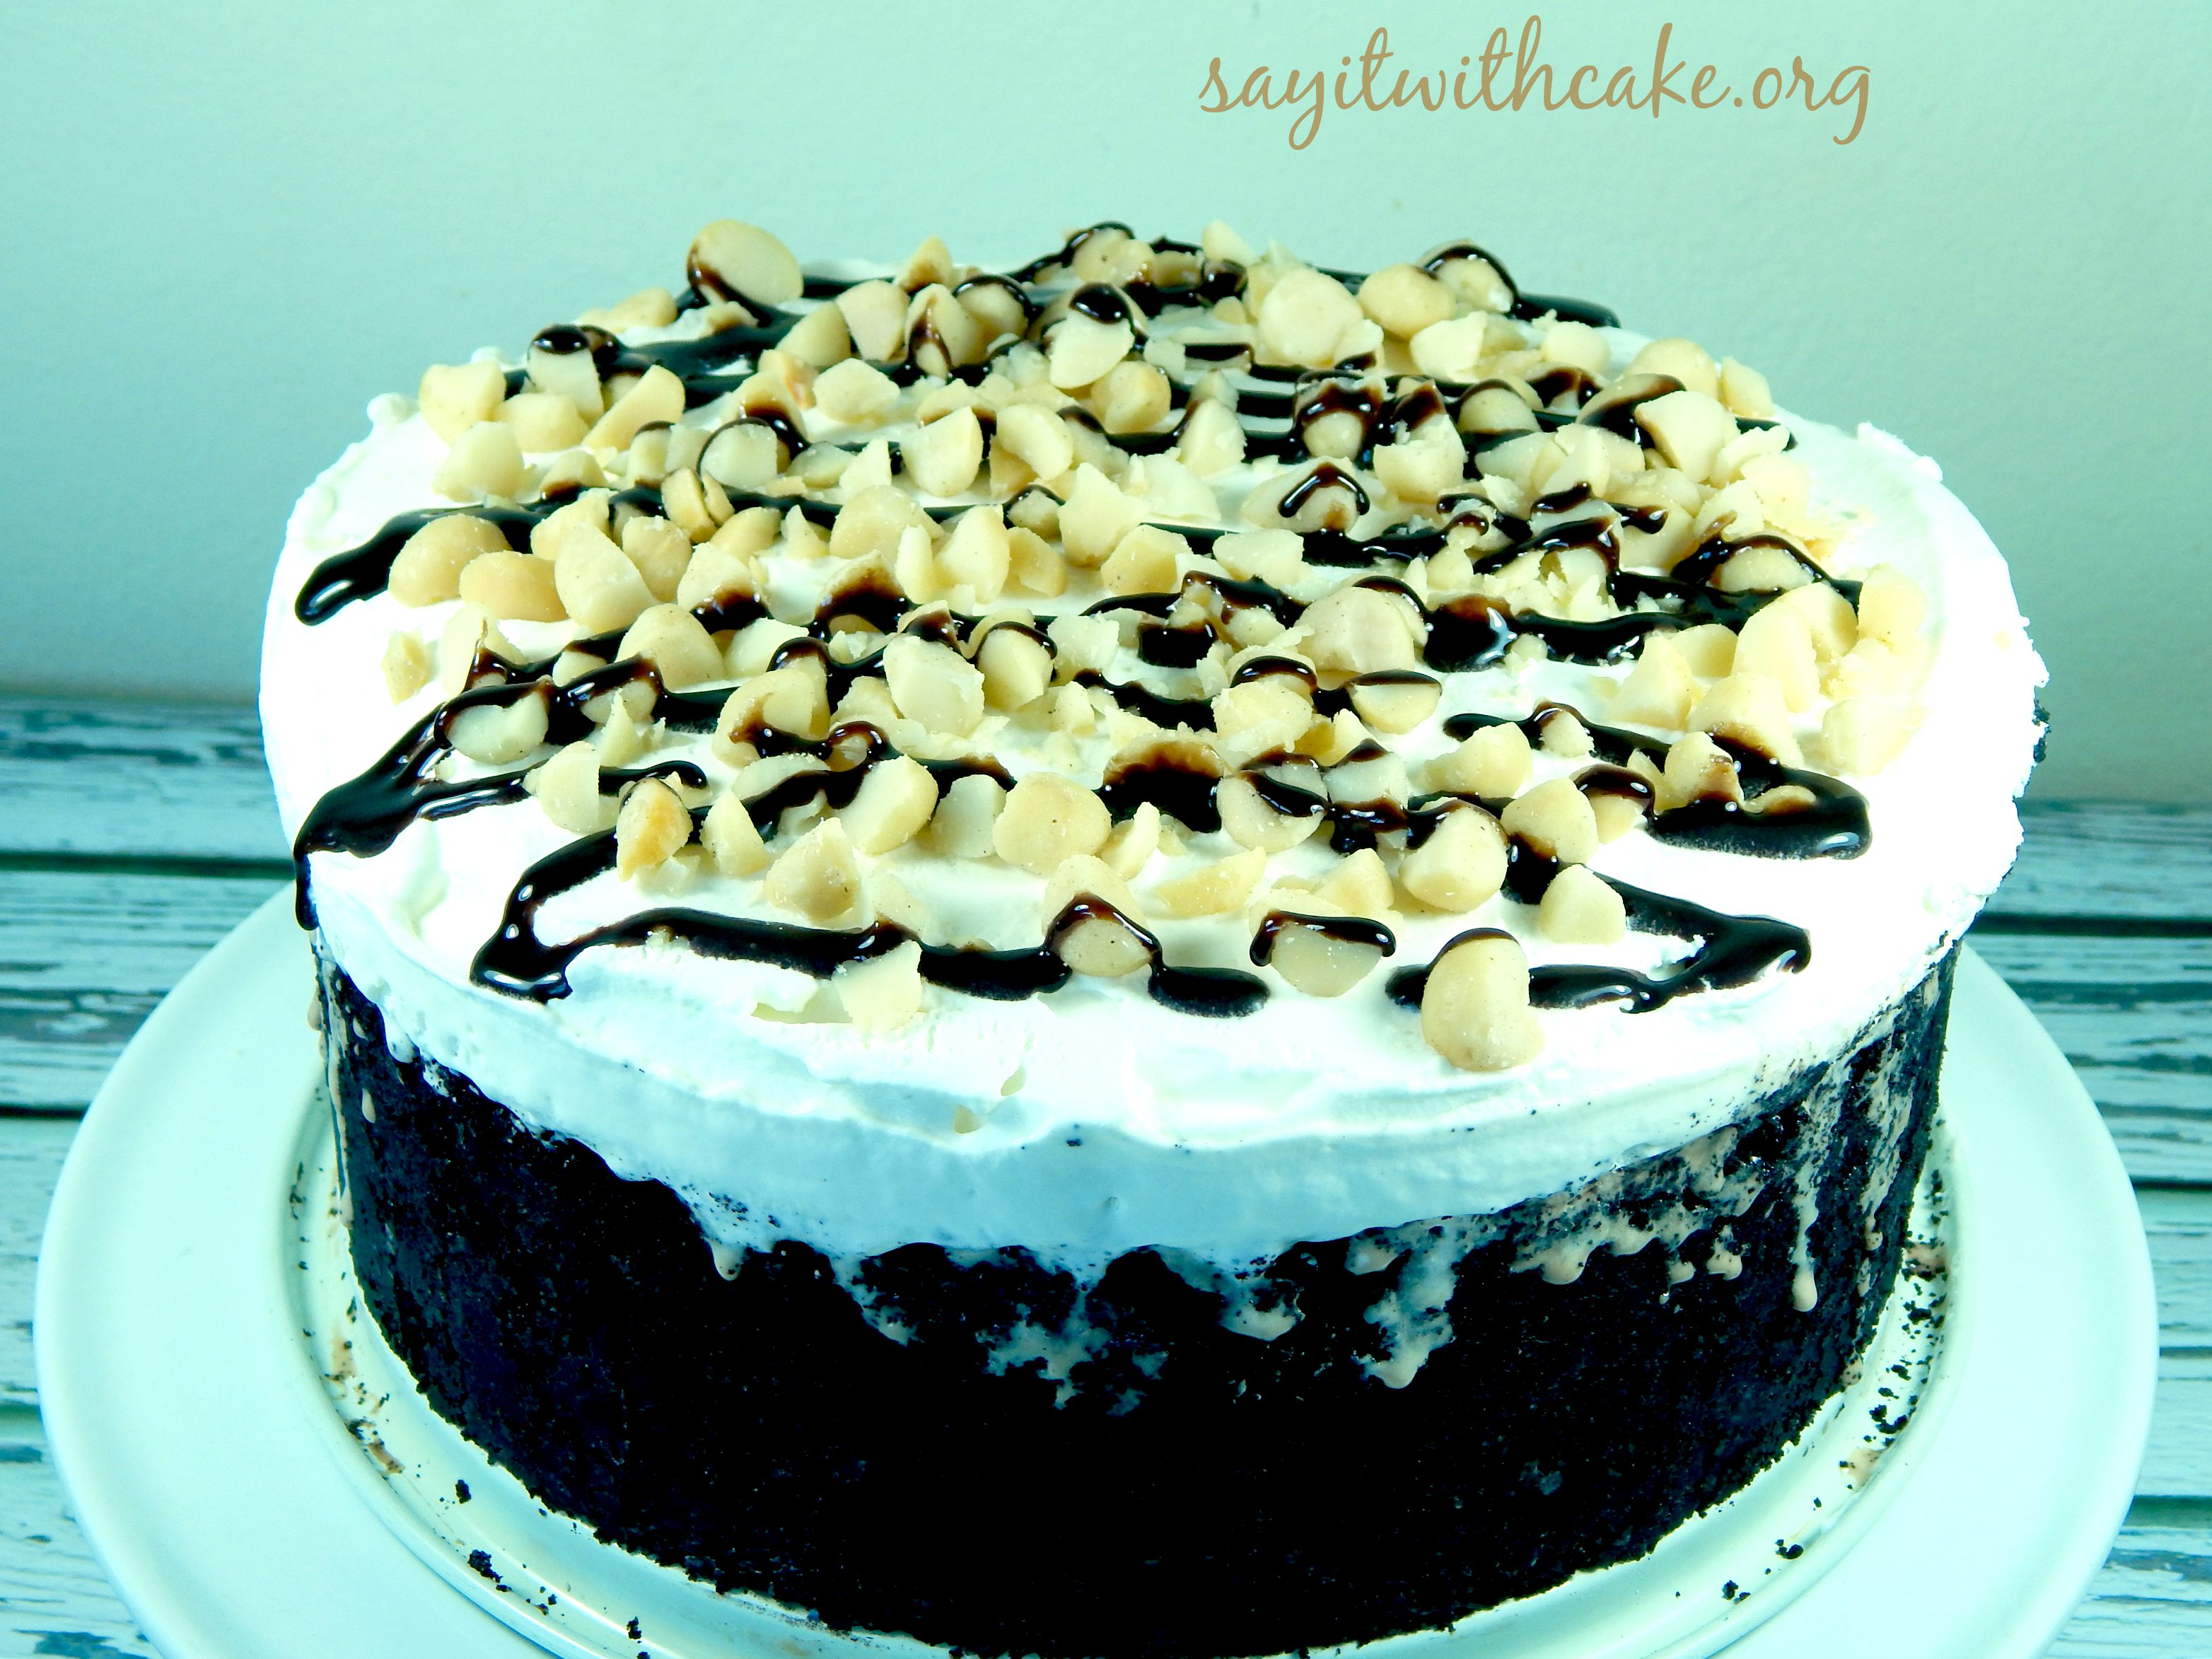
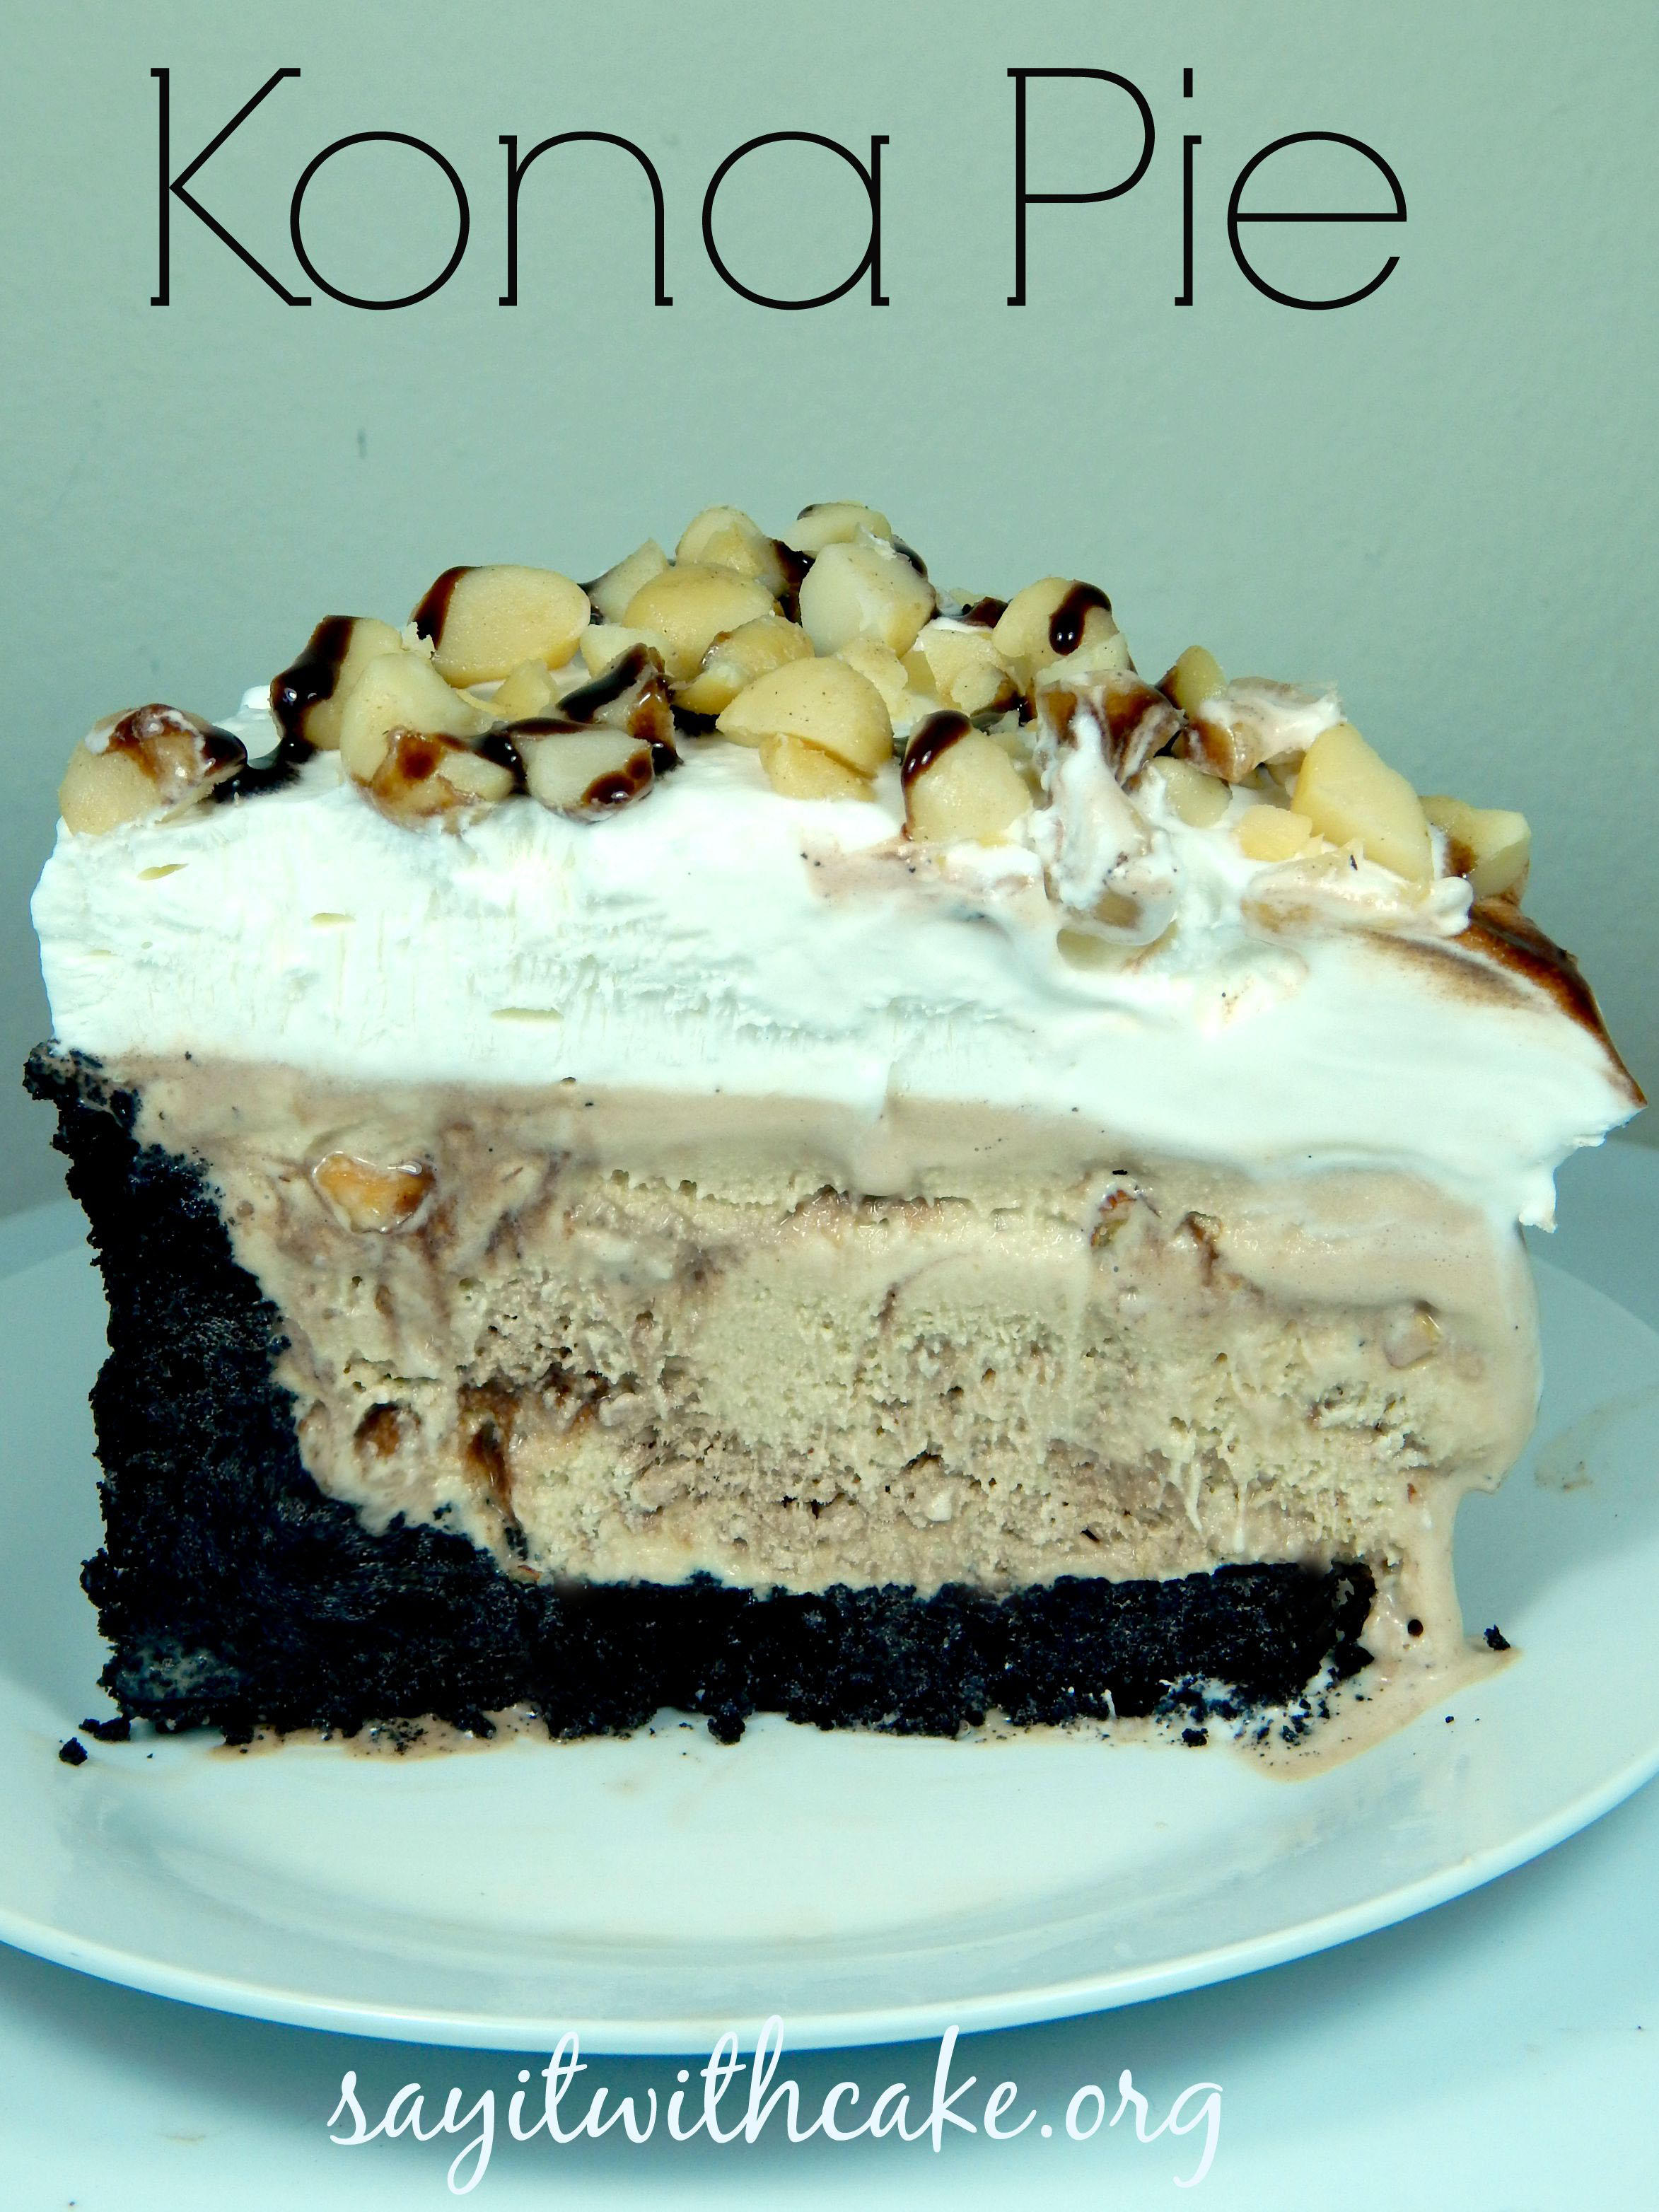
http://sayitwithcake.org/kona-pie/#commentsSun, 13 Sep 2015 00:19:10 +0000http://sayitwithcake.org/?p=2216On my last trip to Hawaii, my family and I went to Kona and ate at Big Island Grill. The food was delicious, but what I loved the most was the “Kona Pie”. Kona Pie is rich creamy mocha almond fudge ice cream piled high on an Oreo cookie crust, topped with fresh homemade whipped cream, hot fudge, and macadamia nuts! Yum! We went back several times to this restaurant just for the Kona Pie! Since I have been home, my husband and I have had cravings for Kona Pie many times. I knew this would have to be my next dessert for my blog. Since there is no recipe from the Big Island Grill, I made my own. It is super easy with only 3 ingredients! I hope you like it as much as I do!
To start, get 2 packages of Oreo cookies and put them in the food processor. This will make the cookies the perfect texture for the crust. Put the cookies into a bowl and add 2 sticks of melted butter. Mix it all together and spread out over the bottom and sides of a 9 inch springform pan. Put it into the freezer and freeze for several hours.
Take one gallon of mocha almond fudge ice cream and let it melt slightly enough to mix. Mix it all up and put it on top of the cookie crust. Make sure you press all of the ice cream down so there are no air pockets. Put it back in the freezer and freeze over night.
Next, whip up some whip cream and cover the top of the pie. When you are ready to serve, you can pour fudge and sprinkle macadamia nuts over the entire pie, or individual slices.
]]>http://sayitwithcake.org/kona-pie/feed/0Tiramisu
http://sayitwithcake.org/tiramisu/
http://sayitwithcake.org/tiramisu/#commentsMon, 07 Sep 2015 03:17:07 +0000http://sayitwithcake.org/?p=2180Tiramisu is a popular coffee-flavored Italian dessert. It is made of ladyfingers dipped in coffee, layered with a whipped mixture of eggs, sugar, and mascarpone cheese, flavored with cocoa. I first had this delicious dessert at my friend Mike’s Italian restaurant. I always want to order it every time I go, but sometimes they run out of the Tiramisu. I decided I needed to learn how to make it myself!
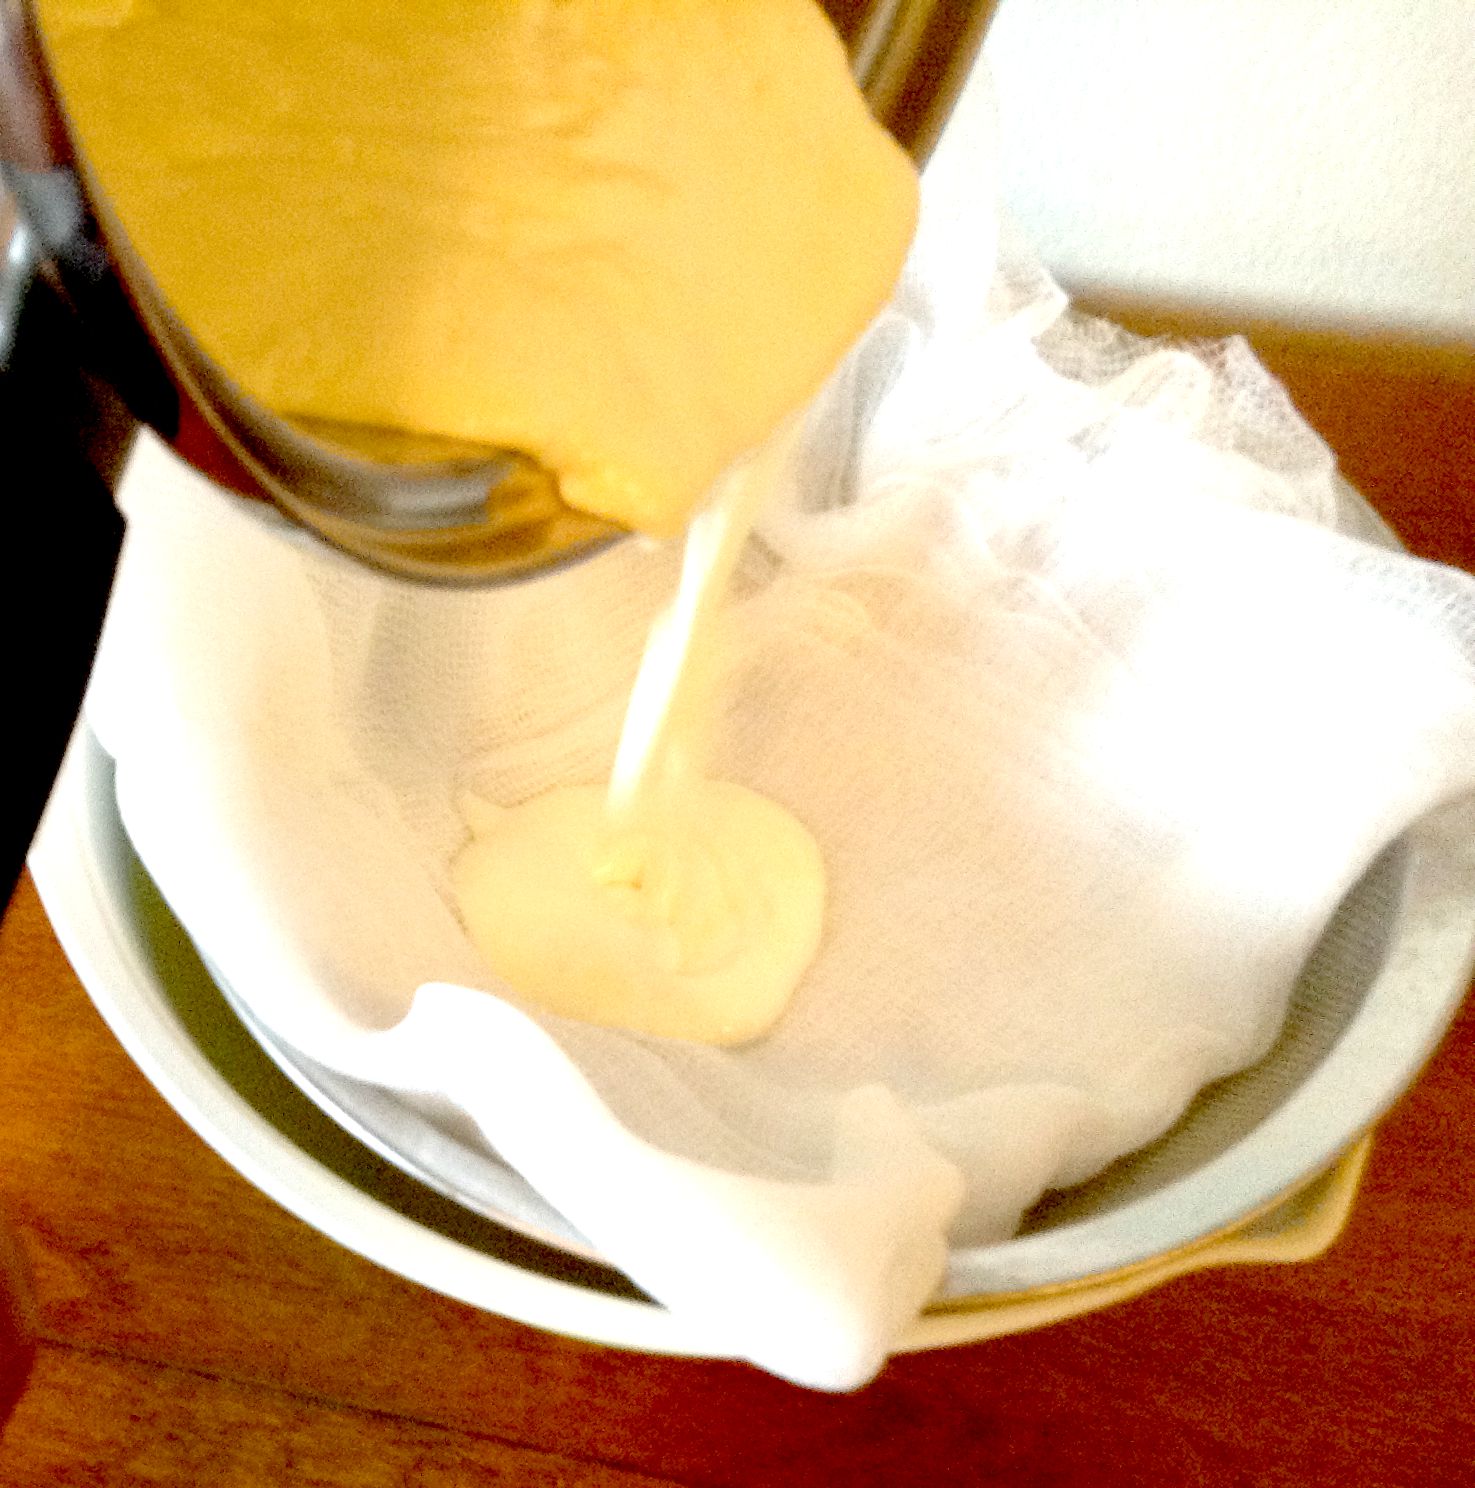
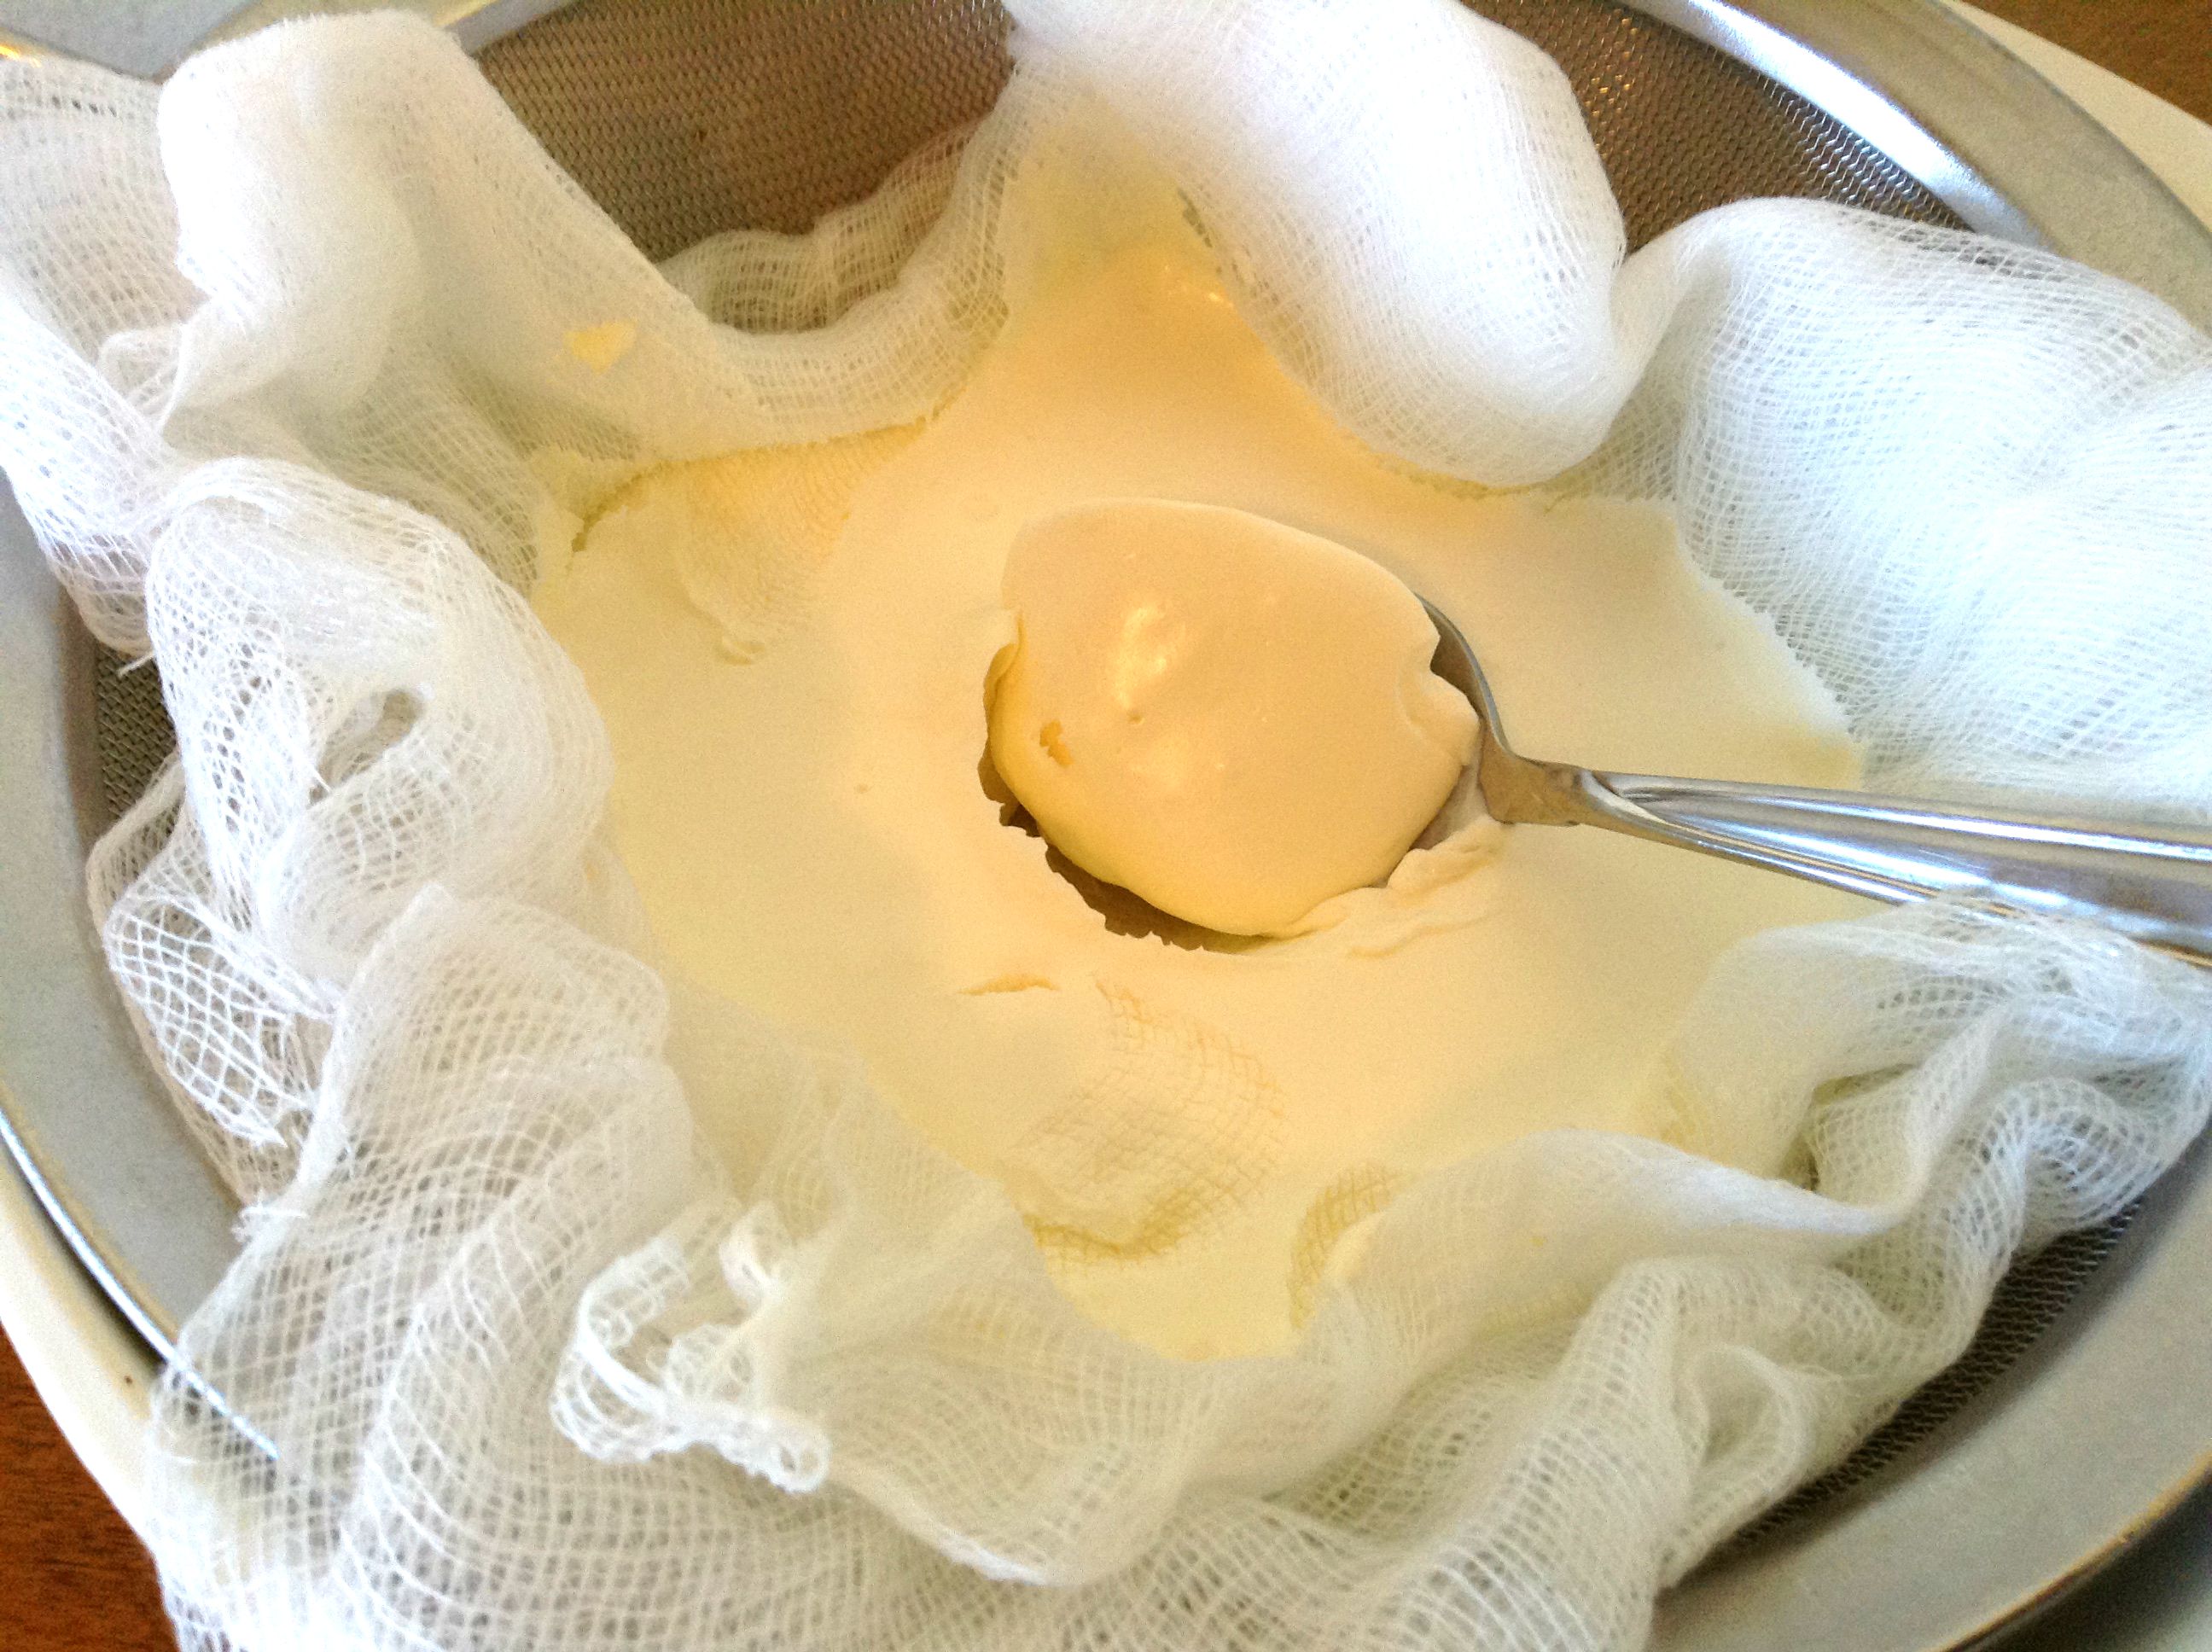
Here are the steps to making the tiramisu. First you will make the Mascarpone cheese a day in advance. If you decide to buy the Mascarpone cheese, then that is ok, but just know it is really easy to make! All you need is heavy whipping cream and lemon juice!
Mascarpone is an Italian cheese made from cream, coagulated by the addition of certain acidic substances, such as lemon juice, vinegar, citric acid or acetic acid.
Pour whipping cream into a heavy glass bowl; submerge in water (up to the level of the cream in the bowl) in a saucepan.
Bring water to a boil over medium-high heat until cream reaches 190 degrees (just below the boiling point – it will be very frothy and steamy), stirring frequently.
Keeping bowl in the water, pour in lemon juice and stir continuously until cream becomes very thick and coats the back of a spoon, about 5-10 minutes.
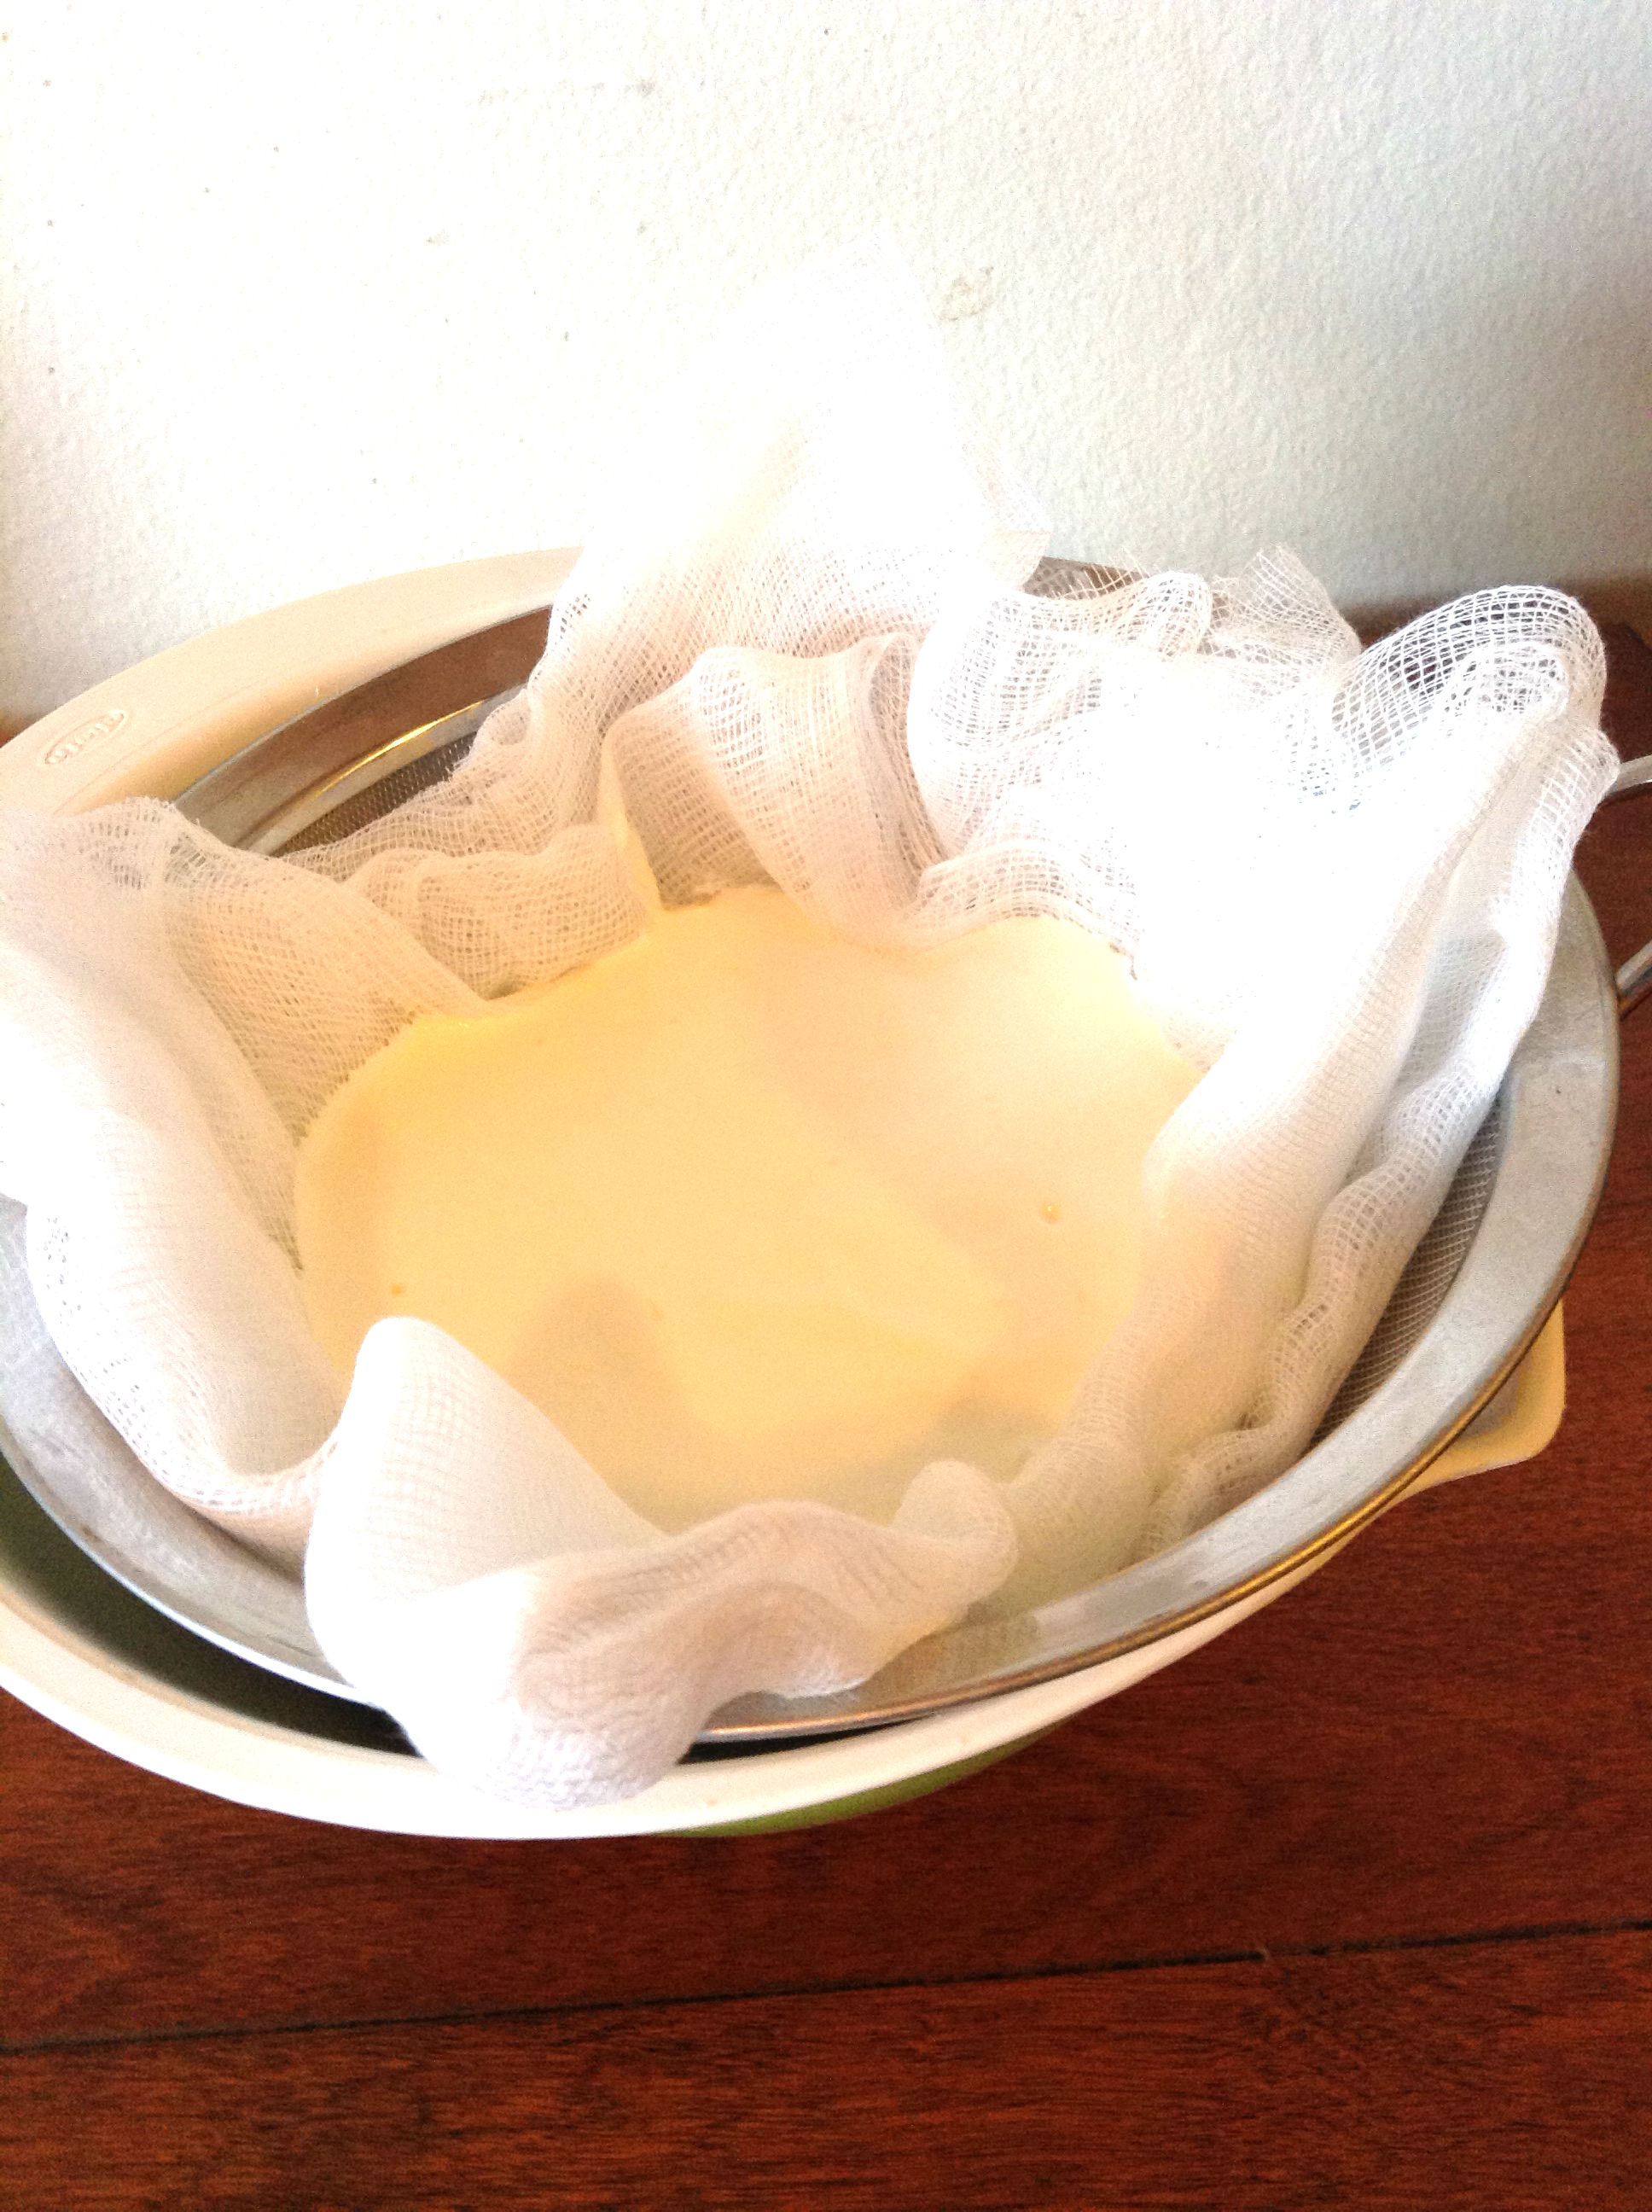
Remove from heat and allow to cool for 20 minutes.
Line a fine-mesh strainer or sieve with cheese cloth or a coffee filter (you’ll need more than one if you double the recipe) and suspend over a bowl. Pour in thickened cream.
Once cream cools completely, move the strainer and bowl to the refrigerator. 24 hours later, peel off the coffee filter and put your finished cheese in a container.
After you pour the mixture into the cheese cloth, cover it and let it sit in the refrigerator 8-24 hours.
After you take it out of the refrigerator, it will be a nice soft consistency but will hold its shape.
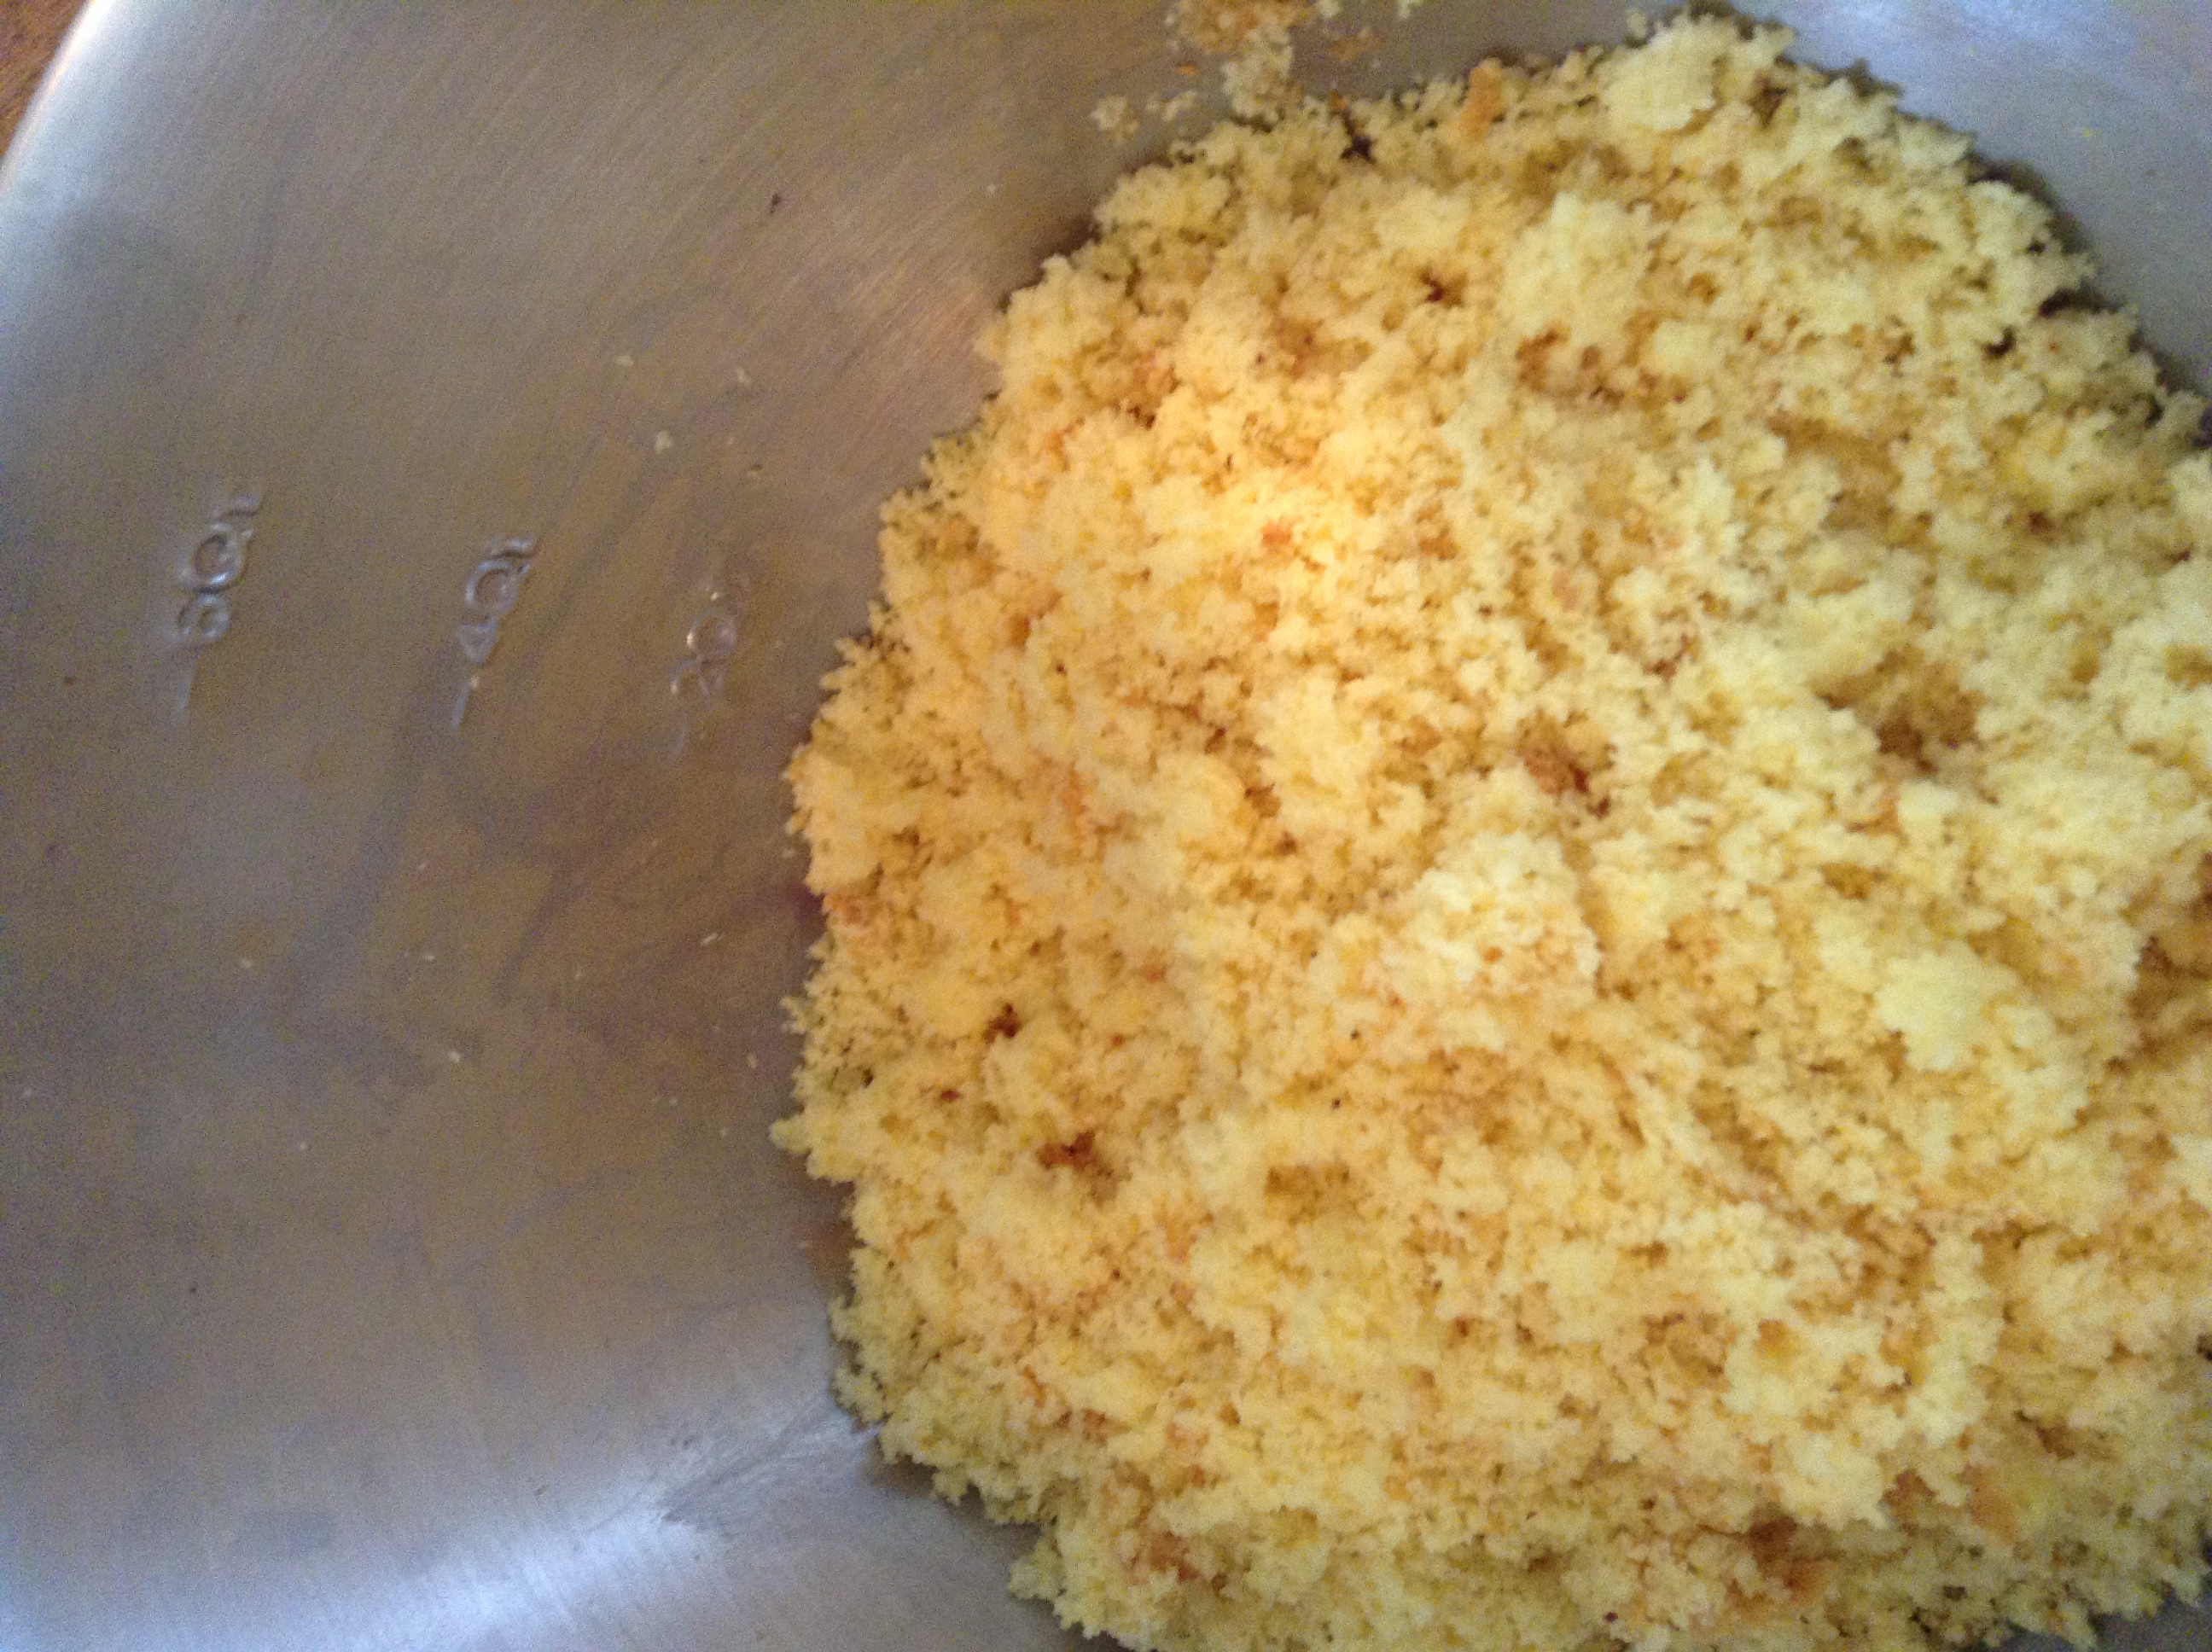
Next, make the sponge cake if you decide to do that or if not, you can use lady fingers. For my first Tiramisu I made a sponge cake. The second Tiramisu I used lady fingers. They were both tasty and I suppose I prefer the lady fingers because it takes less time! After that, make the crème.
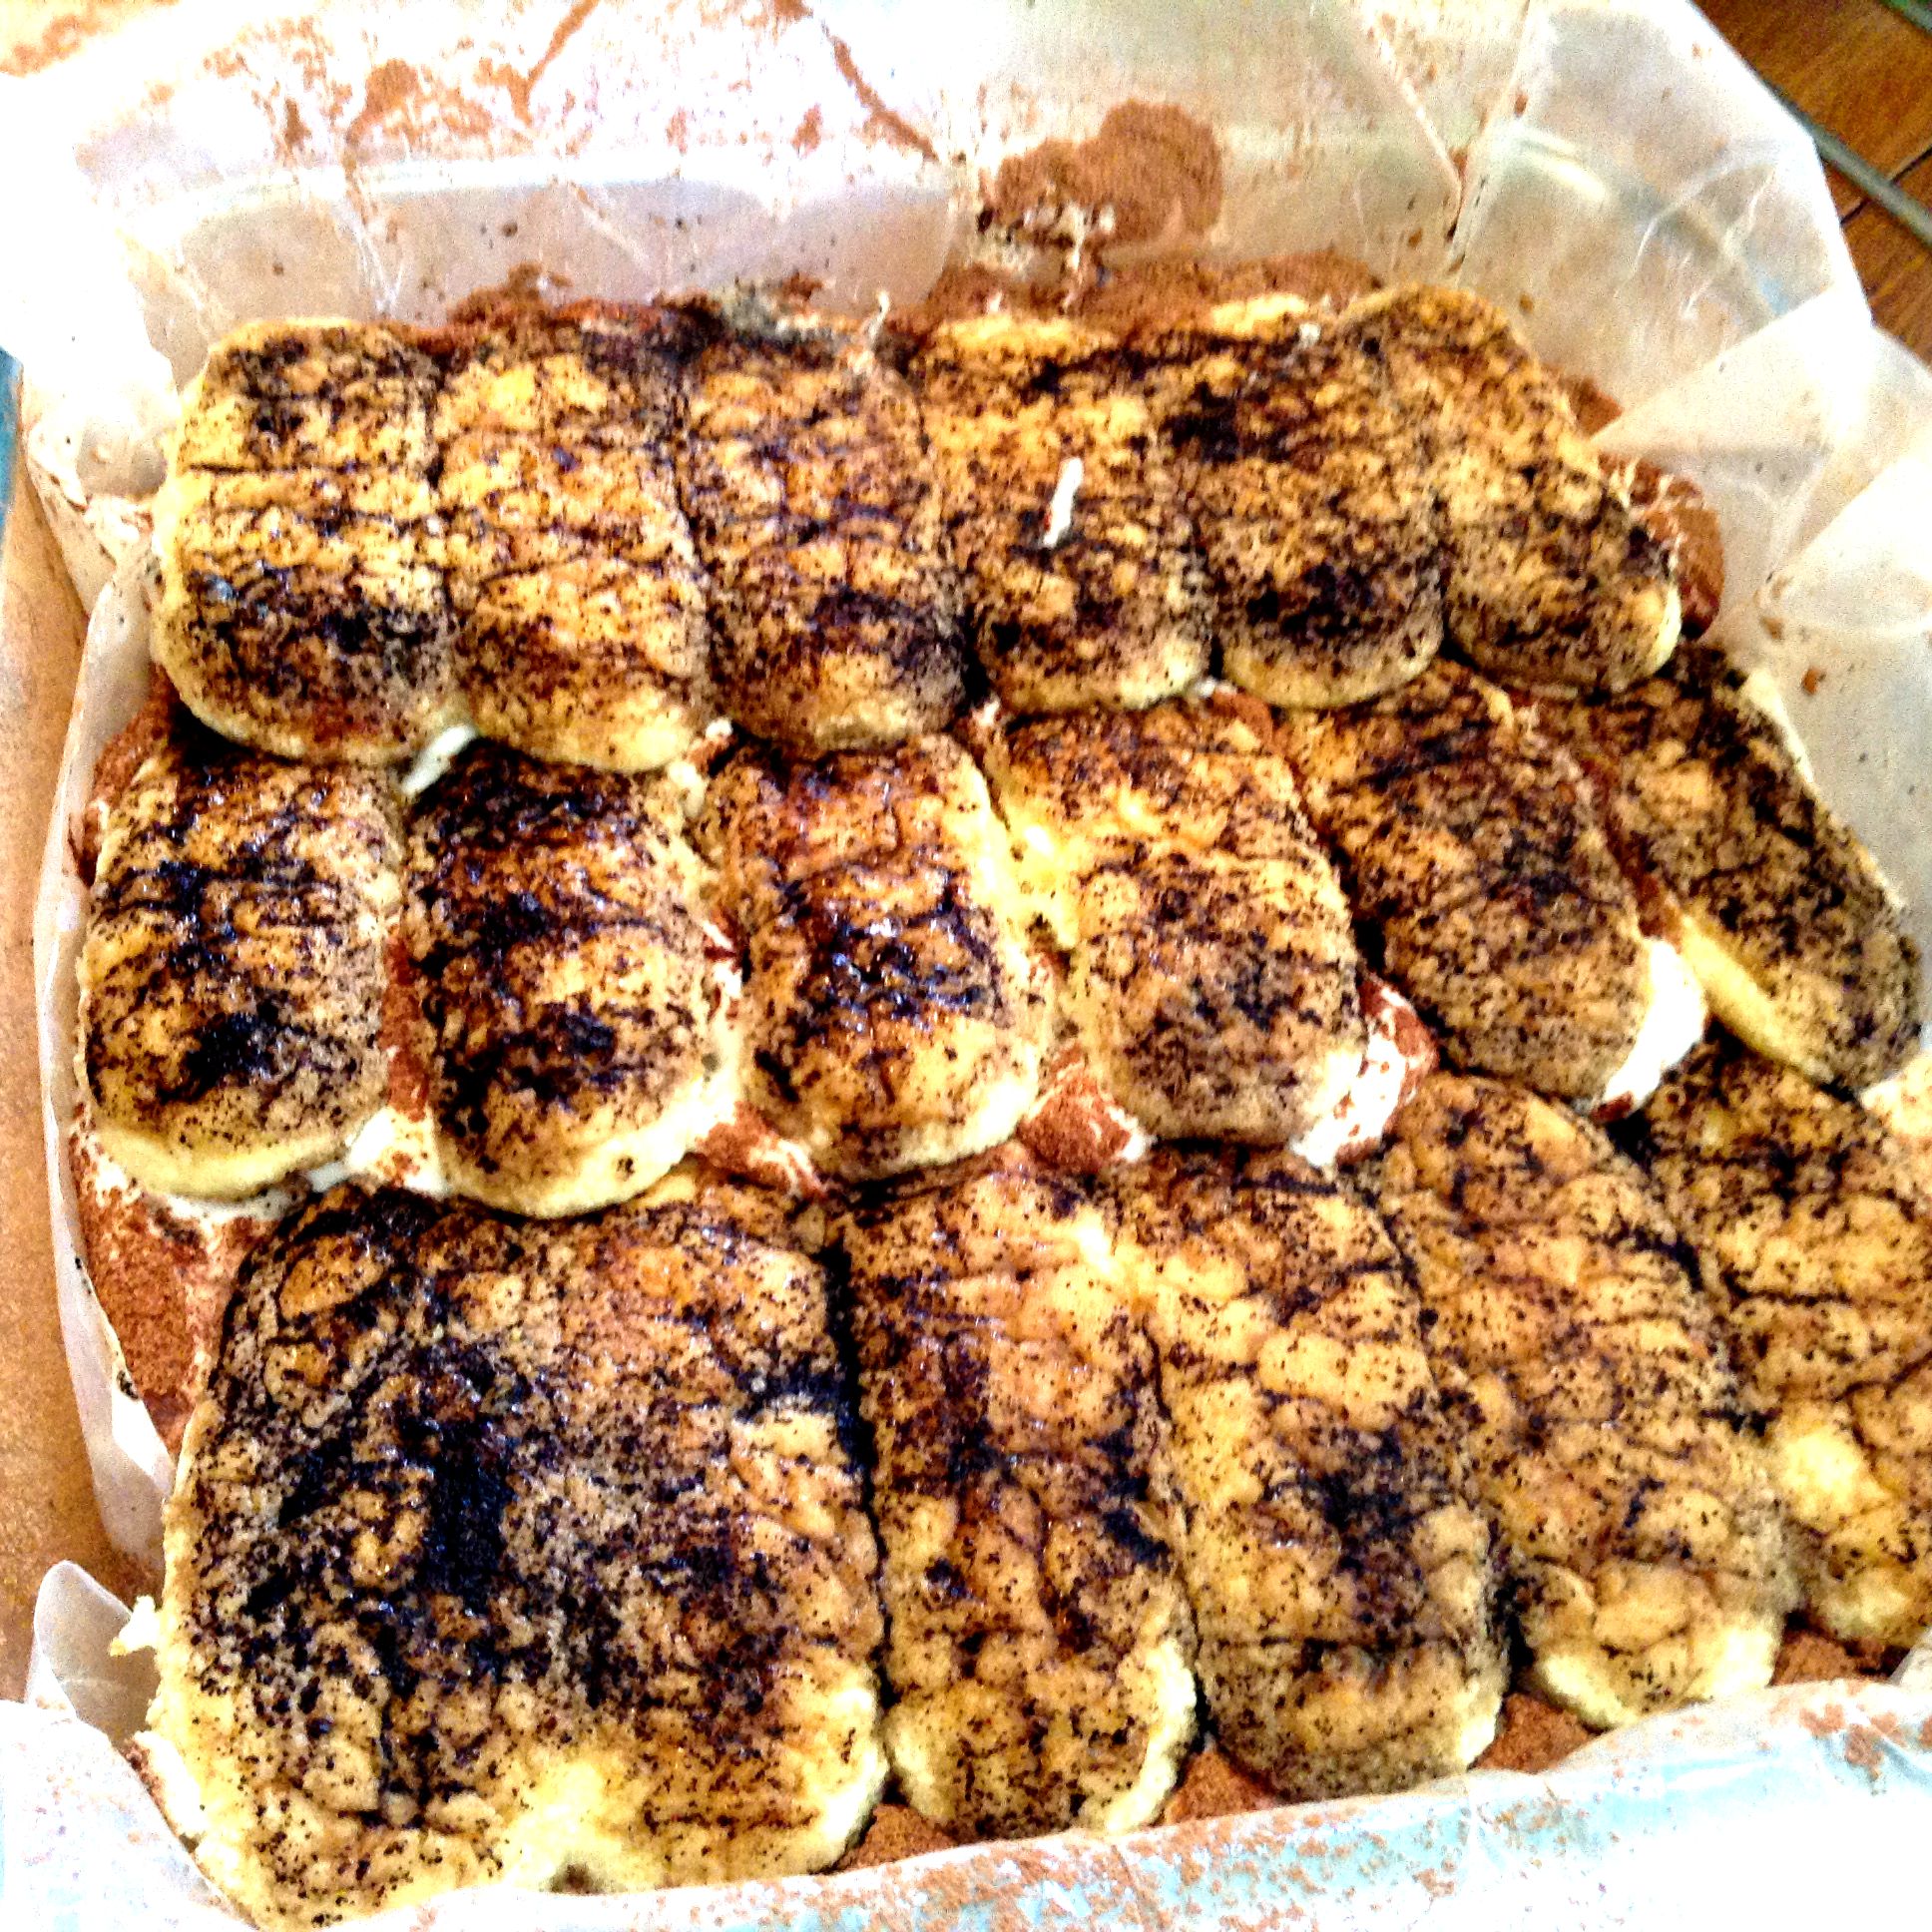
Dip the lady fingers in the coffee mixture. Only dip for a few seconds or they will become too soggy! Place them in the pan.
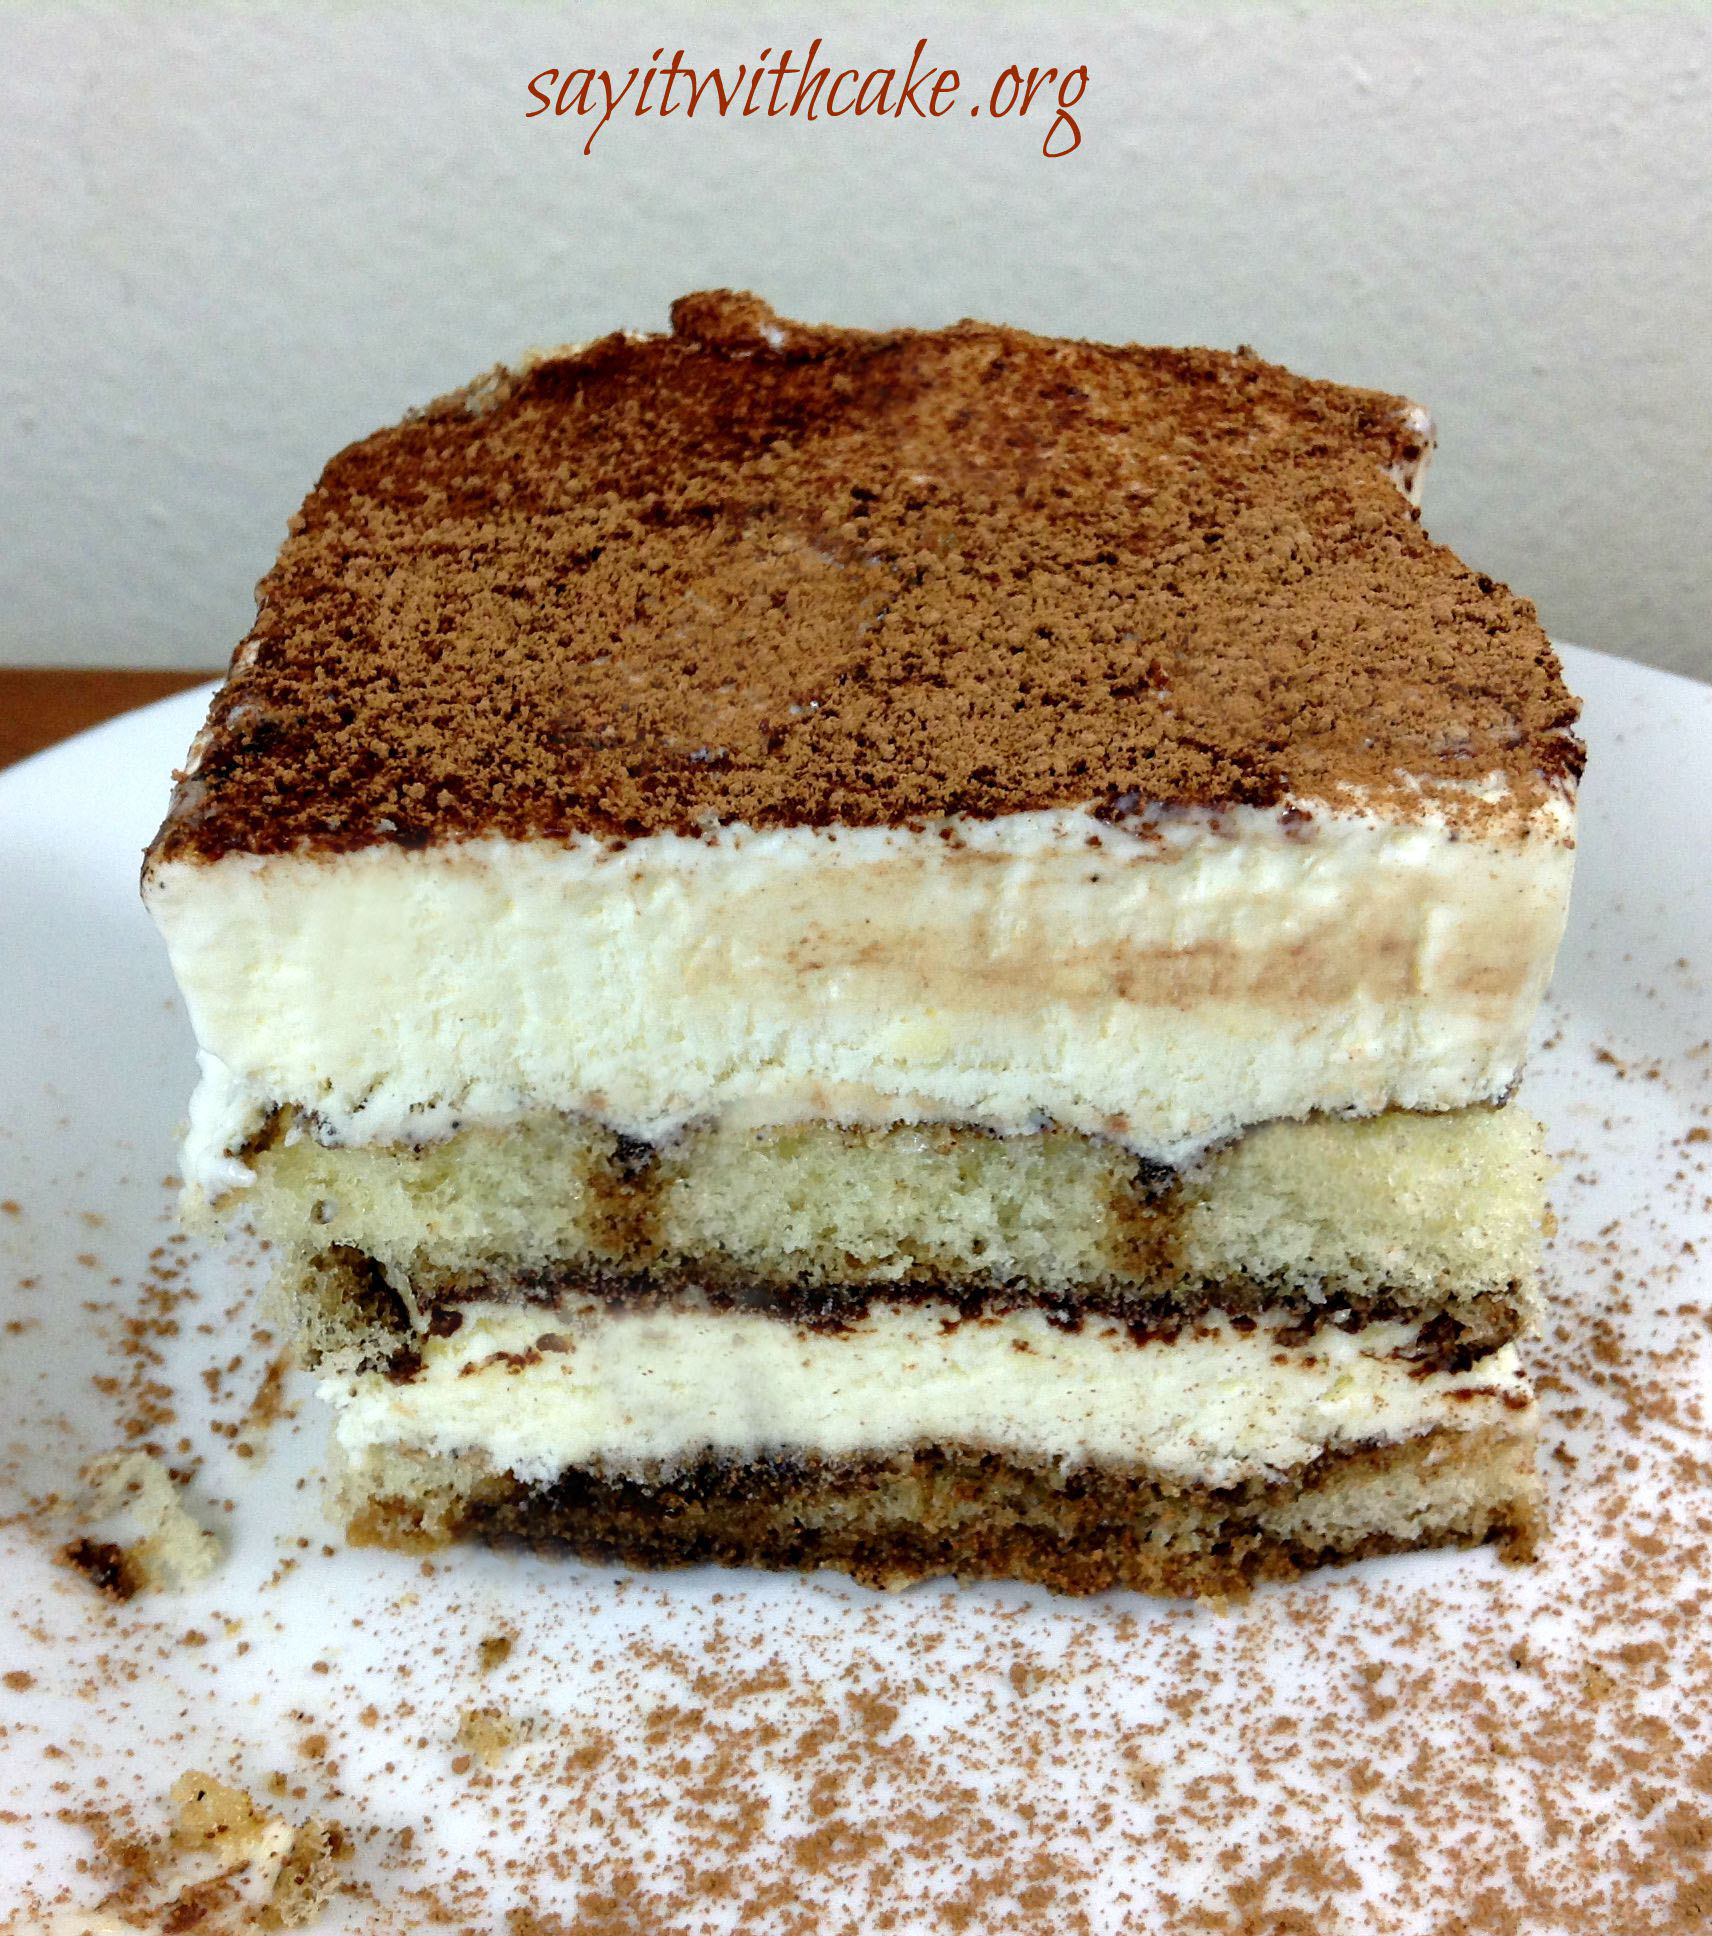
After you layer the lady fingers, pour half of the crème onto the lady fingers. Repeat with another layer of lady fingers and the rest of the crème. Sprinkle cocoa powder into a sieve and sprinkle over the top of the Tiramisu. Place in the refrigerator for at least 12 hours. They say it tastes the best after refrigerating for 2 days, but I couldn’t wait that long! Before I took a picture of this cake I had set it in the freezer. Once it is at room temperature, the crème filling tends to not hold its shape as well as this picture. This Tiramisu is so delicious I’m sure you will love it!
mix the eggs and sugar in kitchen aid for 7-10 minutes until pale in color and thick.
mix baking powder and flour together in small bowl
sift in the flour into the egg mixture little at a time in 5 increments. Fold in carefully.
put into 9 inch springform pan lined on bottom with parchment paper and greased on bottom but not on the sides.
Preheat oven to 350
cook 10-12 minutes if cooking in 2 8 inch pans, or 20 minutes if cooking in a 9 inch spring form pan. Either way, check with a toothpick to see if it is done.
let cool 10 minutes in pan
take out of pan and cool completely.
crème
Prepare a 9x13 baking dish. If you want to be able to remove the tiramisu from the pan when done so that you can see the layers, I suggest lining the pan with parchment paper that sticks up over the sides, then putting a cardboard cake rectangle in the bottom of the pan. The tiramisu will be supported by the cardboard when you remove it using the parchment paper.
Combine egg yolks and sugar in the top of a double boiler, over boiling water. If you don't have a double boiler, you can use a metal mixing bowl set over a pot.
Cook for about 10 minutes, with heat on low, stirring constantly.
When done, whip yolks with mixer until they thicken and yellow a bit.
Add mascarpone to whipped yolks and mix until combined.
If you have a second metal mixing bowl, use it for your whipped cream. If not, put mascarpone mixture into another bowl and get your metal mixer bowl clean.
Place metal bowl and whisk into freezer for about 15-20 minutes.
Remove bowl and whisk from freezer, add whipping cream to bowl and whip with mixer. Whip until soft peaks form, about 5-7 minutes.
Fold whipped cream into mascarpone mixture.
Dissolve espresso into warm water, then combine with the Kahlua.
One at a time, dip the ladyfingers into the Kahlua mixture for about 4-6 seconds. The longer you dip the ladyfingers, the stronger the flavor will be. As you dip the ladyfingers, lay them into the bottom of the 9x13 pan. You should be able to get two rows in a layer.
Spoon half of the mascarpone mixture over the ladyfingers.
Repeat ladyfinger layer, then top with remaining mascarpone mixture.
Dust the top with cocoa powder.
Refrigerate for several hours or overnight, then remove from pan (if desired) and serve.
]]>http://sayitwithcake.org/tiramisu/feed/0How to make Cake Pops
http://sayitwithcake.org/how-to-make-cake-pops/
http://sayitwithcake.org/how-to-make-cake-pops/#commentsFri, 03 Apr 2015 18:43:18 +0000http://sayitwithcake.org/?p=1793This post is for my sister Katy! She loves cake pops and recently told me she was looking through my blog for directions on how to make cake pops, but I only had the recipe not the steps! So Katy, this is for you and all other cake pop lovers who want simple step by step directions on how to make cake pops! I will also include tips for the most common cake pop making troubles!
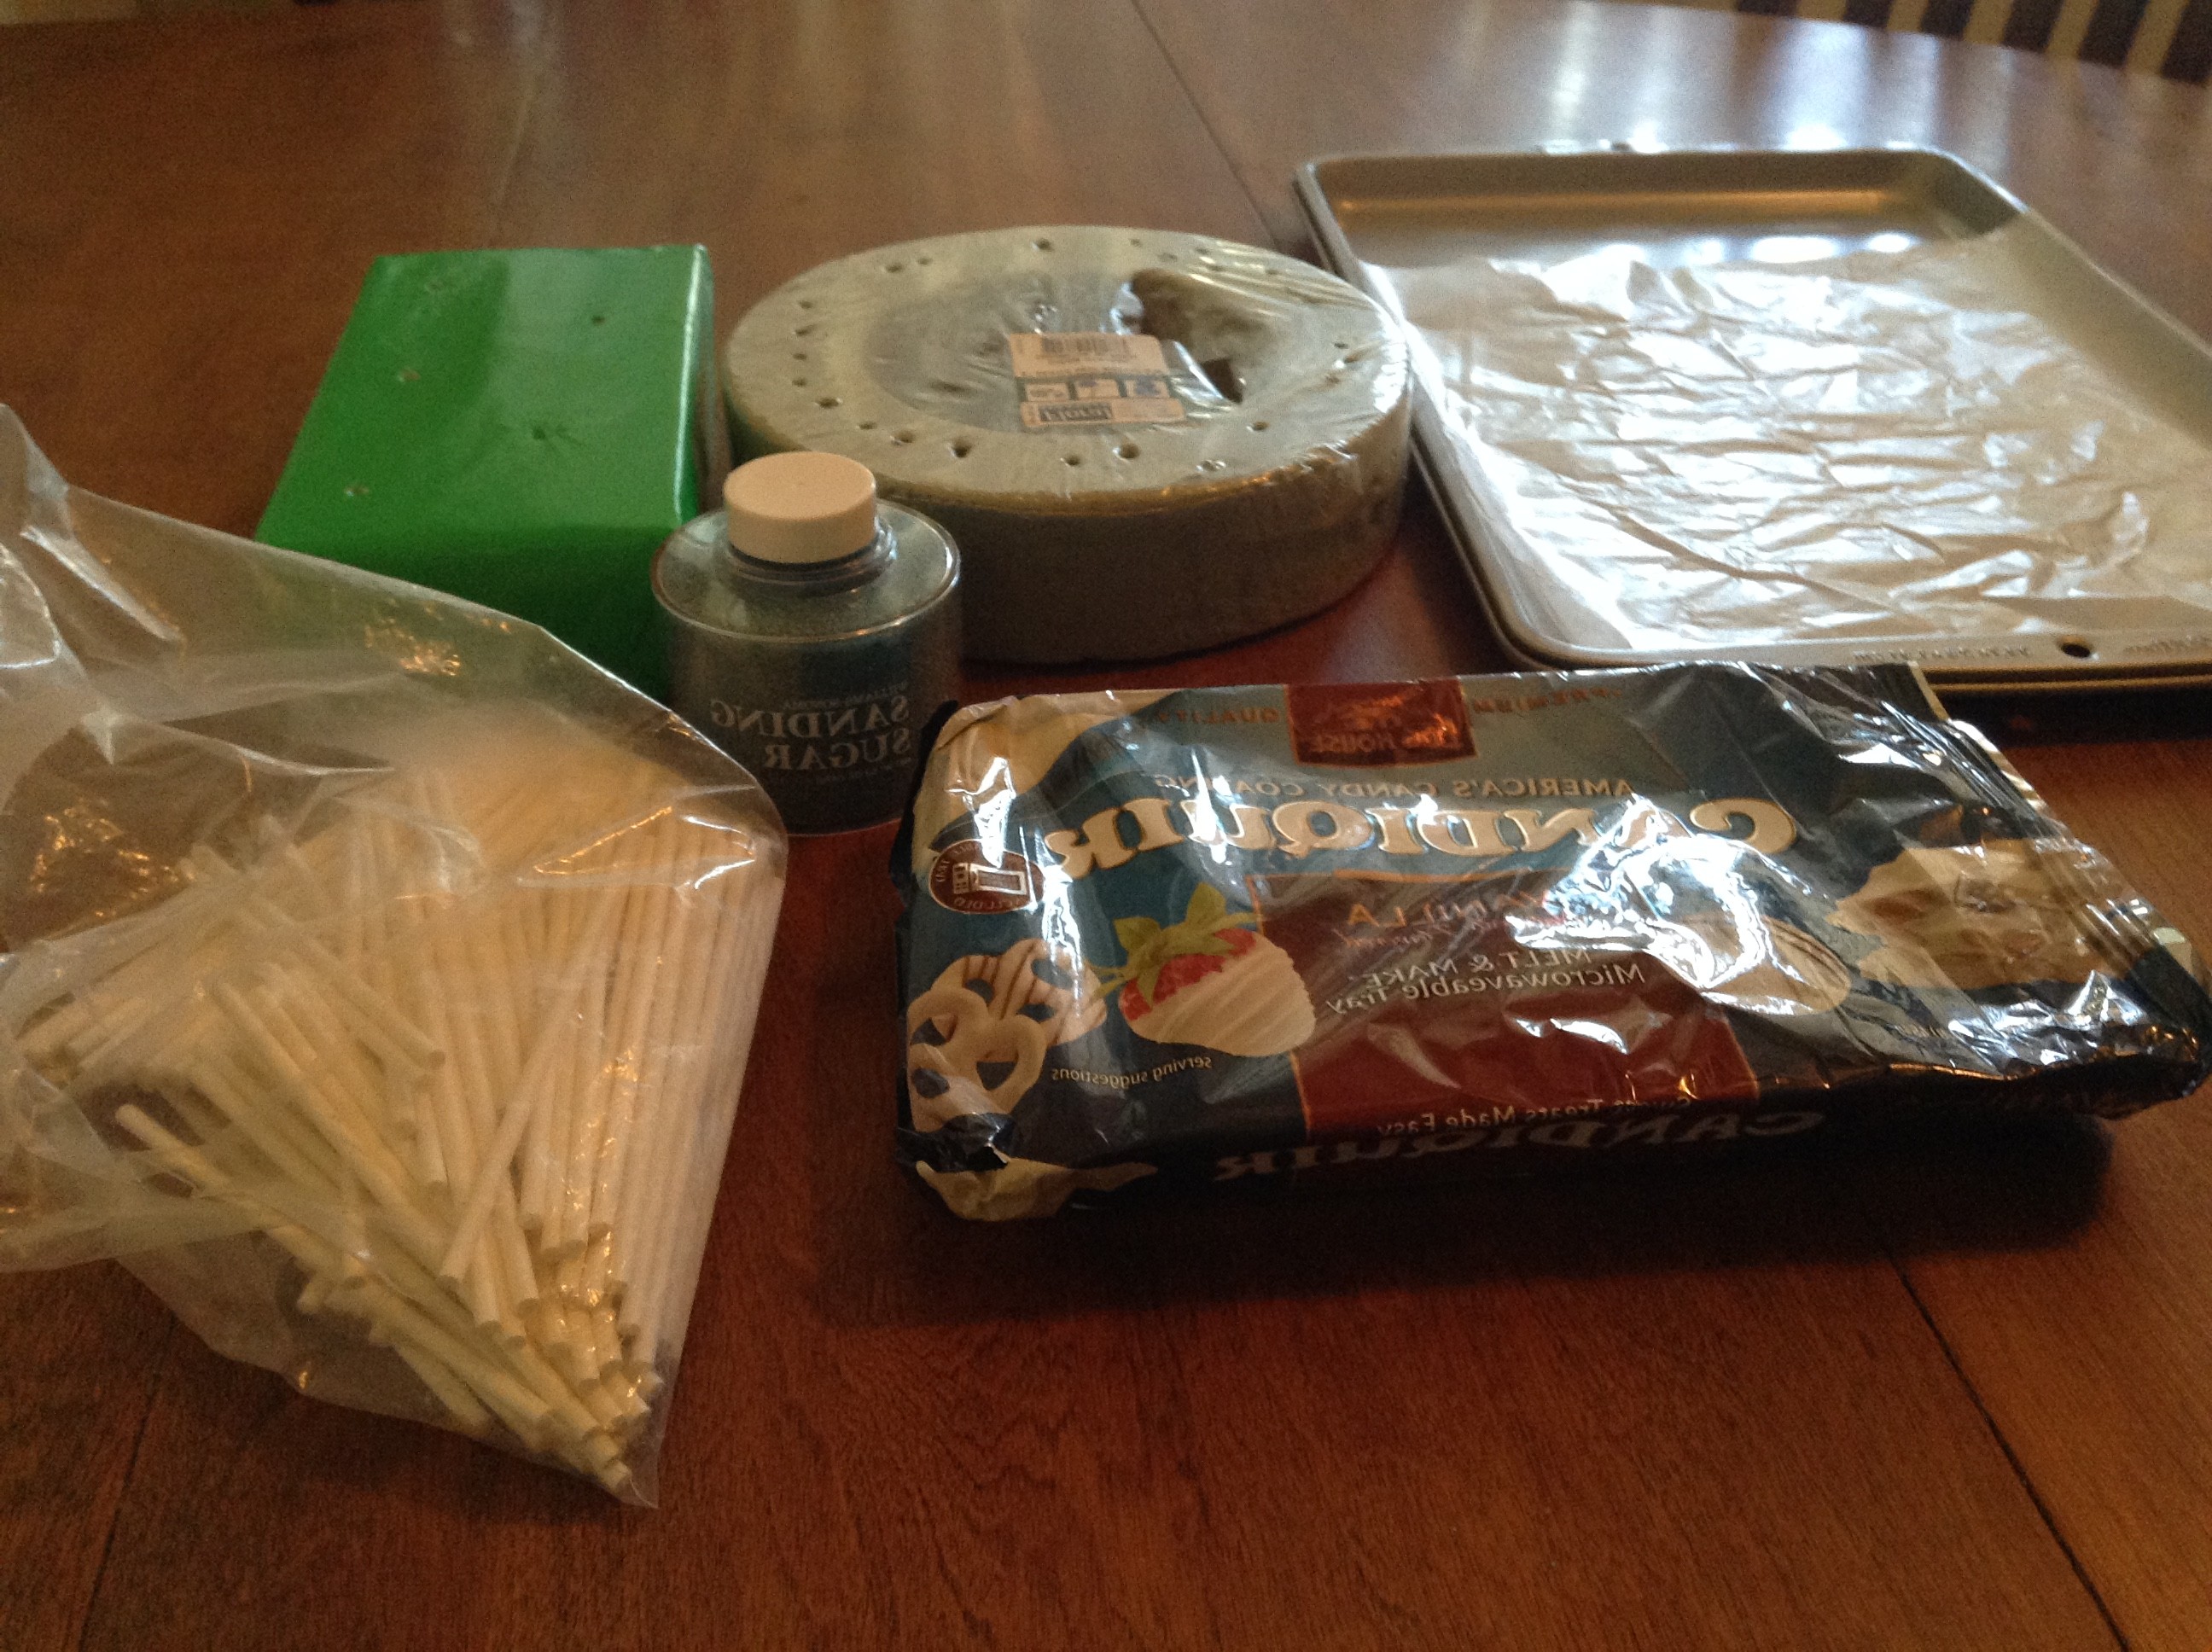
To make cake pops, you will need:
– A box cake mix and ingredients to make the cake
– A can of frosting
-Candy melts or Candiquik
–lollipop sticks
-sprinkles if desired
– Cake pop stand
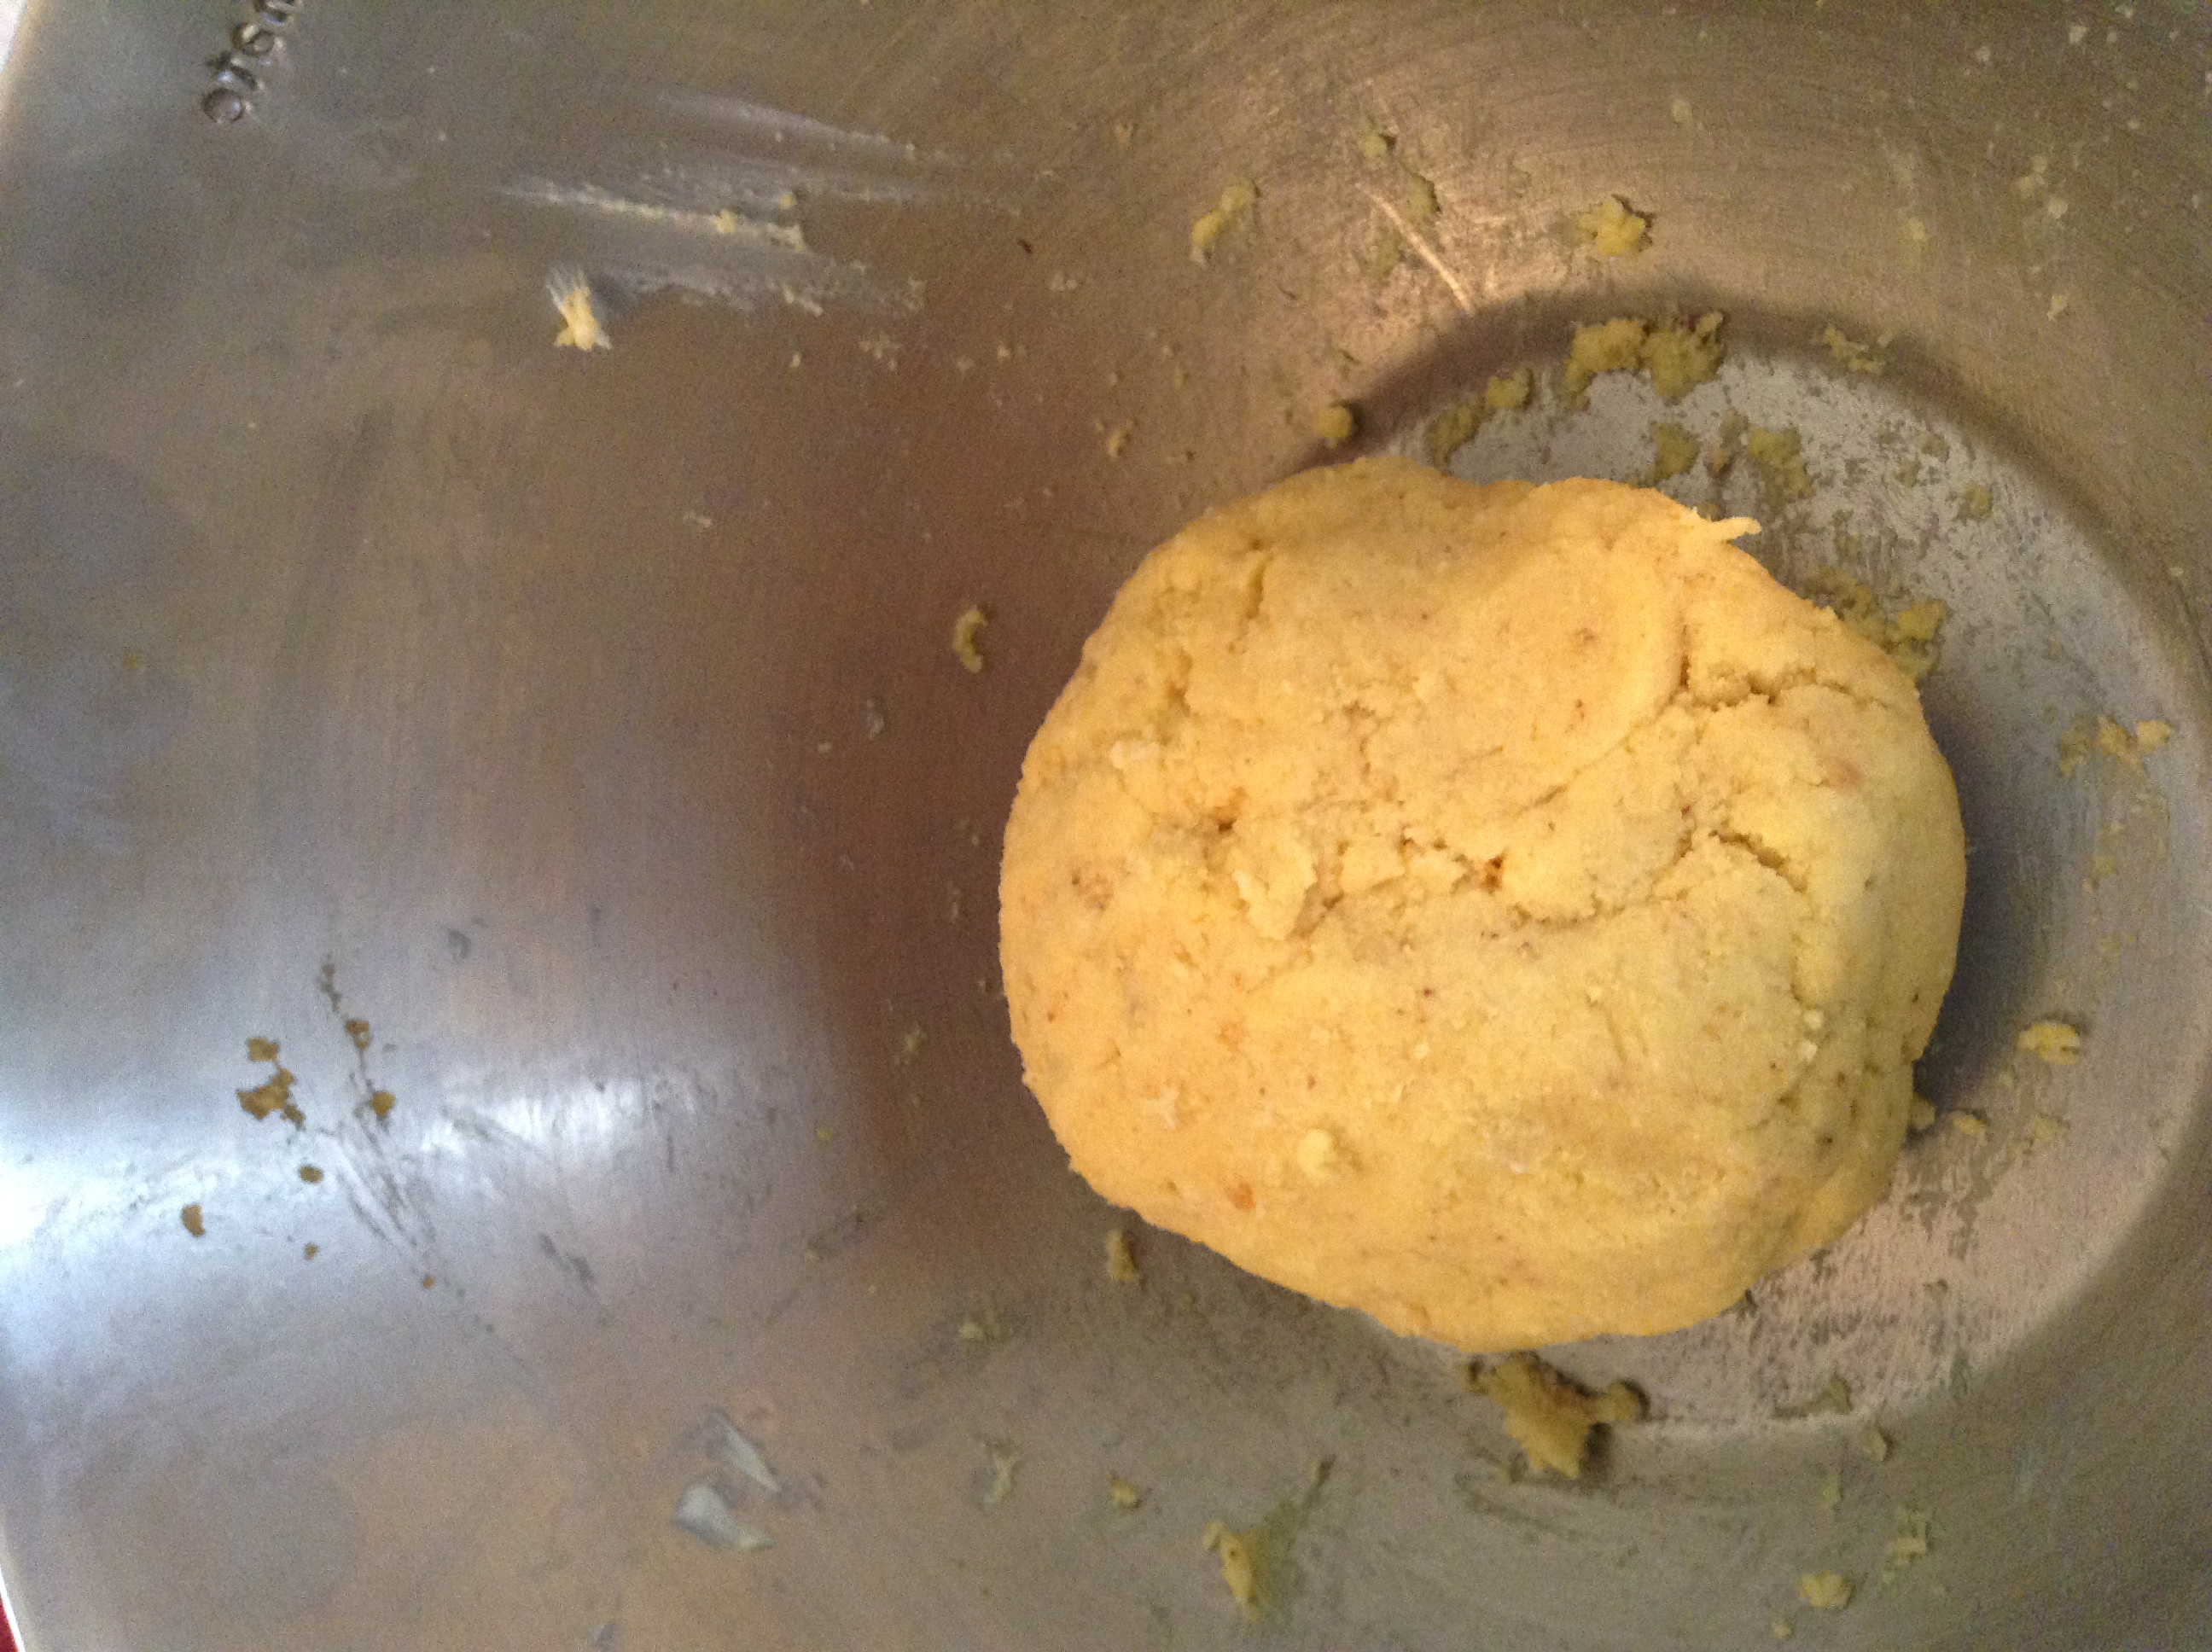
To create cake pops, you need to start by making cake balls that you will later stick a lollipop stick on. The easiest way to make cake balls is to follow the directions on a box of cake mix. I have also heard that if you use half the amount of oil, this helps create the right consistency for your cake balls. I have not tried that yet, but I plan on it. If you are not a fan of boxed cake mix, you can also bake a homemade cake.
After you bake your cake, let it cool completely. Sometimes if I am in a hurry, I dump the whole cake right out of the oven into a large bowl, cover it and put it in the freezer to speed up the cooling process! Next is the fun part, you get to destroy the cake. Your goal is to crumble your cake into fine crumbs. You can do this one of two ways:
1) Use your hands. Put chunks of your cake into a large mixing bowl and use your hands to crumble it into a pile of fine crumbs. If you use this method, I suggest cutting off the hard edges of your baked cake. This is the method that I use.
2) Use a food processor. Put chunks of your cake into a food processor and pulse it into fine crumbs. Move the crumbs into a large mixing bowl.
Add a small amount of frosting to your cake crumbs and thoroughly combine using your hands. Continue to add small amounts of frosting until your crumb mixture becomes the consistency of clay.
Helpful hint: Some recipes tell you to add an entire container of frosting. Don’t do it! This is way too much. 1/3 to 1/2 half cup of frosting works good. I usually just put in two big spoonful’s.
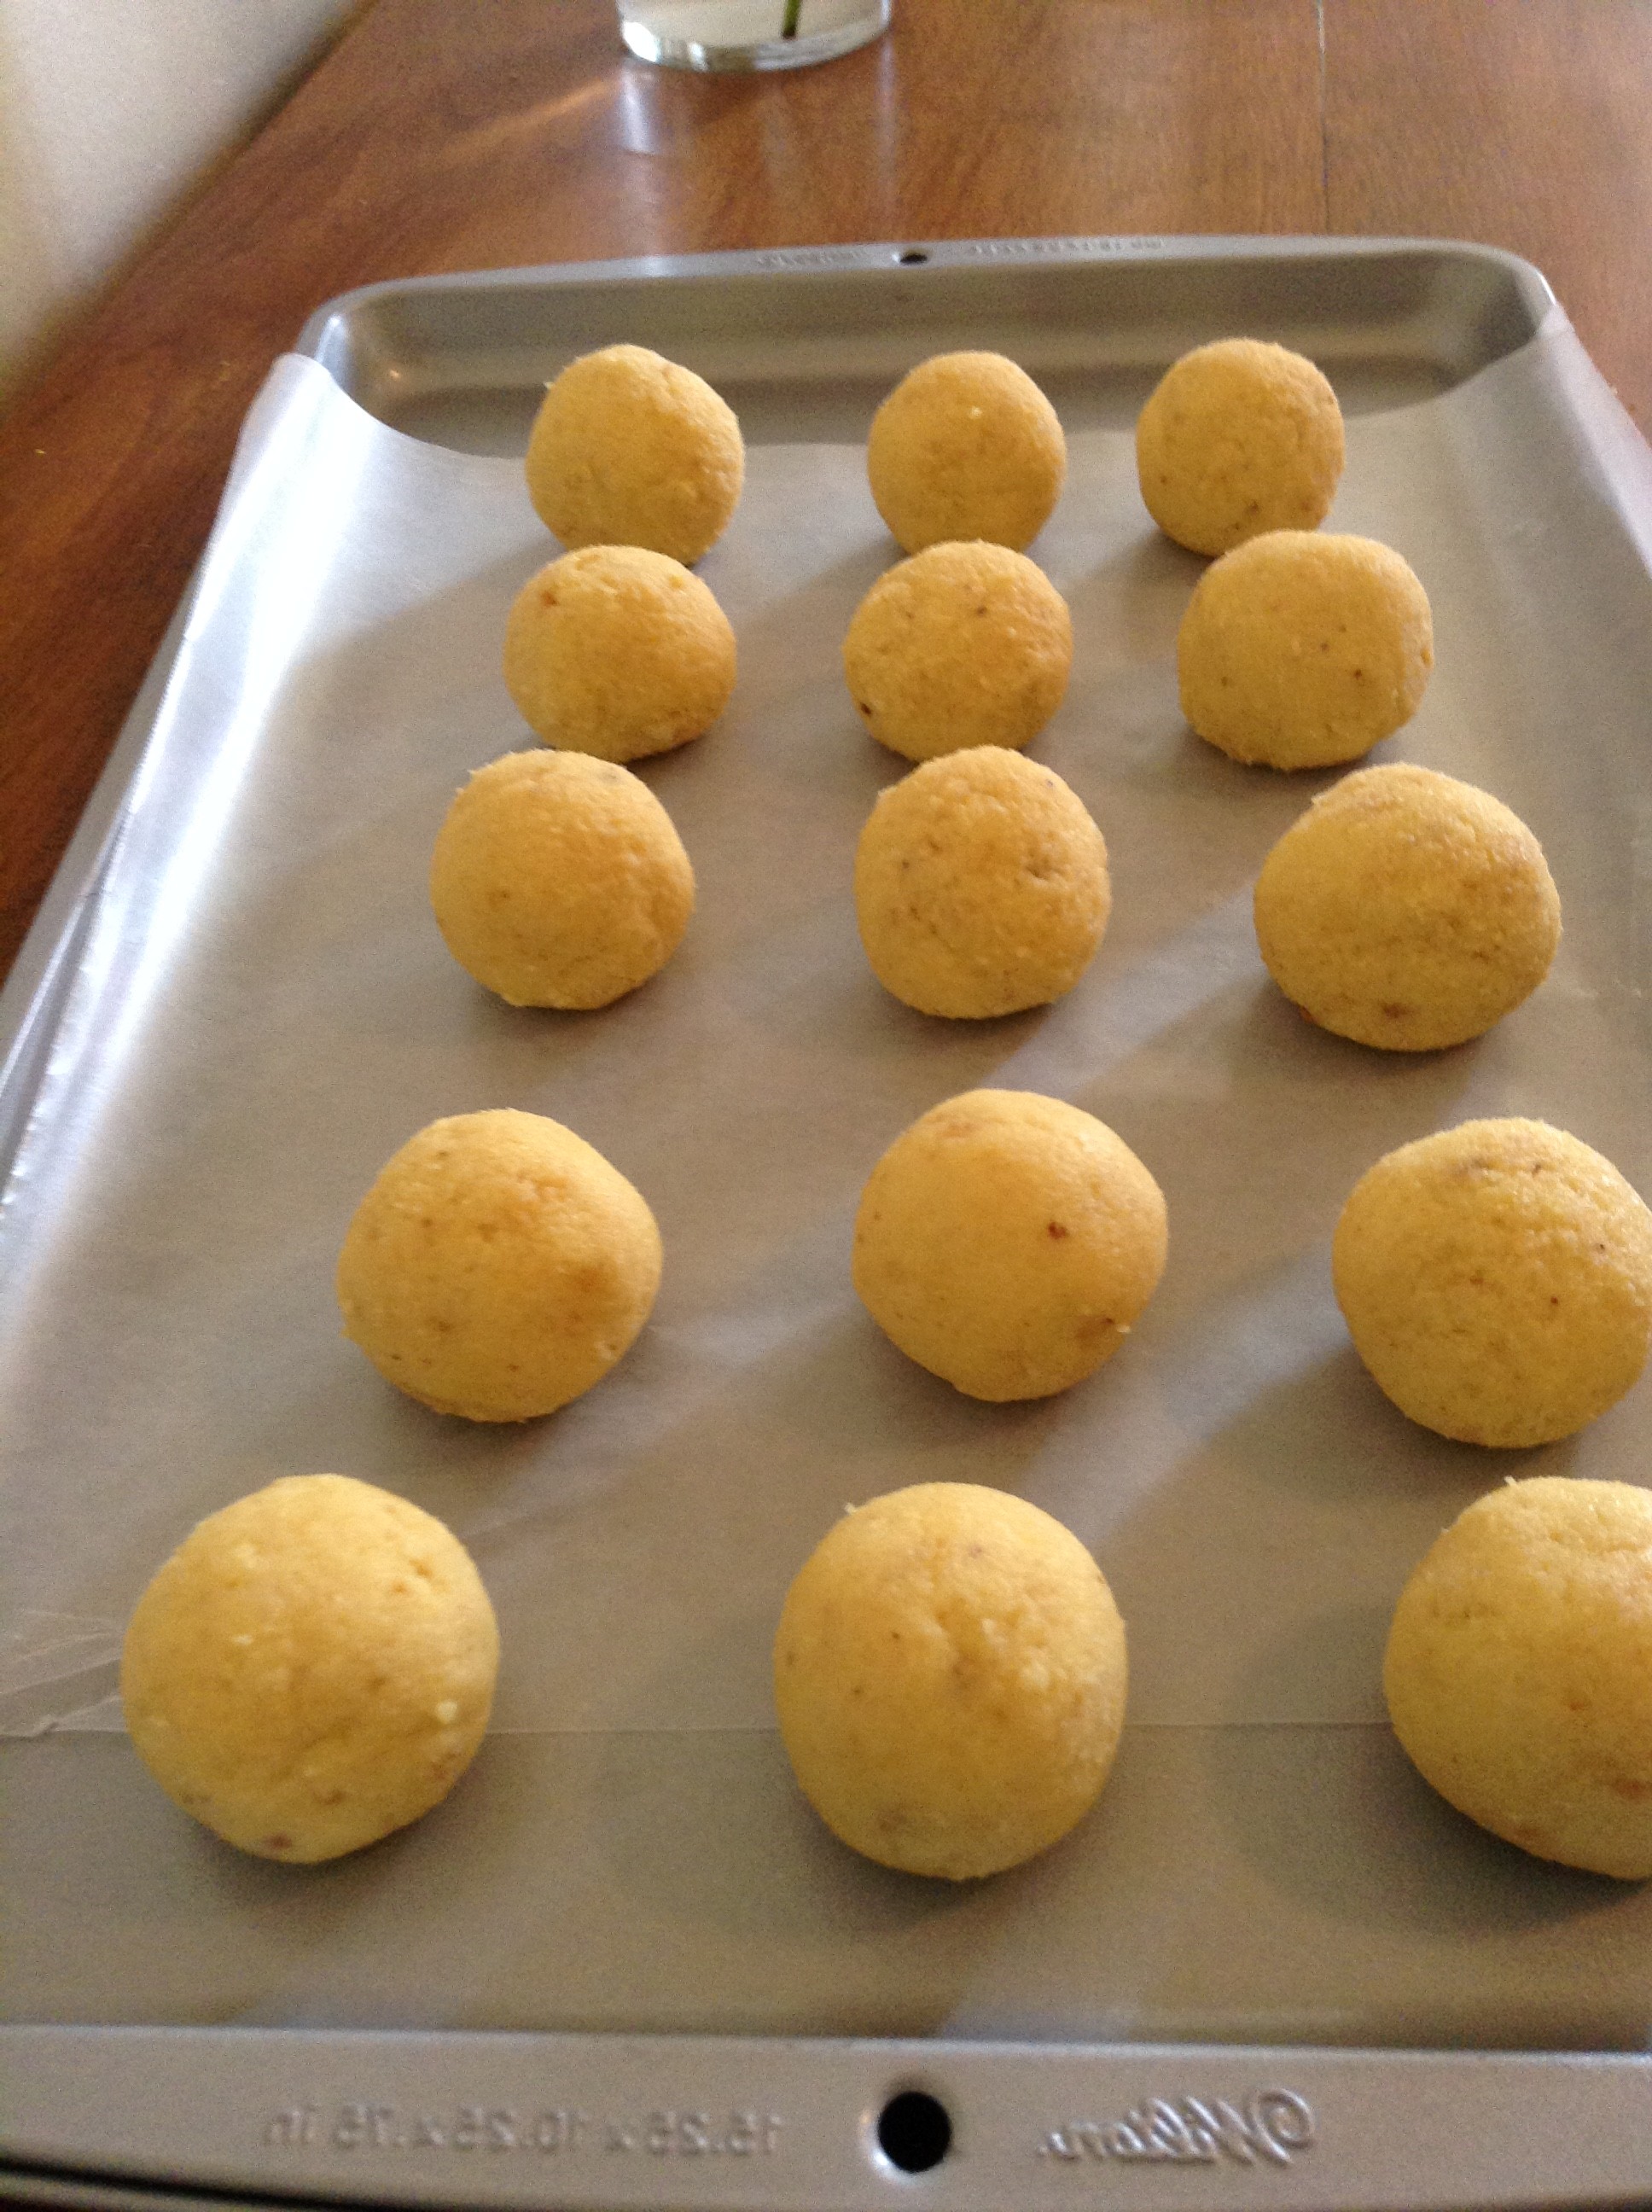
Once you have created your “dough”, you can begin rolling your cake balls. Some people use a stainless steel coffee scoop to portion out the cake mixture so that all the cake balls are the same size, about 1.25″. I usually just eyeball it. Roll the mixture in the palm of your hand to create round cake balls.
Set your cake balls onto a parchment lined baking sheet or plate and put them in the freezer or refrigerator. If you have time, keep the cake balls in the fridge for a few hours until chilled. If this just doesn’t fit into your busy schedule, about 15 to 20 minutes in the freezer will do the trick. Do keep in mind that making cake pops is a temperature sensitive process. Putting cake balls in the freezer may make them too cold for dipping, so you will need to let them sit for a few minutes after removing them.
Helpful Hint: For the next few steps, work with just a handful of cake balls at a time, rotating them in and out of the fridge. This will ensure that you always have chilled cake balls ready to go. This is where it comes in handy to have a few cake pop stands to rotate around!
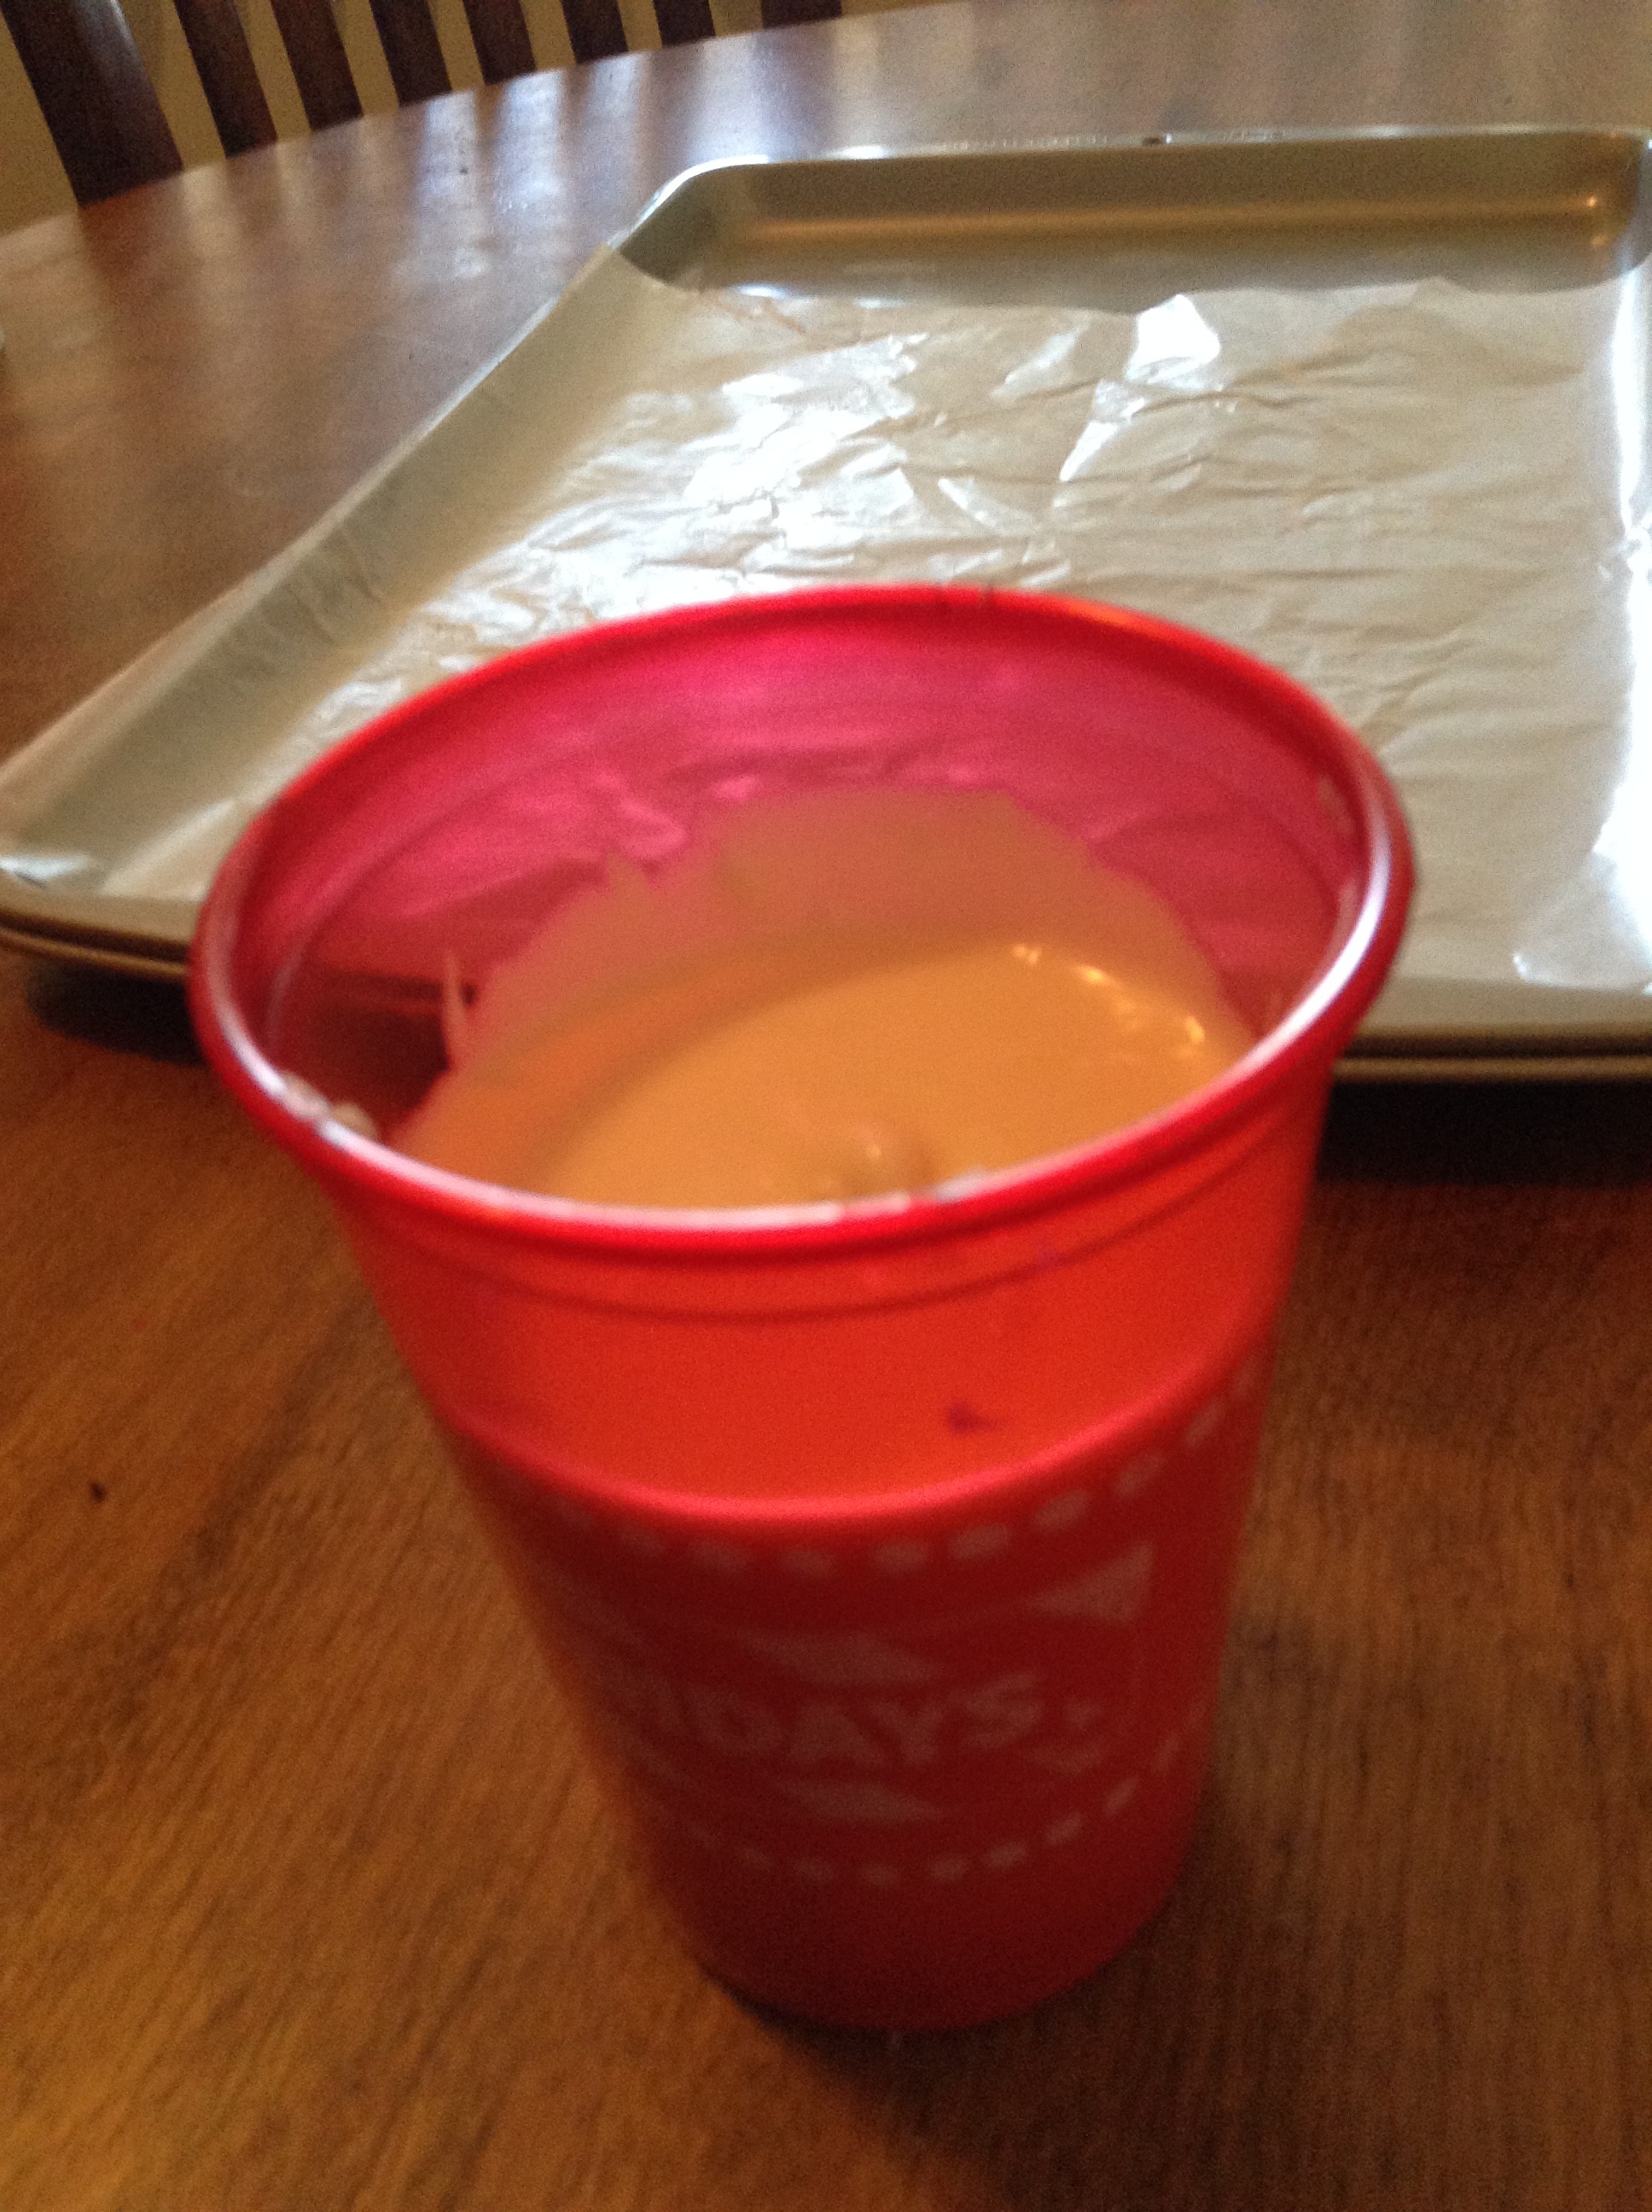
Microwave your candy melts in a bowl on low power for 30-seconds at a time. Stop and stir after each 30-second interval then repeat until the coating is completely melted. Do not overheat the candy melts or your coating will become lumpy. If the coating is too thick, add a small amount of vegetable oil to thin it out.
I ALWAYS USE CANDIQUIK CHOCOLATE WHEN MAKING MY CAKE POPS. I HAVE FOUND THAT IT MELTS THE BEST AND IS THE SMOOTHEST! YOU DON’E EVEN NEED TO USE VEGETABLE OIL TO THIN IT OUT.
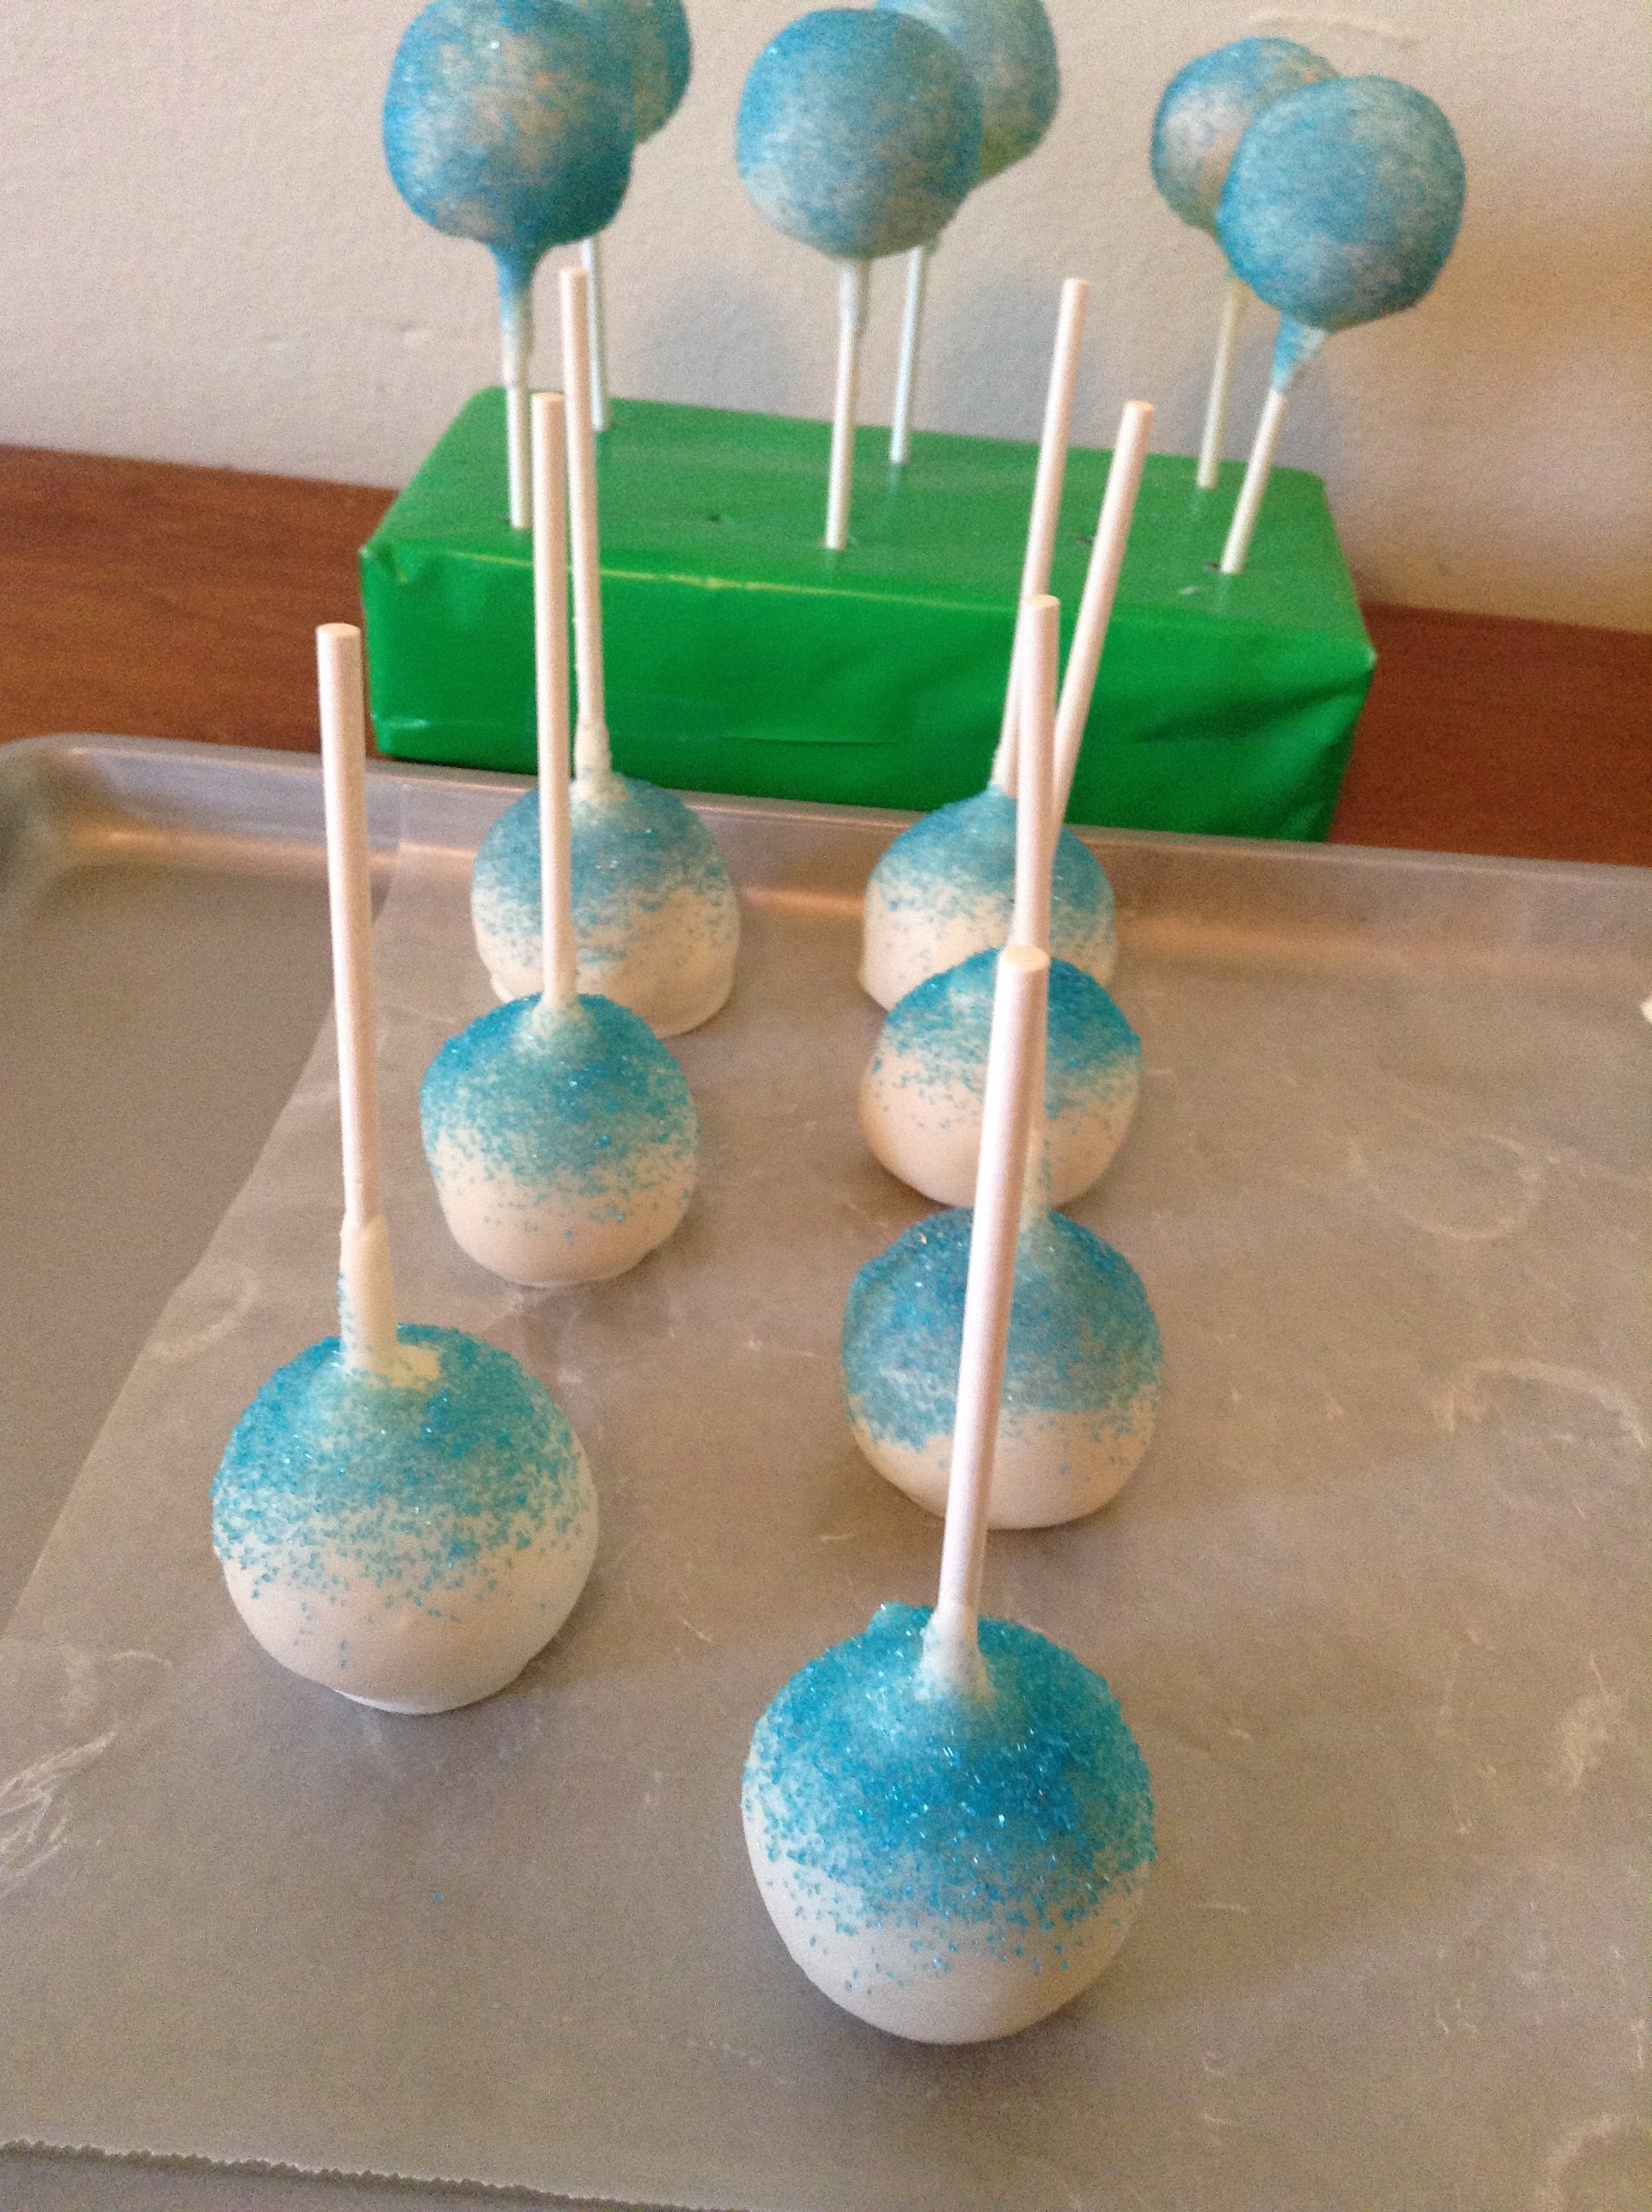
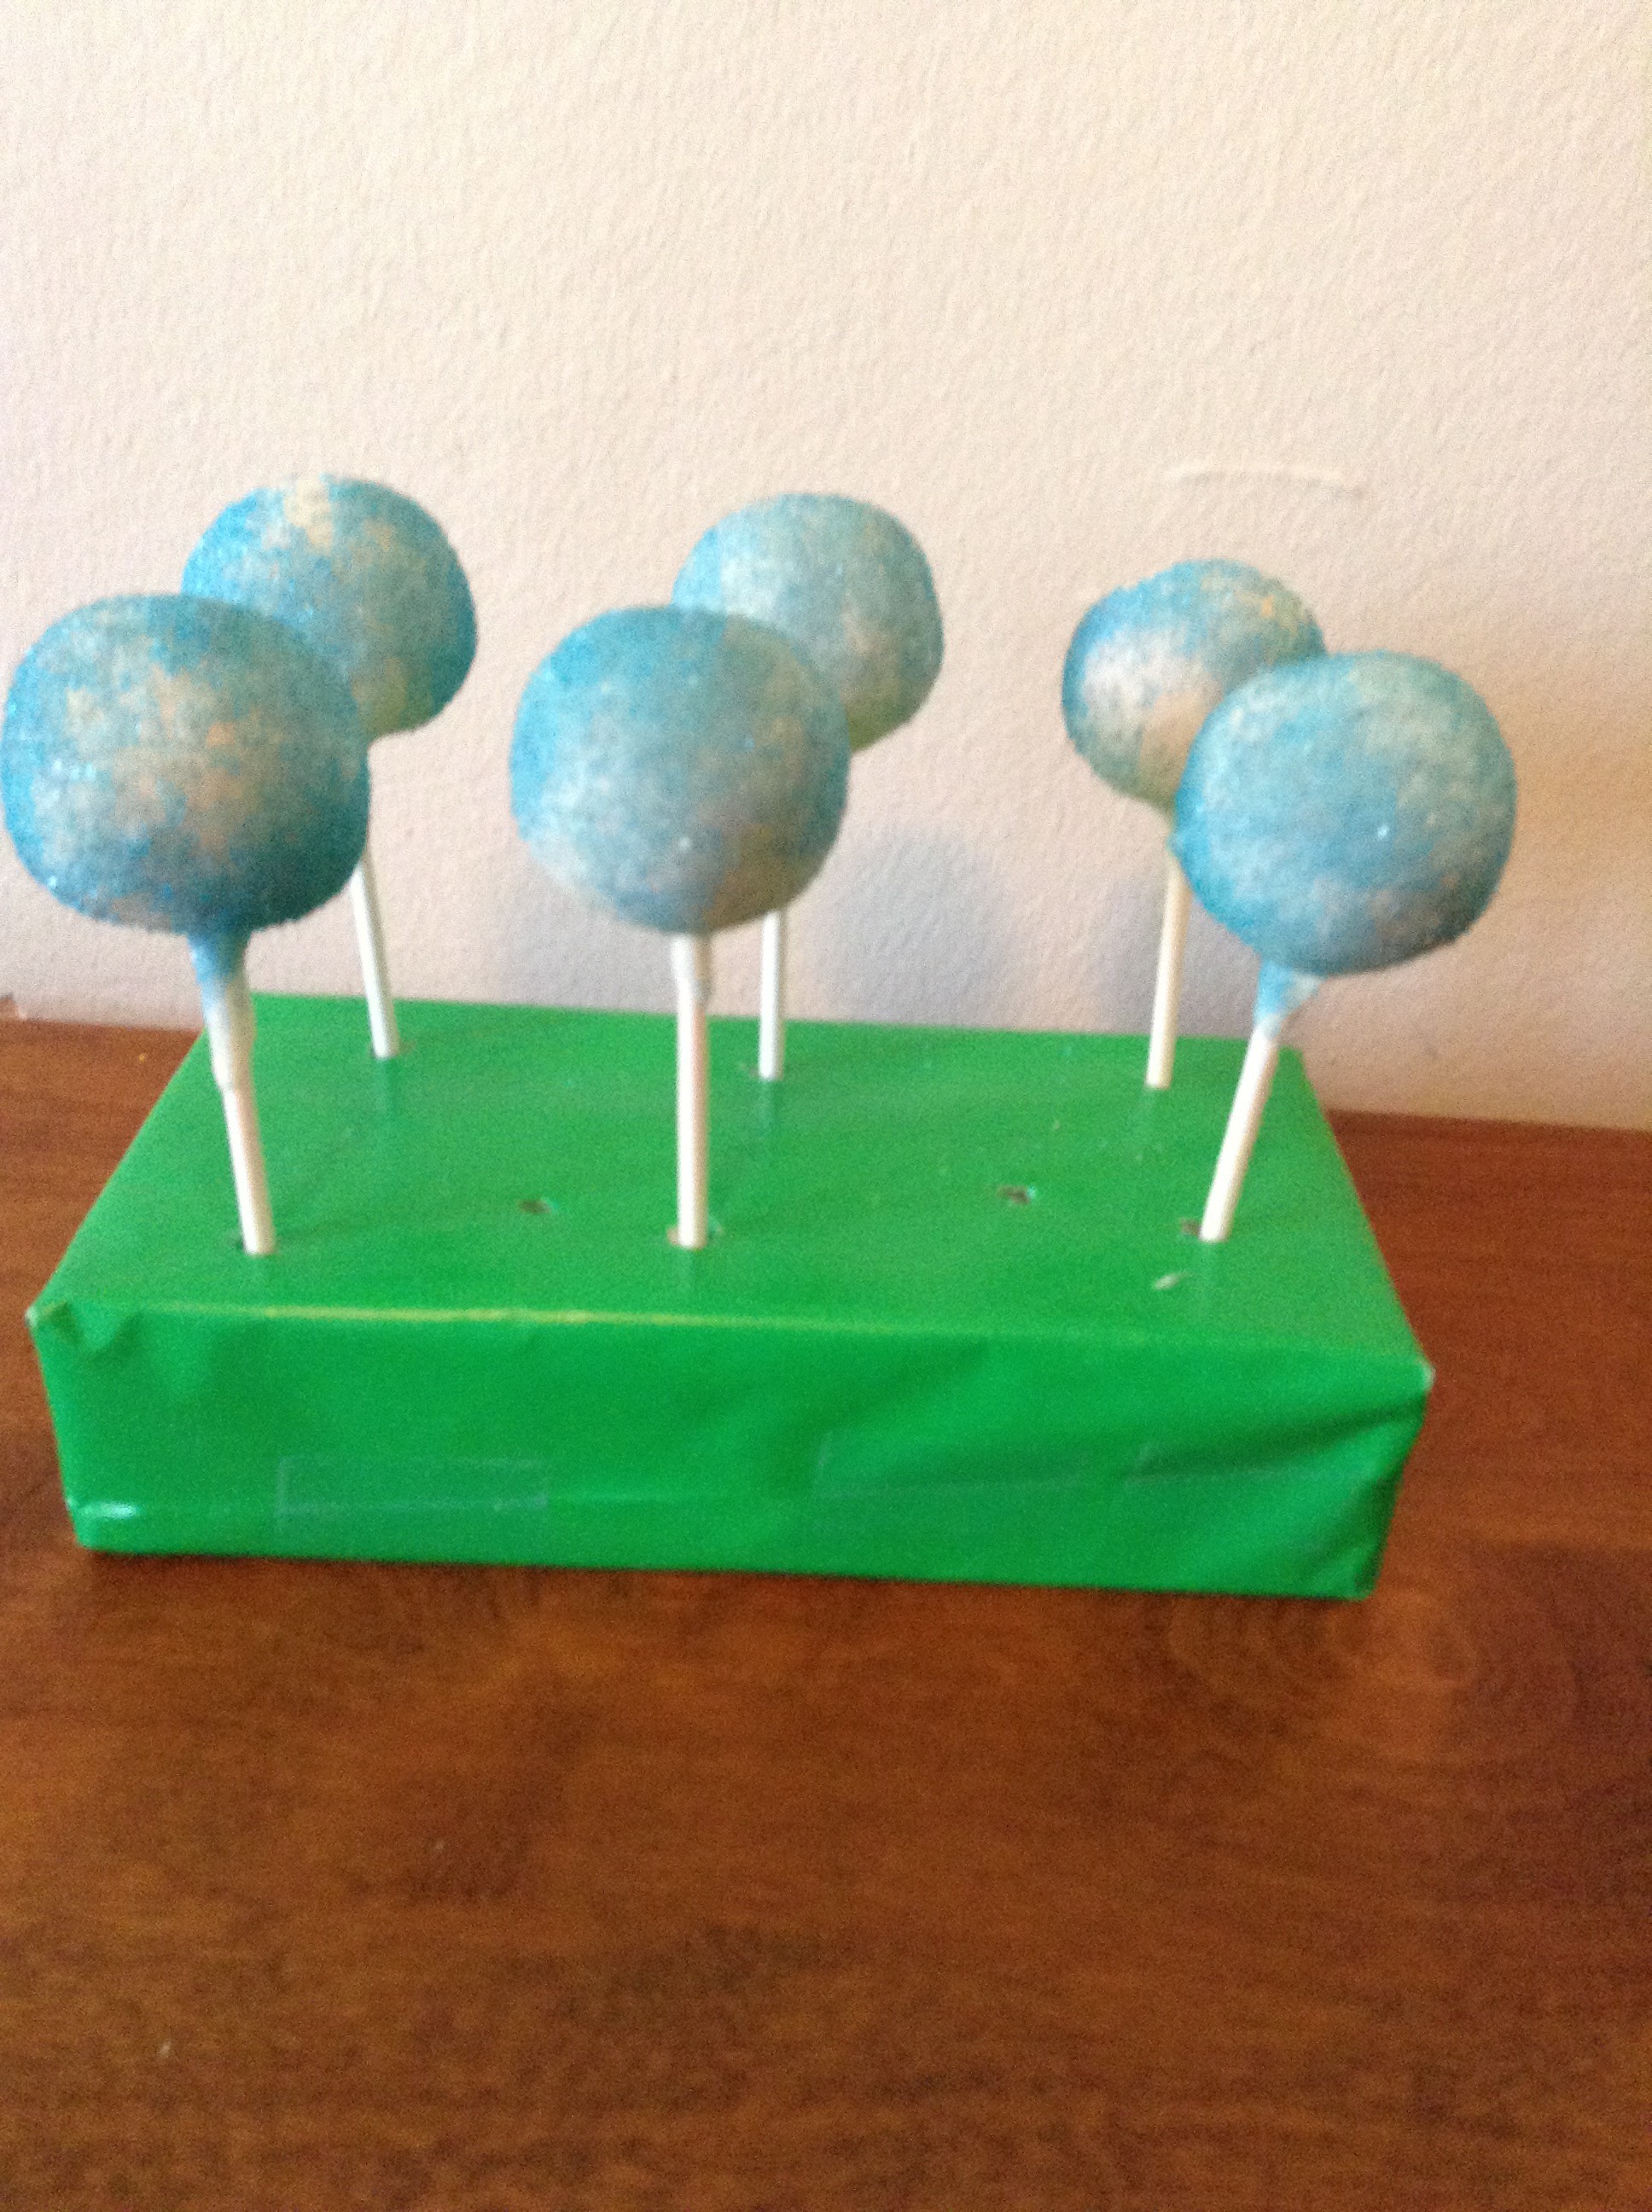
These are the supplies I use when dipping my cake pops. I have a make shift cake pop stand that I use when I want the cake pops to stand up. I got it at the dollar store, it is to use for flowers, but it works great for cake pops. I also have a Styrofoam rectangle covered in wrapping paper that I use as well. When I want the cake pops to be face down, I use a cookie sheet lined with wax paper.
Dip the end of a lollipop stick into the melted coating and then into a cake ball, gently pushing until the stick is about half way through the cake ball. Set your cake pops in the fridge to chill for dipping. (You can also turn your cake pop upright and set it in your Styrofoam block or cake pop stand.)
Dip each chilled cake pop straight down into the melted coating until the cake ball is completely covered and sealed. If you need to angle the cake pop, gently tilt it in one direction and then another. Resist the temptation to stir the coating with the cake pop. If you do, your cake pop may fall off of the stick into a candy coating abyss.
I always use a short cup to dip my cake pops in the chocolate. This works perfect for me.
Reset your cake pops in your cake pop stand until the coating has hardened. Or while the coating is still wet use sprinkles, candies, or sugars to decorate your cake pops. Move the cake pop from the melted coating by pulling it straight up. Then, turn the cake pop at an angle and gently tap off any excess coating.
COMMON CAKE POP ISSUES AND PROBLEMS
This next section is advice I got from the greatest website Miss Candiquik
FALLS OFF THE STICK!
This can happen because of a few problems. I think the most common is thick coating and it is dragging your cake pop down. Again, smooth coating is one of the most (if not THE most) important parts of successful cake pops! Also, huge cake balls are heavy cake balls. So try to make them moderate size (1″ tall), use a spoon (small cookie dough scoop, coffee scoop, melon baller) or something to measure an even amount for each ball. Also, when I first started making cake balls I would use the whole container (16 oz) of frosting. Now, I start with adding 1/3 of the can and typically use up to 1/2 cup (8 oz) of frosting. You could probably get away with even less than that, but I found this amount is good for me and rolls out smooth.
Also, when dipping your cake pops: dip the stick in the coating first, then insert into the cake ball. Then, when dipping the cake pop make sure that you don’t bump the bottom of the cake ball on the bowl/cup. Finally, don’t swirl the cake pop around in the coating, just dip and get out!
MY CAKE BALLS/POPS ARE NOT SMOOTH!
This is probably the easiest problem to fix. It begins with baking your cake. Do not overbake – simple. Second, trim off the edges and (if your obsessed like I am) leave the bottom of the cake out too. Mix thoroughly with frosting. Thoroughly, as in: dig in(!) using your clean hands to mush the mixture of the cake and frosting together. Finally, roll, roll, roll. The smoother they look as uncoated cake balls, the better they will look when dipped. Voila.
Tip: use something to measure the amount of cake ‘dough’ you are rolling. I bought this coffee scoop at Target for $5 and it works awesome. Perfectly sized consistent cake balls, every time.
DANG CRACKS!
They look perfectly fine, then magically they look like they experienced an earthquake. Super frustrating! Typically, this is caused by the drastic difference in temperature of the coating and the cake ball itself – the coating is super hot and the cake balls are too cold; the cake ball expands and now you have cracks. While I do like to chill my cake pops in the fridge (sometimes freezer for a few minutes, but be careful – there is a fine line between keeping them firm to ensure they stay on the stick and too cold where they crack), make sure you pull them out before dipping and that your candy coating isn’t TOO hot (let it sit for a couple minutes after immediately heating). Think of it this way, you want to dip your cake pop in the warmest (while still being cool) condition you can, before it begins to soften and fall off the stick. This is the biggest challenge I have found with other cake poppers, sometimes – even with the perfect conditions – cracks happen.
My Cake Pops are LEAKING CAKE/OIL!
Some call it cake pop *poop*, which I think is a good word for it. After all, this was my initial reaction for it when I began making cake pops a couple years ago. This happens when the cake is pushing it’s way out of the coating through a weak spot, a tiny hole, or a bubble that resulted in a hole. Make sure you coat the entire cake ball in coating. This issue can also be caused by the cake ball and coating temperature difference – see the “cracks” problem. But in my opinion, leakage is better than cracks, so if you have a leak – pull the excess cake off and use a toothpick to seal up the hole with additional coating (luckily they usually occur near the stick/bottom so it shouldn’t be too obvious).
The cake can also be very oily, causing oils to seep out the coating and even down the lollipop stick. If this happens, remember, you can always substitute apple sauce or greek yogurt for oil in your cake recipe!
Also, using less frosting = less oil. And again, you can seal any holes up with a little candy coating. Despite all of that, I still have some cake pops that are oily and the stick literally absorbs the oil (could be the cake flavor/mix) and I’m fine with it, as long as they don’t crack/leak! Colored lollipop sticks would help hide any oil absorbed (these can be purchased online or at specialty cake supply stores).
AIR BUBBLES?!
Air bubbles happen. You can prevent this a lot of the time. Usually caused by stirring your chocolate too fast/vigorously. Create a smooth “spot” with the back of your spoon before dipping your cake pop, it helps drastically! Just run your spoon (in a back and forth motion) over the coating between dipping each cake pop. If you notice the air bubble immediately upon pulling your cake pop out of the coating, just give it a second dip immediately.
My coating is THICK & CLUMPY!
You may have scorched your coating. This is a very common issue and happens when the sugar particles become too hot, causing them to carmelize or scorch. When using the microwave, be sure to follow the instructions and heat the entire block of CandiQuik for an initial 60 seconds, then stir very well and heat in 15 second intervals. If using less, adjust the microwave times accordingly. And remember, you can’t go backwards if you scorch your coating, so it’s better to start off slow. Of course, microwaves can heat unevenly and cause hot spots, so stirring constantly in between heating and using short intervals will help this. If melting on the stovetop, make sure you have the burner on low heat and stir constantly.
And of course, I suggest using CandiQuik Candy Coatings. I don’t have to add anything to thin it out and I get a nice, smooth, palatable, thin shell of coating (versus a thick, gloppy mouth full of thick sugar particles).
*If you experience the coating is thicker than normal (commonly caused by humidity/climate), add a teaspoon-tablespoon of solid vegetable shortening (ex: Crisco) to the melted (16 oz) coating. Begin by adding a little and add more if needed.
*Also, if you see just a tiny section that has burned/scorched/became too hot, I have been able to save the rest of the coating by carefully scooping out all of the coating that was burned! Simply spoon it out and allow the rest of the coating to cool slightly, then continue heating in short time intervals. This is usually a microwave heating the coating unevenly.
My Coating is DRYING TOO FAST!
This is usually caused by overheating. See the tip above on thick/clumpy coating. However, whenever I have added oil or powder based food colorings (the only kind to use with candy coatings), it simply dries faster. I cannot explain this, but it just means you have to work faster! It can be good in the case that you don’t have to wait so long when tapping the excess coating off, but it can be hard when making character pops. Also, whenever adding a lot of coloring to your CandiQuik, I add a little Crisco to the coating as well; some brands of the oil based food colors cause it to become slightly thicker than normal. And the more coloring you are adding (for deeper colors), I would recommend adding Crisco as well.
*I recommend oil versus powdered food colors if you have the option. I have had issues with the powders leaving little specks in the coating.
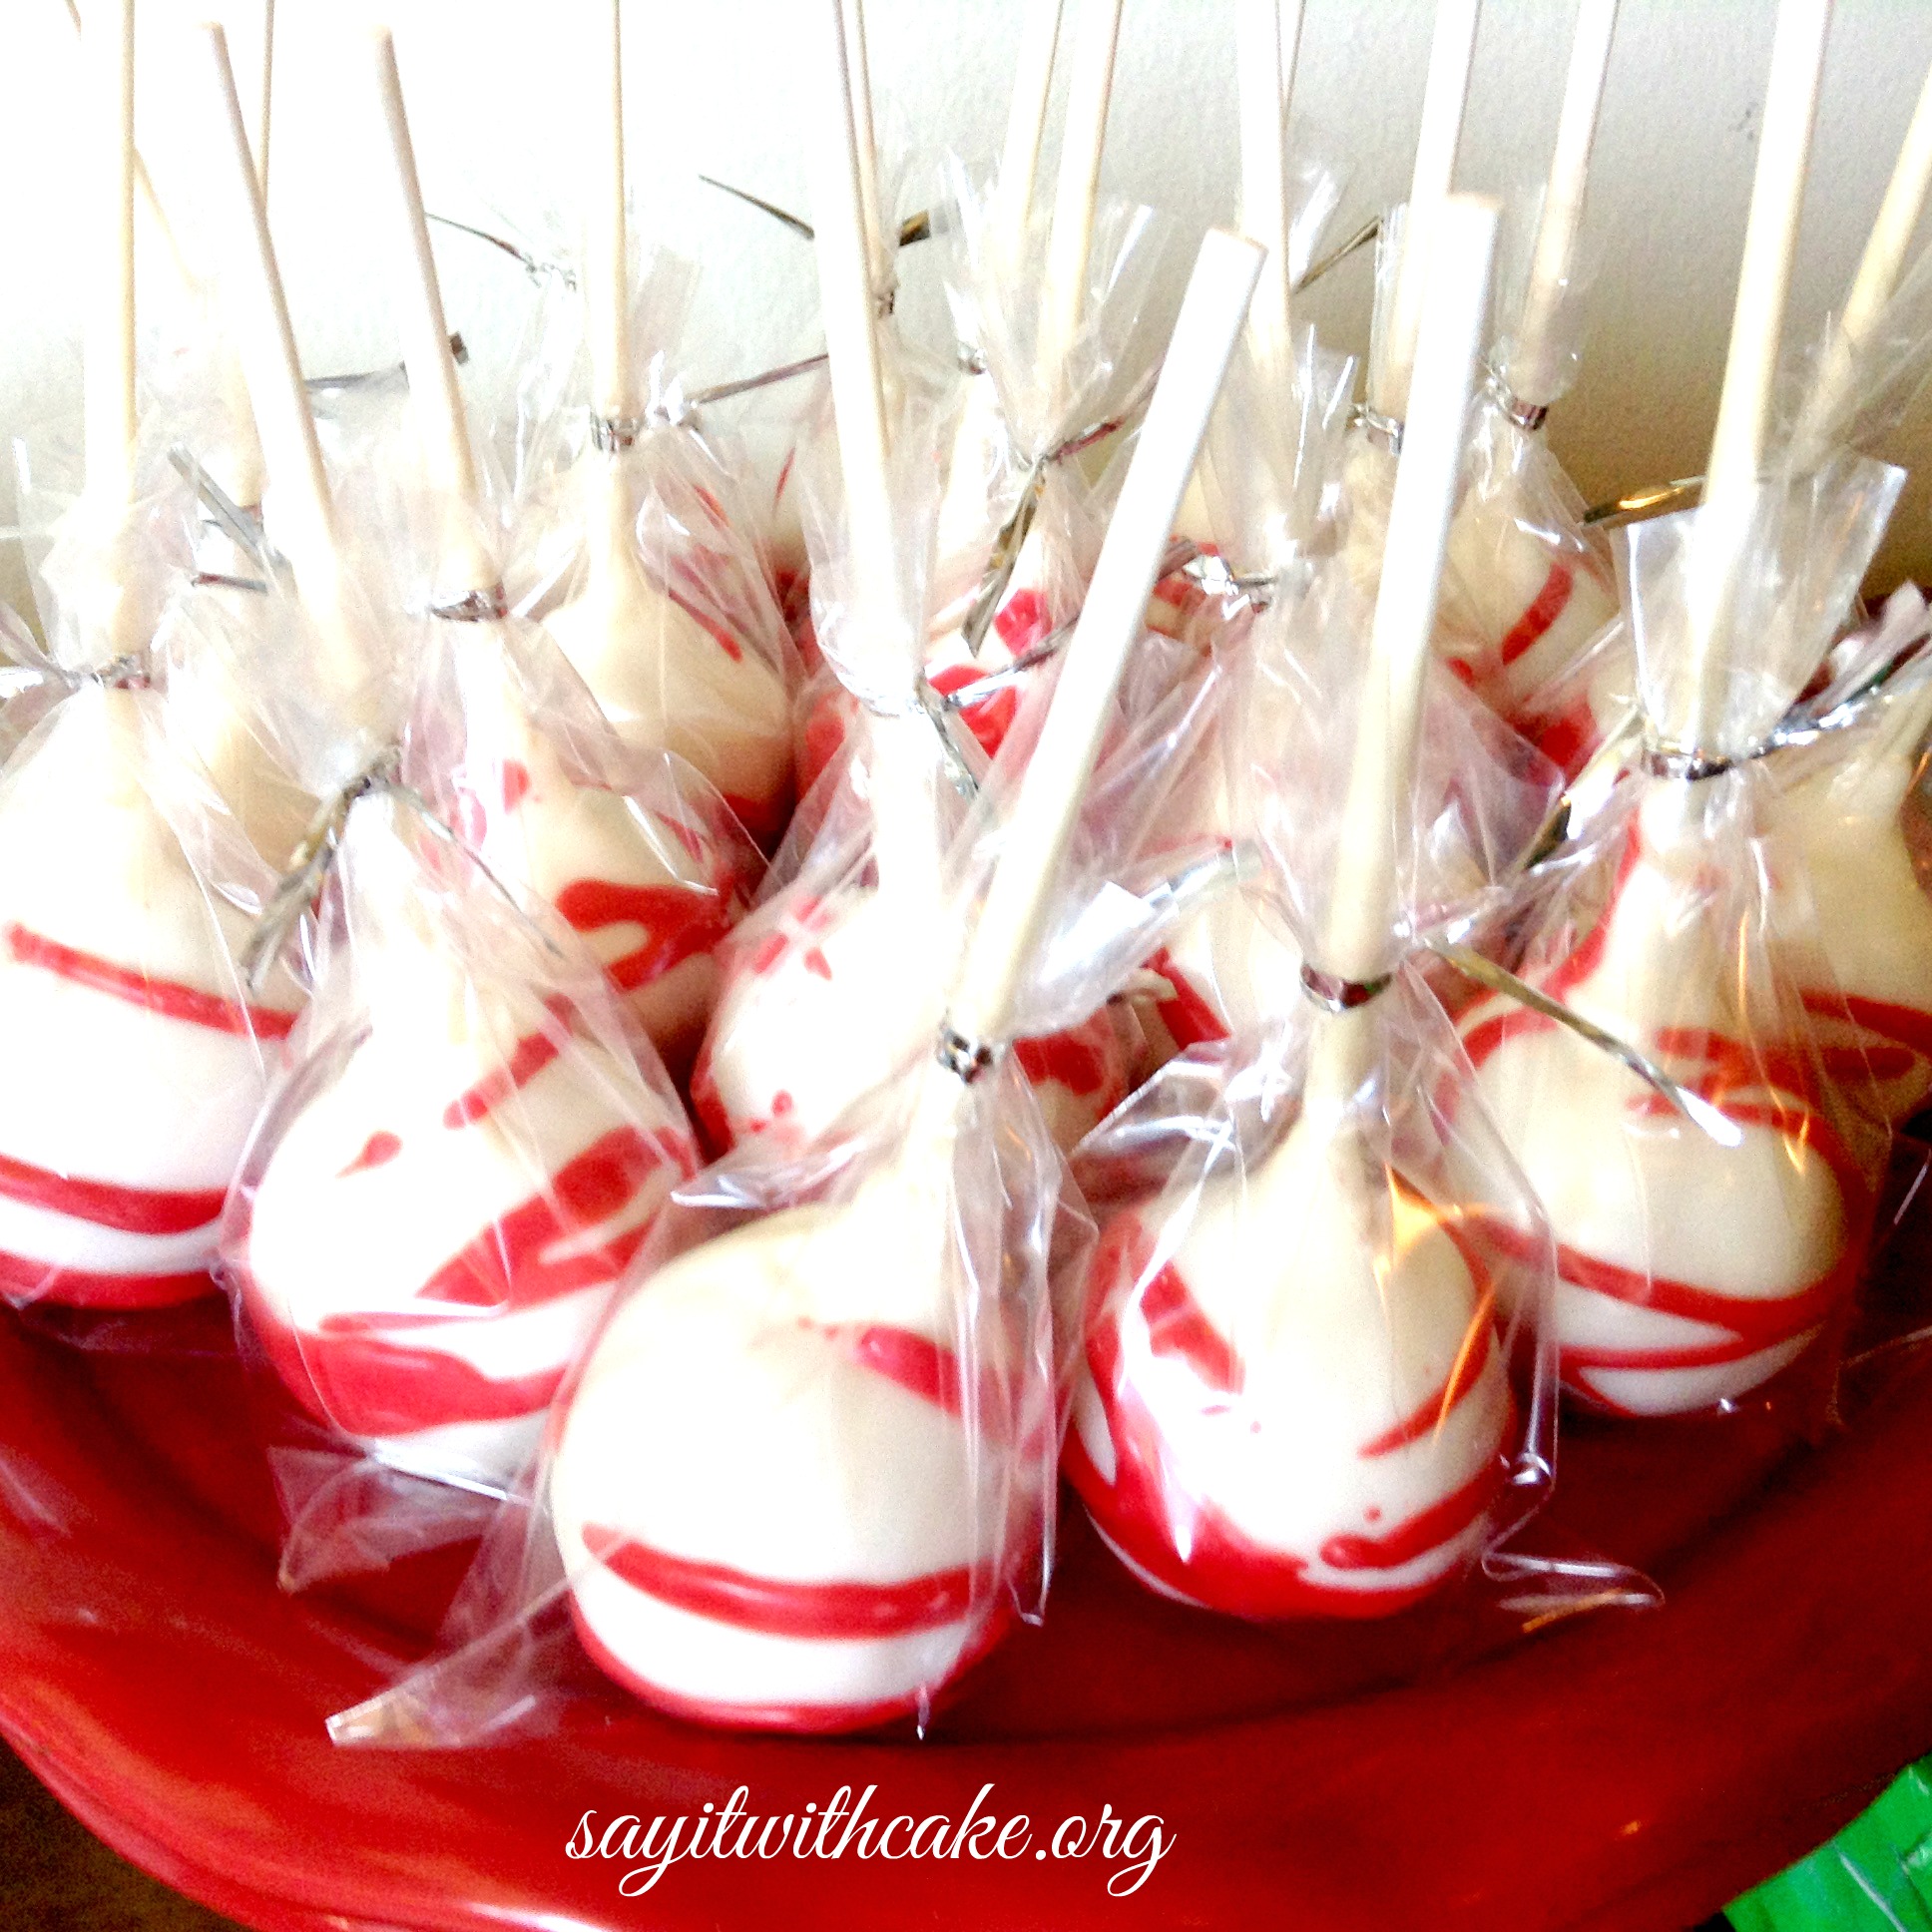
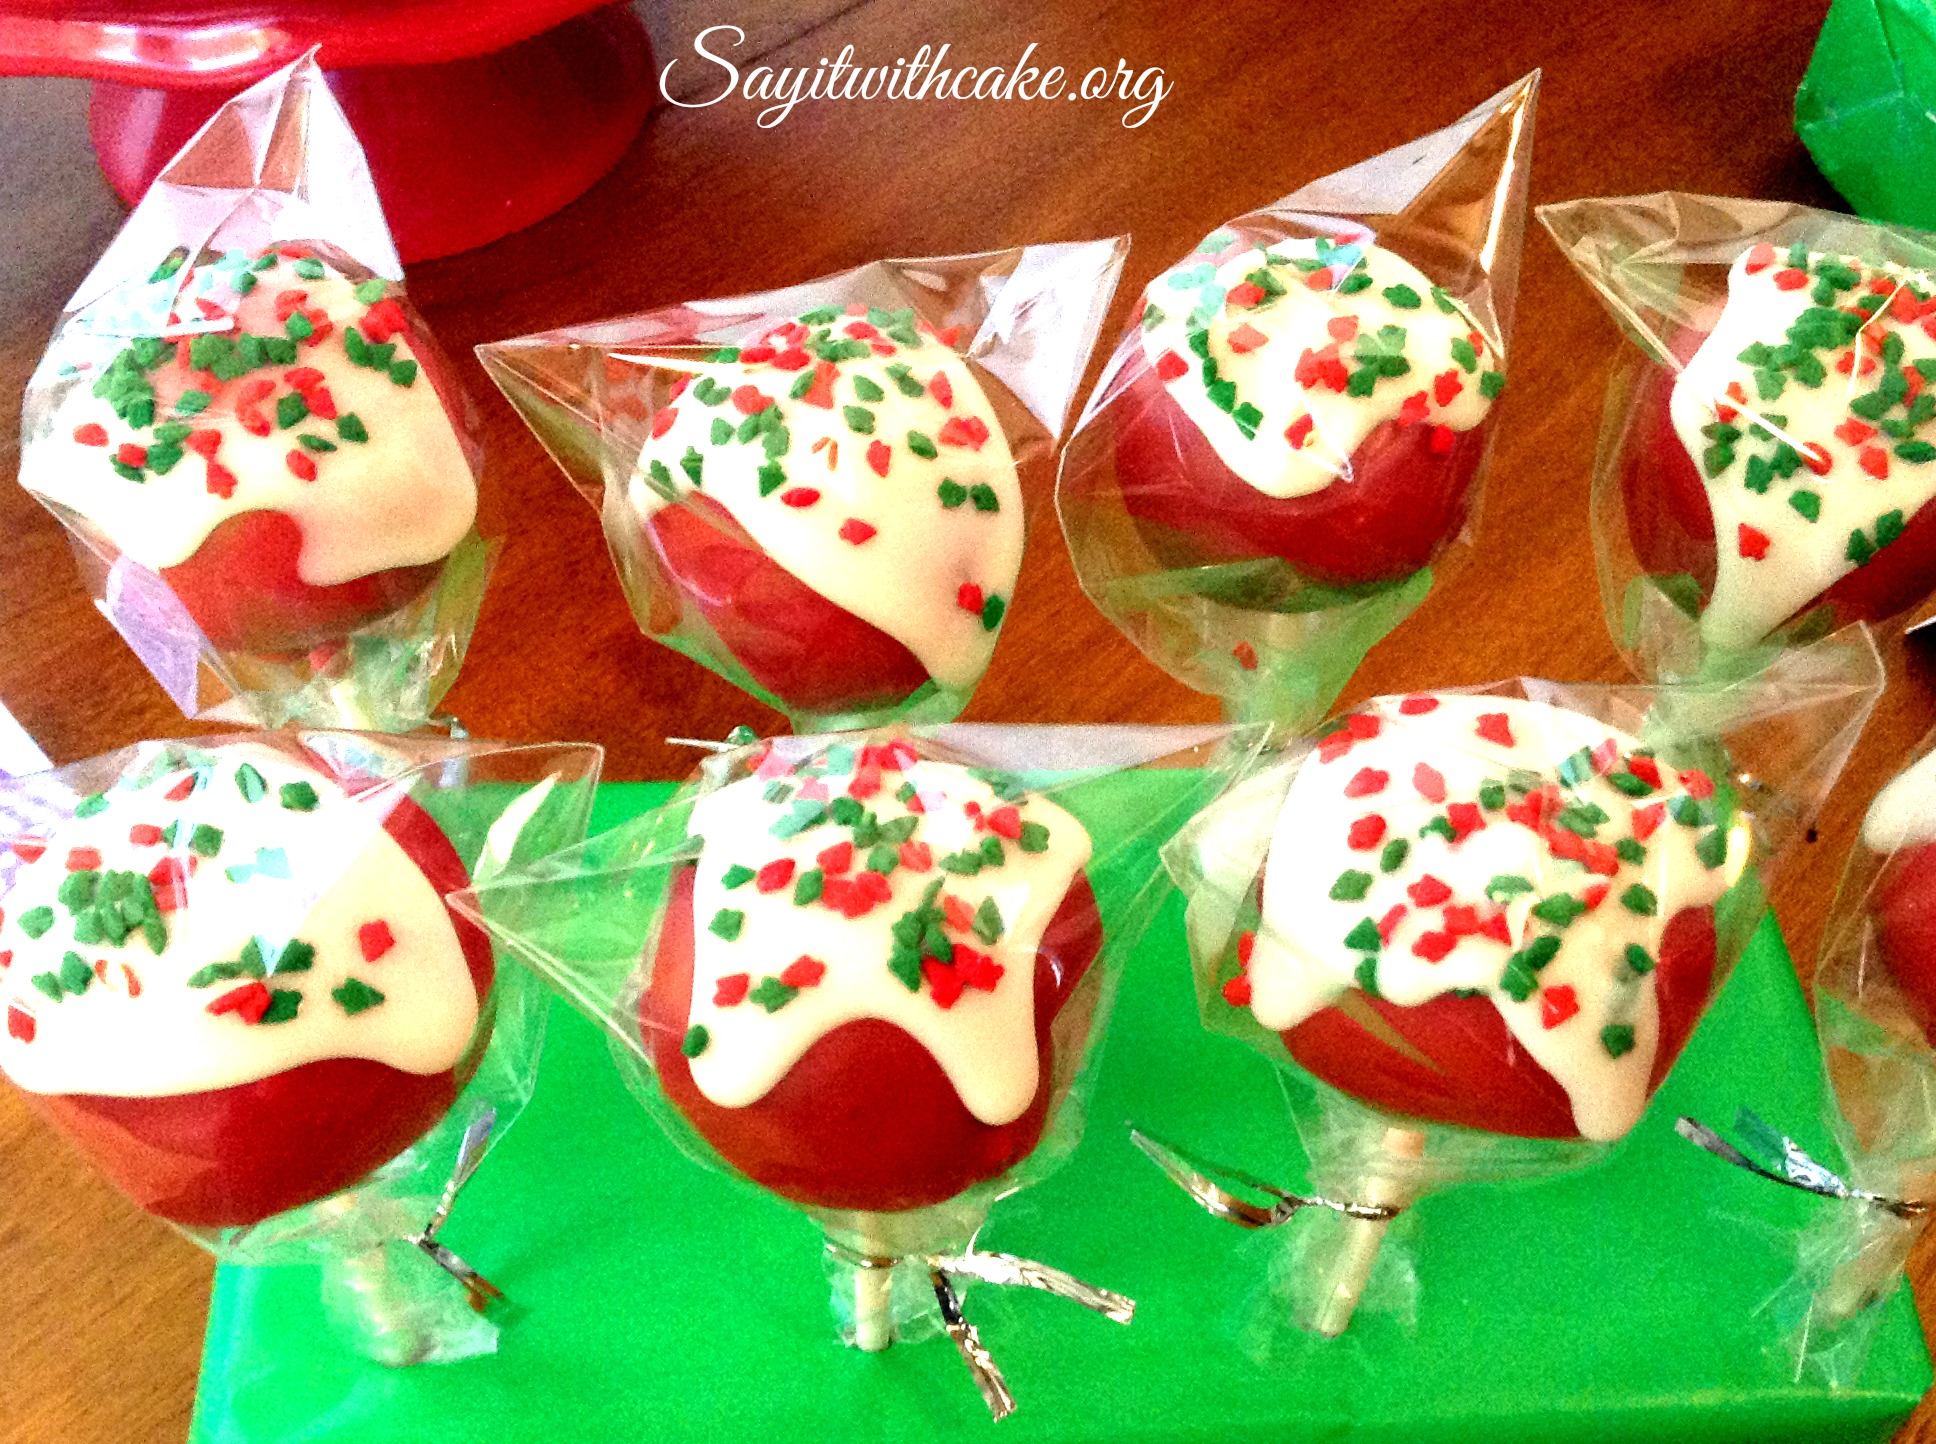
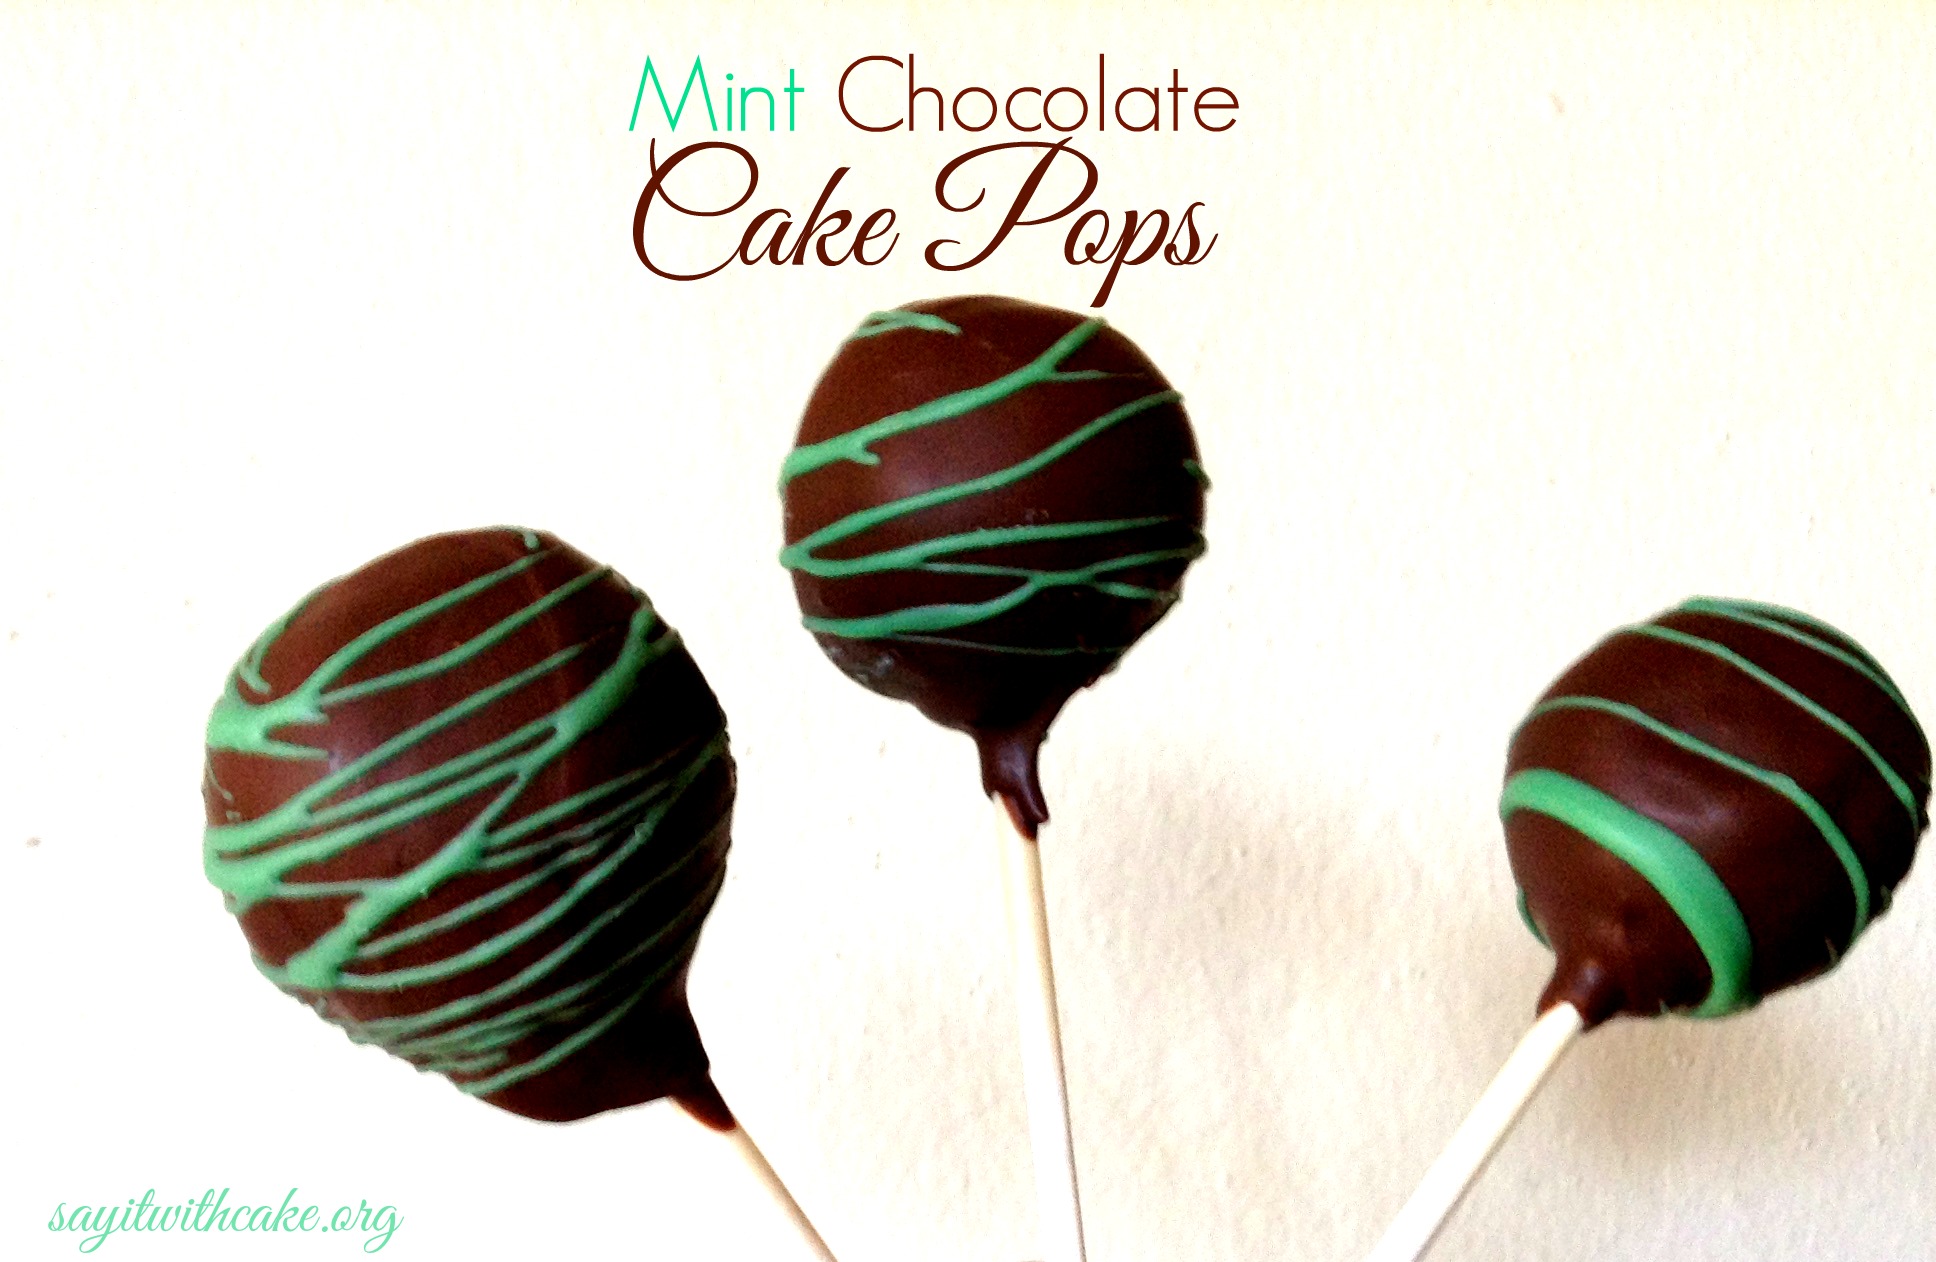
to make mint cake pops, add peppermint oil to candy coating.
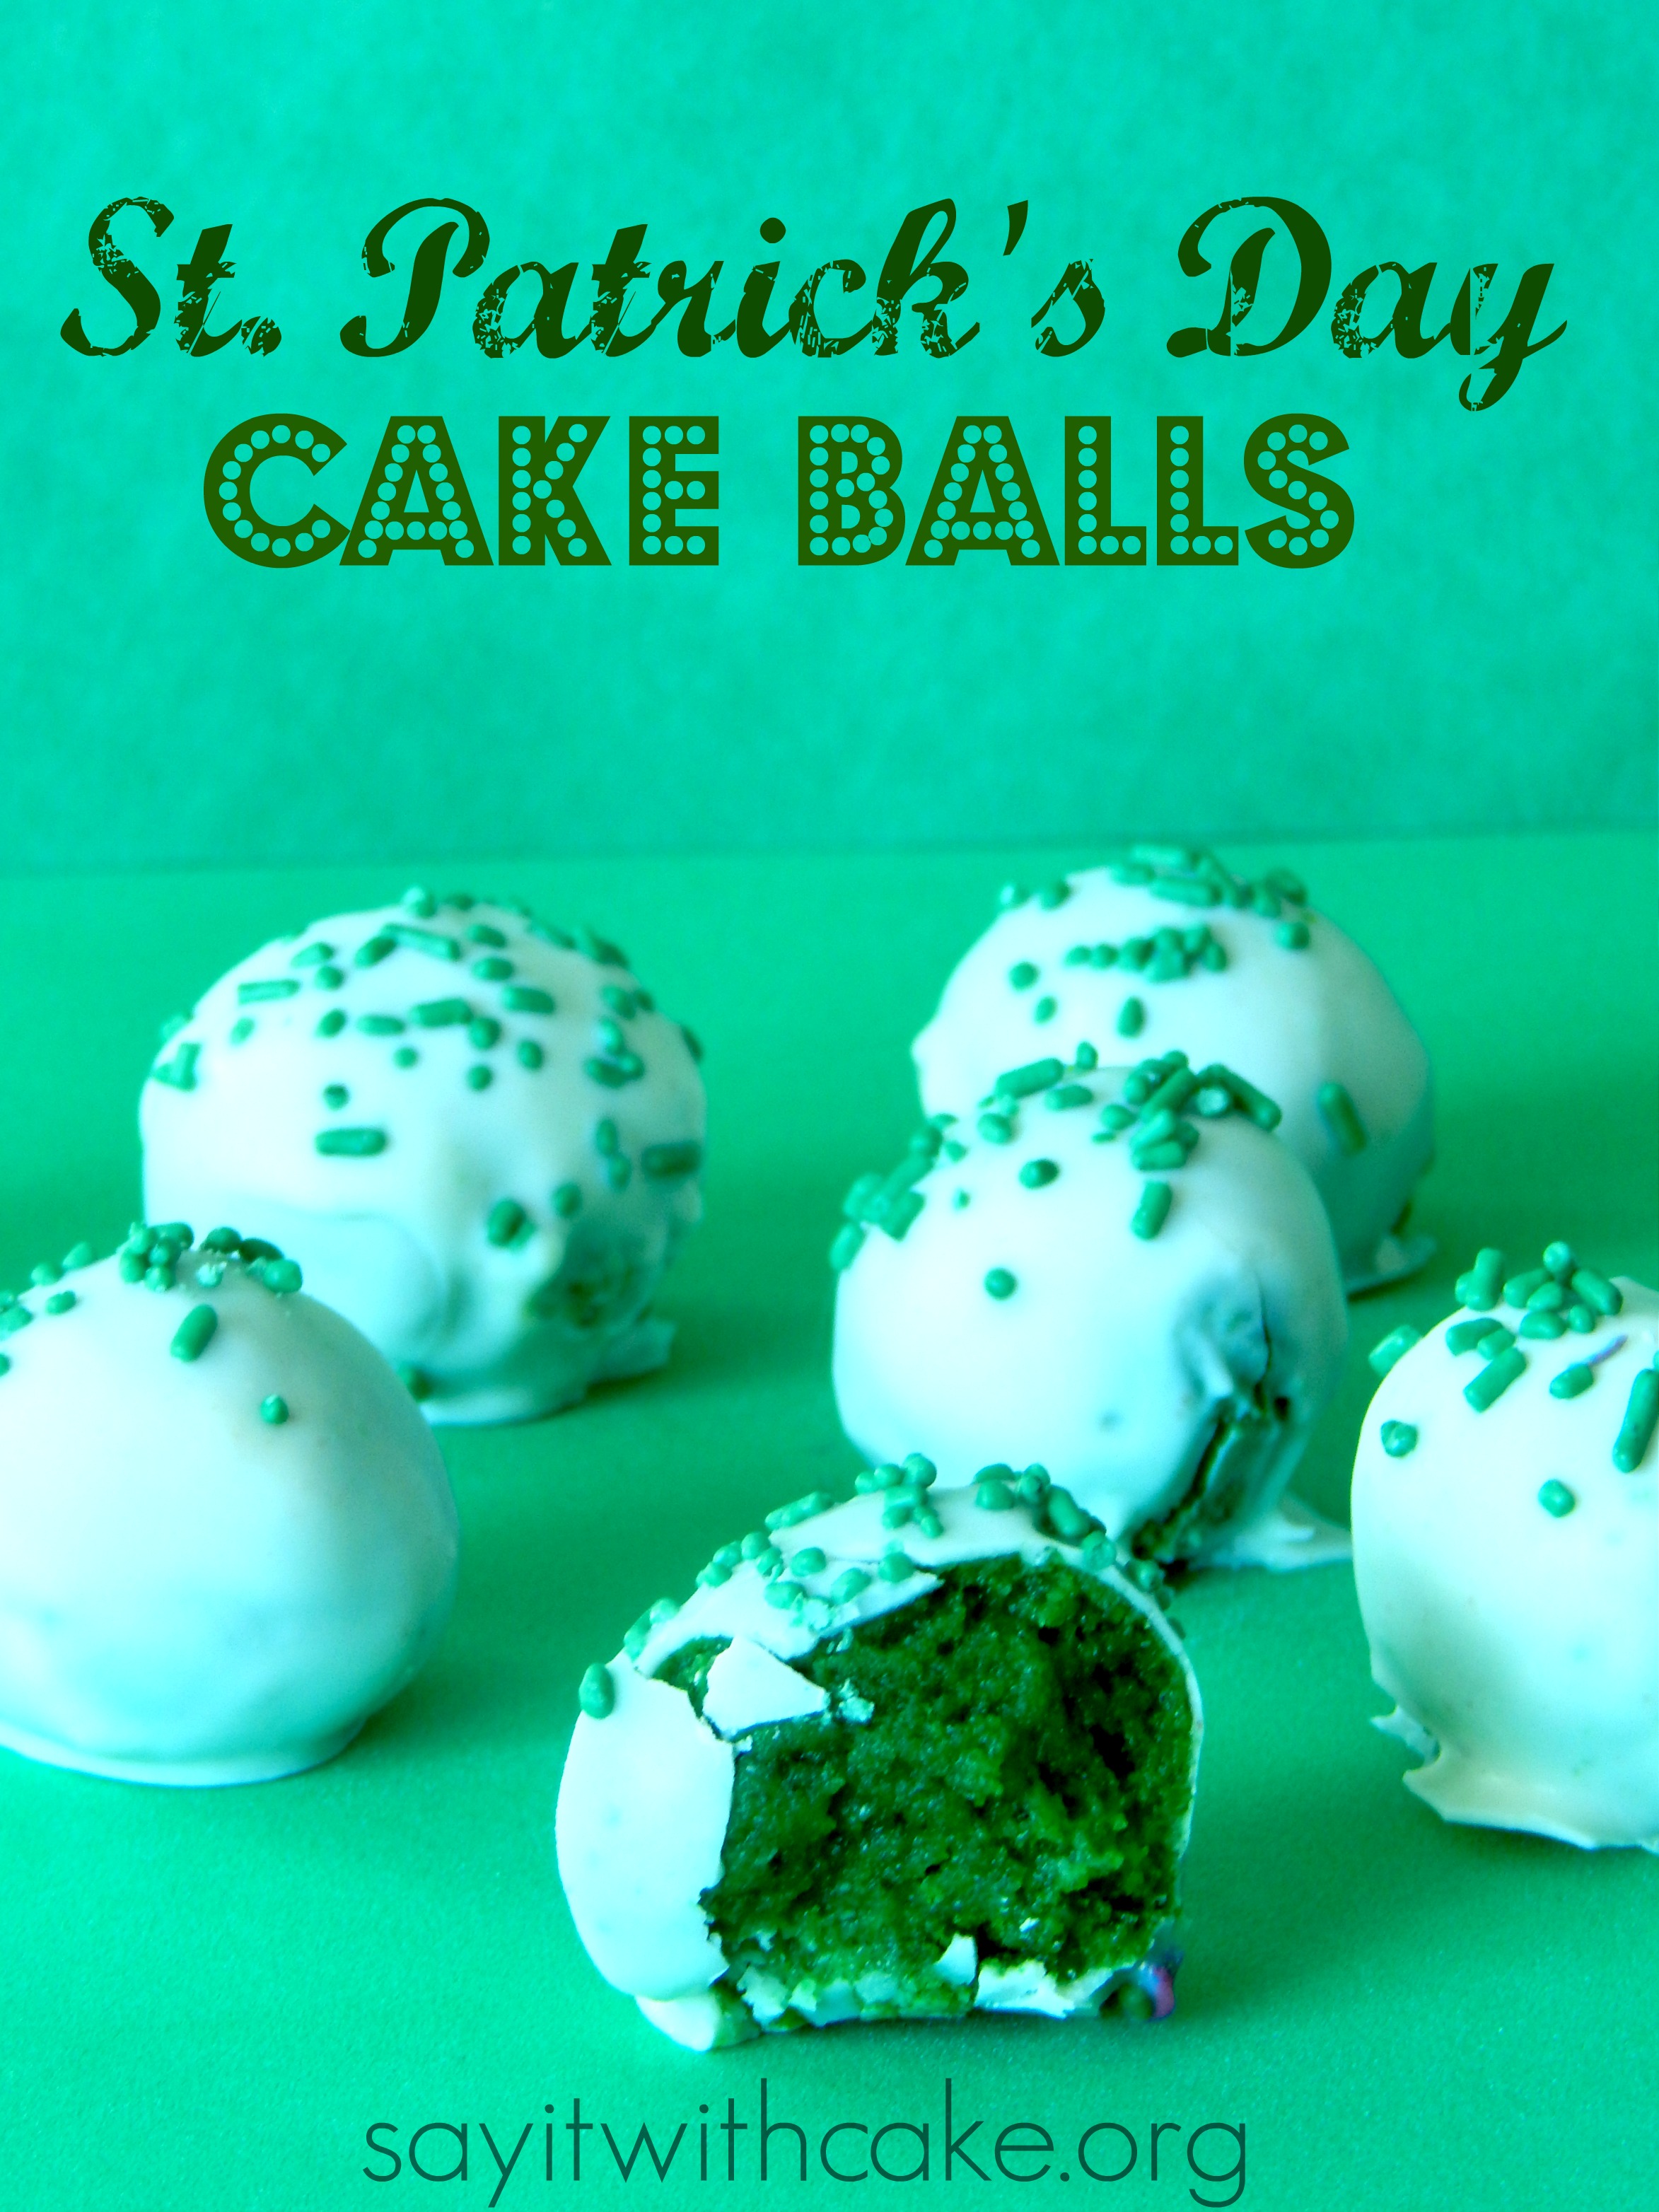
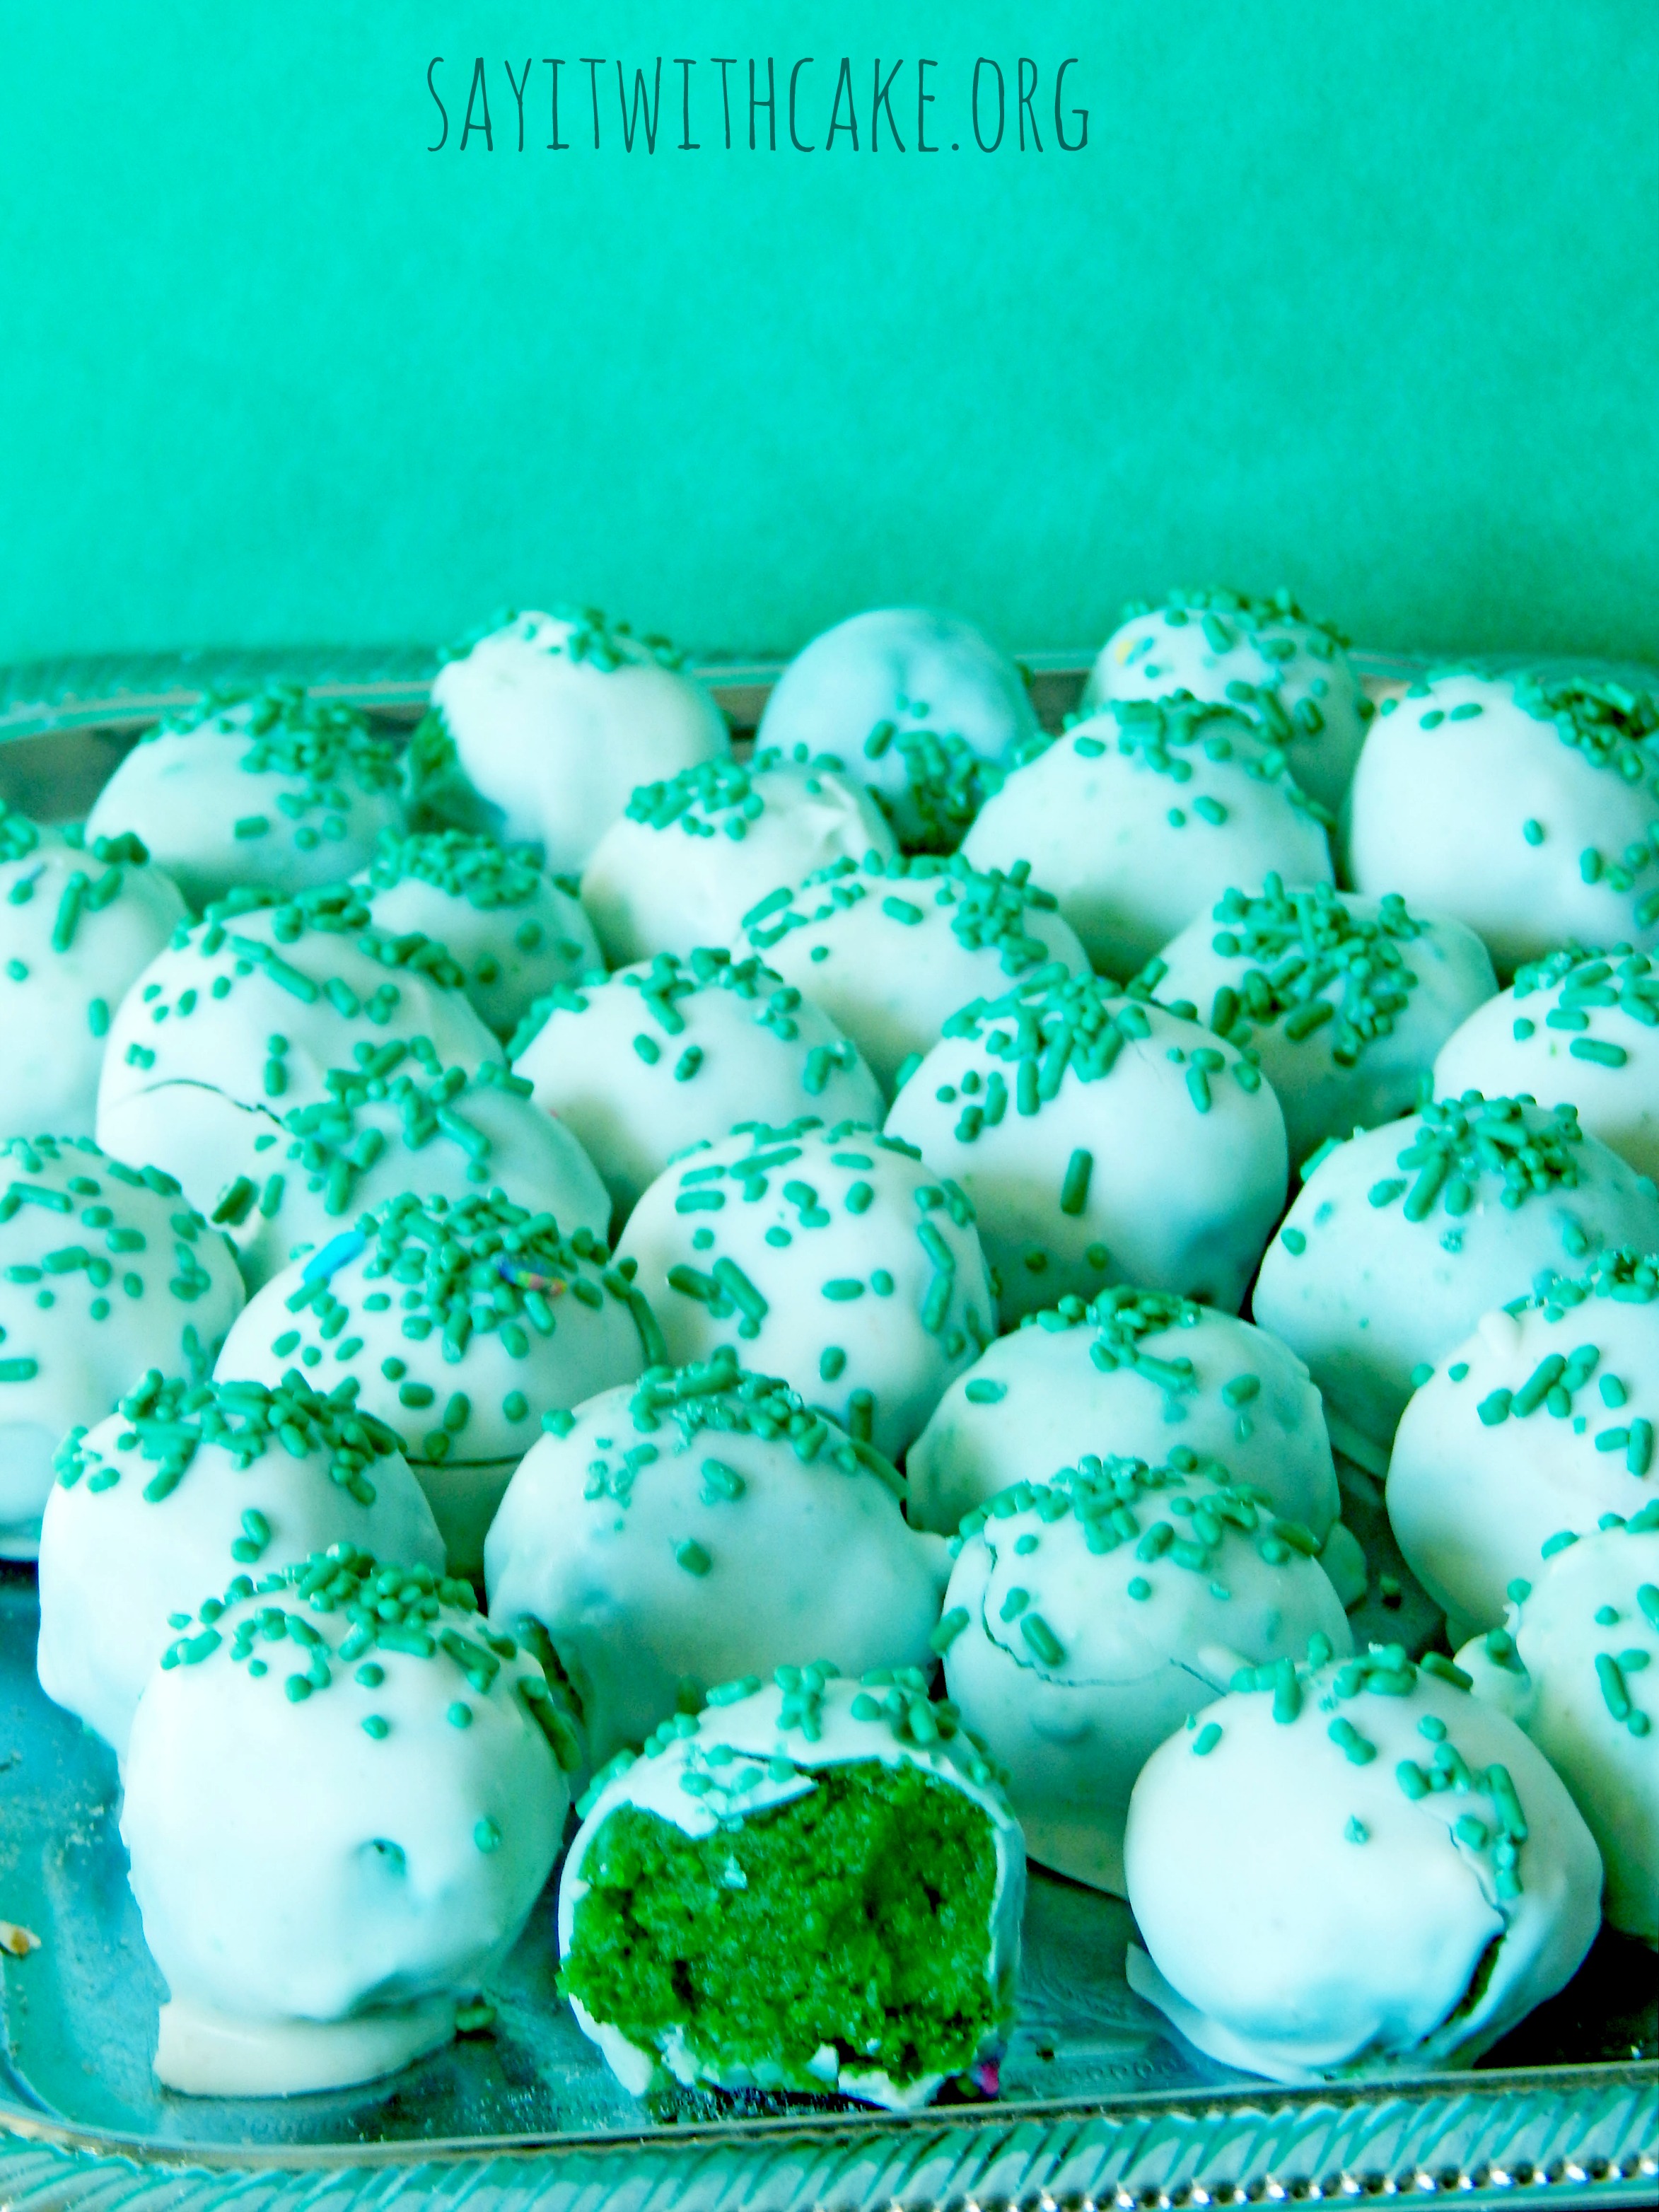
These cake balls are so easy to make and a delicious treat without having to eat a whole slice of cake! My son helped me by rolling out the balls and put on the sprinkles. They are easy enough for a three year old to help with!
2 tablespoons (1-ounce bottle) green food coloring
Instructions
Preheat the oven to 350 F. Spray two 9-inch round pans with nonstick spray and line each pan with a round of parchment paper (see *Tips). In a medium bowl, sift together the flour, cocoa powder and salt. In a large bowl, combine the oil and sugar together and beat with an electric mixer for 2 minutes. Add the eggs, one at a time, and the vanilla, and beat for an additional 2 minutes.
In a small bowl, combine the vinegar and baking soda and stir to dissolve. Add the vinegar to the bowl, along with the buttermilk and food coloring. Beat on medium-low speed for 1 minute, until blended. Add the dry ingredients and increase speed to medium-high, scraping down the sides of the bowl while mixing, for 2 additional minutes. Divide the batter evenly between the prepared pans. Bake 30 to 35 minutes, or until a toothpick inserted into the center comes out with a few moist crumbs attached. Let the cakes cool for 20 minutes. Run a knife along the edge of the pans, then invert the cakes onto a rack to cool completely.
]]>http://sayitwithcake.org/green-cake-balls/feed/14Mississippi Mud Pie
http://sayitwithcake.org/mississippi-mud-pie/
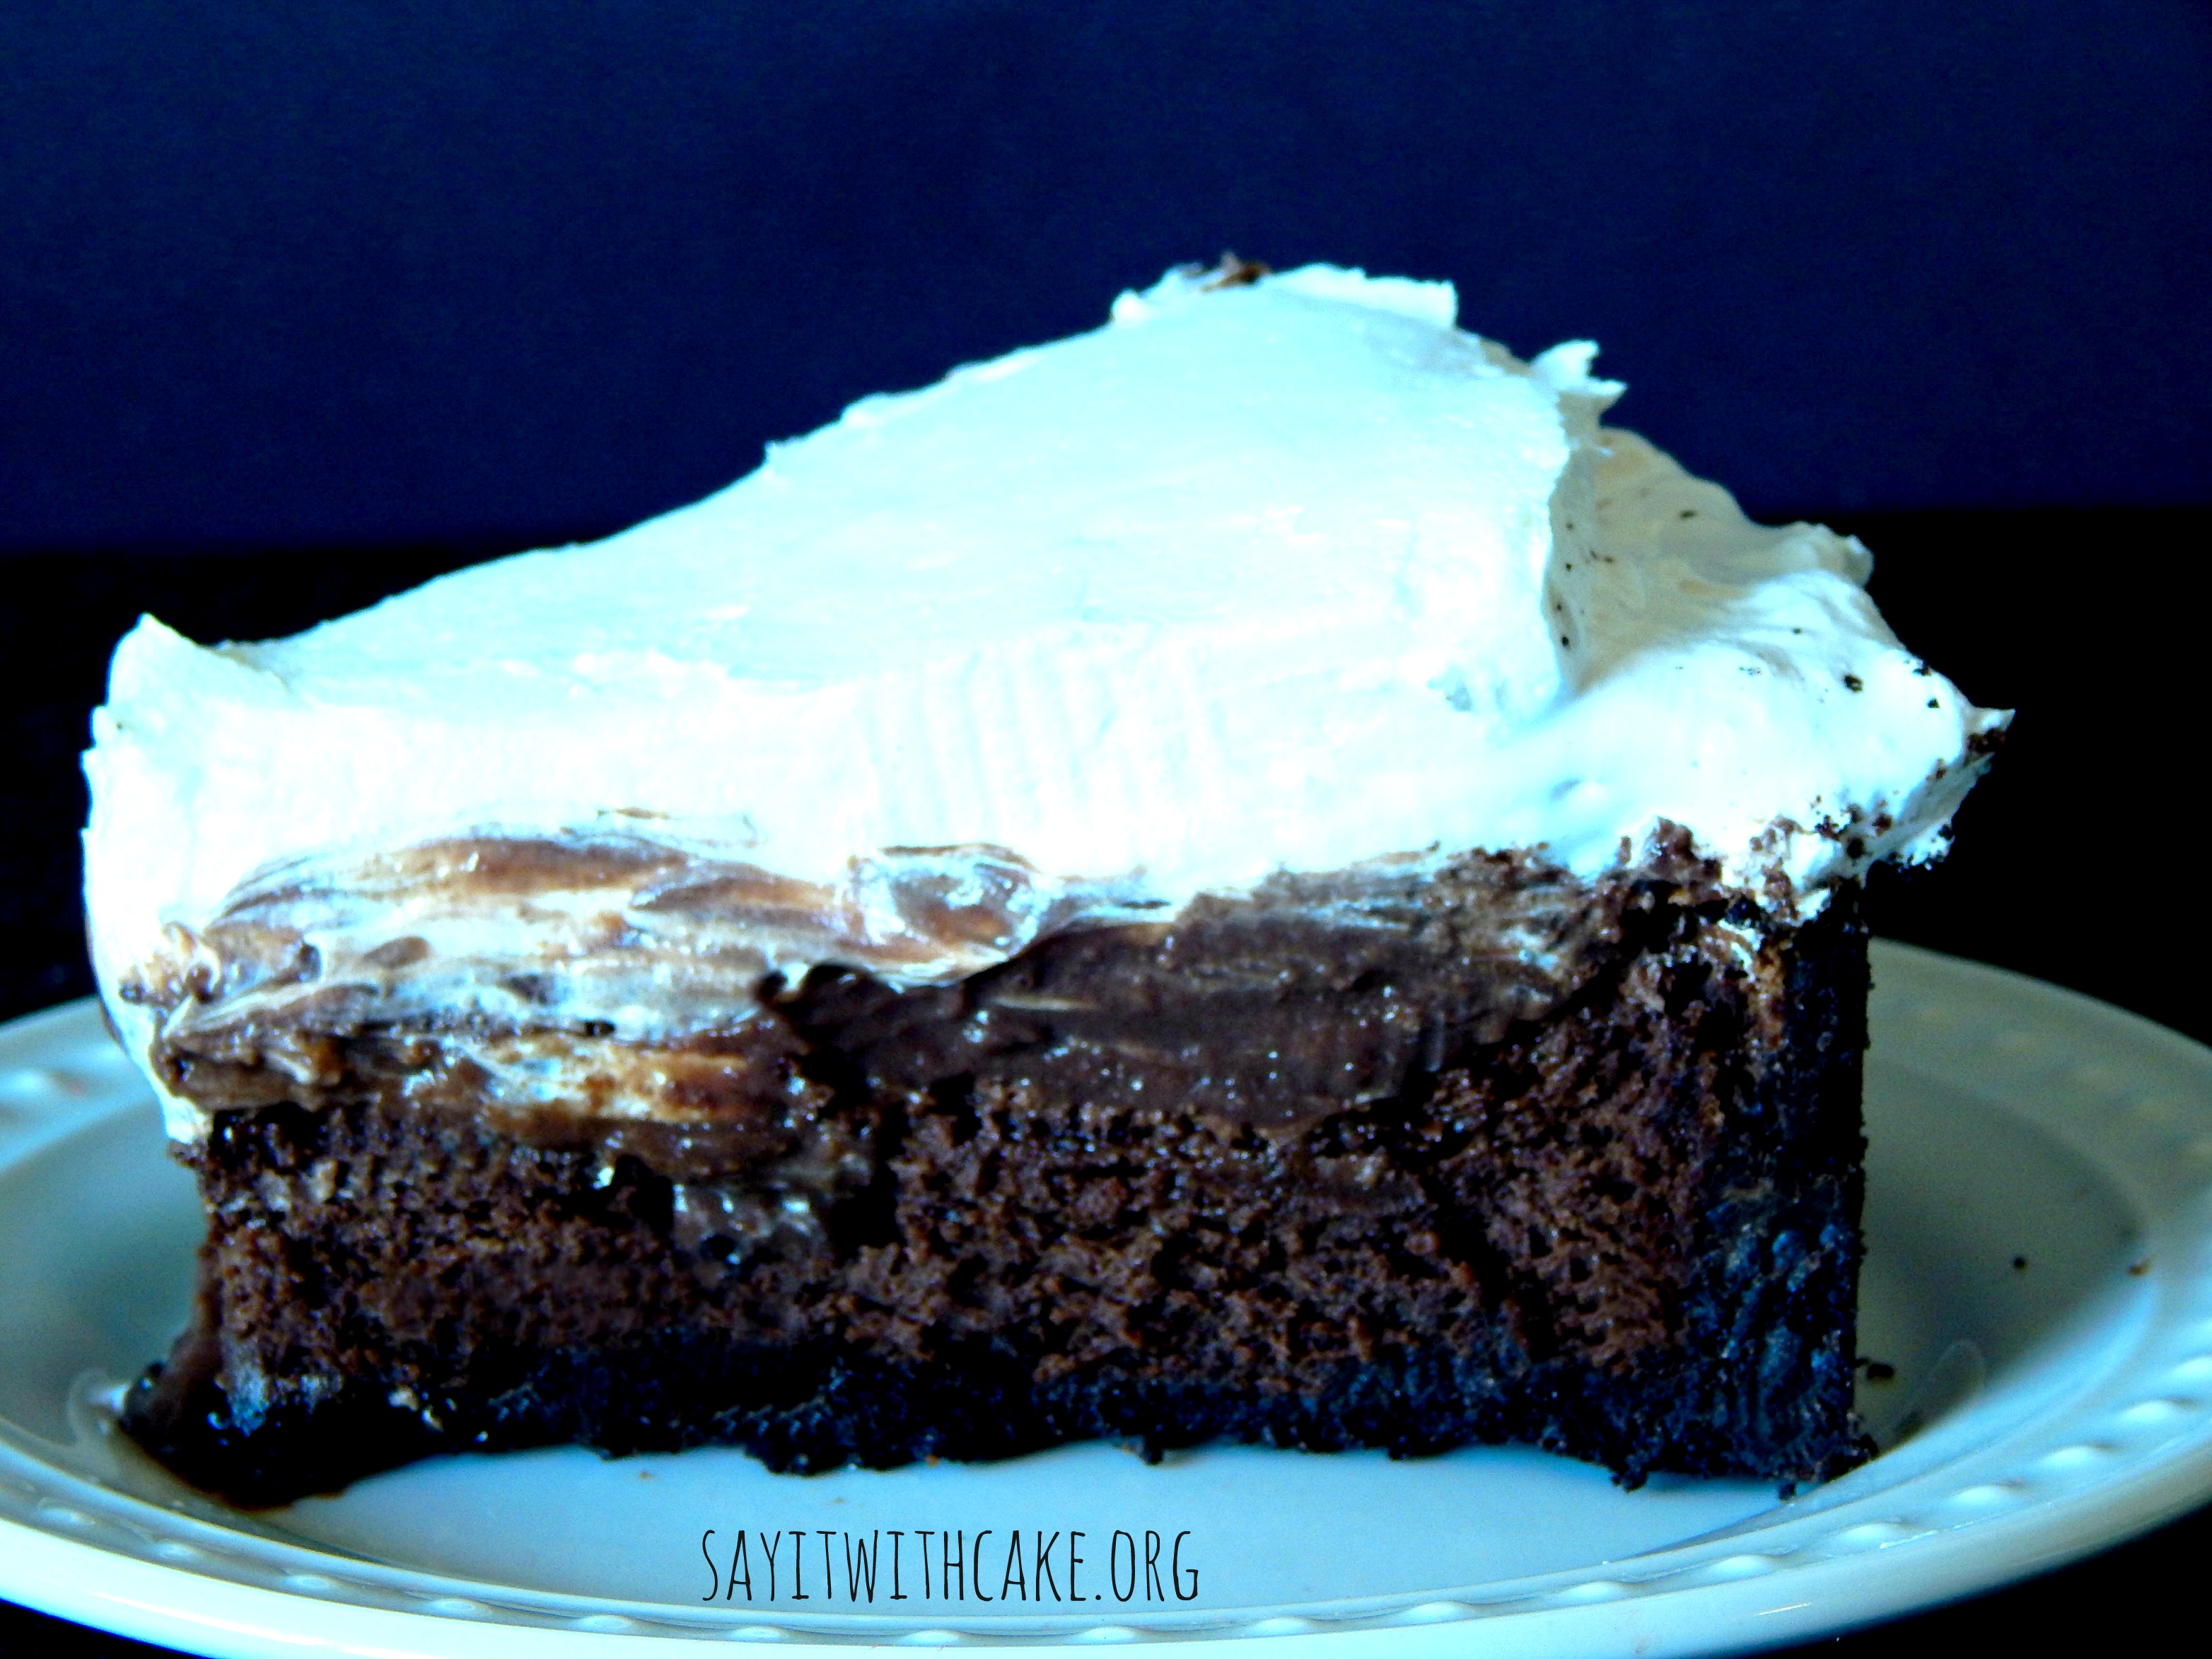
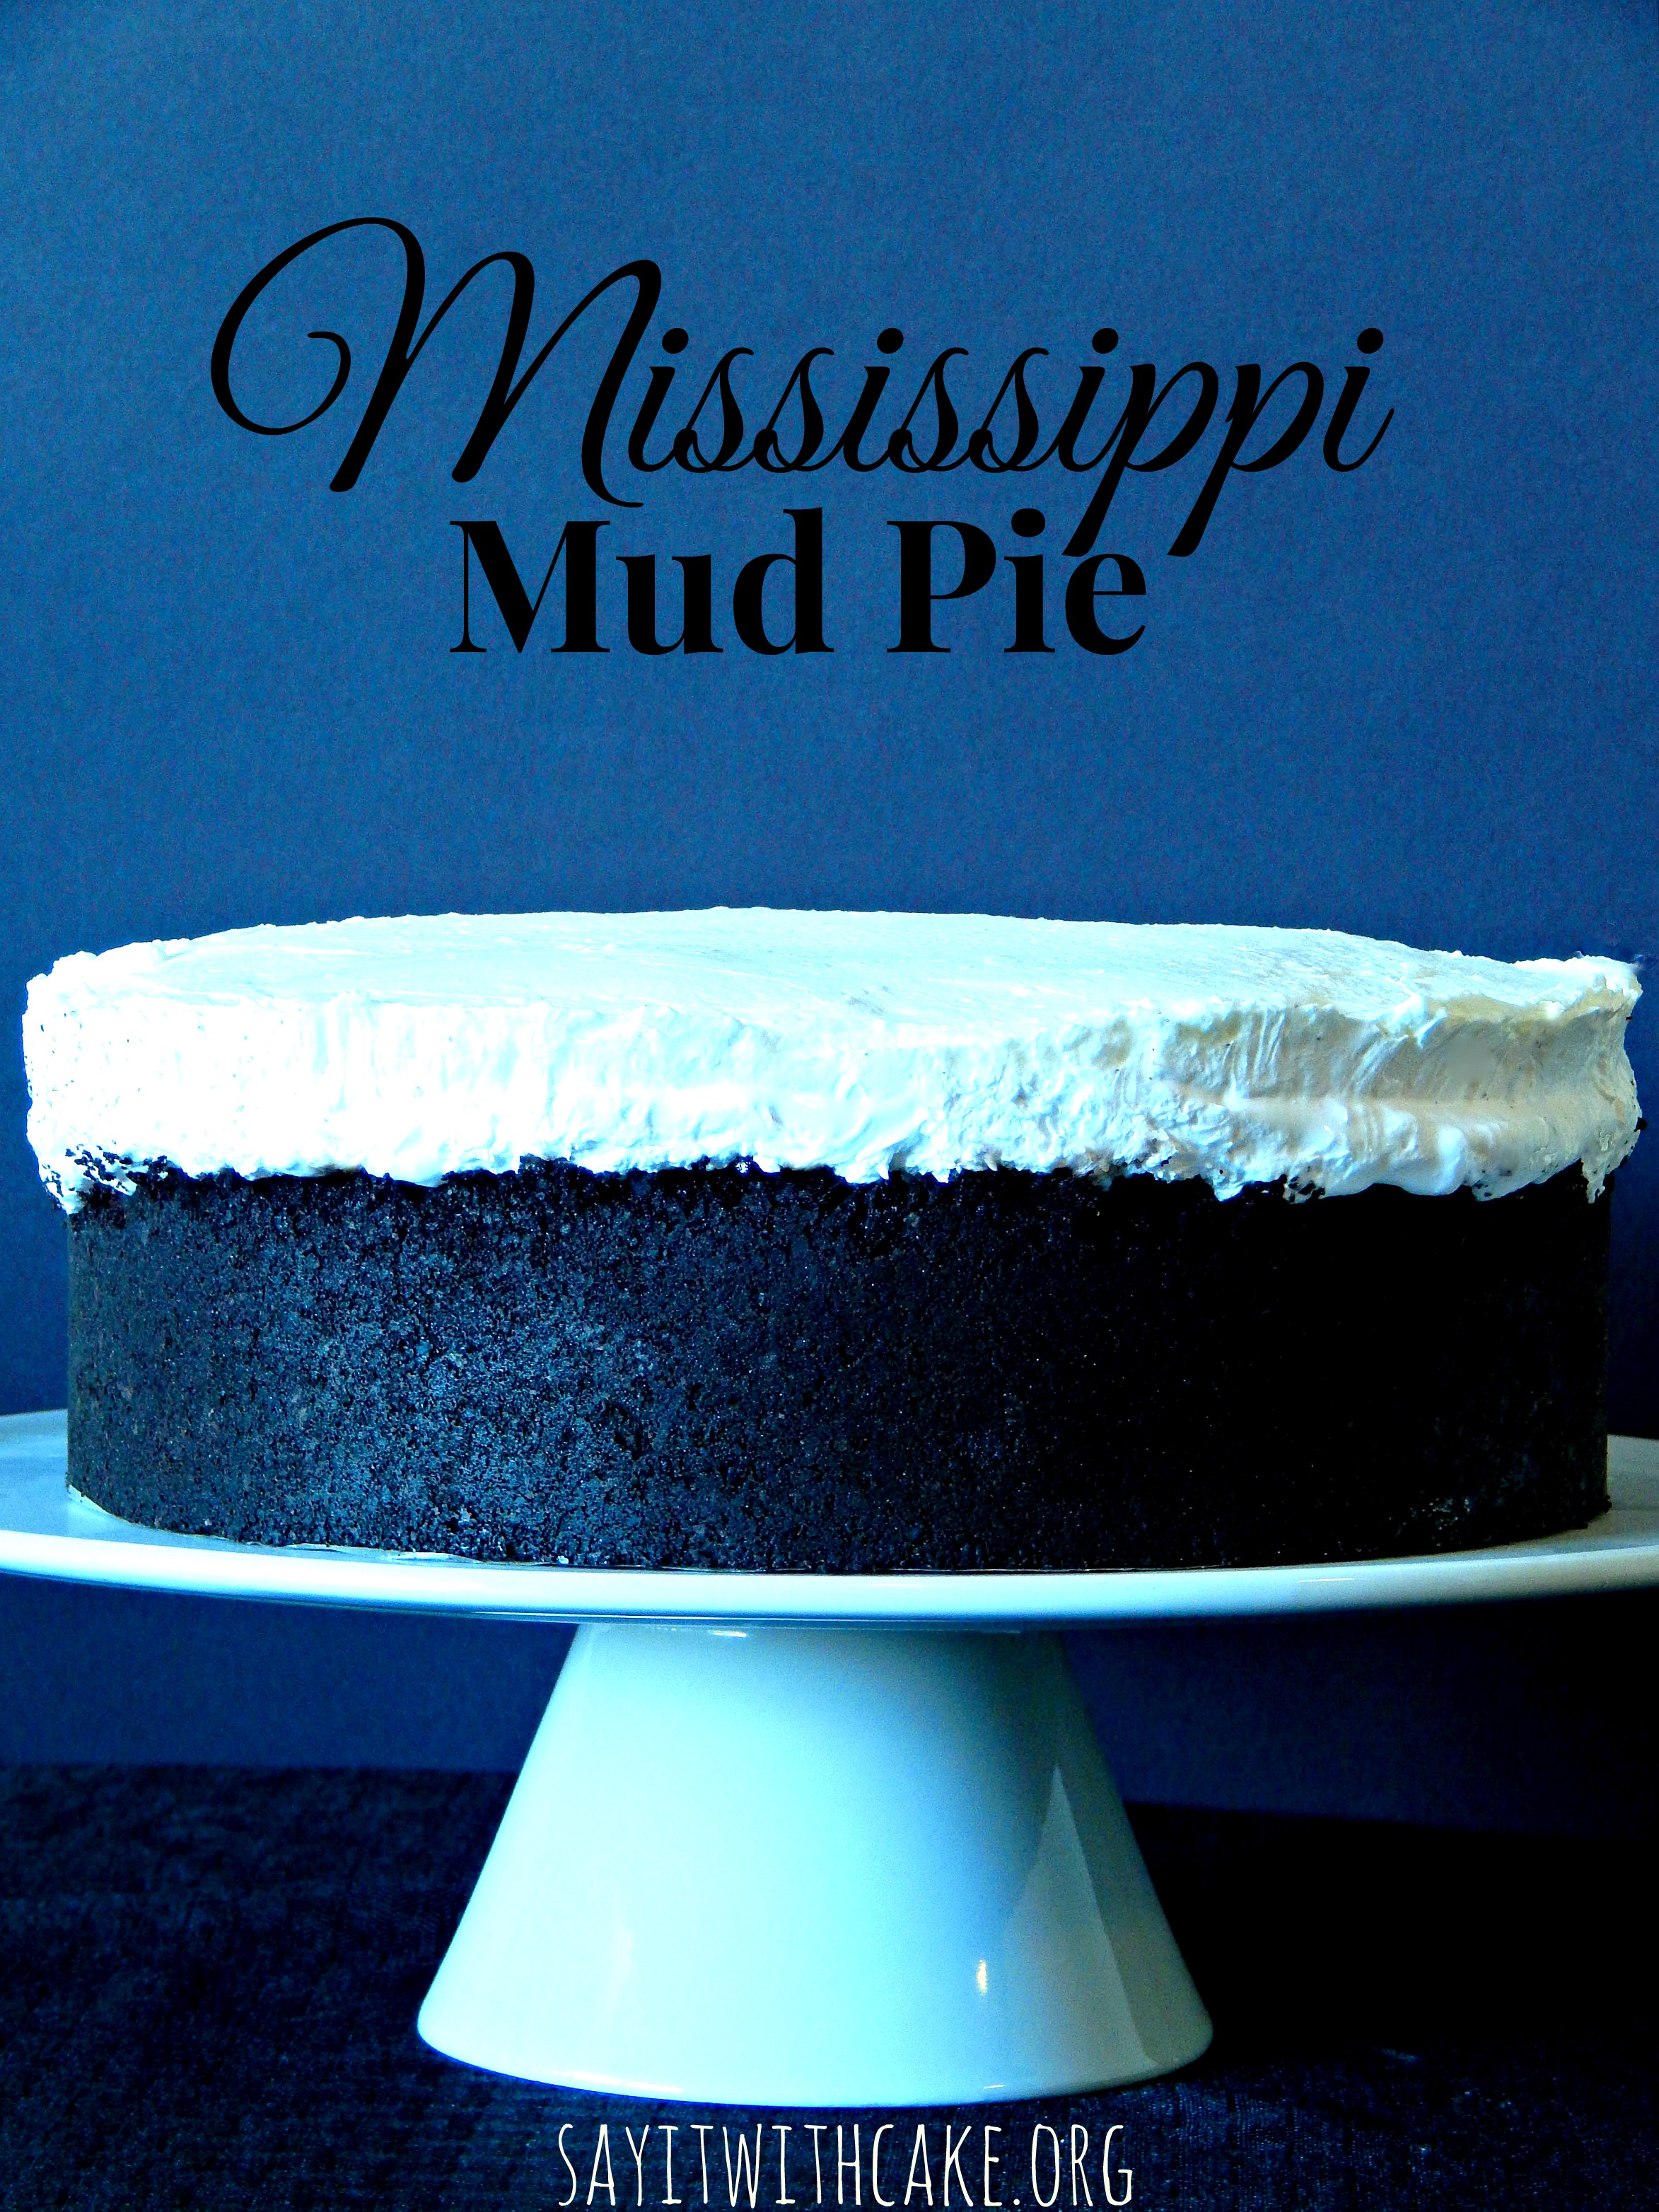
http://sayitwithcake.org/mississippi-mud-pie/#commentsMon, 06 Jan 2014 18:02:45 +0000http://sayitwithcake.org/?p=811Mississippi mud pie, can you just taste it? The crisp Oreo crust, the deliciously fudgy, flourless cake, layered with a thick and creamy, decadent chocolate pudding and topped with a fluffy, sweet whipped cream. If you’re looking for an extra special dessert to really impress your guests, I encourage you to try this Mississippi Mud Pie! For a chocolate lover like me it doesn’t get any better than this!
This was the first time I have every made a Mississippi Mud Pie. The recipe for Mississippi mud pie is long and intimidating, but was actually very easy! It just has a lot of steps and looks long but don”t be scared of it because if I can do it, anyone can! It tasted delicious, was probably the best dessert I have ever eaten! I only wish I had gotten a nicer slice, but at least you get to see the layers and how yummy it looks!
364 g (4 cups) Oreo cookie baking crumbs (or about 60 chocolate wafer cookies)
85 g (6 tablespoons) unsalted butter, melted
For Flourless Chocolate cake
226 g (8 ounces) good quality bittersweet, 60% or extra bittersweet, 70% chocolate, finely chopped
85 g (6 tablespoons) unsalted butter, cut into 12 equal pieces
30 ml (2 tablespoons) hot brewed espresso or strong coffee
6 g (2 tablespoons) instant espresso powder
6 g (1 tablespoon) unsweetened good quality cocoa powder
¼ teaspoon salt
60 ml (¼-cup) Frangelico (hazelnut liqueur)
15 ml (1 tablespoon) pure vanilla extract
6 large eggs, separated, room temperature
100 g (½ cup) golden yellow sugar (light brown sugar)
113 g (½ cup) caster (superfine) sugar
For Chocolate pudding
85 g (3 ounces) good-quality bittersweet, 60% or extra bittersweet, 70% dark chocolate, finely chopped
48 g (½ cup) unsweetened good-quality cocoa powder
32g (¼ cup) cornstarch
¼ teaspoon salt
170 g (¾ cup) caster (superfine) sugar
4 large egg yolks
600 ml (2½ cups) whole milk
42 g (3 tablespoons) unsalted butter, cut into 6 equal pieces
2 teaspoons pure vanilla extract
For Whipped Cream Topping
*Please note – To prevent cream topping from weeping I’ve added gelatin. This step is completely optional but I do recommend it if you’re not serving the pie immediately or within hours of preparing and also if the pie will not be consumed in one sitting.
360 ml (1½ cups) heavy (whipping) cream, 35%
56 g (¼ cup) caster (superfine) sugar
1 teaspoon unflavoured gelatin
Instructions
For Crust
Unlatch a springform pan, turn the base over (lip facing down) and line the base with a sheet of non-stick baking paper leaving a 2-inch border on all sides. Reassemble springform pan (lip must be facing down). Lightly spray the sides and baking paper with cooking spray.
If using baking crumbs, place baking crumbs in a small bowl. Add butter; stir until crumbs are evenly moistened.
If using chocolate wafer cookies, place wafer cookies in the bowl of a food processor. Pulse to a fine crumb. Add the butter through the feeding tube and process until crumbs are evenly moistened. (If you want the crust sweeter, add sugar to taste.)
Transfer crumbs to prepared springform pan. Press the crumbs evenly on the base and up the sides stopping about 6-mm (¼-inch) from the top of the pan. Chill in the freezer, 15 minutes.
Preheat oven to 180° C (350° F).
Transfer crust to oven and bake until dry to the touch, 8 to 10 minutes.
Remove from oven, transfer to wire rack and allow crust to cool completely.
For Flourless Chocolate Cake
Line rimmed baking sheet with non-stick baking paper. Place line baking sheet in oven and preheat oven to 180° C (350° F).
Place chocolate and butter in a large heatproof bowl set over a saucepan of just simmering water (make sure bottom of bowl doesn’t touch the water), stirring occasionally until melted and combined well. Set-aside to cool slightly.
Meanwhile, in 250-ml (1-cup) capacity liquid measuring cup, dissolve espresso powder, cocoa and salt in hot espresso (or strong coffee). Add Frangelico and vanilla; stir together until combined well.
In bowl of stand mixer fitted with whip attachment, beat together egg yolks and brown sugar at high speed until pale, fluffy and doubled in volume, scraping down sides and bottom of bowl, 5 to 7 minutes.
Remove bowl from mixer, add the chocolate mixture, and return bowl to mixer and beat at medium speed until just combined, scraping down sides and bottom of bowl.
Add the coffee mixture; beat at medium speed until just combined, scraping down sides and bottom of bowl.
In large bowl, using electric hand mixer, beginning on low speed and gradually increasing speed to high, beat egg whites until foamy.
Gradually add the sugar and beat until soft peaks form.
Using large, flexible spatula gently fold one-third of the egg whites into the chocolate batter to lighten the mixture, 30 seconds. Gently fold in the remaining egg whites until almost combined, do not over-mix.
Pour the batter into the cooled crust. Transfer to the oven placing the springform pan on the rimmed baking sheet.
Bake until cake is set but still slightly jiggles in the centre, about 40 minutes. (Cake may not appear cooked.)
Remove from oven; remove springform pan from baking sheet and transfer to wire rack. Let cool completely. Cake will deflate in the centre as it cools.
Tightly wrap cooled cake (in springform pan) with plastic wrap and refrigerate at least 3 hours or up to overnight.
For chocolate pudding
Place chocolate in a medium bowl.
Using fine mesh sieve, sift cocoa, cornstarch and salt into a medium saucepan. Add sugar and whisk together until combined well. Add the egg yolks and whisk until blended well.
Gradually pour the milk into the cocoa mixture, whisking constantly.
Place the saucepan over medium heat and bring the mixture to a boil, whisking constantly. Boil for 30 seconds and remove from heat. Using fine mesh sieve, strain the chocolate mixture over top of the finely chopped chocolate. Whisk to blend well.
Add the butter and vanilla; whisk until well combined.
Place a sheet of plastic wrap directly on the surface of the pudding to prevent a skin from forming as it cools. Let cool at room temperature, 15 minutes. Cover bowl with plastic wrap (make sure to leave the sheet of plastic on the surface) and refrigerate until chill, at least 3 hours.
Remove pudding from refrigerator; remove plastic and using large, flexible spatula stir pudding to loosen. Remove cake from refrigerator.
Pour the pudding on top of the cake (making sure to stay within the cookie crust). Level and spread pudding evenly to edges of crust using large, offset spatula. Transfer to refrigerator and chill, 2 to 3 hours.
For whipped cream topping
Chill stand mixer bowl and whip attachment (or large bowl and beaters or large balloon whisk) in the freezer, 15 minutes.
In a small saucepan, sprinkle gelatin over 2 tablespoons very cold water; let soften, 5 minutes.
Place saucepan over low heat; stir until gelatin is dissolved. Remove from heat and set-aside to cool.
Remove bowl and attachment from freezer and attach to mixer. Pour cream and sugar into the bowl and beat at medium speed until soft peaks form, about 1 minute. Pour the gelatin through a small sieve onto the cream and continue to beat at medium speed until stiff peaks form.
Remove cake from the refrigerator. Spread topping evenly to the edges of the pan using large, offset spatula.
Unlatch springform pan and with the help of a large, offset spatula carefully slide cake off the baking paper onto a cake stand or plate.
Serve immediately. If not serving immediately, cake can be stored, covered in the refrigerator, up to 2 days.
 I love to bake and am often asked to brink desserts to family and friends functions. I was asked to brink cupcakes for my friends birthday and I wanted to somehow make them extra special. I decided to try these dark chocolate cupcakes filled with Bavarian cream, and also raspberry filling. I couldn’t decide which filling would be best so I tried out both on my family. I will let you know which one was the winner! I frosted these cupcakes with Raspberry Swiss Meringue buttercream, a chocolate glaze, and a fresh raspberry garnish.


 Assembly of the Dark Chocolate & Raspberry Cupcakes:


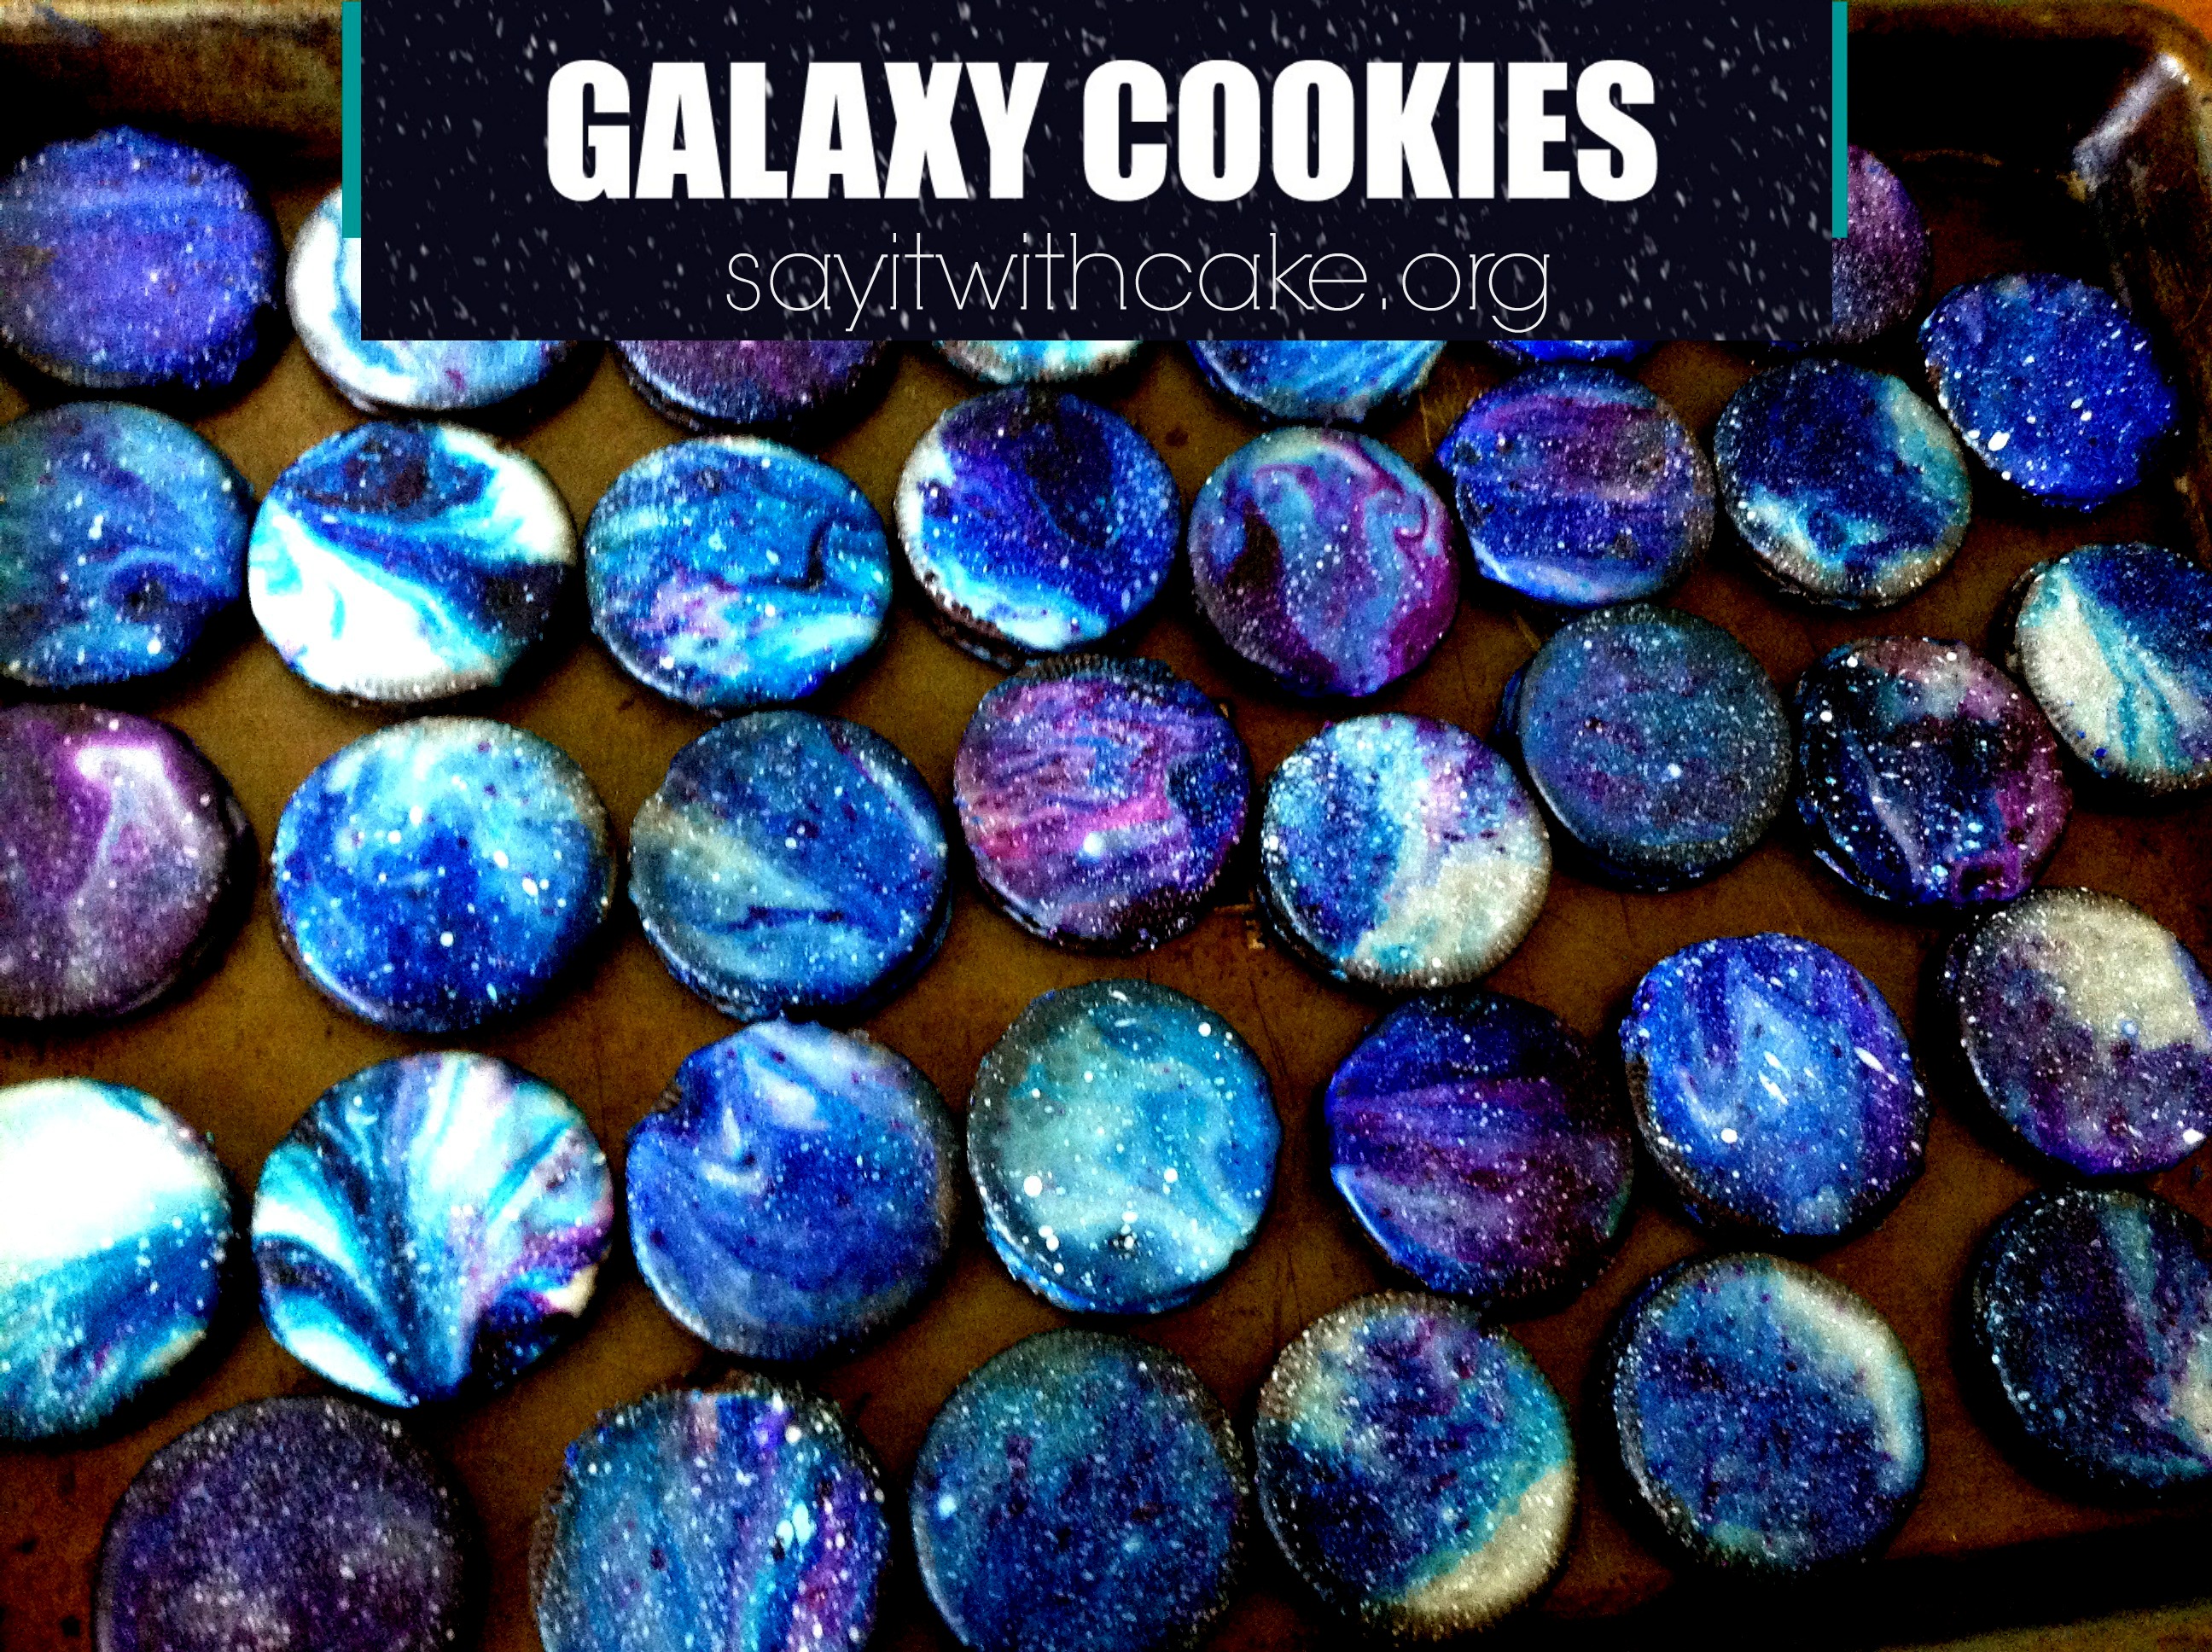 I am a Cub Scouts leader, and tonight is our Space Derby! I was in charge of refreshments, so I came up with these Galaxy cookies. I think they go along great with the space theme of the night! They are easy and really fun to make! The glaze only takes two ingredients, a definite plus!


 I hope you have a chance to make these soon!
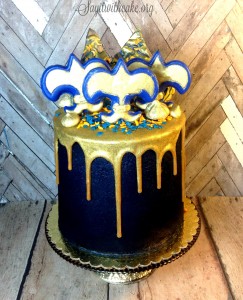
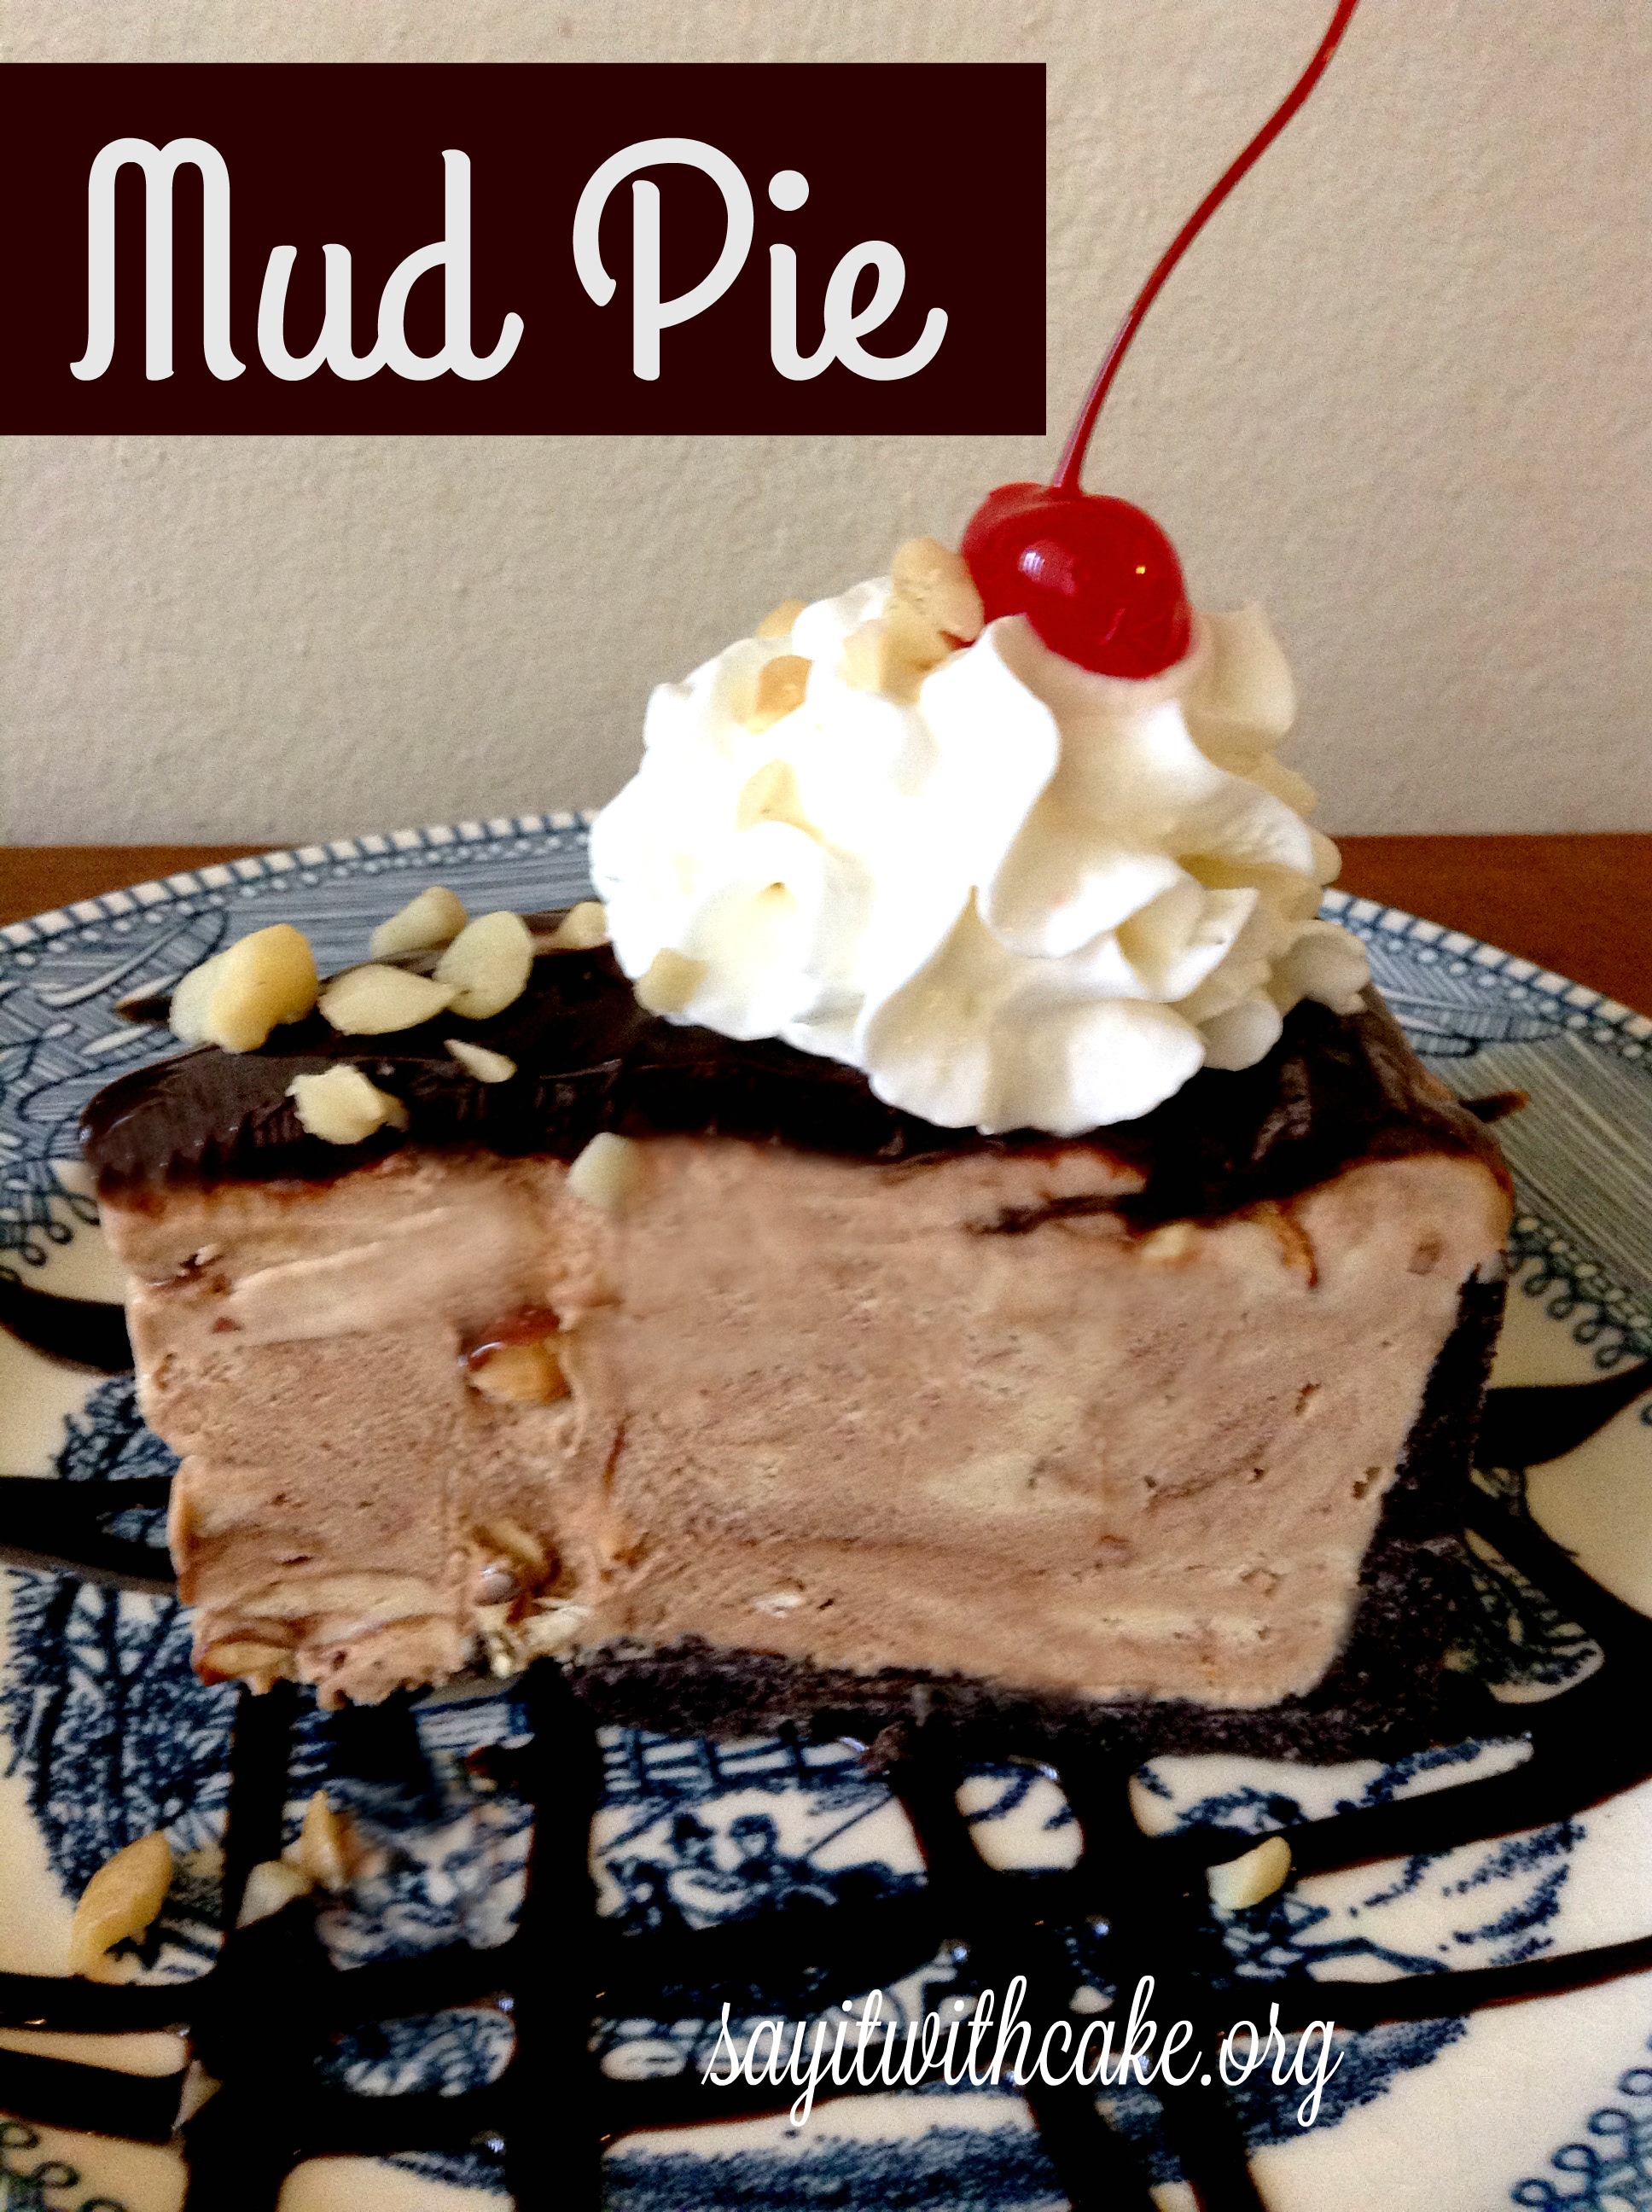 This delicious mud pie is a new and improved recipe based on my Kona Pie recipe HERE. I used a different ice cream called Mocha almond fudge. I also covered the pie in fudge instead of covered with whipped cream. I put a swirl of whipped cream on each piece instead. The result is a chocolatey mocha yumminess!

 An entremets is in modern French cuisine a small dish served between courses or simply a dessert. Originally it was an elaborate form of entertainment dish common among the nobility and upper middle class in Europe during the later part of the Middle Ages and the early modern period. An entremet marked the end of a serving of courses and could be anything from a simple frumenty (a type of wheat porridge) that was brightly colored and flavored with exotic and expensive spices to elaborate models of castles complete with wine fountains, musicians, and food modeled into allegorical scenes.
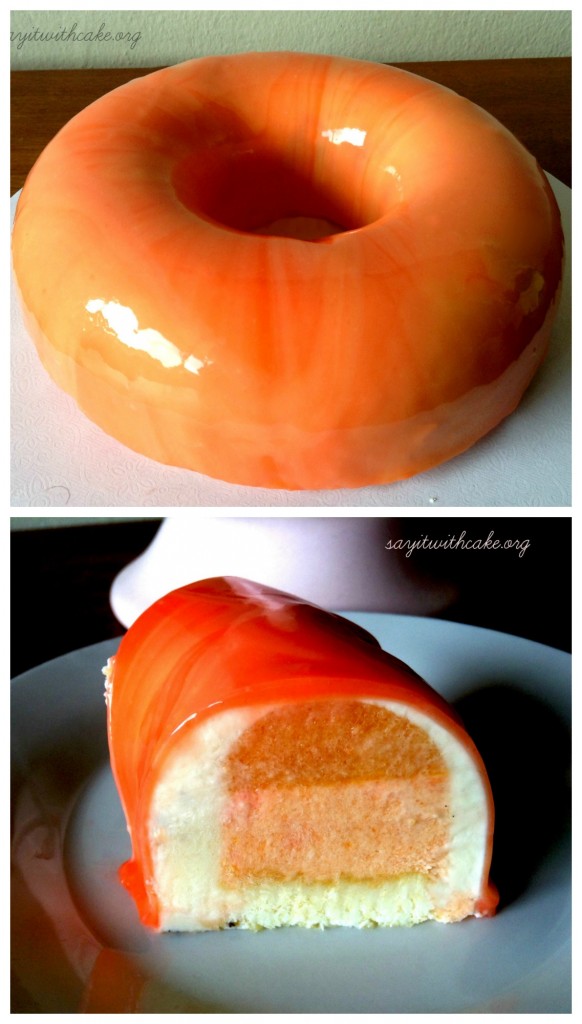

Special Equipment you will need
recipe by Chef Iso


 These St. Patrick’s Day Chocolate Covered Strawberries are so easy to make and are very beautiful! They are perfect for a St. Paddy’s Day treat!
![cakepops-1024x768[1]](https://sayitwithcake.org/wp-content/uploads/2016/02/cakepops-1024x7681-300x225.jpg)
![green8-682x1024[1]](https://sayitwithcake.org/wp-content/uploads/2016/02/green8-682x10241-200x300.jpg)
![green12-613x1024[1]](https://sayitwithcake.org/wp-content/uploads/2016/02/green12-613x10241-180x300.jpg)
 On my last trip to Hawaii, my family and I went to Kona and ate at Big Island Grill. The food was delicious, but what I loved the most was the “Kona Pie”. Kona Pie is rich creamy mocha almond fudge ice cream piled high on an Oreo cookie crust, topped with fresh homemade whipped cream, hot fudge, and macadamia nuts! Yum! We went back several times to this restaurant just for the Kona Pie! Since I have been home, my husband and I have had cravings for Kona Pie many times. I knew this would have to be my next dessert for my blog. Since there is no recipe from the Big Island Grill, I made my own. It is super easy with only 3 ingredients! I hope you like it as much as I do!

 Tiramisu is a popular coffee-flavored Italian dessert. It is made of ladyfingers dipped in coffee, layered with a whipped mixture of eggs, sugar, and mascarpone cheese, flavored with cocoa. I first had this delicious dessert at my friend Mike’s Italian restaurant. I always want to order it every time I go, but sometimes they run out of the Tiramisu. I decided I needed to learn how to make it myself!
 This post is for my sister Katy! She loves cake pops and recently told me she was looking through my blog for directions on how to make cake pops, but I only had the recipe not the steps! So Katy, this is for you and all other cake pop lovers who want simple step by step directions on how to make cake pops! I will also include tips for the most common cake pop making troubles!

 Mississippi mud pie, can you just taste it? The crisp Oreo crust, the deliciously fudgy, flourless cake, layered with a thick and creamy, decadent chocolate pudding and topped with a fluffy, sweet whipped cream. If you’re looking for an extra special dessert to really impress your guests, I encourage you to try this Mississippi Mud Pie! For a chocolate lover like me it doesn’t get any better than this!