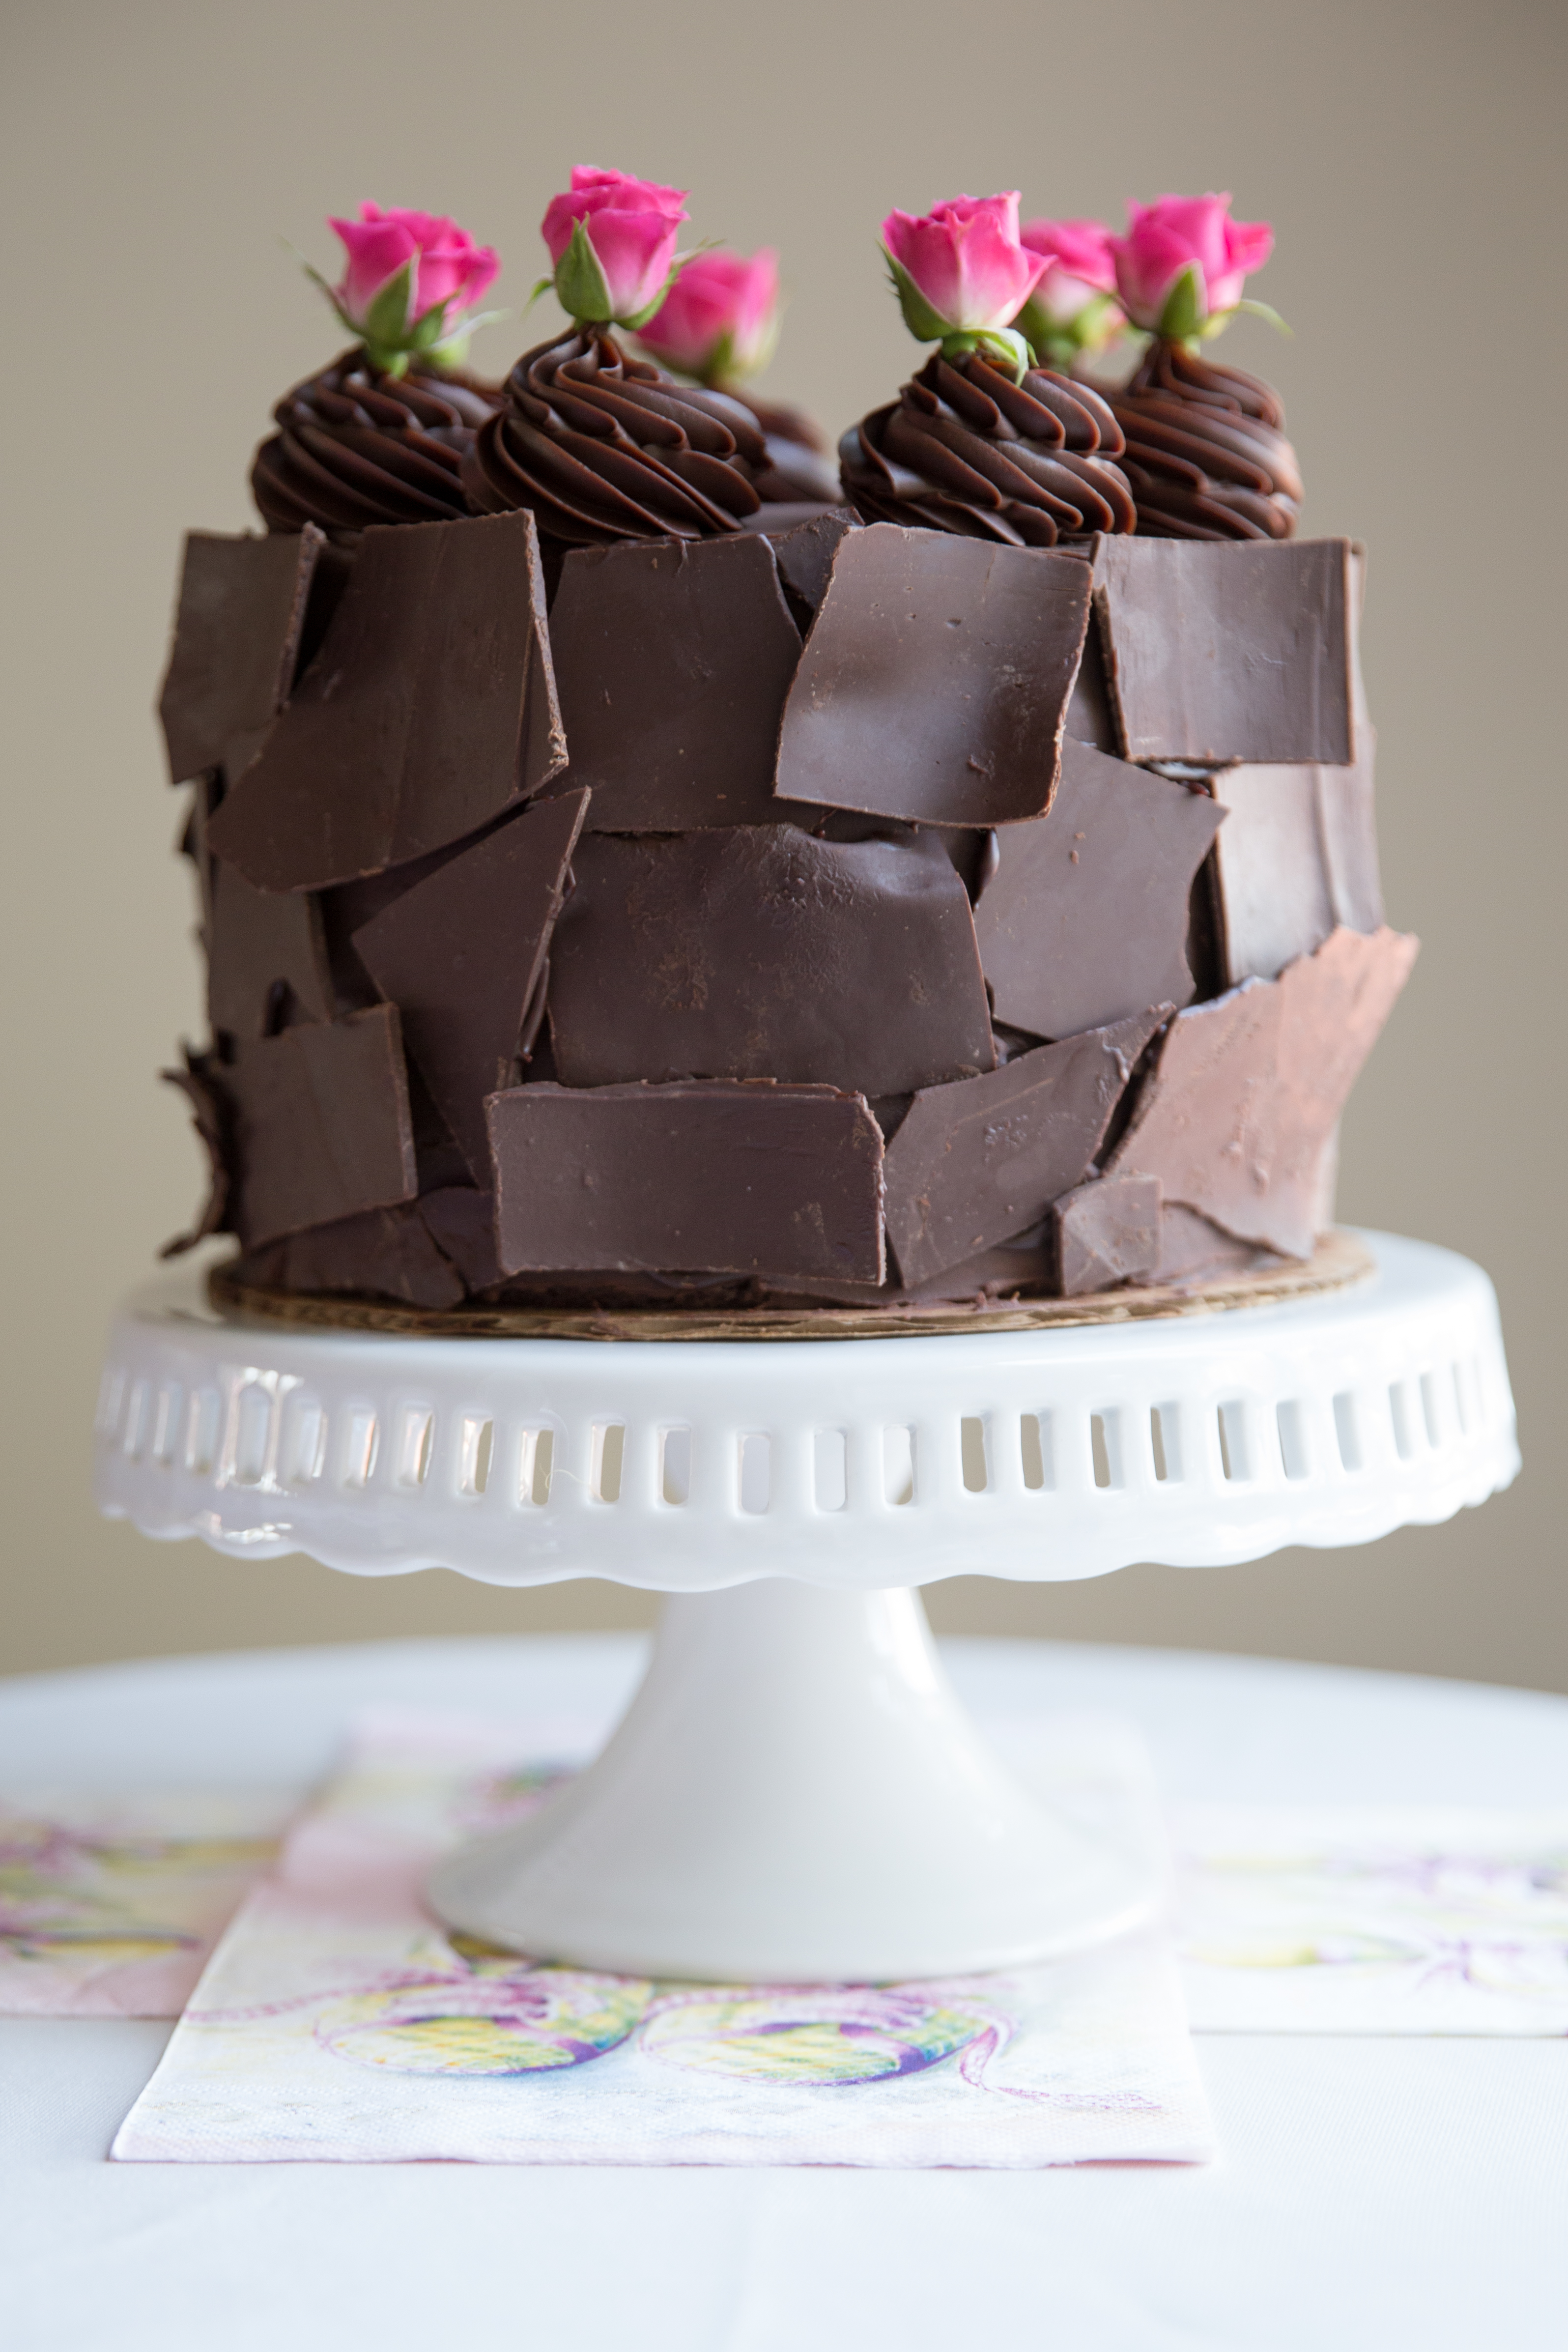
 This cake I made for my sister Emily’s Baby Shower. She is having her third girl, and wanted a chocolate with chocolate and chocolate cake! I made her an extra special chocolate cake with chocolate ganache filling, chocolate cheesecake filling, covered in chocolate ganache, topped with chocolate ganache swirls, and covered with chocolate square pieces!


Enjoy!

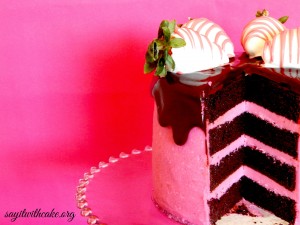
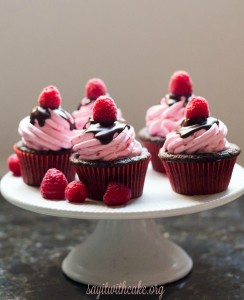
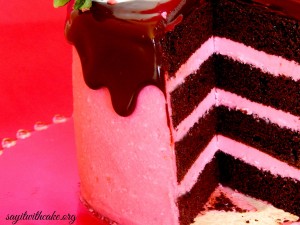
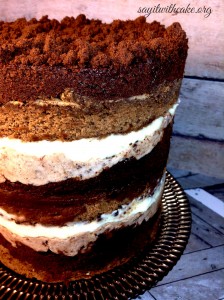
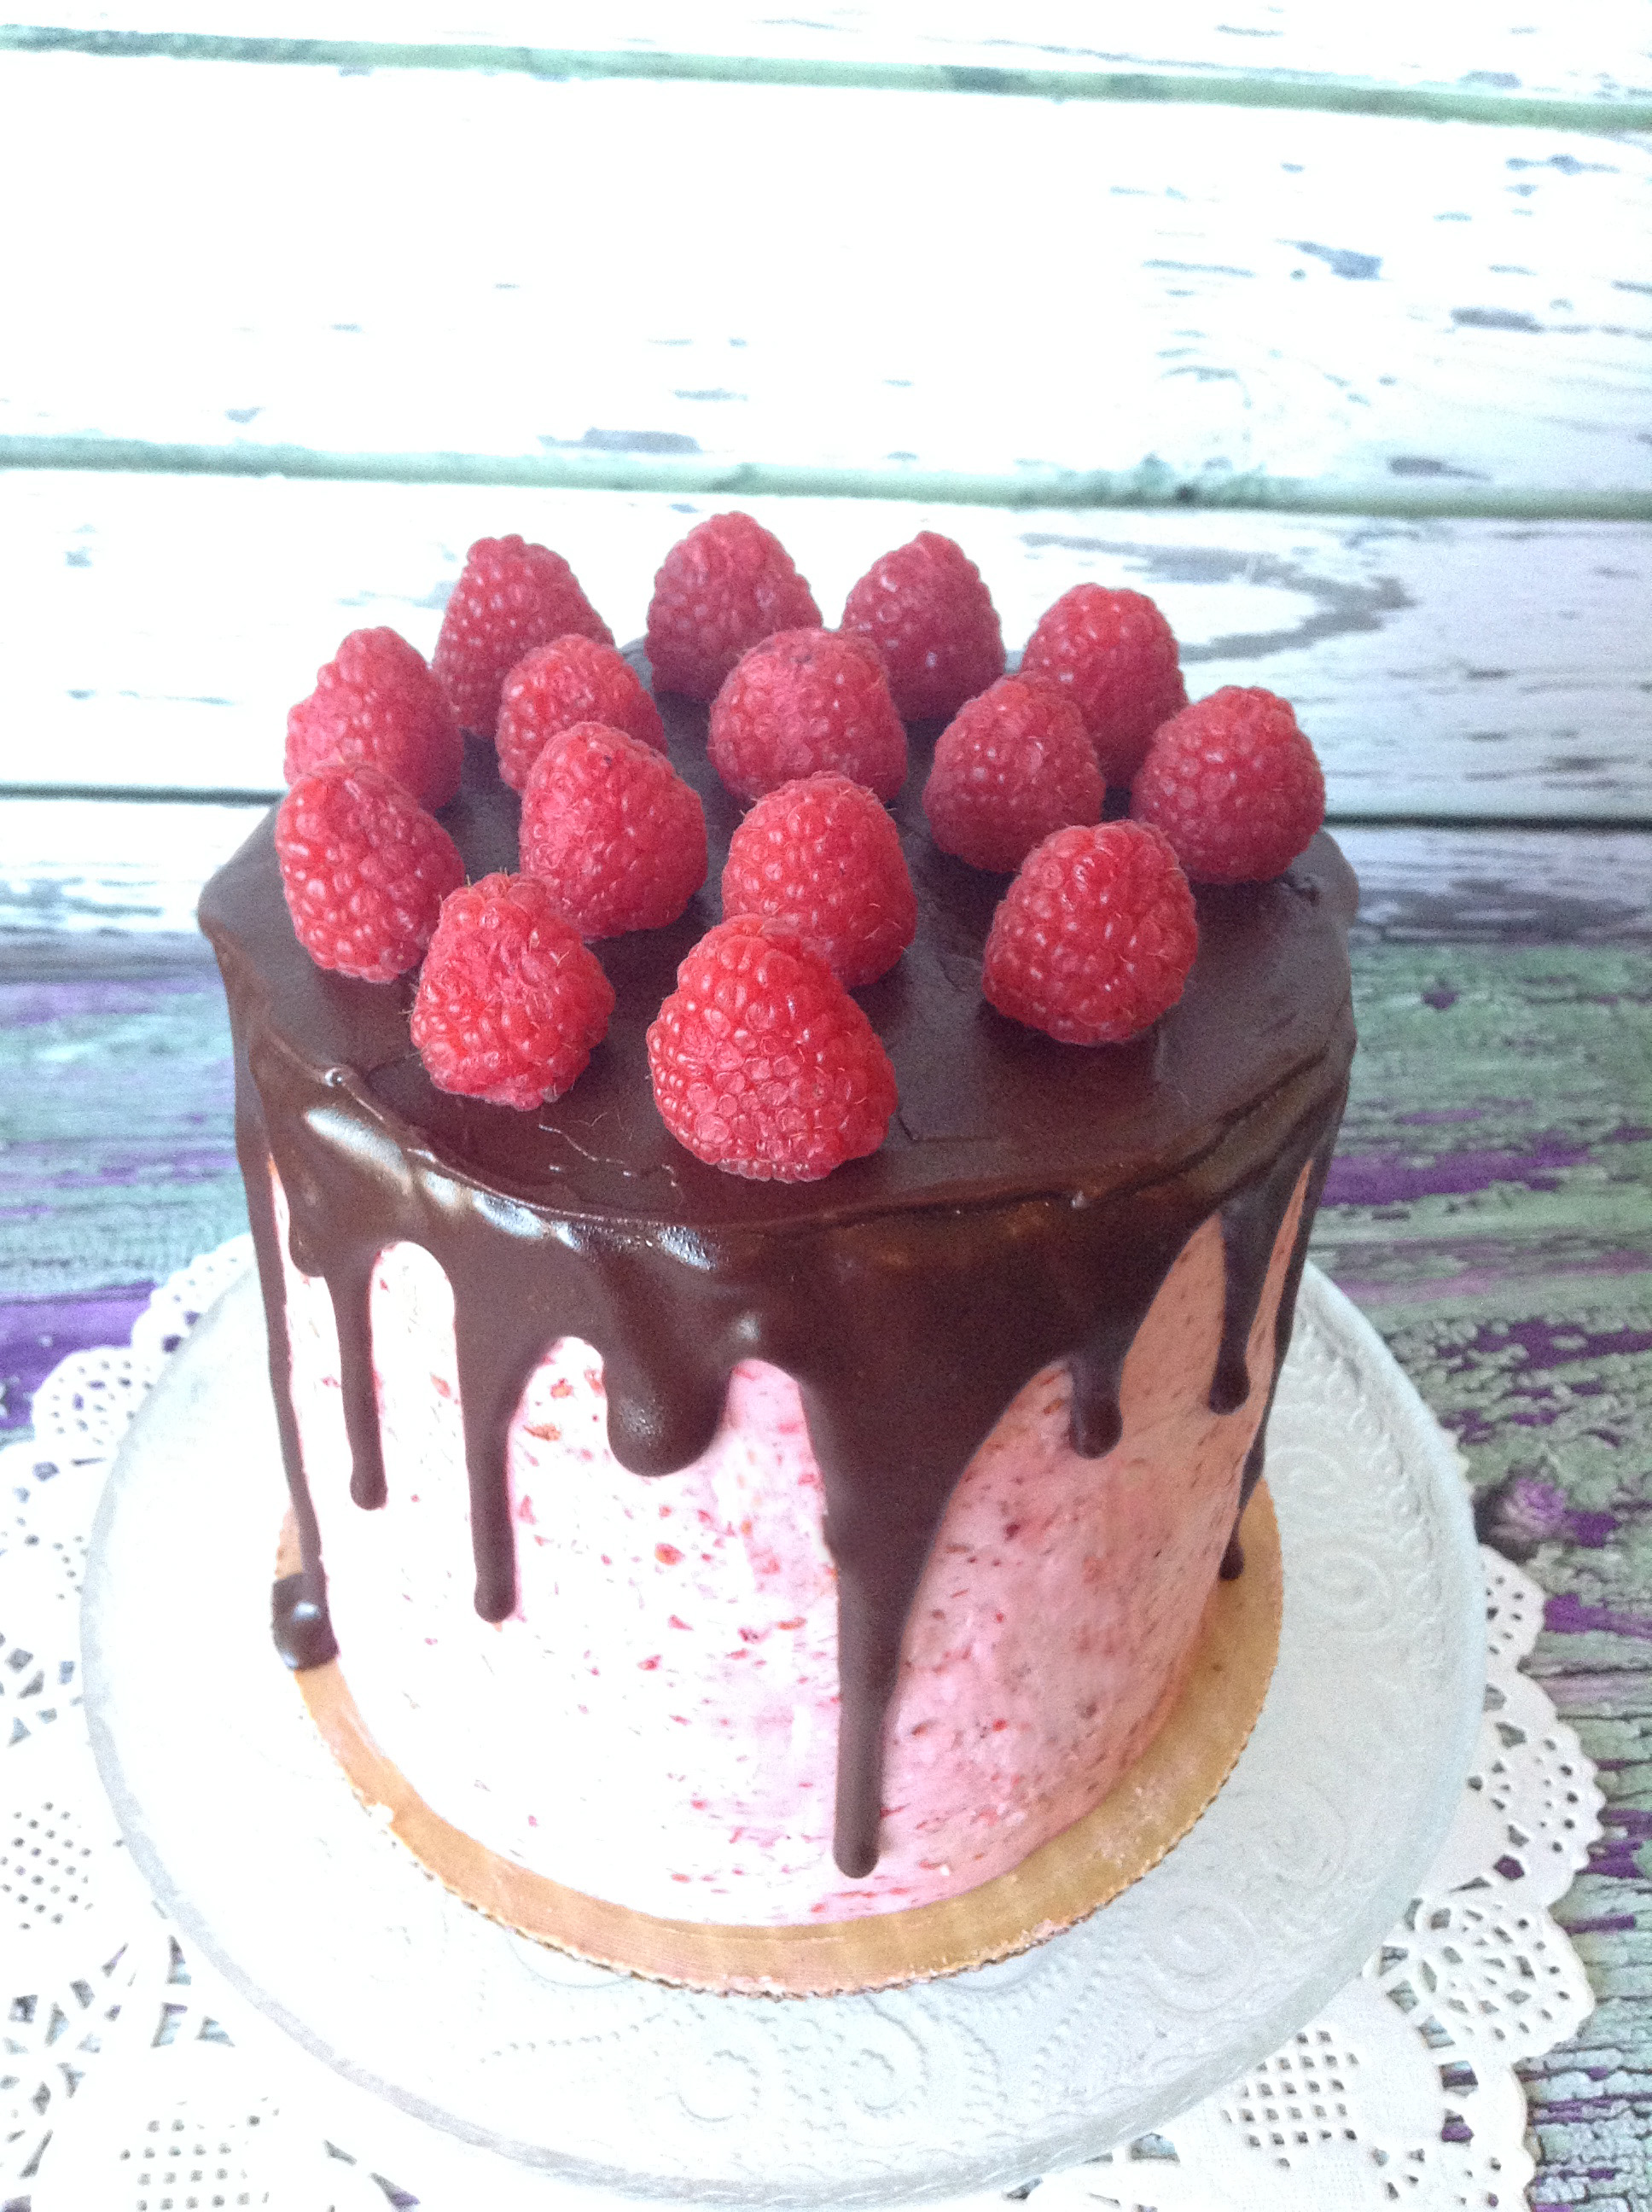 I made this cake for my good friend Lynn’s Birthday! This cake was inspired by these cupcakes, and I just had to try to make it in cake form! This little cake is a 6 inch mud chocolate cake with raspberry cheesecake filling, raspberry cheesecake filling, and a dark chocolate glaze on top.

Yum!
All Purpose Flour 2 cups / 240 grams
Cocoa Powder – 1/2 cup / 60 grams
Baking Powder – 2 tsp
Baking Soda – 1/2 tsp
Salt – 1/2 tsp
Water – 3/4 cup / 180 ml
Soft Unsalted Butter – 250 grams
Milk – 1/2 cup / 120 ml
Eggs – 4
Sugar – 2 3/4 cup / 550 grams
Dark Chocolate – 220 Grams chopped
Instant Coffee Powder – 2 TBSP
Oil – 2 TBSP
Preheat oven to 350 * grease 3 six inch cake pans
- 5 large, fresh egg whites (150 g)
- 1-1/4 cups (250 g) sugar
- 1-1/2 cups (3 sticks)(340 g) butter, cut into cubes and cool, but not cold
- 2 teaspoons (10 ml) pure vanilla extract
- 1/4 cup (59 ml)(or to taste) raspberry puree OR a handful (about 1 cup, or more to taste) of fresh, washed, and dried raspberries
- pinch of salt
- few drops pink food coloring (optional)
Directions
- Wipe the bowl of an electric mixer with paper towel and lemon juice, to remove any trace of grease. Add egg whites and sugar, and simmer over a pot of water (not boiling), whisking constantly but gently, until temperature reaches 160°F, or if you don’t have a candy thermometer, until the sugar has completely dissolved and the egg whites are hot.
- With whisk attachment of mixer, begin to whip until the meringue is thick, glossy, and the bottom of the bowl feels neutral to the touch (this can take up to 10 minutes or so). *Don’t begin adding butter until the bottom of the bowl feels neutral, and not warm.
- Switch over to paddle attachment and, with mixer on low speed, add butter cubes, one at a time, until incorporated, and mix until it has reached a silky smooth texture (if curdles, keep mixing and it will come back to smooth). *If mixture is too runny, refrigerate for about 15 minutes and continue mixing with paddle attachment until it comes together. Add vanilla and salt, continuing to beat on low speed until well combined.
- Add raspberry puree to taste or the fresh raspberries in small increments, and blend until combined. Add small amount of pink food coloring, if desired.
One 8-ounce package cream cheese
¾ cup granulated sugar
1 tablespoon cornstarch
1 teaspoon kosher salt
2 tablespoons whole milk
1 large egg
1/2 cup raspberry puree
2. In a small bowl, gently whisk together the cornstarch and salt. Add the milk in a slow, steady stream, then whisk in the egg.
3. With the mixer on medium-low speed, add the egg mixture to the cream cheese, add the raspberry puree and start beating until the mixture is smooth, about 3 to 4 minutes. Scrape down the sides of the bowl.
4. Pour the cheesecake batter into an 8-inch-square baking pan. Place the pan in the oven. Bake for 15 minutes. After 15 minutes, gently shake the pan: The outside edges should be firm and the center loosely set. If the cheesecake has not reached that consistency, allow it to cook for an additional 5 minutes.
- 4 oz (115 g) high quality bittersweet chocolate, coarsely chopped or callets
- 1/3 cup (76 g) unsalted butter, at room temperature and cut into cubes
Place the chocolate and butter in a medium heatproof bowl over a pot of simmering water. Stir the mixture using a rubber spatula until melted and smooth. *Be careful to not get even a droplet of water into your bowl of chocolate and butter.

Enjoy!
]]>
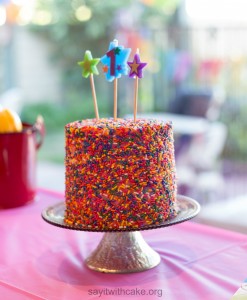 I made this sprinkle smash cake for my niece Matilda Wild who is turning one today! Sprinkle cakes are so pretty and festive! I will share some methods with you on how to make a sprinkle cake the easy and non messy way!
I have tried a sprinkle cake before but ended up with sprinkles all over the floor, table, and everywhere! This new method I learned from The Greedy baker and it was not messy at all! I was a little hesitant at first to actually roll the cake around in the sprinkles, but if you chill the cake until it has crusted, it isn’t an issue. Another think I learned is that next time, I will use small nonpareils sprinkles. The jimmies sprinkles I used left a few gaps and you can see more of the frosting. I would have preferred a more full coverage sprinkle like nonpareils!
1. Frost cake except top
2. roll cake in sprinkles with a cardboard circle on top and bottom an inch smaller then the cake
3. frost top of cake
4. cover top with sprinkles and smooth out
This is my sweet little niece Matilda enjoying her cake!
Enjoy!

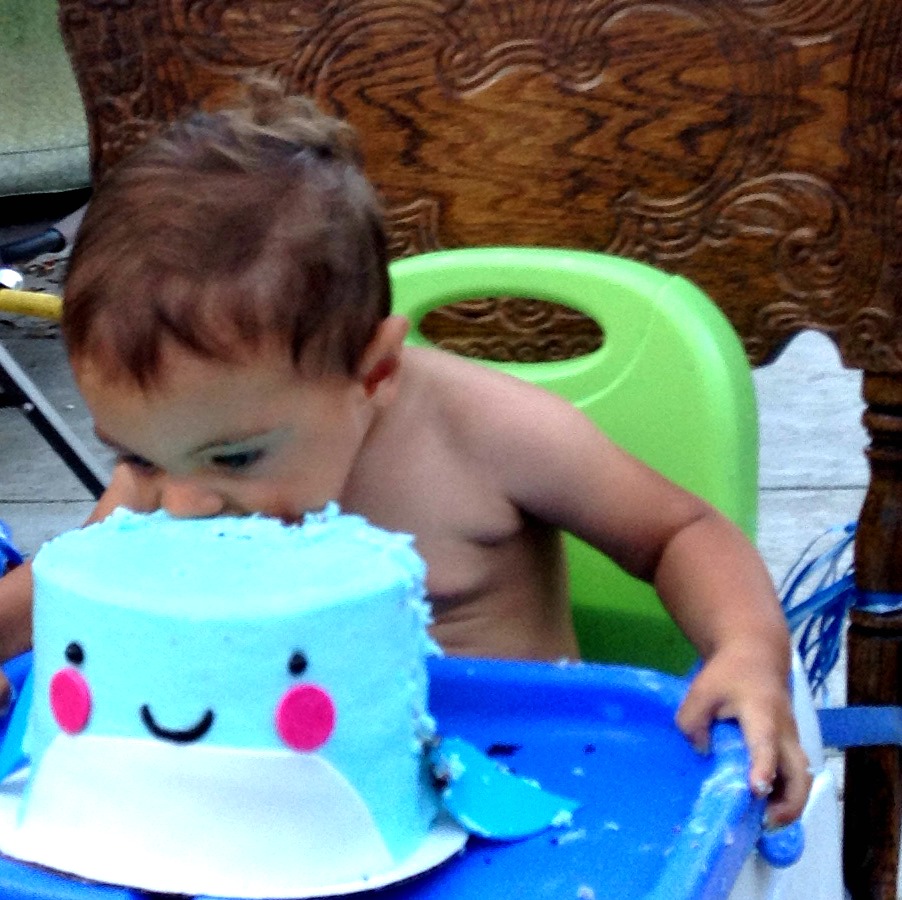
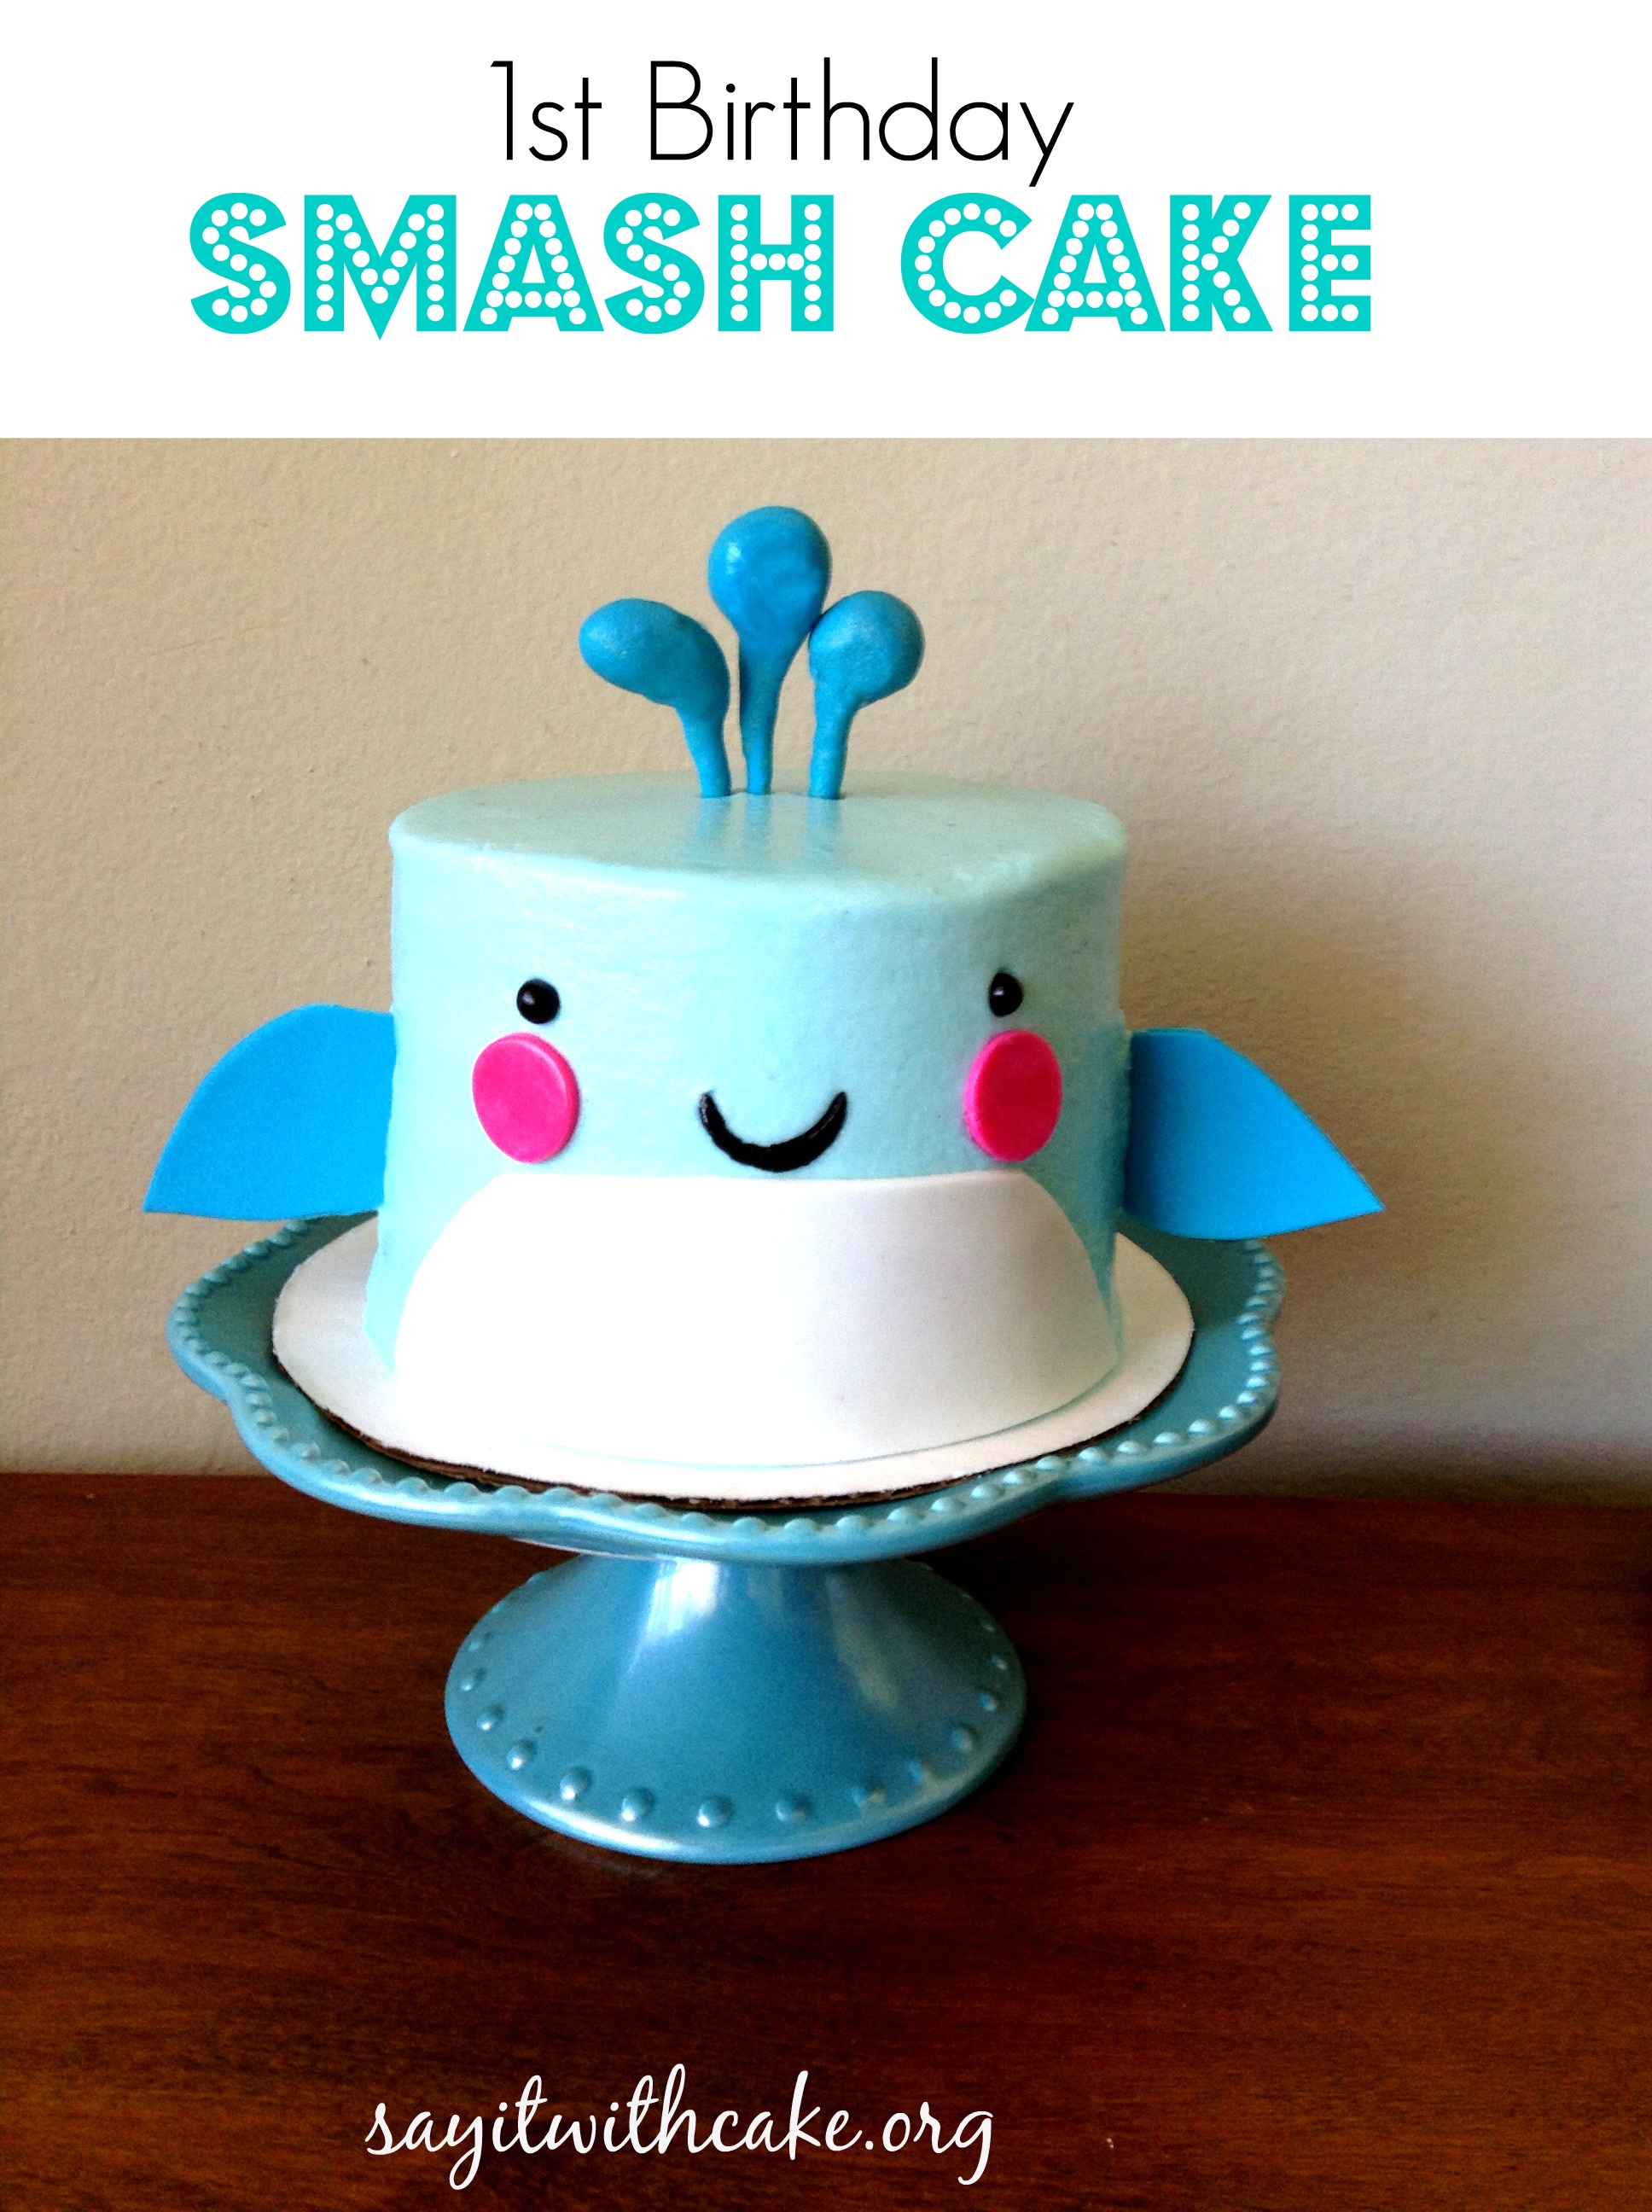 I made this little whale smash cake for my nephew Gabriel (I call him Gabey) who turned 1 years old! The inside is chocolate, and the outside whale is made with blue buttercream, and fondant pieces for the whale face. I have to say, Gabey really loved this cake and dug right in face first! By the end, the cake was destroyed and he seemed very pleased!
Doesn’t he look so cute sitting there with his legs crossed! He is patiently waiting while we take pictures so he can dig in!

now he can really enjoy a big bite! He is such a cutie!
To make this cake, I first baked three five inch cakes, cooled them, filled them with cream cheese filling, stacked them, and frosted them with a light blue buttercream.
Buttercream Frosting
- 1 1/2 cup sweetex or crisco
- 1/4 teaspoon salt
- 1 teaspoon meringue powder
- 2 pounds powdered sugar
- 1/2 cup milk or water
- 1 tsp vanilla
Instructions
- mix the sweetex, salt, and meringue powder with electric mixer to blend aobut 30 seconds
- Add the milk and vanilla in the bowl, then add the sugar and blend by hand with a spatula until the sugar is absorbed into the liquid
- .put bowl back on the mixer and beat on medium speed for 2-5 minutes until smooth and a little fluffy.
- if mixture is too stiff, you can add more liquid. if it is too runny add more powdered sugar
Then I made the fondant and colored it pink, blue, and black and left some white.
- 8 ounces miniature marshmallows (4 cups not packed, or half of a 16-ounce bag)
- 1 pound powdered sugar (4 cups), plus extra for dusting
- 2 tbsp water
- Food coloring or flavored extracts, optional
Instructions
- Dust your counter or a large cutting board with powdered sugar. Place the marshmallows and the water in a large microwave-safe bowl. Microwave on high for 1 minute, until the marshmallows are puffy and expanded.
- Stir the marshmallows with a rubber spatula until they are melted and smooth. If some unmelted marshmallow pieces remain, return to the microwave for 30-45 seconds, until the marshmallow mixture is entirely smooth and free of lumps. If you want colored or flavored fondant, you can add several drops of food coloring or extracts at this point and stir until incorporated. If you want to create multiple colors or flavors from one batch of fondant, do not add the colors or flavors now. Instead, refer to step 6 below for instructions.
- Add the powdered sugar and begin to stir with the spatula. Stir until the sugar begins to incorporate and it becomes impossible to stir anymore.
- Scrape the marshmallow-sugar mixture out onto the prepared work surface. It will be sticky and lumpy, with lots of sugar that has not been incorporated yet–this is normal. Dust your hands with powdered sugar, and begin to knead the fondant mixture like bread dough, working the sugar into the marshmallow with your hands.
- Continue to knead the fondant until it smoothes out and loses its stickiness. Add more sugar if necessary, but stop adding sugar once it is smooth–too much sugar will make it stiff and difficult to work with. Once the fondant is a smooth ball, it is ready to be used. You can now roll it out, shape it, or wrap it in cling wrap to use later. Well-wrapped fondant can be stored in a cool room or in the refrigerator, and needs to be kneaded until supple before later use.
- If you want to add coloring or flavoring to your fondant, flatten it into a round disc. You might want to wear gloves to avoid getting food coloring on your hands during this step. Add your desired amount of coloring or flavoring to the center of the disc, and fold the disc over on itself so that the color or flavor is enclosed in the center of the fondant ball.
- Begin to knead the ball of fondant just like you did before. As you work it, you will begin to see streaks of color coming through from the center. Continue to knead until the streaks are gone and the fondant is a uniform color. Your fondant is now ready to be used or stored as outlined above.
Cut out shapes for eyes, cheeks, fins, chest, and water. Put the blue fondant for the blow hole around toothpicks or skewers and dry and harden overnight. You can also add some tylose powder to the blue fondant to make it dry harder like gum paste.
Enjoy!
]]>
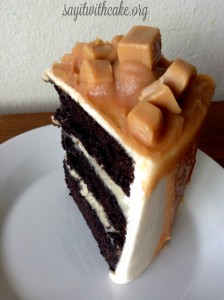
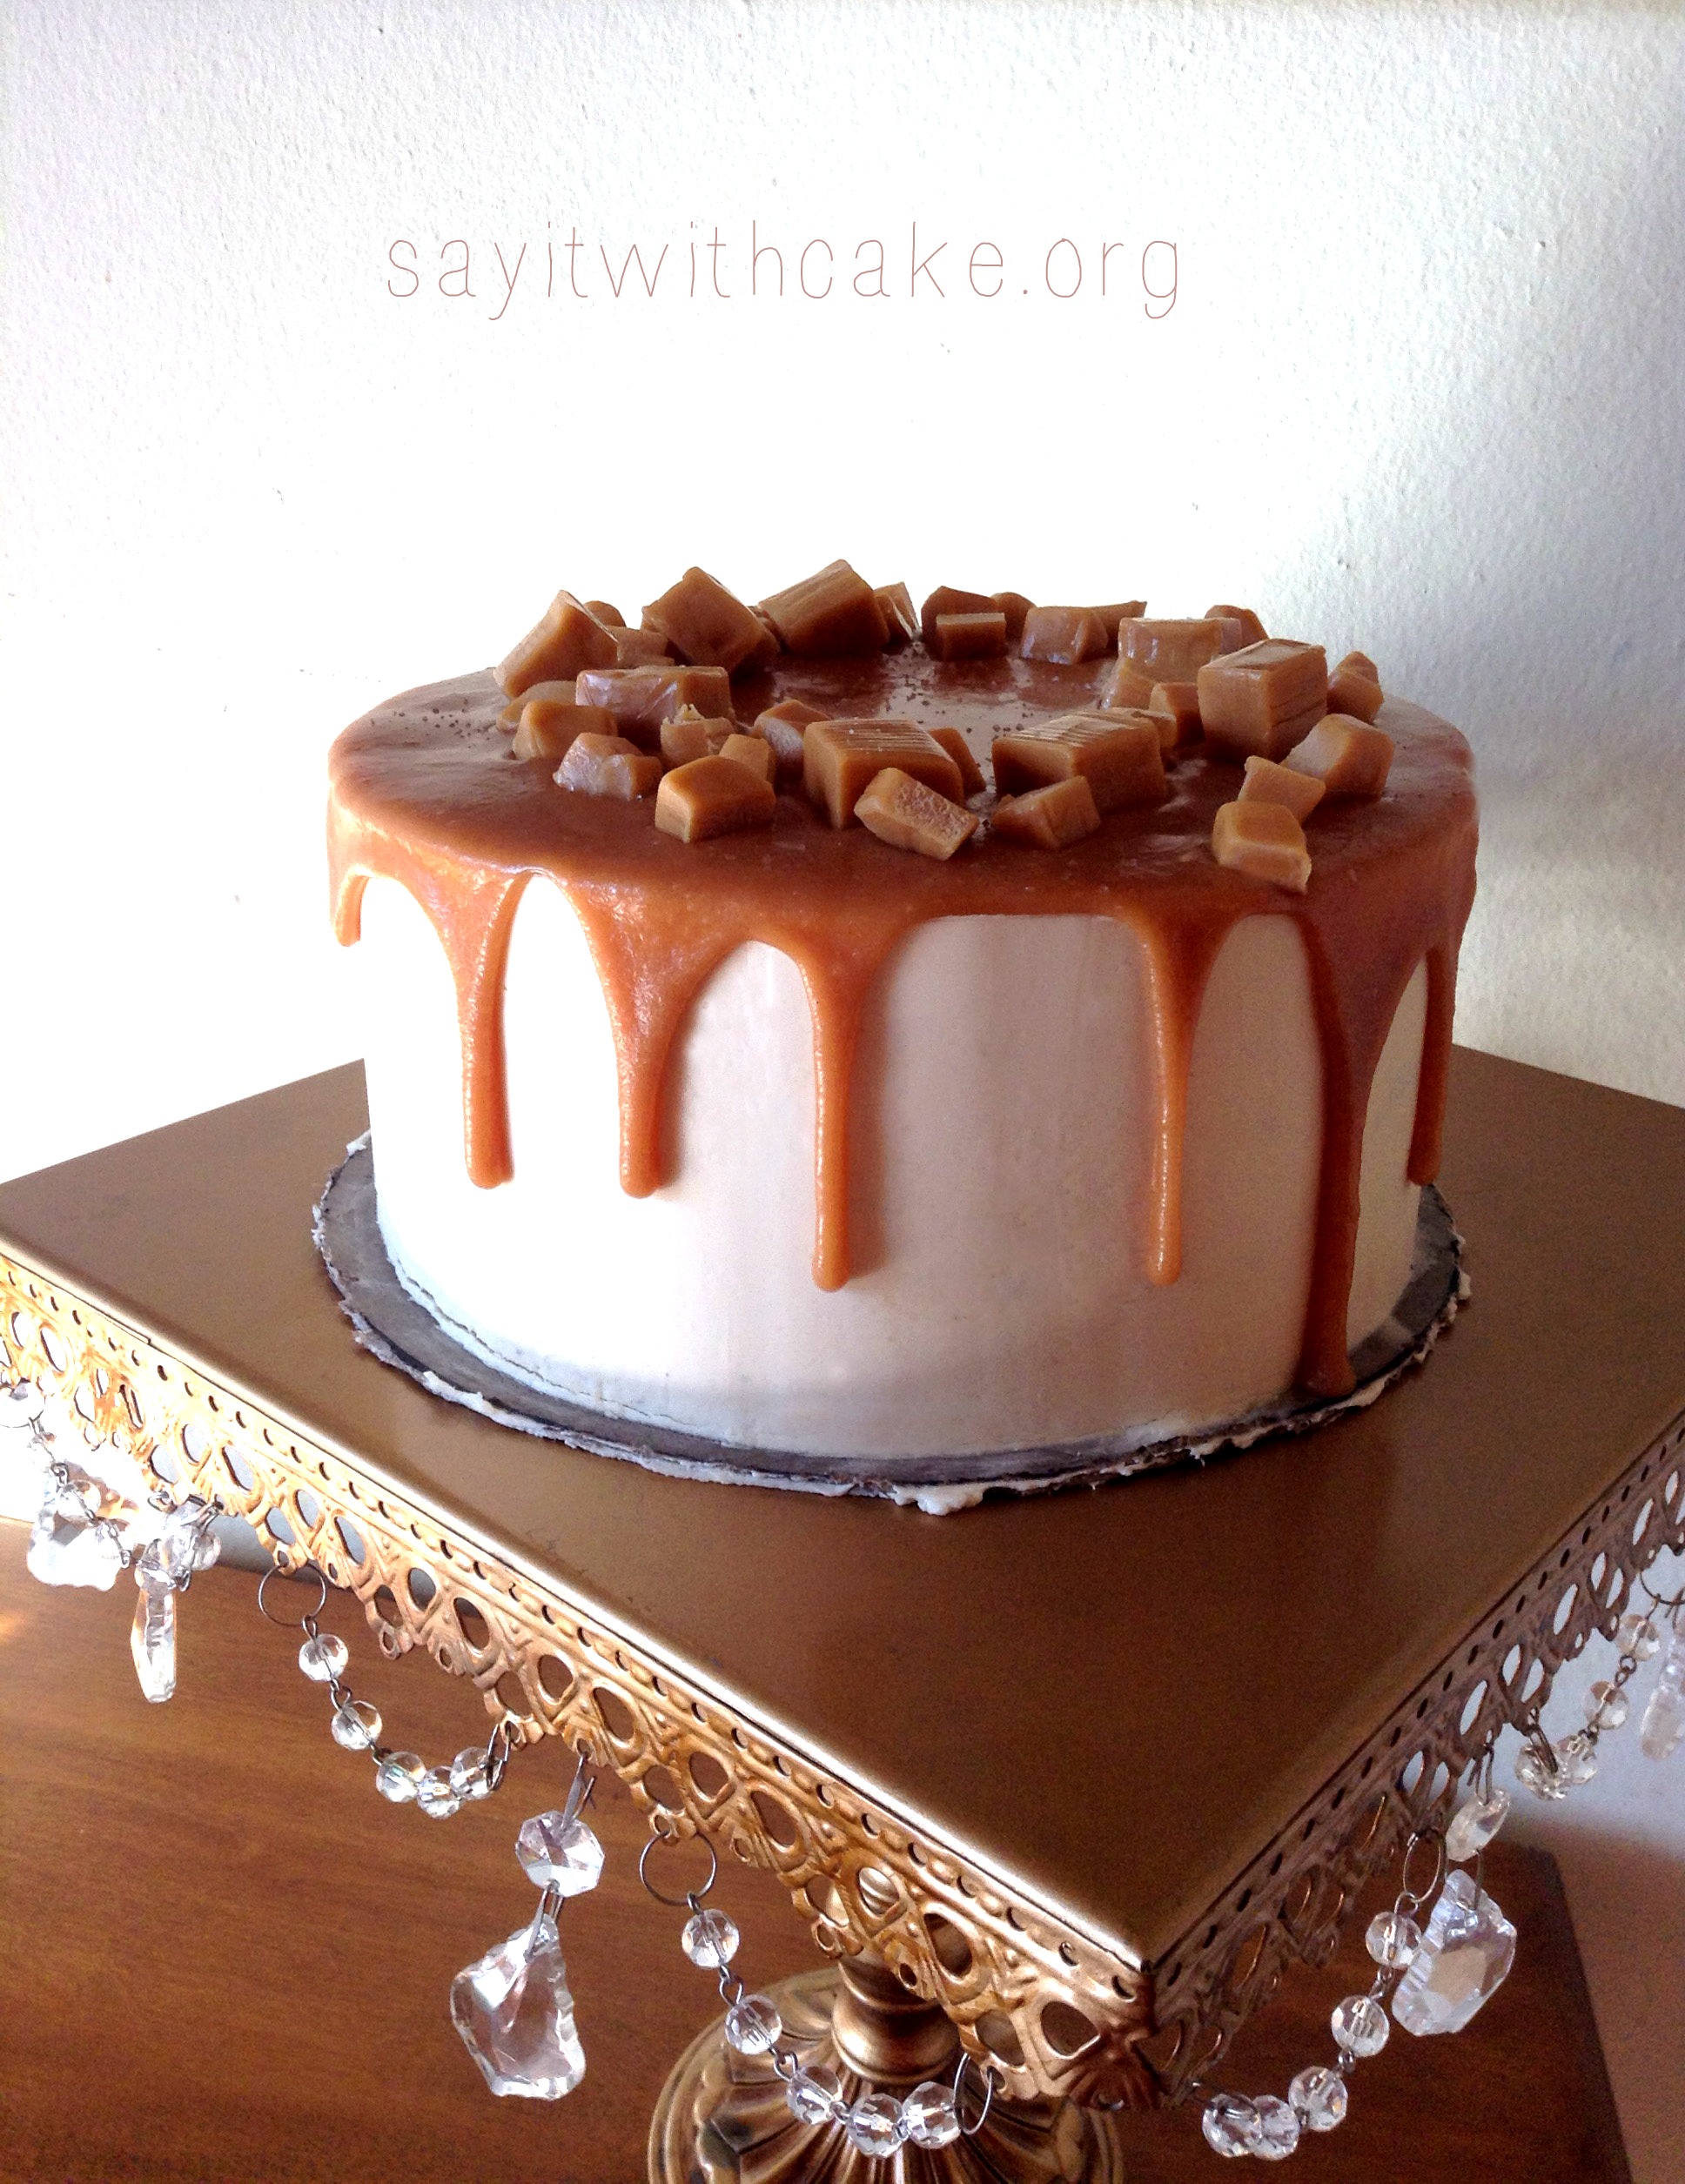 Chocolate and salted caramel go great together in this delicious three layer cake. This cake was made just for my salted caramel loving sister Wendy for her birthday. It is a dark chocolate mud cake with caramel cheesecake filling, frosted with a salted caramel Swiss meringue buttercream, topped with a thick homemade salted caramel sauce, and garnished with bits of caramel candies.
This cake is very rich, the kind you want to eat with a cold glass of milk! The Cake stand is from my Dad, it is so pretty and gold with crystals hanging down!
 Here is the recipe, it looks long but you can break it up into a few days. I made the caramel sauce, the cake, and the filling on the day before. The second day, I made the Swiss meringue buttercream. There will be extra caramel sauce, so you can save the extra and pour over individual pieces of cake or use it later on ice cream or pancakes. If you are storing the cake, make sure you wrap it with saran wrap in the refrigerator.
¼ cup water
1 cup granulated sugar
2/3 cup heavy cream
3 tablespoons unsalted butter, cut into tablespoon size pieces
1 teaspoon vanilla
1 teaspoon salt (or to taste)
Increase the heat to high and bring to a boil, stop stirring completely. Let the mixture continue boiling until it turns an amber color, this could take anywhere from 4-12 minutes.
Remove from the heat and slowly whisk in the heavy cream. The mixture will bubble up a lot, so make sure to do this very carefully. Mix until everything is well combined.
Add the butter and stir well until the butter has melted completely.
Add in the vanilla and salt, and stir until fully combined.
Pour the caramel sauce into a dish and allow to cool completely.
All Purpose Flour 2 cups / 240 grams
Cocoa Powder – 1/2 cup / 60 grams
Baking Powder – 2 tsp
Baking Soda – 1/2 tsp
Salt – 1/2 tsp
Water – 3/4 cup / 180 ml
Soft Unsalted Butter – 250 grams
Milk – 1/2 cup / 120 ml
Eggs – 4
Sugar – 2 3/4 cup / 550 grams
Dark Chocolate – 220 Grams chopped
Instant Coffee Powder – 2 TBSP
Oil – 2 TBSP
Preheat oven to 350 *. Line the base and sides of a 20 cm deep round pan with parchment paper. Make sure the parchment comes above the pan, since it will rise so much. You can also chose to spray and flour the pan. For this cake, I used three 8 inch cake pans so I wouldn’t have to tort.
One 8-ounce package cream cheese
¾ cup granulated sugar
1 tablespoon cornstarch
1 teaspoon kosher salt
2 tablespoons whole milk
1 large egg
1/2 cup caramel sauce
2. In a small bowl, gently whisk together the cornstarch and salt. Add the milk in a slow, steady stream, then whisk in the egg.
3. With the mixer on medium-low speed, add the egg mixture to the cream cheese, beating until the mixture is smooth, about 3 to 4 minutes. Scrape down the sides of the bowl.
4. Pour the cheesecake batter into an 8-inch-square baking pan. Place the pan in the oven. Bake for 15 minutes. After 15 minutes, gently shake the pan: The outside edges should be firm and the center loosely set. If the cheesecake has not reached that consistency, allow it to cook for an additional 5 minutes.
200g (1 cup) caster (superfine) sugar
4 large egg whites
250g (1 cup + 1 tbsp) softened unsalted butter
1 tsp vanilla extract
6 tbsp (or more to taste) salted caramel
Place over a pan of simmering (not boiling) water (do not let the base of the bowl touch the water) and whisk with a hand whisk (not electric) until the sugar has dissolved completely and the mixture is warm to the touch, if you rub some of the mixture between your fingers it should be smooth and you shouldn’t be able to feel any graininess, this will take about five minutes. If you want to get technical about it the mix should reach 60°C/140°F on a thermometer.
Remove the bowl from the heat and attach it to your stand mixer with the whisk attachment or use an electric hand whisk, whisk the egg whites until it forms a thick, glossy, bright white meringue and is completely cool, the bottom of the bowl should feel cool to the touch, this will take about 10 minutes.
Once the meringue is cold, switch the mixer to a low speed and begin to add the butter, a tablespoon at a time, make sure that each addition is fully incorporated before adding the next; the meringue will deflate a little and may begin to look curdled, don’t panic! This is normal, just keep adding the butter gradually and whipping away and it will come back together. If, once all the butter has been added, your mixture is runny, the butter may have been too soft or the meringue still warm, just put the bowl in the fridge for 15 minutes or so then carry on whipping.
If, even after a decent amount of whipping, it still looks curdled, place about 4 tablespoons worth of the mixture in a small bowl and microwave for 10-15 seconds, it should become runny, pour this back into the bowl of buttercream, down the side of the bowl while whisking, continue to whisk for a few minutes and it should come back together. Once the buttercream is completely smooth and silky and all the butter has been incorporated, whisk in the vanilla extract and salted caramel.


Happy Birthday Wendy!
Enjoy!
Other cakes you might like…

Caramel Apple Layer Cake
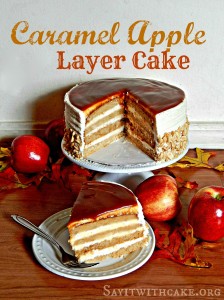
Apple spice cake with toffee and cream cheese frosting
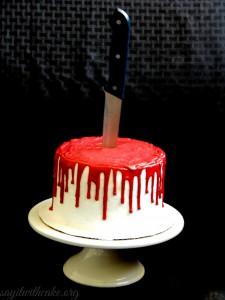
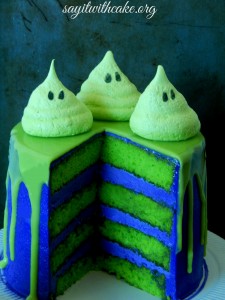
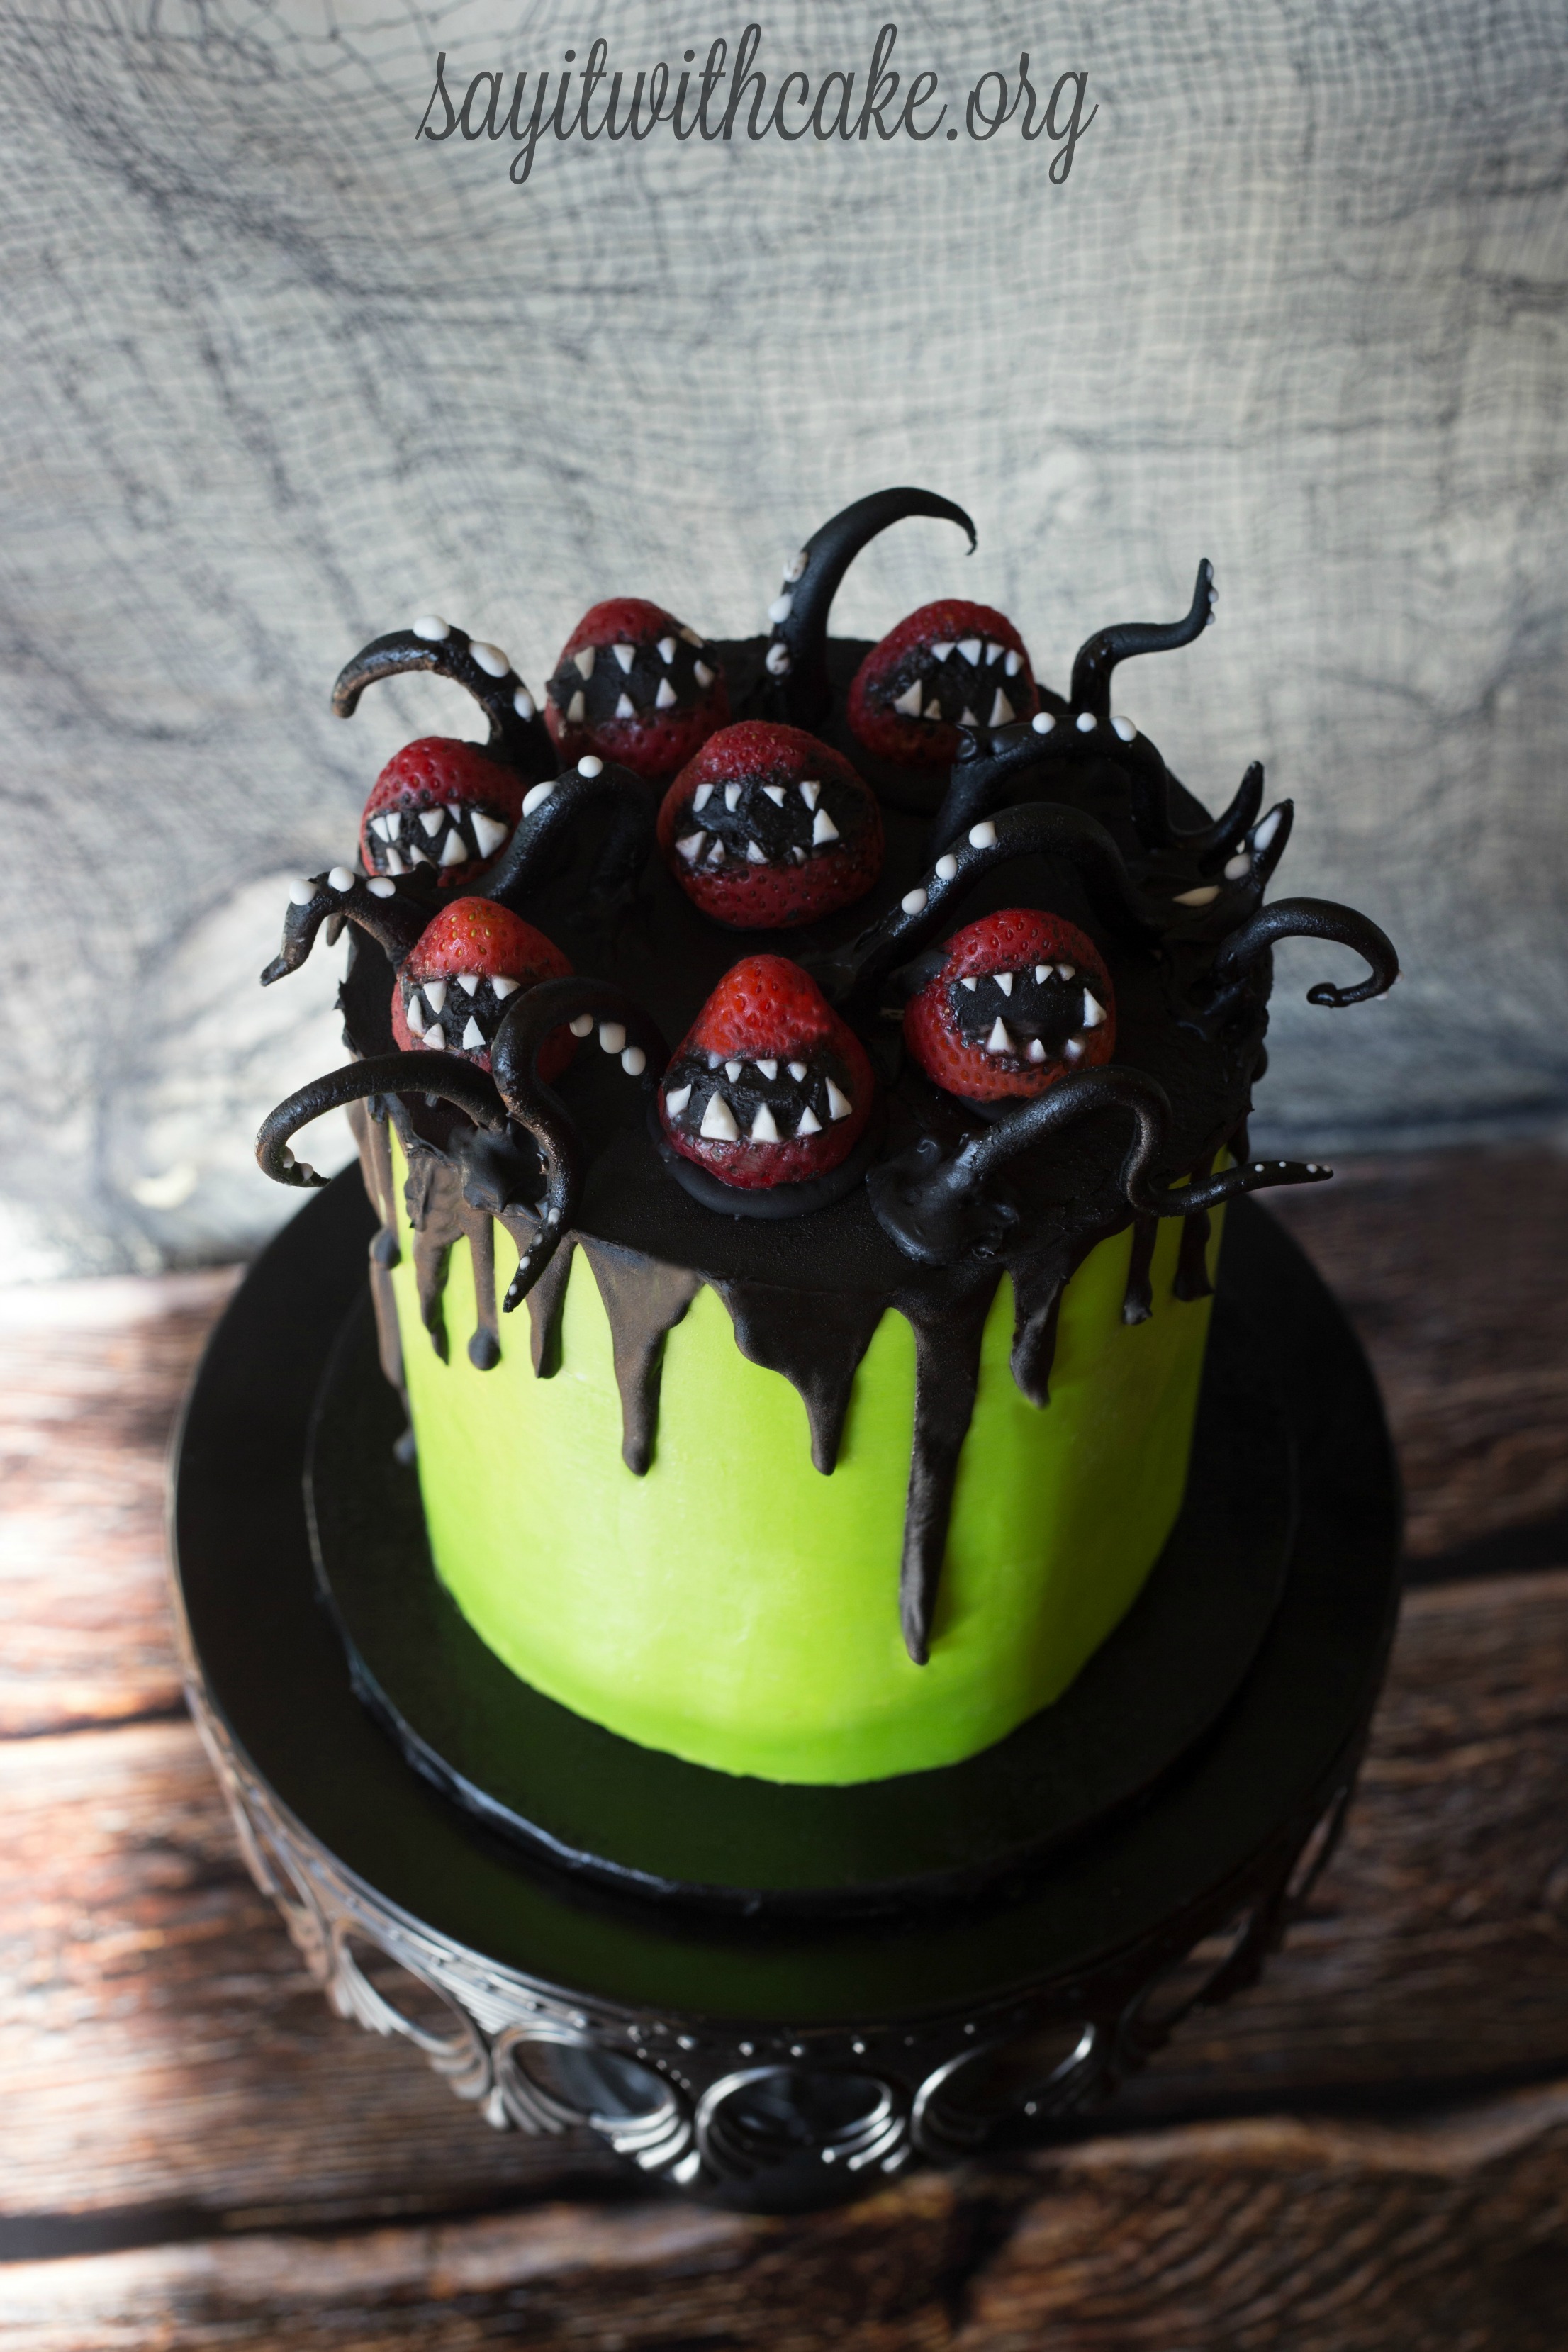 This cake is a four layer 5 inch cake with marbled Halloween colors inside of neon orange, purple, and green! The cake is filled with neon green whipped cream and covered in a neon green white chocolate ganache. It is decorated with black ganache dripping down the top, along with creepy strawberry monsters with black chocolate and fondant teeth, and black gum paste tentacles! Everything on this cake is yummy and edible!


Ingredients
- 2 boxes white cake mix 2 cups all-purpose flour 2 cups granulated sugar 1 1/2 teas. salt 8 egg whites 2 2/3 cups water 4 Tbls. vegetable oil 2 cups (16oz carton) sour cream 2 teaspoon clear vanilla flavor 2 teaspoons almond extract
Instructions
- Mix all dry ingredients by hand using a whisk in a very large mixing bowl. Add the rest of the ingredients and beat on low speed for 2 minutes. Bake at 325 degrees
- ***One recipe makes: one 14″ round + one 6″ round
- or one 16″ round
- or one 12″ round + one 10″ round
- or one 12×18″ sheet cake
- or one 12″ round + one 8″ round + one 6″
- Half a recipe makes: two 8″ rounds
- or two 6″ rounds + 6 cupcakes
While the cake was baking, I made a batch of neon green ganache, and a half batch of black ganache.
To make white chocolate ganache, the ratio is 4:1 because white chocolate is a lot softer then regular chocolate. You can use a high quality white chocolate, but you can also use white chocolate chips. When I made this recipe, I added a few drops of neon green food coloring to the cream while it was cooking.
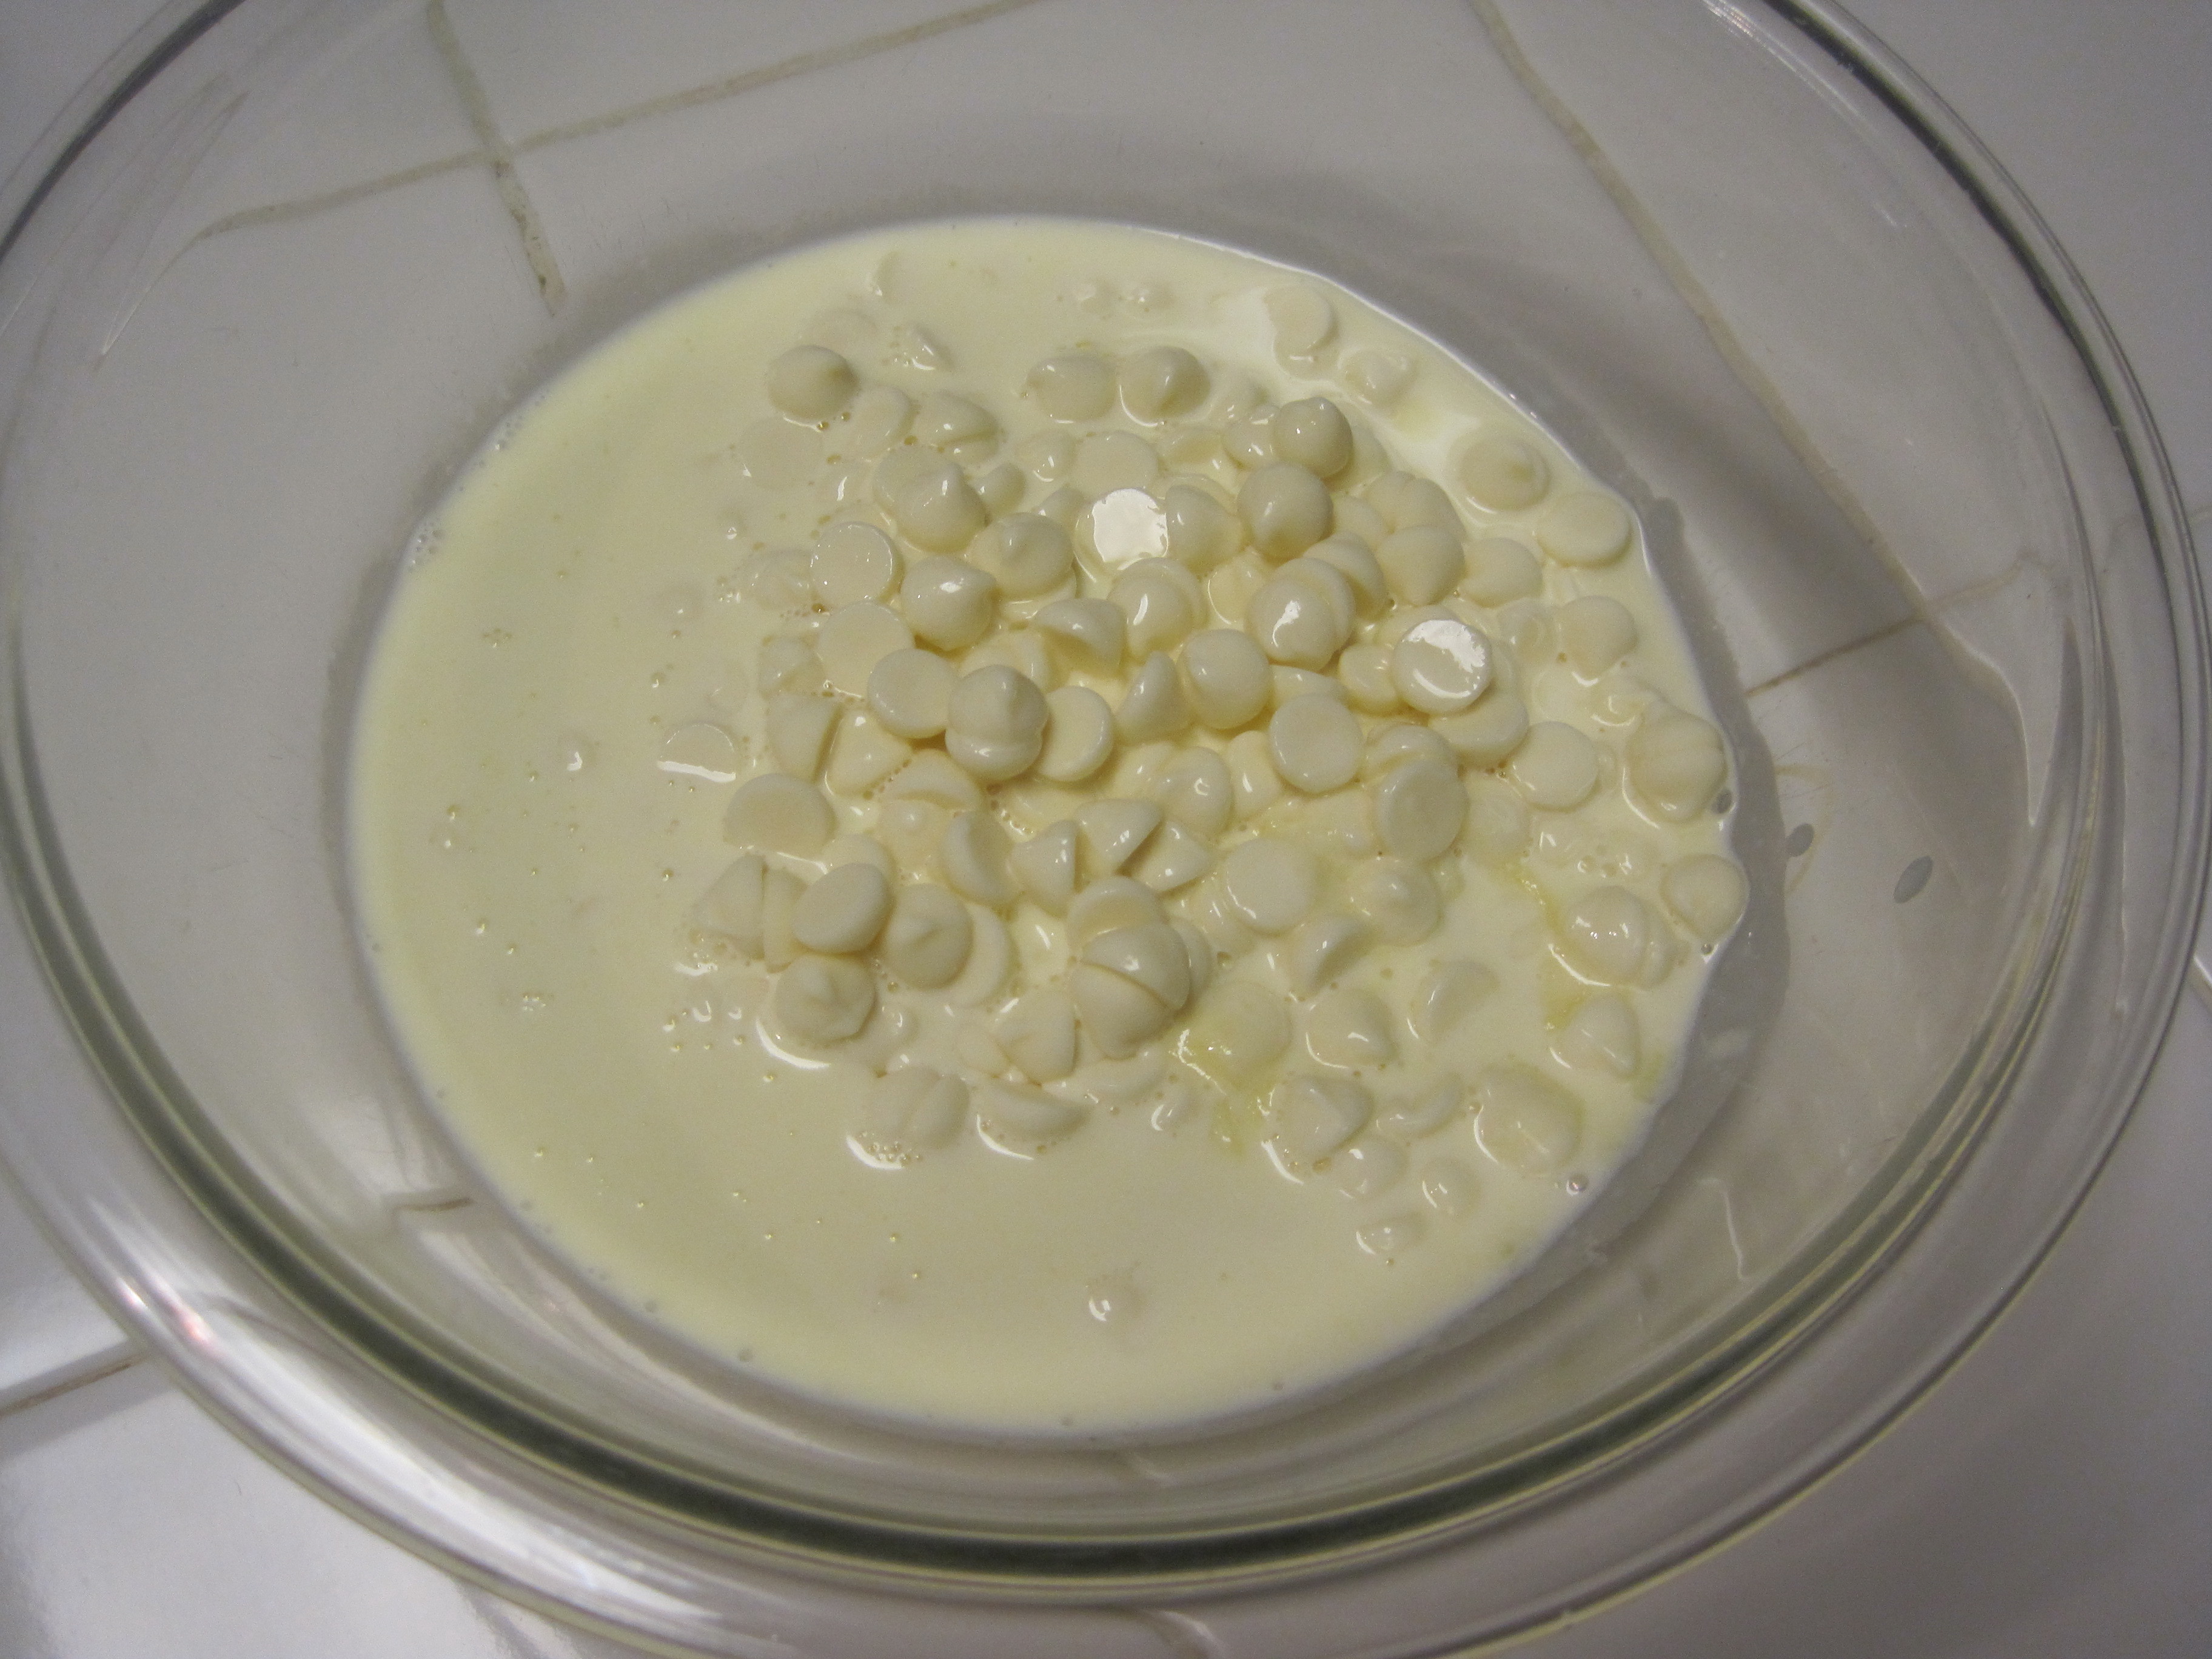
These are the ingredients you will need. White chocolate and heavy whipping cream.
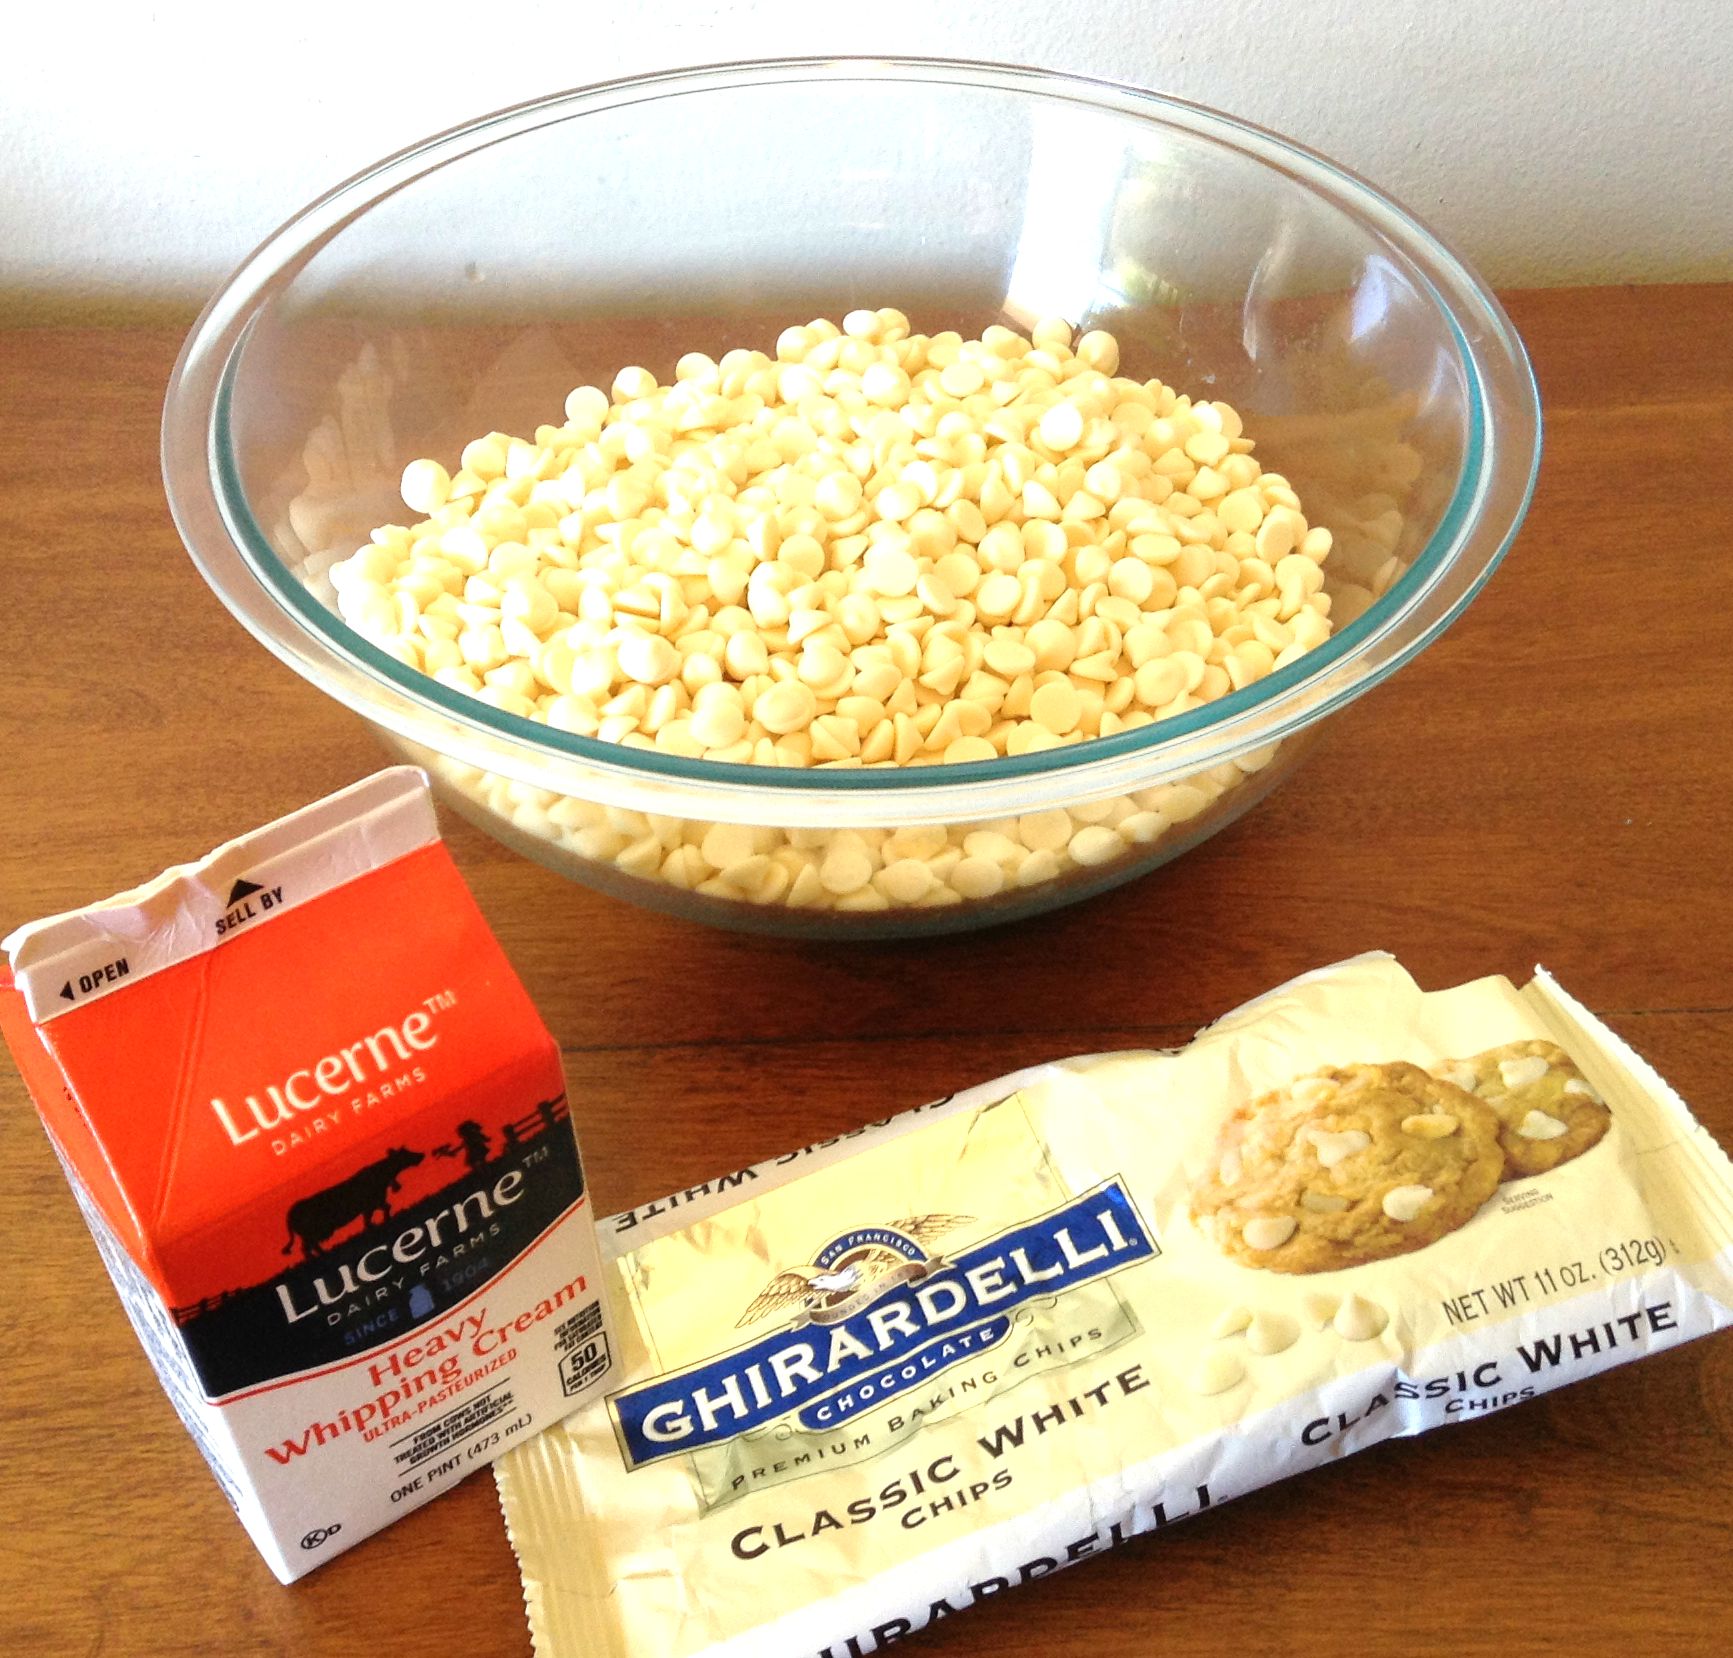
For one recipe, pour 4 cups of chopped or white chocolate chips in a bowl.
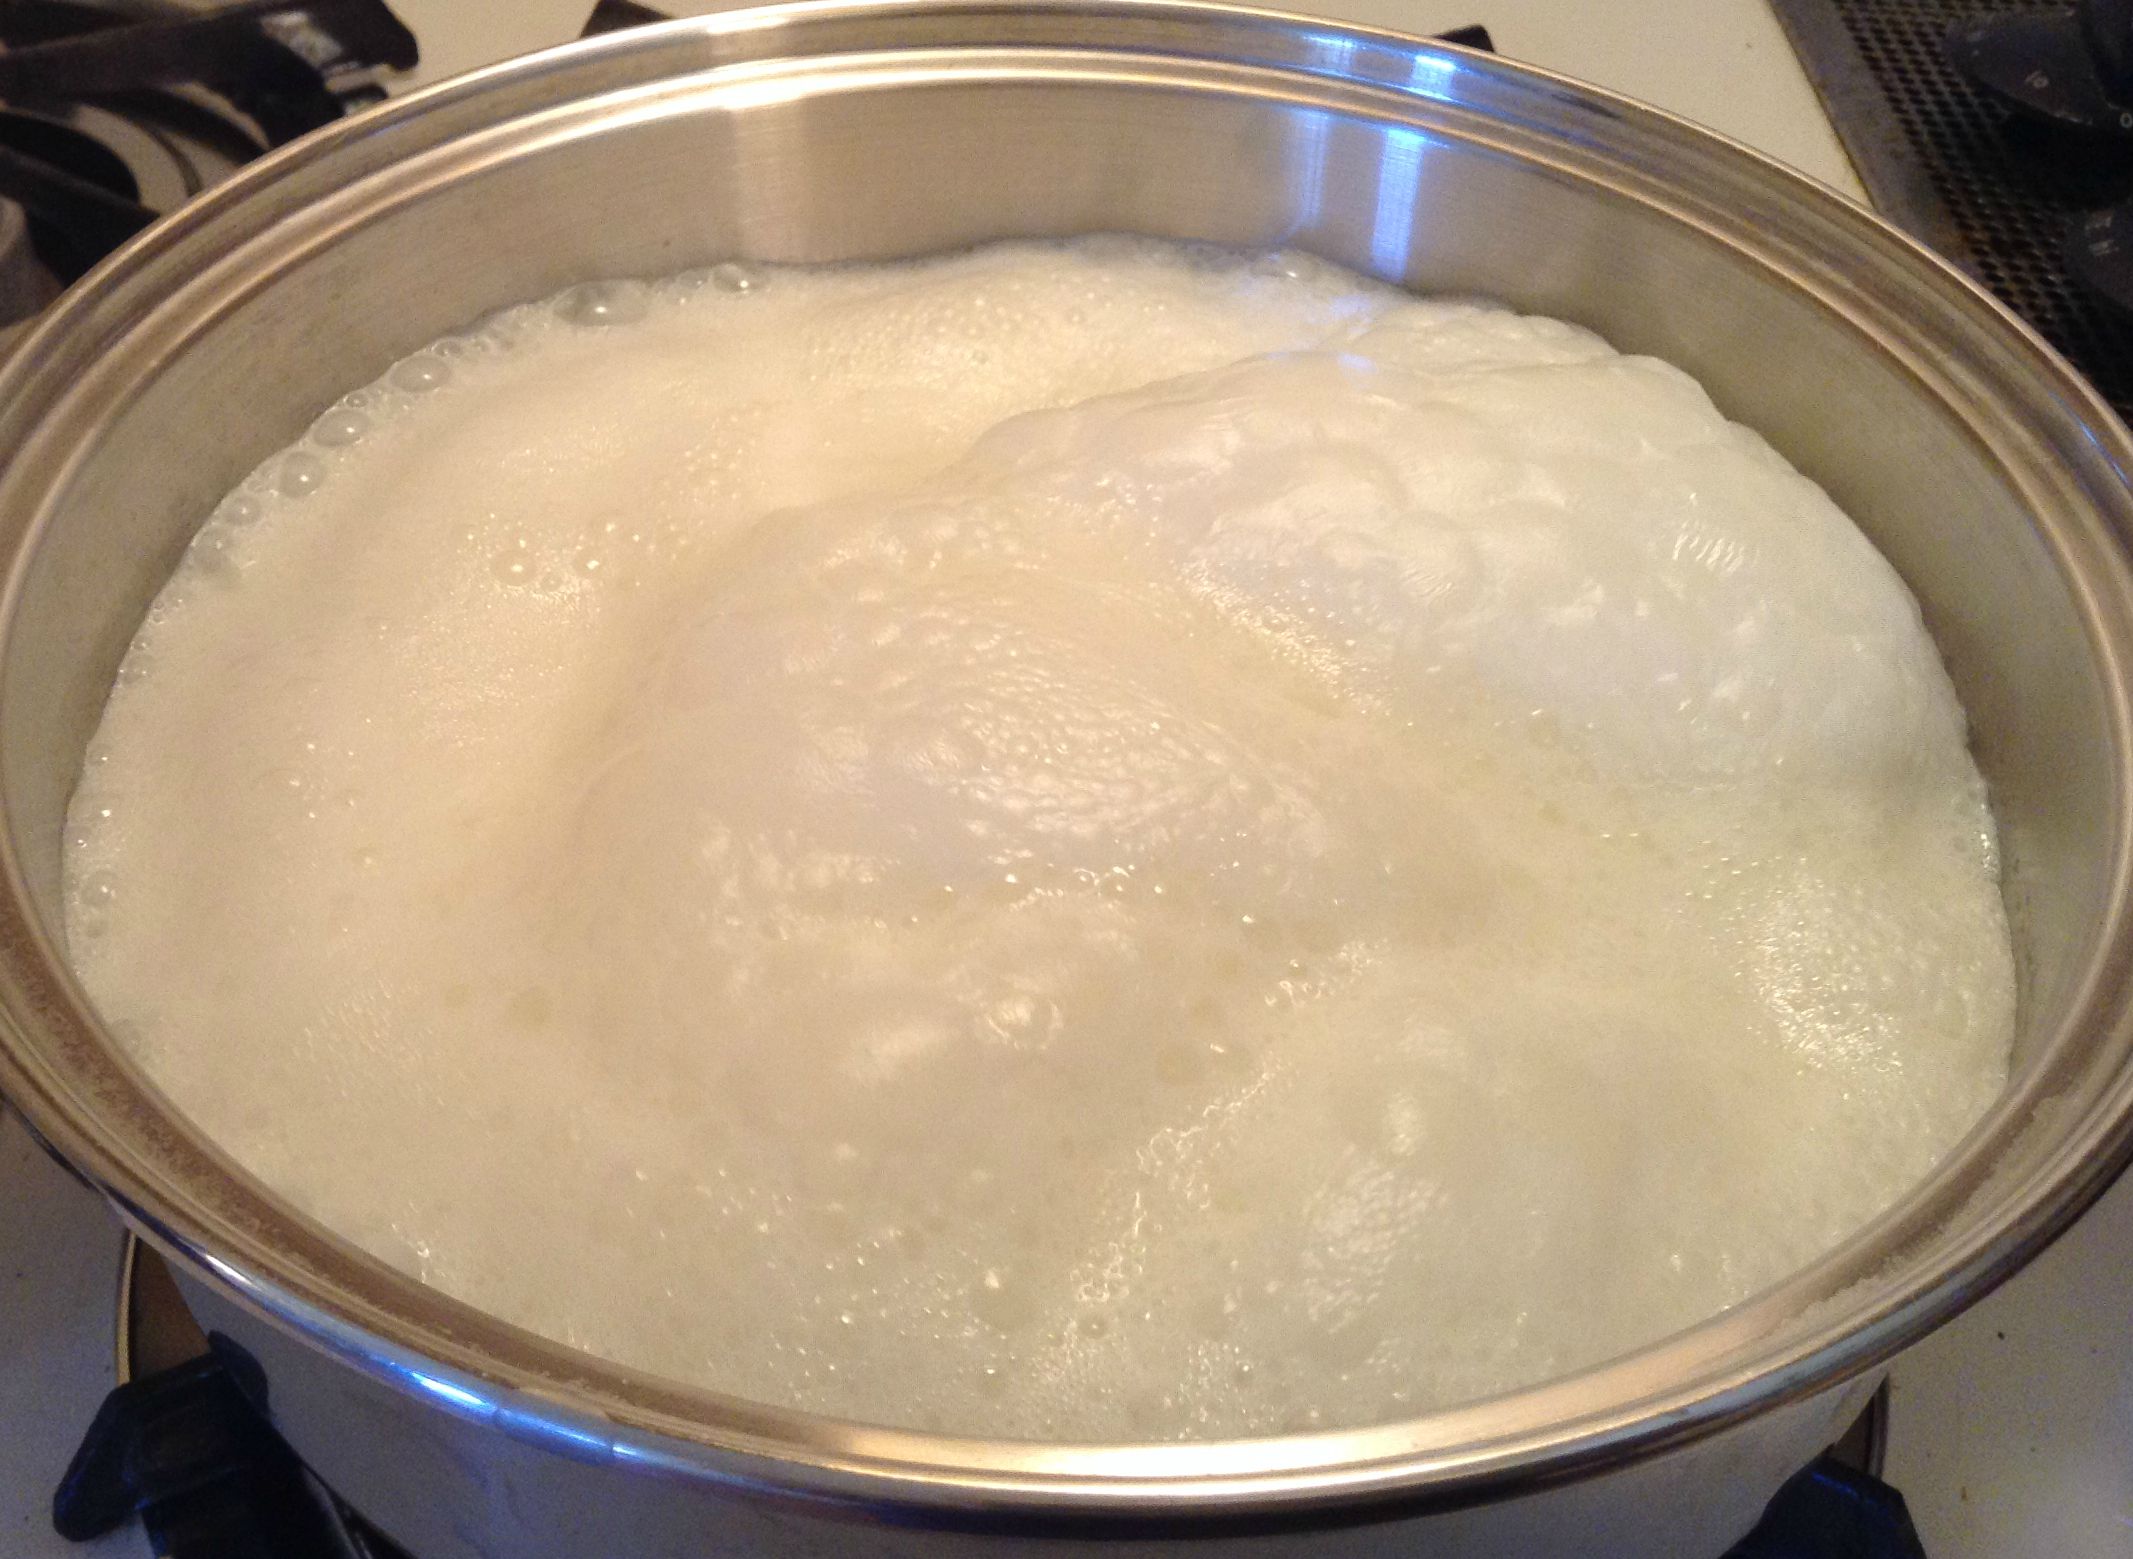
Heat one cup of heavy cream in a saucepan until it starts to boil and rise up.
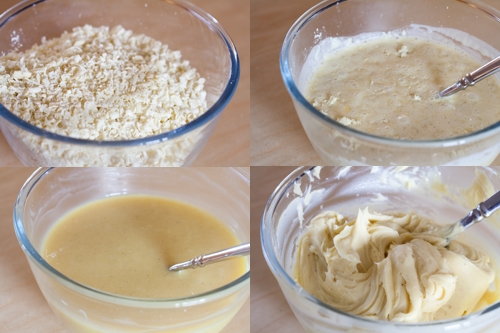
pour the cream on top of the chocolate and let it sit for 5-10 minutes.
With a wire whisk, stir the chocolate and cream until smooth and use a spatula to scape down the sides as necessary
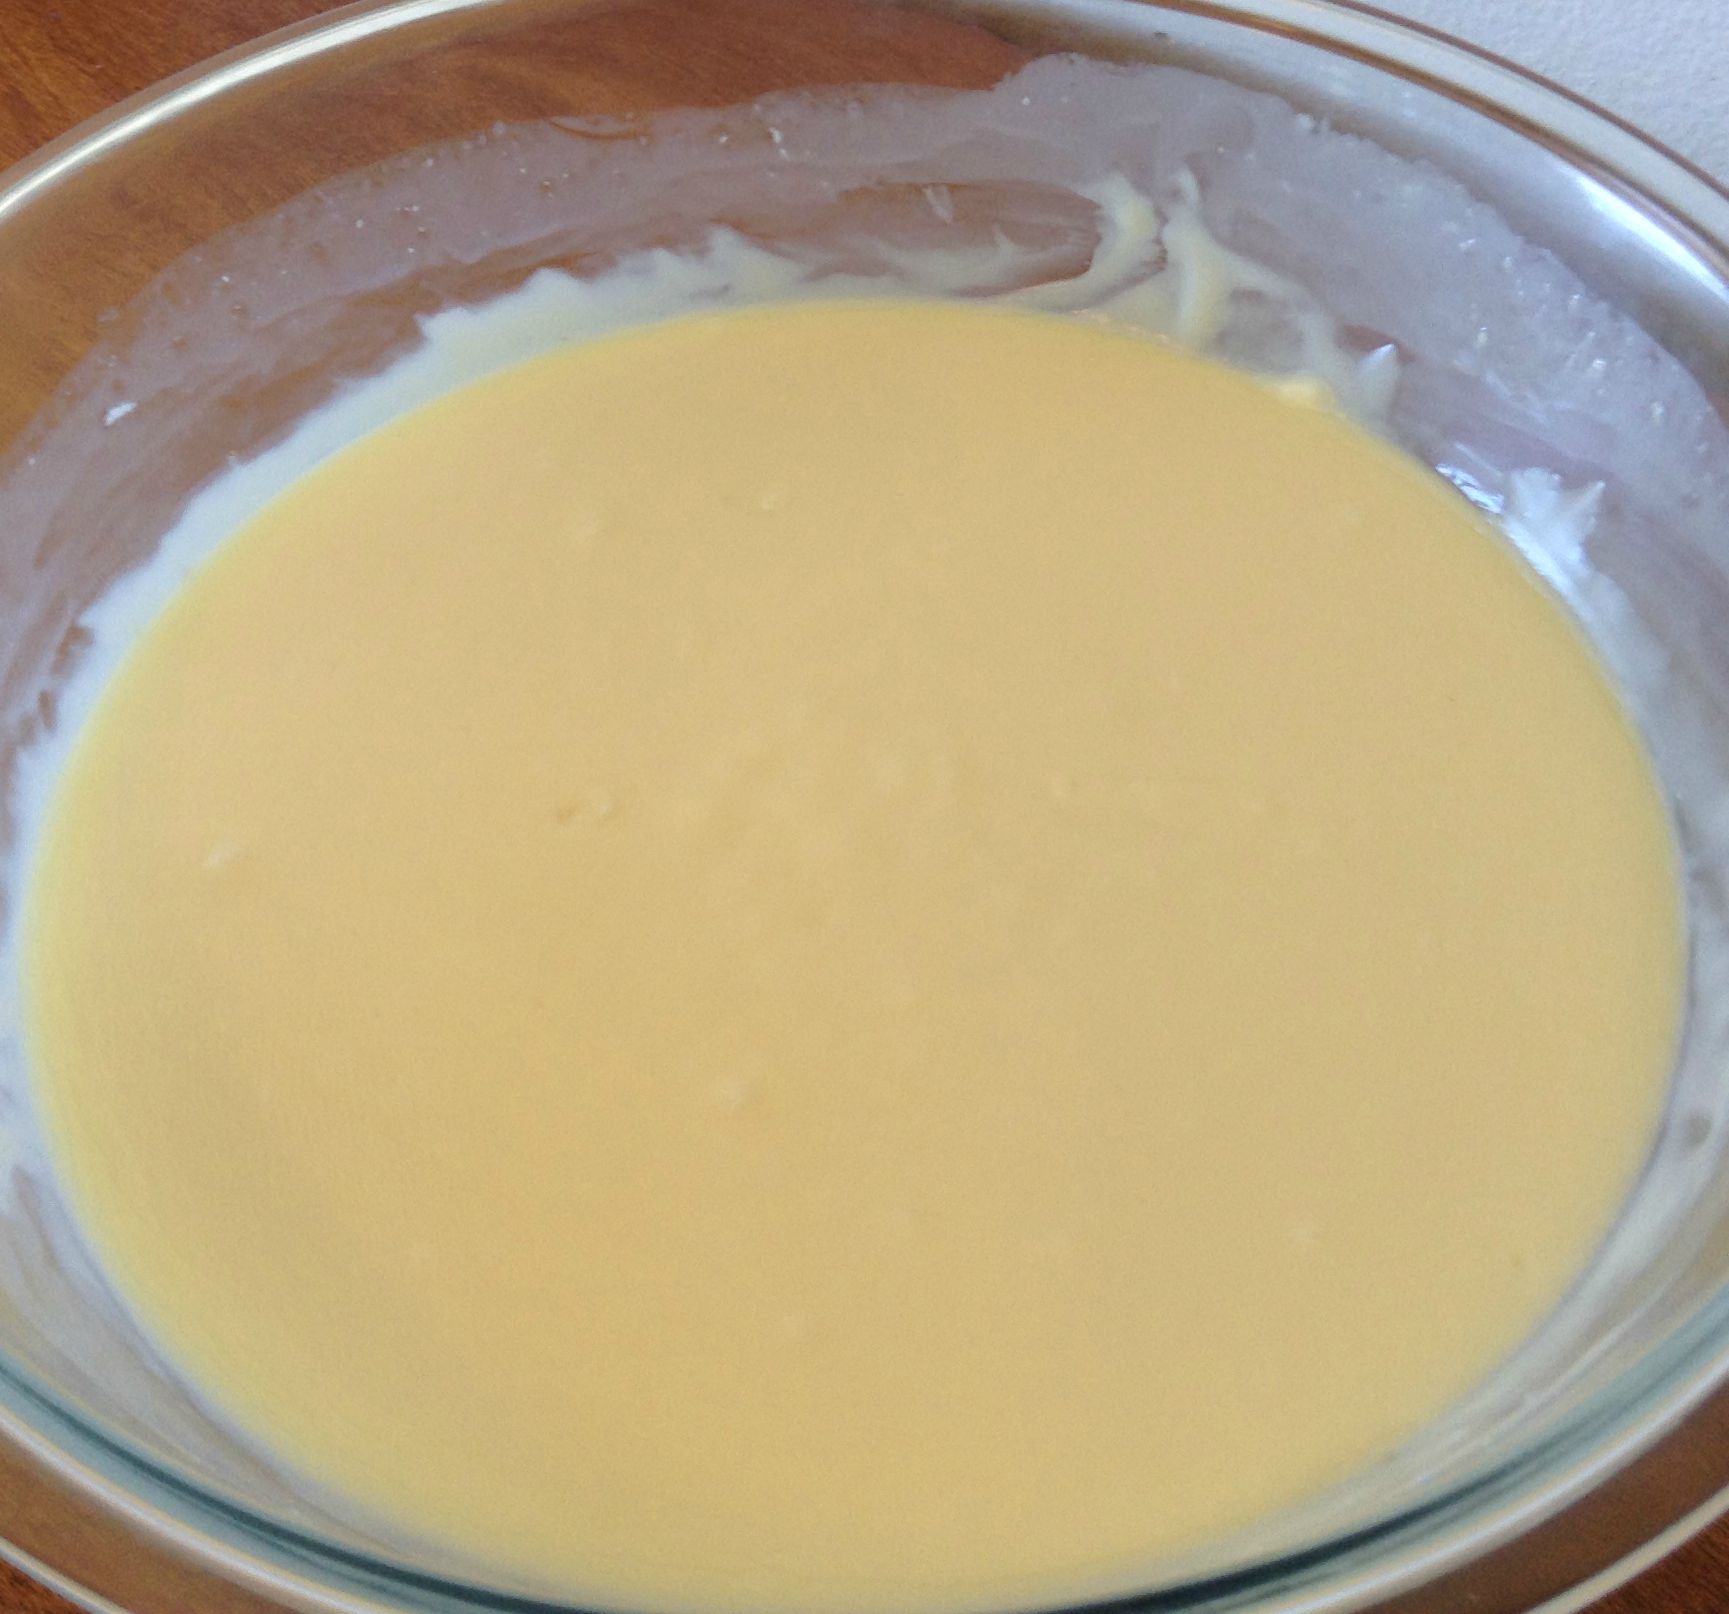
Cover with plastic wrap, and press plastic down to touch the ganache so a film doesn’t develop
Let ganache sit overnight on the counter
Ganache is great to use under fondant.
Here is my recipe for chocolate ganache that I used for my black ganache. The only difference was that I put a few drops of black food coloring into the cream before I added the chocolate.
- 12 ounces chocolate chips
- 1 cup heavy cream
- Place the chocolate in a medium-sized bowl and set aside.
- Bring cream to a boil in a small saucepan and when it begins to bubble up, pour over the chocolate and let sit for 5 minutes. Gently stir, starting in the middle and working your way outward, until the cream and chocolate are completely mixed. Cover with plastic wrap and set aside. Let the ganache sit at room temperature over night.
I also whipped up half of a batch of whipping cream with neon green food coloring.
- 1 eight oz package reduced fat cream cheese (room temperature)
- 1/2 cup of white sugar
- 1 tsp vanilla extract
- 1/8 tsp almond extract
- 1 quart of heavy or regular whipping cream
Combine all ingredients except the whipping cream by using a regular or stand mixer. While the mixer is still running, slowly add the cream. Continue to whip until stiff peaks form.
I put one cup of whipped cream between each layer of cake. Then I covered the cake with the neon green ganache and made sure it was smooth. Next, I poured the black ganache over the top of the cake and let it drip down the sides. I let it set in the refrigerator for 20 minutes.
To make the strawberries:
I got about 12 strawberries from the batch of strawberries I had and picked out the best ones. I cut out mouths with a paring knife, scooping out the excess strawberry inside. I took some black ganache extra from the dripping ganache, and spread it inside the opening of the mouth and filled it with the ganache. I let that harden while I cut out white teeth from white fondant, but you can also pipe the teeth with white royal icing. It was pretty tricky cutting out the fondant and trying to stick them onto the ganache with a little bit of water. I think next time I will try piping them on instead. They are so cute and creepy looking at the same time! It was fun watching my son and his cousins staring at this cake when I first showed it to them. They just couldn’t make out if it was scary, gross, or cute lol.

I made the tentacles ahead of time with black gum paste. I let them harden into the shapes I wanted. At the end of the assembly, I stuck the tentacles into the black ganache and stuck the strawberries on also.

This cake was inspired by Christine McConnell she is so awesome! Also yummycrumble Kathleen does great work!
My cake was featured here!
]]>
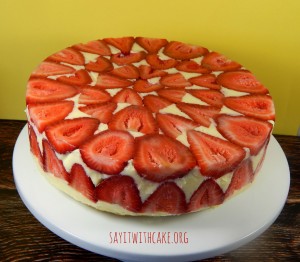
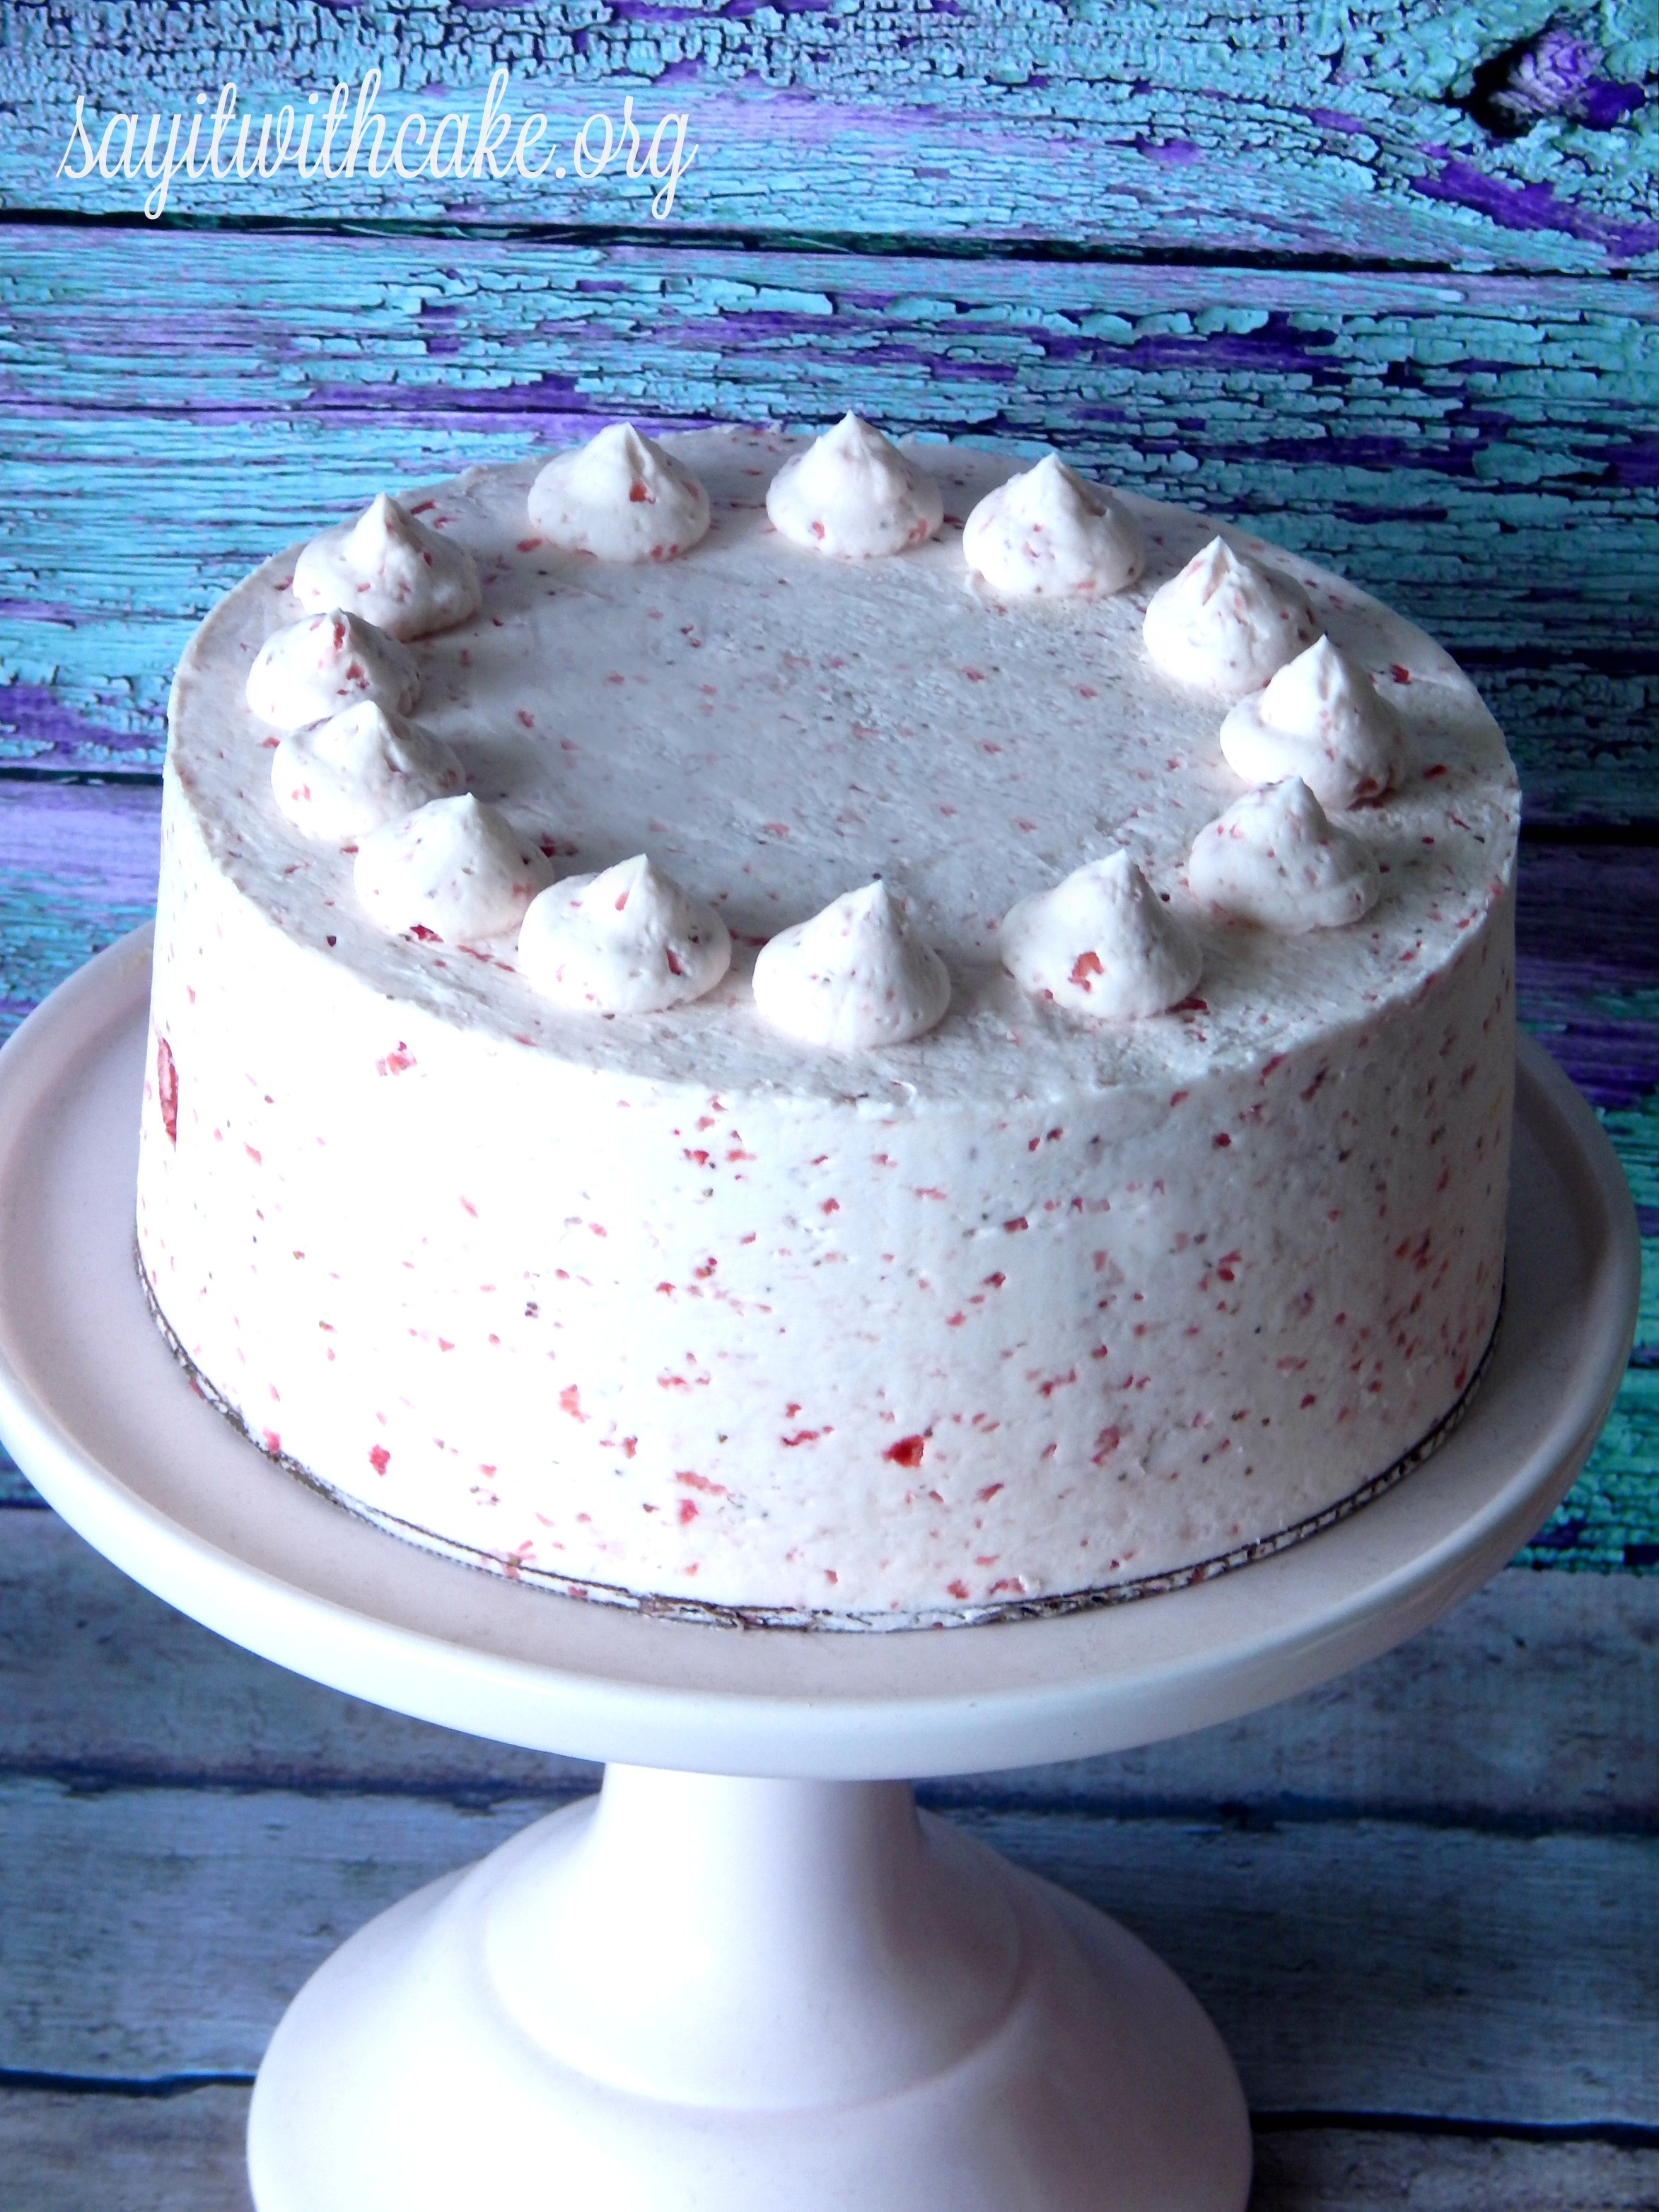 Now this strawberry cake is great. But the frosting, well that is another story entirely. In fact, it really deserves its own post! It is one of the best frostings I have ever had! It has pieces of fresh strawberries and the flavor is smooth, creamy, and not as sweet as regular American buttercream. It is a little bit harder to make, but worth it!
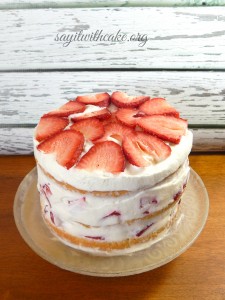
This cake is a white cake with fresh strawberries and strawberry Swiss meringue buttercream in-between the layers. You can find my recipe for my WASC (white, almond, sour cream ) white cake here. It is my go- to white cake recipe and it is delicious!
 I made this cake for my step mother Peggy for her birthday.
I thought about putting something else on top of the cake, but I decided to leave it simple. I have a few other strawberry cakes where I decorated the top with strawberries. You can see them here, and here. I like the piping I chose for this cake, they look like kisses!

Ingredients
- 1 ½ cups strawberries (about 8 oz)
- •5 large egg whites
- •1 cup plus 2 tablespoons sugar
- •Pinch of salt
- •1 pound (4 sticks) unsalted butter, cut into tablespoons, room temperature
- •1 1/2 teaspoons pure vanilla extract
Instructions
- Puree the strawberries until smooth and set aside.
- Combine egg whites, sugar, and salt in the heatproof bowl of a standing mixer set over a pan of simmering water. Whisk constantly by hand until mixture is warm to the touch and sugar has dissolved (the mixture should feel completely smooth when rubbed between your fingertips or gets to 140 degrees F ).
- Attach the bowl to the mixer fitted with the whisk attachment. Starting on low and gradually increasing to medium-high speed, whisk until stiff (but not dry) peaks form. Continue mixing until the mixture is fluffy and glossy, and completely cool (test by touching the bottom of the bowl), about 10 minutes. Set your timer, it makes life much simpler.
- With mixer on medium-low speed, add the butter a few tablespoons at a time, mixing well after each addition. If for some reason your frosting now resembles curdled milk, don’t freak out, just keep beating it; it will come back I promise. Once all butter has been added, whisk in vanilla and the strawberry puree. Switch to the paddle attachment, and continue beating on low speed until all air bubbles are eliminated, about 2 minutes. Scrape down sides of bowl with a flexible spatula, and continue beating until the frosting is completely smooth. Keep butter cream at room temperature if using the same day. This frosting can be made ahead and refrigerated, if you do that, make sure you let it get to room temp before you re-beat it. If you are using the next day, simply take it out the refrigerator the night before and let it sit on the counter, it will be the perfect temperature to whip the next morning.
enjoy!
If you like strawberry, here are some other strawberry cakes you might like!

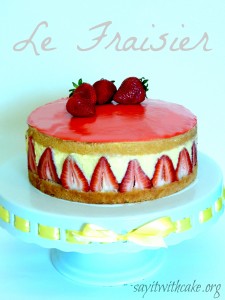
le fraisier
Strawberry fraisier
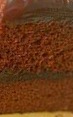
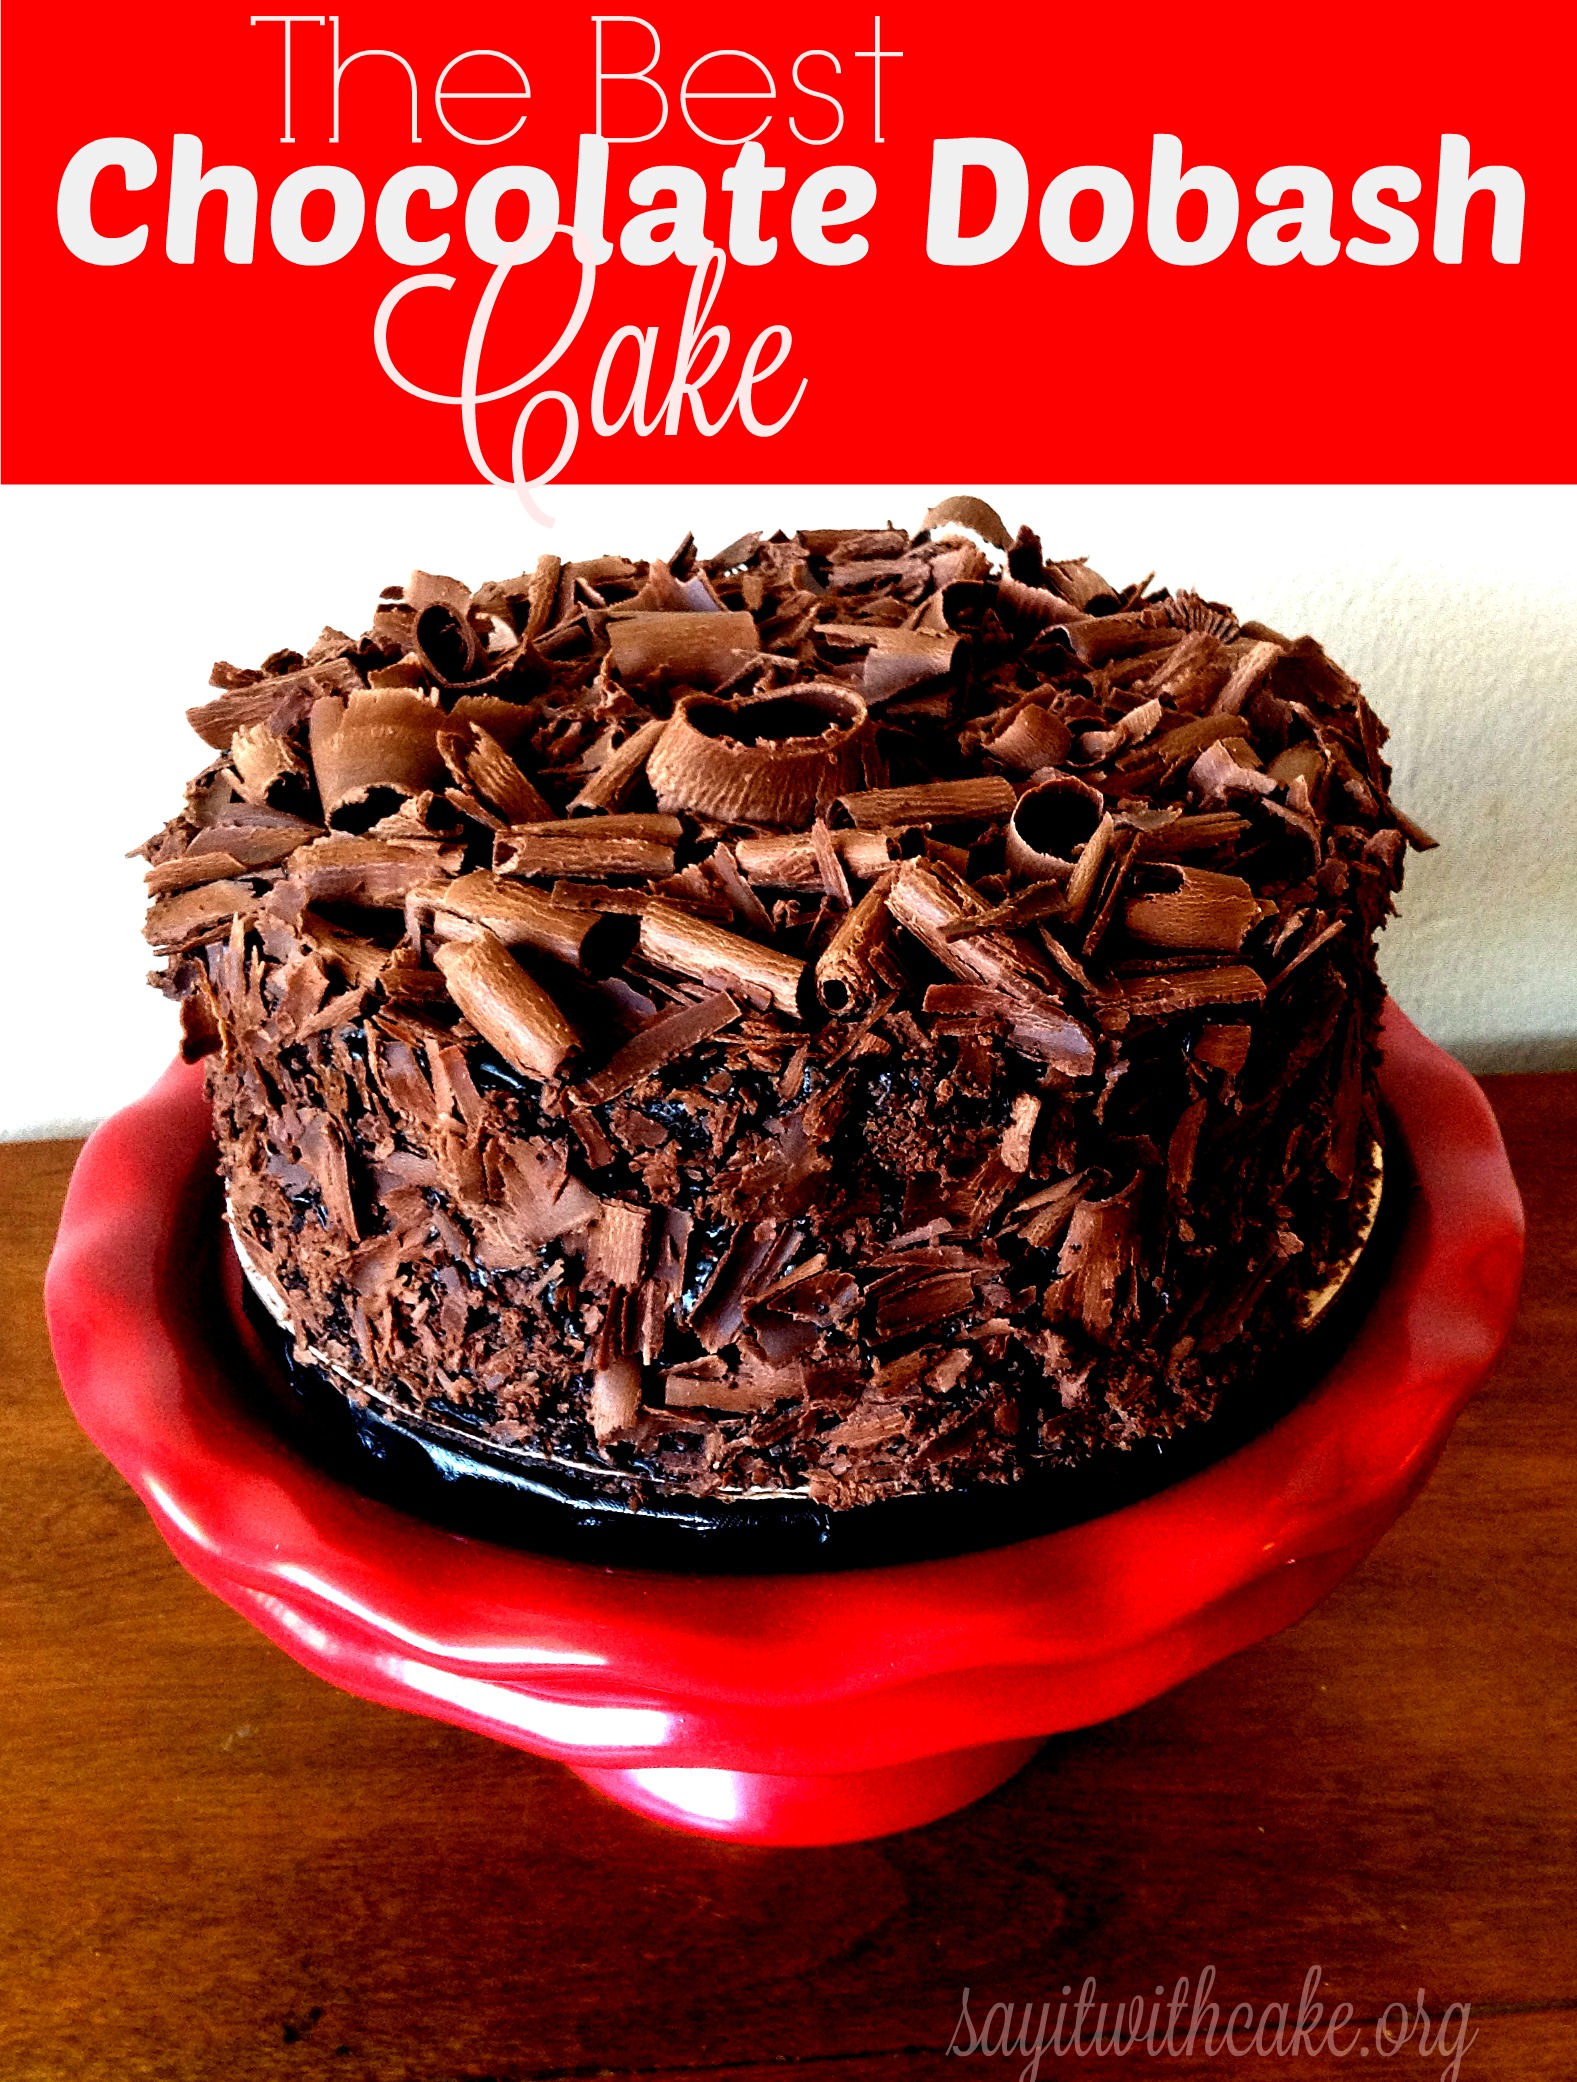 This Chocolate Dobash cake was a request from my Hawaiian husband for his birthday. A Dobash cake is a popular cake in Hawaii. It is a genoise cake (a sponge like cake) and a pudding like chocolate filling and frosting. You can see other Hawaiian cakes here, here, and here. The best part of this cake is the pudding like filling!The cake and filling are pretty easy to make. I used the filling for the frosting as well and covered the cake with chocolate shavings. My husband was very happy with his cake!
 To make chocolate shavings, all you do is get a chocolate bar and shave the sides with a peeler. Make sure you don’t touch the shavings with your fingers because they can melt really easy!
I used the recipe from The Polynesian Kitchen
Ingredients
- 3 eggs, separated
- 1-1/2 cups sugar
- 1-1/2 cups cake flour
- 3/4 teaspoon baking soda
- 3/4 teaspoon salt
- 1/3 cup cocoa powder
- 1/3 cup vegetable oil
- 1 cup milk
- 1-1/2 cups water
- 1 cup sugar
- 1/4 teaspoon salt
- 1/4 cup butter or margarine
- 1/2 cup cocoa powder
- 1/3 cup cornstarch
- 1/2 cup water
Instructions
- Preheat oven to 350 degrees. Grease and flour 2 8-inch pans.
- Beat egg whites until frothy; gradually beat in 1/2 cup sugar until stiff.
- Sift together remaining 1 cup sugar, flour, baking soda, salt and cocoa. Make a well in center; add oil and half of milk. Beat until well-blended at medium speed. Add remaining milk and egg yolks; beat until smooth.
- Fold mixture into egg whites. Pour batter into pans and bake 30 to 35 minutes. Cool, then slice each layer in half to make 4 layers.
- Combine water, sugar, salt and butter in saucepan and bring to boil. Combine cocoa, cornstarch and water; add to boiling mixture and return to boil. Cool completely. Frost between cooled layers, sides and top.
- Dust the sides with cake crumbs or shaved chocolate.
Enjoy!
Other Chocolate cakes you might like
chocolate peanutbutter cake
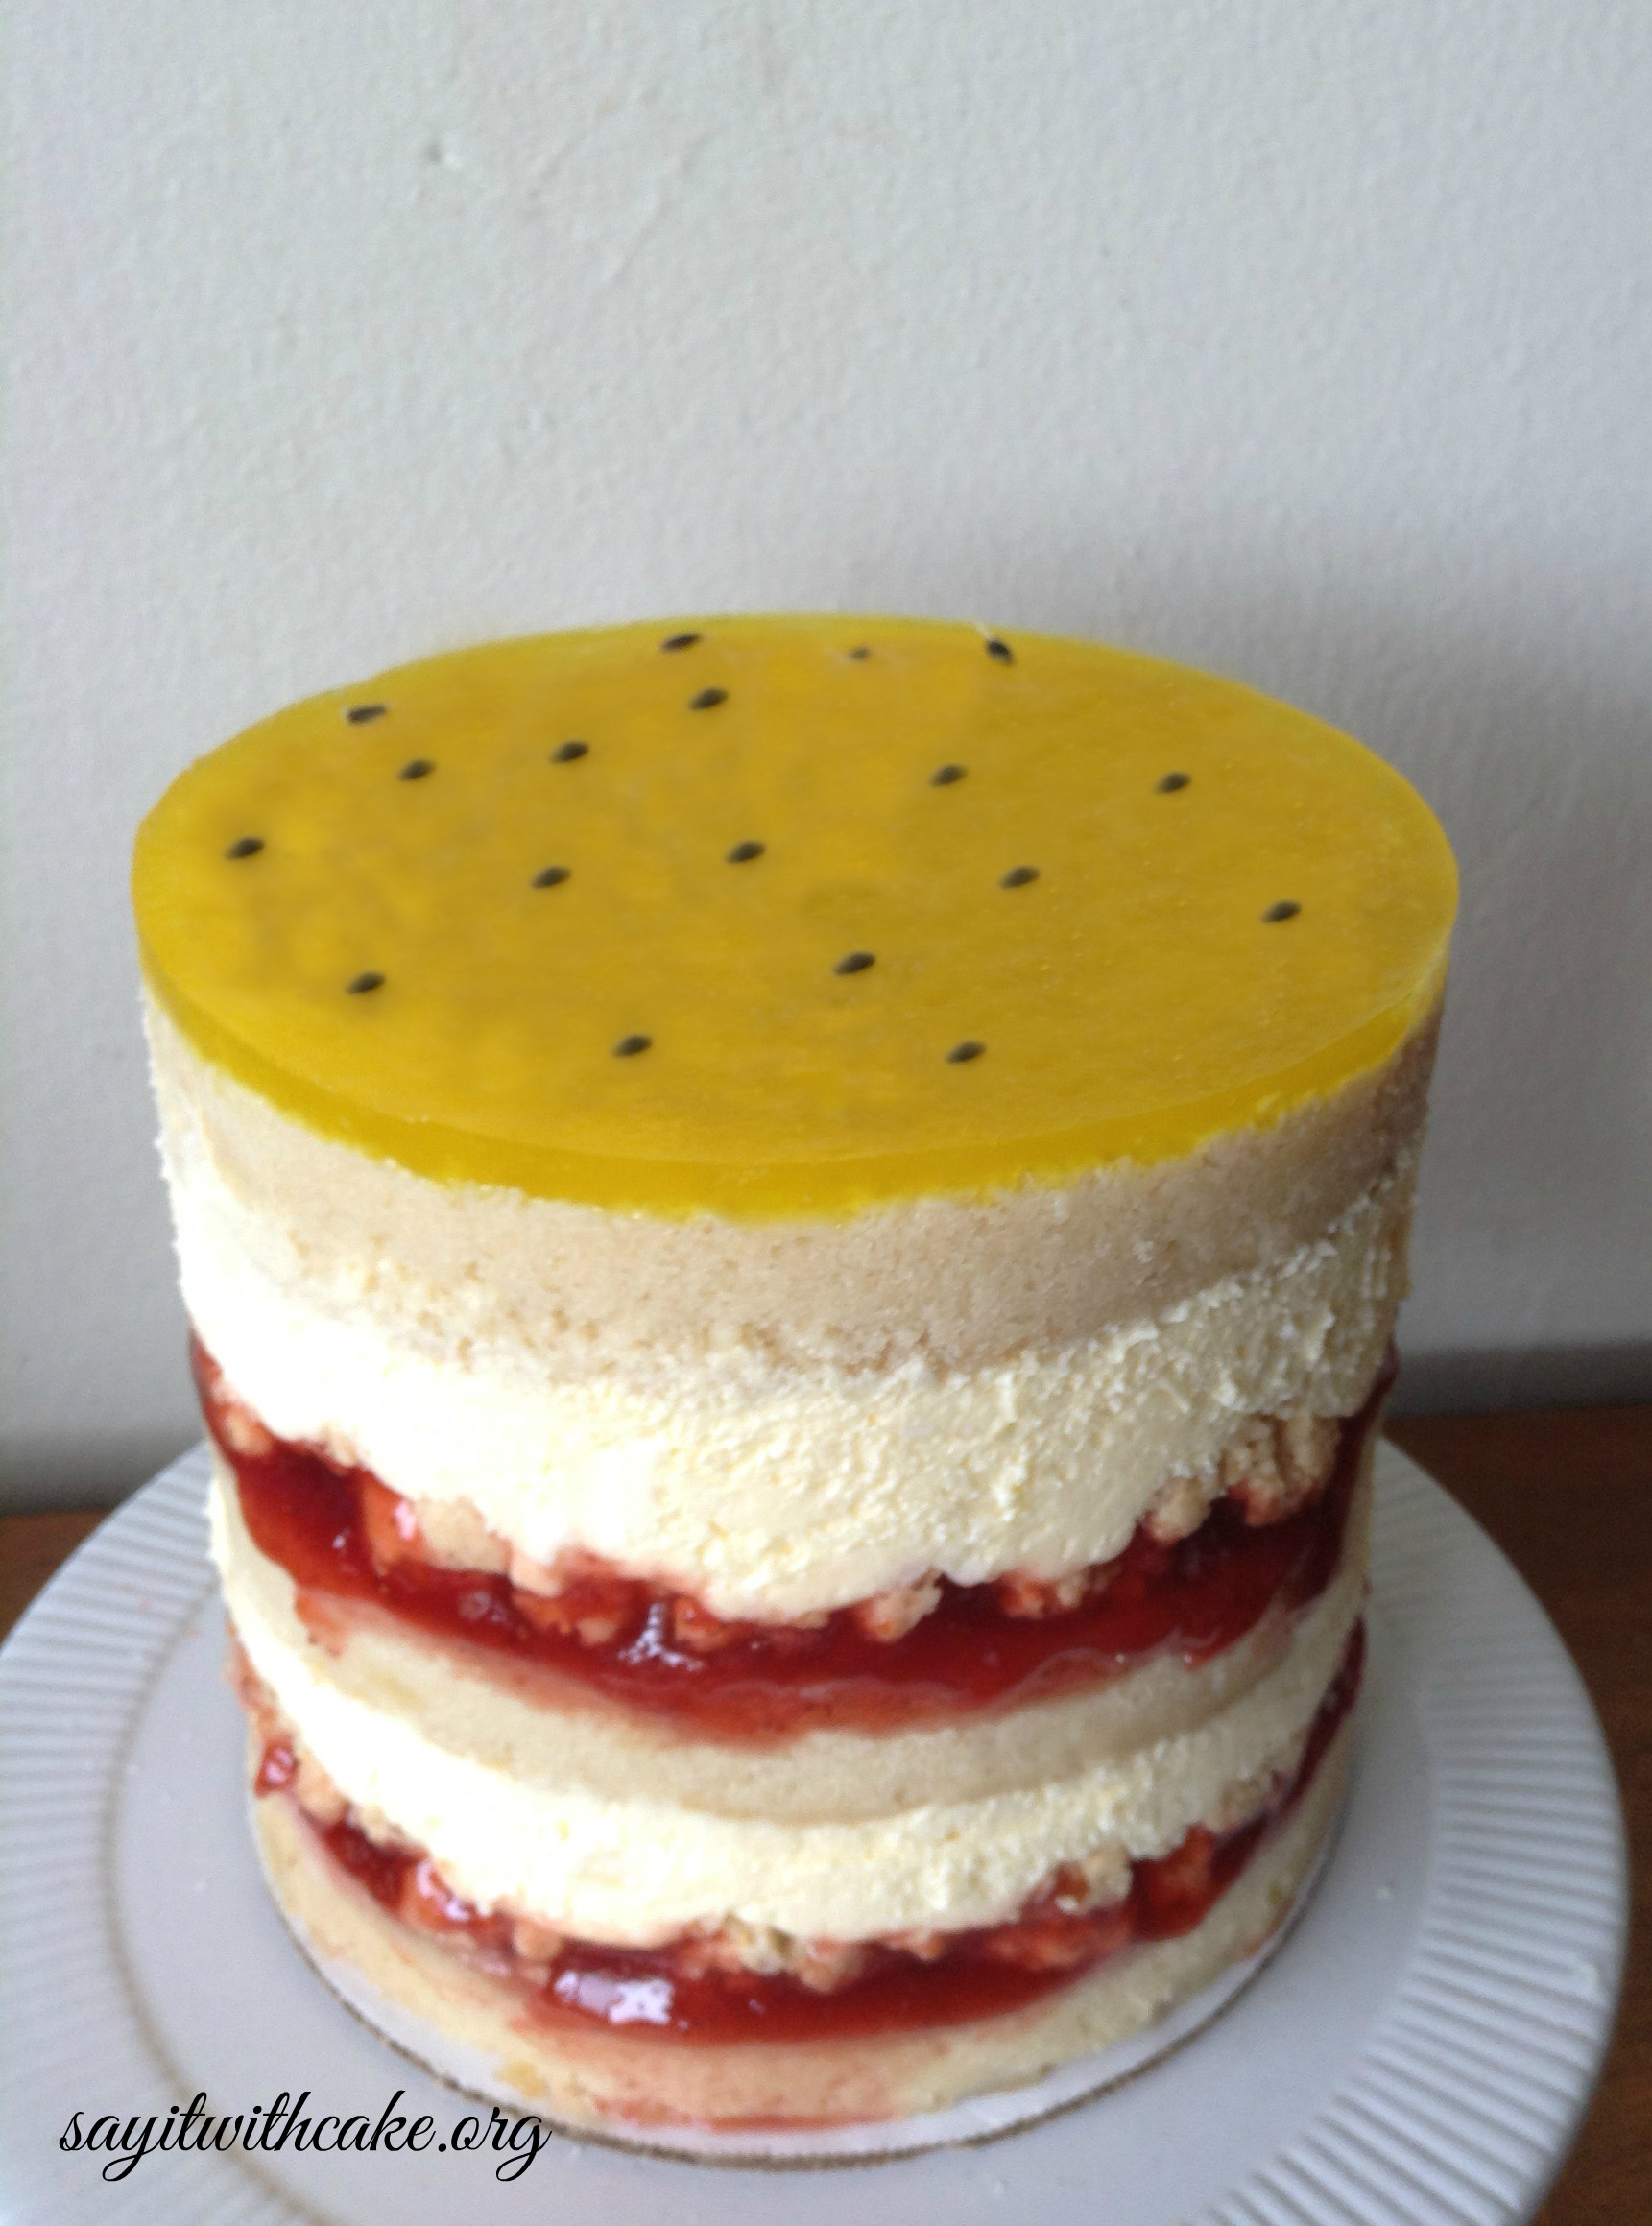
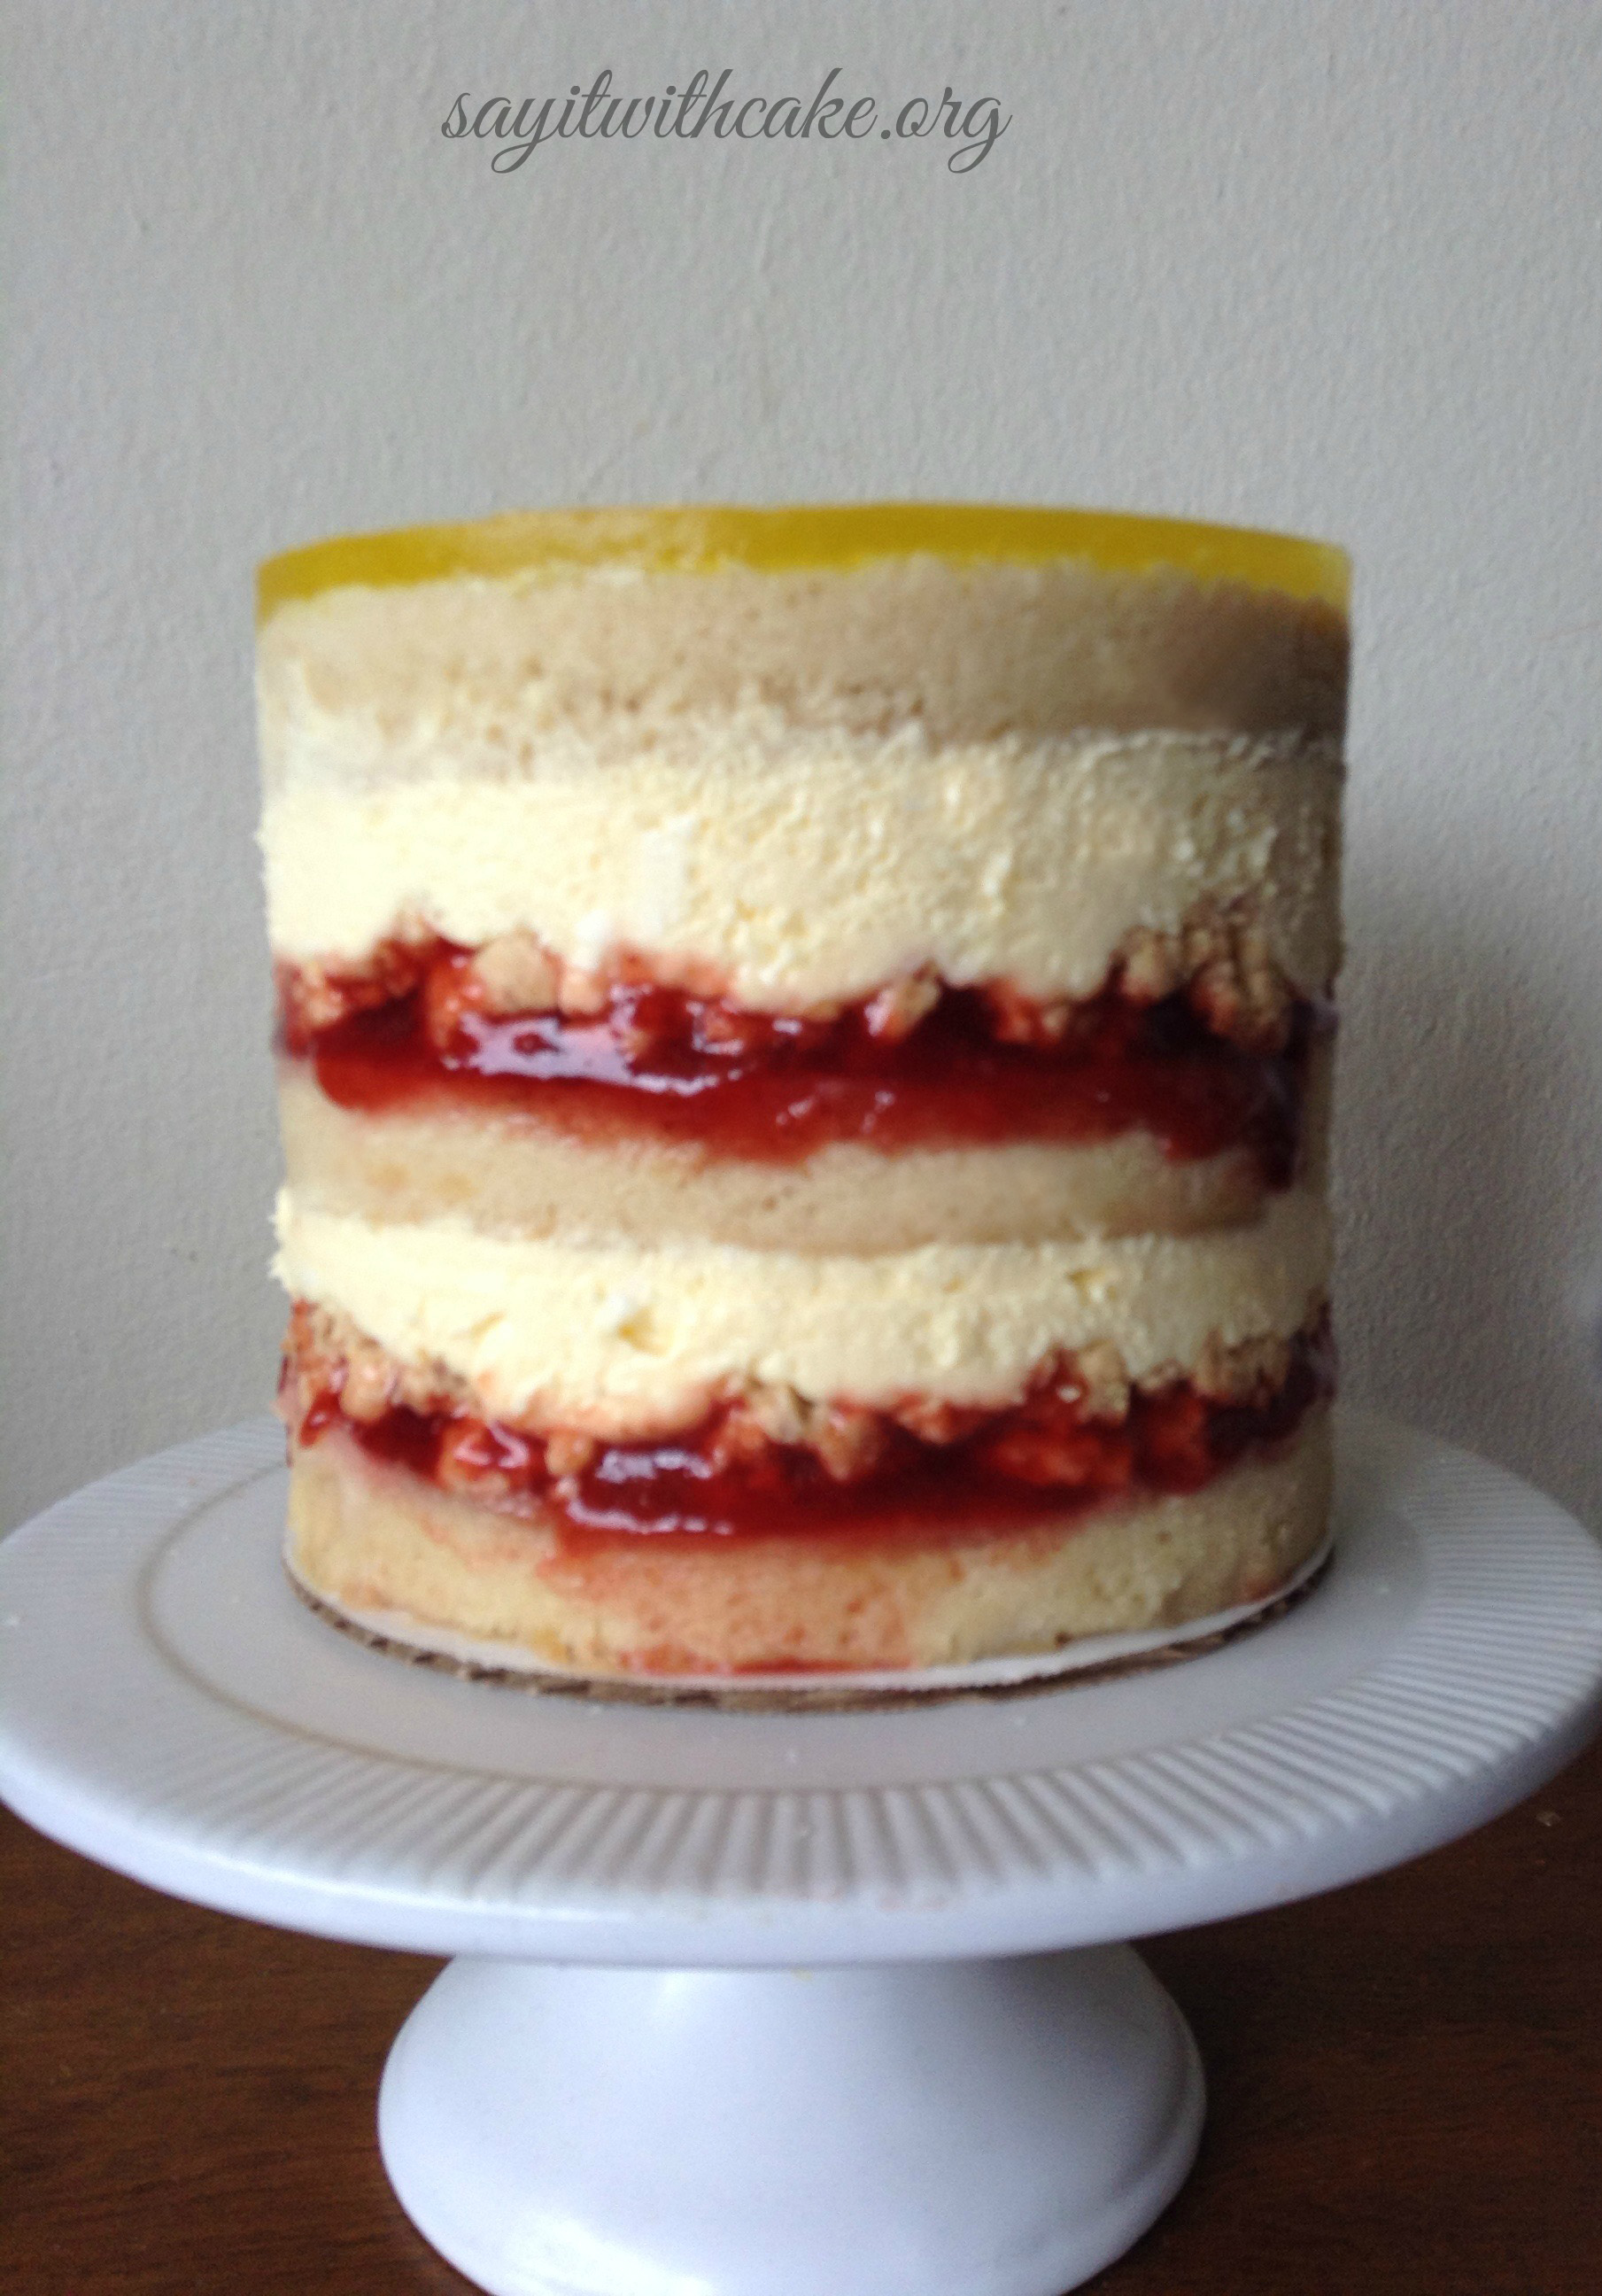
I based this cake on a strawberry cake from Milk bar. Instead of using lemon, I used passion fruit. I love how it is a naked cake and you can see all the delicious layers! The passion fruit and strawberry go together perfectly. Passion fruit by itself is kind of tangy, but with the liquid cheesecake and vanilla cake, it all comes together deliciously! I made this cake for my Aunt Teresa’s Birthday!
This cake has 6 different recipes that make up the whole cake. You can make them all ahead of time except the glaze. When I made this cake, it took me 3 days. Remember when you have assembled the cake, it still needs to freeze over night! Here are the different components of the cake!
makes 1 (6-inch) layer cake, 5 to 6 inches tall. serves 8-12
1 recipe vanilla cake
20 g lemon juice (1 ½ tsp)
1 recipe pickled strawberry jam
1 recipe passion fruit cheesecake
½ recipe milk crumbs
1 recipe passion fruit glaze
special equipment
1 (6-inch) cake ring
2 strips acetate, each 3 inches wide and 20 inches long
Ingredients
- makes 1 quarter sheet pan
- 115g (8 tbsp [1 stick]) butter, at room temperature
- 250g (1 ¼ cups) granulated sugar
- 60g (¼ cup, tightly packed) light brown sugar
- 3 eggs
- 110g (½ cup) buttermilk
- 75g (½ cup) grapeseed oil
- 12g (1 tbs) vanilla extract
- 185g (1 ½ cups) cake flour
- 4g (1 tsp) baking powder
- 4g (1 tsp) kosher salt
- pam or other nonstick cooking spray (optional)
- makes about 400g
- 240g (1 ¼ cup) strawberry puree
- 180g (1 cup) sugar
- 8g (2 tsp) pectin
- 2g (½ tsp) kosher salt
- 18g (2 tsp) sherry wine vinegar
- 12g (1 ½ tsp) white wine vinegar
- makes about 325 g (1 1/2 cups)
- 225g (8 oz) cream cheese
- 150g (¾ cup) sugar
- 6g (½ tsp) cornstarch
- 2g (½ tsp) kosher salt
- 25g (2 tbs) milk
- 1 egg
- makes about 360 g (1 ½ cups)
- 100 g passion fruit puree ½ cup
- 65 g sugar 1/3 cup
- 2 eggs
- 1 gelatin sheet
- 170 g butter, very cold 12 tablespoons (1 ½ sticks)
- 2 g kosher salt ½ teaspoon
- makes about 260g (2 ¼ cups)
- 40g (½ cup) milk powder
- 40g (¼ cup) flour
- 12g (2 tbs) cornstarch
- 25g (2 tbs) sugar
- 2g (½ tsp) kosher salt
- 55g (4 tbs) butter, melted
- 20g (¼ cup) milk powder
- 90g (3 oz) white chocolate, melted
- 100 ml water
- 1 tbspn sugar
- Pulp of 1 passion fruit
- 1 1/2 tspn gelatin powder soaked in 1 tbpn of cold water
Instructions
- heat the oven to 350°f.
- combine the butter and sugars in the bowl of a stand mixer fitted with the paddle attachment and cream together on medium-high for 2 to 3 minutes. scrape down the sides of the bowl, add the eggs, and mix on medium-high again for 2 to 3 minutes. scrape down the sides of the bowl once more.
- on low speed, stream in the buttermilk, oil, and vanilla. increase the mixer speed to medium-high and paddle for 4 to 6 minutes, until the mixture is practically white, twice the size of your original fluffy butter-and-sugar mixture, and completely mixed in. stop the mixer and scrape down the sides of the bowl.
- on very low speed, add the cake flour, baking powder, and salt. mix for 45 to 60 seconds, just until your batter comes together and any remnants of dry ingredients have been incorporated. scrape down the sides of the bowl. if you see any lumps of cake flour in there while you’re scraping, mix for another 45 seconds.
- pam-spray a quarter sheet pan and line it with parchment, or just line the pan with a silpat. using a spatula, spread the cake batter in an even layer in the pan. give the bottom of your sheet pan a tap on the countertop to even out the layer.
- bake the cake for 30 to 35 minutes. the cake will rise and puff, doubling in size, but will remain slightly buttery and dense. at 30 minutes, gently poke the edge of the cake with your finger: the cake should bounce back slightly and the center should no longer be jiggly. leave the cake in the oven for an extra 3 to 5 minutes if it doesn’t pass these tests.
- take the cake out of the oven and cool on a wire rack or, in a pinch, in the fridge or freezer . the cooled cake can be stored in the fridge, wrapped in plastic wrap, for up to 5 days.
- whisk together the sugar, pectin, and salt in a medium pot or saucepan. slowly whisk in the strawberry puree, sherry wine vinegar, and white wine vinegar and bring to a full, rolling boil. reduce the heat and cook at a low boil for 2 minutes to activate the pectin and turn the puree into a beautiful jam.
- once the pectin has been activated and coats the back of a spoon, remove the jam from the heat. the jam can be stored in an airtight container in the fridge for up to 2 weeks.
- heat the oven to 300°f.
- put the cream cheese in the bowl of a stand mixer fitted with the paddle attachment and mix on low speed for 2 minutes. scrape down the sides of the bowl with a spatula. add the sugar and mix for 1 to 2 minutes, until the sugar has been completely incorporated. scrape down the sides of the bowl.
- whisk together the cornstarch and salt in a medium bowl. whisk in the milk in a slow, steady stream, then whisk in the egg until the slurry is homogenous.
- with the mixer on medium-low speed, stream in the egg slurry. paddle for 3 to 4 minutes, until the mixture is smooth and loose. scrape down the sides of the bowl.
- line the bottom and sides of a 6 x 6-inch baking pan with plastic wrap. pour the cheesecake batter into the pan, put the pan in the oven, and bake for 15 minutes. gently shake the pan. the cheesecake should be firmer and more set toward the outer boundaries of the baking pan but still be jiggly and loose in the dead center. if the cheesecake is jiggly all over, give it 5 minutes more. and 5 minutes more if it needs it, but it’s never taken me more than 25 minutes to underbake one. if the cheesecake rises more than a 1/4 inch or begins to brown, take it out of the oven immediately.
- cool the cheesecake completely, to finish the baking process and allow the cheesecake to set. the final product will resemble a cheesecake, but it will be pipeable and pliable enough to easily spread or smear, while still having body and volume. once cool, the cheesecake can be stored in an airtight container in the fridge for up 1 week.
- Put the passion fruit puree and sugar in a blender and blend until the sugar granules have dissolved. Add the eggs and blend on low until you have a bright orange-yellow mixture. Transfer the contents of the blender to a medium pot or saucepan. Clean the blender canister.
- Bloom the gelatin (see below).
- Heat the passion fruit mixture over low heat, whisking regularly. As it heats up, it will begin to thicken; keep a close eye on it. Once the mixture boils, remove it from the stove and transfer it to the blender. Add the bloomed gelatin, butter, and salt and blend until the mixture is thick shiny, and super-smooth.
- Transfer the mixture to a heatproof container, and put in the fridge until the curd has cooled completely, at least 30 minutes. The curd can be refrigerated for up to 1 week; do not freeze.
- blooming the gelatin: get it right, or do it twice
- In order to incorporate it seamlessly into a mixture, gelatin must be softened, or “bloomed,” first. To bloom any amount of sheet gelatin, soak it in a small bowl of cold water. The gelatin is bloomed when it has become soft, after about 2 minutes. If the gelatin still has hard bits to it, it needs to bloom longer. If it is so soft it is falling apart, it is overbloomed; discard the gelatin and start over. Gently squeeze the bloomed gelatin to remove any excess water before using.
- To bloom powdered gelatin (any amount between ½ teaspoon and 2 teaspoons), sprinkle it evenly onto the surface of 2 tablespoons of cold water in a small cup. If you pour the powdered gelatin into a pile on top of the water, the granules in the center will remain hard and will not bloom. If you use too much water to bloom the gelatin, it will dilute the flavor of the recipe and its consistency will be looser than intended. Allow the granules to soften entirely in the cold water for 3 to 5 minutes.
- Once it is bloomed, in order to incorporate either kind of gelatin into a mixture, you need to dissolve the gelatin in hot, but not boiling, liquid – usually a bit of whatever it will be mixed into. If the gelatin gets too hot, it will lose its strength and you will have to start over again.
- Mix the passion fruit curd with the liquid cheesecake until just mixed.
- heat the oven to 250°f.
- combine the 40 g (½ cup) milk powder, the flour, cornstarch, sugar, and salt in a medium bowl. toss with your hands to mix. add the melted butter and toss, using a spatula, until the mixture starts to come together and form small clusters.
- spread the clusters on a parchment- or silpat-lined sheet pan and bake for 20 minutes. the crumbs should be sandy at that point, and your kitchen should smell like buttery heaven. cool the crumbs completely.
- In a heavy bottom pan, add water and sugar let them simmer on medium heat. Occasionally stir them till sugar dissolves, next add in passion fruit pulp and gelatin soaked in water. Bring it to simmer till the gelatin dissolves.
- Let the glaze to cool in ice water bath till it becomes syrupy, them immediately pour it on top of the cake. Cover with fresh wrappers and refrigerate it. Serve the cake cold with warm tea or a cock tail!
- crumble any milk crumb clusters that are larger than ½ inch in diameter, and put the crumbs in a medium bowl. add the 20 g (¼ cup) milk powder and toss together until it is evenly distributed throughout the mixture.
- pour the white chocolate over the crumbs and toss until your clusters are enrobed. then continue tossing them every 5 minutes until the white chocolate hardens and the clusters are no longer sticky. the crumbs will keep in an airtight container in the fridge or freezer for up to 1 month.
One thing I would do different next time with this cake is to make the milk crumbs smaller. I made them pretty big and had a hard time cutting the cake and cutting through the milk crumbs.

cake assembly instructions
1. put a piece of parchment or a silpat on the counter. invert the cake onto it and peel off the parchment or silpat from the bottom of the cake. use the cake ring to stamp out 2 circles from the cake. these are your top 2 cake layers. the remaining cake “scrap” will come together to make the bottom layer of the cake.
layer 1, the bottom
2. clean the cake ring and place it in the center of a sheet pan lined with clean parchment or a silpat. use 1 strip of acetate to line the inside of the cake ring.
3. put the cake scraps together inside the ring and use the back of your hand to tamp the scraps together into a flat even layer.
4. dunk a pastry brush in the lemon juice and give the layer of cake a good, healthy bath of half of the juice.
5. use the back of a spoon to spread the pickled strawberry jam in an even layer over the cake.
6. sprinkle half of the milk crumbs evenly over the pickled strawberry jam. use the back of your hand to anchor them in place.
7. use the back of a spoon to spread one-half of the lemon cheesecake as evenly as possible over the crumbs.
layer 2, the middle
8. with your index finger, gently tuck the second strip of acetate between the cake ring and the top ¼ inch of the first strip of acetate, so that you have a clear ring of acetate 5 to 6 inches tall – high enough to support the height of the finished cake. set a cake round on top of the lemon cheesecake, and repeat the process for layer 1 (if 1 of your 2 cake rounds is worse than the other, use it here in the middle and save the prettier one for the top).
layer 3, the top
9. nestle the remaining cake round into the frosting. Cover the top of the cake with the passion fruit glaze. Garnish with passion fruit seeds.
10. transfer the sheet pan to the freezer and freeze for a minimum of 12 hours to set the cake and filling. the cake will keep in the freezer for up to 2 weeks.
11. at least 3 hours before you are ready to serve the cake, pull the sheet pan out of the freezer and, using your fingers and thumbs, pop the cake out of the cake ring. gently peel off the acetate, and transfer the cake to a platter or cake stand. let it defrost in the fridge for a minimum of 3 hours (wrapped well in plastic, the cake can be refrigerated for up to 5 days).
12. slice the cake into wedges and serve.
Enjoy!
More cakes you might enjoy!
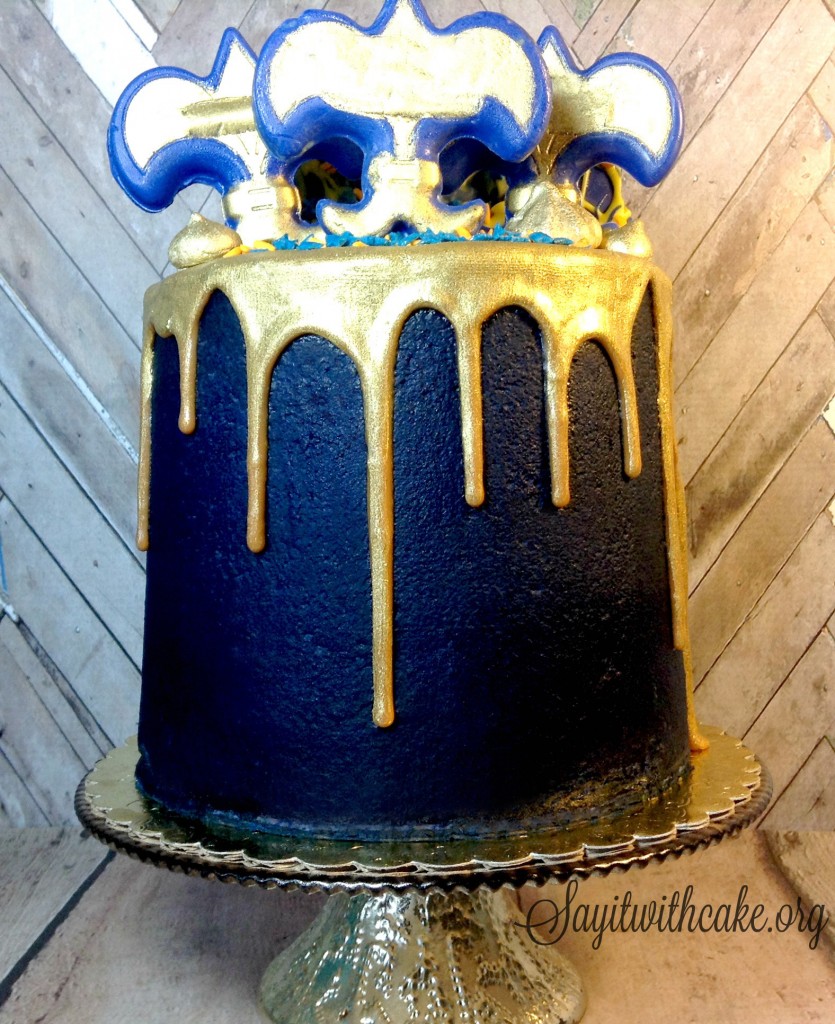
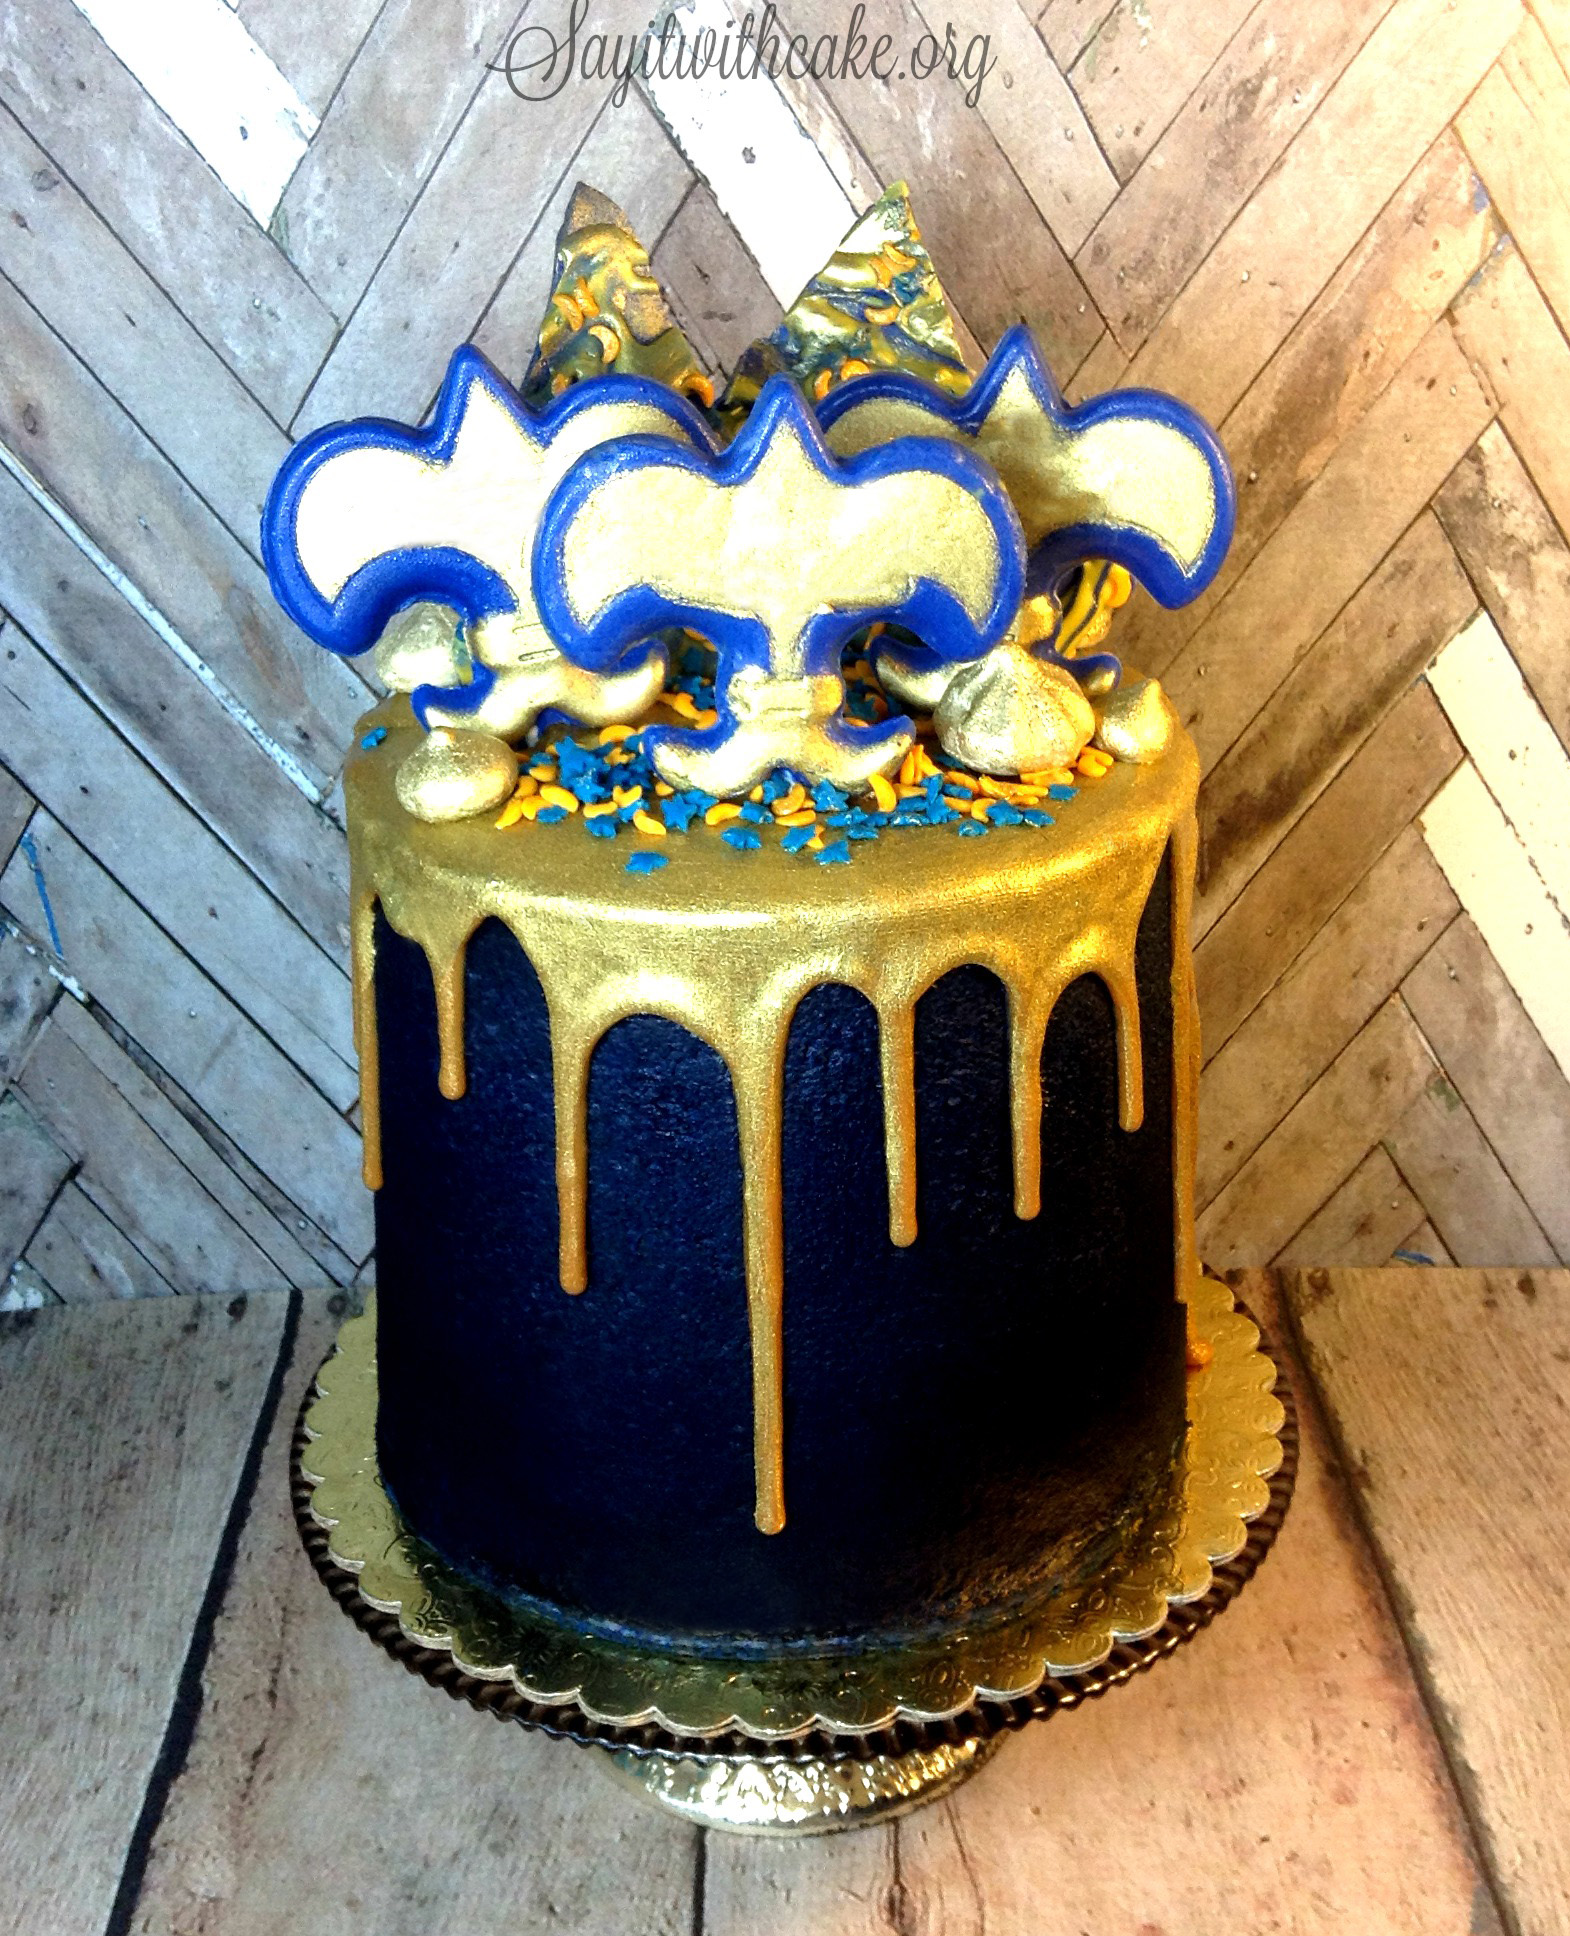 I made this cake for the Cub Scouts Blue and Gold banquet. My favorite part was the dripping gold ganache. This cake has midnight blue buttercream, gold ganache, chocolate boy scout logo toppers, blue and gold moon and stars sprinkles, gold meringue cookies, and blue and gold bark!
Many components of this cake can be made ahead of time like the toppers, meringues, bark, ganache, and frosting. You can find my recipes on the links.
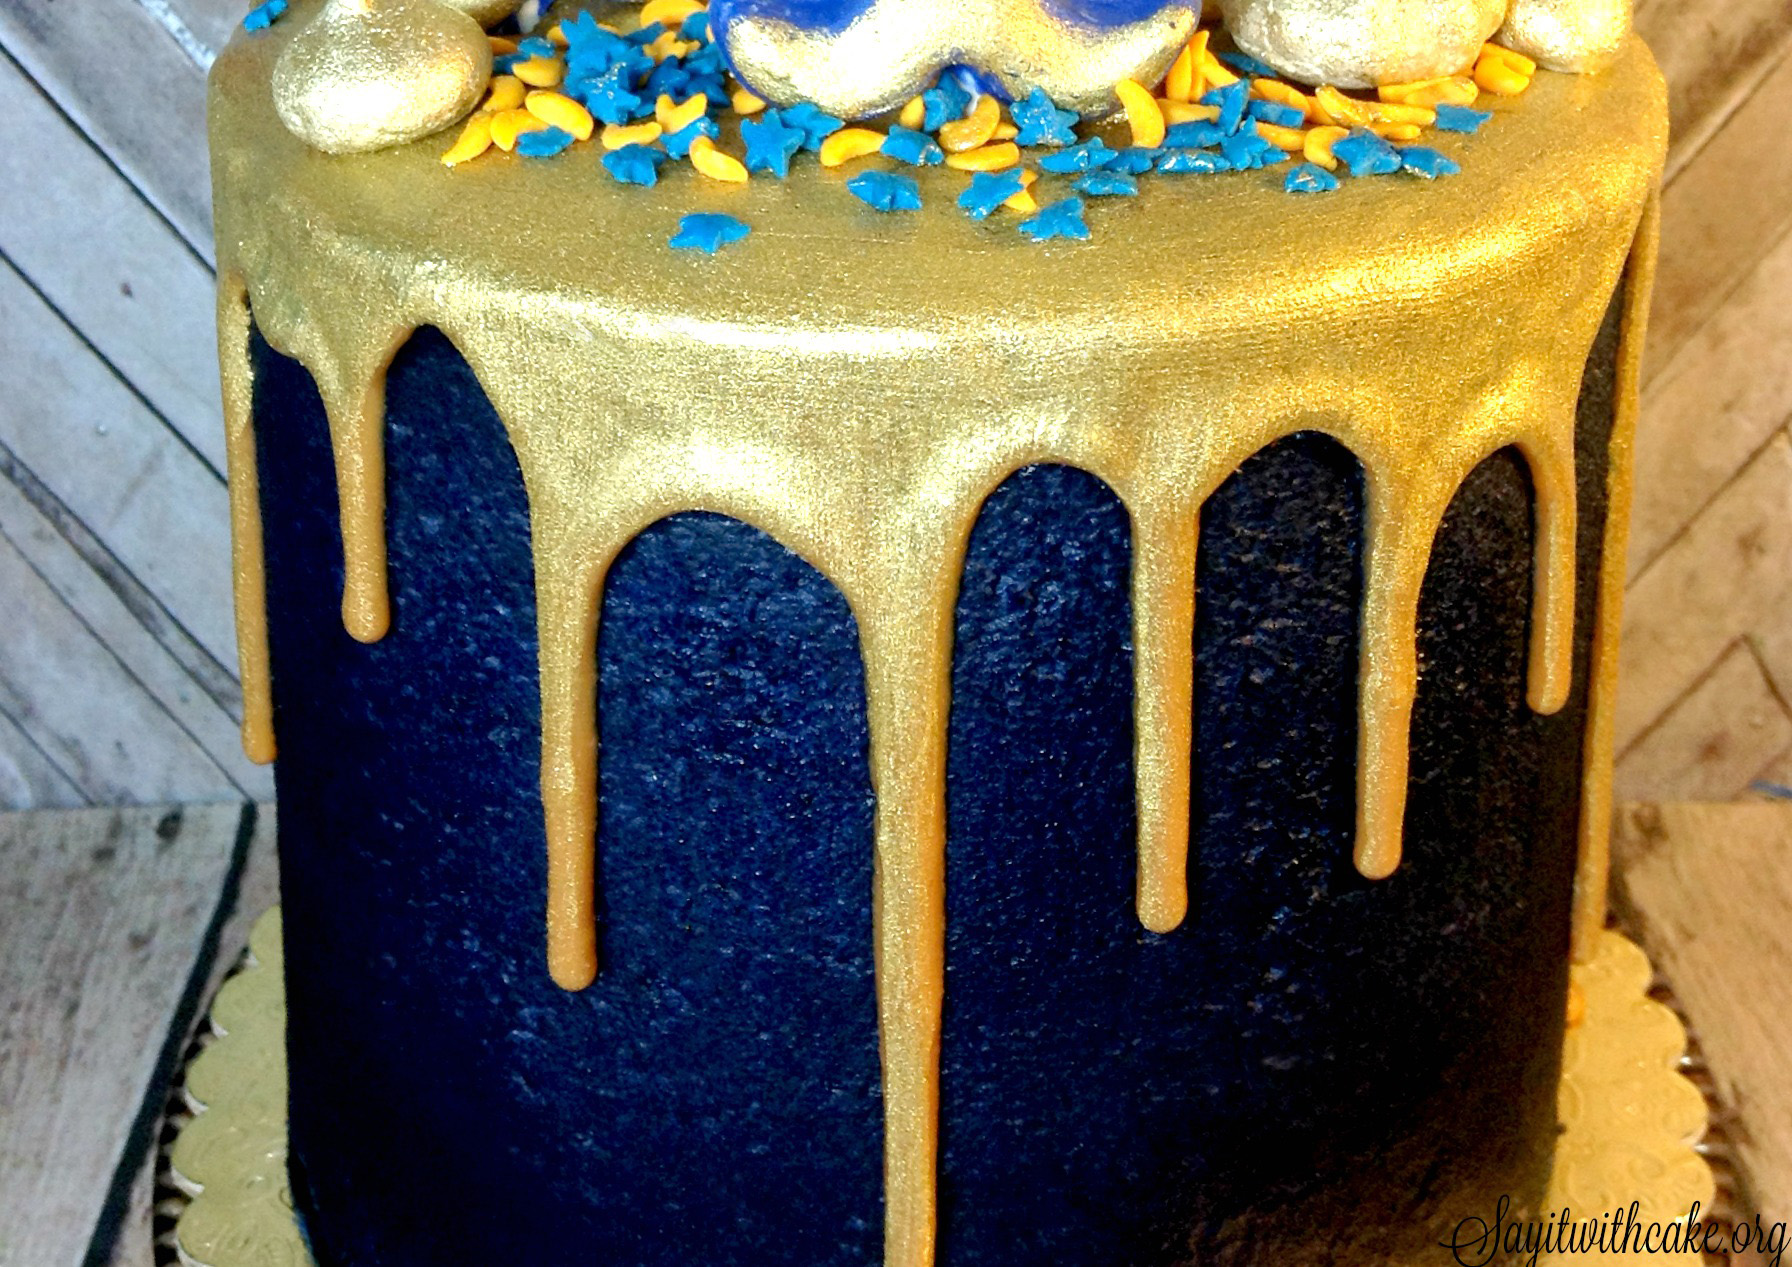
The trick to making the gold ganache is to start with a yellow ganache. Add yellow food coloring to the cream while it is heating up. You can check out my post on how to make colored ganache here.
Yellow chocolate ganache
- 12 ounces of yellow candy melts
- 1/3 cup heavy whipping cream
- yellow food coloring
After you make the ganache and drip it down the cake, paint it with gold luster dust. You can also check out my tutorial on how to make perfect ganache drips here. Add a tiny bit of vodka or extract to a small bowl, then add the luster dust and mix it up till it is a thick paste. Then paint it on top of the ganache! I think it looks so beautiful!
Enjoy!
Other cakes with dripping ganache you might enjoy!
Halloween Cake