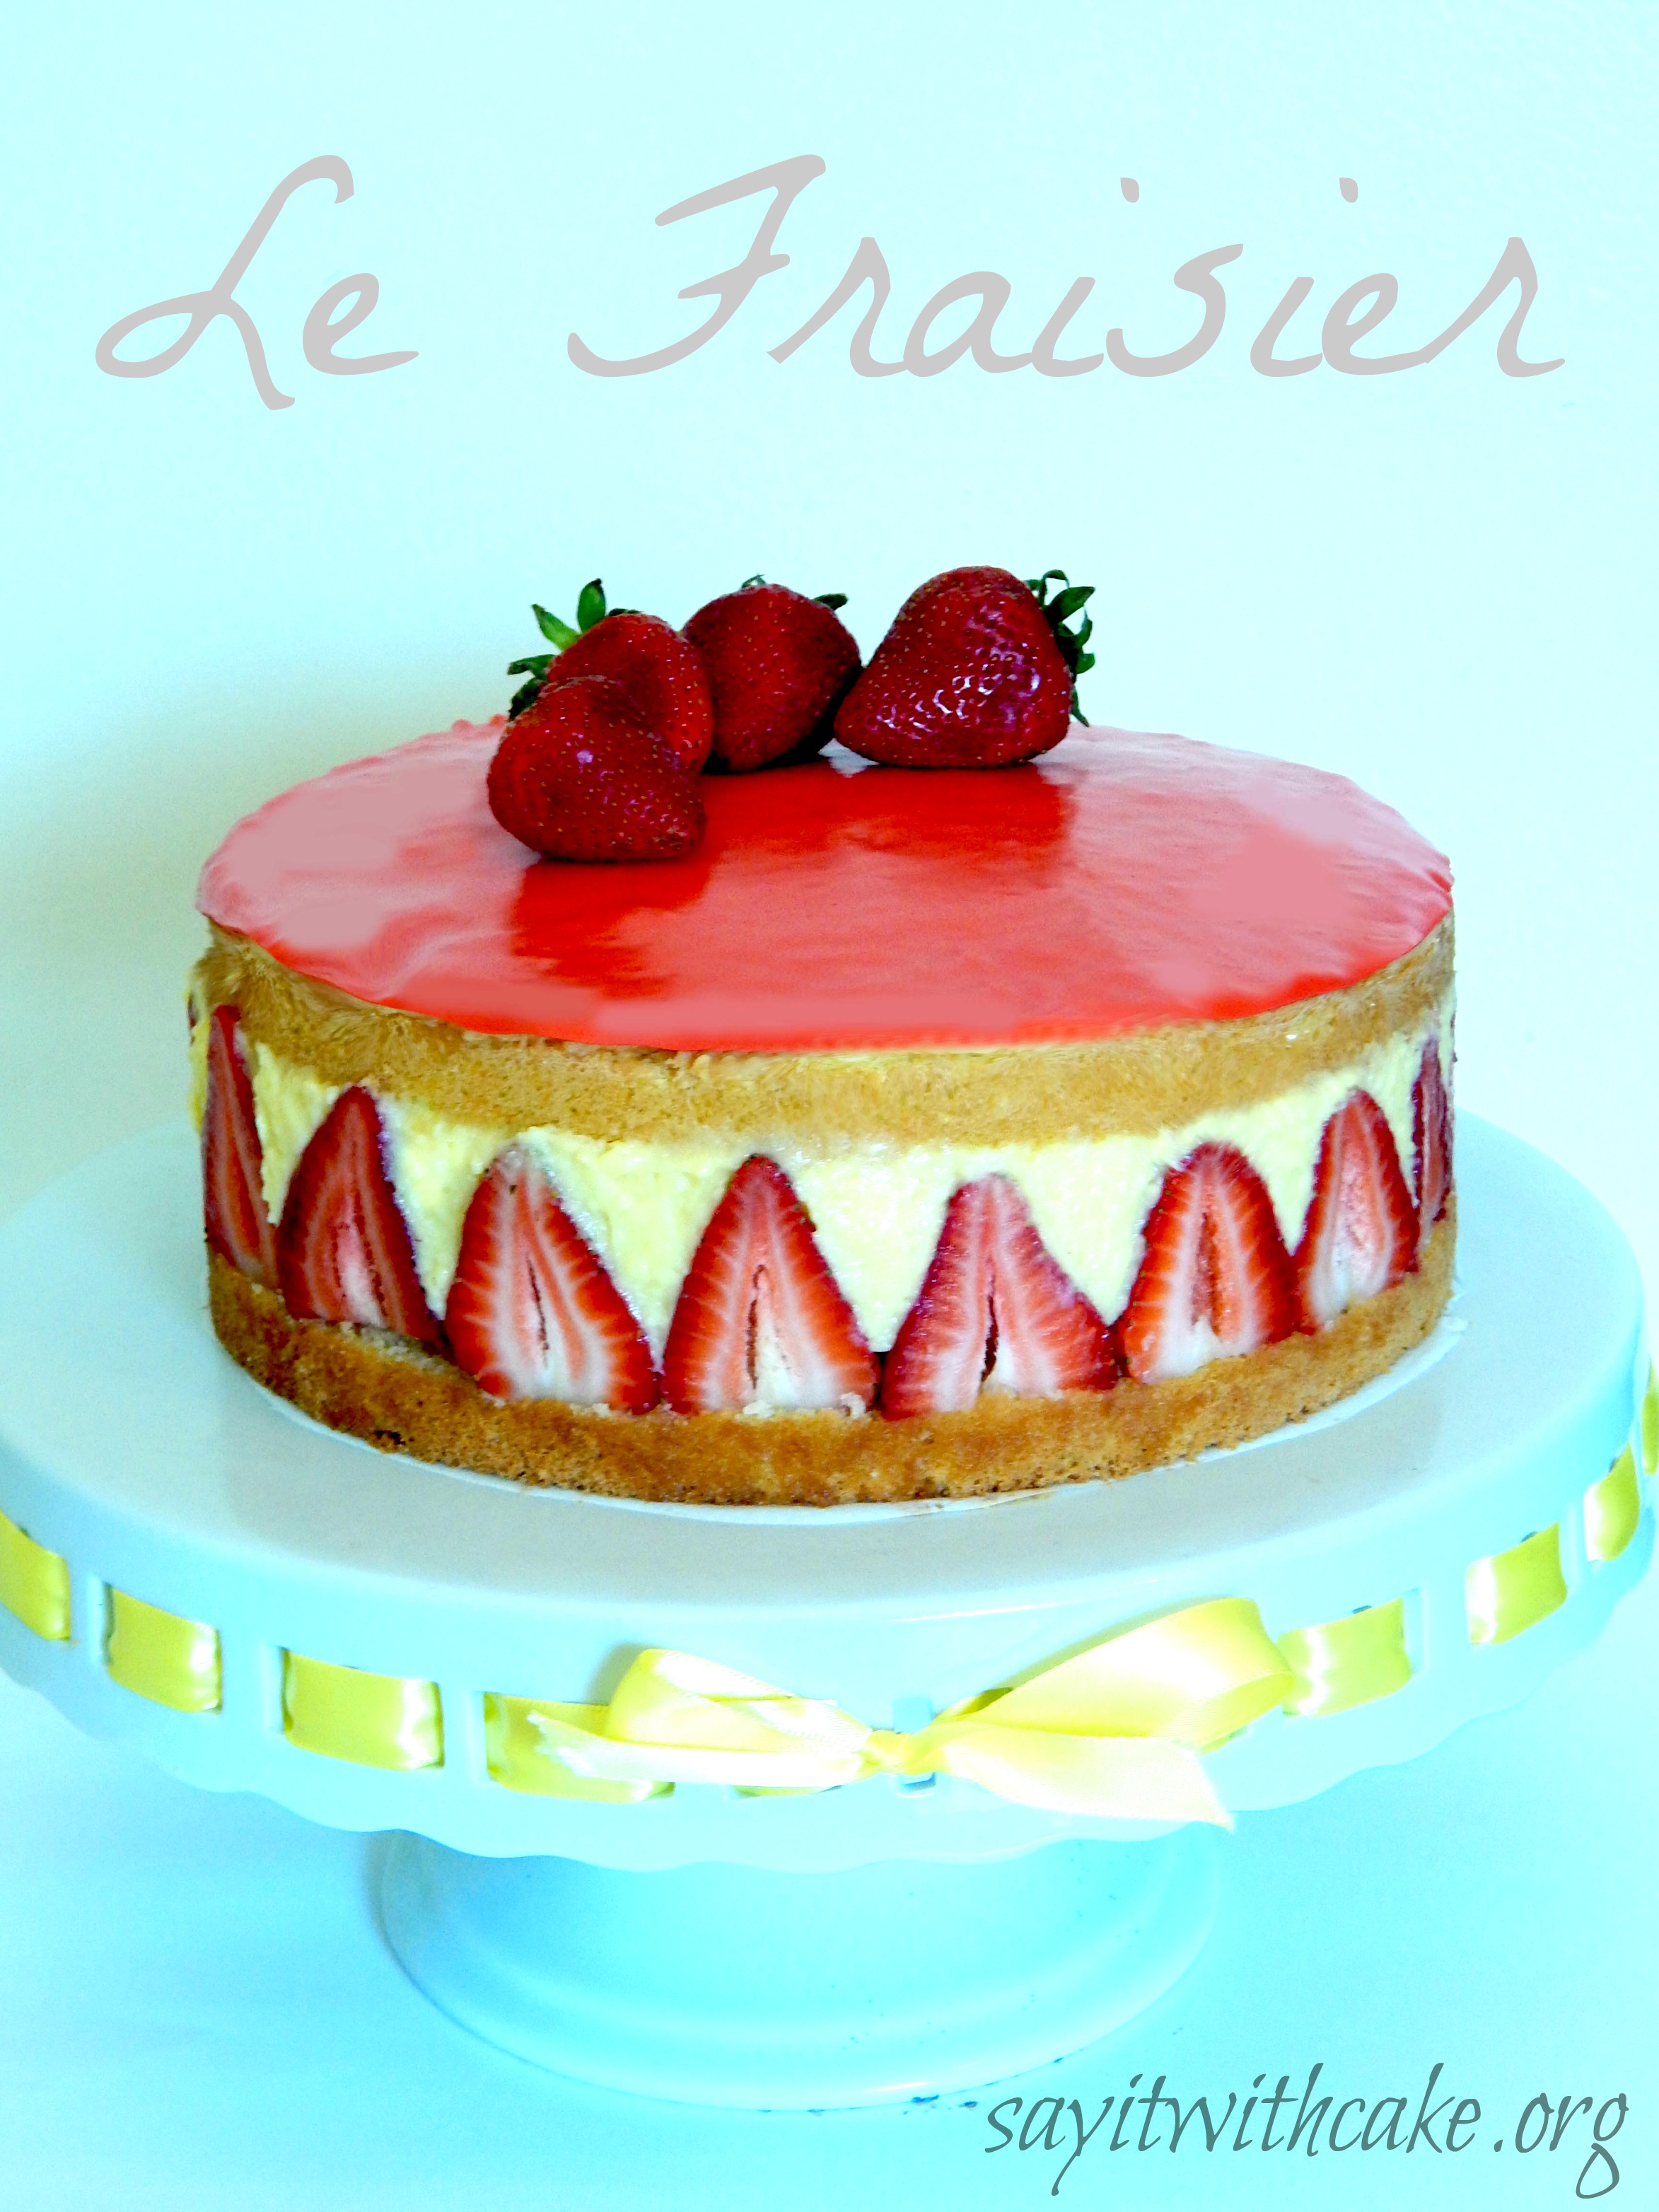 Fraisier derives from the French word fraise, meaning strawberry. Le Fraisier is a classic French cake made with a basic génoise sliced in two halves, each of which is brushed with kirsch liqueur. It is filled with crème mousseline and lots of fresh strawberries.
 This French cake was very intimidating for me, as all the recipes I found at first were in french. When I finally found some recipes in English, they were measured in grams instead of cups! I found the perfect recipe and converted it all into cups and tablespoons for those of you who are like me and prefer to measure this way! I had never made a creme patisserie and made several batches before I perfected it. Actually it took my husband and me together to make this creme patisserie, because you need four hands to cook this! Whisking for 20 minutes can get tiring, so its nice to have someone to help relieve you.
  Don’t be intimidated by this cake, I will break it down and show you an easy way to make it!
 To make the Fraisier, you will need: One 9-inch Génoise cake, sliced in half (recipe below) About 1/2 cup Simple Syrup (recipe below) About 3 cups Crème Mousseline (recipe below) About 2 pounds (1 kg) fresh strawberries, stemmed and hulled
Ingredients
- 1 cup (125 g) cake flour
- 2 tablespoons (25 g) butter, melted
- 4 eggs, at room temperature
- 1/2 cup plus 2 tablespoons (130 g) granulated sugar
- lemon zest from one lemon
- 1/3 cup (70 g) granulated sugar
- 1/3 cup (70 ml) water
- 4 egg yolks
- 1-1/2 cups milk
- 1/2 cup sugar
- 1/4 cup cornstarch
- 2 teaspoons vanilla
- 2 TB butter
Instructions
- Preheat and oven to 350ºF and lightly grease the bottom of a 9-inch cake pan
- Sift the cake flour and set aside. Melt the butter and set aside.
- Heat the eggs and sugar over a double boiler with simmering water. Whisk constantly until the mixture reaches 122ºF (50 C), about 7 minutes. Once the mixture is heated beat the mixture to ribbons, preferably using a stand mixer. (You can use a handheld mixer or whisk by hand, but it will take a lot longer.) The mixture is at the “ribbon stage” when you pull the batter up with the beater and it stays atop the rest of the mixture, forming a ribbon-like effect. It will take about 8 minutes for the mixture to reach this stage using a stand mixer, about double the time using a handheld.
- Fold 1/4 of the egg mixture into the melted butter to lighten the butter. Add the lemon zest to the egg/butter mixture. Fold the egg/butter mixture back into the rest of the egg mixture. Sift 1/3 of the cake flour onto the egg mixture, then gently but quickly fold together. Repeat in thirds until the flour has been incorporated. Gently pour the batter into the cake pan and bake about 17 minutes, or until you insert a knife in the center, and it comes out with a few moist flakes of cake.
- Remove from the oven and let cool for 10 minutes, then remove from the cake pan. Let cool completely. (If a mound has formed on the top of the cake, slice it off to make an even and flat top.) Slice the cake into two halves.
- *How you fold the mixture together is crucial to the success of a light and spongy génoise. You want to evenly incorporate the flour into the egg mixture while not deflating the aerated eggs. It’s important that you’re quick and gentle at the same time, cutting the spatula down toward the center, lifting the batter from the bottom of the bowl, and turning the bowl with your other hand towards the hand that’s folding.
- Bring to a boil the sugar and water. Remove from the heat and cool.
- beat yolks
- scald milk
- add sugar and cornstarch to yolks and beat till light in color
- gradually add milk to yolks, whisk constantly
- return entire mixture to pot and heat on medium stir constantly
- as it starts to thicken, turn heat to low and be aware it might start to thicken very fast
- stir constantly
- add butter and vanilla while stiring
- put in a bowl and put plastic wrap directly on top of creme to avoid a skin layer
- refridgerate till use
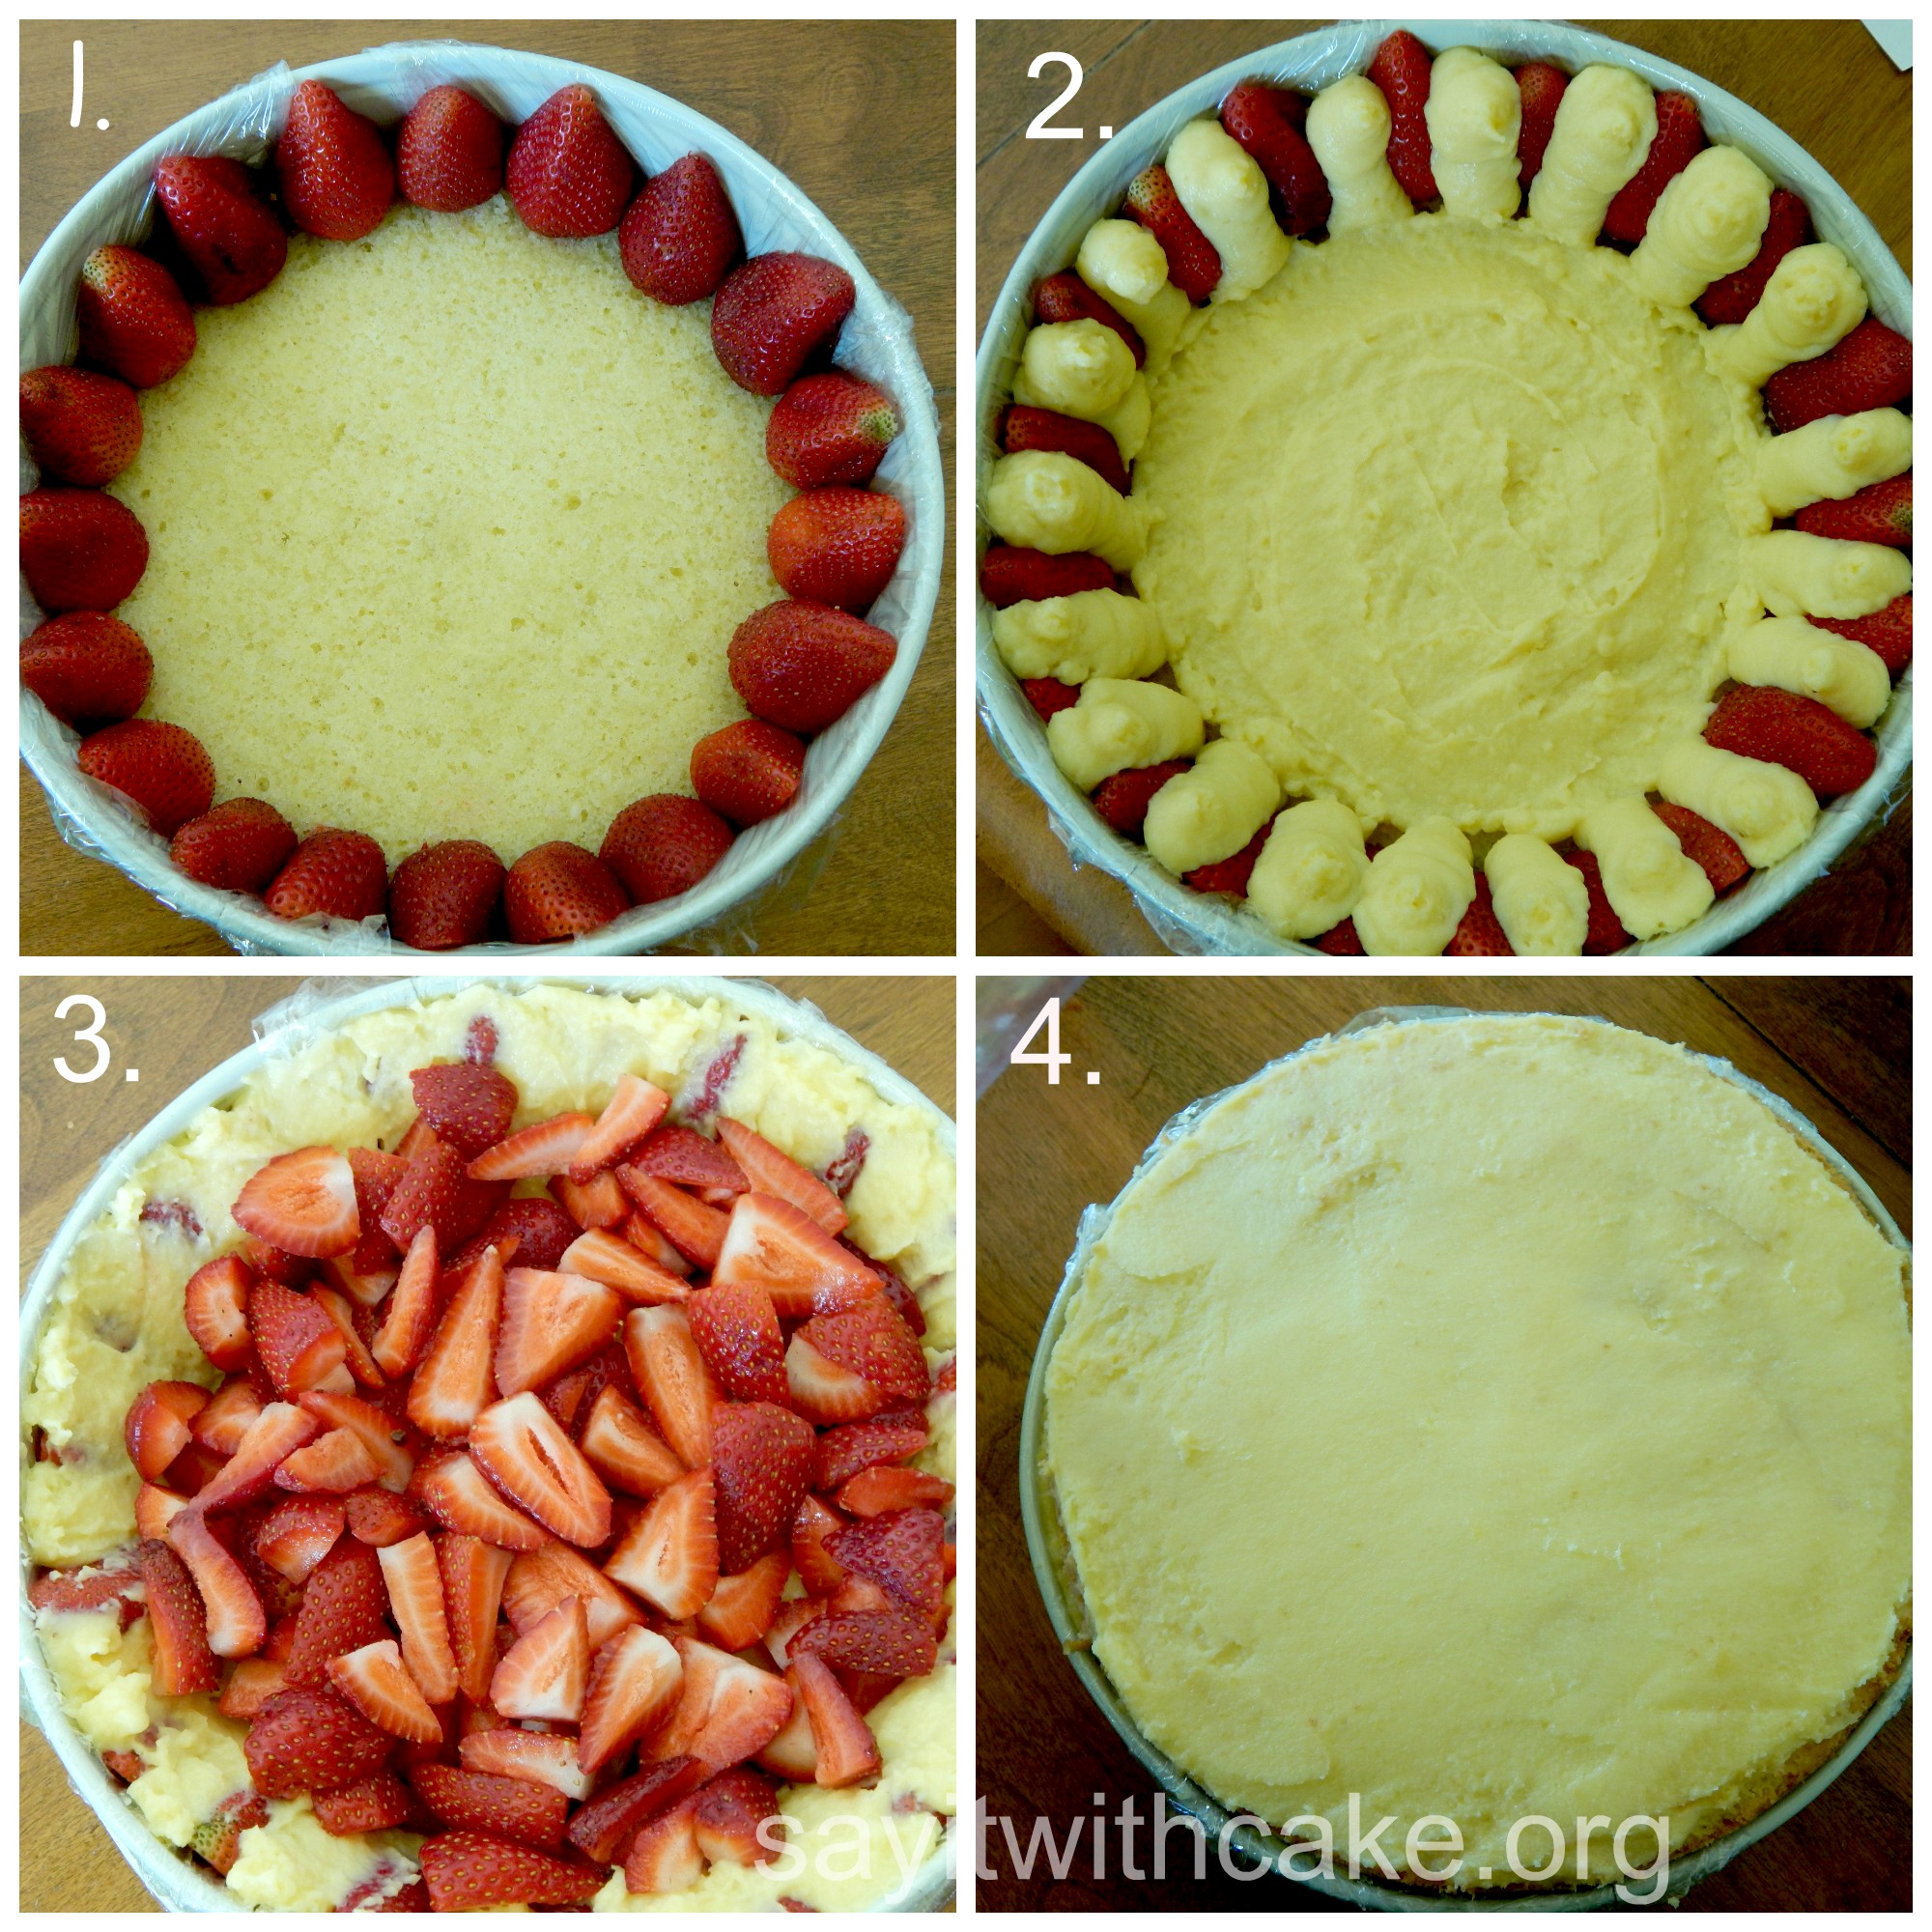
- Place one sliced half of the génoise cake into the bottom of a 9-inch spring form pan. Using a pastry brush, brush about half of the simple syrup onto the top of the cake. (You know you have enough syrup in the cake if you press down on the cake and hear a “squish,” like that of a full sponge.)
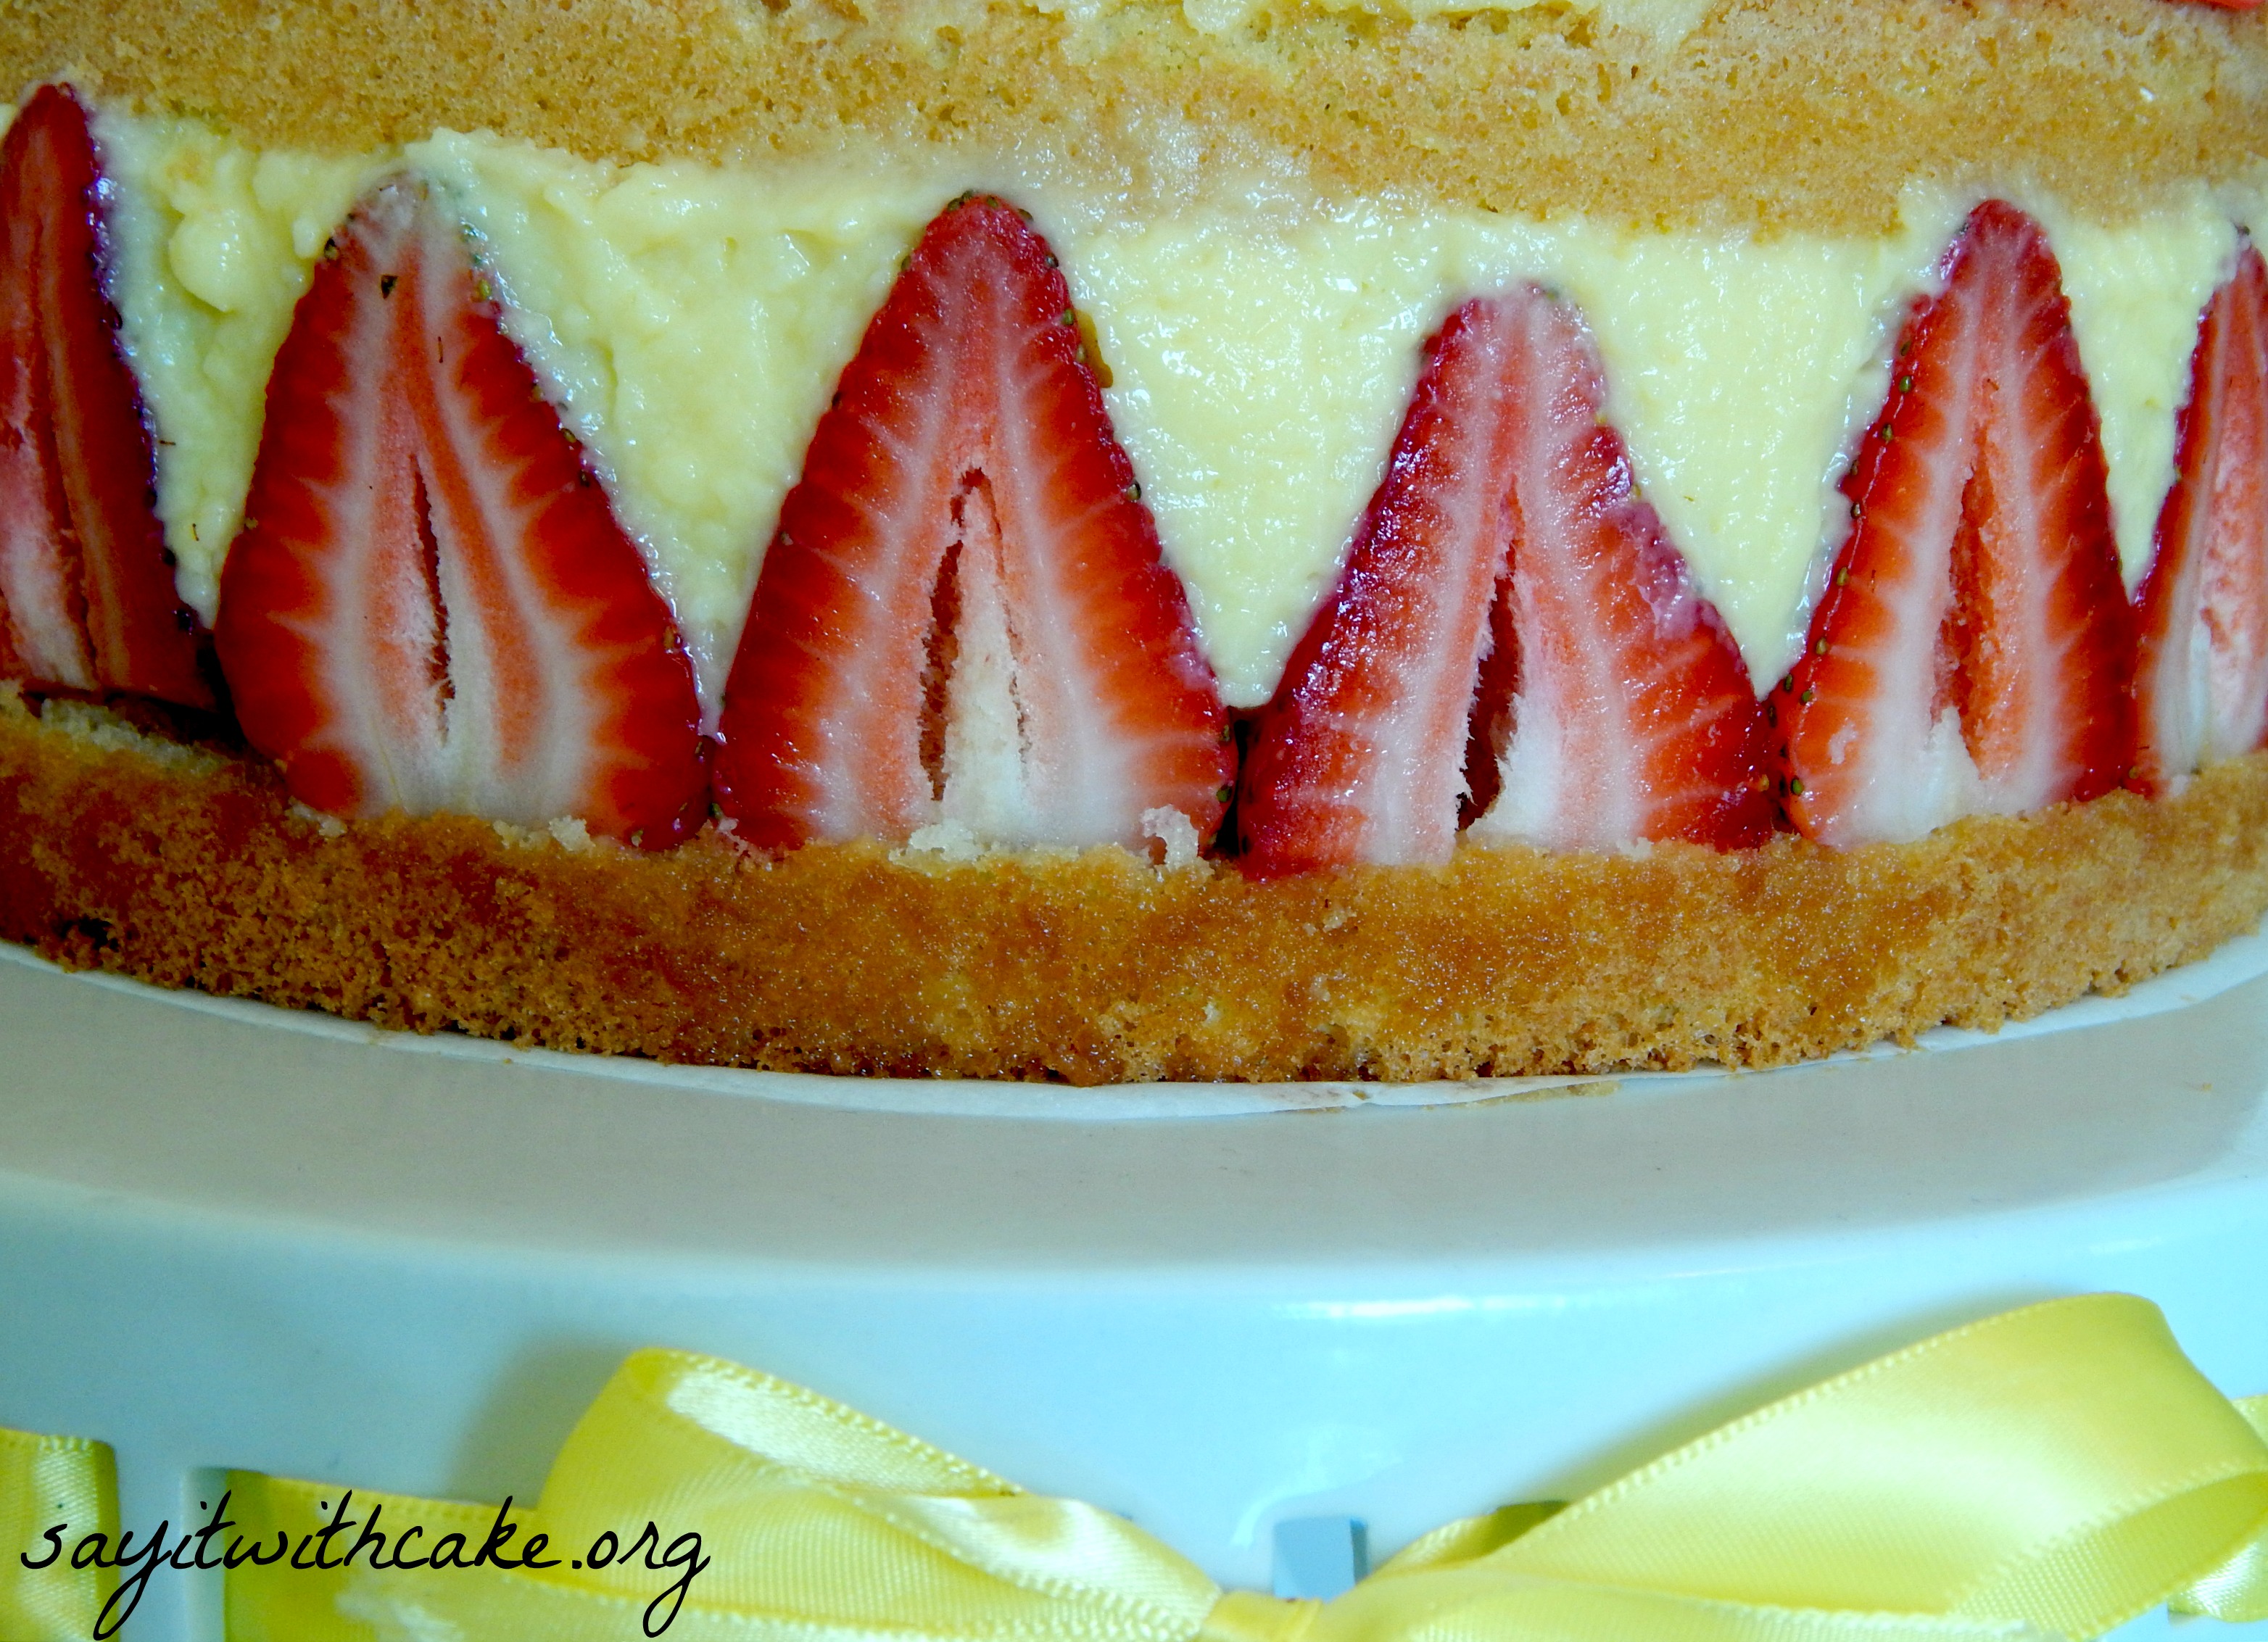
- Slice 12-15 of the strawberries in half. They should be the same height. Place the strawberries on top of the cake in a ring with the sliced half of the strawberries against the side of the spring form pan.
- Pipe a ring “escargot” of crème mousseline onto the top of the cake. Pipe more crème mousseline in a line upwards between each strawberry. Using a flat metal spatula, spread the crème out so that any air pockets are filled.
- Quarter the remaining strawberries and place them on top of the layer of crème mousseline. Fill it full with strawberries (fraises)! As my French chef *told me, "It's called a Fraisier, not a creme mousselinier."
- Pipe another ring in the form of an “escargot” on top of the strawberries. Smooth out with a flat metal spatula.
- Brush the remaining simple syrup onto the other sliced half of the génoise cake. Place this slice on top of the crème mousseline layer in the spring form pan. (Be careful because the cake is filled with the simple syrup and extra delicate.) Refrigerate for 20 minutes.
- Remove from the refrigerator and pipe a thin layer, about 1/4-inch thick, of crème mousseline on top of the Fraisier. Decorate with strawberries. Serve.
- *The Fraisier will keep up to 2 days in the refrigerator.
- Pay careful attention when lining the spring form pan with strawberries. Make sure they are all touching and that they are flat against the side of the pan.
- Make a double batch of the creme
- before assembling the cake, I lined my springform pan with cling wrap. You can also use parchment paper. Also put a 9 inch circle of parchment paper under the cake to make it easier to slide the cake off from the springform pan bottom.
Recipe for the glaze here. Make sure you put the glaze on while the cake is still in the pan and let it set in the freezer or refrigerator.
Enjoy!
Shamene
More desserts you might like!
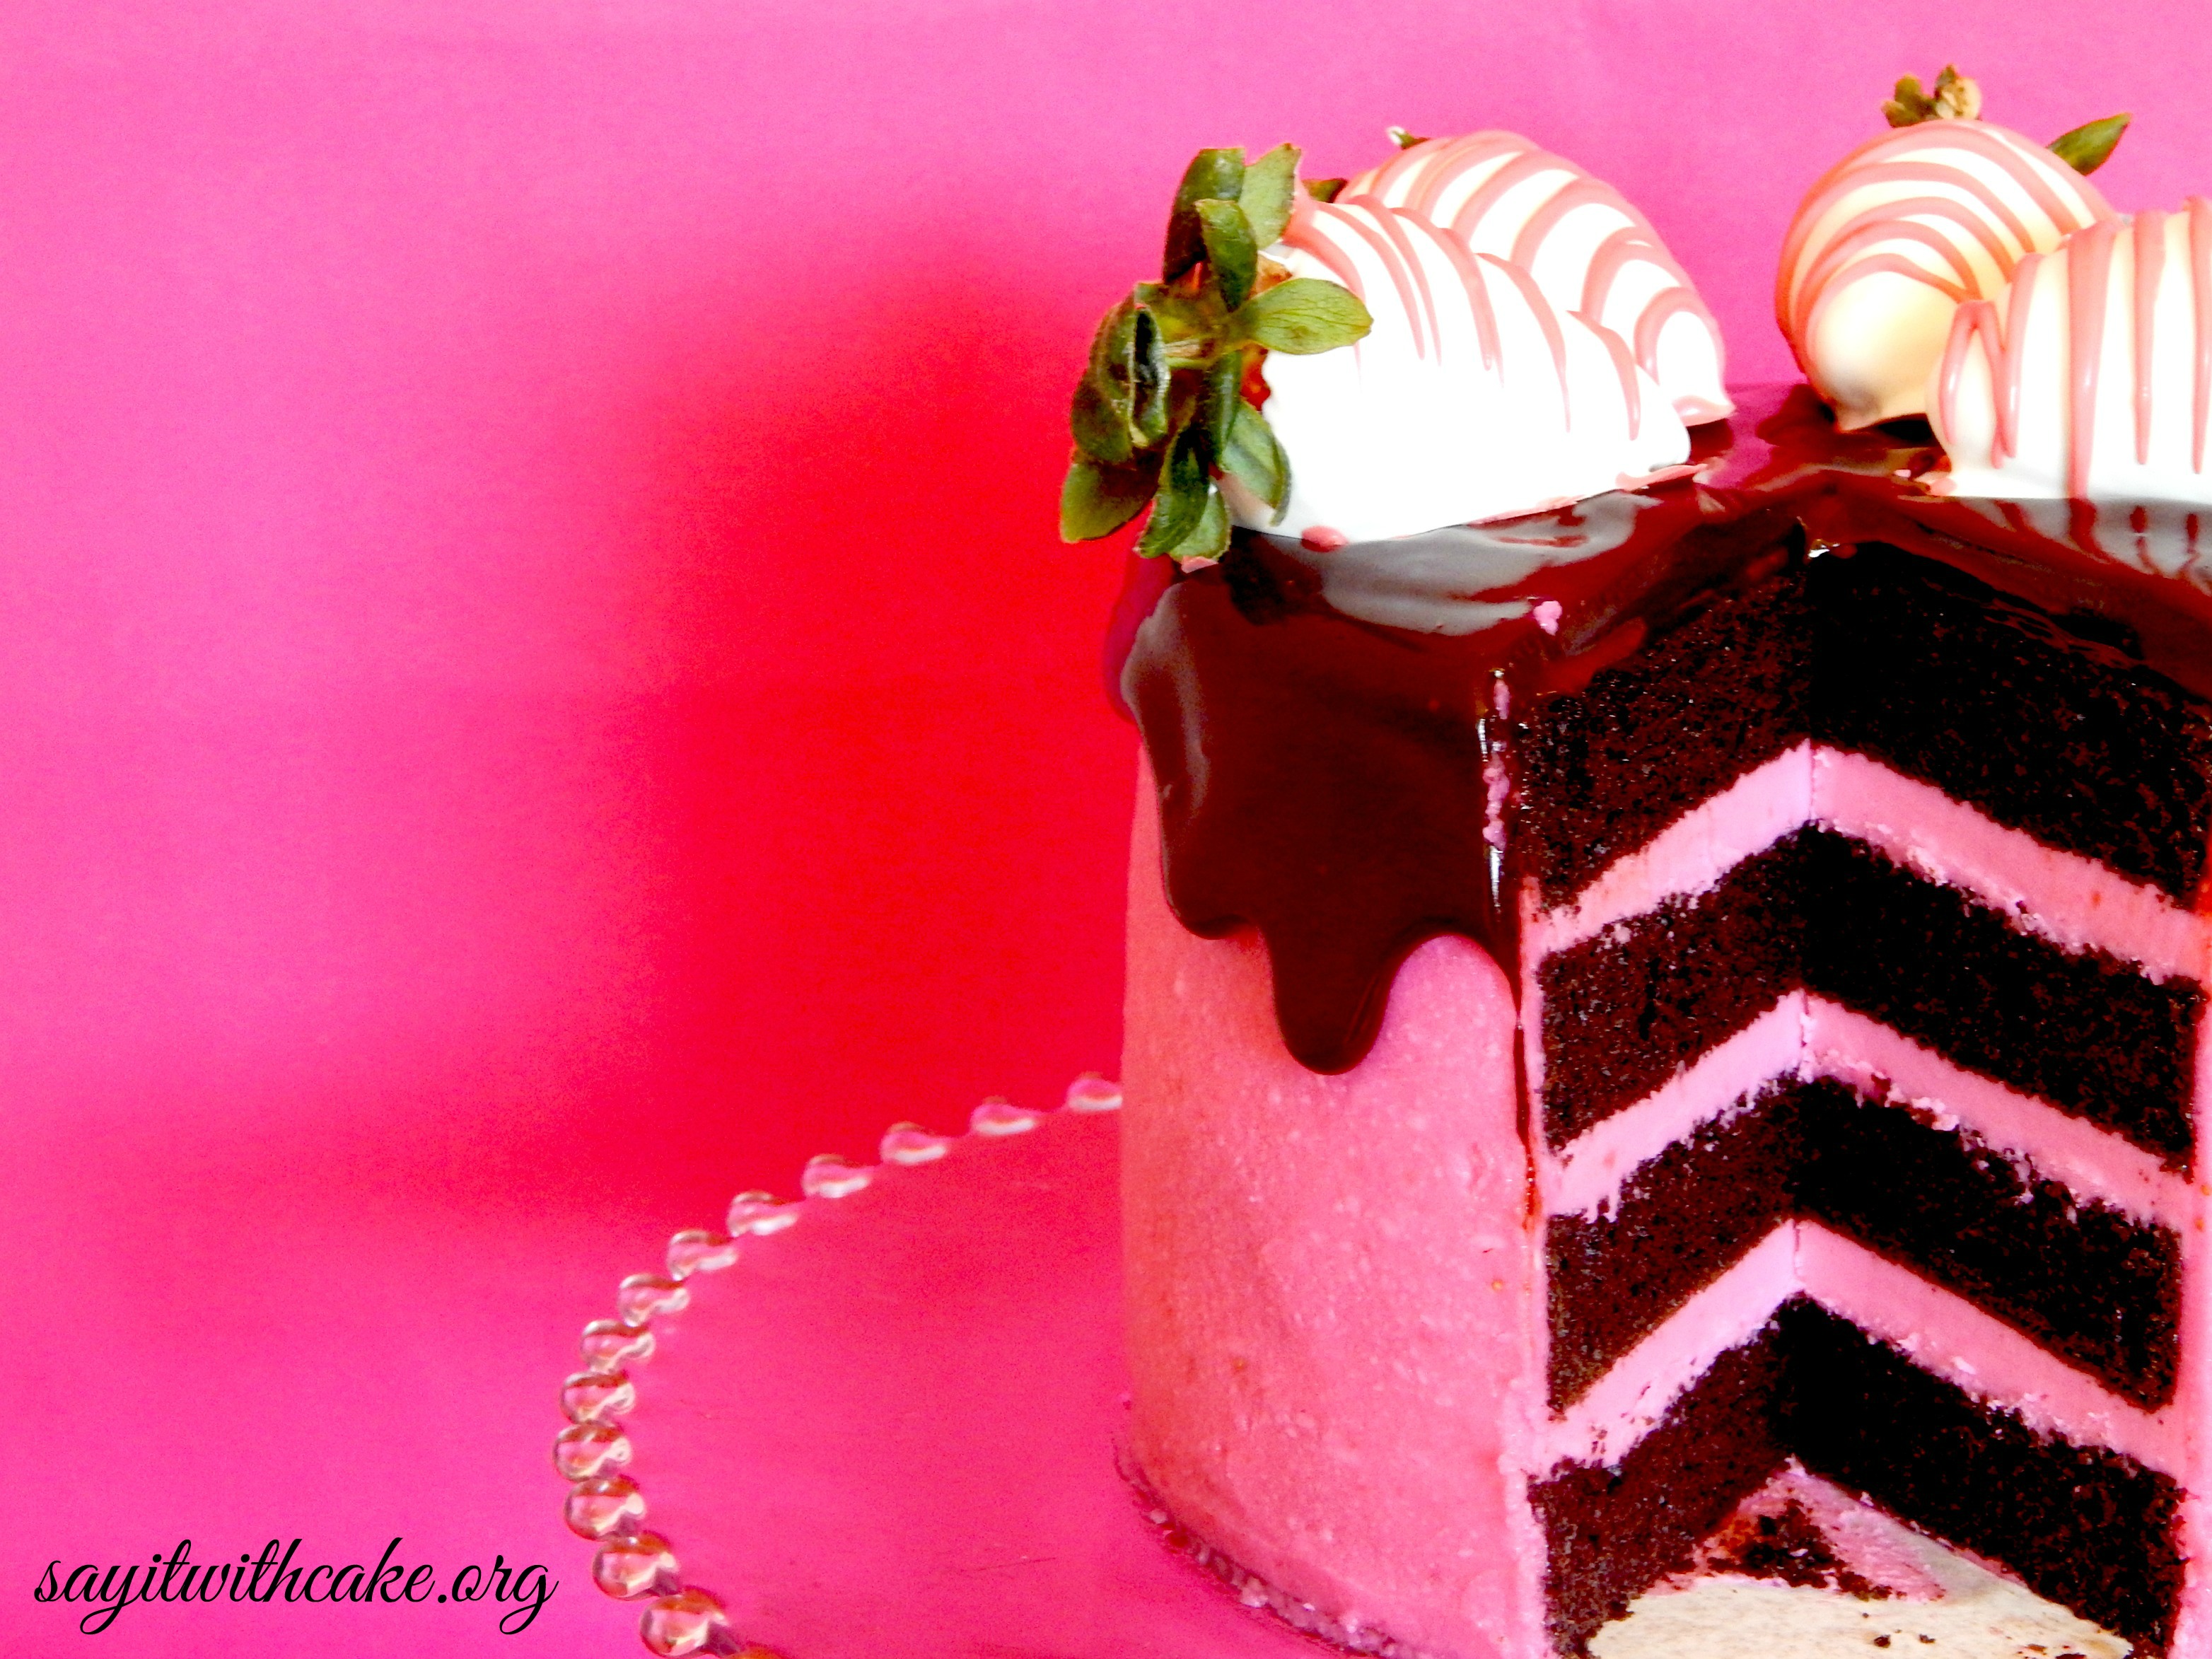
Dark Chocolate & Strawberry Buttercream Cake with Chocolate Covered Strawberries
My cake was featured here!

I saw this delicious looking recipe over at the six sister’s link party that I was also part of and thought I would come by for a visit. This cake look like something I’m going to have to make. Love it!
Thank you so much Nicole! I hope you get a chance to make it!
What a BEAUTIFUL cake!!
I’ve seen such cakes before but yours look absolutely awesome
Btw – I much prefer the weights of dry ingredients as this is the way they must be measured (it’s wrong to measure dry ingredients in volumes). therefore it’s more accurate
Pinning
Thank you so much Winnie! Wow, thank you for the compliments! I have never measured in grams, only cups or tablespoons…I’m glad you prefer that way! Also, thank you for pinning, that means a lot to me Winnie!
This looks delicious! I would love for you share it on my Tasty Tuesday recipe link up here! Everything gets pinned and I would love to have you!
Thank you Stephanie, I will stop by and link up!
Hi Shamene! This Frazier looks stunning! You did an amazing job – I’ve always wanted to try one of these. So excited that you shared this at Best of the Weekend – thank you so much! Pinned (a couple of times!) and shared! Hope you’re having a great week and thanks for sharing your recipe and beautiful cake!
Thank you so much Cindy! I am so happy you stopped by to comment and also for pinning it! I hope you have a great weekend and I love your party
Beautiful and sounds delish as well!! What is the red layer on the top of yours pictured?
Thank you Heather! The red layer is actually pink marzipan…I need to include the recipe, sorry!
Wow! Sounds wonderful! Thank you!
Le Frasier is my absolute favorite cake (it was my even my wedding cake!). I, too, have looked at recipes and have been very intimidated as well! I’m very impressed that you made this *AND* it looks like a French chef made it!
Thank you so much for linking up at Tasty Tuesday! Your recipe has been pinned to the Tasty Tuesday Pinterest board! Please join us again next week!
It definitely looks very good on this traditional cake. I am pinning on my personal board too. thanks for sharing with 4 seasons blog hop. Cheers and have a nice day.
Hmmm, I don’t have any Kirsch handy, but I do have Cherry Kijafa. Maybe that will do in a pinch. Definitely pinning for future reference. [#TastyTuesdays]
I love the techinque for putting the strawberries around the cake.. amazing looking and so seasonal. Thanks for sharing it with us on foodie friday.
This cake is pure perfection! Absolutely beautiful, and I bet it tastes amazing too. Thanks for linking up to my Creative Ways Link Party! Hope to see you again this week!
Blessings,
Nici
Thank you so much Nici! I appreciate your comments!
This is a beautiful cake! Do you think it would work with almond flour rather than cake flour? I can’t use gluten, but I’d love to try this!
Hi Helen, I don’t know if it would work with almond flour, I’m sorry! I will have to look into that
Awesome post. I love cakes. Thanks for sharing
Hello darling!.I have made this cake several times using a classic recipe ! You have the other version of this one( the one you assemble upside down) That was classic! BUT I am COMPLETELY confused with this one. It sounds like classic But the classic demands 14 Tbsp of butter is the custard for 8 inch cake and a DOUBLE for the bigger one.THIS ONE YOU DID NOT USE MICH BUTTER !!! ONLY 2 TBSP! i KIND OF LIKE IT, BECAUSE TONS OF BUTTER IN CLASSICAL RECIPE ALWAYS TASTES AWESOME BUT….TOO MUCH CALORIES BUT YOURS DOES NOT DEMAND IT. CAN YOU PLEASE TELL ME IF IT WAS STILL TASTING JUST LIKE CLASSIC AND IF IT STILL HELD ITS FORM!!! Plus you di not say the recipe for the glaze on the top! I will be very gratefull if you answer! Thank you so very much!!!!
Hi Alla!
The cream did taste good even with not much butter. It also held its form. For the recipe for the glaze, I will add it to my page right now! Thanks for noticing it was missing!
Hello darling! Thank you so very much for the answer! I am DELIGHTED to know that it still tasted awesome and still held its form even nt with 14 Tb-spoons of butted he recipe is asking for! I mean… I know this is a CLASSIC one but I was wondering would I have the same result with less butter and I was going to actually try it but you did it FOR me!! So thank you so very much!!!!! It is Not as hard as it looks ….I made three of them already will make this one for my kiddo’s birthday! Thank you for the glaze!!!
cool, thanks Alla!
Hi! The classic recipe need a lot of butter: the mousseline is a creme patissiere (pastry creme) with butter, and the butter is here to give the “mousse” part (that’s why it’s called “mousseline”). Believe me, the butter give lightness to the creme patissiere.
For the mousseline, it’s better to do the creme patissiere first, let it cool down until it reach ambient temperature, then cut the butter (ambient temperature to), and add it gradually to to creme, while you are stiring.