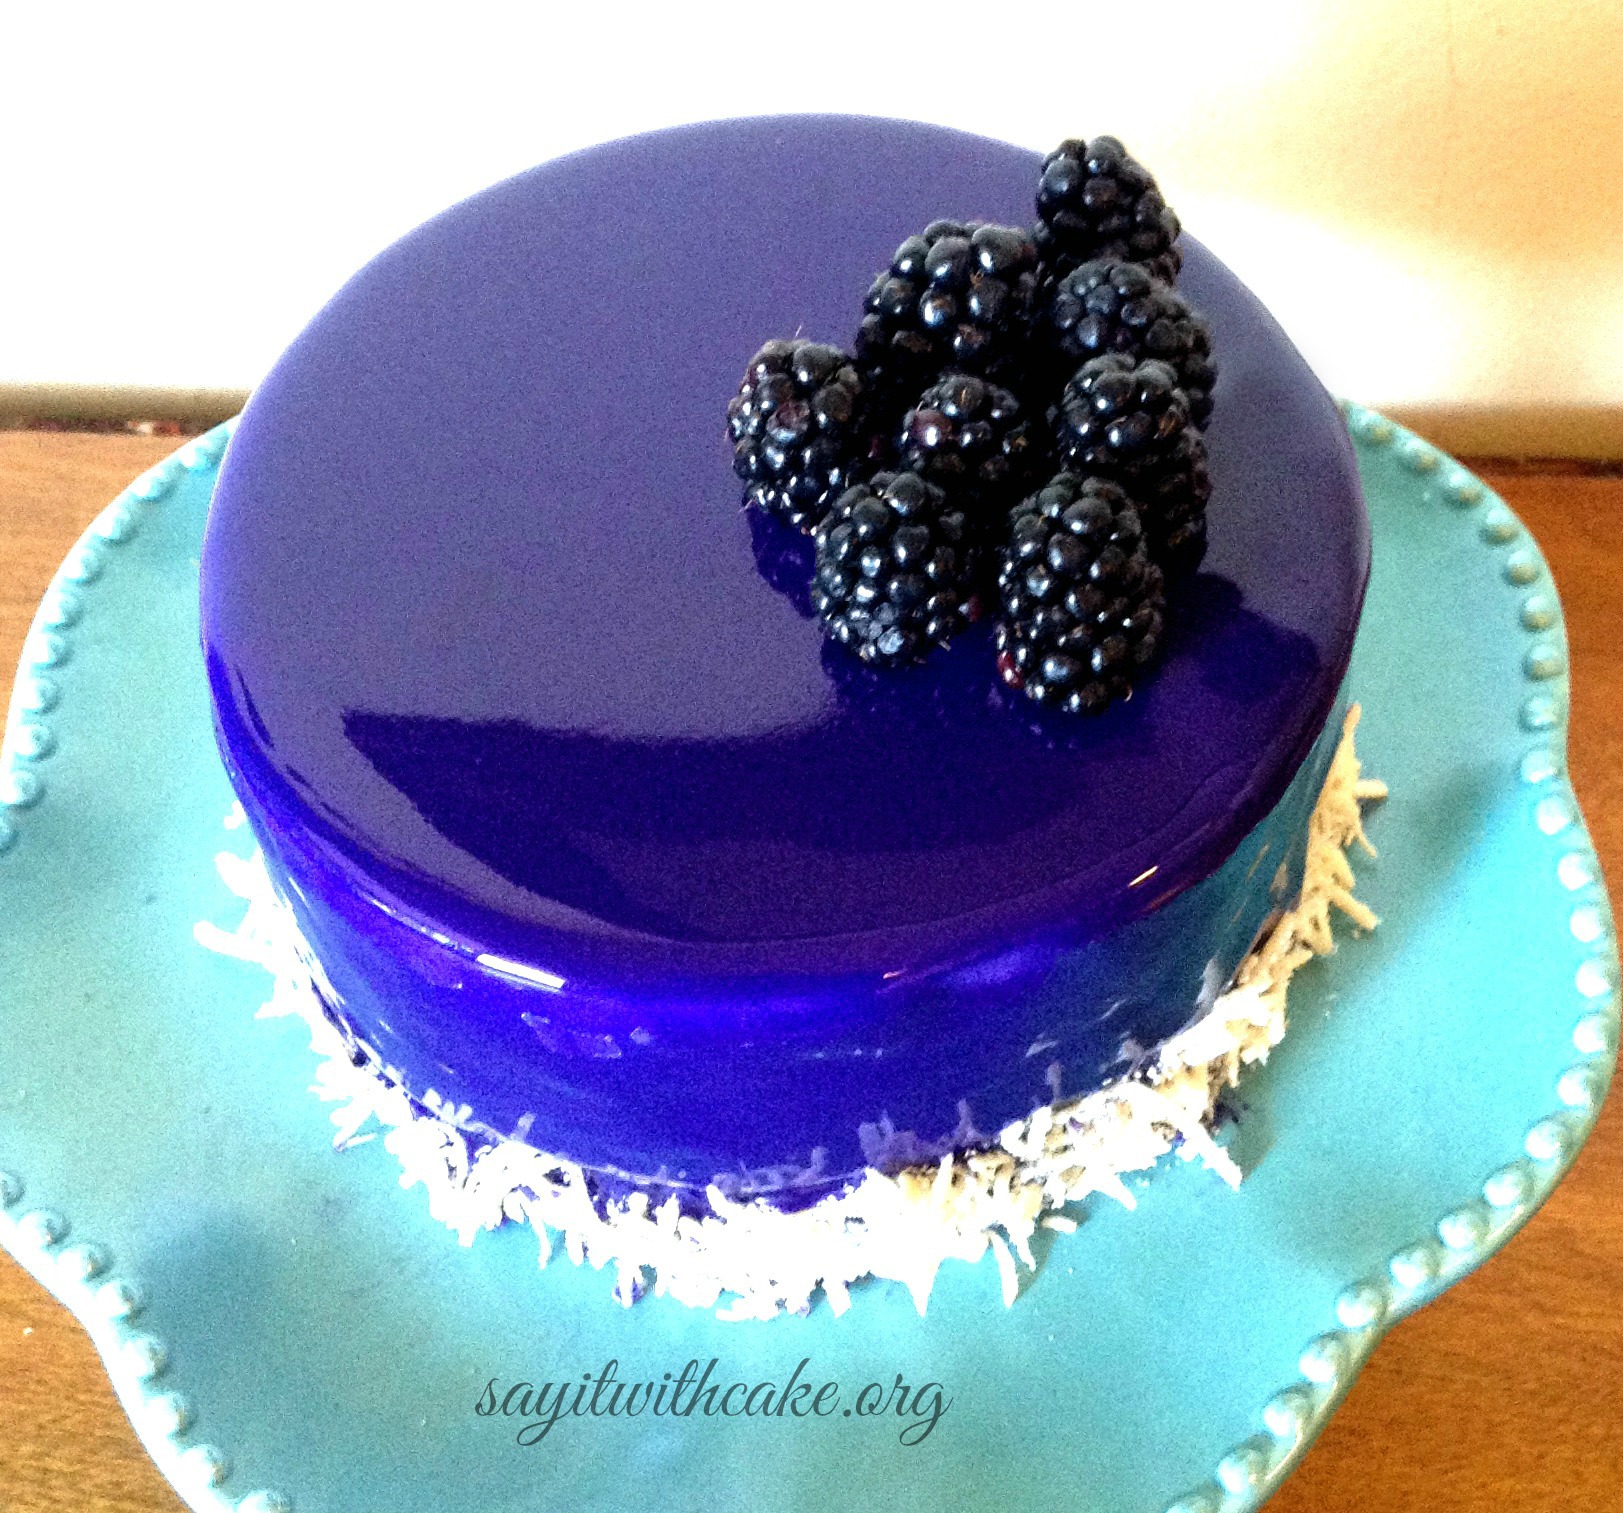
 This Blackberry mousse cake has everything it needs to be a great dessert. The base is a chocolate Italian sponge cake. It’s dark and moist, sweet, and has the distinctive flavor of chocolate. The delicate white chocolate mousse is light, and soft in both sweetness and flavor. However, the mousse suspends a blackberry purée that’s been set with a touch of gelatin. This fruit layer is intense in both its color and its tart flavor. The final touch is a glaze of melted white chocolate colored purple on top of the cake; it provides a startling white chocolate flavor, and vibrant blackberry purple color that stands out in contrast to the white chocolate mousse. An airy texture is key to the mousse’s role in the dessert, so be careful when whipping the heavy cream. When using an electric mixer, there’s very little time difference between whipped cream that’s just shy of stiff peaks and cream that’s on the verge of becoming butter. The mousse with the white chocolate is light and creamy and so yummy! The blackberry puree inside the mousse is just the right amount of tanginess. I wish I had put the blackberry puree higher in the cake, because it blends in with the chocolate sponge cake at the bottom. I think next time I would also make a thicker layer of blackberry.
 *To make the blackberry purée “float,” begin by spooning half of the white chocolate mousse over the cake layer in the spring form pan. Set the circle of blackberry purée in the pan’s center and push it into the mousse until the purée is at the middle of the pan. The mousse will rise around the purée and up the pan’s sides. *To complete the illusion of the floating blackberry, add the remaining mousse to the spring form pan; it will exceed the top of the pan. Then use the pan’s edges to guide a large metal spatula across the top of the cake to smooth it.

Ingredients
- 120 grams (1/2 cup+1½ tablespoon) granulated sugar
- 4 extra large eggs, at room temperature
- 100 grams (1 cup minus 1 tablespoon) cake flour, sifted (if you use all-purpose flour 100 grams = 1 cup minus 2 tablespoons)
- 20 grams (3 tablespoons) unsweetened cocoa powder
- 12-oz. package frozen blackberries
- 2 tsp. un flavored powdered gelatin
- 1/4 cup sugar
- 8 oz. good-quality white chocolate, chopped fine
- 1/4 cup water
- 1 envelope unflavored powdered gelatin
- 2 1/2 cups heavy cream
Instructions
- Take the eggs out from the fridge ahead of time or soak them for a few minutes in a bowl of warm water.
- Preheat the oven to 170 degrees C (338 degrees F).
- Butter and flour (or spray with baking spray) a 20 cm (8 inch) pan.
- Put the eggs and sugar in the bowl of your stand mixer.
- Beat the eggs until very fluffy and pale yellow (about 15 minutes on medium/high speed). To test that it has been beaten enough, let some of the mixture fall into the bowl, if it remains "sitting" on top it means that it's ready.
- Sift the flour and cocoa powder on top of the egg mixture, a little at a time, and fold it gently with a wooden spoon, from bottom to top.
- Pour the batter into the prepared pan. Don't smooth the top or bang the pan on the counter, leave it as it is!
- Bake for 40 minutes or until a toothpick inserted into the center comes out clean. (Don't open the oven for the first 20 minutes!)
- Turn off the oven but leave the chocolate Italian sponge cake inside (put a wooden spoon to keep the oven door slightly open) for at least 10 minutes so it can cool down slowly. After that, remove it from the oven, let it cool 10 more minutes, loosen around the edges with a knife, then flip the cake on a wire rack upside down (without the pan) to cool completely.
- This part of the recipe calls for an 8-in. cake pan because that’s the round pan most people have. However, since you’ll only need a 51/2-in. circle of purée, you won’t use all the purée. Use a smaller round pan if you have one; just fill it to a depth of 3/4 in.
- Line an 8-in. cake pan with plastic wrap, leaving about 4in. of excess plastic hanging over the pan’s sides.
- Defrost the berries until soft. Purée them in a food processor for about 30seconds, or until smooth. Set a fine sieve over a small, nonreactive saucepan.
- Pour a small amount of the blackberry sauce in the sieve and force it through with a spatula. Repeat the process until you have strained all the blackberry purée.
- Sprinkle the gelatin over the purée.
- Allow the gelatin to soak and soften, about 5min., and then stir.
- Heat the purée over medium heat and continue stirring until the gelatin melts completely.
- Add the sugar and stir until dissolved.
- Cool the blackberry mixture slightly and pour it into the plastic-lined cake pan.
- Freeze for an hour or until just set, and then drape the excess plastic over the top of the purée. Continue freezing for at least 12hours. If you won’t be using the purée within 24hours, prevent freezer burn by popping it out of the pan and completely wrapping it in plastic or putting it in a plastic bag.
- Put the chocolate in a metal bowl (1 qt. or larger) that will ?t snugly over a saucepan. (You also can use a double boiler.)
- Fill the saucepan with 1 in. of water and heat it until it’s on the verge of simmering.
- Remove the pan from the heat and set the bowl of chocolate on top of the saucepan.
- Stir the chocolate with a rubber spatula to encourage melting; however, don’t be concerned if the chocolate doesn’t melt entirely.
- Pour 1/4 cup water in another saucepan and sprinkle in the gelatin.
- Let the gelatin soak for 5 min., and then set the saucepan over medium heat and stir until the gelatin dissolves.
- Pour 1/2 cup of the cream in another small saucepan and bring it to a boil.
- Remove the saucepan from the heat immediately.
- Add the gelatin to the hot cream and stir until well mixed.
- Add this mixture to the melted chocolate and stir well with a spatula until the mixture is very smooth.
- Remove the bowl from the pan and allow the chocolate mixture to cool until it’s just warm.
- Use an electric mixer to whip 2 cups cream until it just holds stiff peaks.
- Use a rubber spatula to gently fold half of the whipped cream into the slightly warm chocolate mixture.
- Add the remaining whipped cream and fold gently until smooth.
- Don’t over fold the mixture; it should still have a few distinct streaks of white chocolate and whipped cream.
 CAKE COUNTDOWN This cake can be made in steps in advance so it isn’t as much work on the final day. Follow this guideline if you like. Chocolate cake—one week to one day before assembly. If you make the cake more than two days in advance, remove the cake from the pan and wrap it in plastic to keep it moist. White chocolate mousse— immediately before assembly. When you make the mousse, the cake and purée should already be prepared. Assembly—one week to nine hours before serving. If you’re going to assemble the cake more than 48 hours before serving it, wrap the assembled cake and freeze it. Defrost it in the refrigerator overnight before you glaze it. Chocolate glaze—at least an hour before serving, but you must pour it on the cake immediately. The glazed cake may wait in the refrigerator for one day to an hour before serving, or you may wrap it and freeze it for a week. The cake should be frozen only once, however, so if you’ve frozen it during an earlier stage, don’t freeze it again.
This mirror glaze recipe is my own creation. I took many different recipes and translated them to English. I tried many times and came up with this recipe! I used grams because it is more precise. Just use a food scale to measure grams if you are used to using cups.
Mirror Glaze Recipe
Ingredients
20 g gelatin powder
120 g water
300 g light corn syrup
300 g sugar
150 g water
200 g sweetened condensed milk
300 g white chocolate good quality chopped fine
food coloring
Directions
Bloom 20 g gelatin in 120 g water
boil 300 g corn syrup, 300 g sugar, and 150 g water
remove from heat and add gelatin
add condensed milk
pour over chocolate and mix until chocolate is melted completely (make sure you chop the chocolate really small before hand)
stir and make sure glaze reaches 95 degrees F
separate into multiple bowls if you want multiple colors
add food color
Let it cool for many hours until the glaze reaches 89.6 degrees F and is semi thick.
Pour glaze over cake
 Recipe adapted from Fine Cooking
Enjoy!
other Mousse cakes you might enjoy!
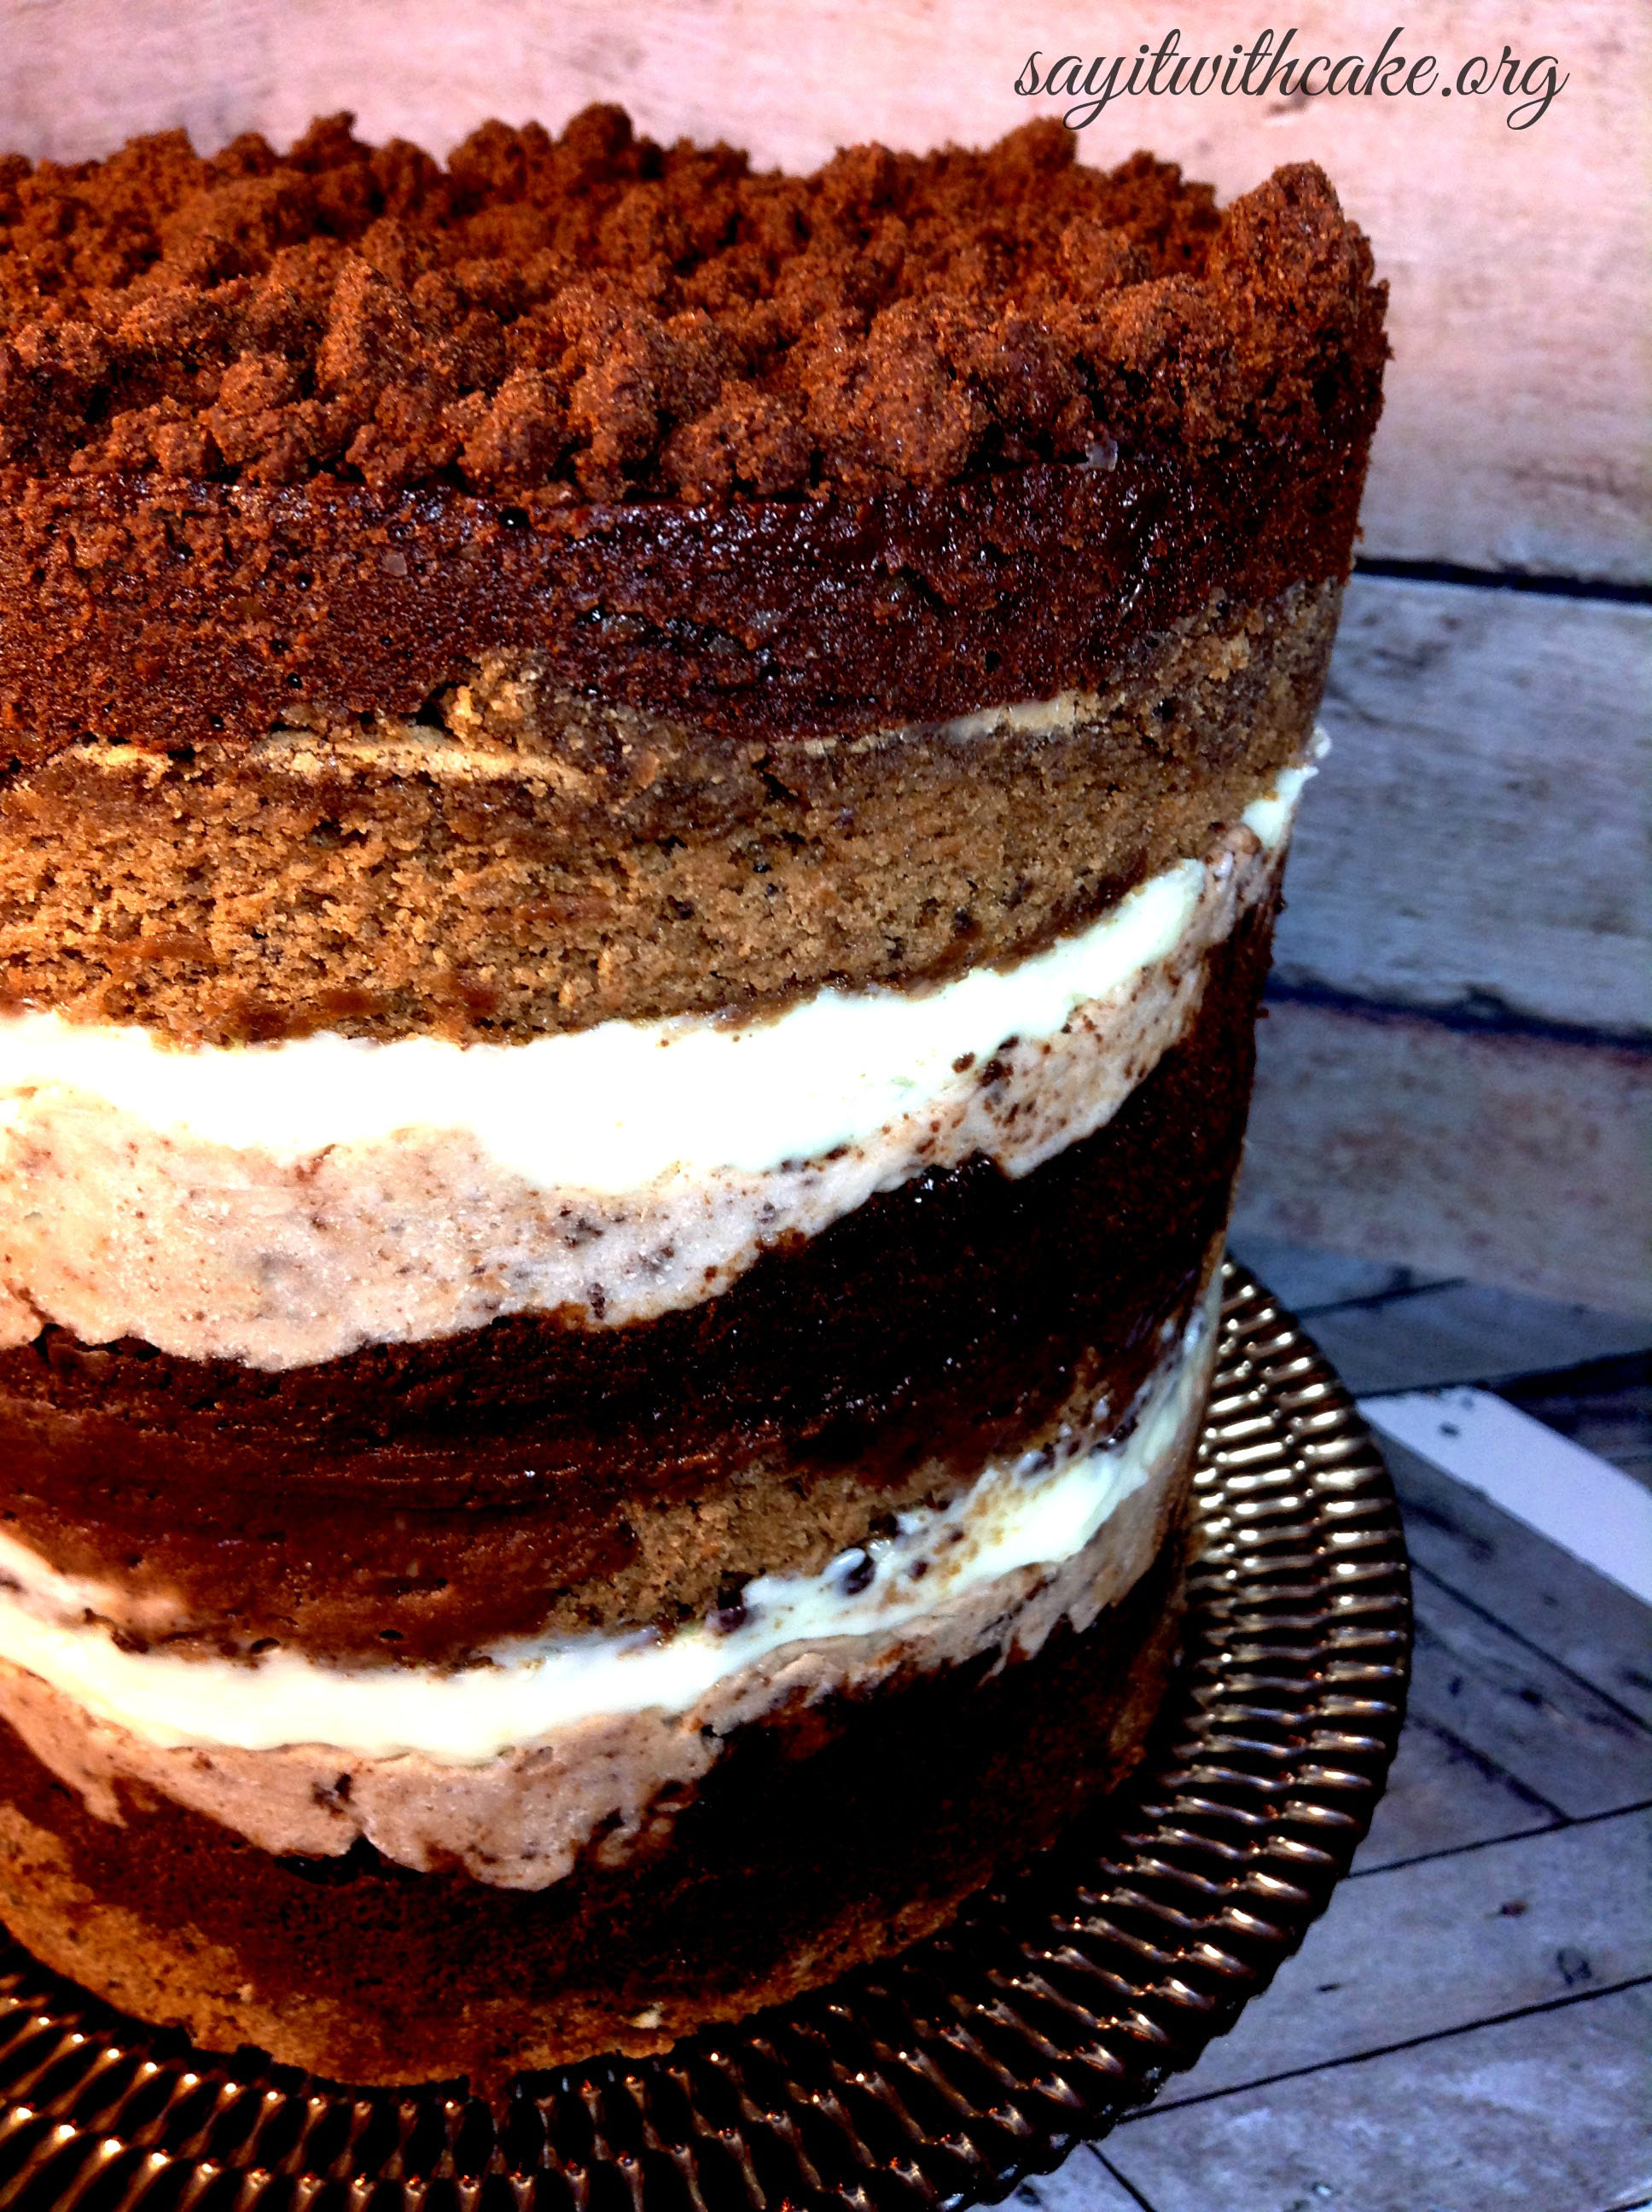
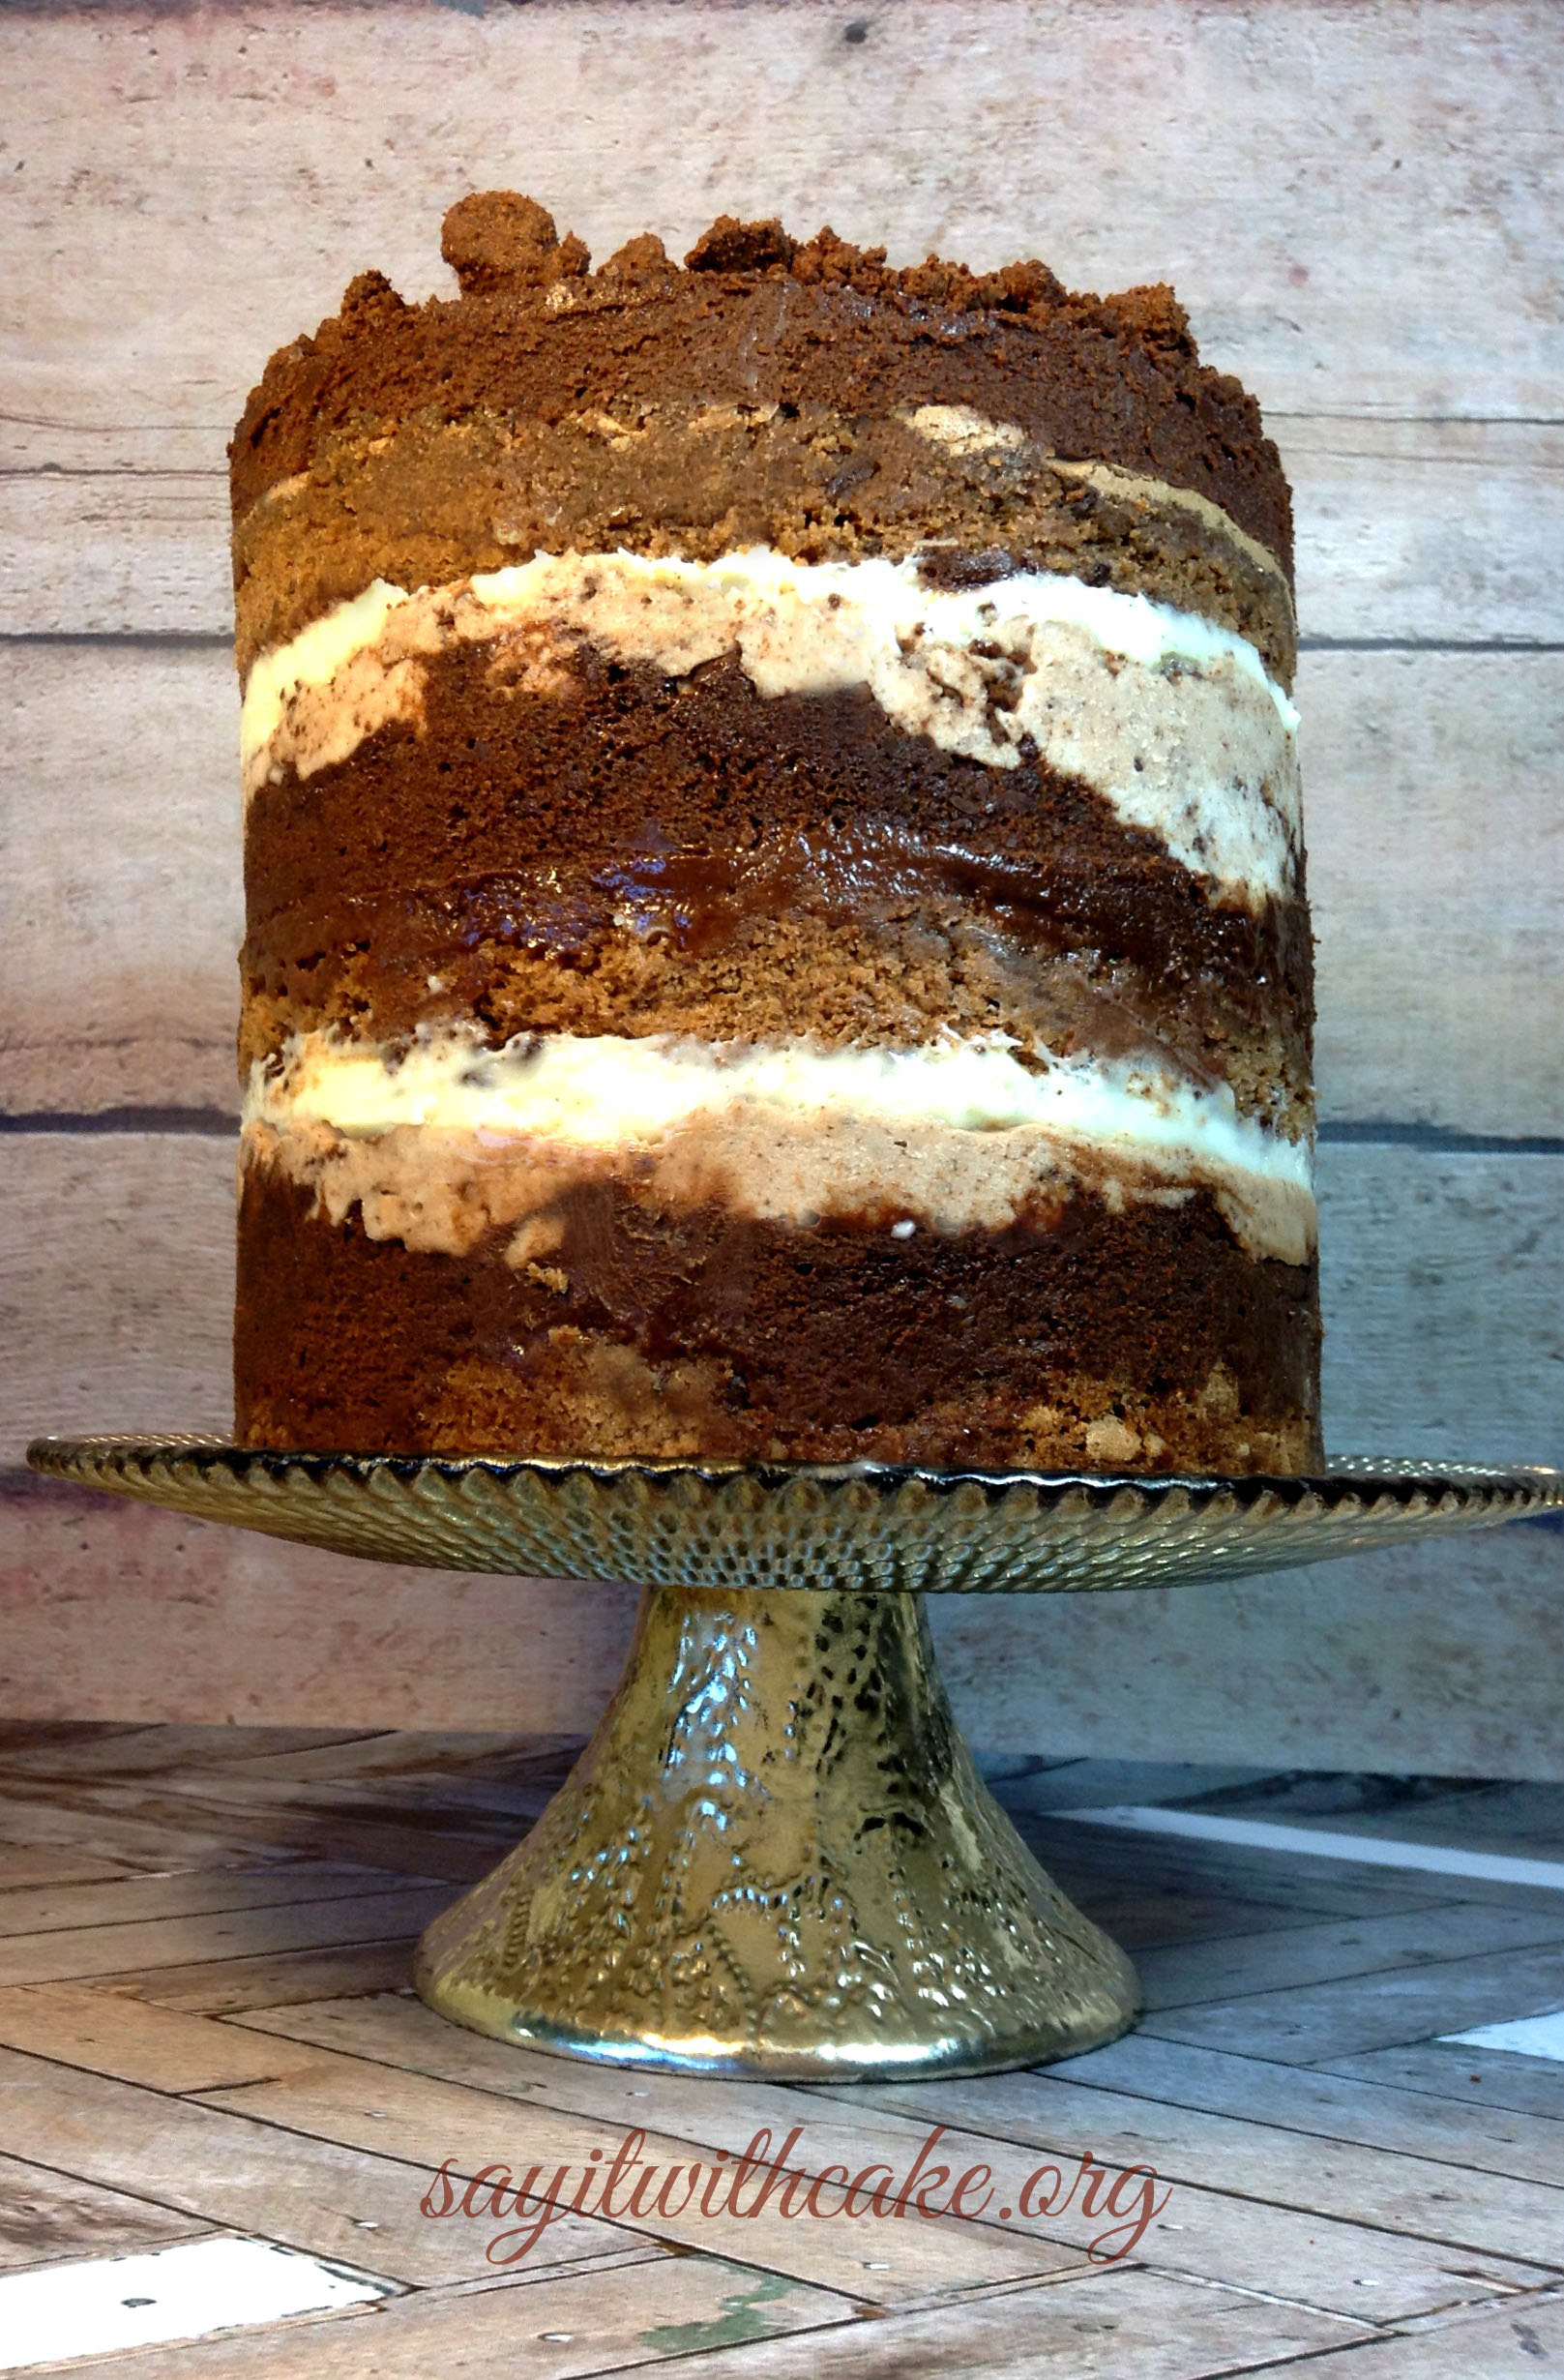
]]>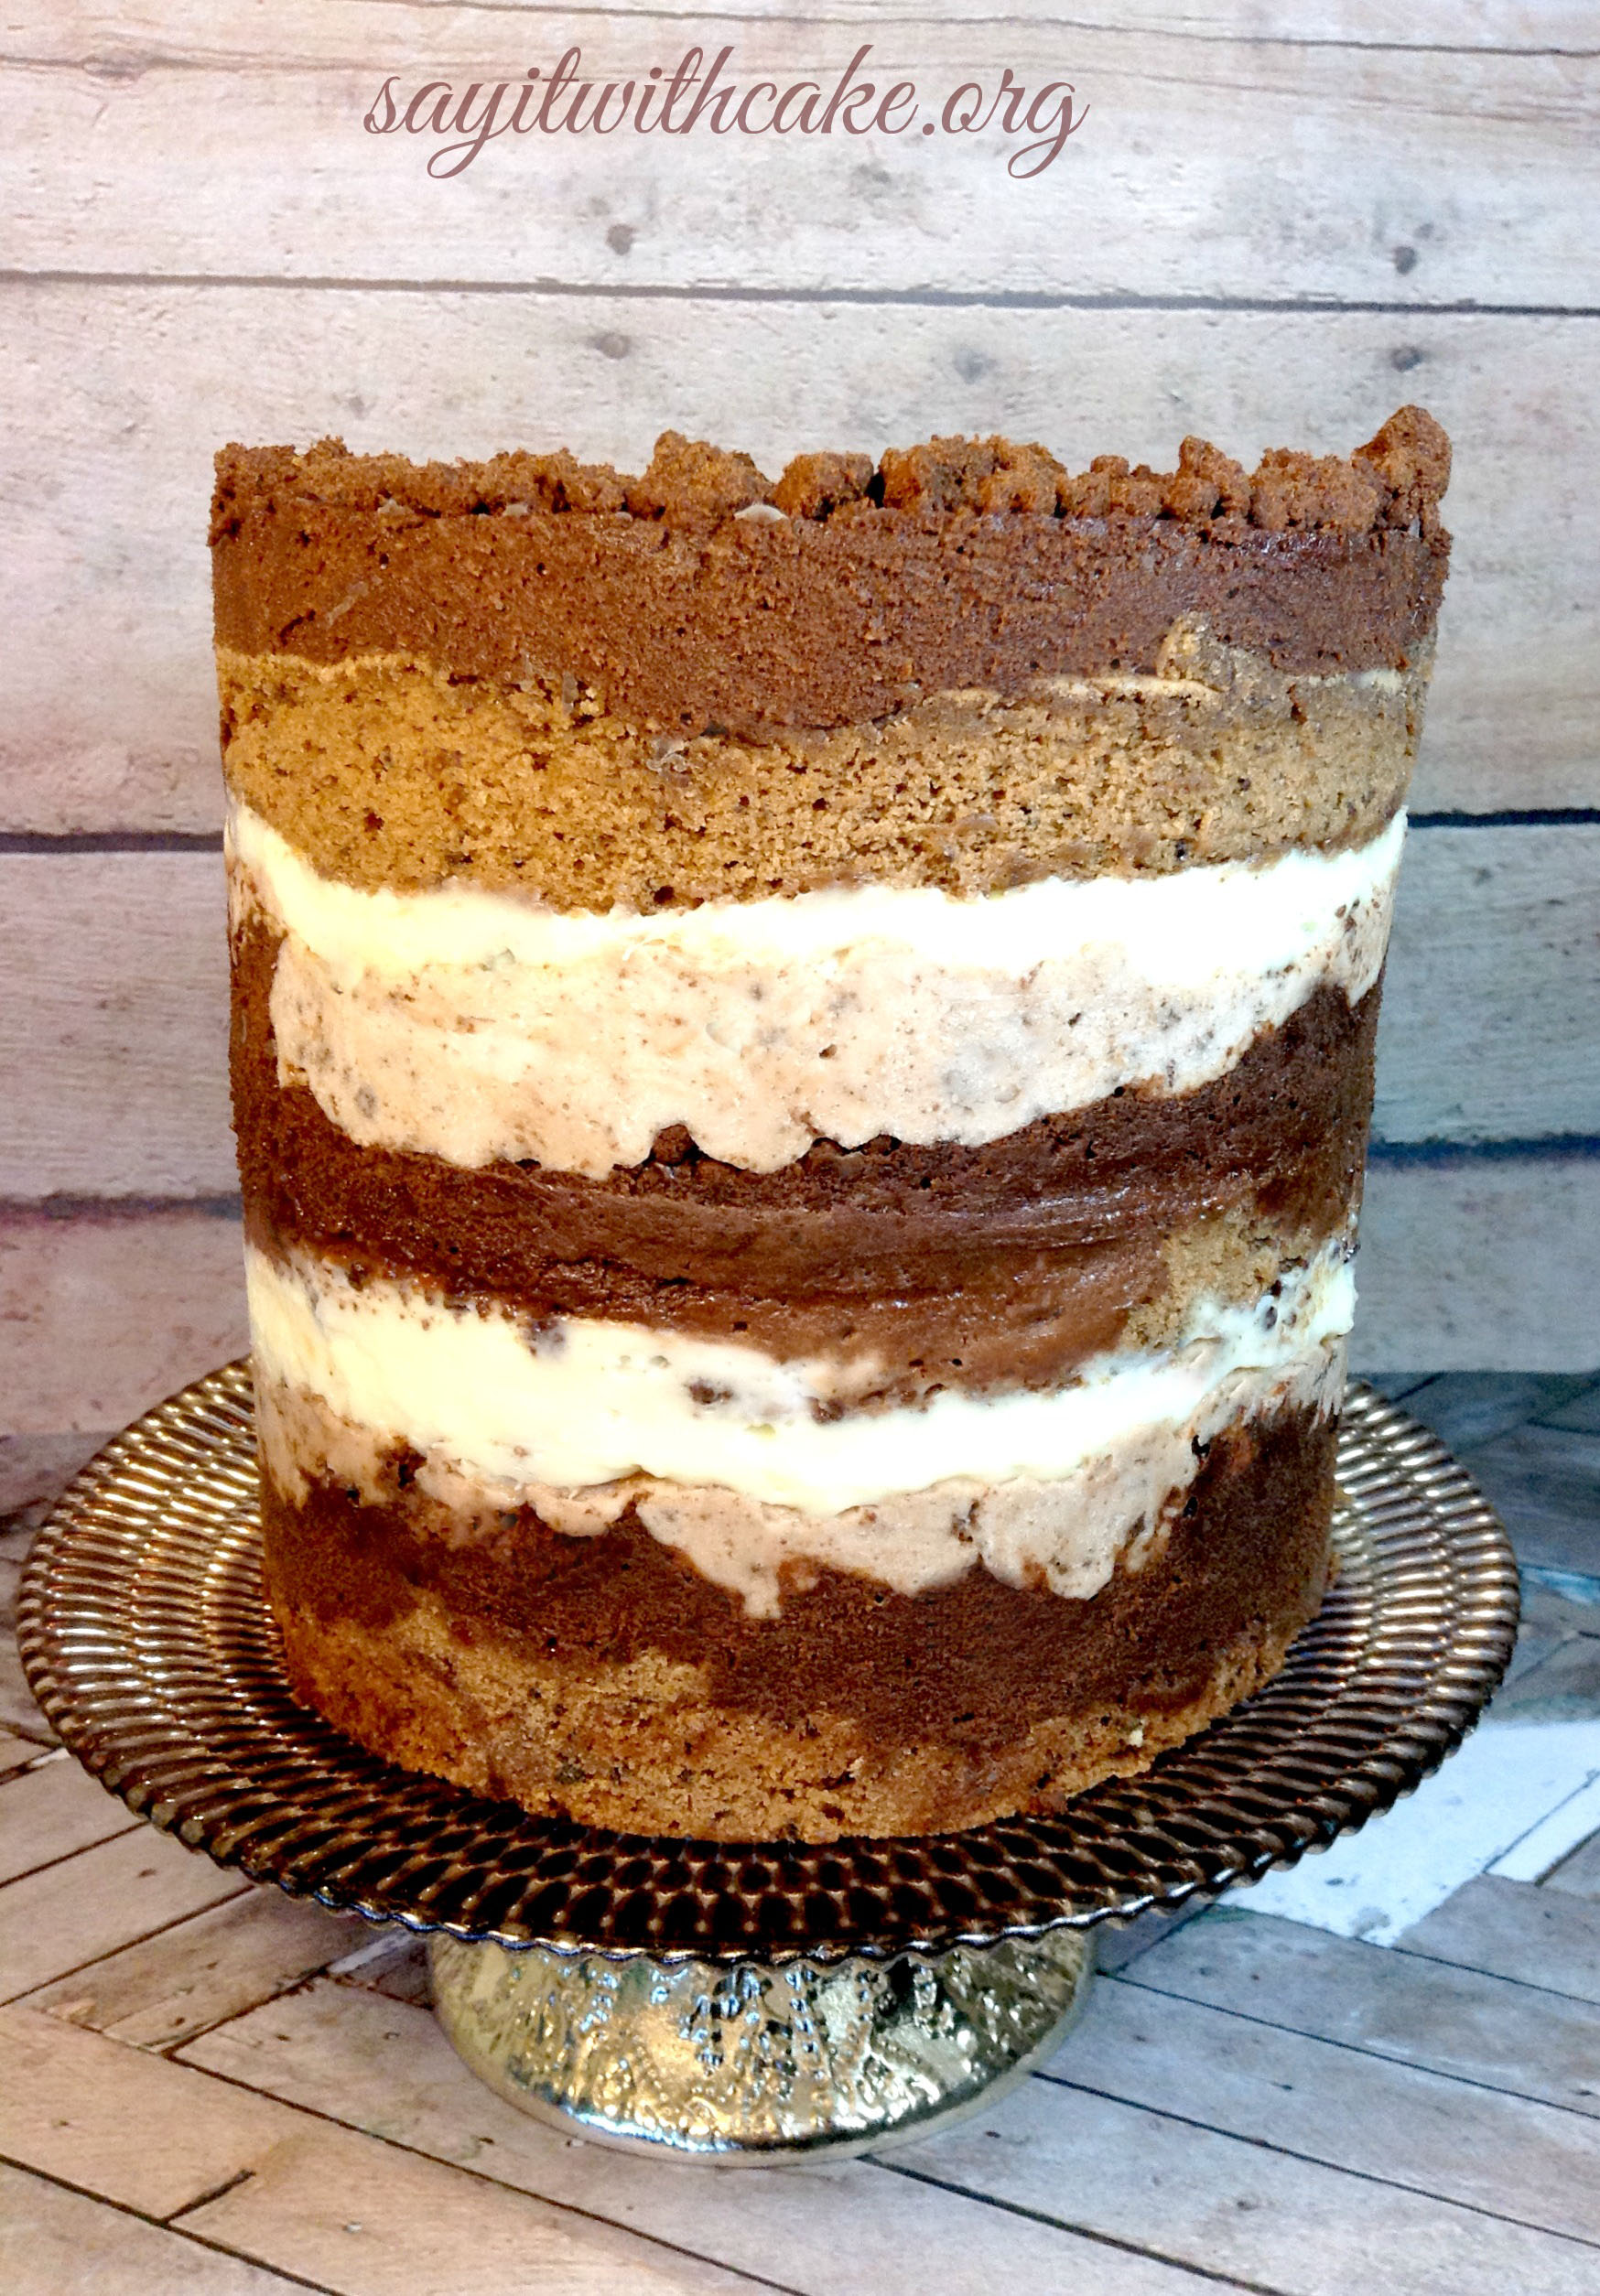 This cake has 15 layers of deliciousness! It has 3 layers of chocolate cake, chocolate fudge, cookie crumble, liquid cheesecake, and cookie frosting. I based my cake off of the chocolate malt cake from Milk Bar, I love those cakes and needed to try my own! The beauty of this cake is that it is naked, so you can see all of the awesome layers! You can see some of my other naked cakes here.
The coolest part of the cake is that you make it with a pastry ring and acetate paper. There are many steps, but it is worth it in the end!
I made the liquid cheesecake, cookie frosting, and cookie crumbles the day before. It really helped to have everything made in advance, so I could assemble it all at once.
 My favorite part of this cake was the liquid cheesecake filling. You bake the cheesecake, then spread it onto the cake as a layer. Yum!
Ingredients
- makes 1 (6-inch) layer cake, 5 to 6 inches tall. serves 8-12
- ½ recipe malted milk crumb (recipe below)
- 1 recipe chocolate cake (recipe below)
- 1 recipe malt fudge sauce, warm (recipe below)
- 1 recipe ovaltine soak (recipe below)
- 1. put a piece of parchment or a silpat on the counter. invert the cake onto it and peel off the parchment or silpat from the bottom of the cake. use the cake ring to stamp out 2 circles from the cake. these are your top 2 cake layers. the remaining cake “scrap” will come together to make the bottom layer of the cake.
- layer 1, the bottom
- 2. clean the cake ring and place it in the center of a sheet pan lined with clean parchment or a silpat. use 1 strip of acetate to line the inside of the cake ring.
- 3. put the cake scraps together inside the ring and use the back of your hand to tamp the scraps together into a flat even layer.
- 4. dunk a pastry brush in the ovaltine soak and give the layer of cake a good, healthy bath of half of the oil.
- 5. use the back of a spoon to spread one-fifth of the malt fudge sauce in an even layer over the cake. (helpful hint: the warmer the fudge sauce, the easier it is to spread.)
- 6. sprinkle one-third of the malted milk crumbs evenly over the malt fudge sauce. use the back of your hand to anchor them in place.
- 7. use the back of a spoon to spread another fifth of the malt fudge sauce as evenly as possible over the crumbs.
- layer 2, the middle
- 8. with your index finger, gently tuck the second strip of acetate between the cake ring and the top ¼ inch of the first strip of acetate, so that you have a clear ring of acetate 5 to 6 inches tall – high enough to support the height of the finished cake. set a cake round on top of the frosting, and repeat the process for layer 1 (if 1 of your 2 cake rounds is jankier than the other, use it here in the middle and save the prettier one for the top).
- layer 3, the top
- 9. nestle the remaining cake round into the fudge. cover the top of the cake with the remaining fudge sauce. since it’s a sauce, not a frosting, here you have no choice to make a shiny, perfectly flat top. garnish with the remaining crumble.
- 10. transfer the sheet pan to the freezer and freeze for a minimum of 12 hours to set the cake and filling. the cake will keep in the freezer for up to 2 weeks.
- 11. at least 3 hours before you are ready to serve the cake, pull the sheet pan out of the freezer and, using your fingers and thumbs, pop the cake out of the cake ring. gently peel off the acetate, and transfer the cake to a platter or cake stand. let it defrost in the fridge for a minimum of 3 hours (wrapped well in plastic, the cake can be refrigerated for up to 5 days).
- 12. slice the cake into wedges and serve.
- special equipment
- 1 (6-inch) cake ring
- 2 strips acetate, each 3 inches wide and 20 inches long
- makes 1 quarter sheet pan cake
- 110 g butter, at room temperature (1 stick)
- 300 g granulated sugar (1 1/2 cups)
- 3 eggs
- 110 g buttermilk (1/2 cup)
- 40 g grapeseed oil (1/4 cup)
- 4 g vanilla extract 1 teaspoon
- 1/4 recipe fudge sauce (recipe below) (3 tablespoons)
- 155 g cake flour (1 1/4 cups)
- 70 g cocoa powder (1/2 cup)
- 6 g baking powder (1 1/2 teaspoons)
- 6 g kosher salt (1 1/2 teaspoons)
- 30 g 72% chocolate chopped (1 ounce)
- 18 g cocoa powder (2 tablespoons)
- .5 g kosher salt (1/8 teaspoon)
- 100 g glucose (1/4 cup)
- 25 g sugar (2 tablespoons)
- 55 g heavy cream (1/4 cup)
- makes enough for 1 recipe of the chocolate cake
- 55 g milk (1/4 cup)
- 10 g ovaltine powder (2 tablespoons)
- whisk together the milk and ovaltine in a small bowl.
- makes about 350 g (2 ½ cups)
- 105 g flour (2/3 cup)
- 4 g cornstarch (1 teaspoon)
- 100 g sugar (½ cup)
- 65 g cocoa powder, preferably Valrhona (2/3 cup)
- 4 g kosher salt (1 teaspoon)
- 85 g butter, melted (6 tablespoons)
- makes about 325 g (1 ½ cups)
- 225 g cream cheese (8 ounces)
- 150 g sugar (¾ cup)
- 6 g cornstarch (½ teaspoon)
- 2 g kosher salt (½ teaspoon)
- 25 g milk (2 tablespoons)
- 1 egg
- makes about 473 g
- 250 g powdered sugar (1 ½ cups)
- 95 g Crisco shortening (½ cup)
- 62 g light corn syrup (3 tablespoons)
- 13 g clear vanilla extract (3 teaspoons)
- 25 g cornstarch (2 tablespoons)
- 1 g salt (¼ teaspoon)
- 40 g chocolate crumbs (½ cup)
Instructions
- 1. heat the oven to 350°f.
- 2. combine the butter and sugar in the bowl of a stand mixer fitted with the paddle attachment and cream together on medium-high for 2 to 3 minutes. scrape down the sides of the bowl, add the eggs, and mix on medium-high for 2 to 3 minutes. scrape down the sides of the bowl once more.
- 3. on low speed, stream in the buttermilk, oil, fudge sauce, and vanilla. increase the mixer speed to medium-high and paddle for 4 to 6 minutes, until the mixture is practically twice the size of your original fluffy butter-and-sugar mixture, and completely homogenous. don’t rush the process. you’re basically forcing too much liquid into an already fatty mixture that doesn’t want to make room for that liquid. there should be no streaks of fat or liquid. stop the mixer and scrape down the sides of the bowl.
- 4. on very low speed, add the cake flour, baking powder, salt, and the cocoa powder. mix for 45 to 60 seconds, just until your batter comes together. scrape down the sides of the bowl.
- 5. pam-spray a quarter sheet pan and line it with parchment, or just line the pan with a silpat. using a spatula, spread the cake batter in an even layer in the pan.
- 6. bake the cake for 30 to 35 minutes. the cake will rise and puff, doubling in size, but will remain slightly buttery and dense. at 30 minutes, gently poke the edge of the cake with your finger: the cake should bounce back slightly and the center should no longer be jiggly. leave the cake in the oven for an extra 3 to 5 minutes if it doesn’t pass these tests.
- 7. take the cake out of the oven and cool on a wire rack or, in a pinch, in the fridge or freezer (don’t worry, it’s not cheating). the cooled cake can be stored in the fridge, wrapped in plastic wrap, for up to 5 days.
- 1. combine the chocolate, cocoa powder, and salt in medium bowl.
- 2. combine the glucose, sugar, and heavy cream in a heavy-bottomed saucepan and stir intermittently while bringing to a boil over high heat. the moment it boils, pour it into the bowl holding the chocolate. let sit for 1 full minute.
- 3. slowly, slowly begin to whisk the mixture. then continue, increasingly the vigor of your whisking every 30 seconds, until the mixture is glossy and silky-smooth. this will take 2 to 4 minutes, depending on your speed and strength. you can use this sauce at this point or store it in an airtight container in the fridge for up to 2 weeks; do not freeze.
- Heat the oven to 300°F.
- Combine the flour, cornstarch, sugar, cocoa powder, and salt in the bowl of a stand mixer fitted with the paddle attachment and paddle on low speed until mixed.
- Add the butter and paddle on low speed until the mixture starts to come together in small clusters.
- Spread the clusters on a parchment-or Silpat-lined sheet pan. Bake for 20 minutes, breaking them up occasionally. The crumbs should still be slightly moist to the touch at that point; they will dry and harden as they cool.
- Let the crumbs cool completely before using; place 40g aside for the liquid cheesecake.
- Heat the oven to 300°F.
- Put the cream cheese in the bowl of a stand mixer fitted with the paddle attachment and mix on low speed for 2 minutes. Scrape down the sides of the bowl with a spatula. Add the sugar and mix for 1 to 2 minutes, until the sugar has been completely incorporated. Scrape down the sides of the bowl.
- Whisk together the cornstarch and salt in a medium bowl. Whisk in the milk in a slow, steady stream, then whisk in the egg until the slurry is homogenous.
- With the mixer on medium-low speed, stream in the egg slurry. Paddle for 3 to 4 minutes, until the mixture is smooth and loose. Scrape down the sides of the bowl.
- Line the bottom and sides of a 6 x 6-inch baking pan with plastic wrap. Pour the cheesecake batter into the pan, put the pan in the oven, and bake for 15 minutes. Gently shake the pan. The cheesecake should be firmer and more set toward the outer boundaries of the baking pan but still be jiggly and loose in the dead center. If the cheesecake is jiggly all over, give it 5 minutes more. And 5 minutes more if it needs it, but it’s never taken me more than 25 minutes to underbake one. If the cheesecake rises more than a ¼ inch or begins to brown, take it out of the oven immediately.
- Cool the cheesecake completely, to finish the baking process and allow the cheesecake to set. The final product will resemble a cheesecake, but it will be pipeable and pliable enough to easily spread or smear, while still having body and volume.
- Mix in the mint extract and green color, with a spatula or in a stand mixer. Once cool, the cheesecake can be stored in an airtight container in the fridge for up 1 week.
- In a stand mixer mix together all ingredients except for the chocolate crumbs until incorporated.
- With a spatula fold in chocolate crumbs.
- The frosting is ready to use immediately, or can stay for up to one week in refrigeration.
recipe adapted from milk bar
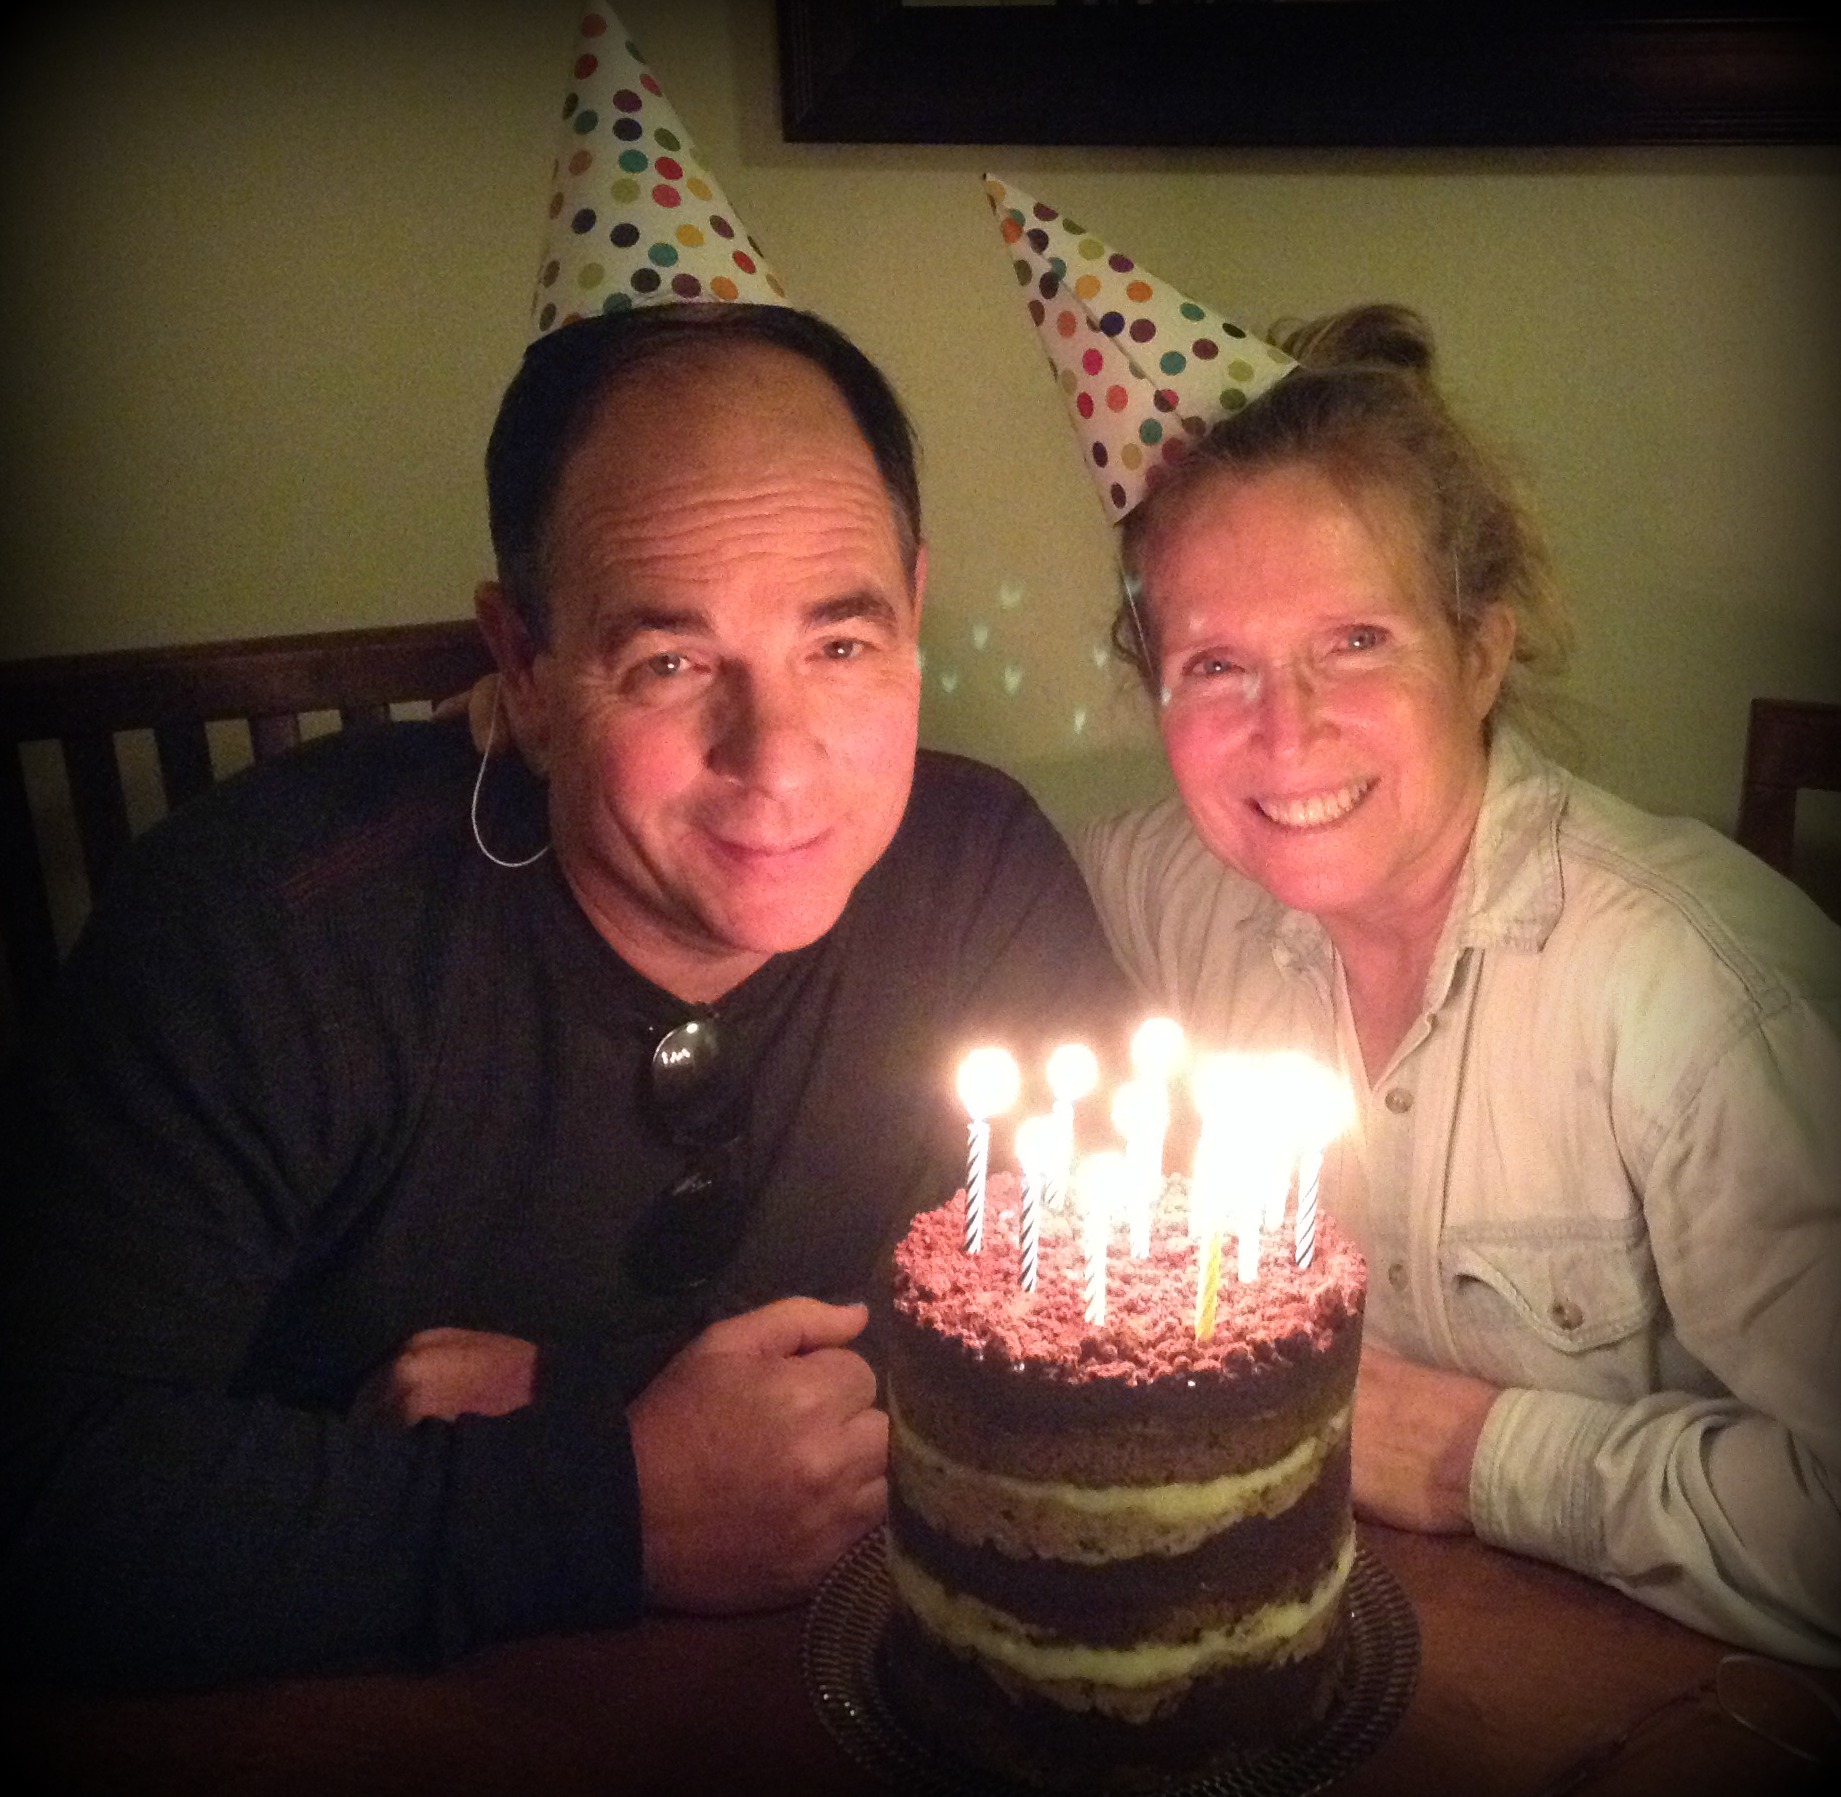
I made this cake for my beautiful Mother and my step Dad for their birthdays!
Enjoy!
Some other cakes you might like

]]>
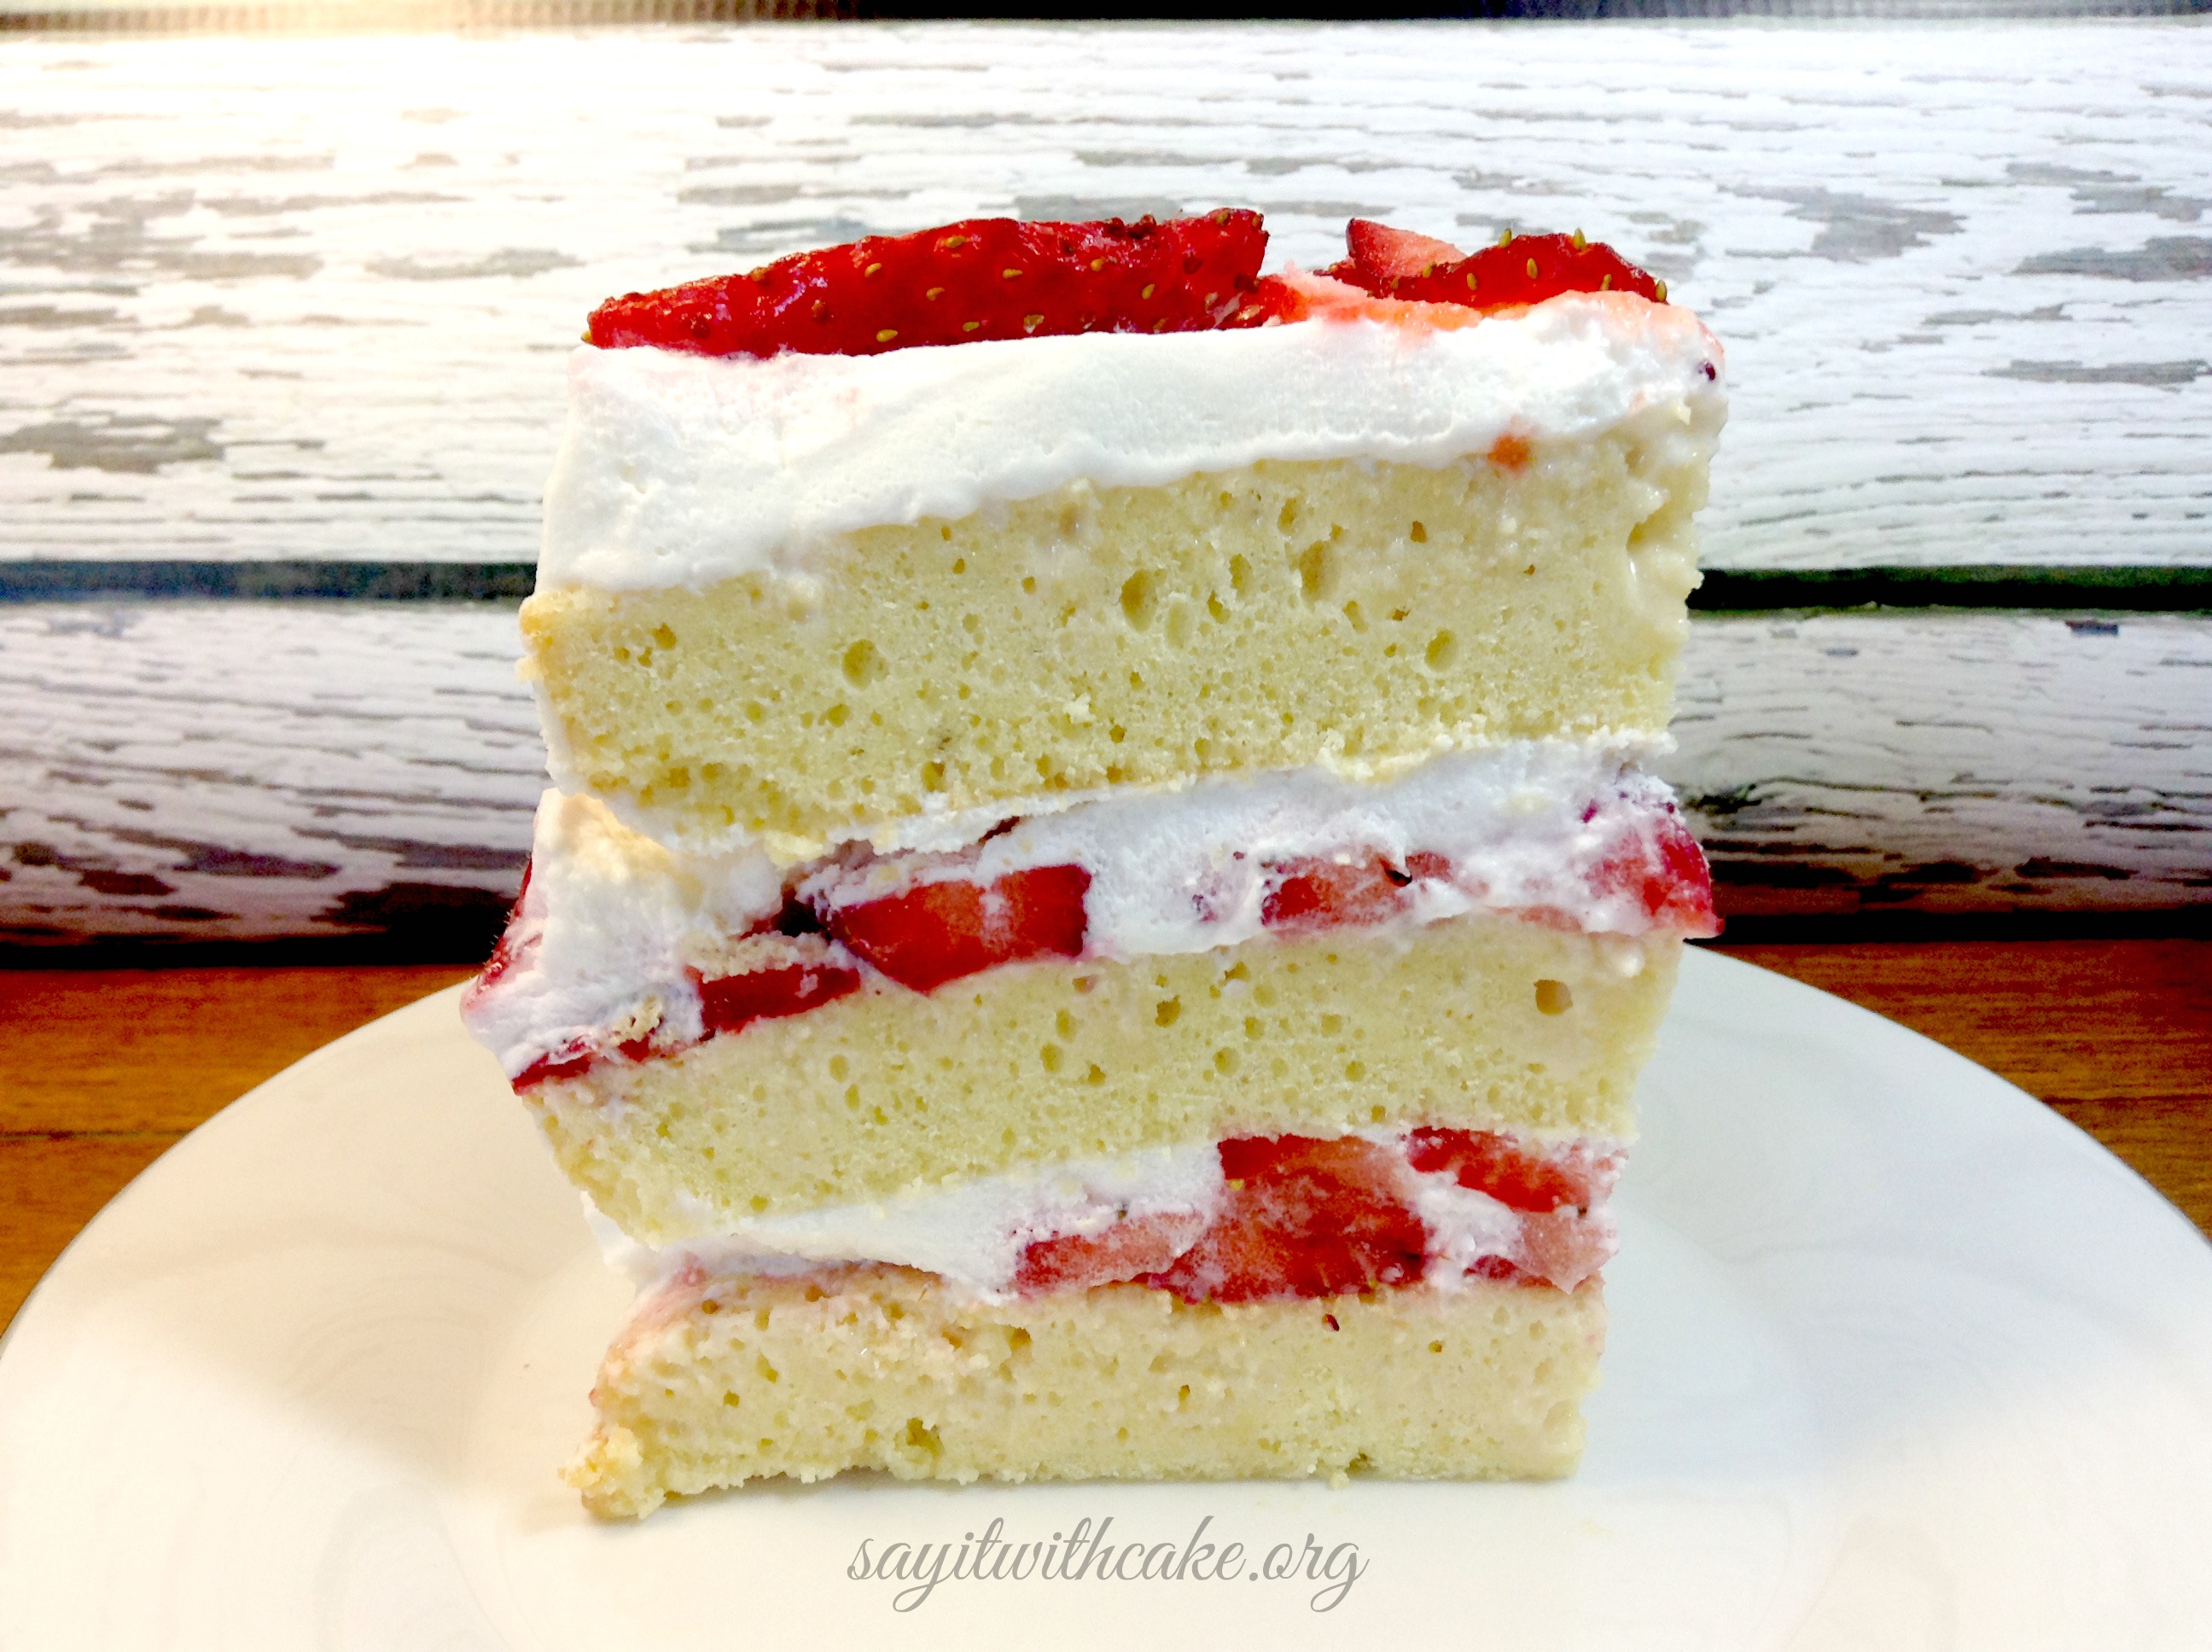
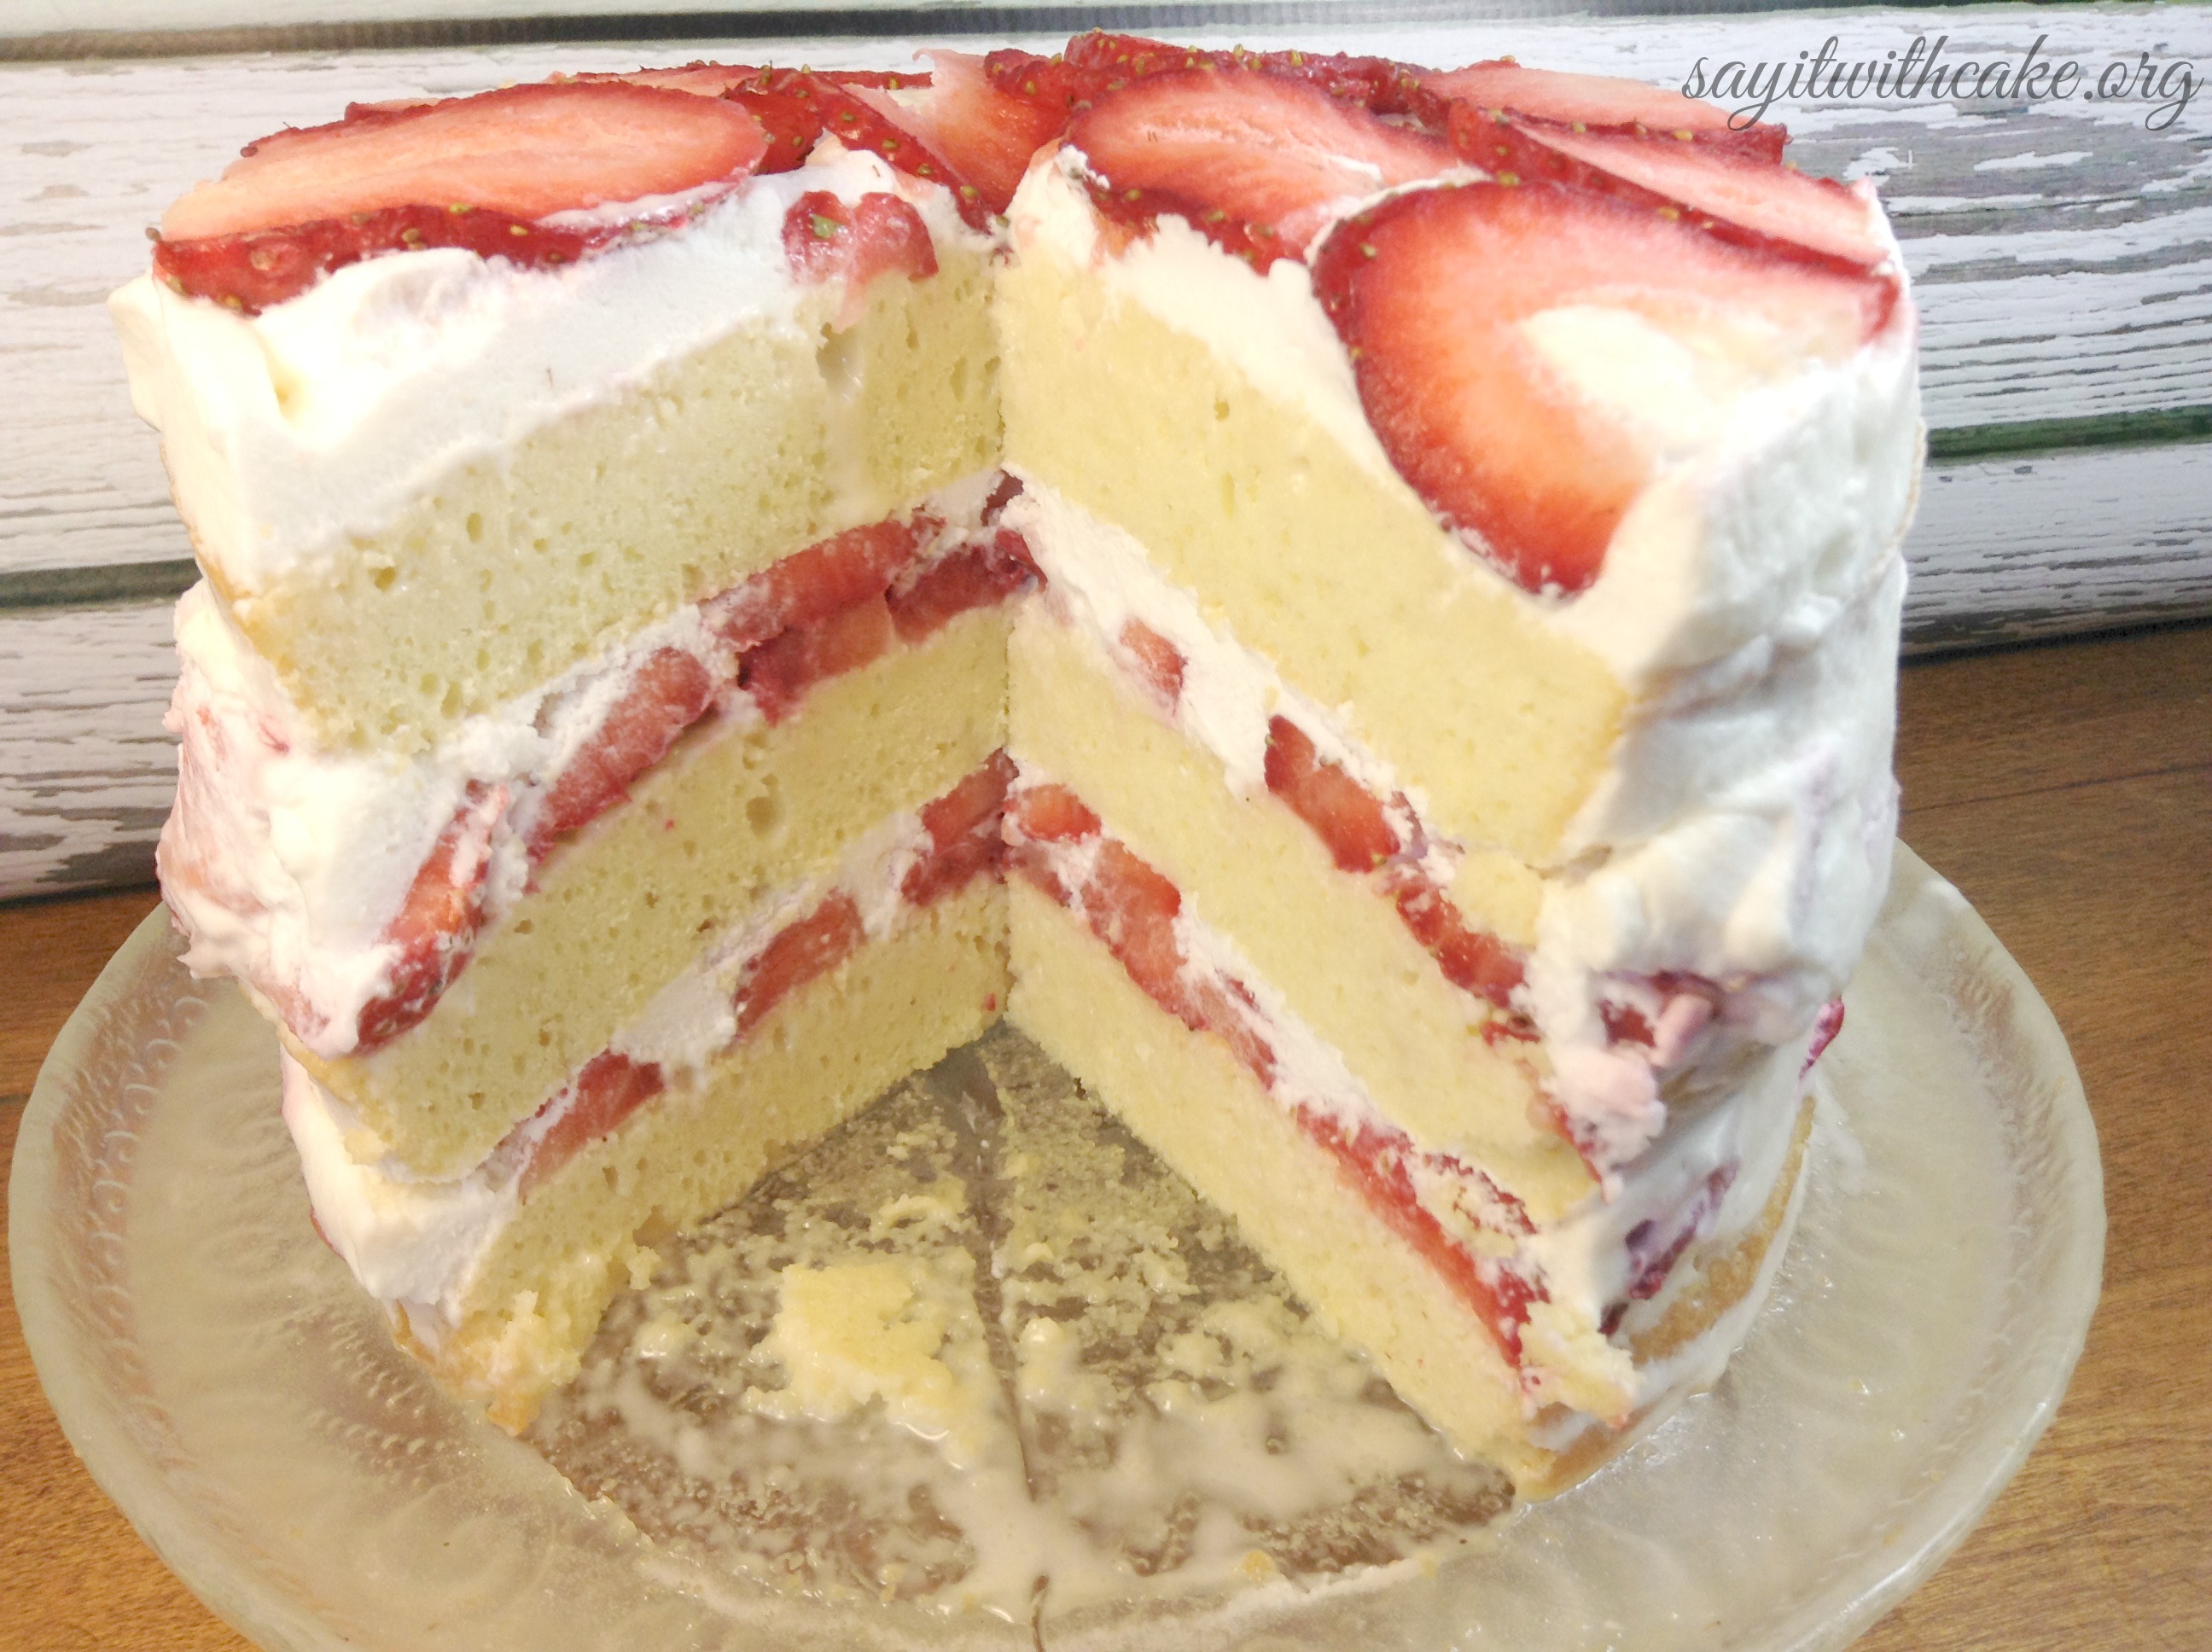
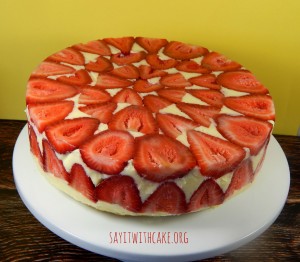
 This was my second time making a tres leche cake. I made it for my family for New Years, and it was really yummy! The previous cake I made was with peaches, you can check that out Here. It is a super moist, light, airy and super delicious sponge cake soaked in the three kinds of milk {evaporated milk, condensed milk, and heavy cream}. Tres Leches is a very light cake {especially if made without butter}, with many air bubbles in its crumb. This distinct texture is why it does not have a soggy consistency, despite being soaked in a mixture of three types of milk.
I can’t say which one I liked better, but strawberries are not in season right now so the strawberries alone cost over $10.00. However, I definitely like the taste of fresh strawberries with the whipped cream. In my opinion, fresh always tastes better then canned fruit.
I also think I should have soaked more milk into the cake. I was in a bit of a hurry with this cake because midnight was coming on New Years Eve and I wasn’t done with the cake yet! I think I should have poked larger and deeper holes into the cake. This might have helped soak more milk into the cake. Try it and tell me what you think!
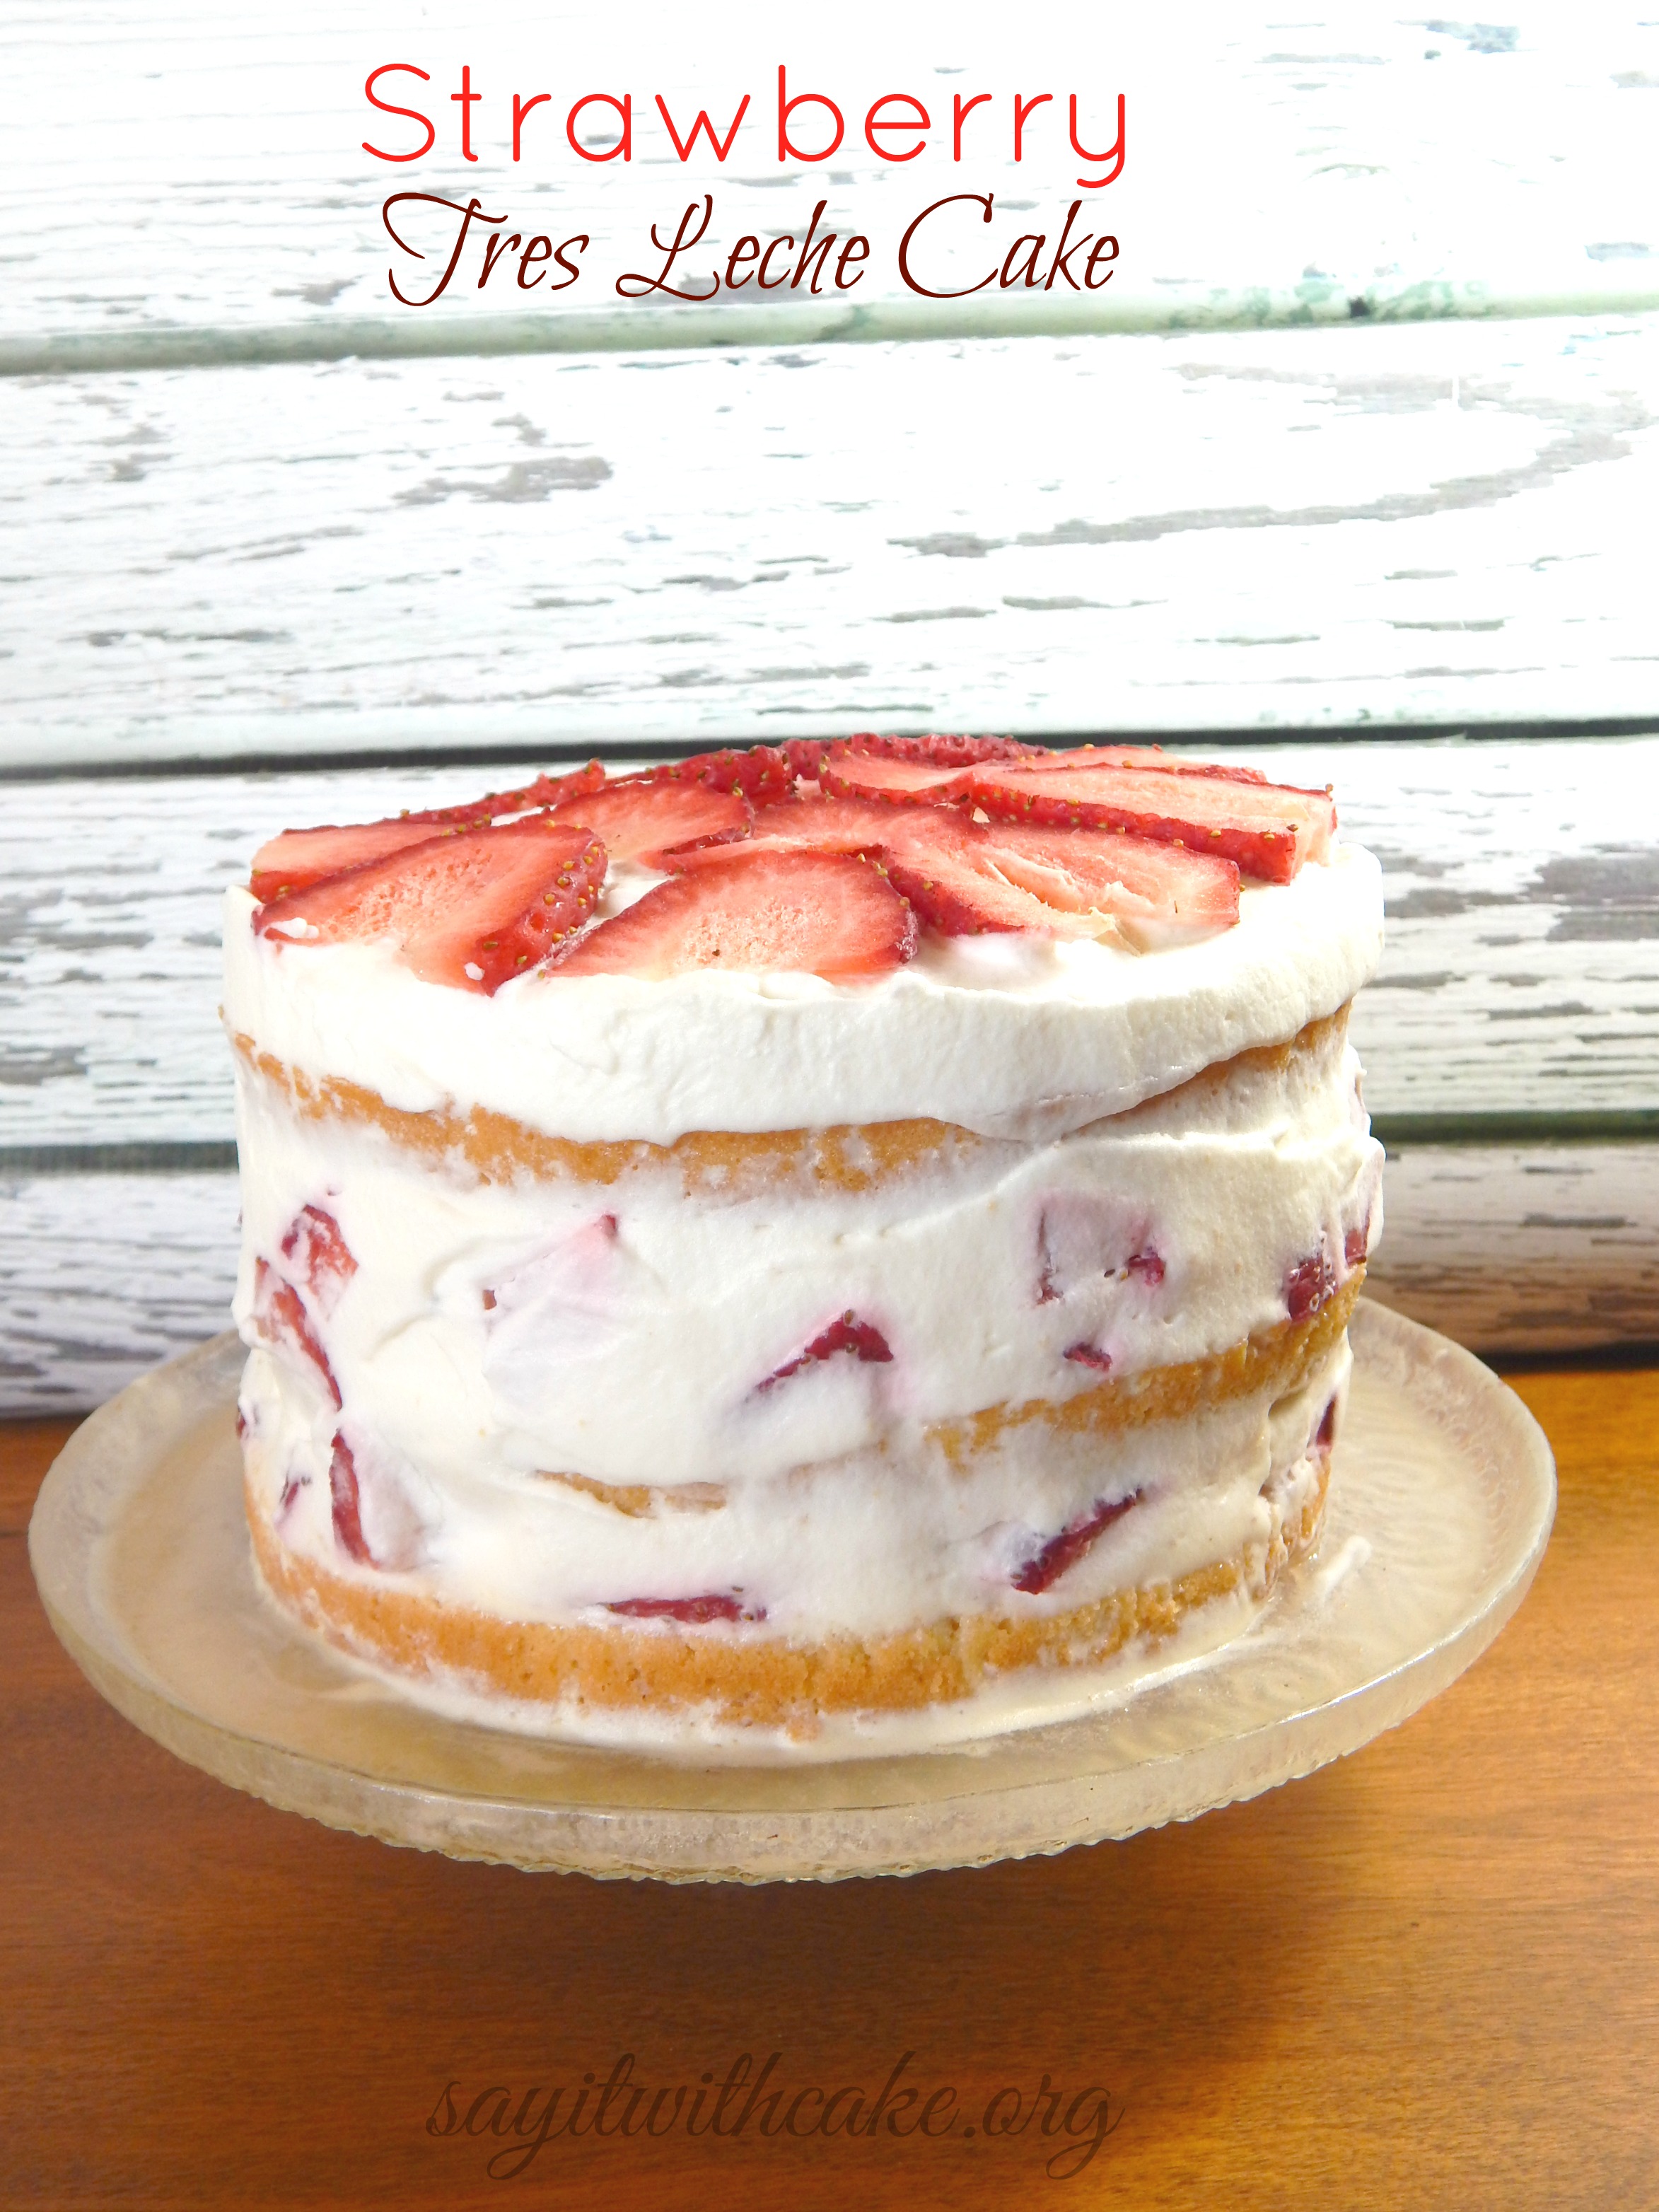
Also, last time I said that I would make a larger cake but I only made a six inch again. Since there are only three in our family, an 8 inch would have been too big. You can also make this cake in a single layer. Both taste good, but I like the way a layered cake looks better.
The strawberries and homemade whipped cream tasted so delicious as a filling!
Ingredients
- 5 large eggs (separated)
- 1/2 cup sugar
- 2 tsp pure vanilla extract
- 1 tsp lemon extract (optional)
- 1 1/4 cups all-purpose (plain) flour (sifted)
- 1 can sweetened condensed milk
- 1 can evaporated milk
- 1 cup heavy whipping cream
- 2 teaspoons lemon extract (optional)
- 1 3/4 cup heavy whipping cream
- 1/4 cup powdered sugar
- 1-2 pounds of strawberries cut up small
Instructions
- Preheat oven to 350 degrees. Prepare 9” round cake pan, or 3 6 inch like I used
- Separate the egg whites from the yolks.
- Beat the egg whites on medium speed, 3 – 5 minutes.
- When soft peaks form slowly add the sugar in small batches.
- Whip until stiff peaks form about 5 minutes. Set aside.
- In a medium bowl beat egg yolks at medium-high speed for about 5 to 6 minutes, or until the egg yolks become pale colored, creamy and puffy. Stir in vanilla.
- Pour the egg yolks over the egg whites, gently fold until just combined trying not to lose any volume from the mixture.
- Fold in the flour little by little in the form of rain. Mix until just combined (over-beating will result in a denser, flatter cake).
- Pour the batter into the prepared pan.
- Bake in the preheated moderate oven for 25 minutes or until the toothpick comes out clean
- Let it cool
- Once cool, split the cake in half, flip the top of the cake and place it on a base. Poke using a fork holes all over the cake to better absorb the three milk soaking liquid
- In a saucepan add the sweetened condensed milk, evaporated milk, heavy cream and cinnamon stick, bring to a boil, reduce the heat and continue boiling for 5 minutes. Remove it and let it cool.
- Once it is cool, add any other flavoring you are using
- Gradually brush all the milk soaking liquid into all sides of the cake (including the cut surfaces) until all absorbed. Best to rest the cake in the fridge overnight to complete the soaking process
- Whip the cream, when soft peaks form, add the sugar little by little, continue whipping until stiff peaks form about 2 mins.
- Decoration
- Layer some whipped cream on the bottom layer and cover with canned or fresh fruit and decorate the top layer with whipped cream and the fresh or canned fruit.
Enjoy!

Other cakes you might like!
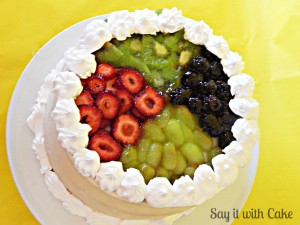
Fresh fruit topping cake

le fraisier
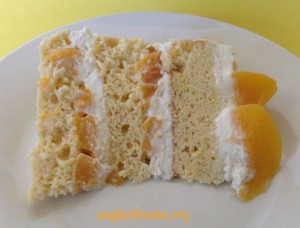
Tres Leche cake with peaches
fraisier
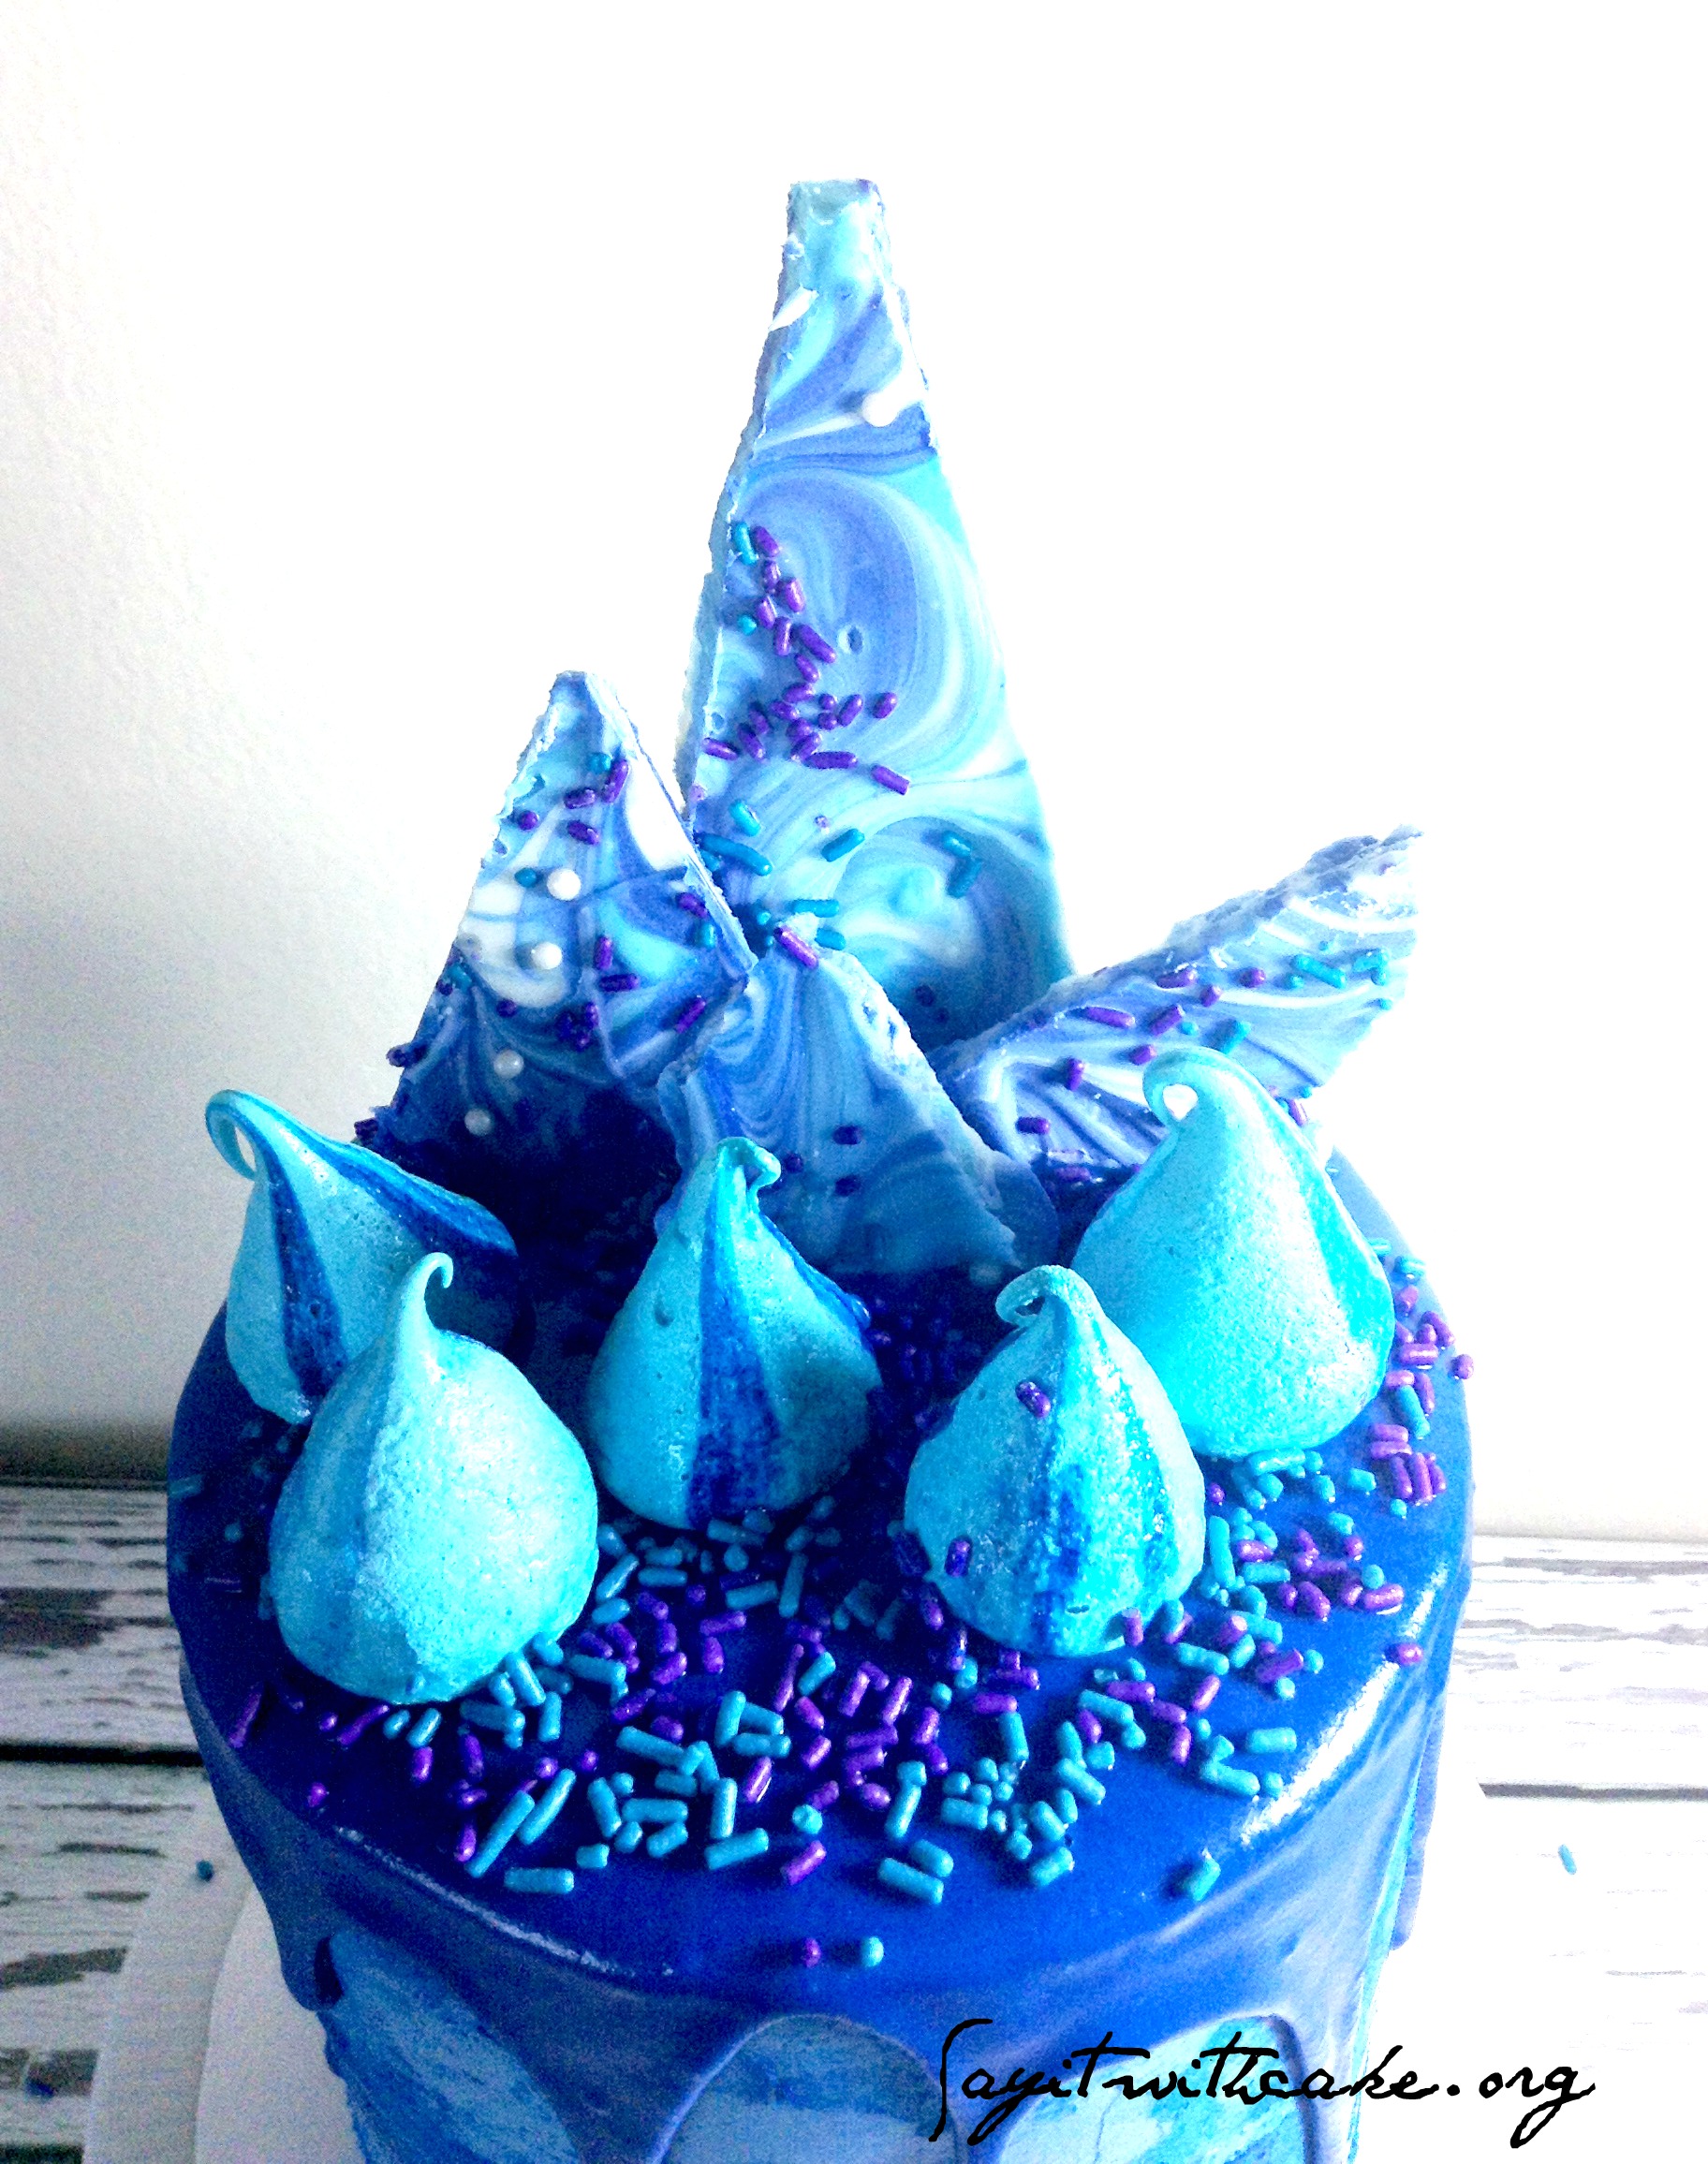
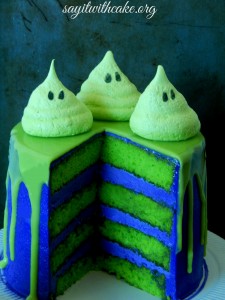
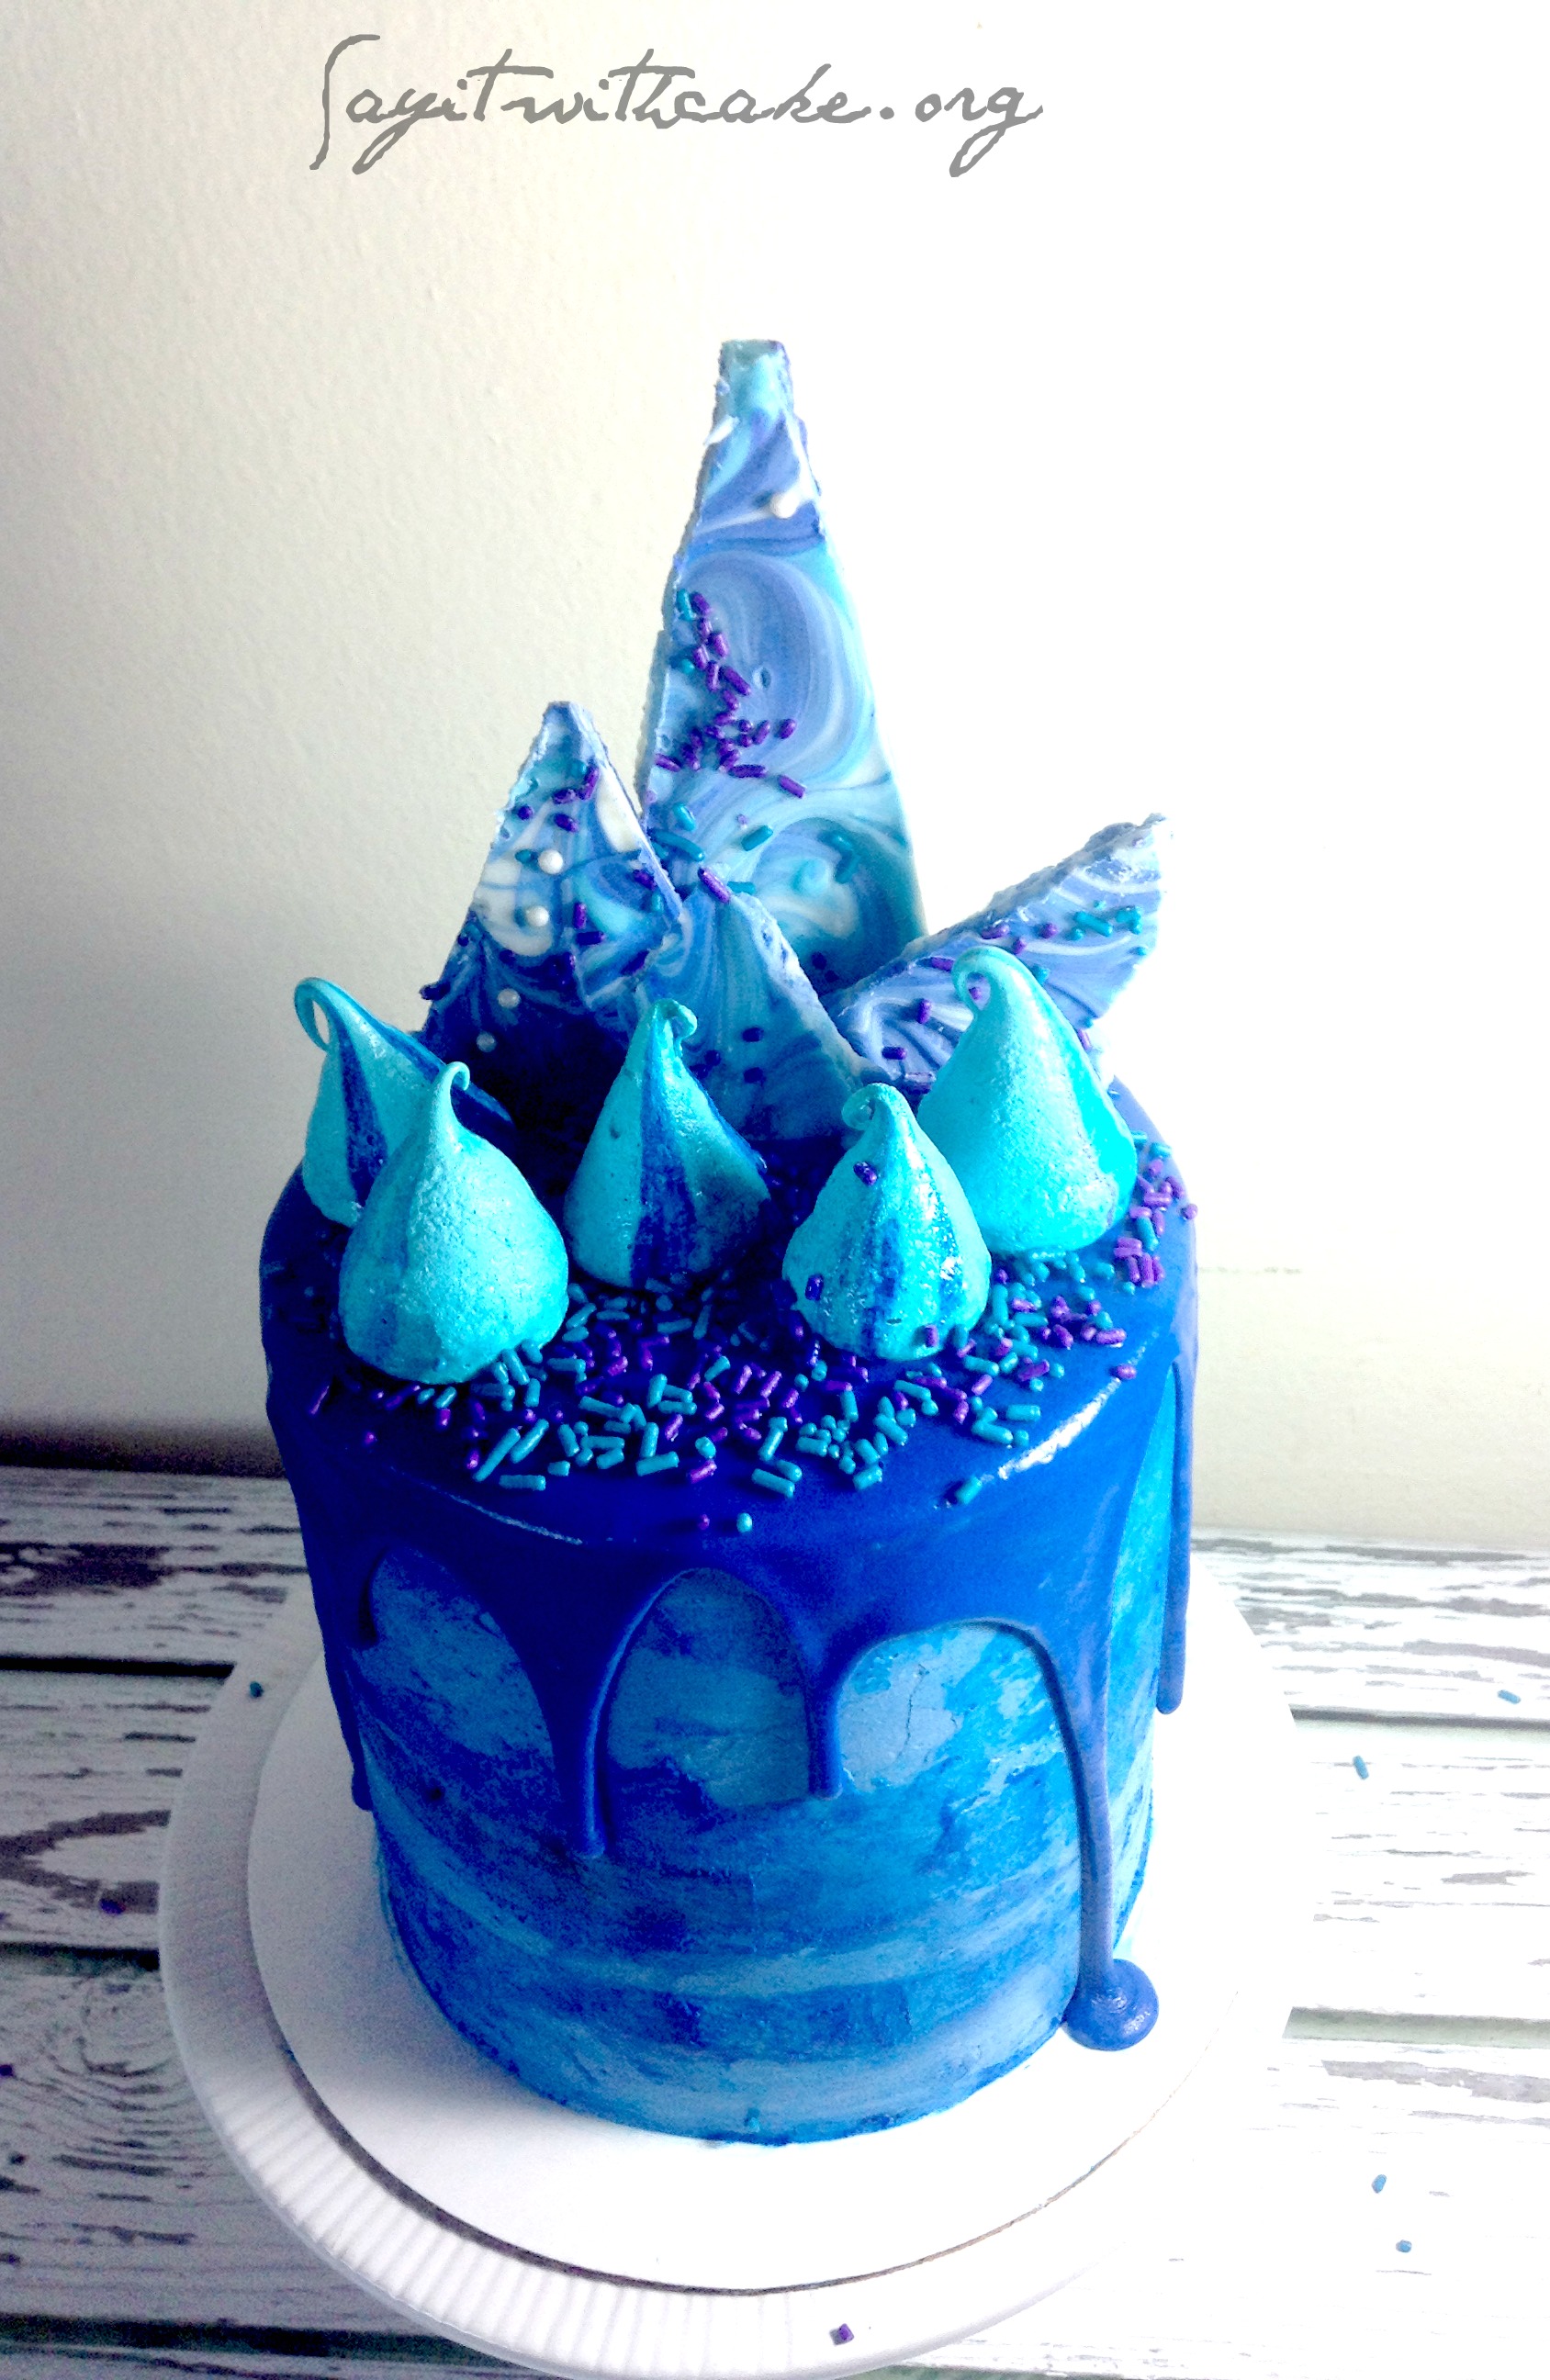 This cake is for my son who wanted to celebrate his 5 1/2 birthday this year! He looooves blue and wanted an all blue cake. I did my best! I got my inspiration from Katherine Sabbath
before sprinkles
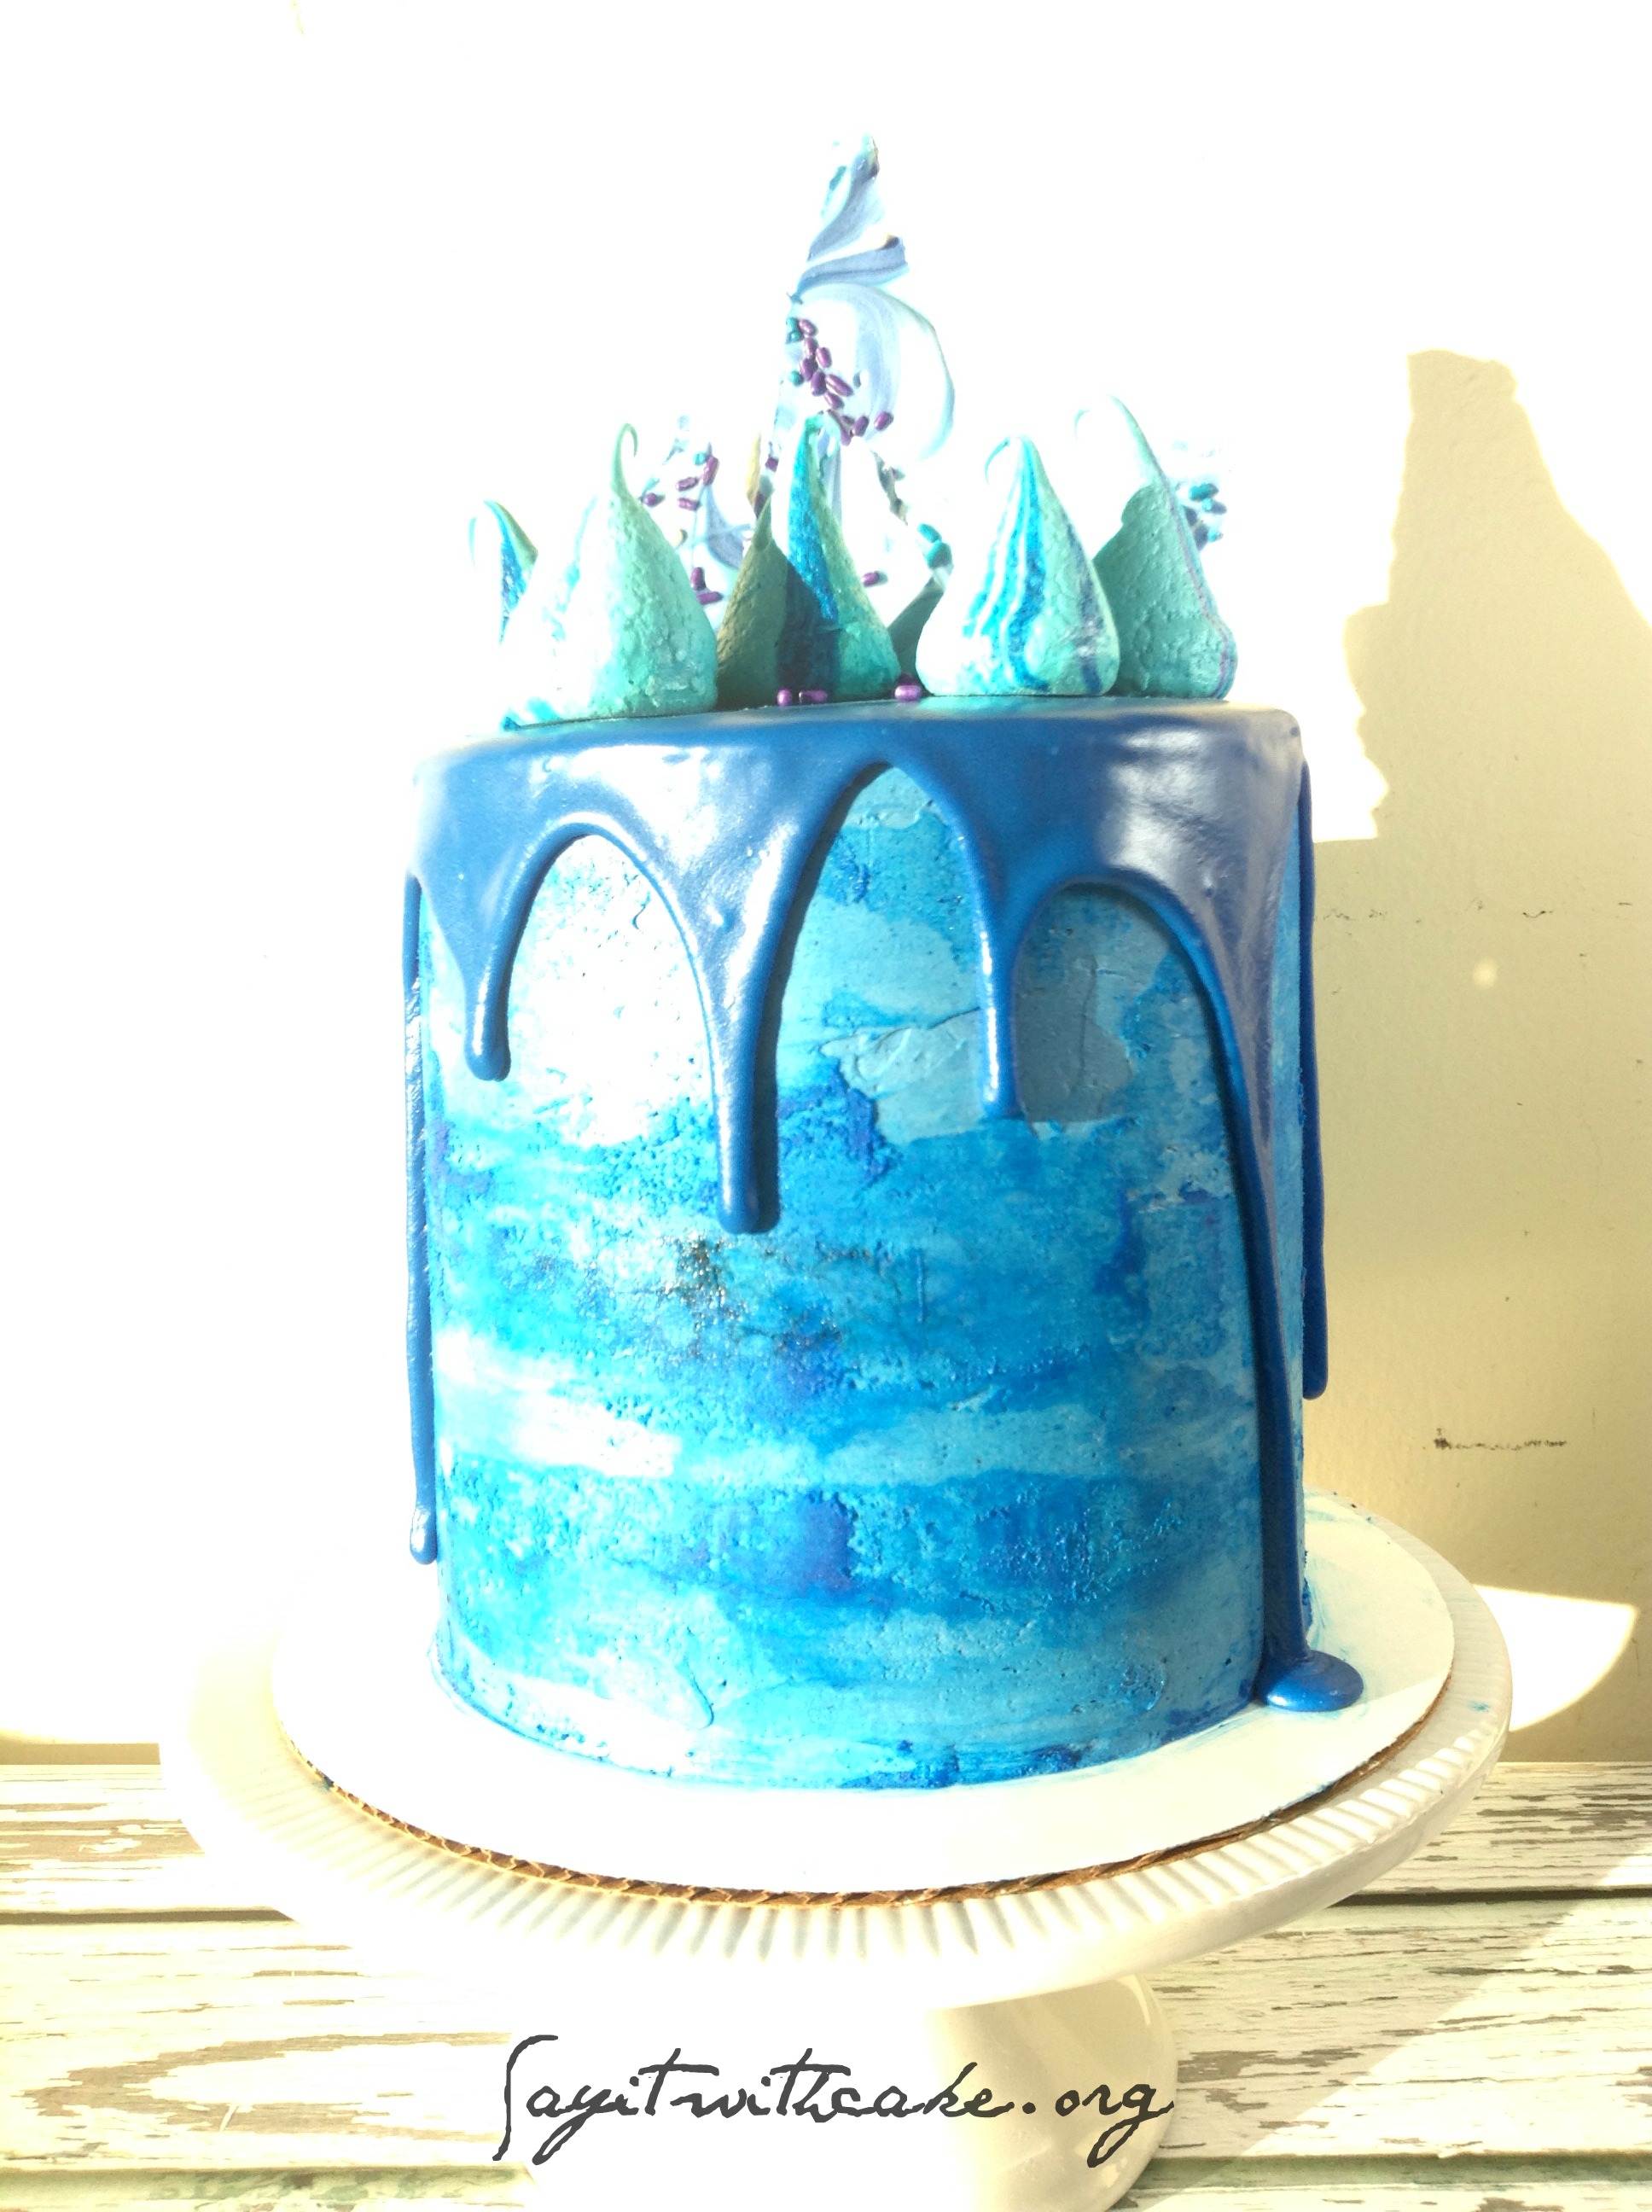
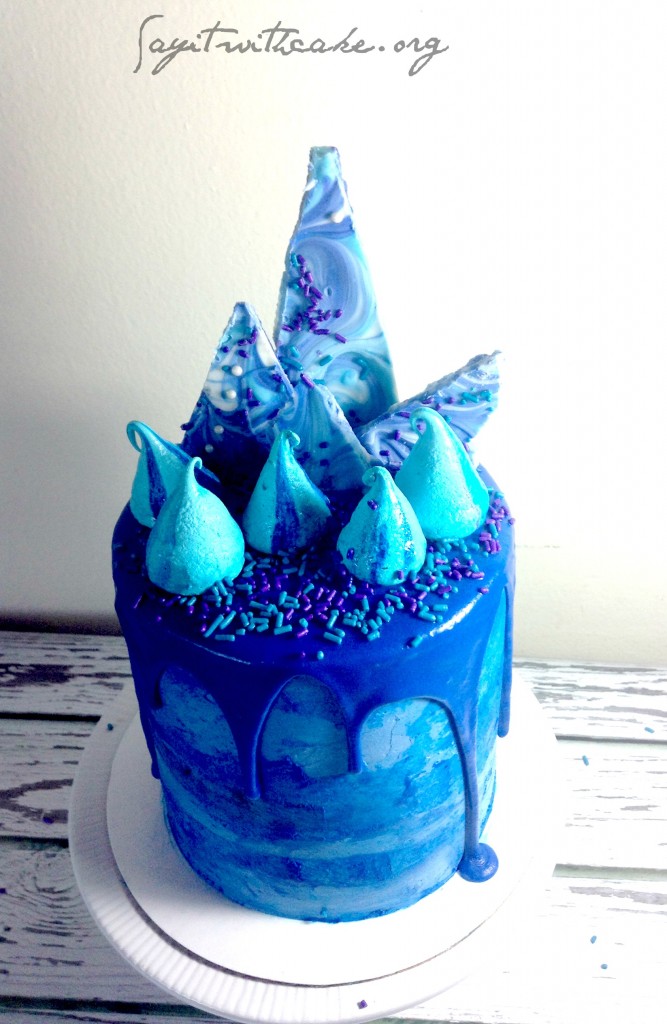
This cake has several components, the blue ganache, the blue meringue cookies, and the blue bark. You can make these several days in advance.
]]>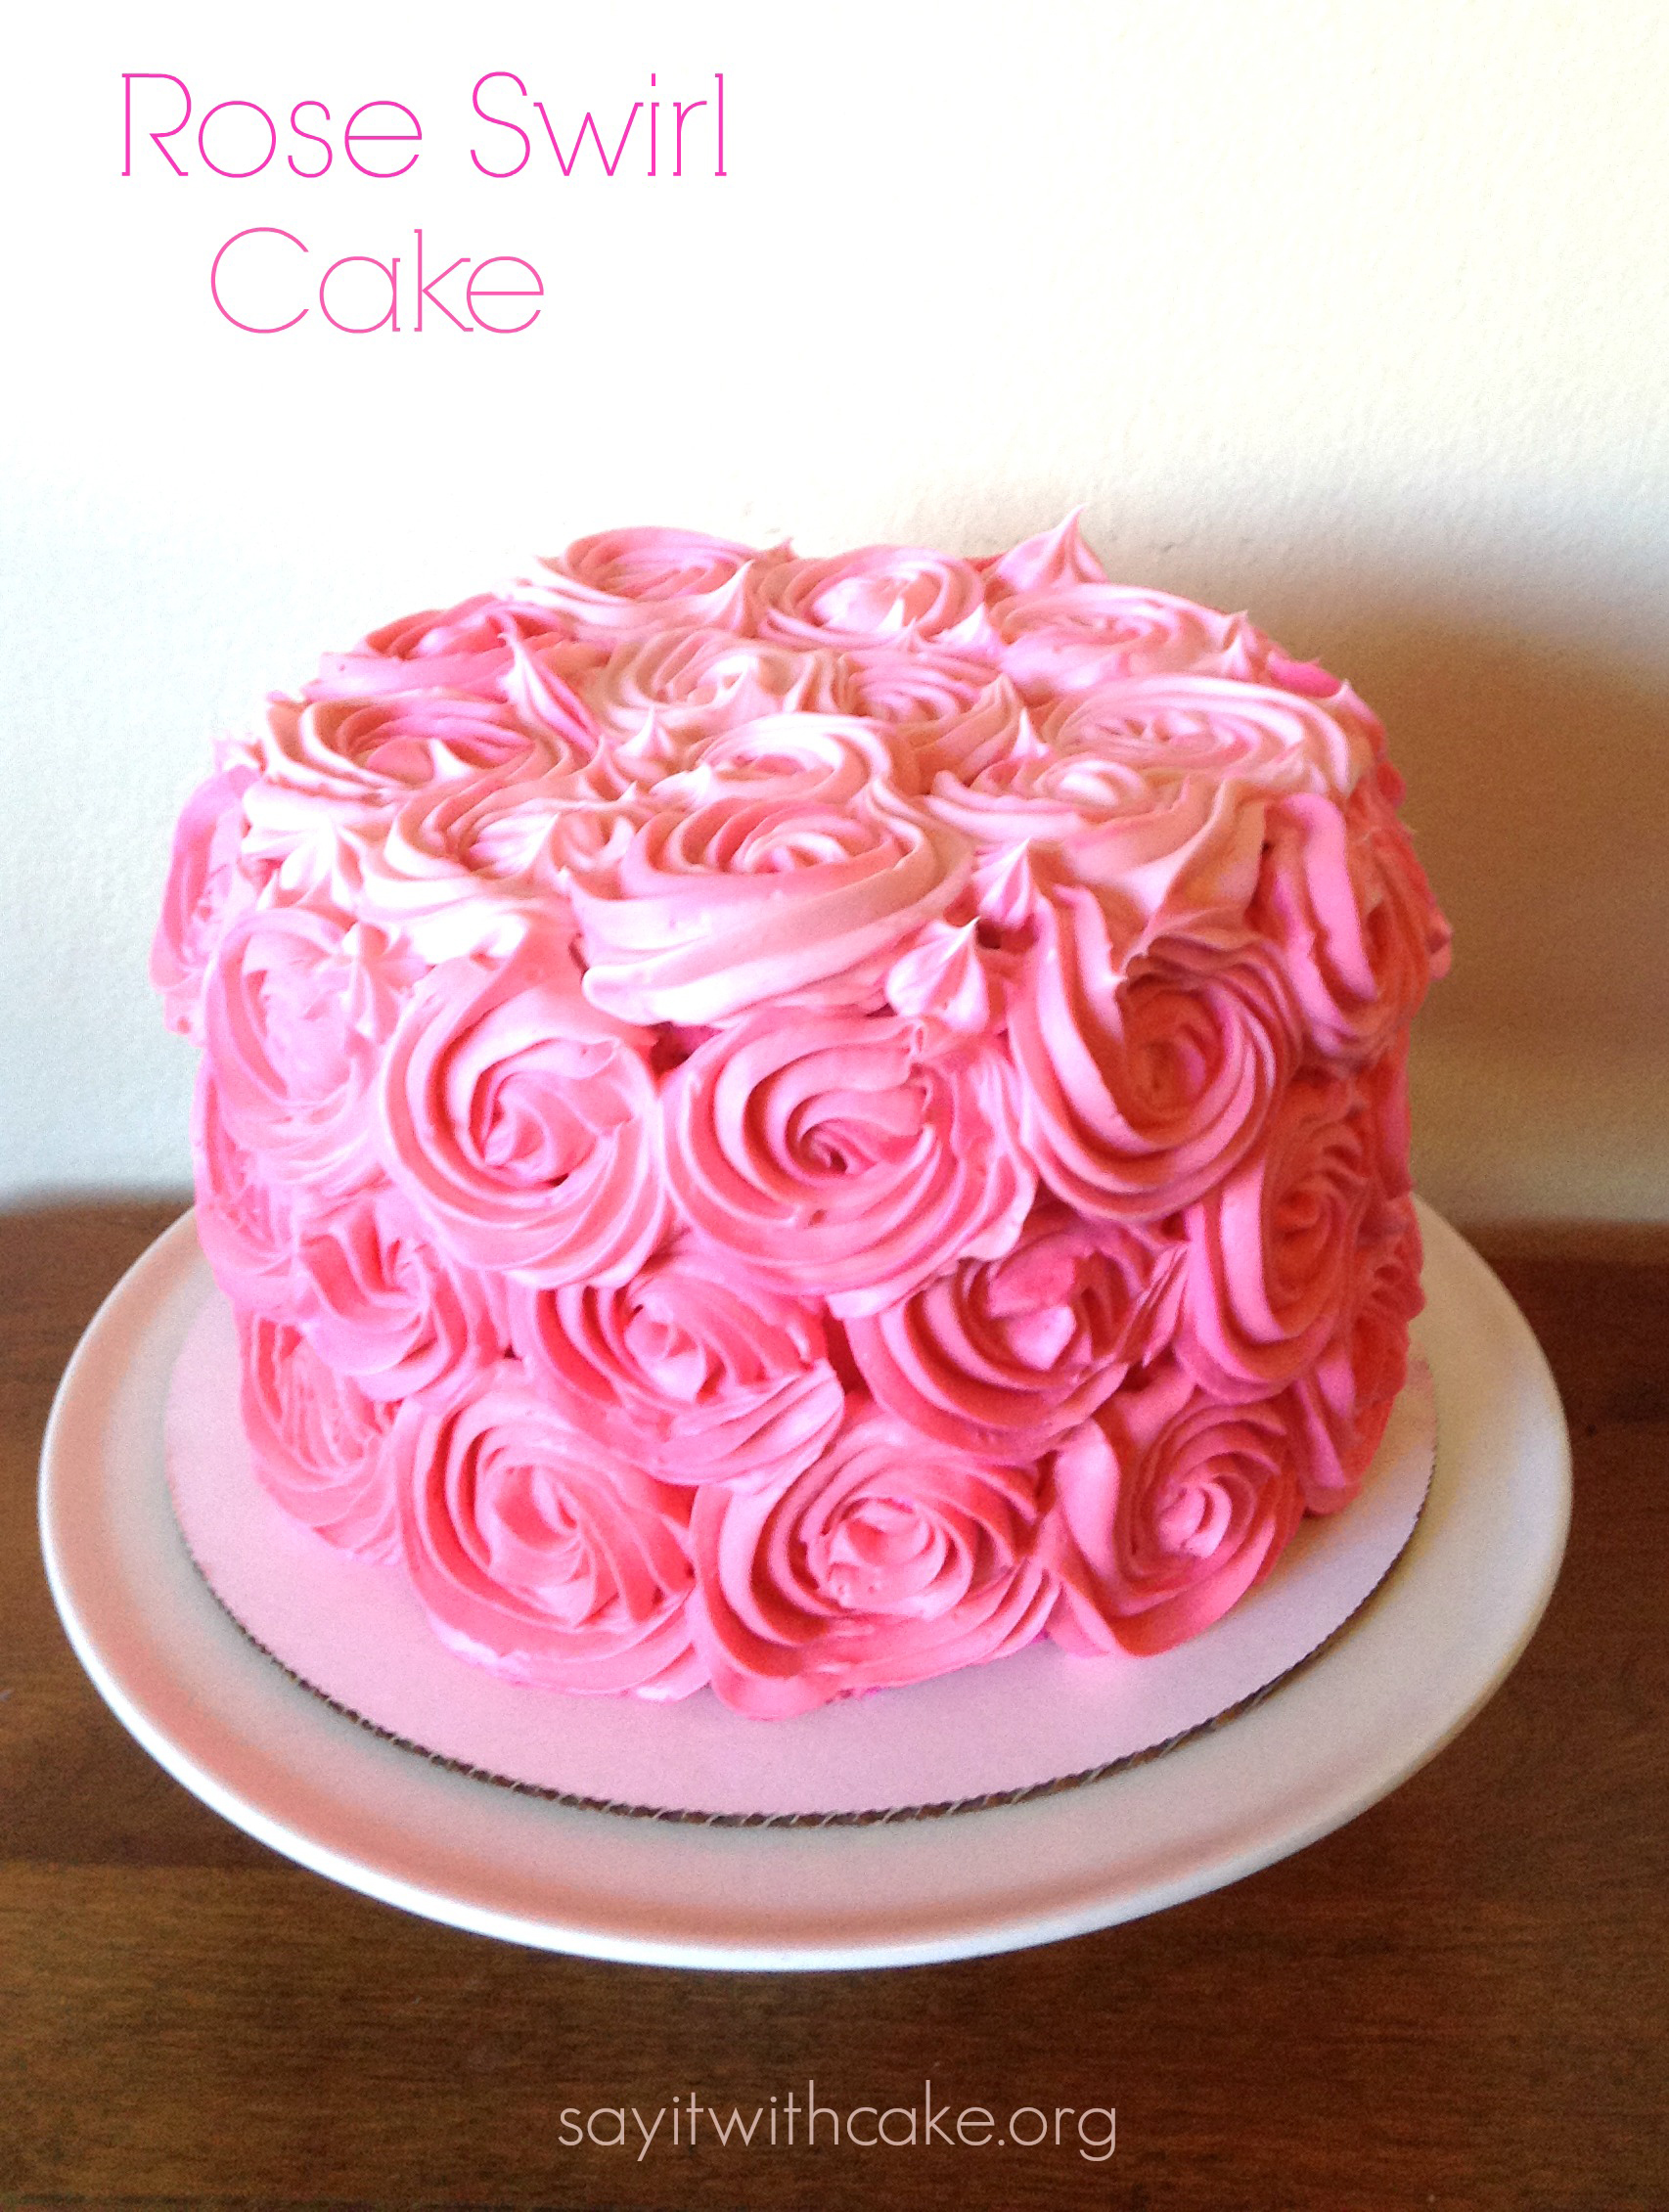 I am so excited about this cake because I used a new recipe for the frosting! I usually made a basic buttercream frosting, but this time I tried the Swiss meringue buttercream. It worked like a dream! The flowers held up, and there weren’t any air bubbles. Also I have to say that it is much tastier, it is a little less sweet. This frosting is perfect for my husband who doesn’t really enjoy super sweet frosting.
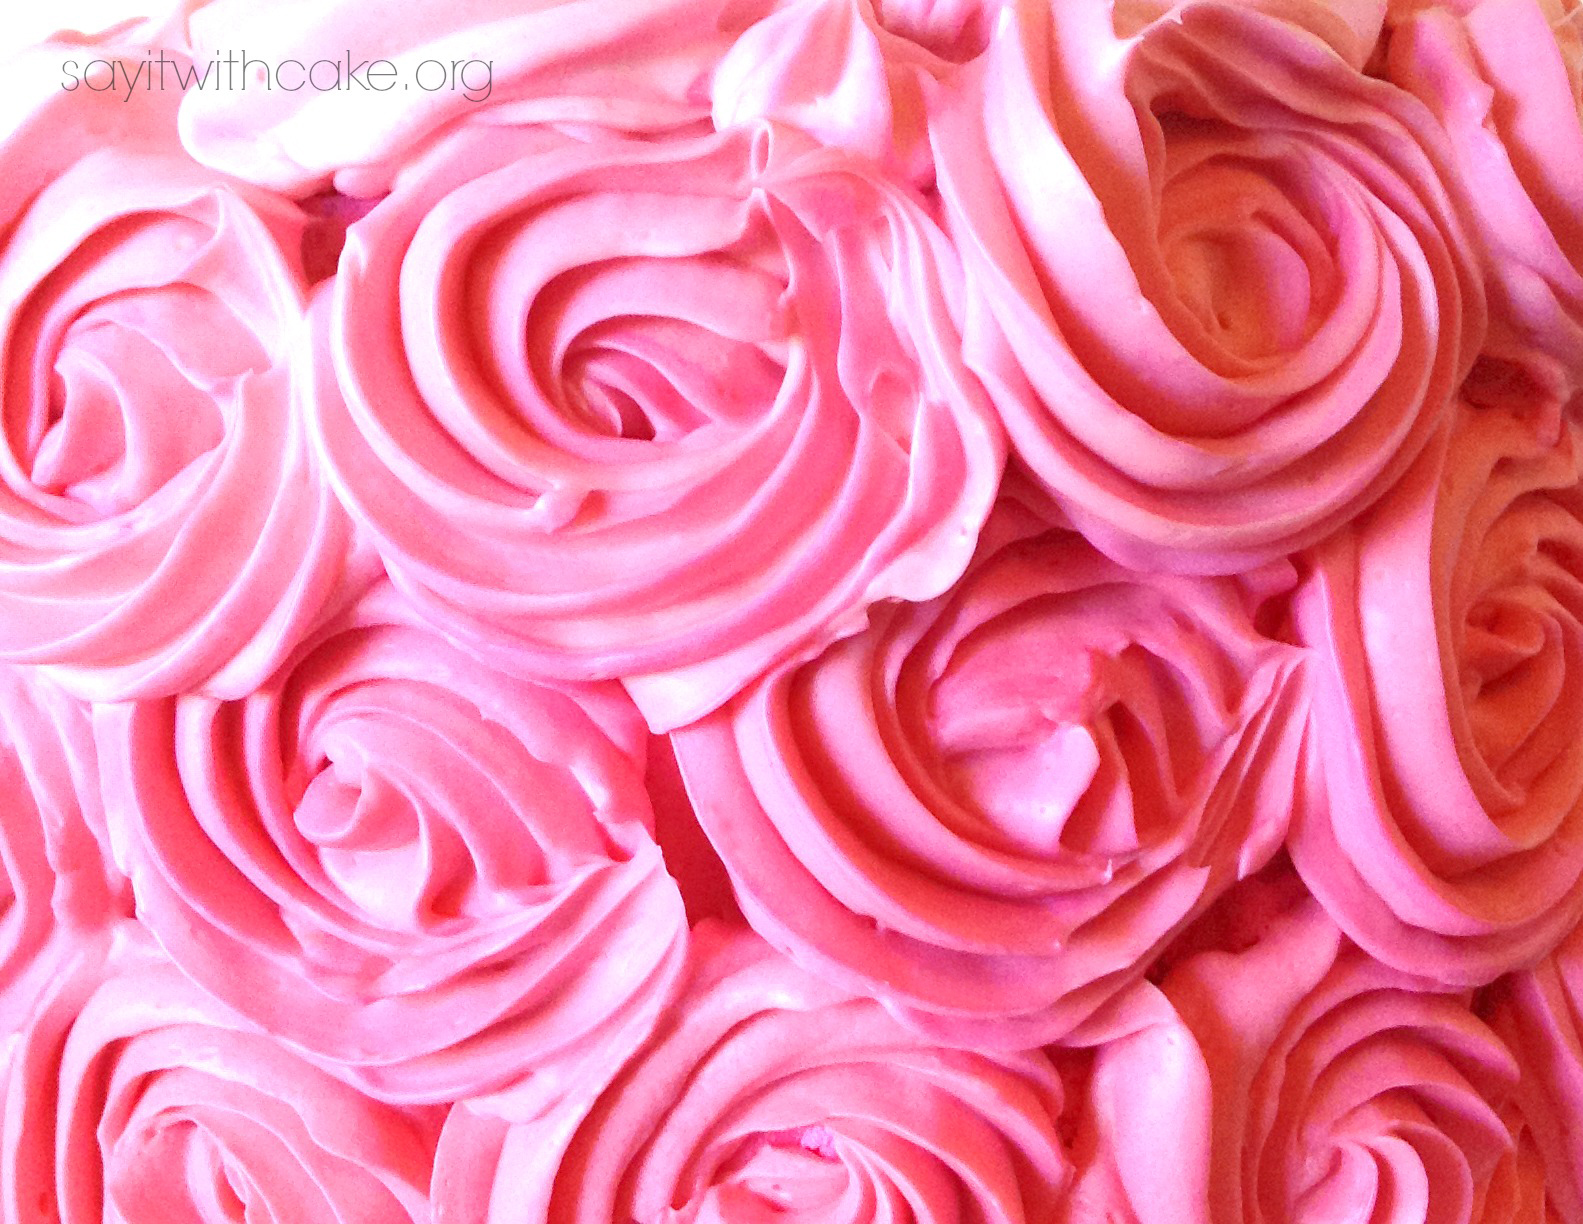
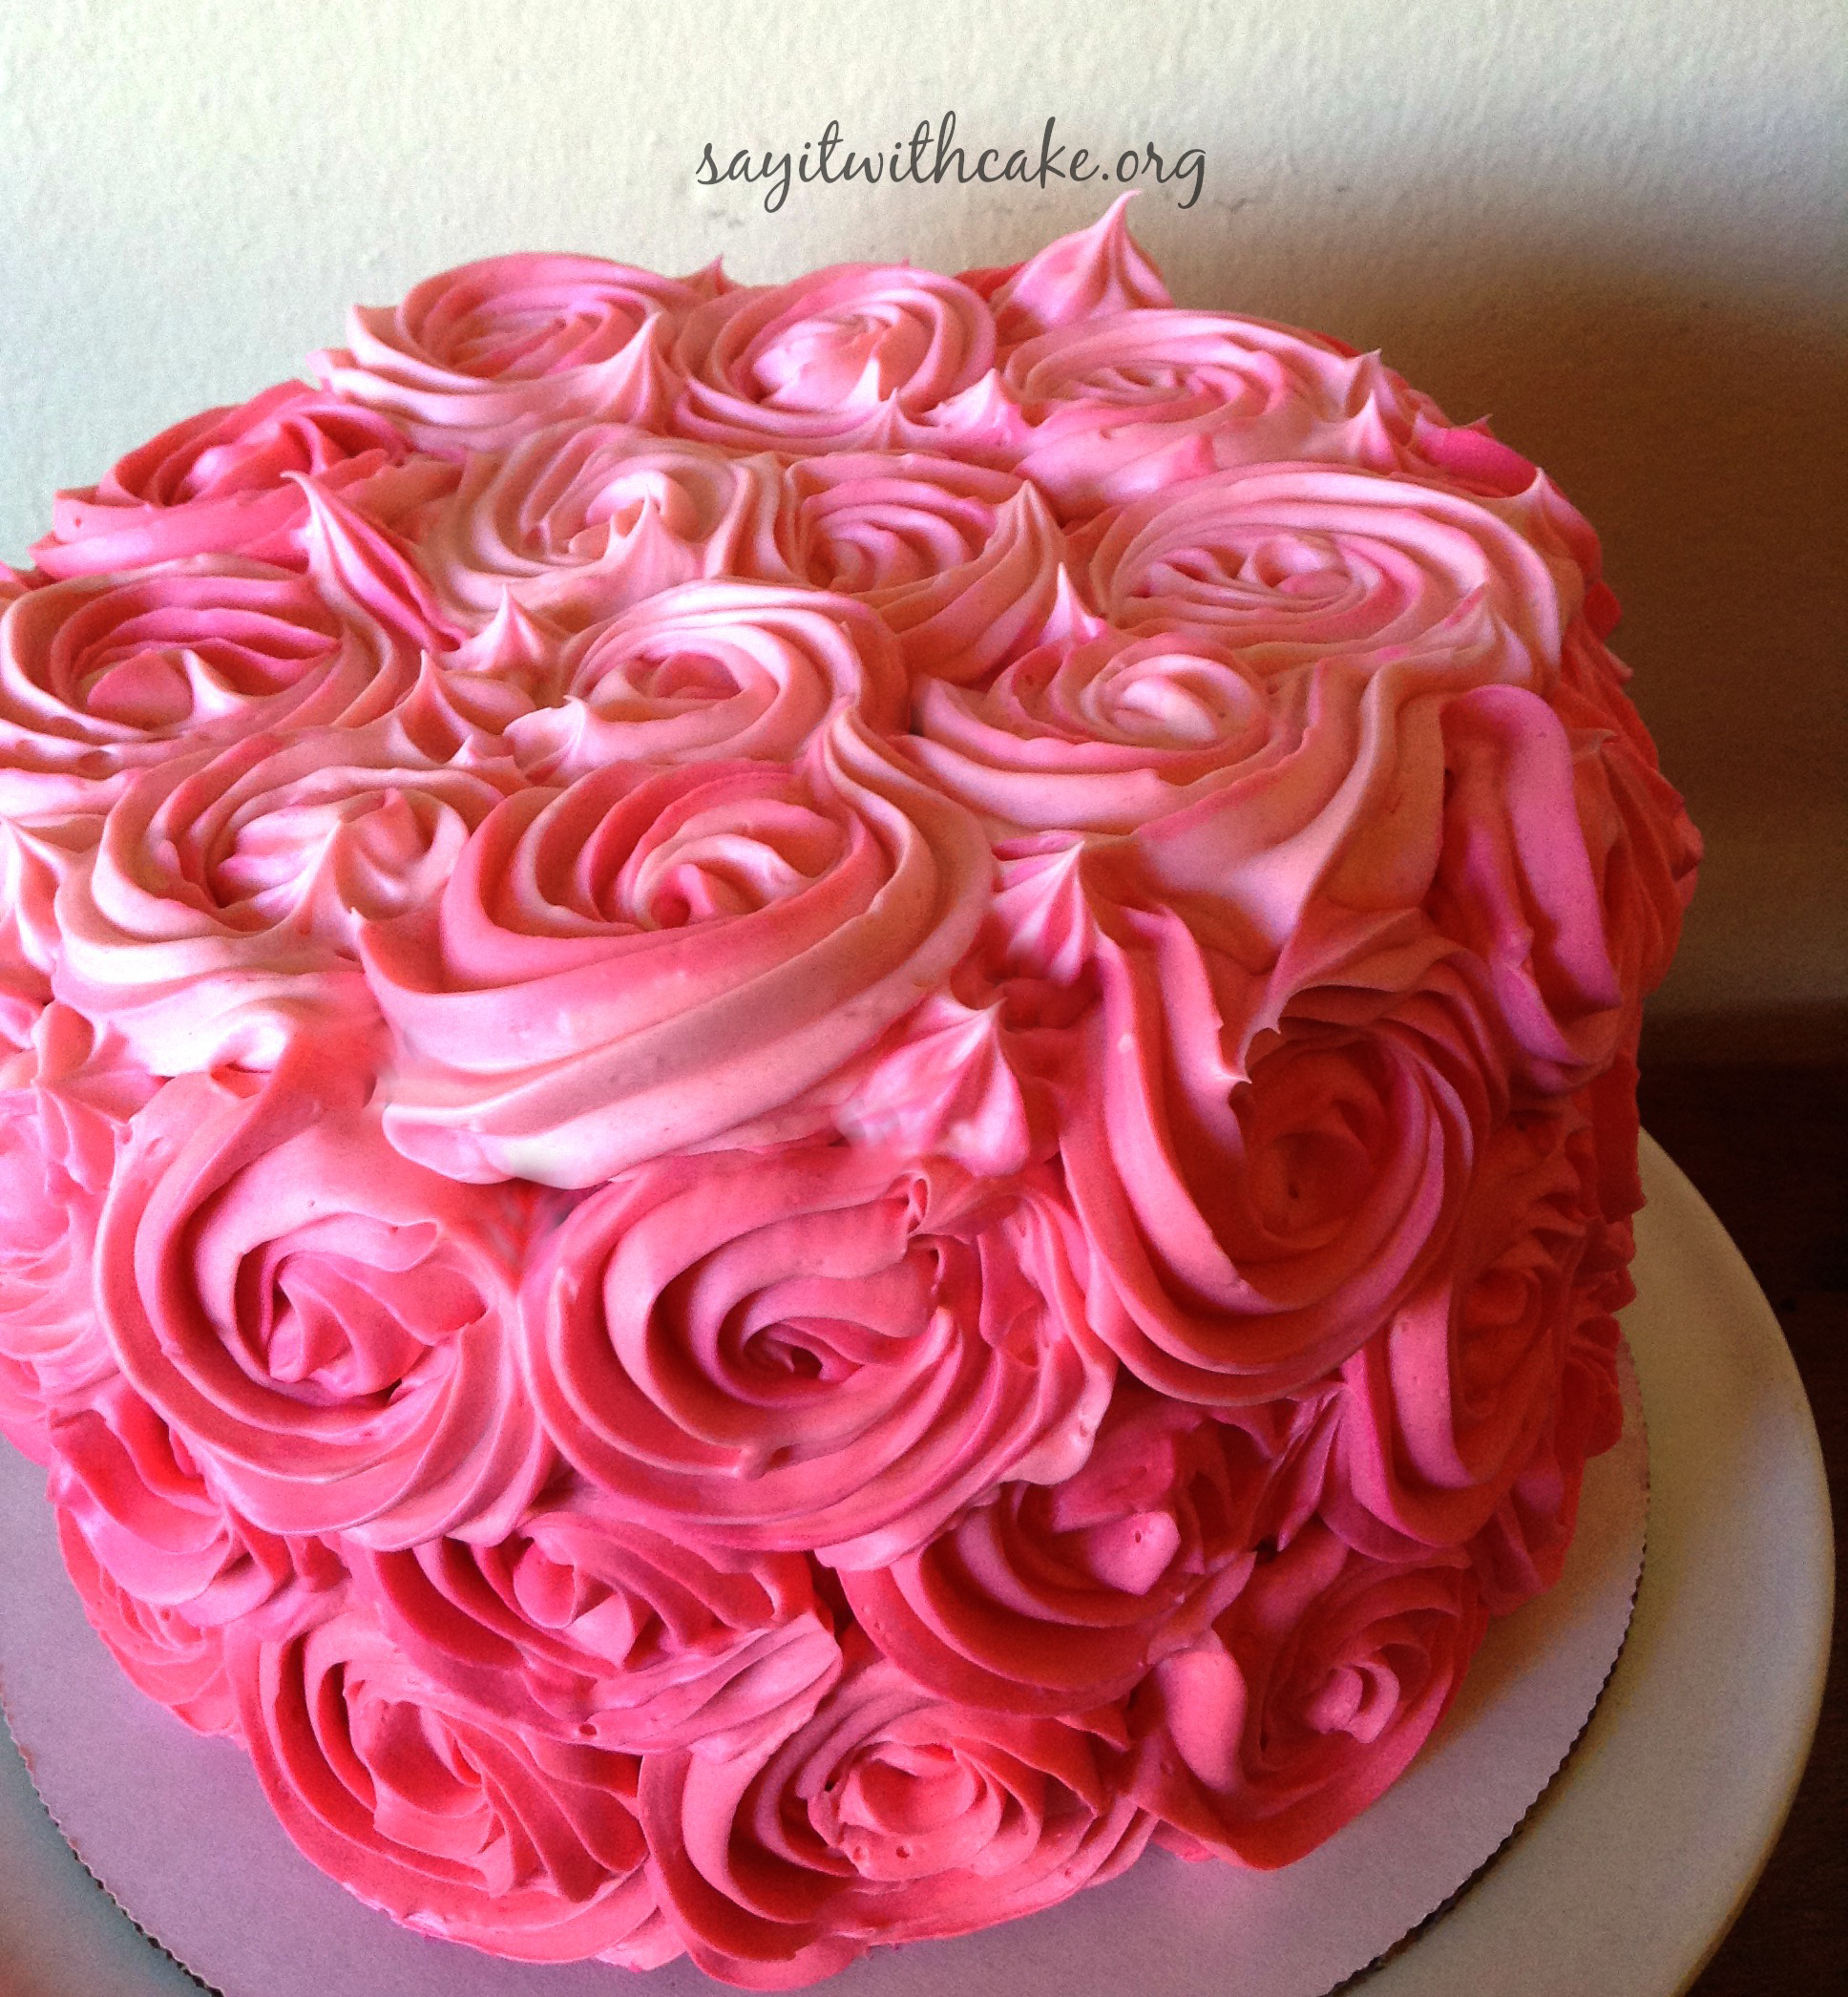
See how beautiful the roses turned out! This cake works well for a birthday cake for a girl, a Mothers day cake, or a Valentines day cake.
This cake is very easy to make once you get the Swiss meringue buttercream down. I had a few problems my first time but found some helpful websites here. If it turns out curdled, you scoop out 1/4 of the mixture and put it in the microwave for 15 seconds. Then pour it back into the bowl and beat it until it turns out creamy and fluffy.
You can see in this picture how I made a very subtle ombre effect with the roses from dark to light.
Ingredients
- 5 large egg whites
- 1 cup plus 2 tablespoons sugar
- Pinch of salt
- 1 pound (4 sticks) unsalted butter, cut into tablespoons, room temperature
- 1 1/2 teaspoons pure vanilla extract
Instructions
- Combine egg whites, sugar, and salt in the heatproof bowl of a standing mixer set over a pan of simmering water. Whisk constantly by hand until mixture is warm to the touch and sugar has dissolved (the mixture should feel completely smooth when rubbed between your fingertips).
- Attach the bowl to the mixer fitted with the whisk attachment. Starting on low and gradually increasing to medium-high speed, whisk until stiff (but not dry) peaks form. Continue mixing until the mixture is fluffy and glossy, and completely cool (test by touching the bottom of the bowl), about 10 minutes.
- With mixer on medium-low speed, add the butter a few tablespoons at a time, mixing well after each addition. Once all butter has been added, whisk in vanilla. Switch to the paddle attachment, and continue beating on low speed until all air bubbles are eliminated, about 2 minutes. Scrape down sides of bowl with a flexible spatula, and continue beating until the frosting is completely smooth. Keep buttercream at room temperature if using the same day.
- (Optional) To tint buttercream (or royal icing), reserve some for toning down the color, if necessary. Add gel-paste food color, a drop at a time (or use the toothpick or skewer to add food color a dab at a time) to the remaining buttercream. You can use a single shade of food color or experiment by mixing two or more. Blend after each addition with the mixer (use a paddle attachment) or a flexible spatula, until desired shade is achieved. Avoid adding too much food color too soon, as the hue will intensify with continued stirring; if necessary, you can tone down the shade by mixing in some reserved untinted buttercream.
Recipe from Martha Stewart
Other Rose Swirl Cakes you might like
Purple rose swirl cake

Rose Swirl Cake
black rose swirl cake
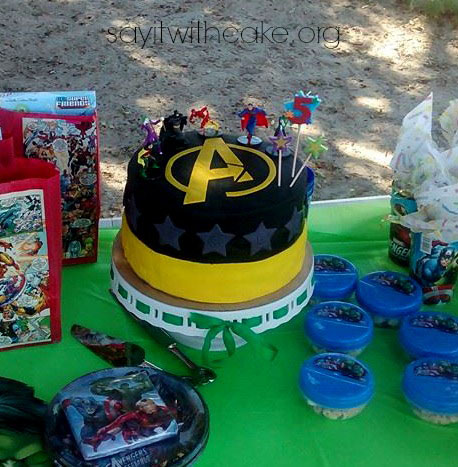
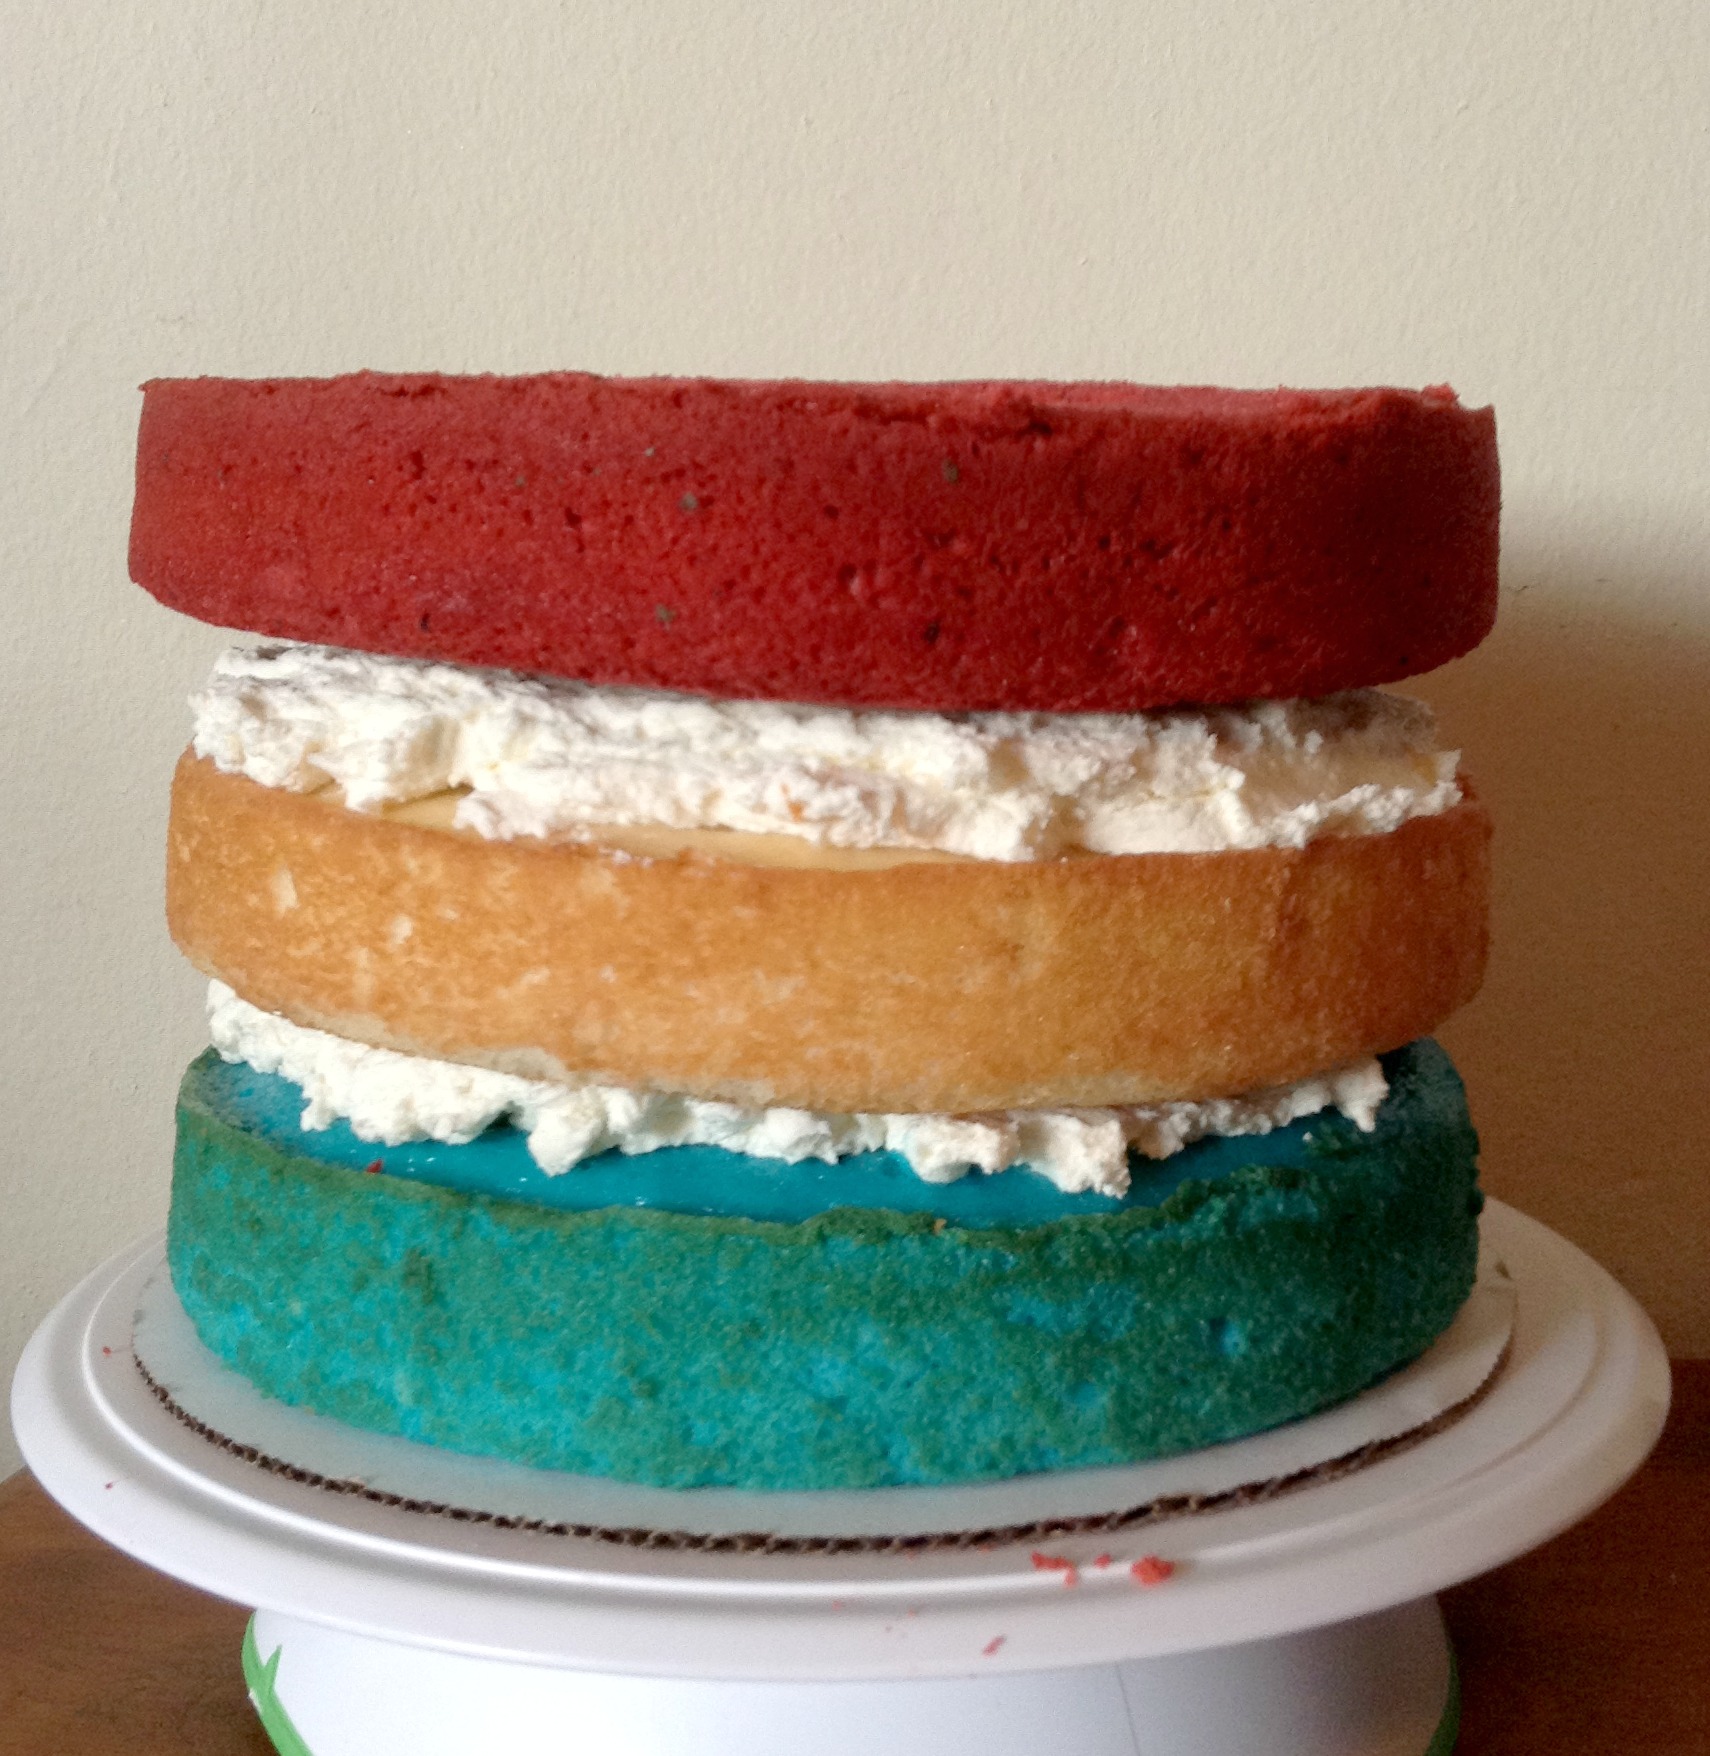
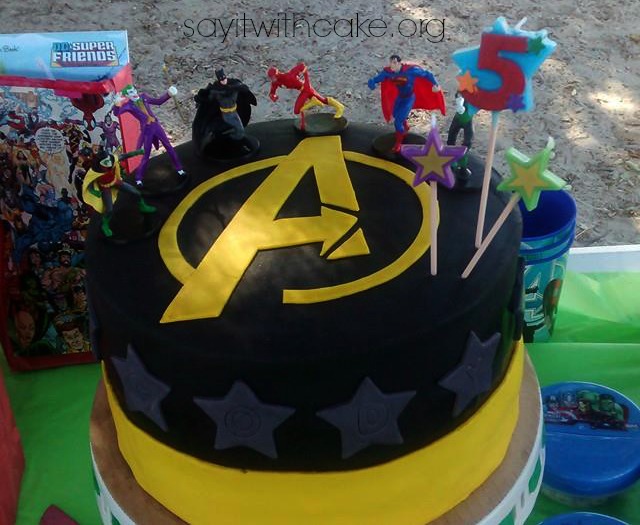 This cake was fun to make! The inside is white cake colored red, white and blue for the Avengers colors. It is filled with white chocolate pudding filling, and covered with chocolate ganache under the fondant. The Avengers logo is made with yellow fondant and is hand cut. This is a really big cake, it is a 10 inch cake and is 6 inches high!
My friend Jenna did an awesome job on the party for her son Cody! I loved all the decorations, and take home goody bags for all the kids!
Here is the Avengers logo in yellow fondant. I added gumpaste powder so it would dry stiffer. I let it dry upside down on wax paper, so it would be easy to stick on the cake with a little bit of water on the fondant.

Next I baked the cake. I used three 10 inch cake pans for this cake.
Next, I covered it with three recipes of chocolate ganache. I used the upside down method to get it smooth.
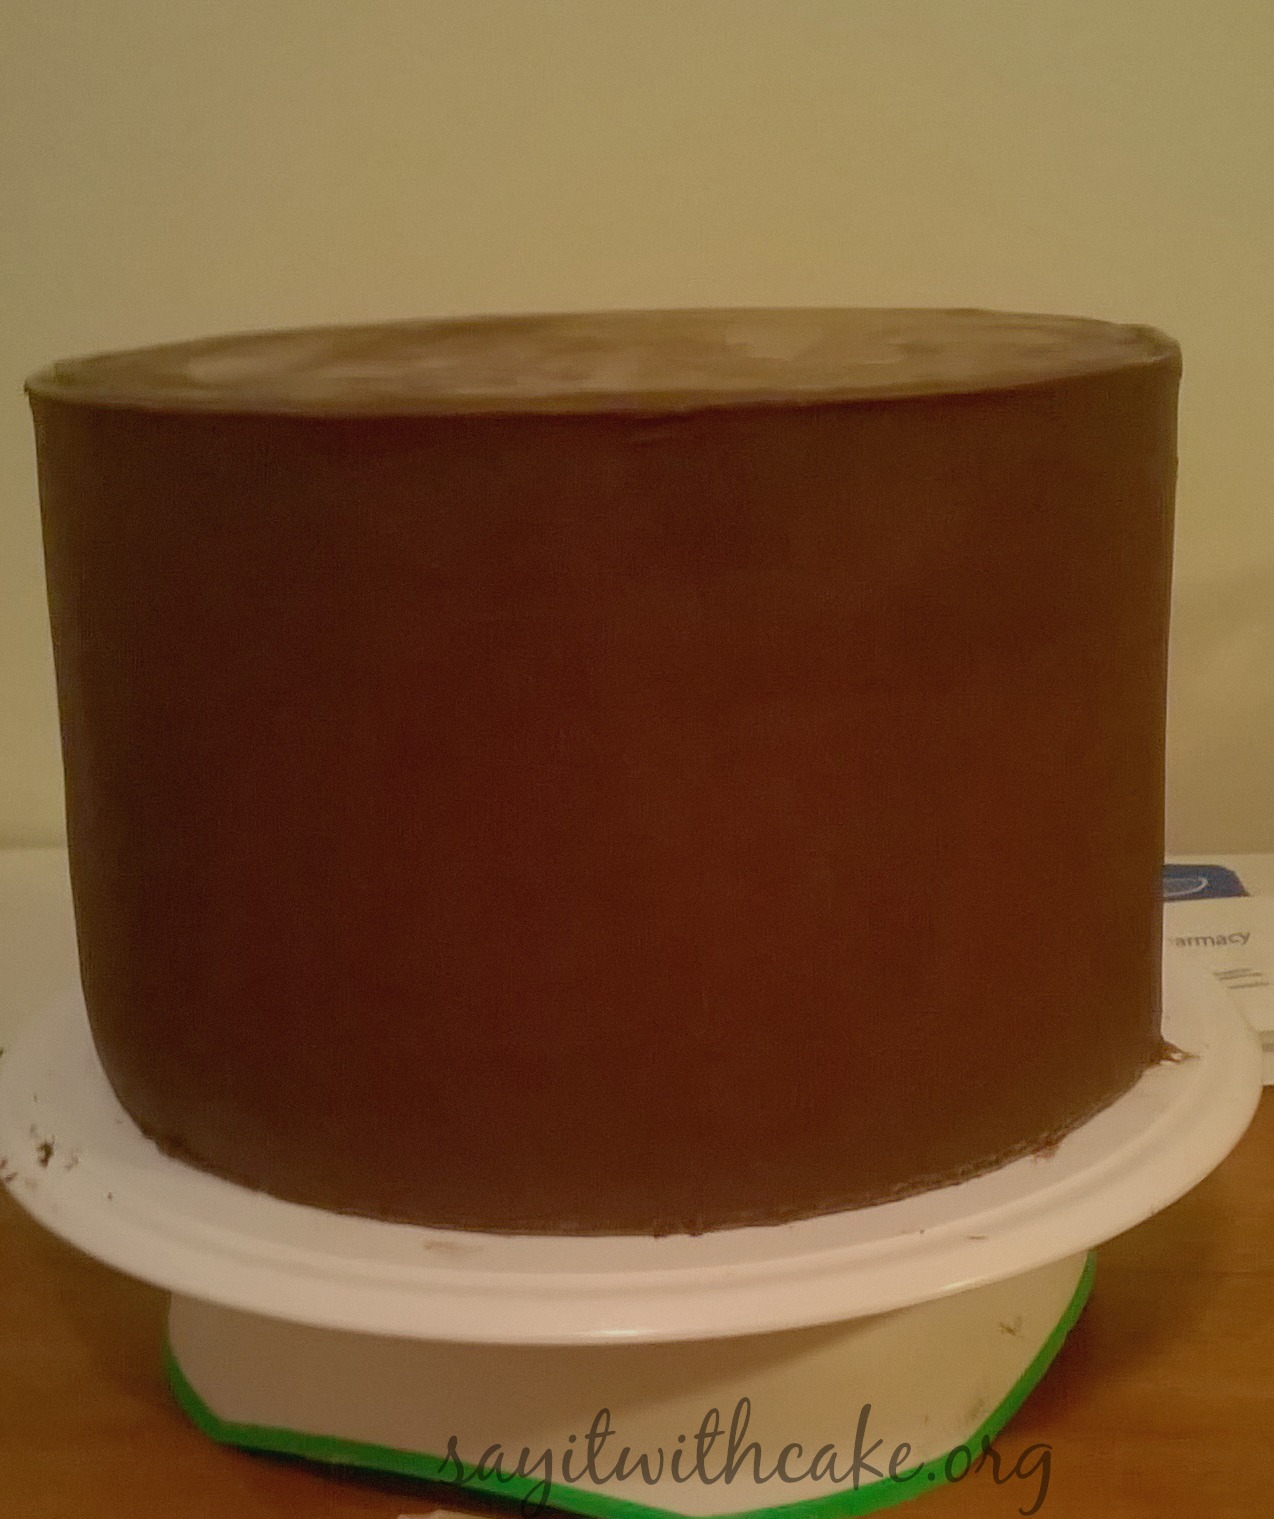 After that I covered it with black fondant and it was ready to decorate!
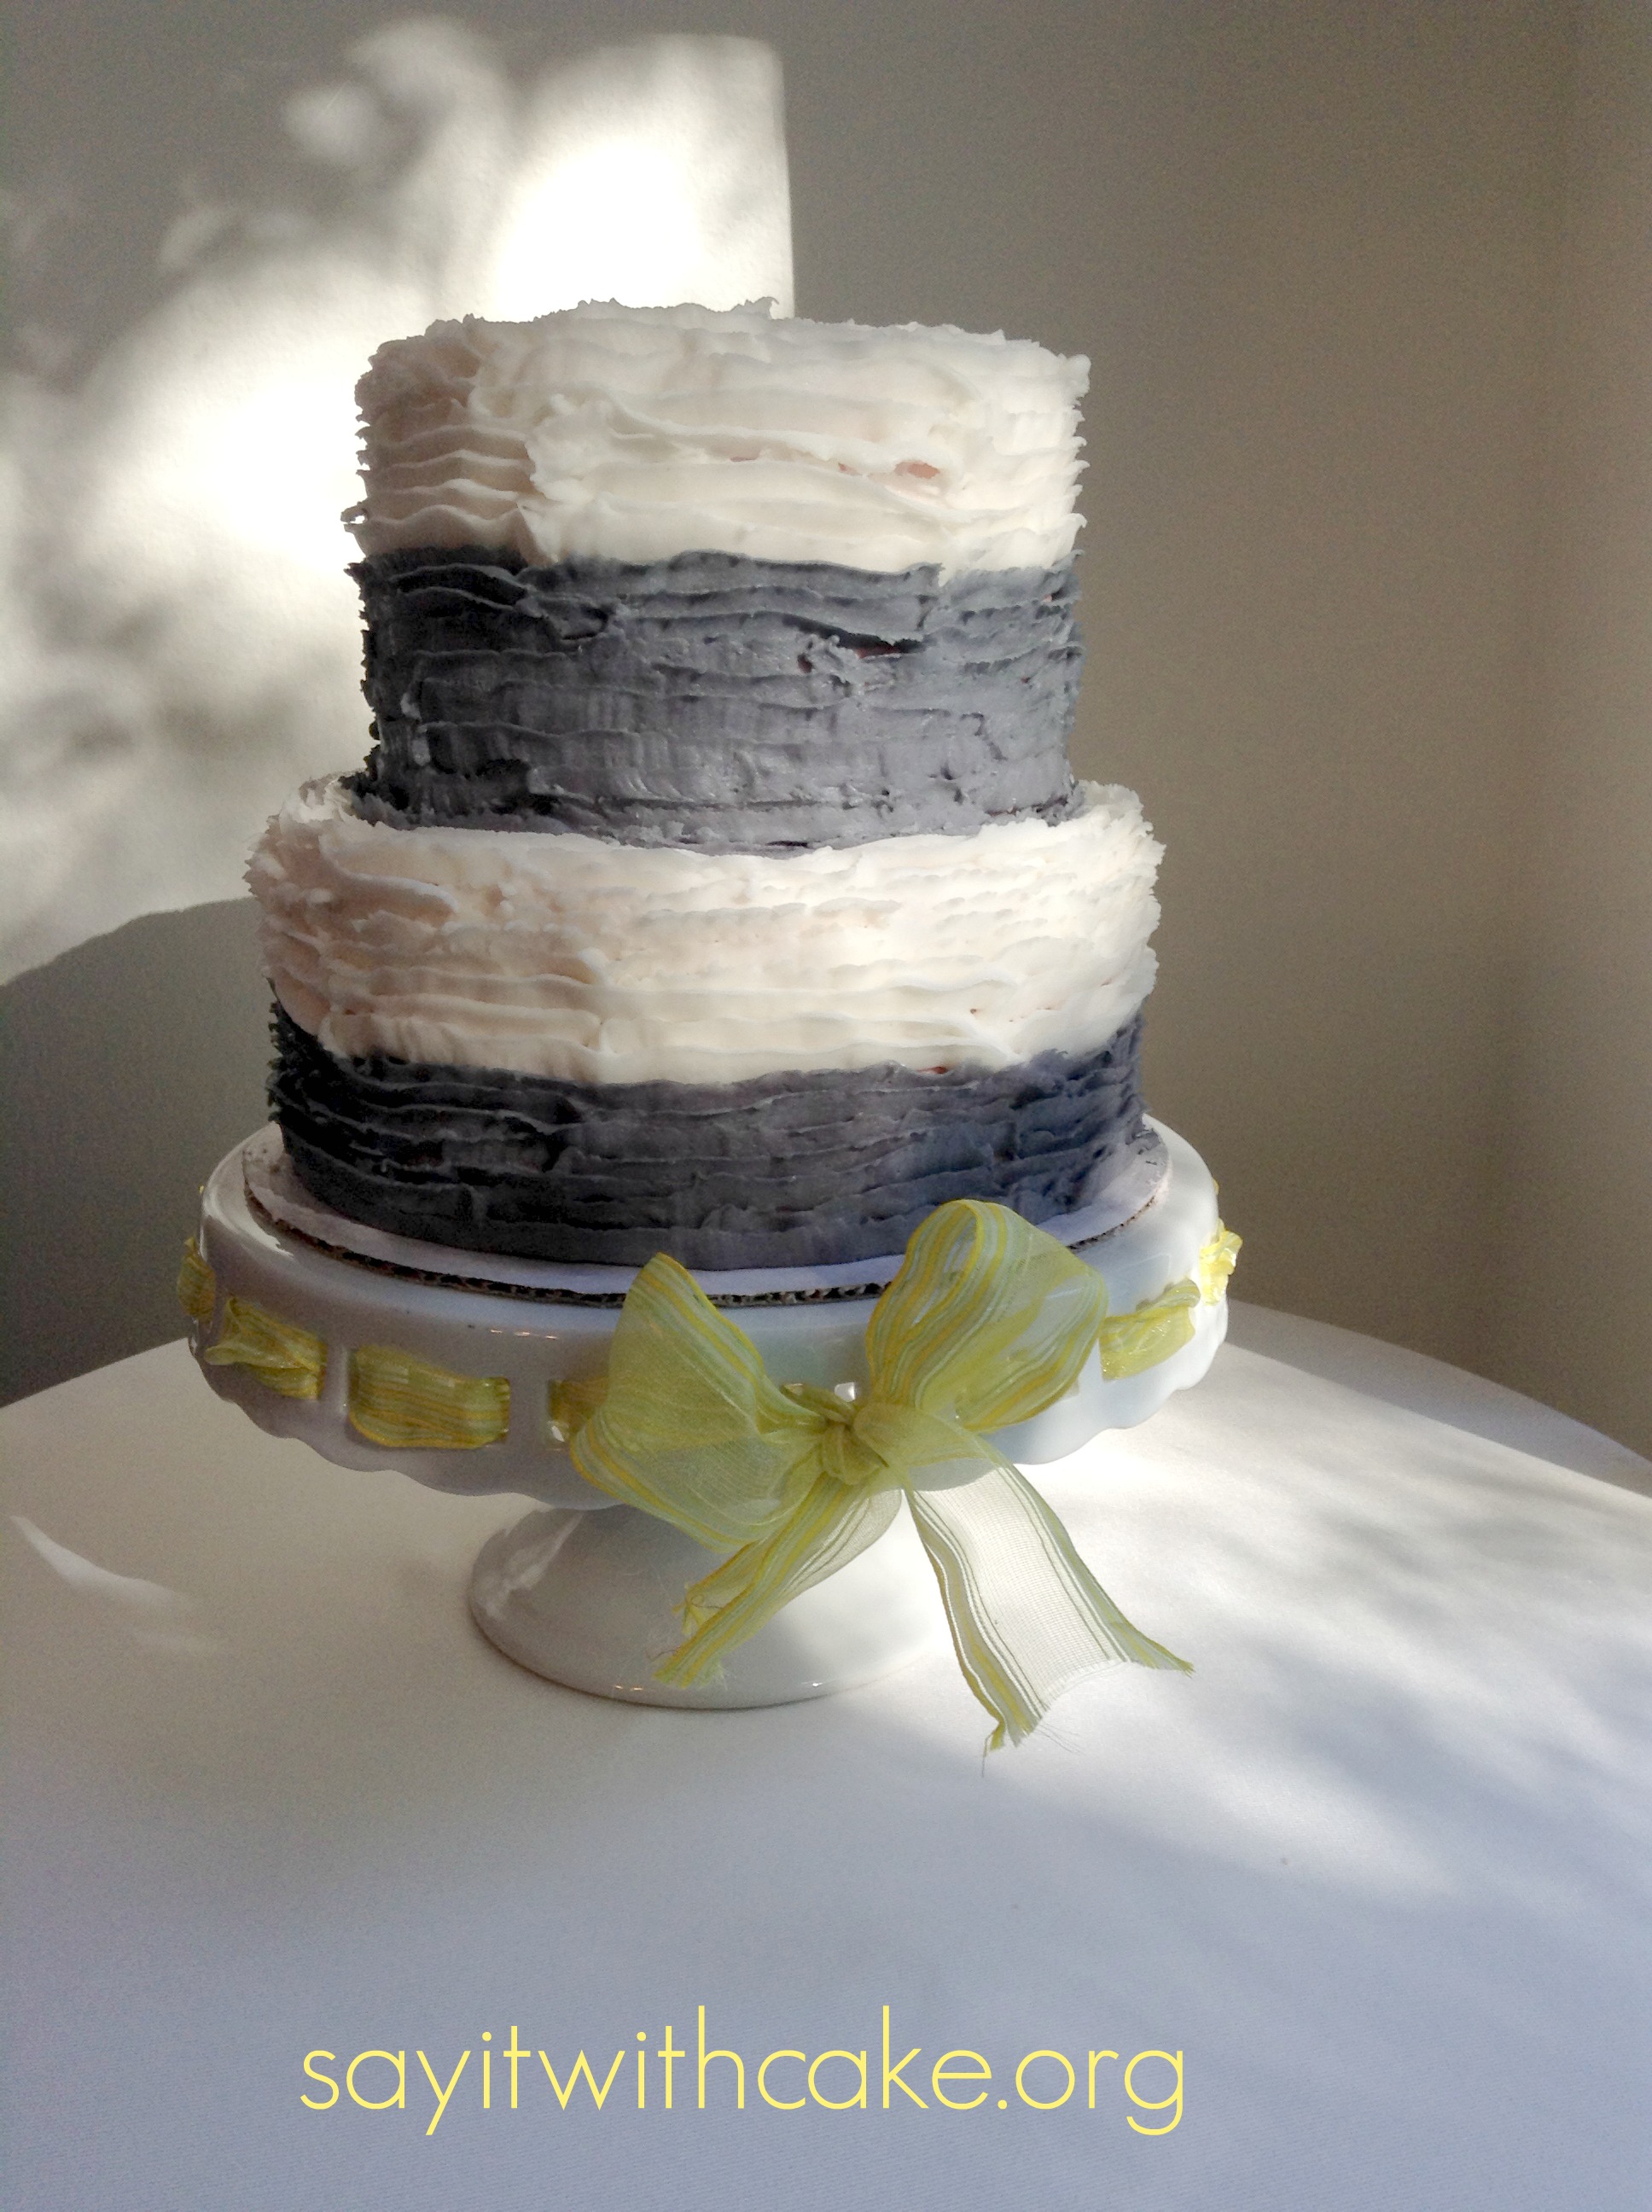
My sister Chelsea had a baby shower last weekend and asked me to do the cake! Since the gender of her baby is a surprise, she wanted grey, white and yellow as her colors. This cake is a two tier chocolate and vanilla cake with raspberry mousse filling and buttercream ruffle frosting.
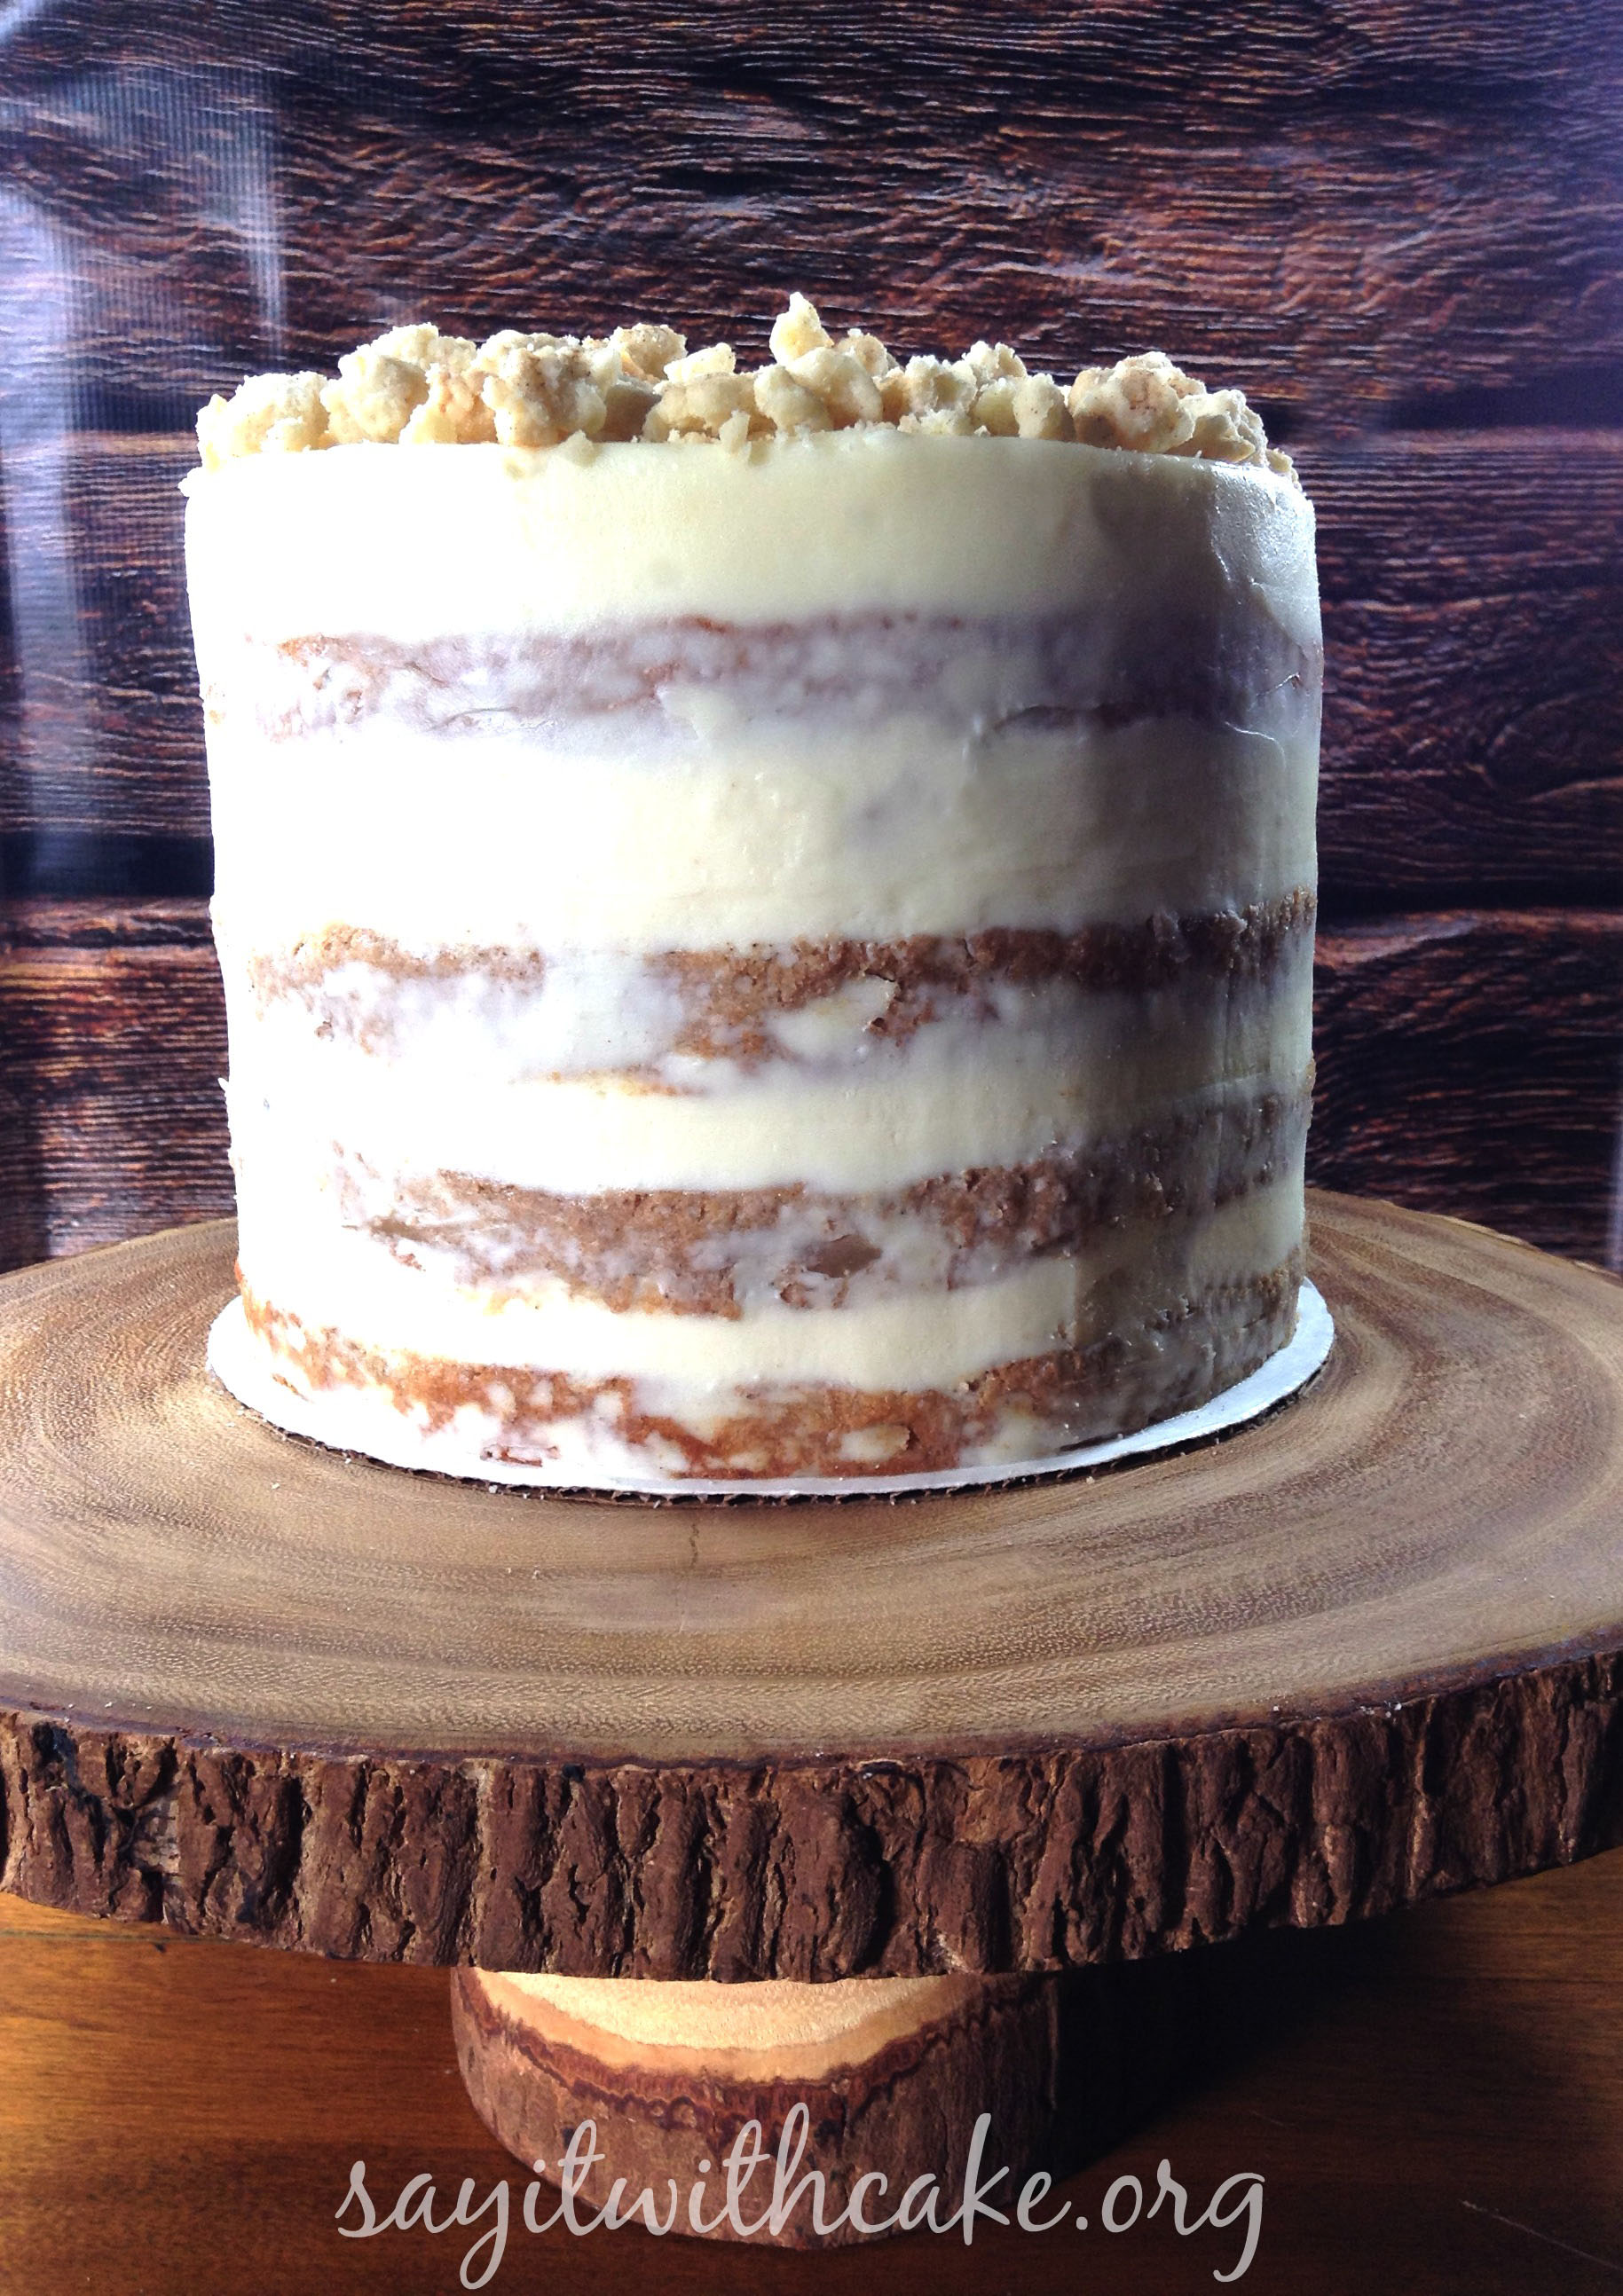
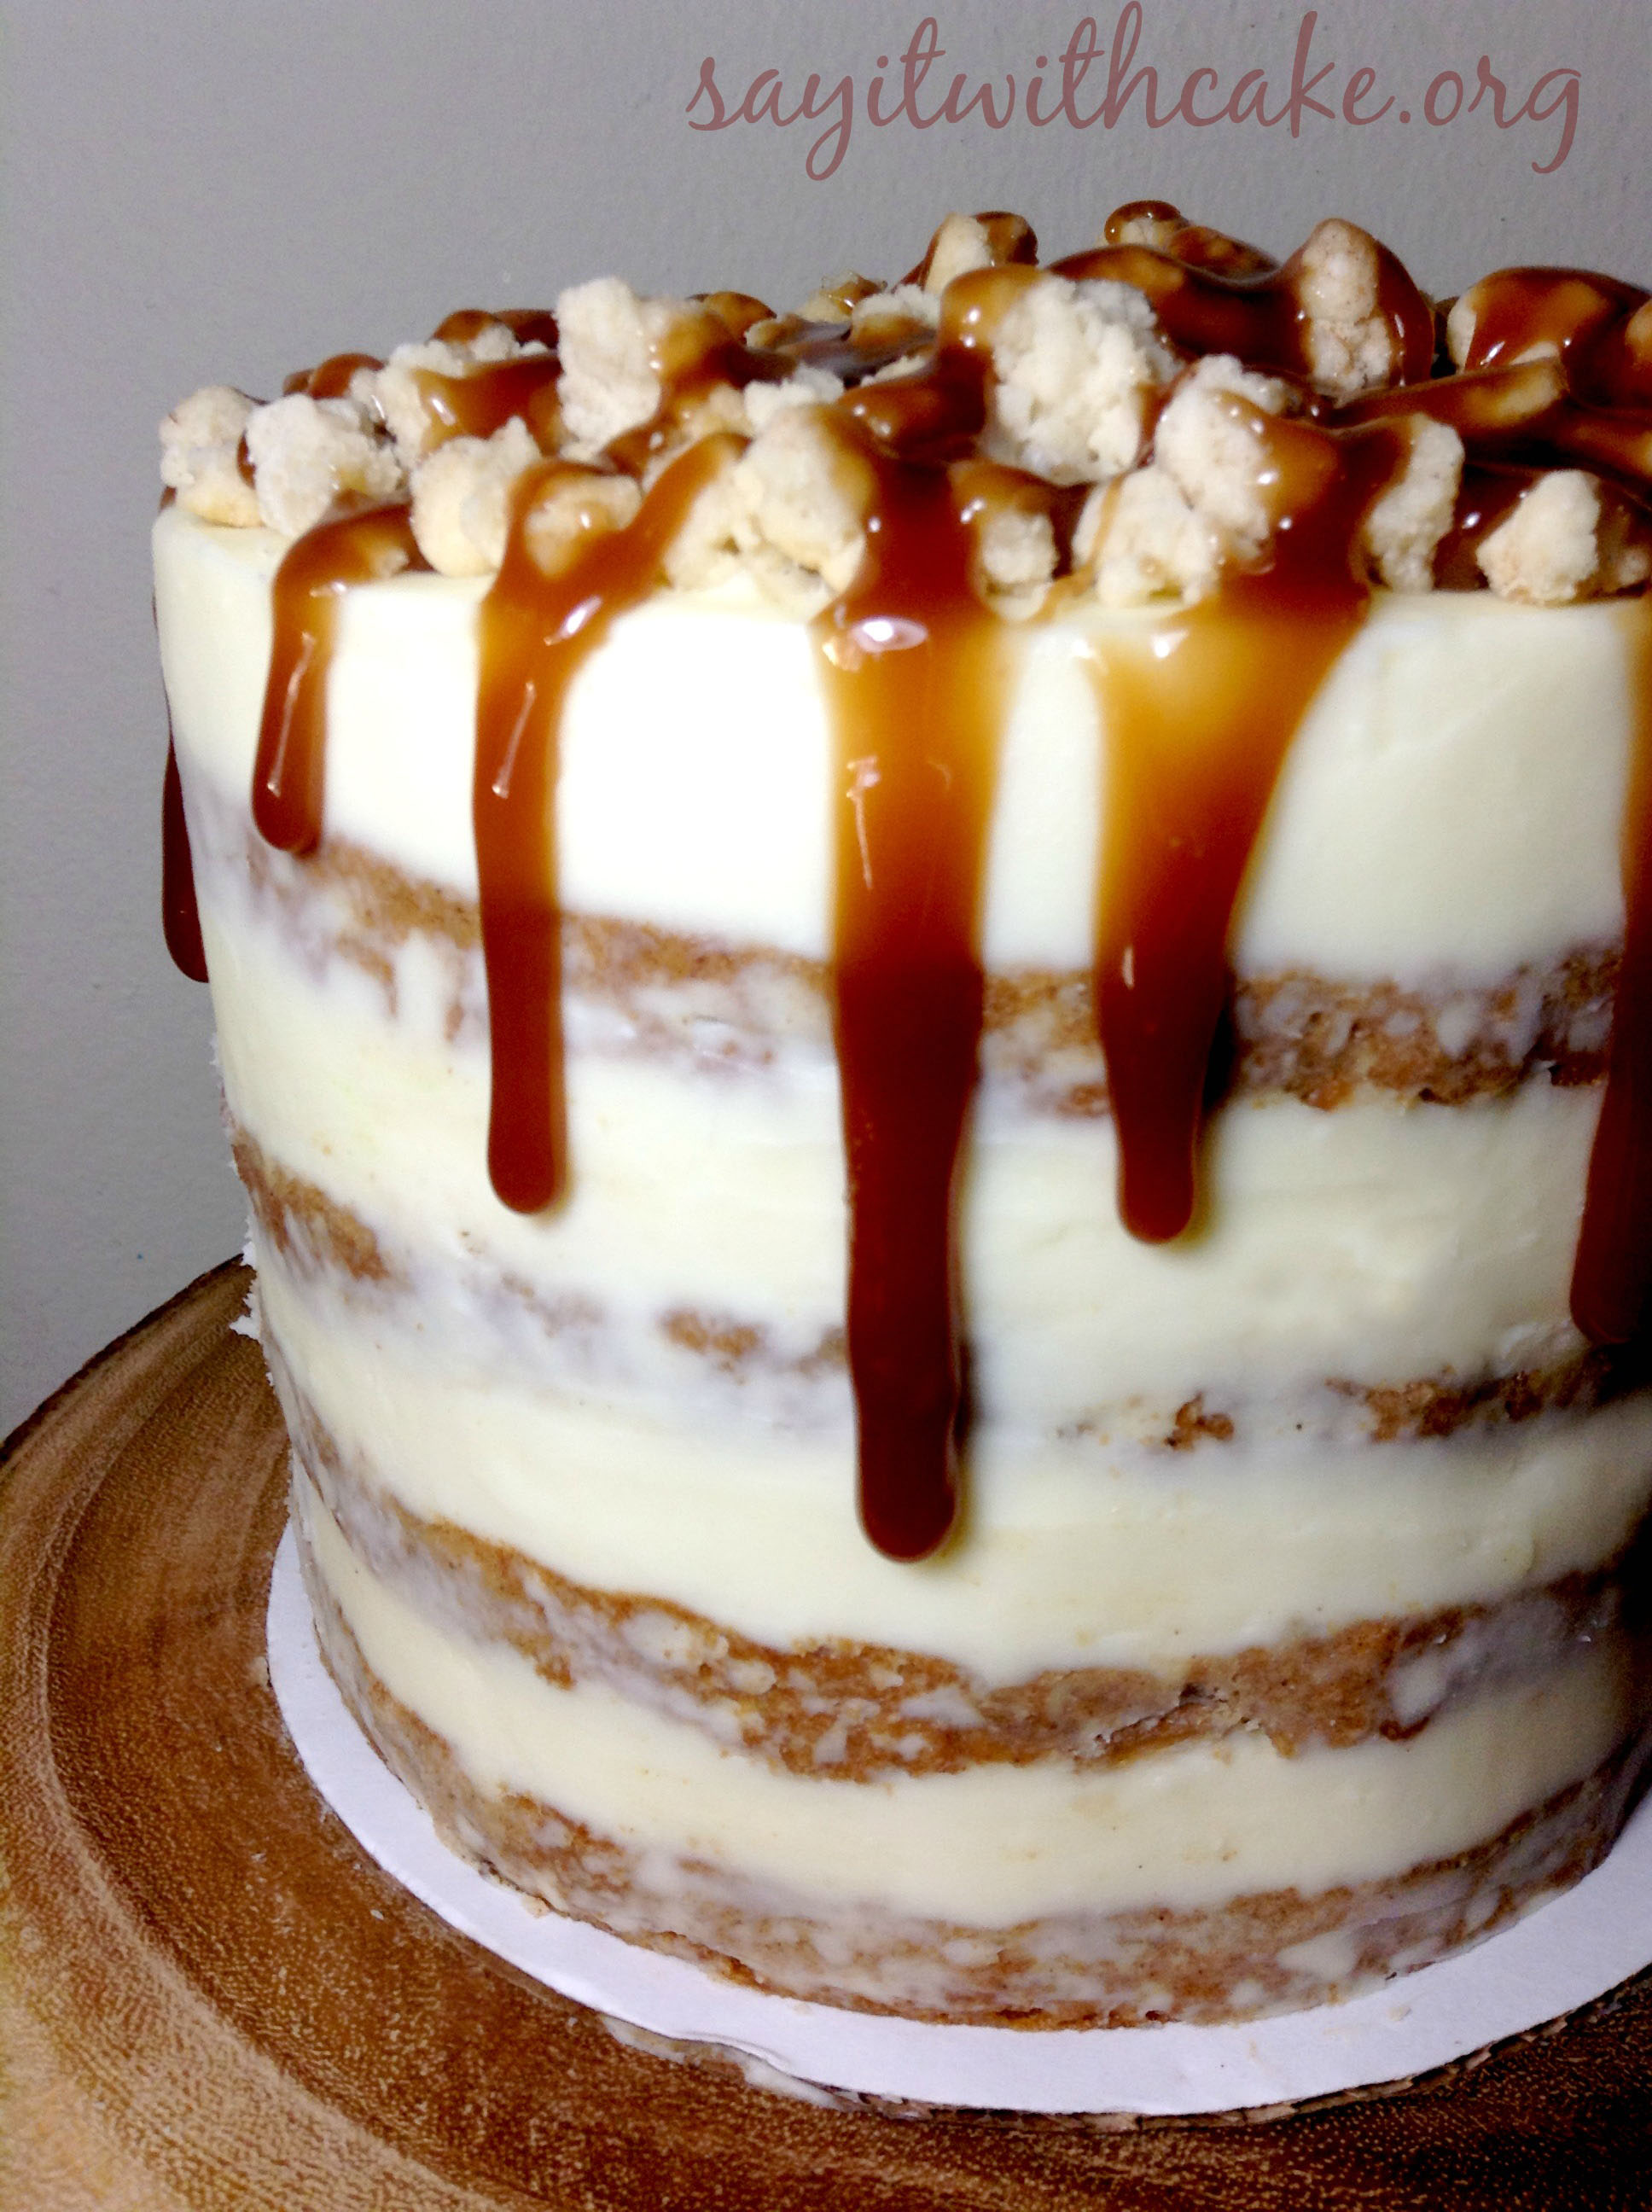 Apples are my favorite part of the fall season. I love apple pies, and this time I wanted to try to incorporate an apple pie into a layer cake. I have seen cakes on pinterest where they actually take a whole apple pie and bake it inside a cake! I thought that was fascinating! I decided not to try it this time, but I made my own version of apple pie cake I took an apple cake with chunks of apple inside, and layered it with apple pie filling, Dutch apple pie crumbs, and cream cheese frosting! This was also my first attempt at making a naked cake!
I have made two other apple cakes here and here, but this cake is the yummiest so far! I think the part that makes this cake so delicious is the new cream cheese frosting recipe I found.
This cake has a few steps that you can make ahead of time. There is the apple roses, the pie crumble, and the cream cheese frosting. First I made the apple roses.
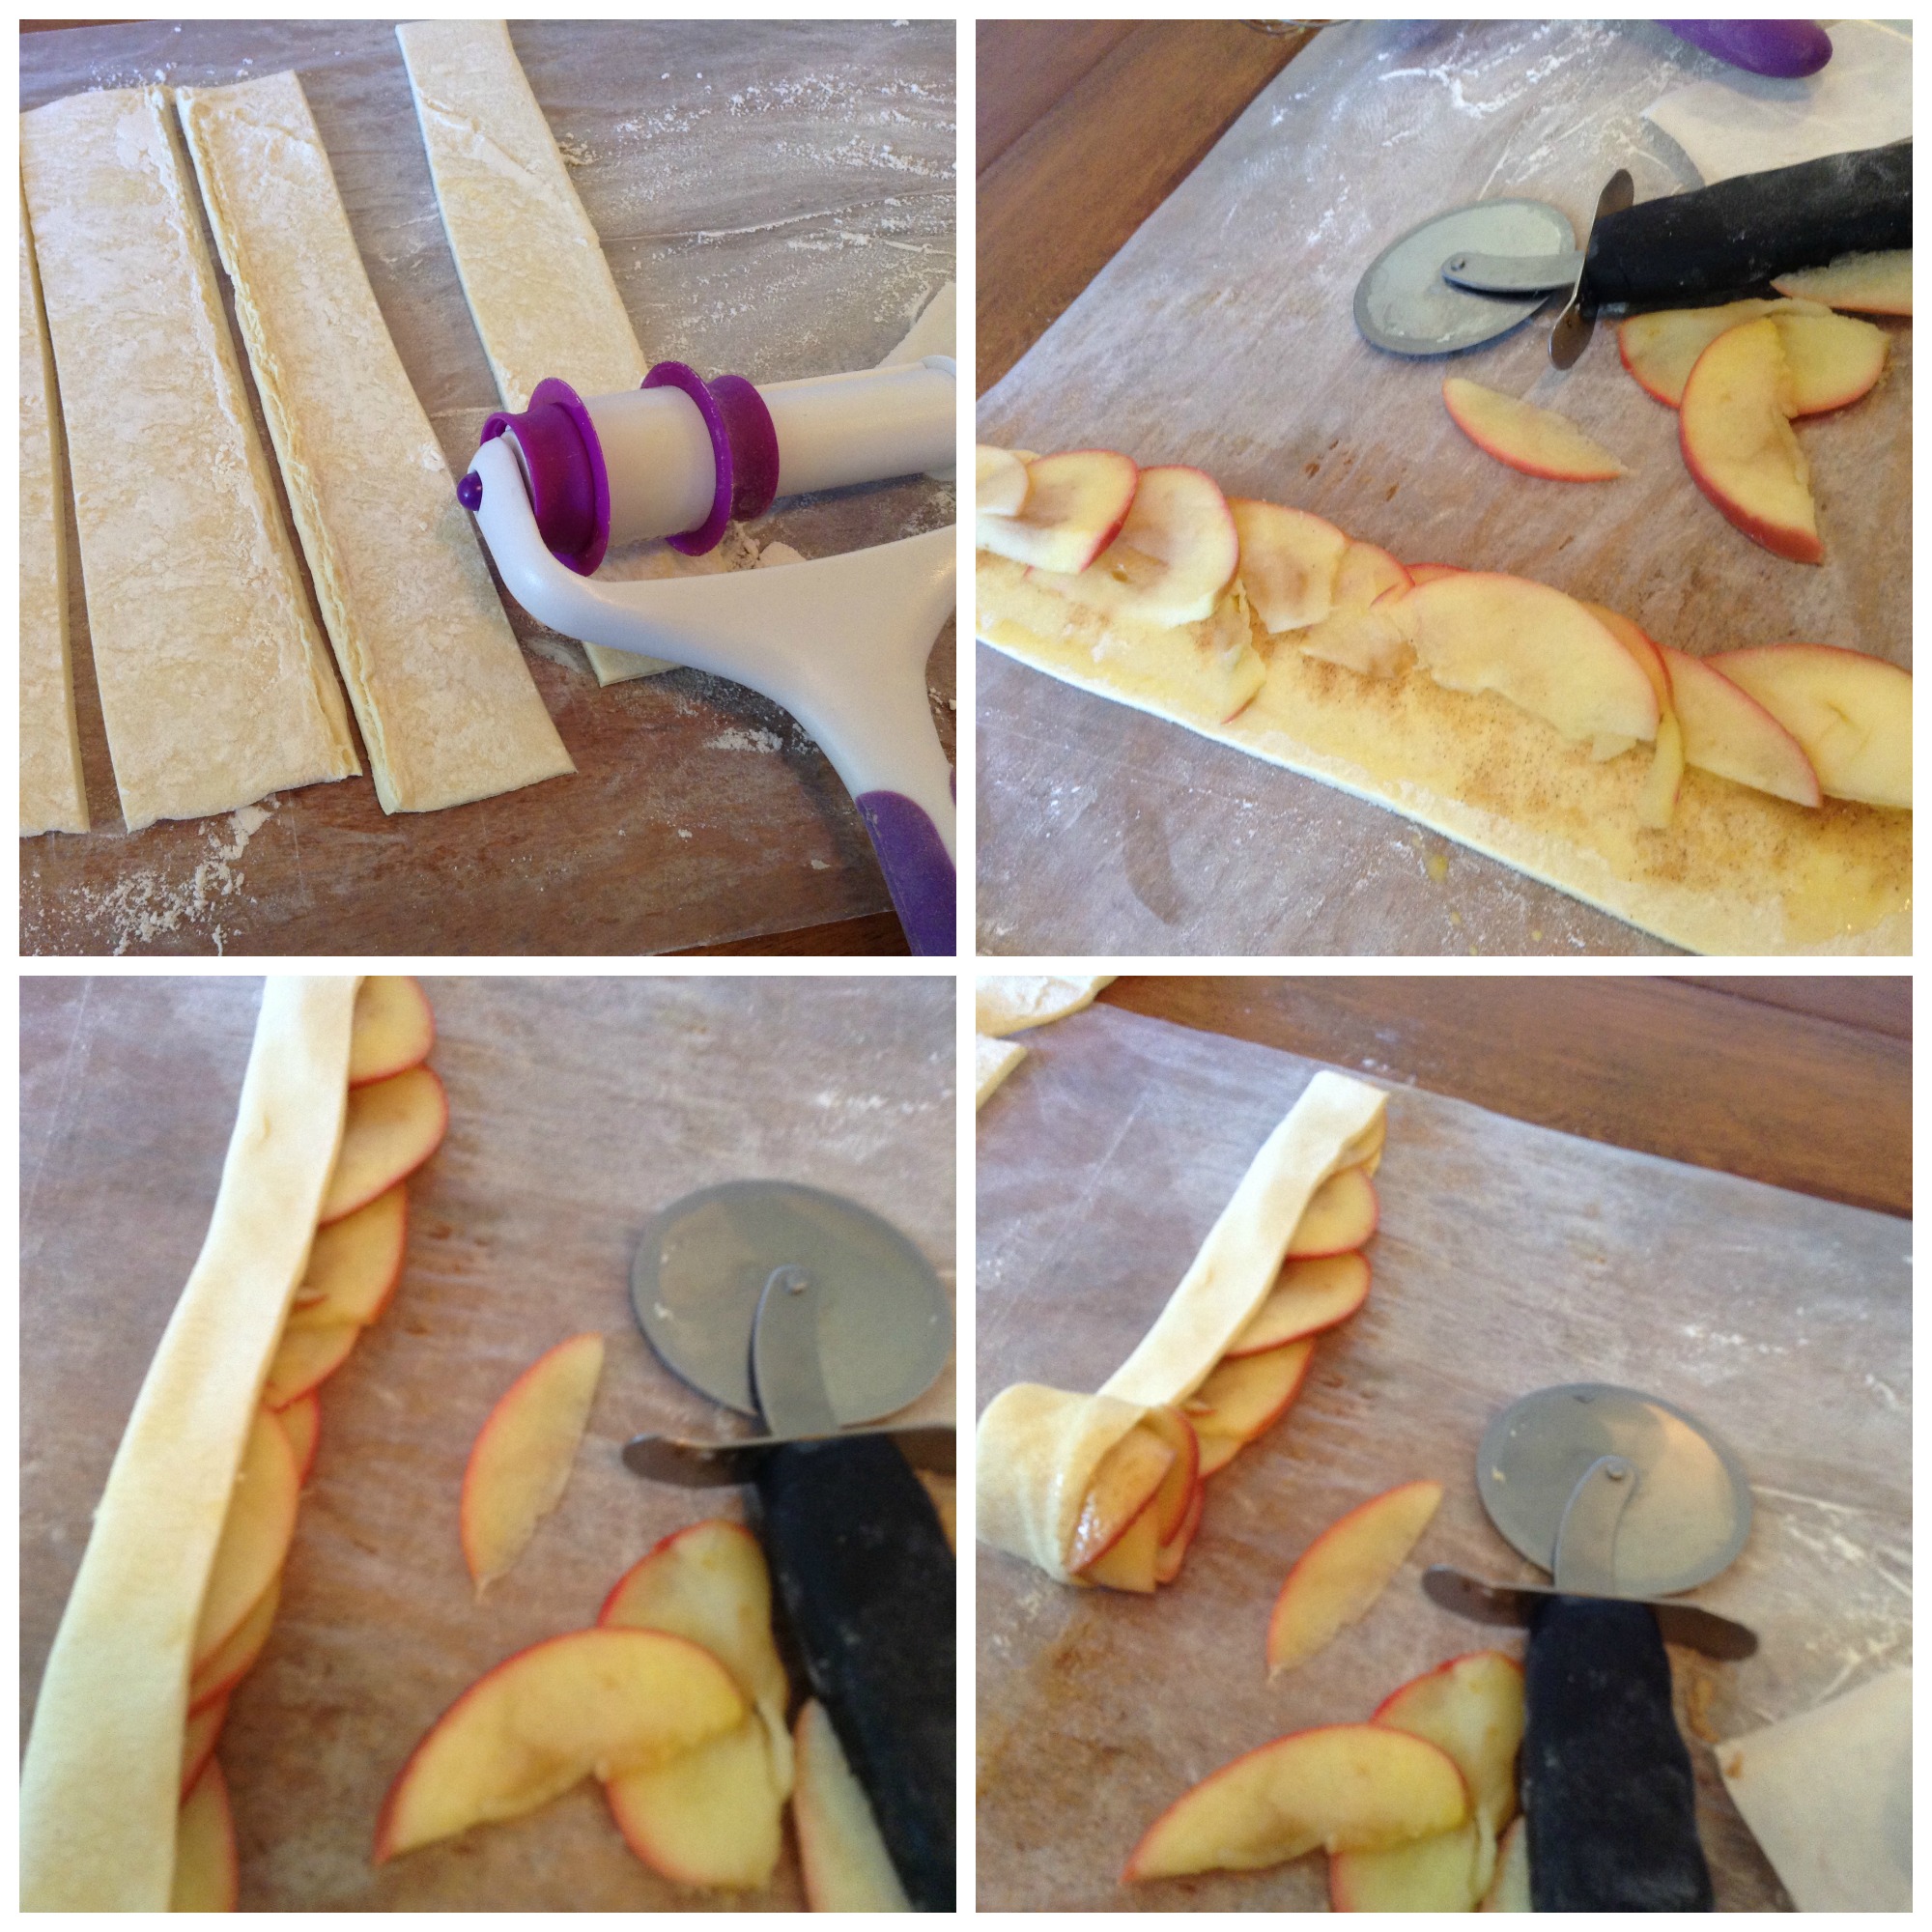
You will need : 1 package puff pastry which has been thawed in the refrigerator, 8 small tart apples, 1 fresh lemon, 8 TBS sugar, 2 TBS cinnamon, 1 egg for egg wash, extra sugar and preheat your oven to 400 degrees
Put a pot with water on heat and let it boil, meanwhile cut the apples into thin slices and add them to the pot with the lemon juice then turn the heat off , put a lid on the pot and let the apples steam for a minute. We want the apples to be soft but not mushy. so as soon as you feel they’re soft. drain the water from the pot and put the apples on a paper towel to cool off and dry
Now take a sheet of puff pastry and place it on a well-floured surface, Brush the pastry with the egg wash, sprinkle it with 4 TBS of sugar and 1 TBS of cinnamon, now cut a 1 inch strip along the long side of the puff pastry and place the apple slices that they will slightly overlap each other and start rolling the pastry.
You should be able to place 9 -11 slices on each stripe.
Put the finished rolled pastry or rosettes in a mold or just on a baking paper.
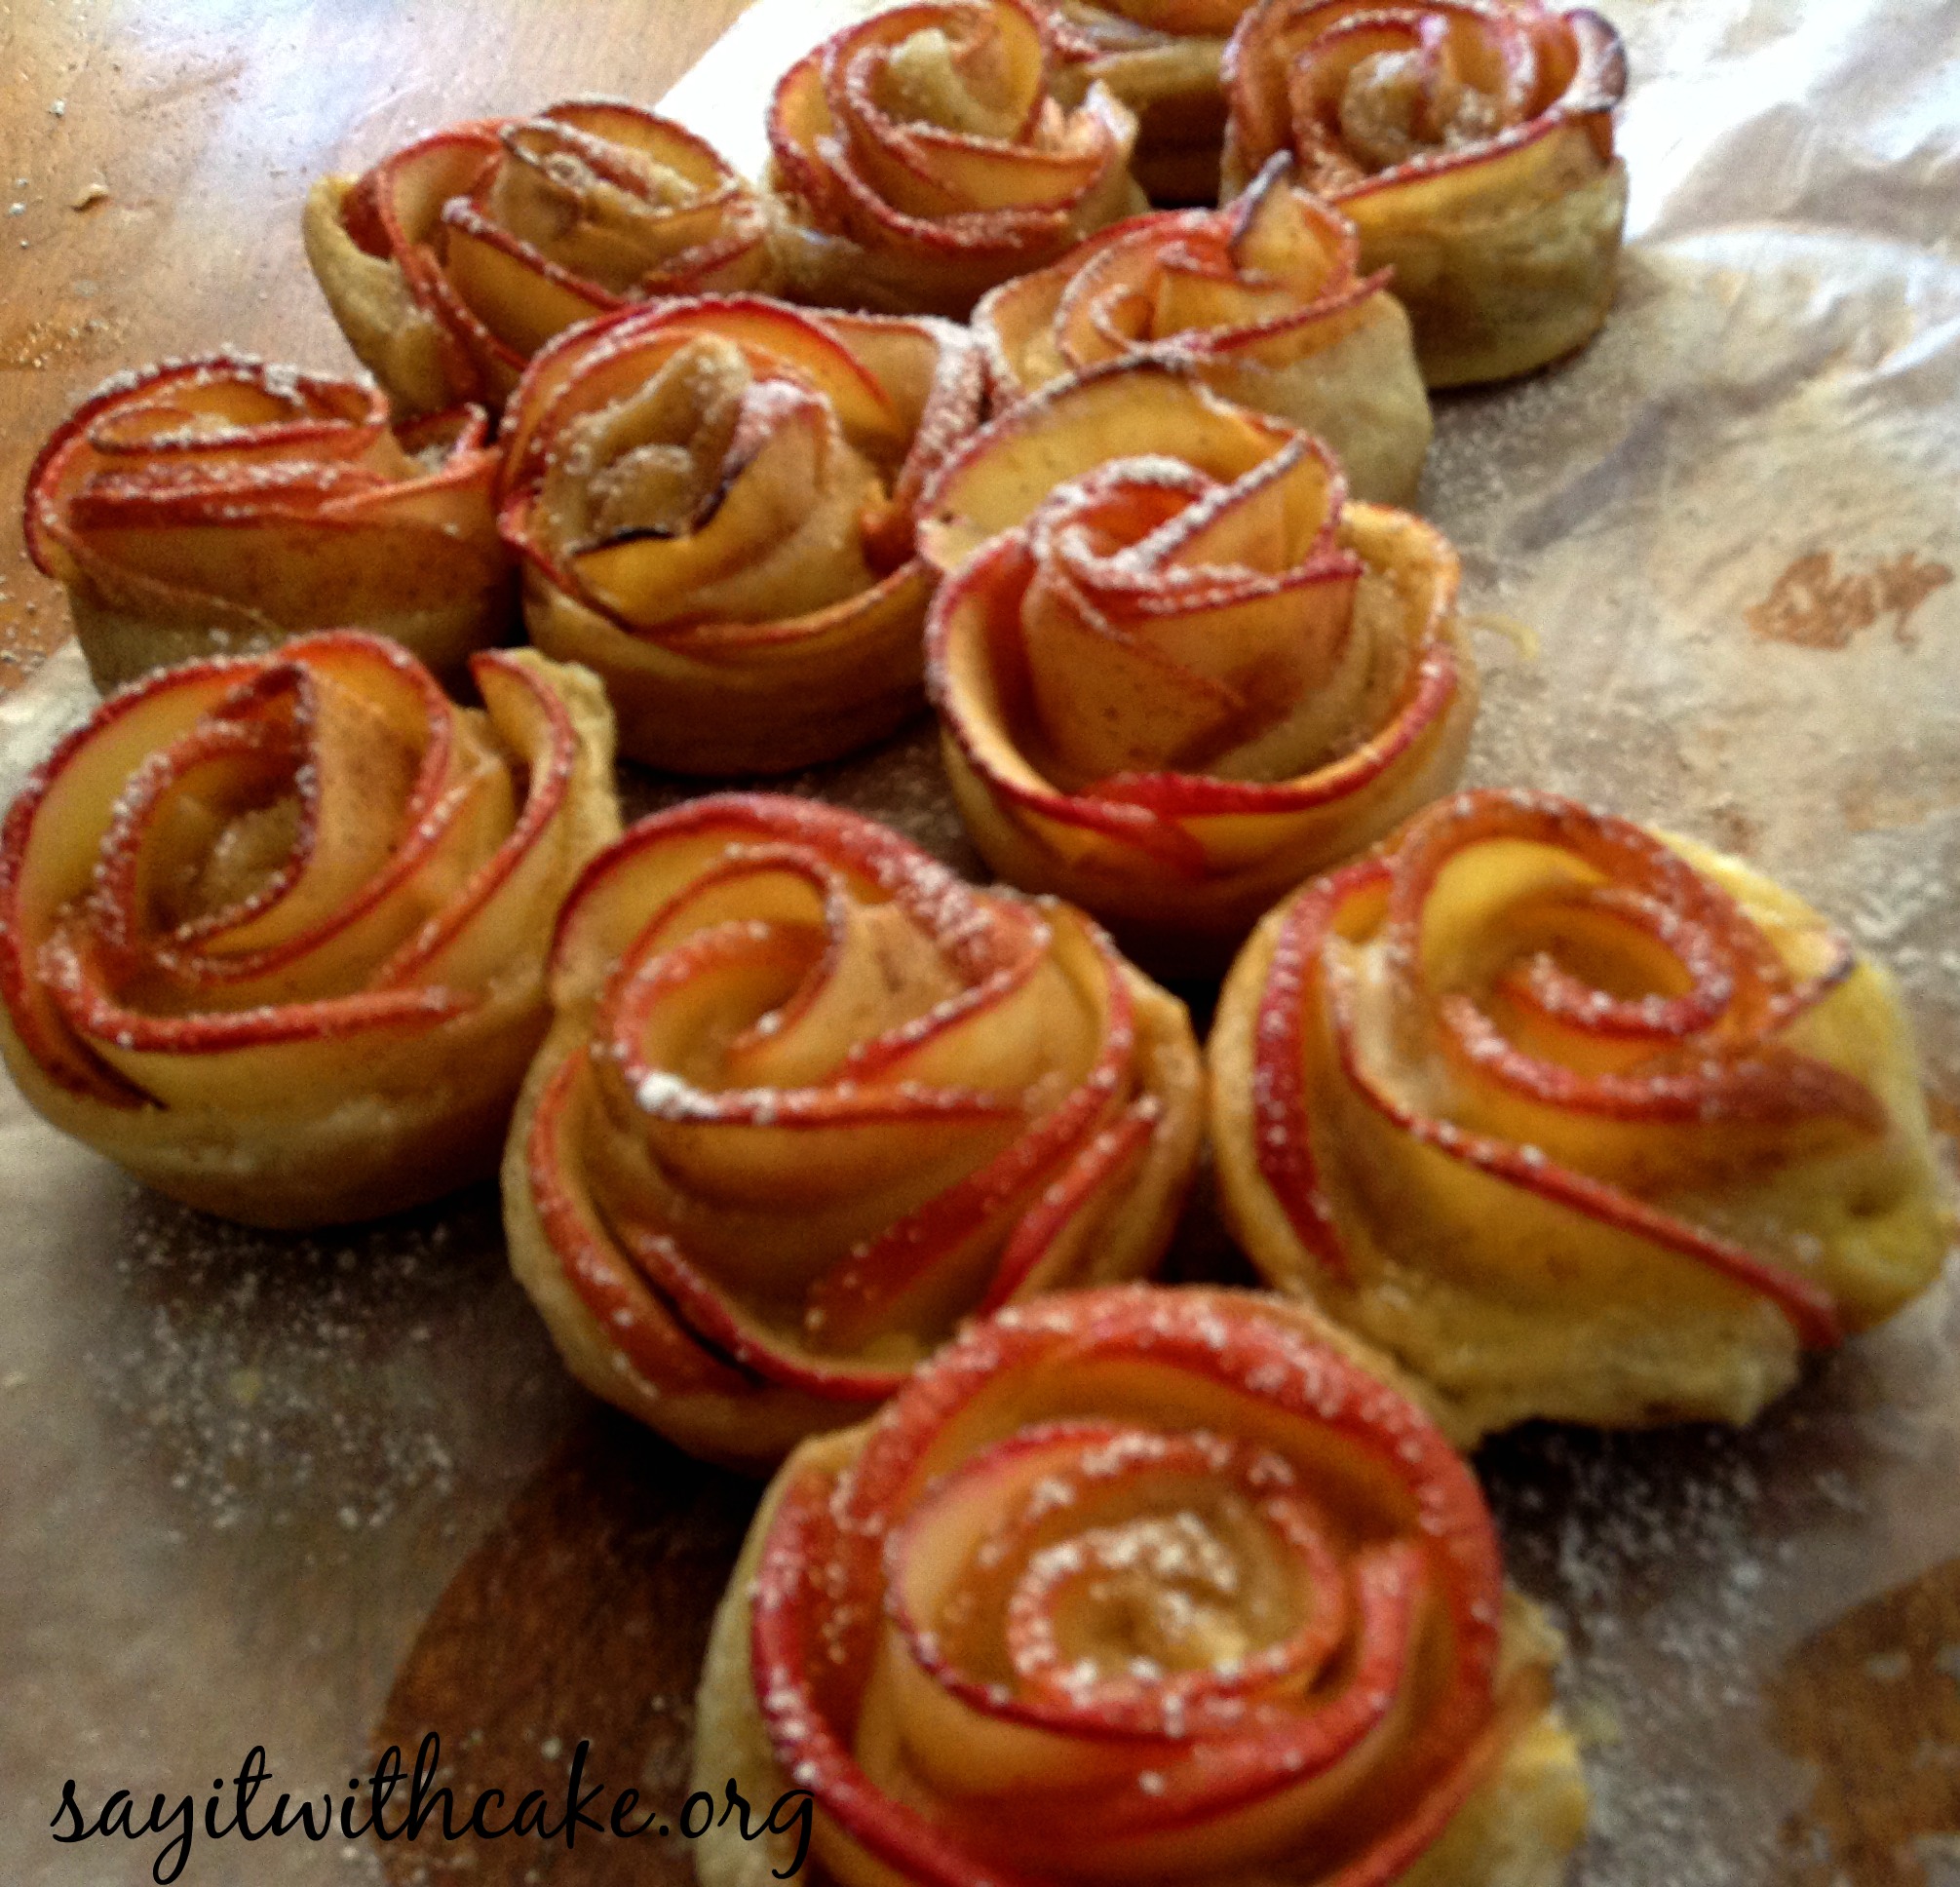
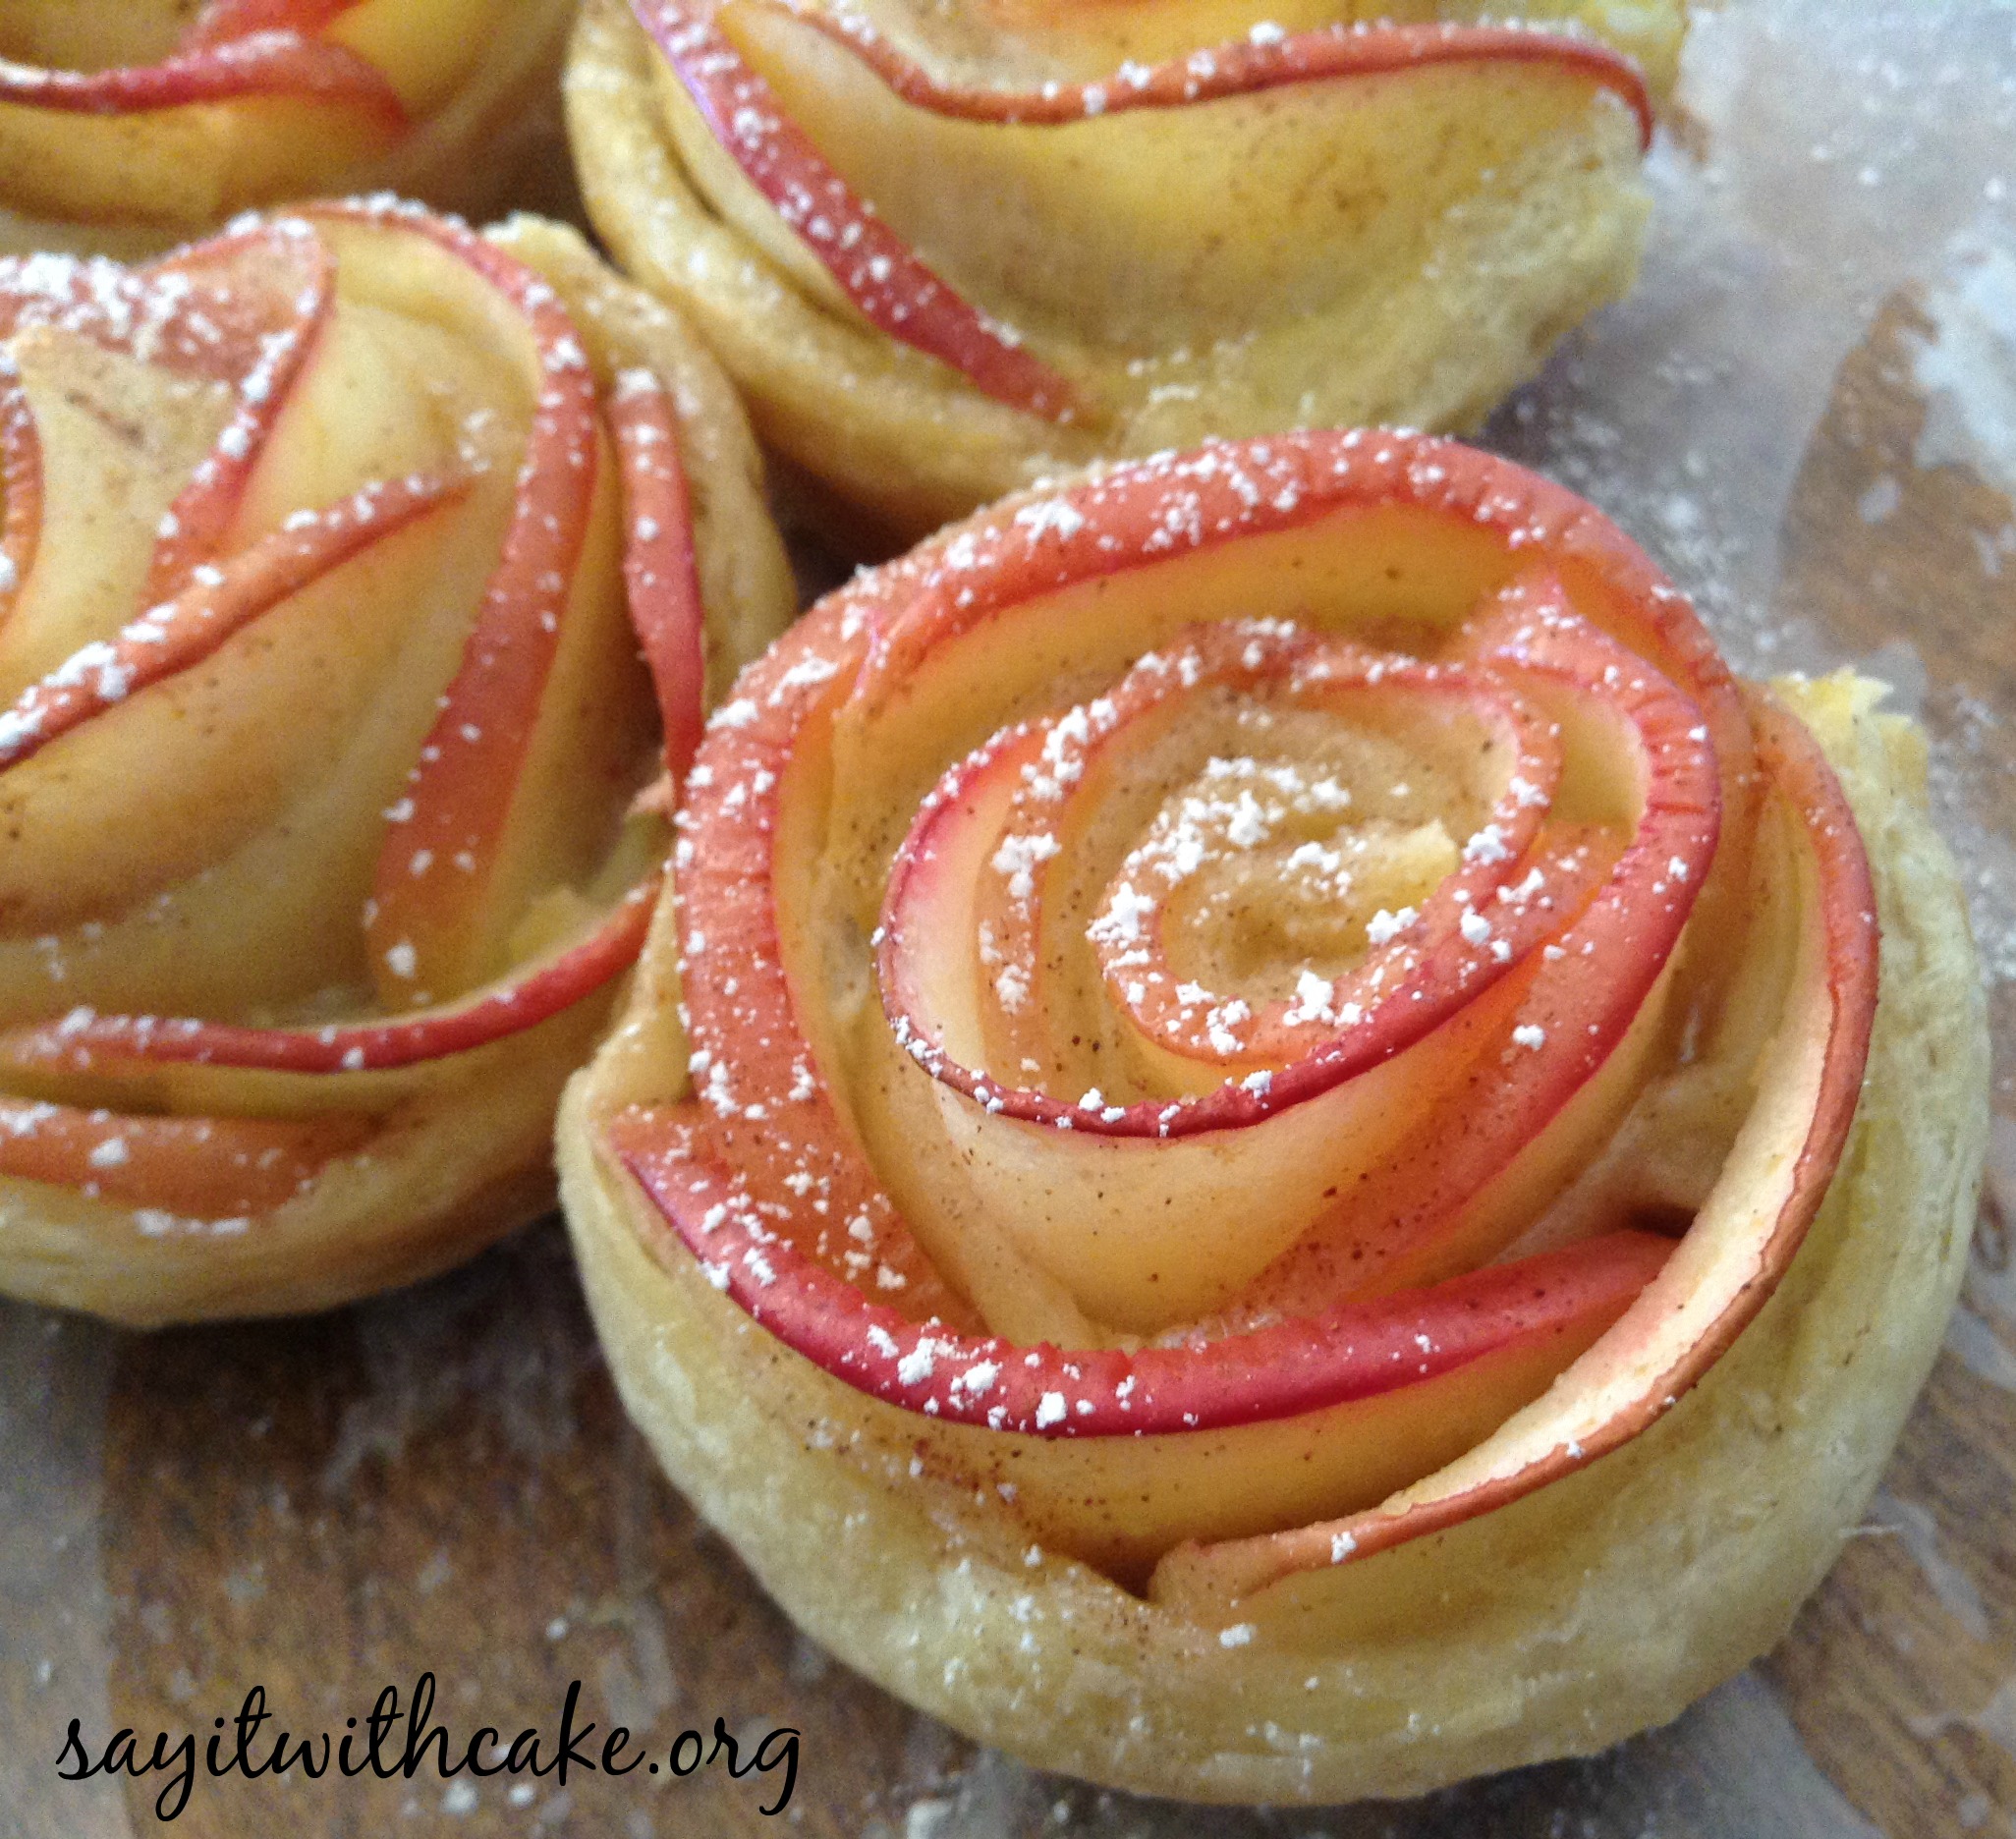
Now place a pan with water in the bottom rack of the oven. this will help to keep the bottom of the rosettes from burning, bake the rosettes on the rack just over the water for 15 – 20 minutes but make sure to check them regularly. you don’t want them to burn, but you want the party to be crispy. when they are done let them cool off outside the oven and serve!
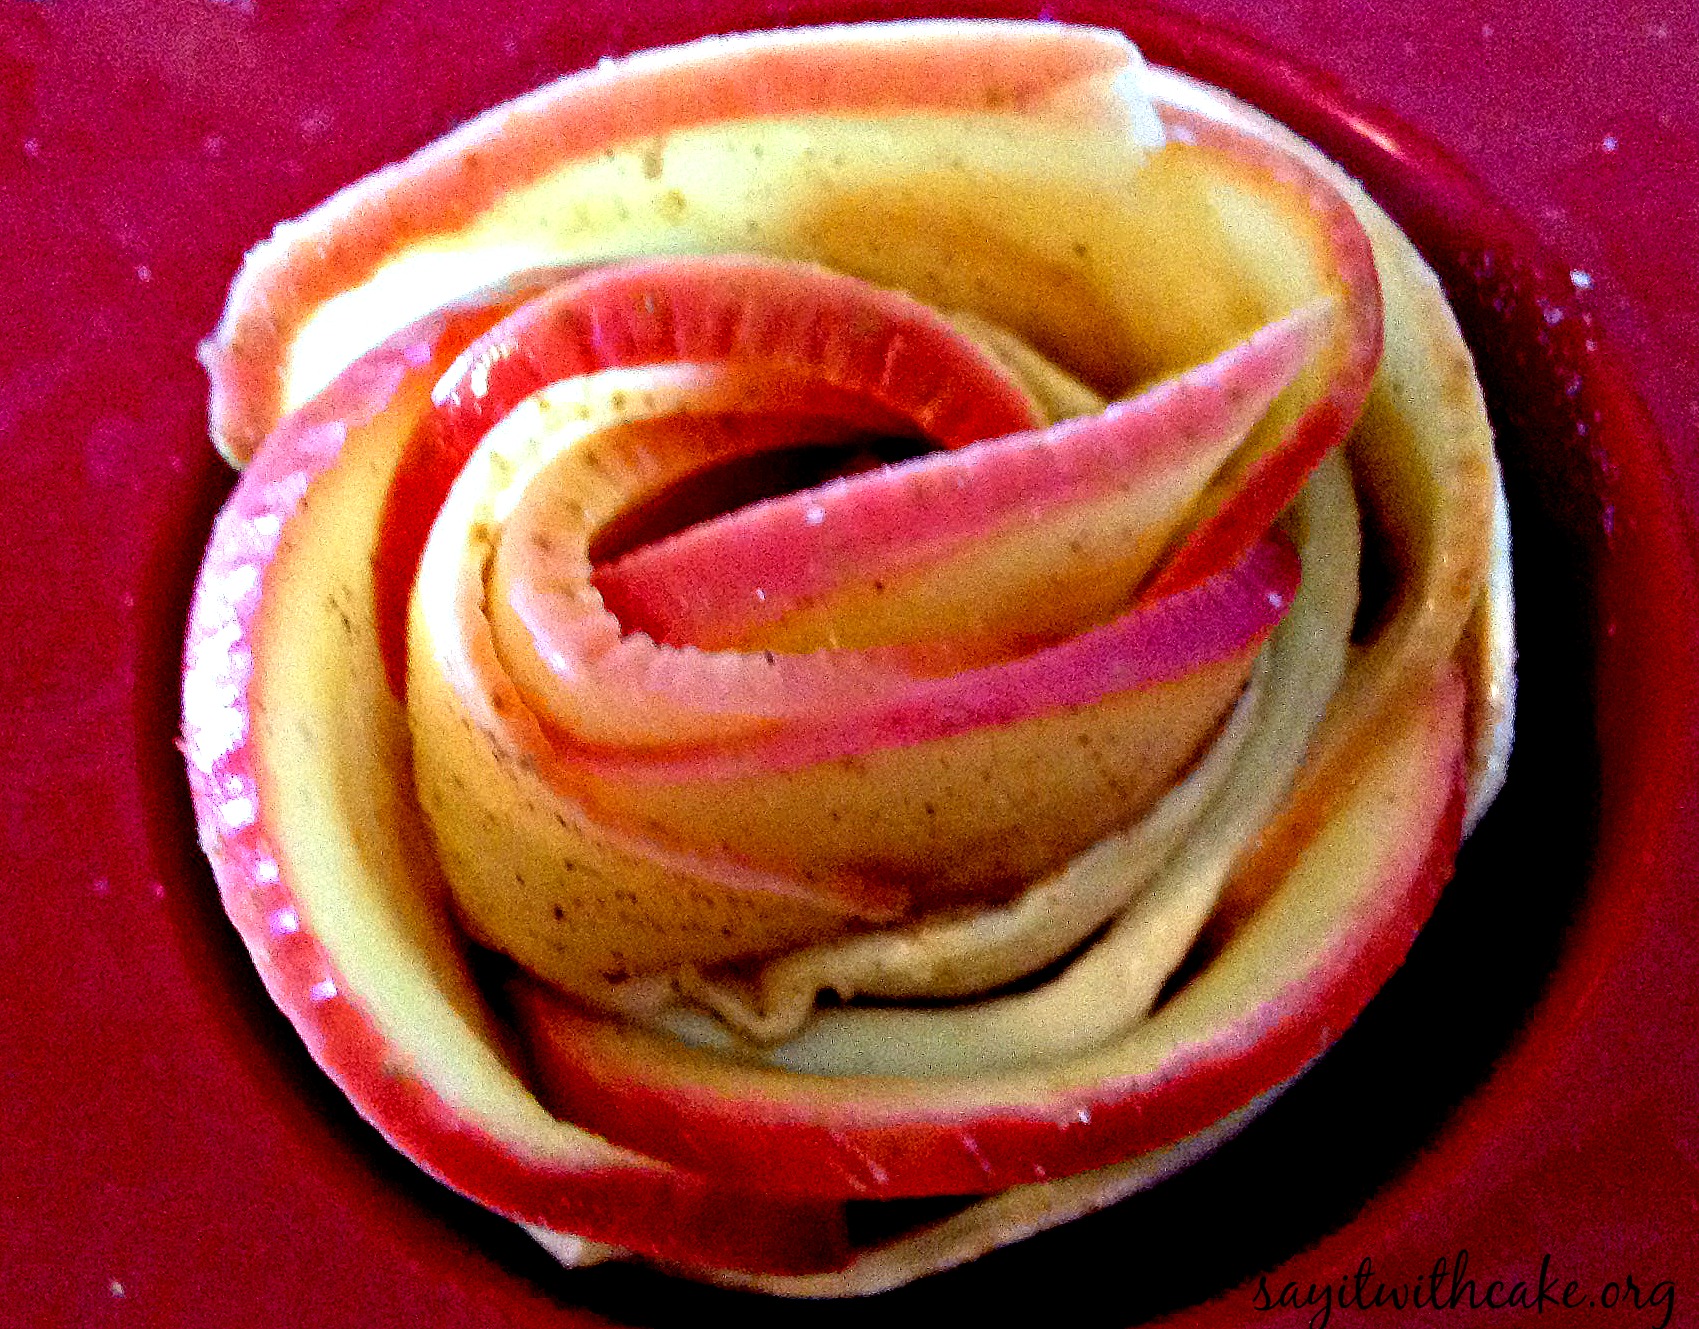
The pic above is what the apple rose looks like before it is cooked. I sprinkled some cinnamon and sugar on the petals. Below is a pic of the roses out of the oven with powdered sugar sprinkled on them.
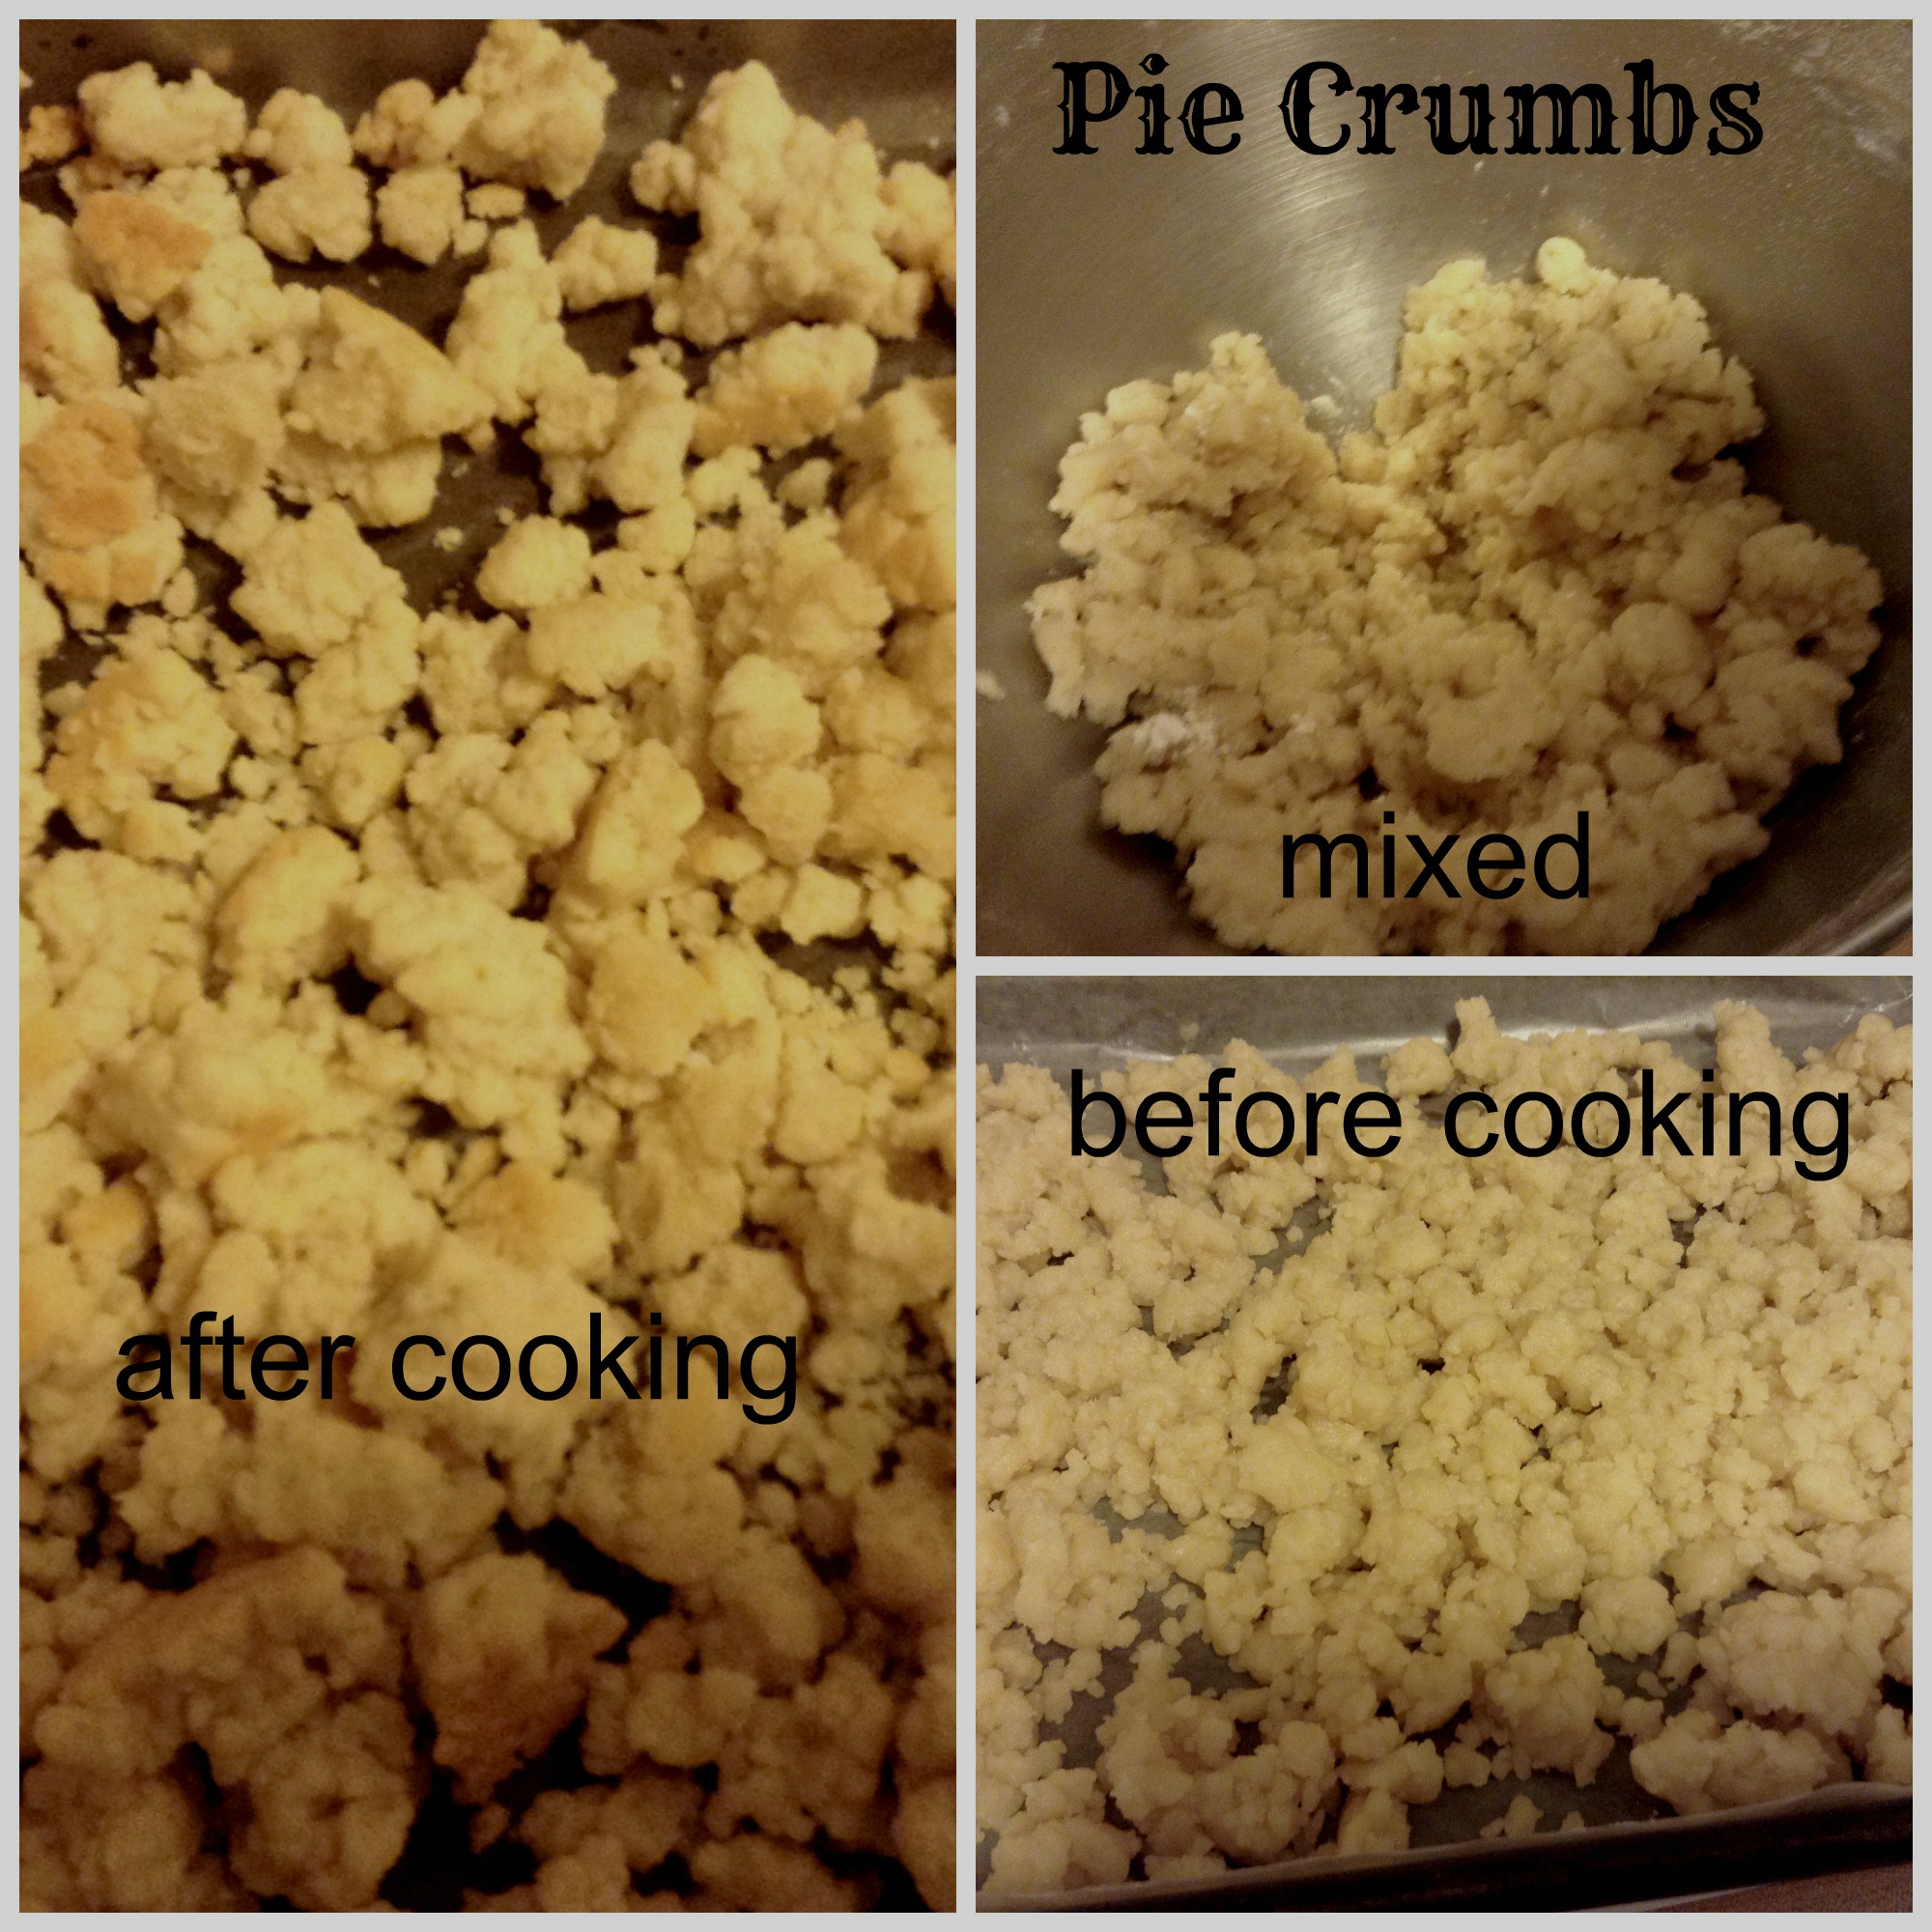
The next step is to make the pie crumbles. The recipe is below. They are really yummy if you sprinkle cinnamon and sugar on them. My husband thinks they taste like shortbread cookies
After making the cream cheese frosting (the recipe is below) it is time to assemble the cake!
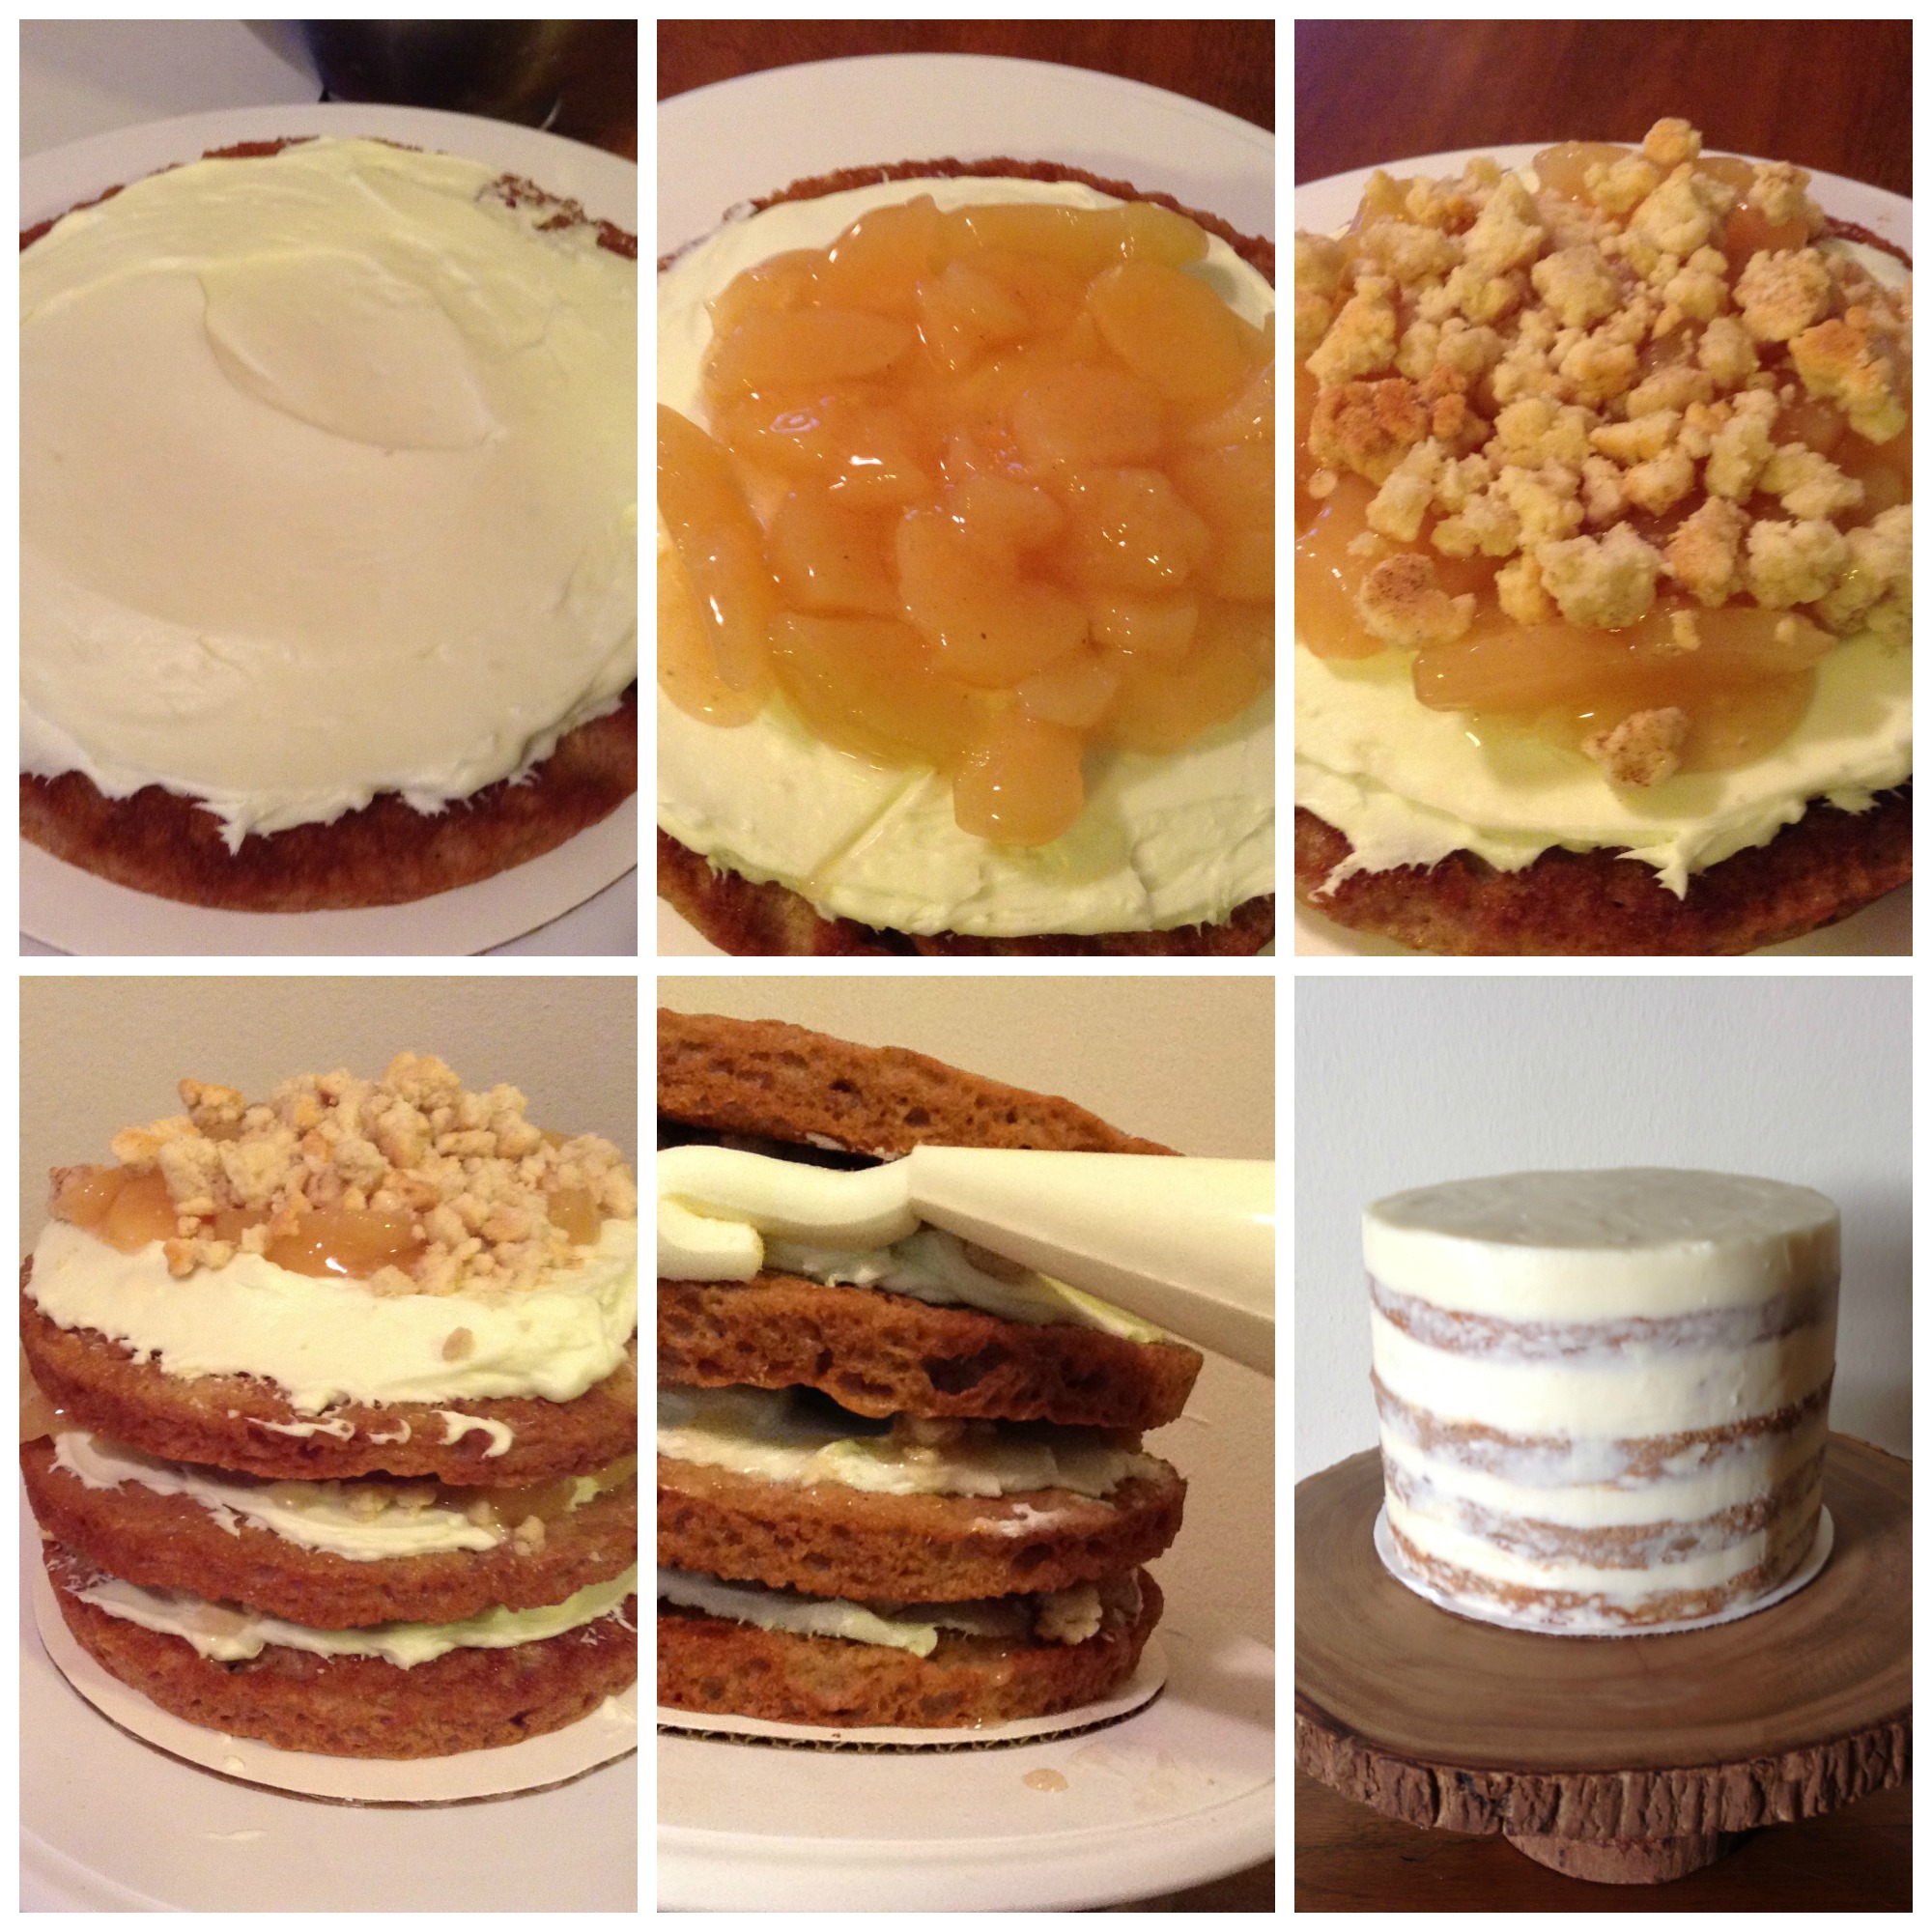
Put your first cake down and cover with cream cheese frosting. Put on a layer of canned apple pie filling. Sprinkle some pie crumbs on top. Repeat with the next two layers. After all four cakes are placed, pipe some cream cheese frosting in the gaps and smooth with a bench scraper. Put a layer of frosting on the top of the cake and smooth. The pictures above are the steps I took while assembling the cake.
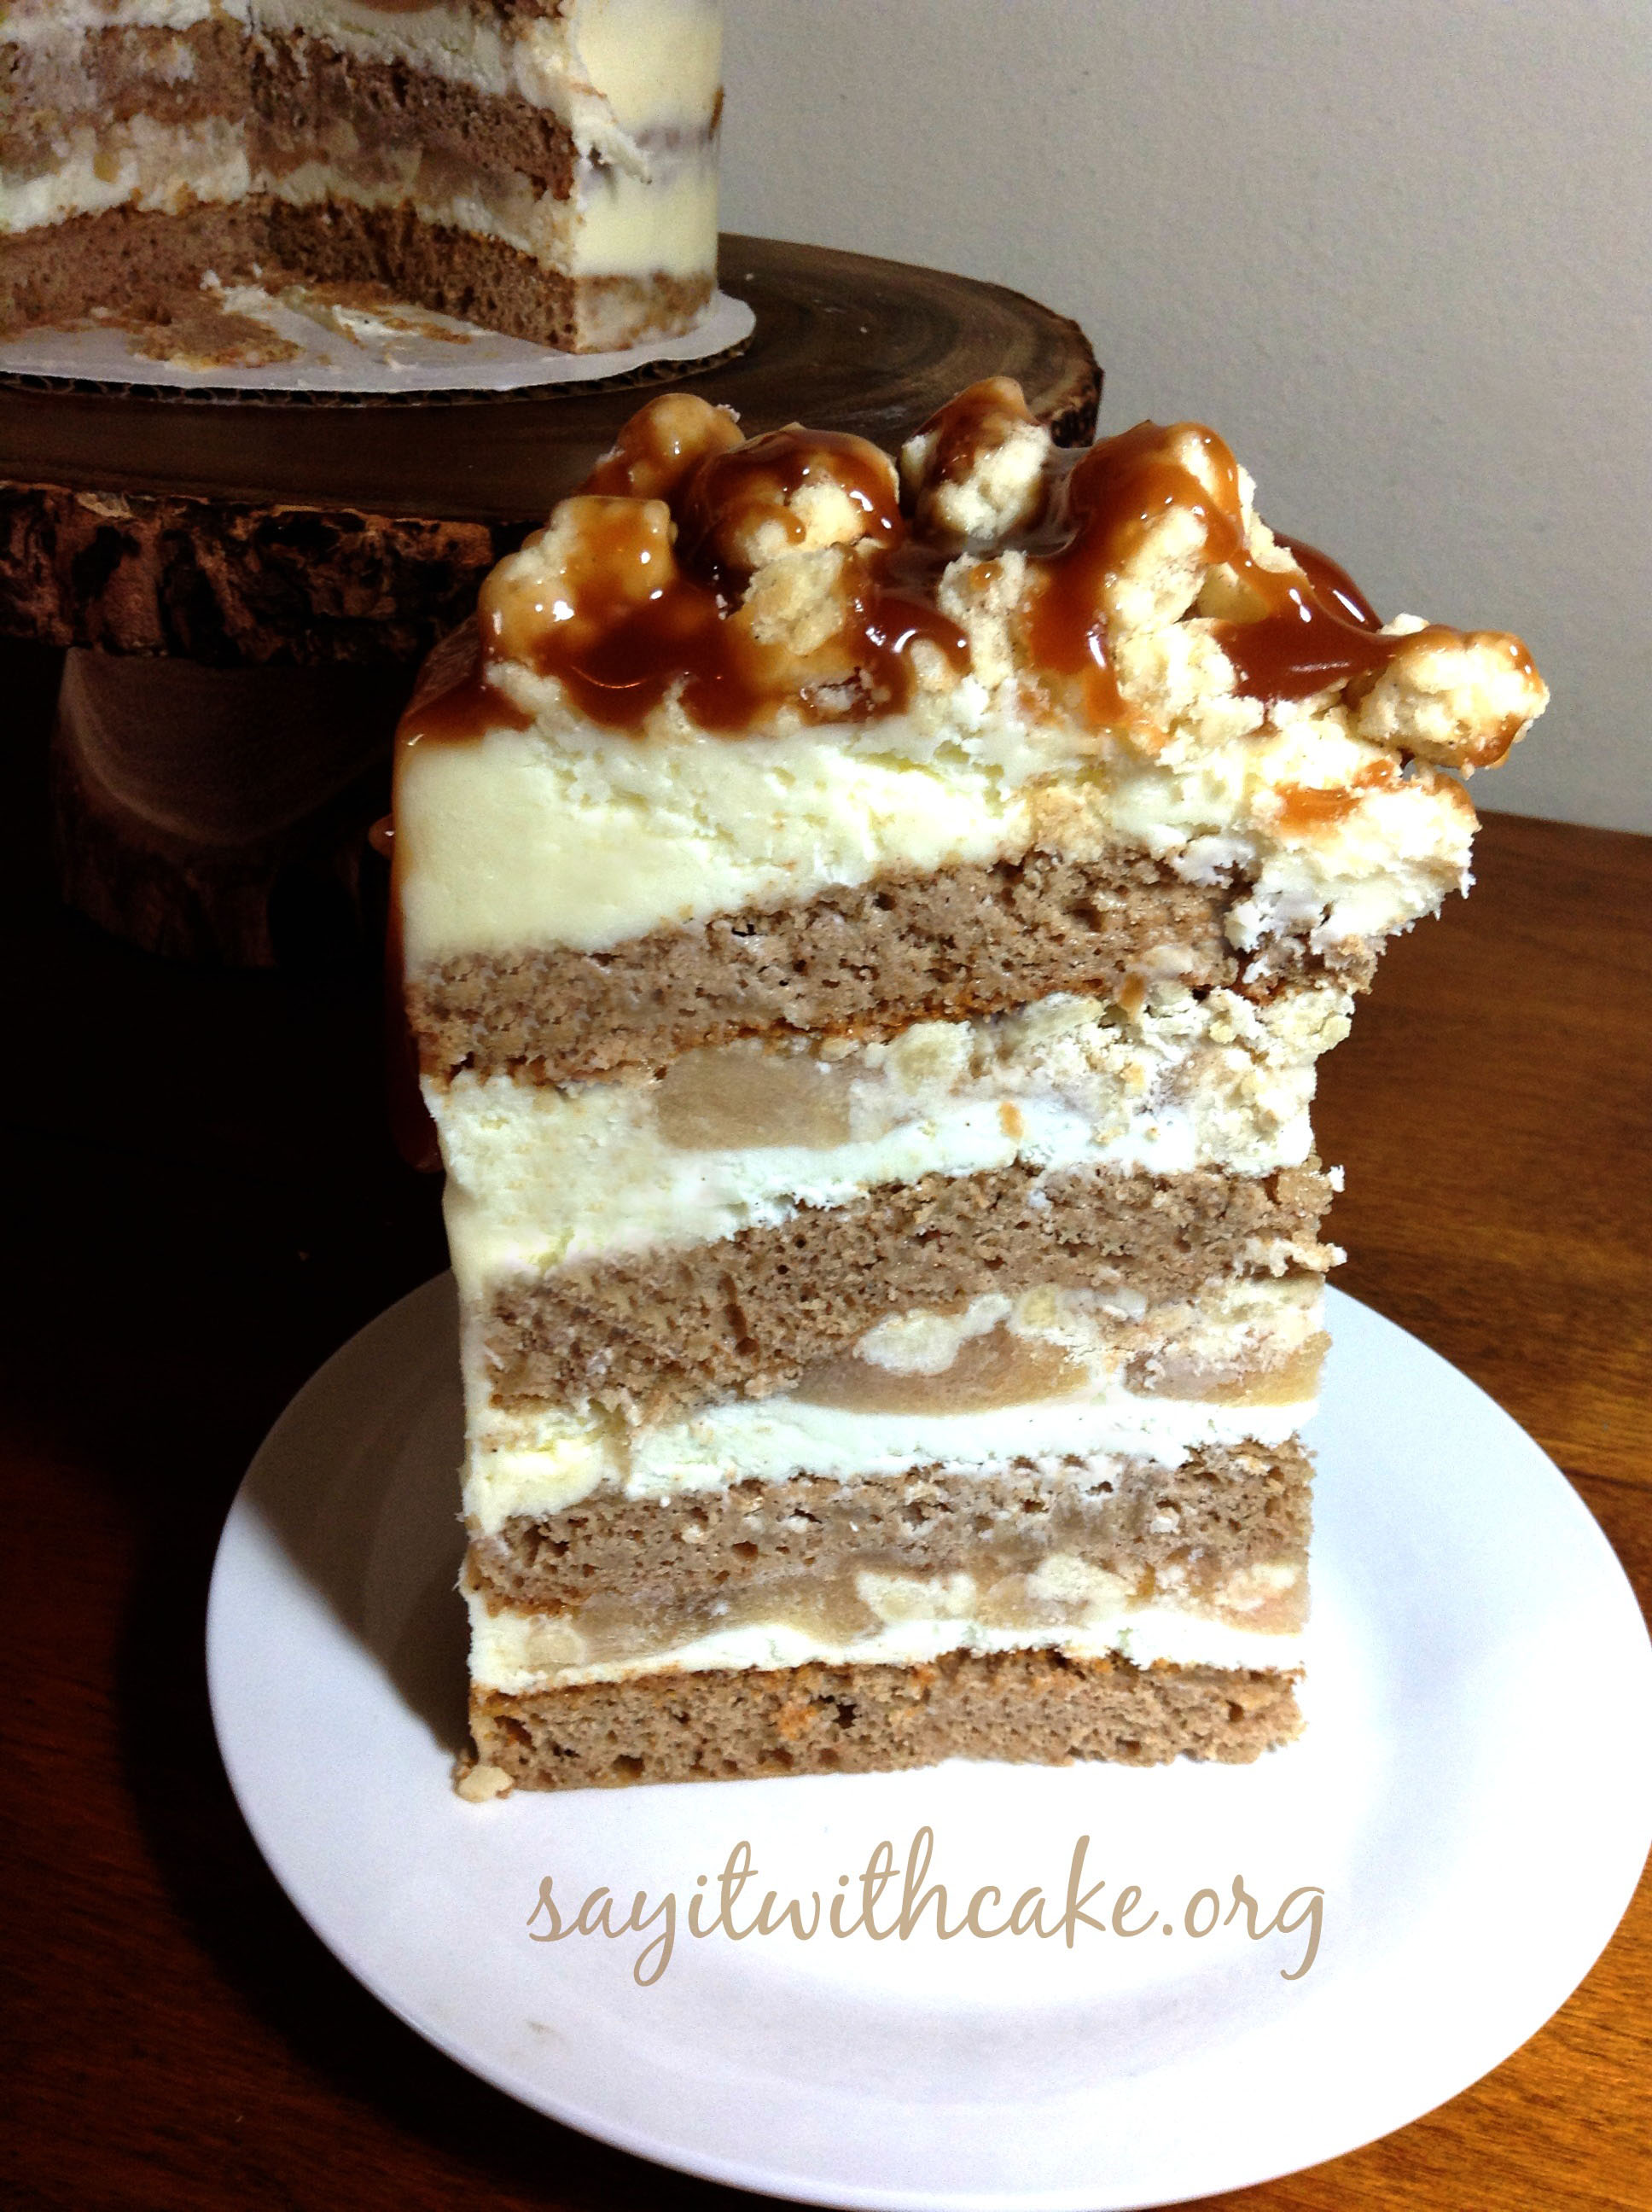
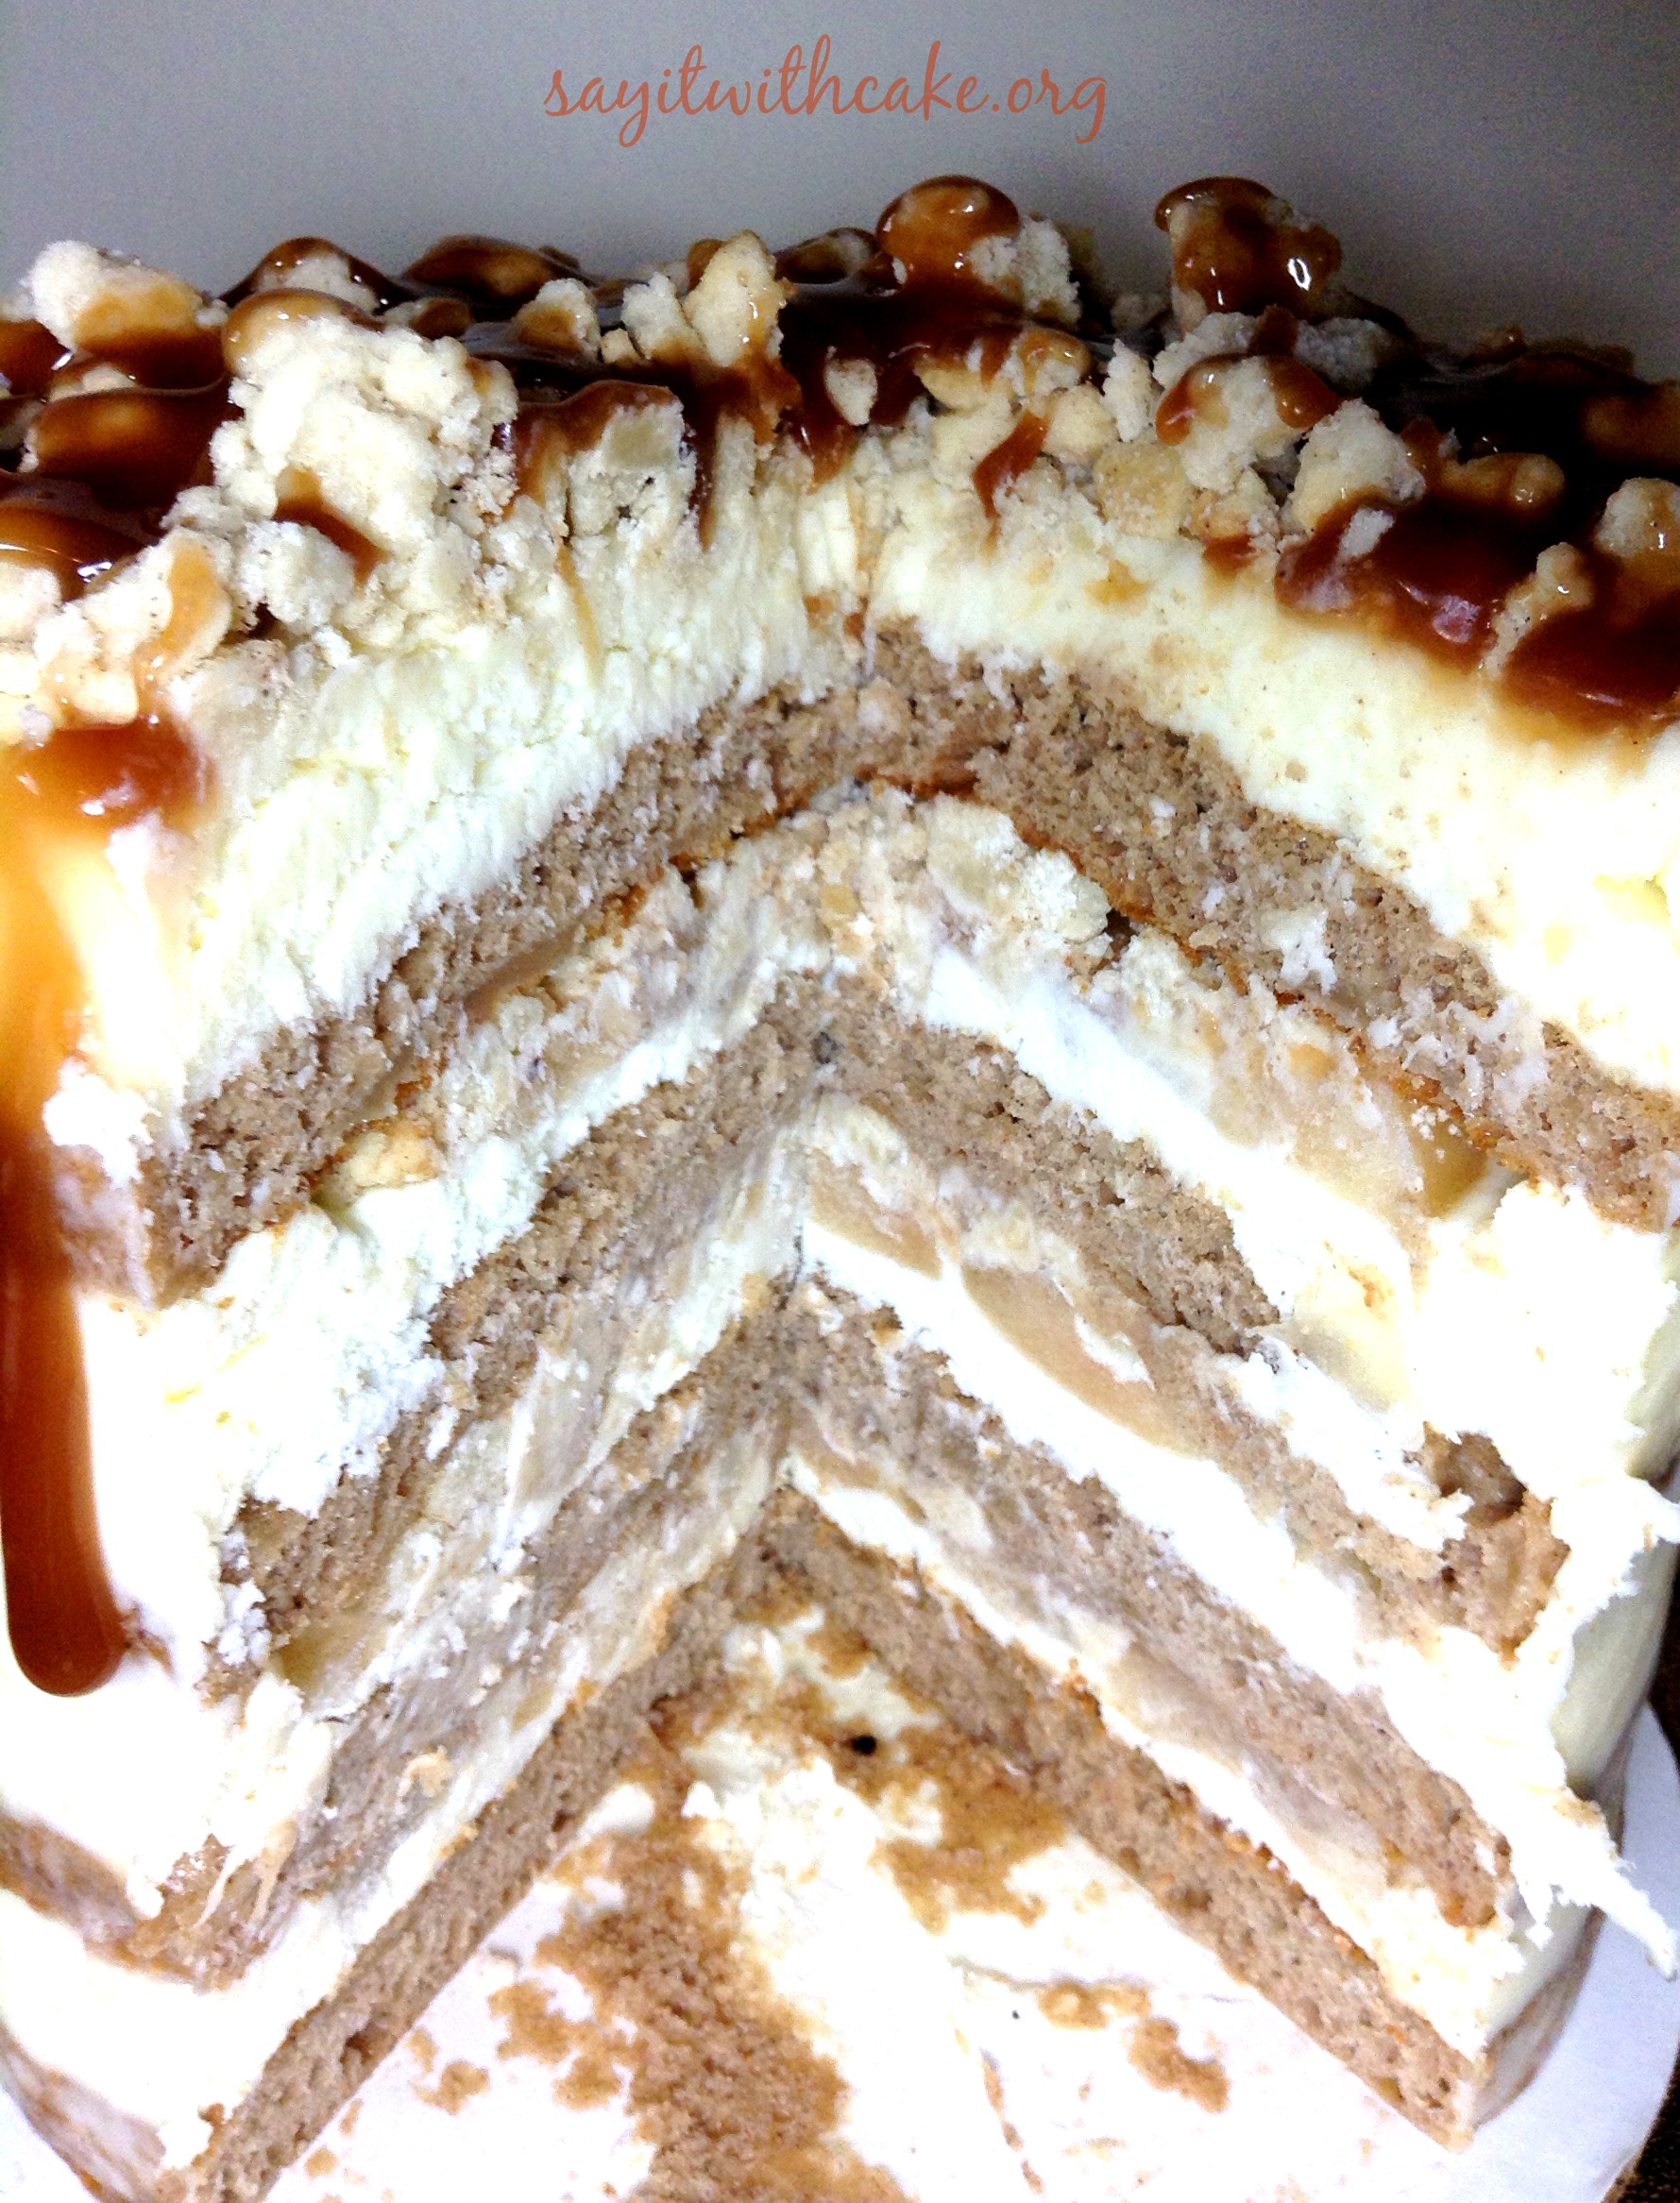
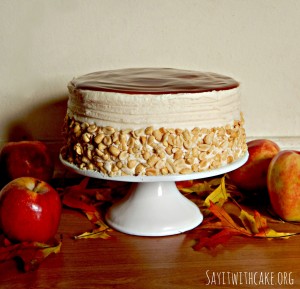
For the top of the cake you can either put the apple roses, or some pie crumbles. Also, with caramel or no caramel? I can’t decide which I like best? I tried them both out and took pictures of each. You can find my recipe for homemade caramel sauce Here.

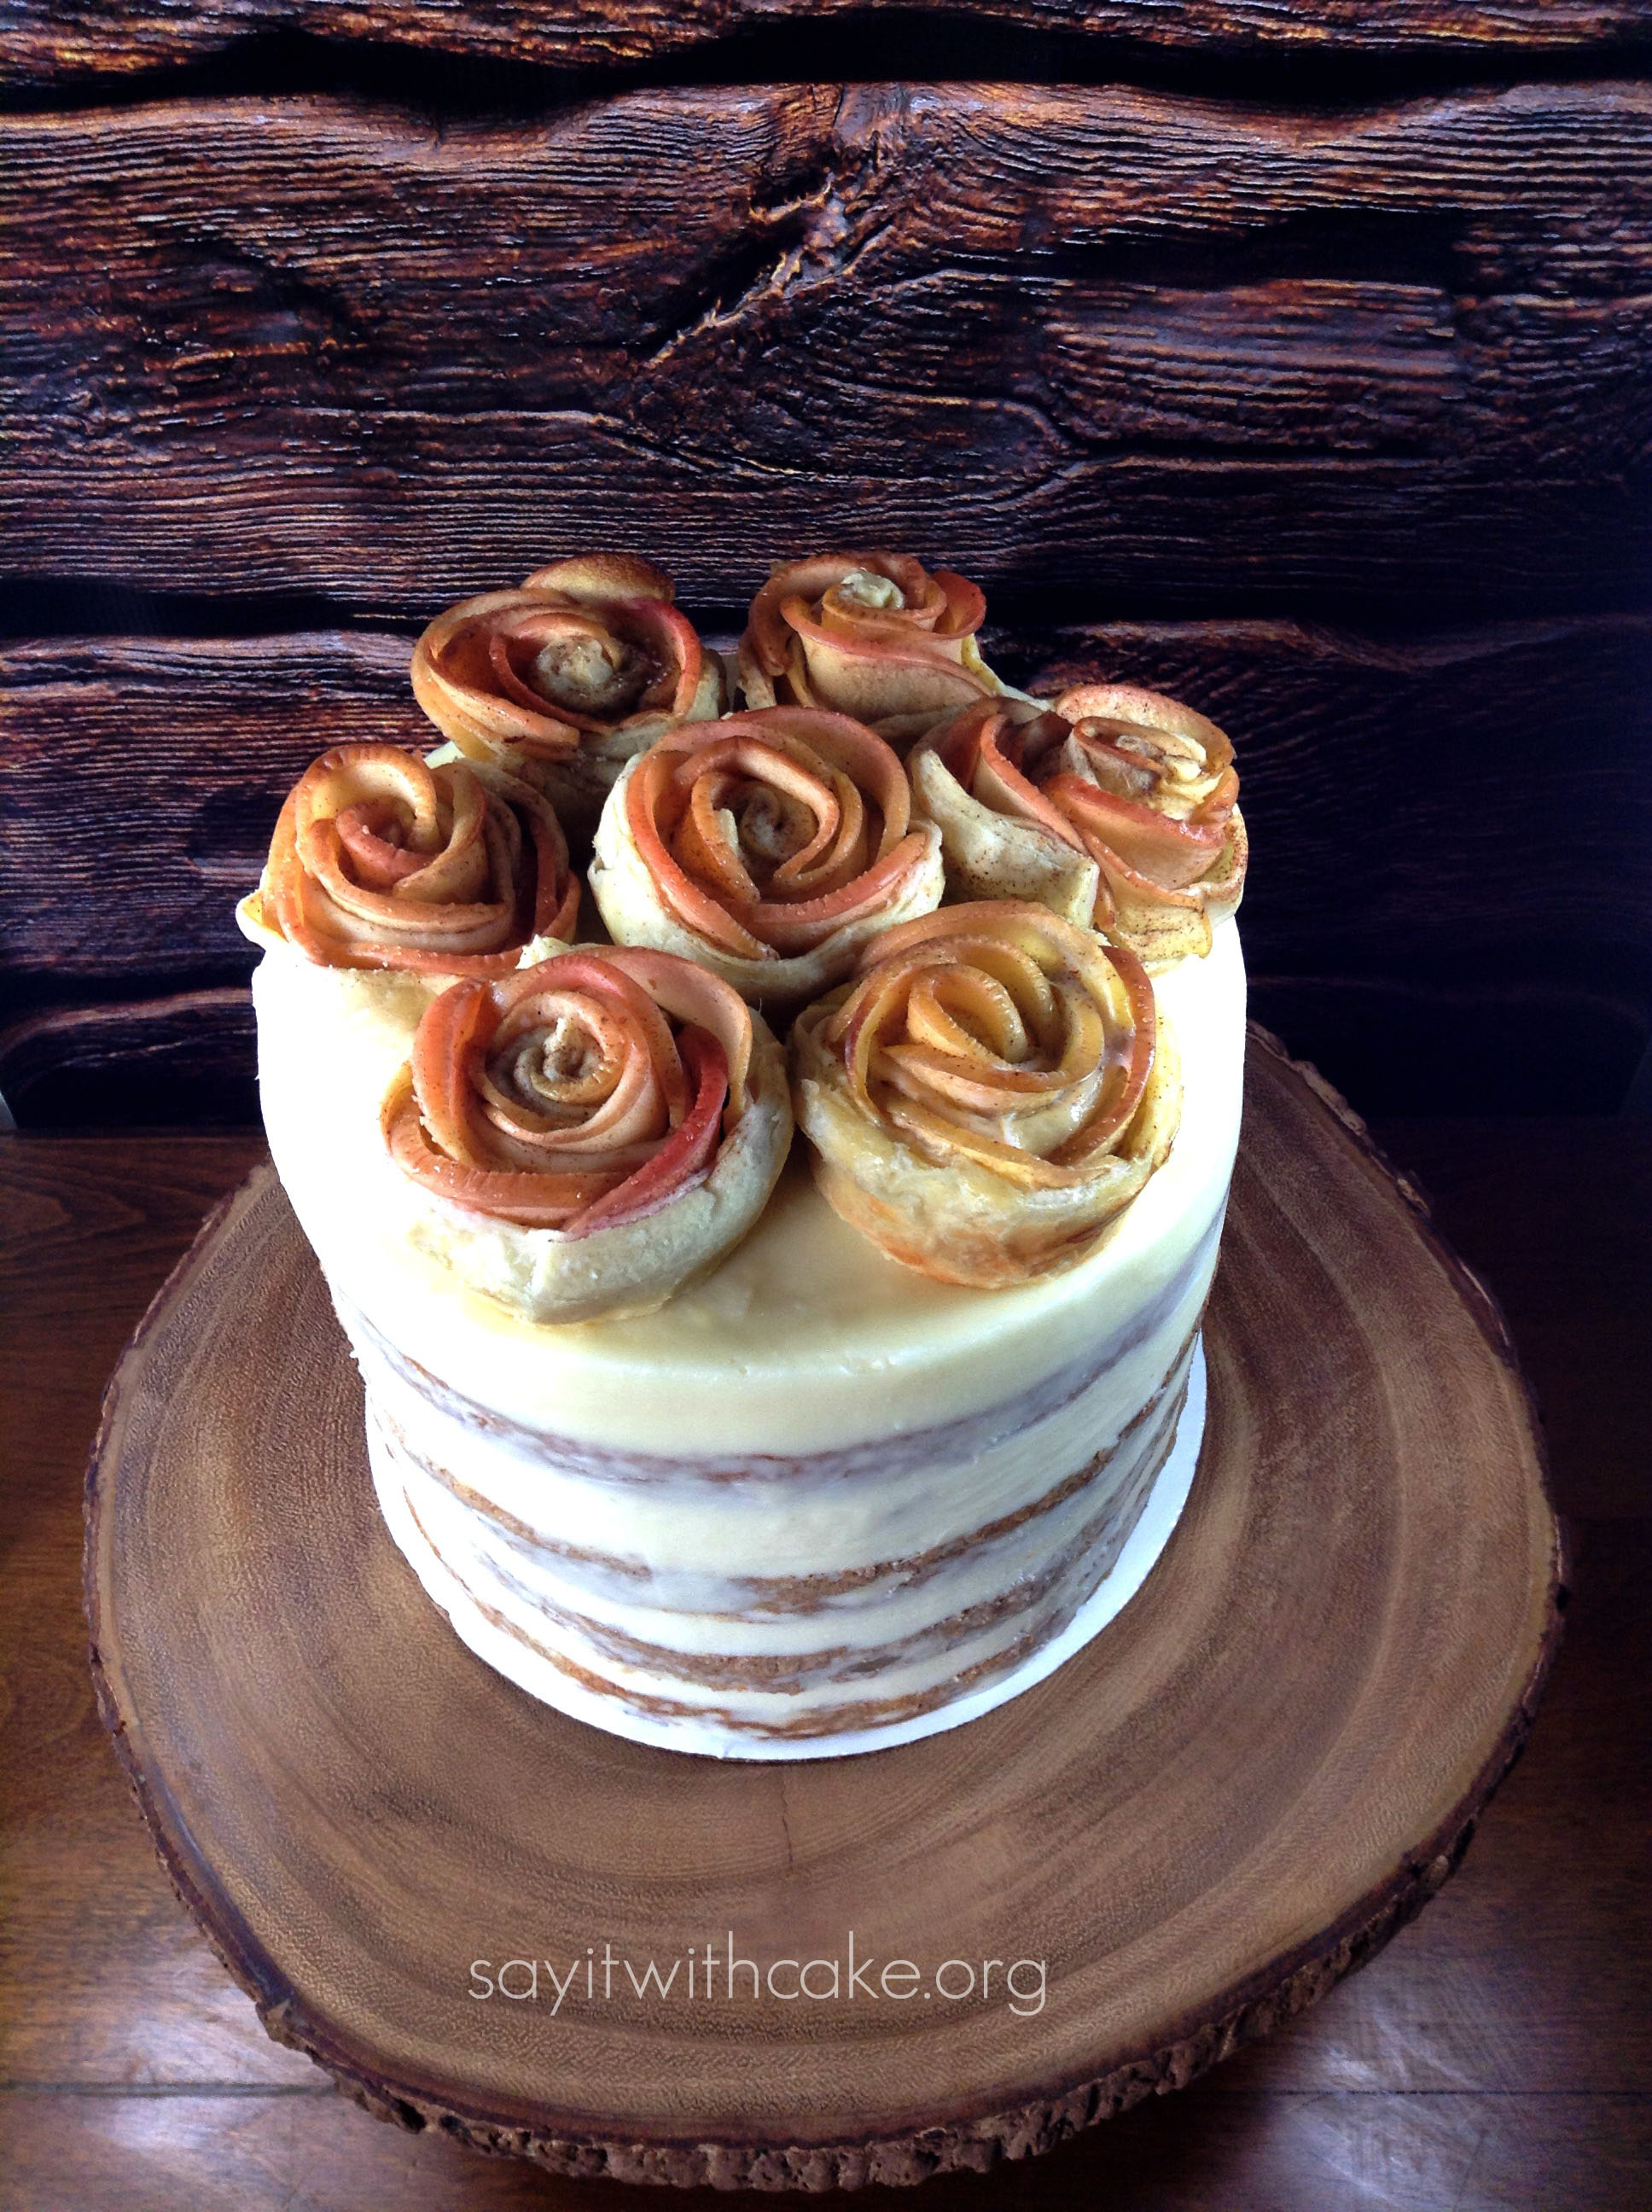
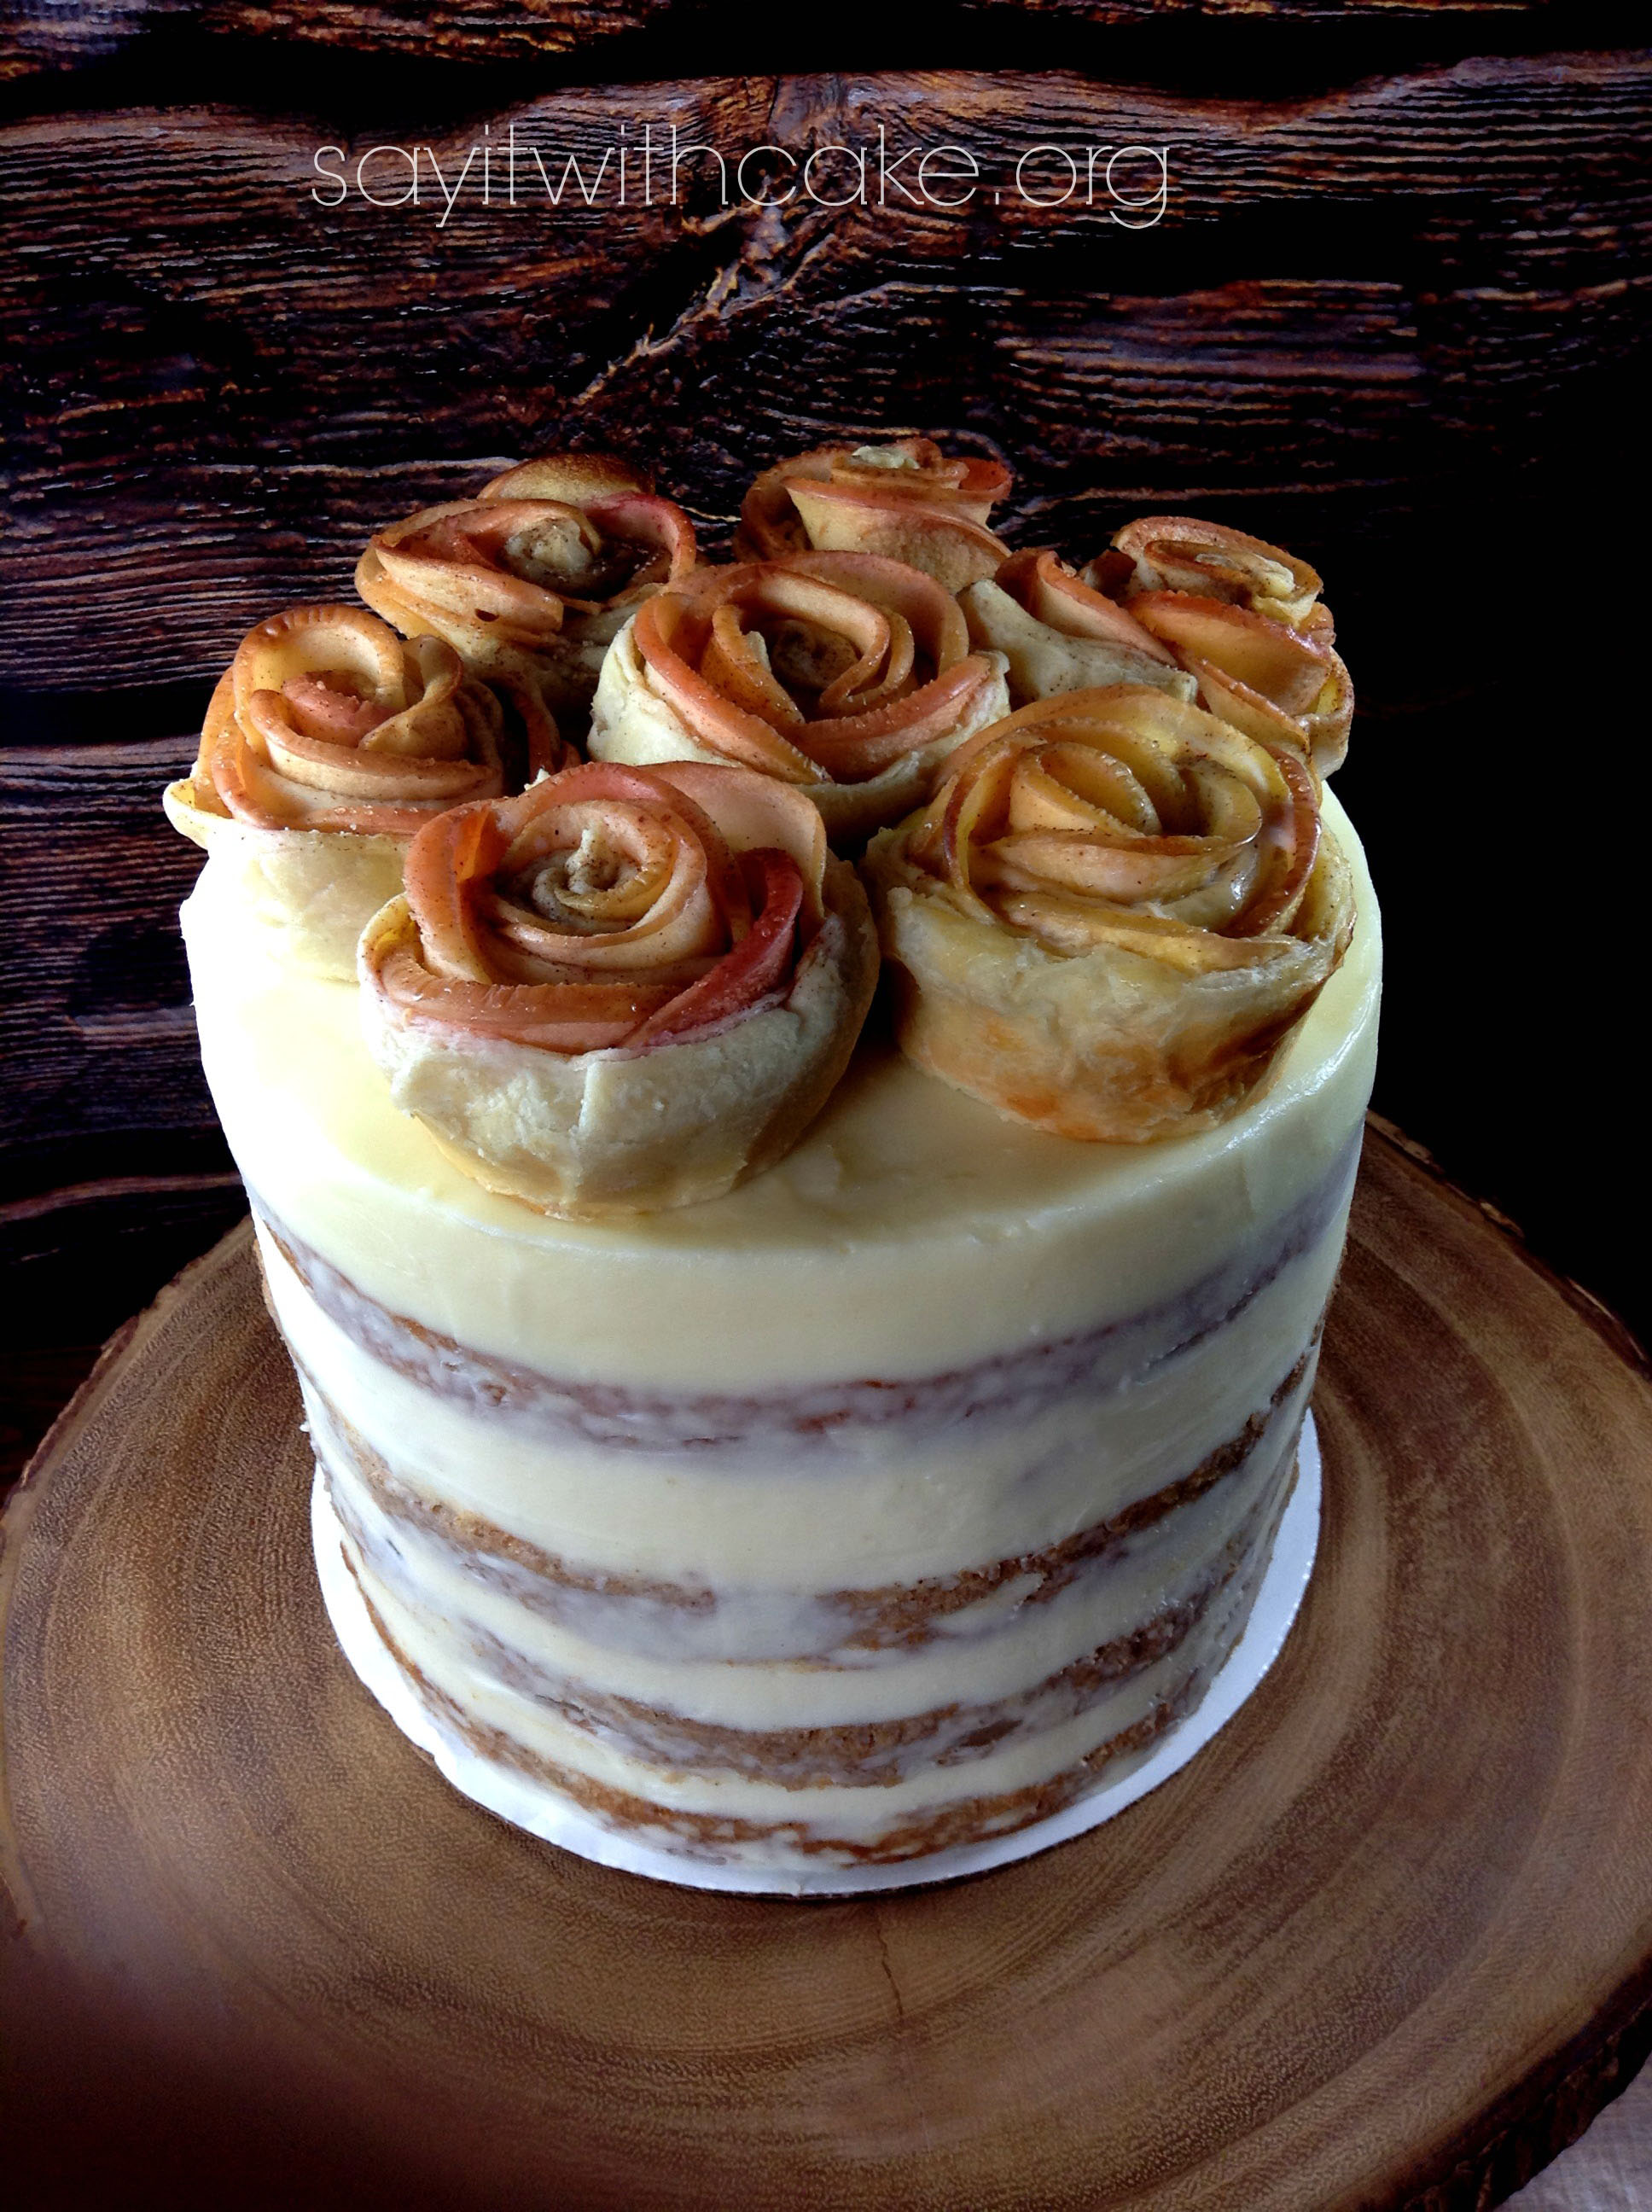
Which topping do you like best? Here is the delicious inside of the cake!
Ingredients
- one box of spice cake mix
- 4 eggs
- one can of apple pie filling
- 3 cups flour
- 4 tablespoons sugar
- 1 1/2 teaspoons kosher salt
- 16 tablespoons butter, melted (2 sticks)
- 3 tablespoons water
- one and a half sticks of butter
- 1 1/4 cups powdered sugar
- 8 oz cream cheese
Instructions
- Mix together cake mix, eggs, and apple pie filling.
- The mixture will be divided into four 8 inch cake pans. Add one cup of mix into each cake pan. Bake at 325 degrees for 30 minutes or until toothpick comes out clean.
- Cool completely on cooling rack.
- Heat the oven to 350°f.
- Combine the flour, sugar, and salt in the bowl of a stand mixer fitted with the paddle attachment and paddle on low speed until well mixed.
- Add the butter and water and paddle on low speed until the mixture starts to come together in small clusters.
- Spread the clusters on a parchment- or silpat- lined sheet pan. bake for 25 minutes, breaking them up occasionally. the crumbs should be golden brown and still slightly moist to the touch at that point; they will dry and harden as they cool.
- Let the crumbs cool completely before using in a recipe or eating. stored in an airtight container, the crumbs will keep fresh for 1 week at room temperature or 1 month in the fridge or freezer.
- Beat butter until pale about 2 minutes with paddle attachment
- add sugar and continue beating until frosting is very pale and fluffy about 3-5 min.
- add cream cheese and beat until just smooth
Enjoy!

Other fall cakes you might like
Caramel Apple Cake
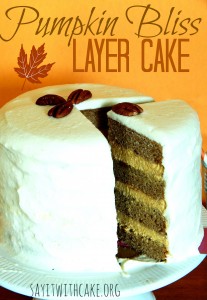
Pumpkin Bliss Layer Cake
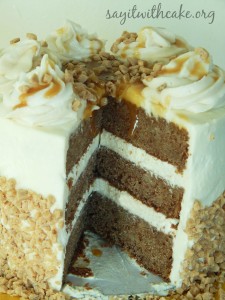
Apple spice cake with toffee and cream cheese frosting
banana pudding layer cake
]]>
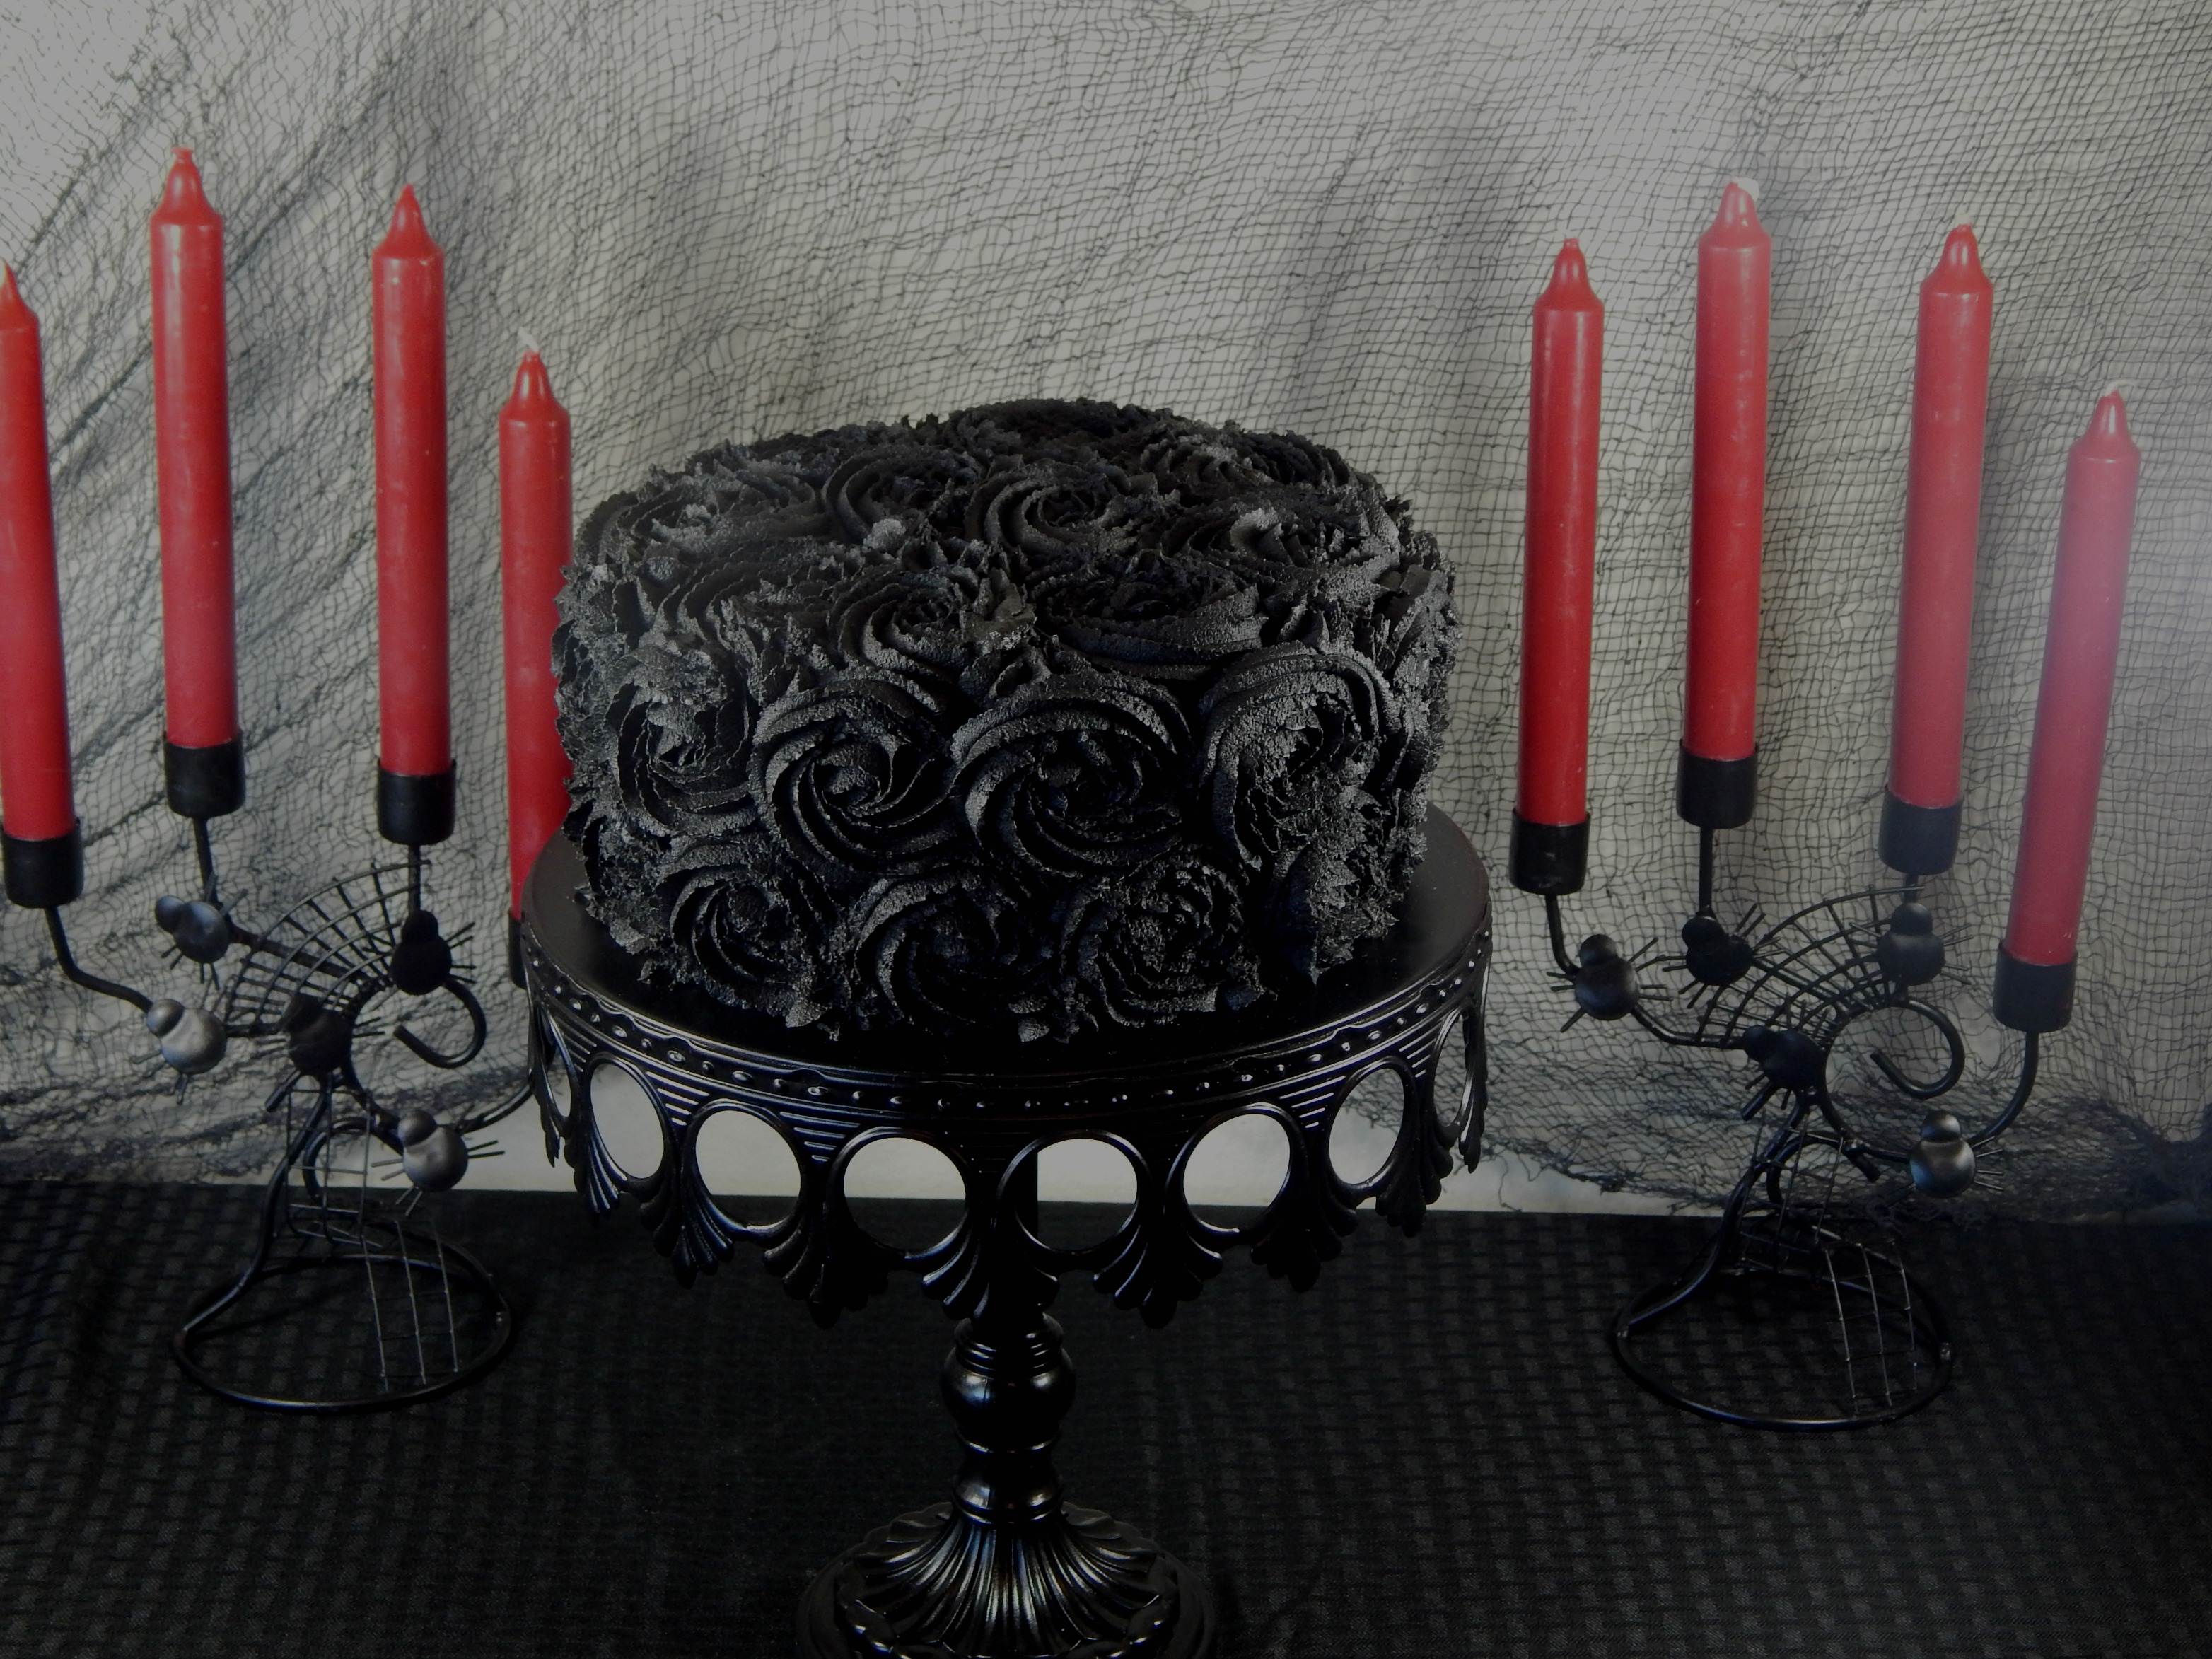
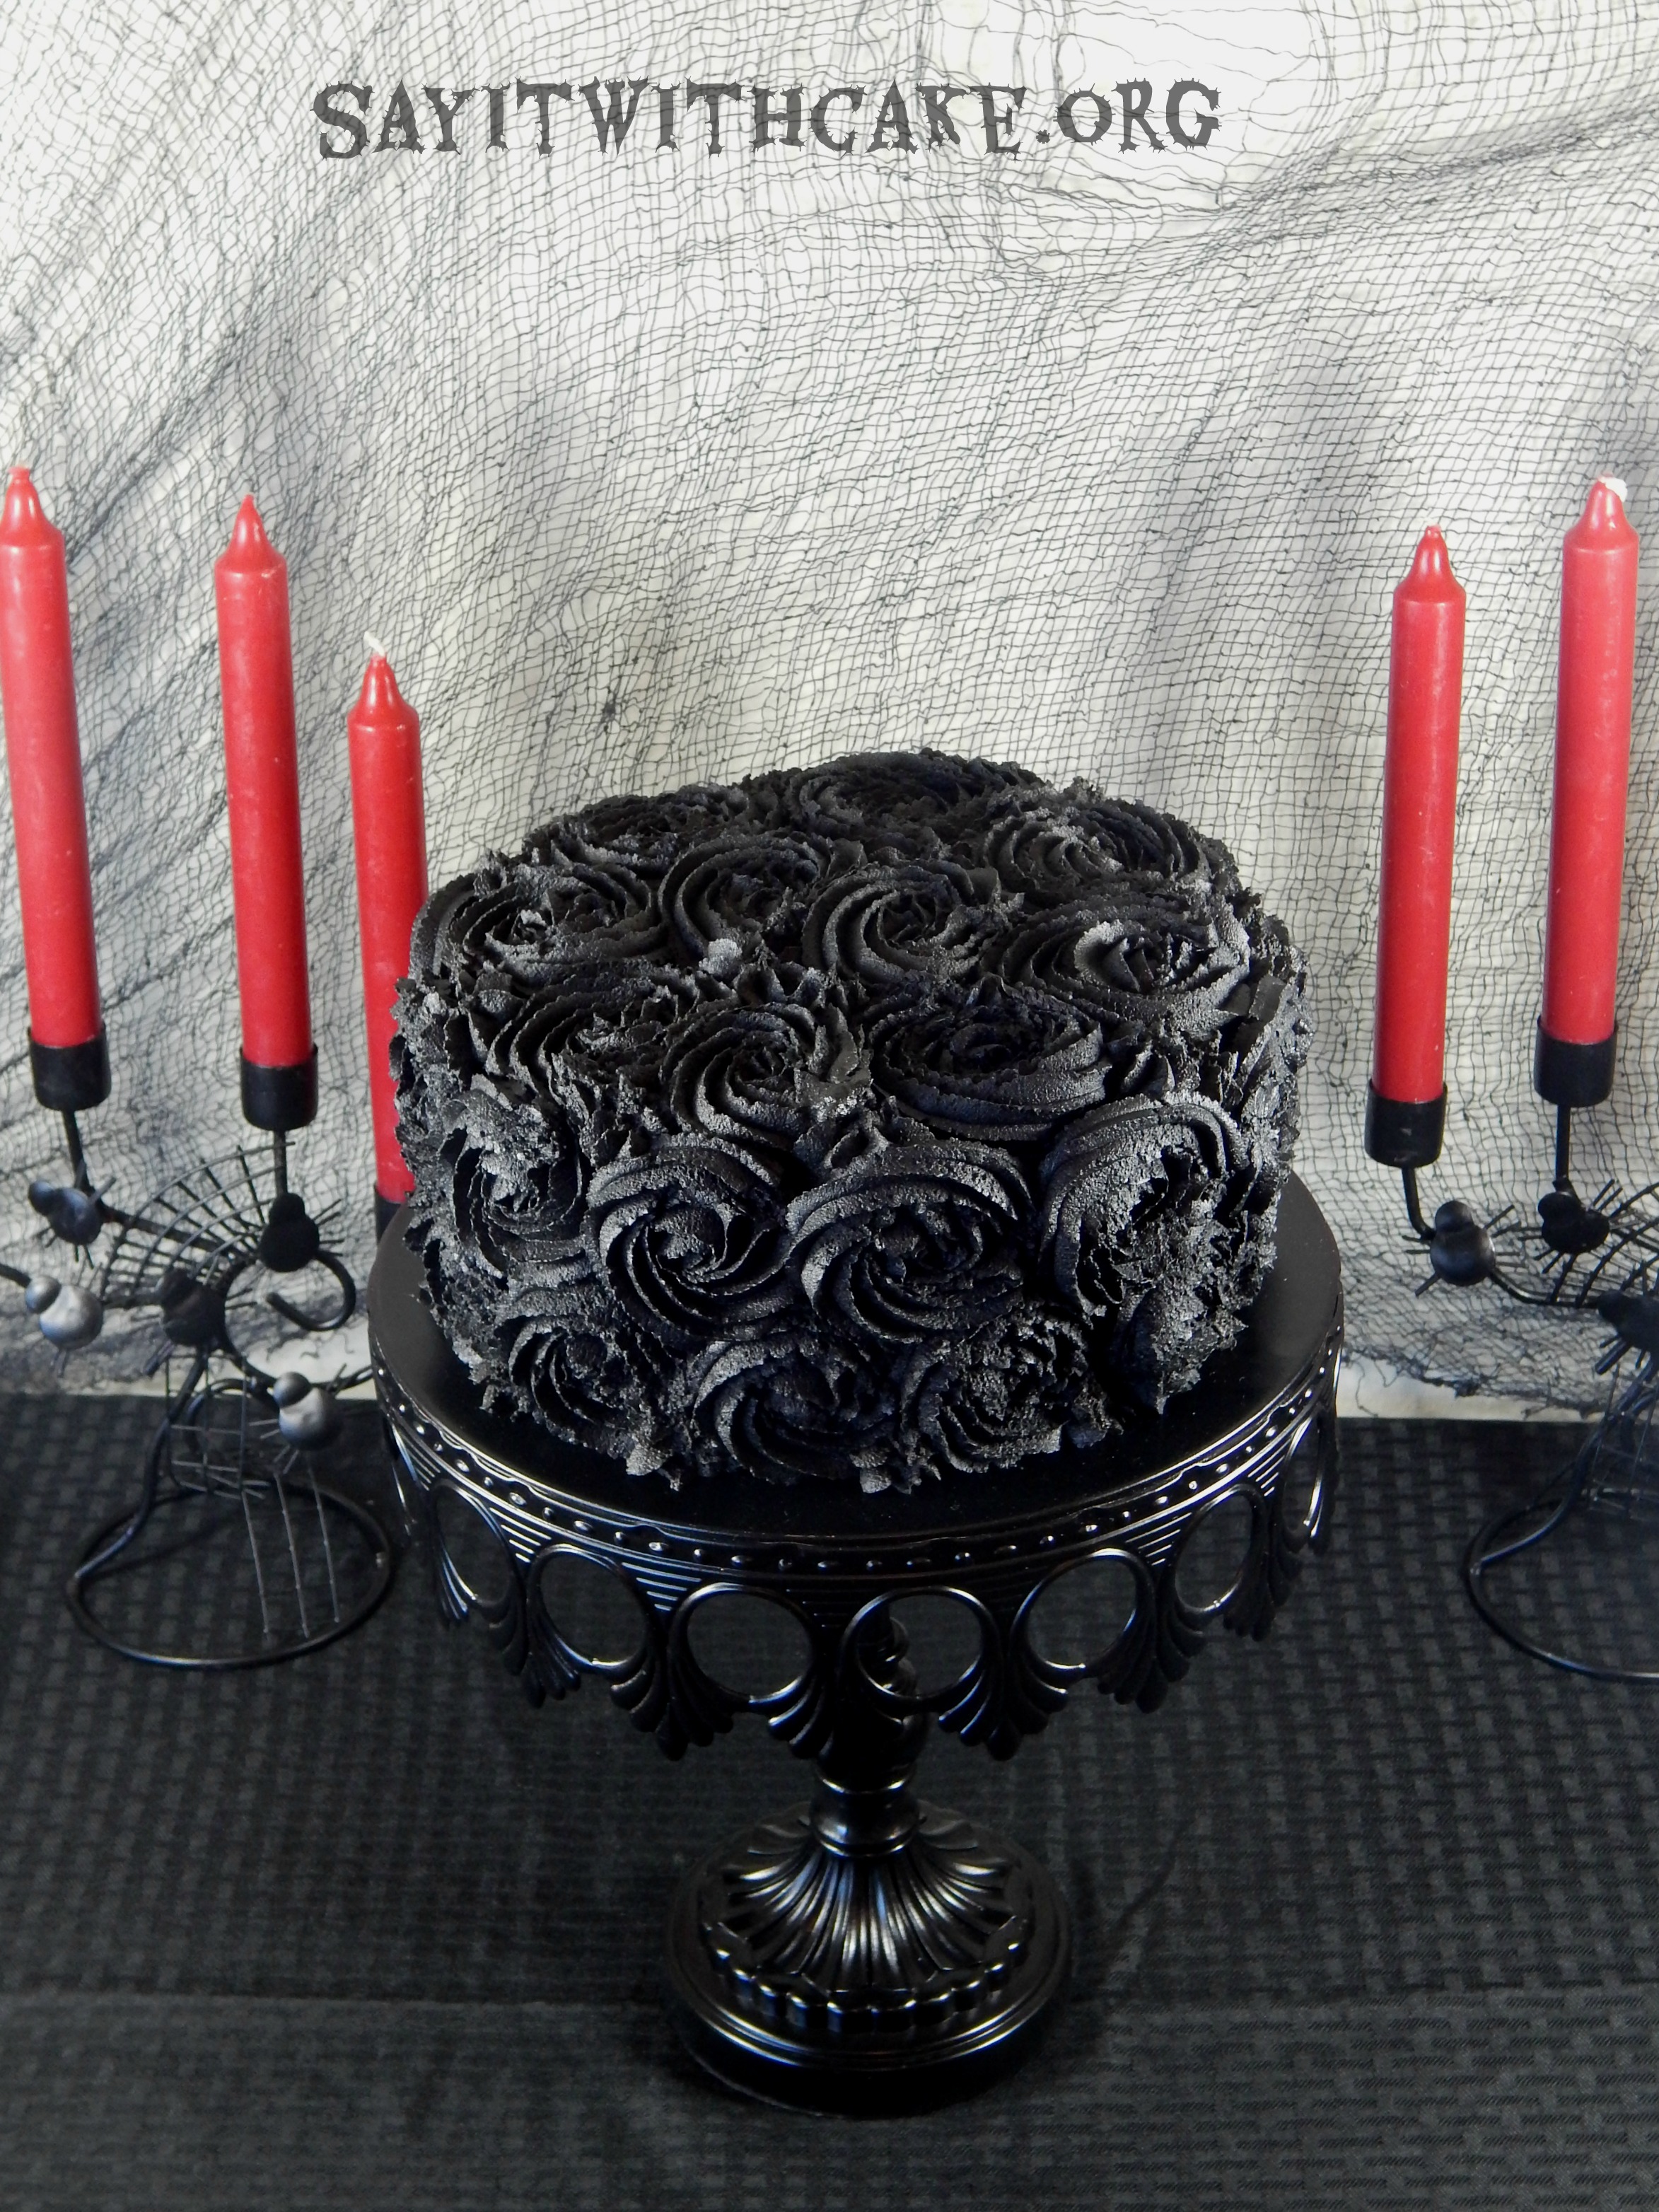
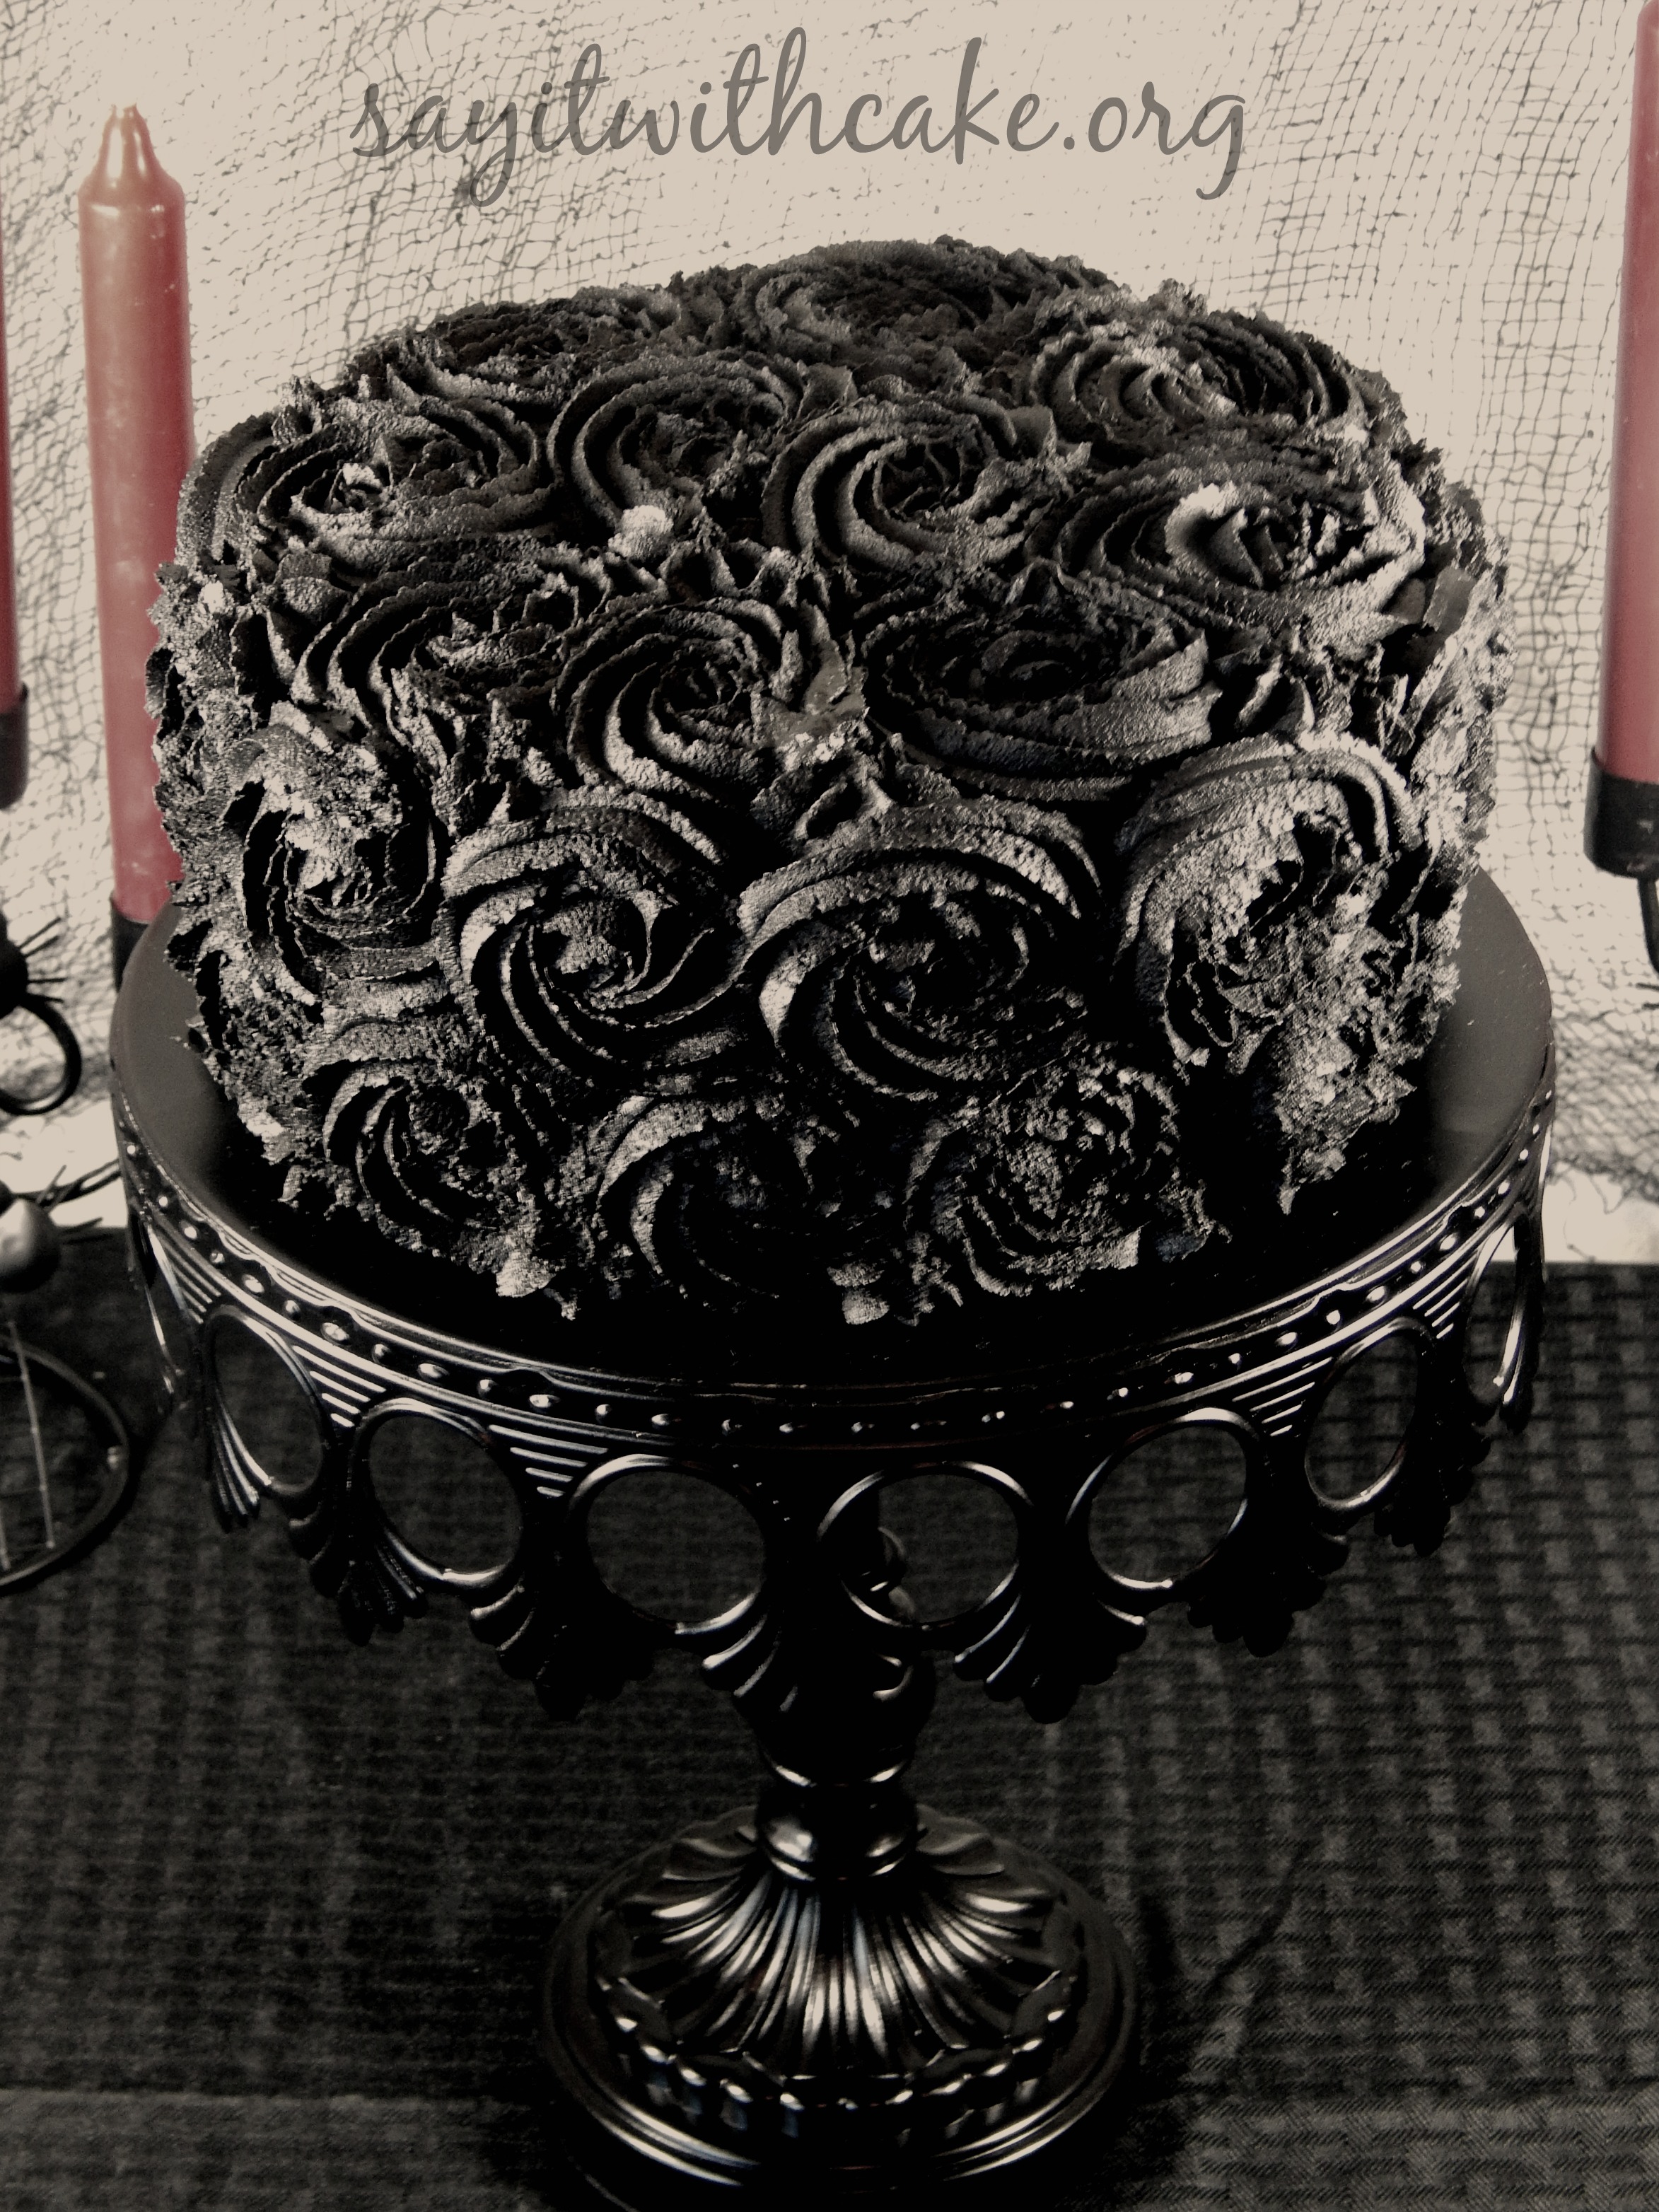 Happy Halloween! I made this black rose swirl cake for a Halloween party. I think the black roses make it a little spooky and mysterious. I got to use my new black cake stand, I think it went perfect with the cake!
For this black rose swirl cake, I started with a dark chocolate cake. I wanted a red filling, so I created my own red velvet filling. It has whipping cream, chocolate pudding, and red coloring. The filling is so delicious and holds up well.
To cover this 8 inch cake, I needed one and a half recipes of buttercream. I added a half a cup of dark cocoa mix. Then I added two teaspoons of black gel coloring. If you let the frosting sit overnight, that’s when it turns its blackest. When I first made it was more on the grey side. By morning it was very black.
You need to frost a crumb coat first on the cake and let it sit in the fridge for 20 minutes.

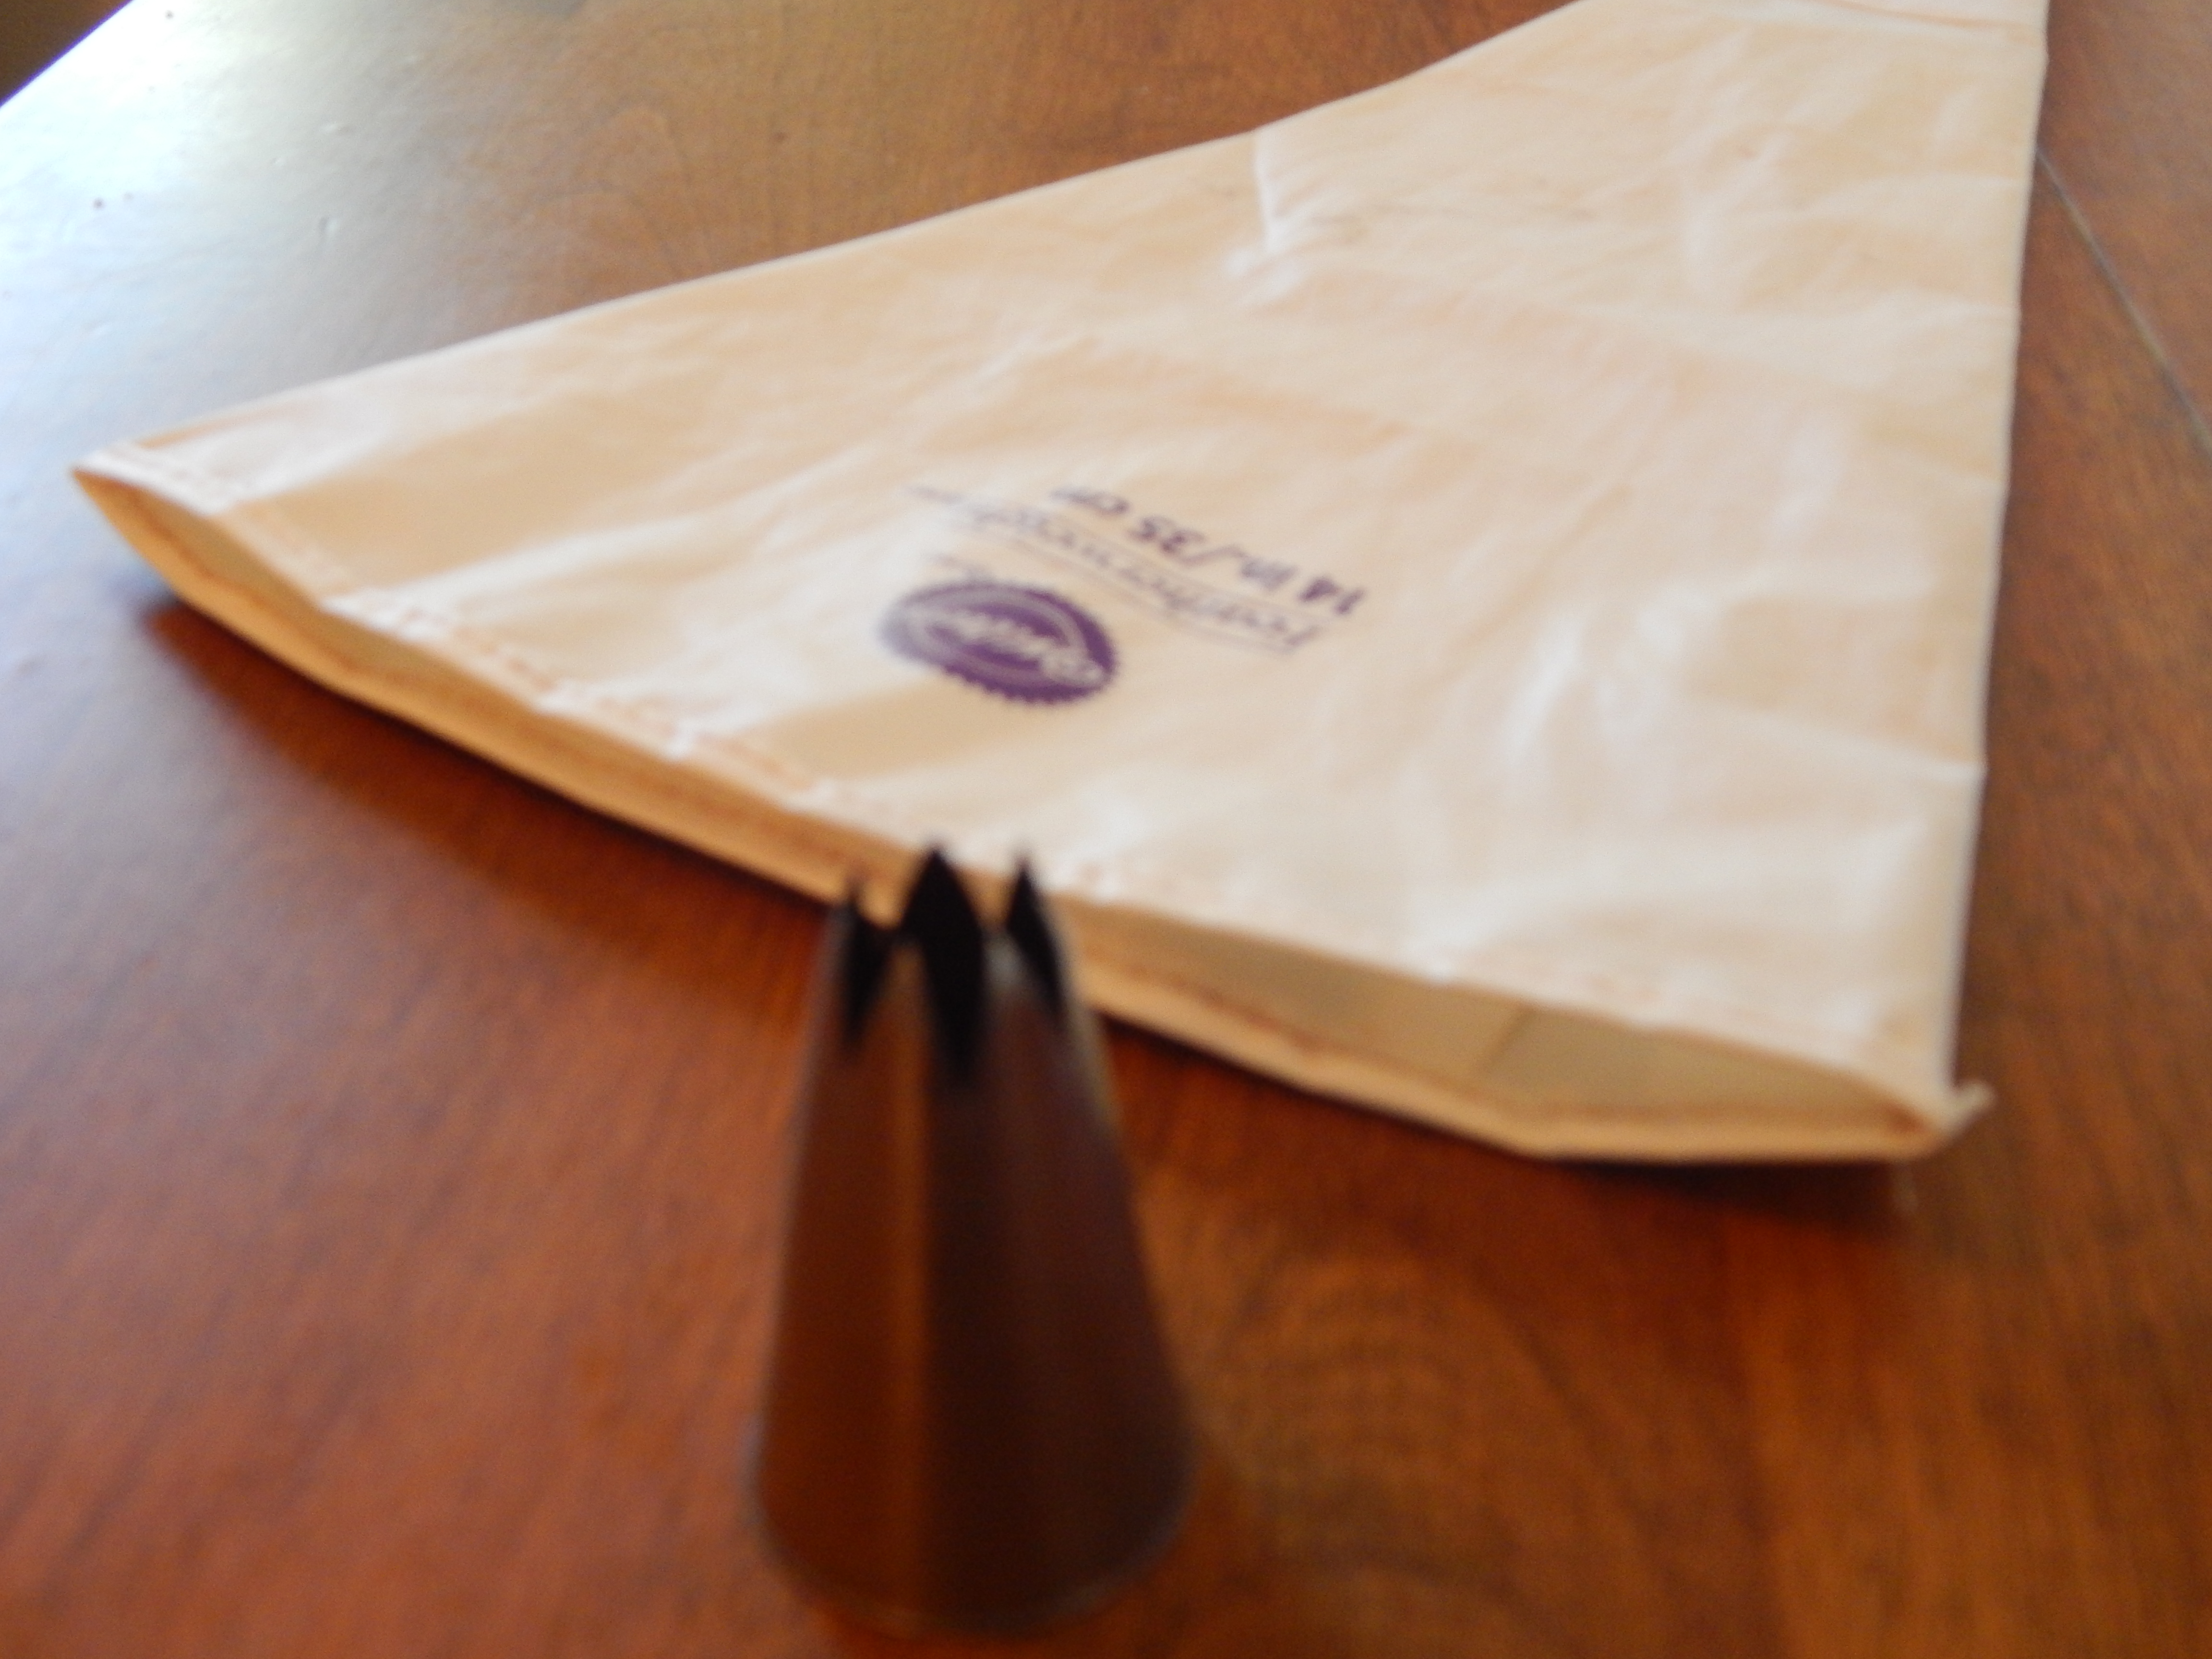
This is the tip I used to make the swirls. You start from the center and make a swirl around. You make swirls to cover the whole cake.
Ingredients
- Ingredients (to cover one 8 inch cake)
- 1 1/2 cup sweetex or crisco
- 1/4 teaspoon salt
- 1 teaspoon meringue powder
- 2 pounds powdered sugar
- 1/2 cup milk or water
- 1 tsp vanilla
- 1/2 cup cocoa powder
- 2 tsp black food color
- 2 cups whipping cream
- 1 box chocolate pudding
- 2 tsp red food color
Instructions
- 1.mix the sweetex, salt, cocoa, black food color, and meringue powder with electric mixer to blend about 30 seconds
- 2.Add the milk and vanilla in the bowl, then add the sugar and blend by hand with a spatula until the sugar is absorbed into the liquid
- 3..put bowl back on the mixer and beat on medium speed for 2-5 minutes until smooth and a little fluffy.
- 4.if mixture is too stiff, you can add more liquid. if it is too runny add more powdered sugar
- add ingredients and whip with kitchen aid until stiff peaks form.
Enjoy!
other Halloween cakes you might enjoy
Halloween Cake
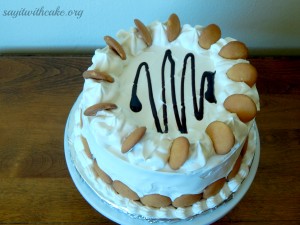
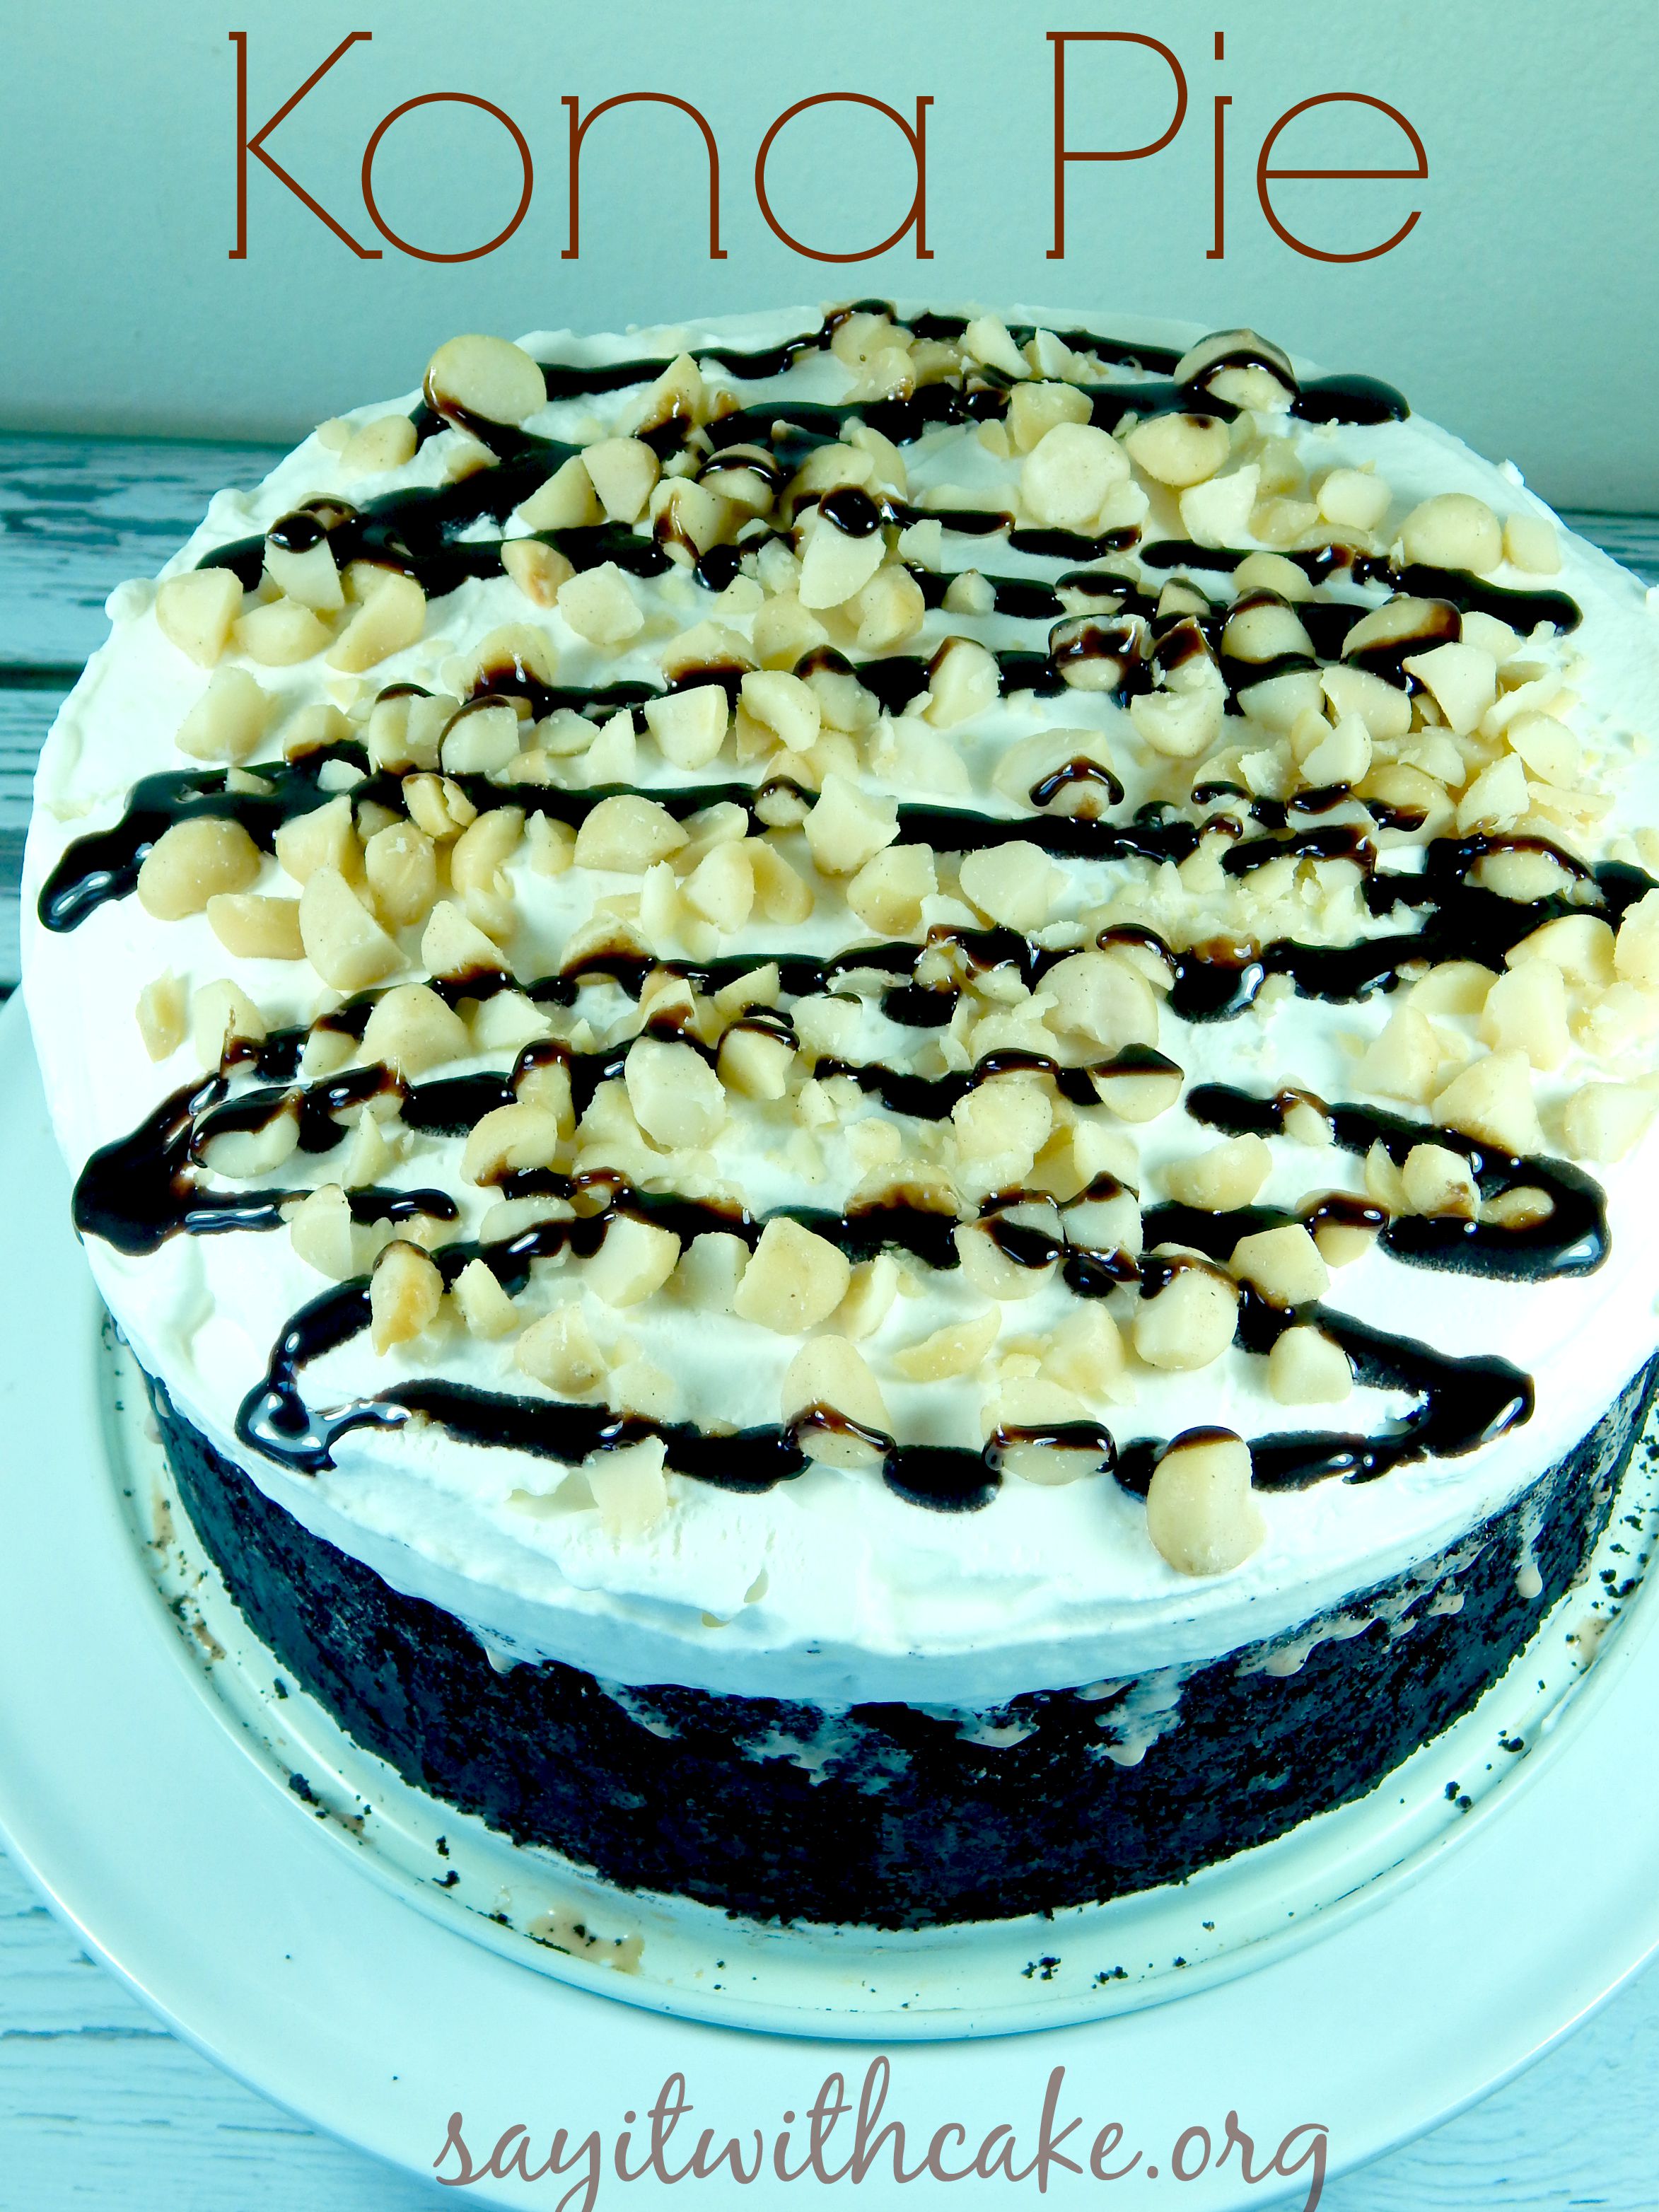
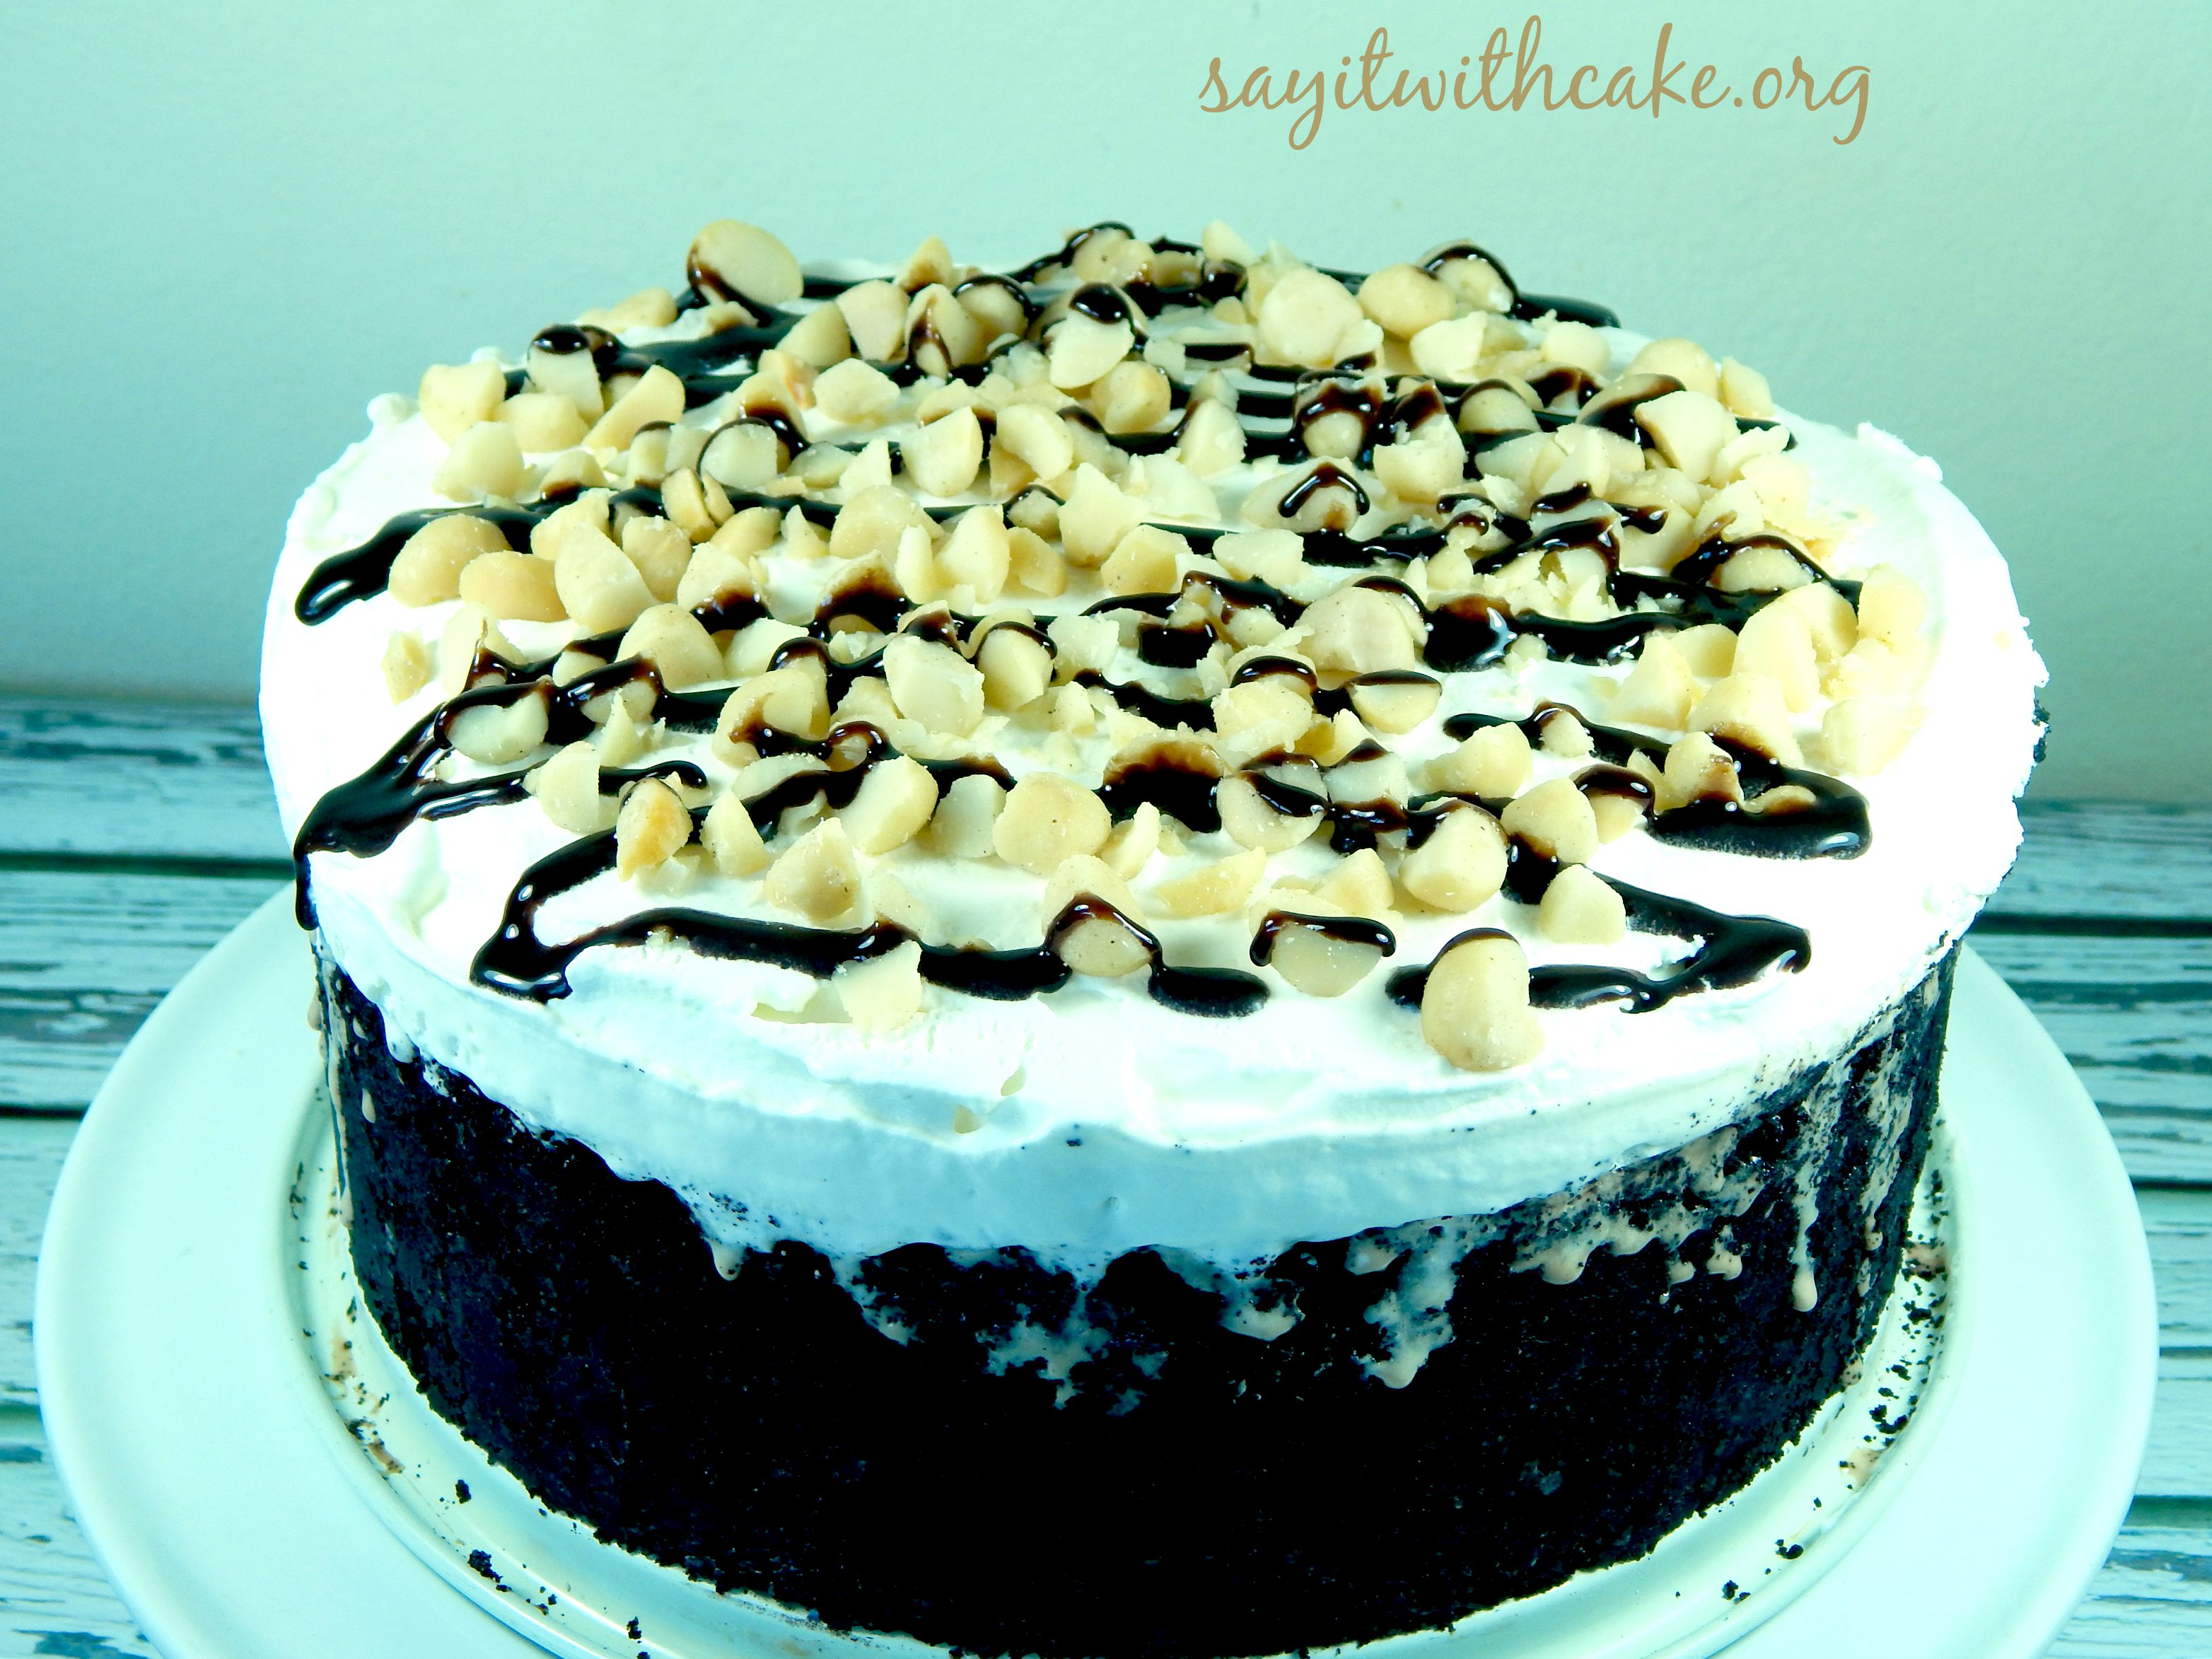
 On my last trip to Hawaii, my family and I went to Kona and ate at Big Island Grill. The food was delicious, but what I loved the most was the “Kona Pie”. Kona Pie is rich creamy mocha almond fudge ice cream piled high on an Oreo cookie crust, topped with fresh homemade whipped cream, hot fudge, and macadamia nuts! Yum! We went back several times to this restaurant just for the Kona Pie! Since I have been home, my husband and I have had cravings for Kona Pie many times. I knew this would have to be my next dessert for my blog. Since there is no recipe from the Big Island Grill, I made my own. It is super easy with only 3 ingredients! I hope you like it as much as I do!
To start, get 2 packages of Oreo cookies and put them in the food processor. This will make the cookies the perfect texture for the crust. Put the cookies into a bowl and add 2 sticks of melted butter. Mix it all together and spread out over the bottom and sides of a 9 inch springform pan. Put it into the freezer and freeze for several hours.
Take one gallon of mocha almond fudge ice cream and let it melt slightly enough to mix. Mix it all up and put it on top of the cookie crust. Make sure you press all of the ice cream down so there are no air pockets. Put it back in the freezer and freeze over night.
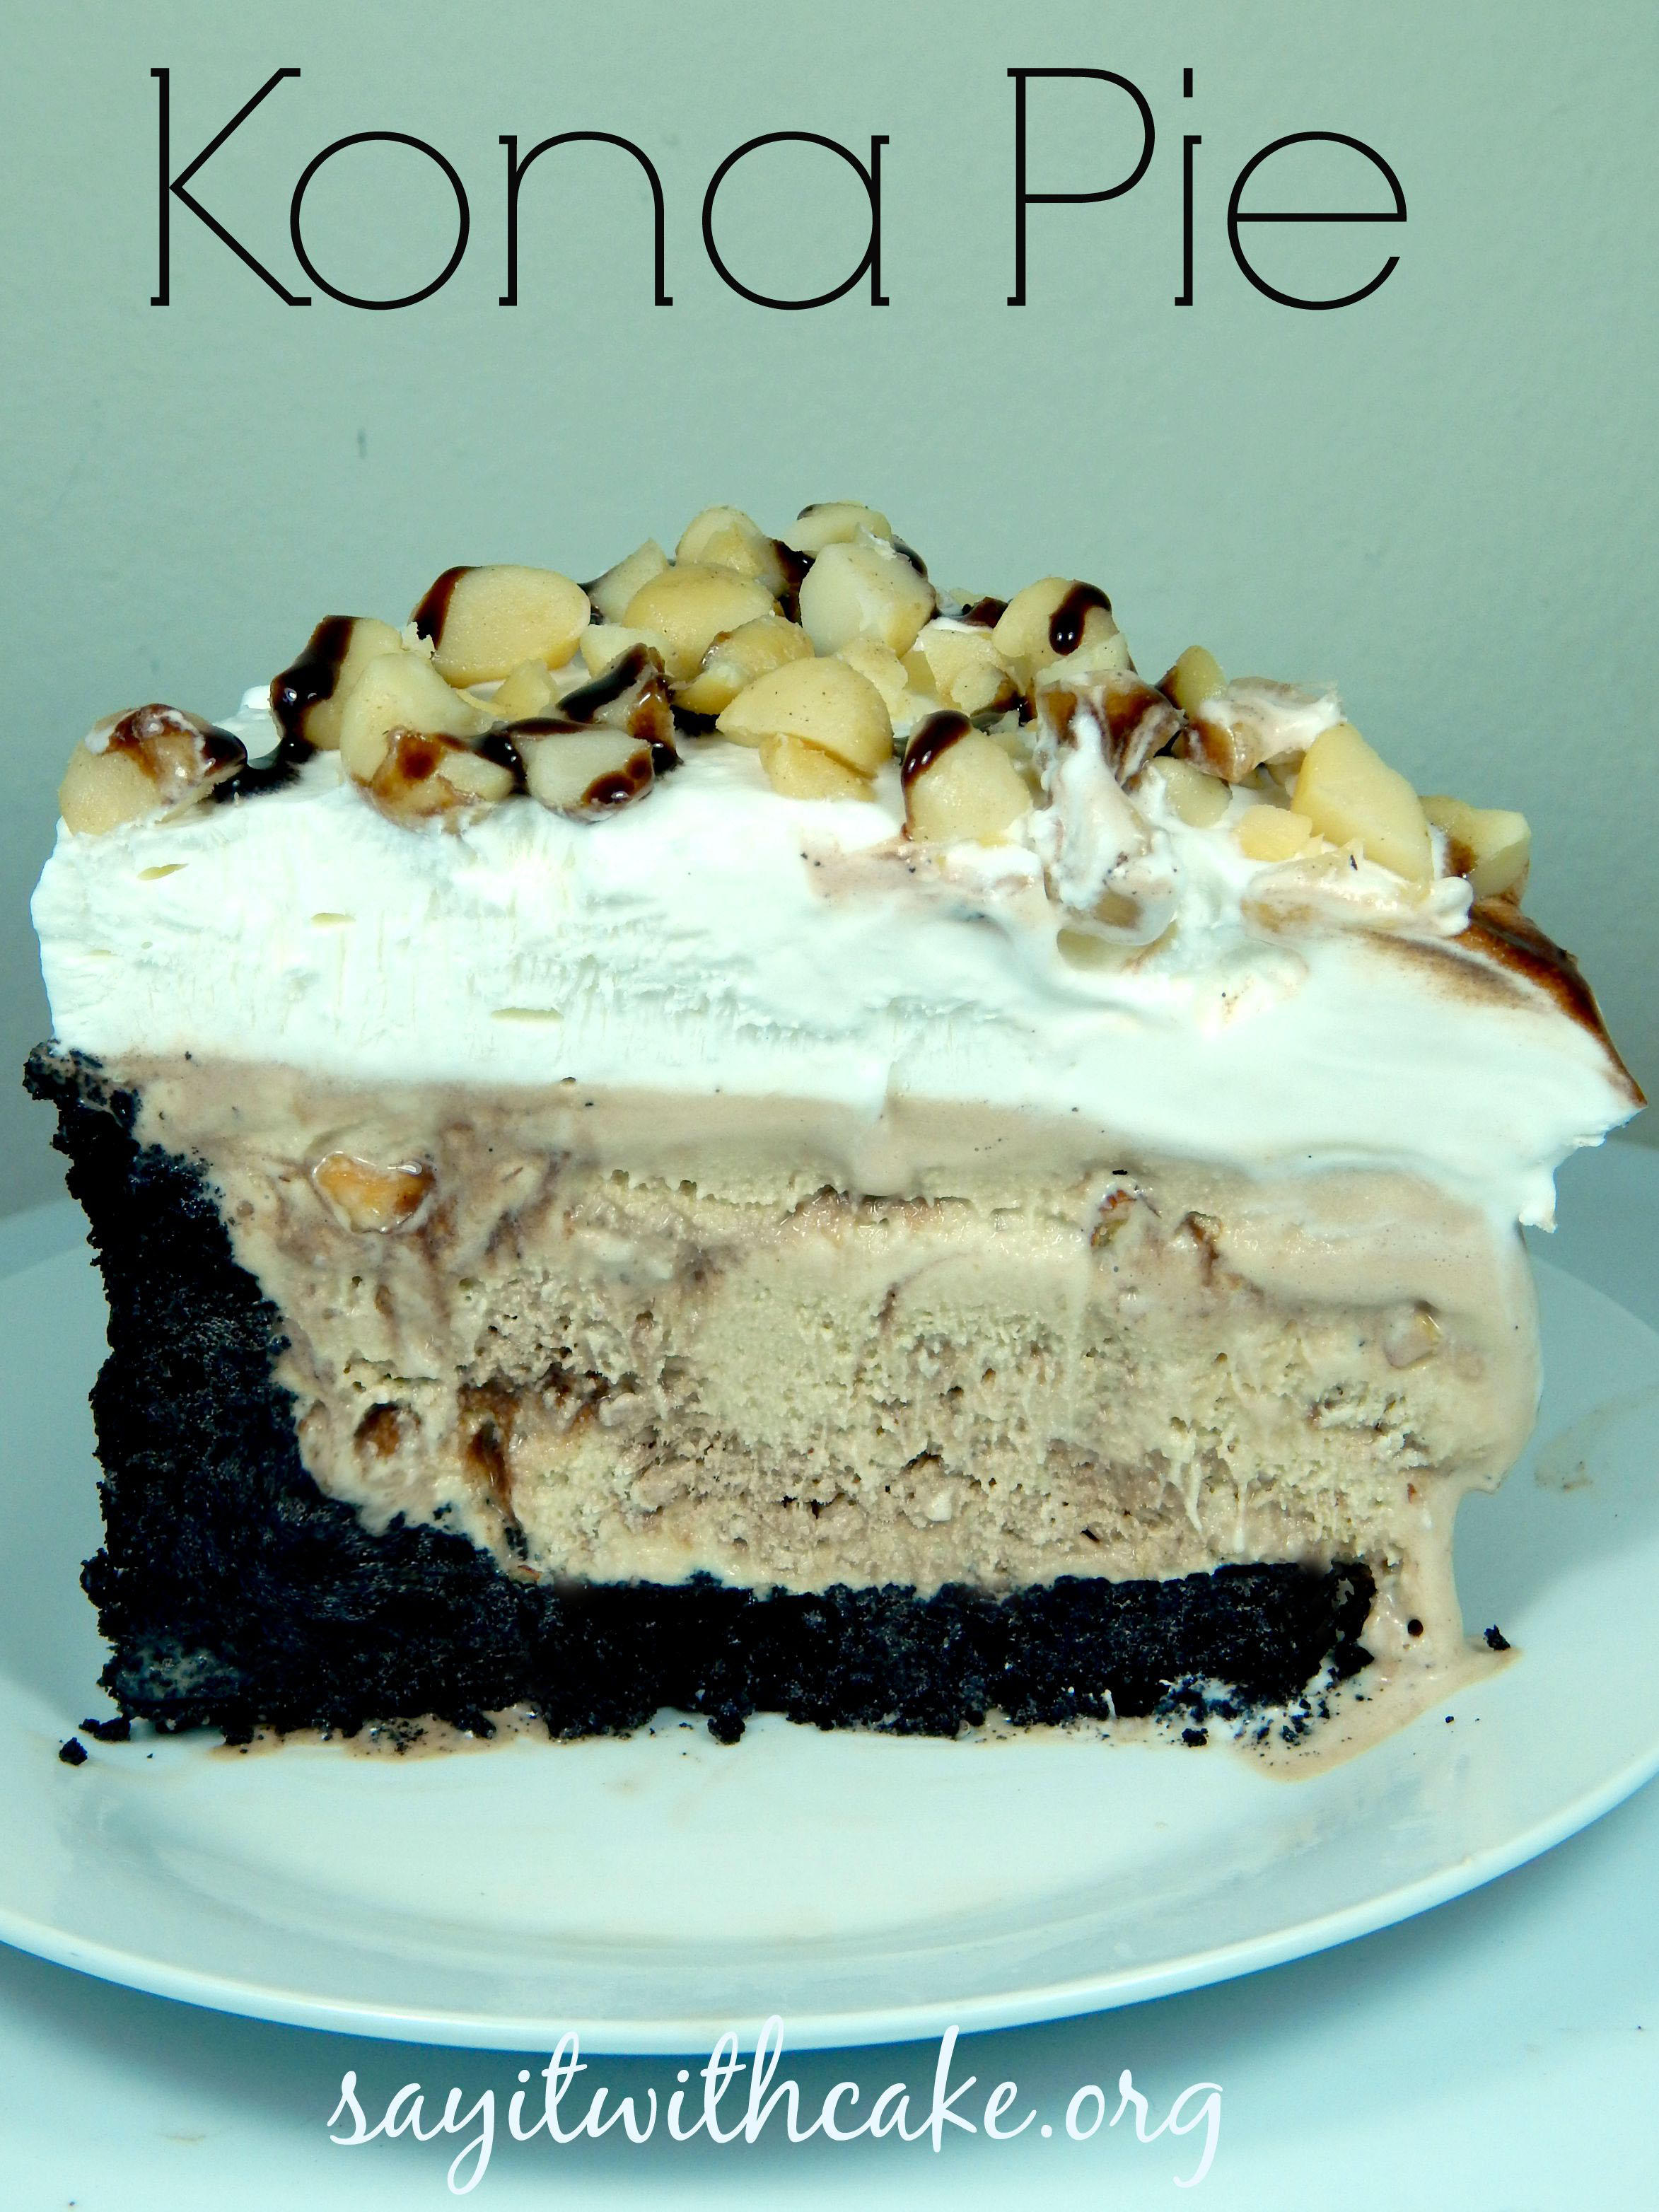
Next, whip up some whip cream and cover the top of the pie. When you are ready to serve, you can pour fudge and sprinkle macadamia nuts over the entire pie, or individual slices.
Ingredients
- 2 packages of Oreo cookies
- 2 cubes of butter
- 1 gallon mocha almond fudge ice cream
- whip cream
- fudge
- macadamia nuts
Instructions
- blend cookies in the food processor
- add cookies and melted butter into a bowl
- mix until all butter is incorporated
- press onto 9 inch springform pan
- freeze for several hours
- mix ice cream in bowl
- scoop into crust and press down with spoon
- freeze over night
- top with whip cream, fudge, and macadamia nuts
Enjoy!
More Hawaiian desserts you might like!
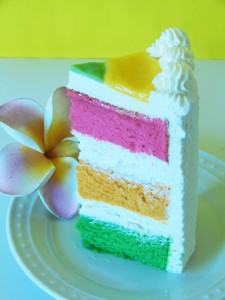
Hawaiian Paradise Cake

Old Fashioned Custard Pie
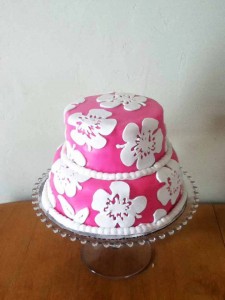
Pink Hibiscus cake